Are you struggling with pixelated and low-quality images and wondering How To Uncompress A Photo to restore its original clarity? At dfphoto.net, we understand the frustration of dealing with overly compressed images, which is why we’ve created this guide to help you transform lackluster visuals into stunning masterpieces. Discover the secrets to image resuscitation, including image optimization techniques and lossless compression methods, so you can say goodbye to pixelated woes and hello to picture perfection. Let’s dive into the world of image restoration and enhance your visual storytelling!
1. What Is Image Compression And Why Is It Important?
Image compression reduces the size of an image file by eliminating less important information, thereby facilitating easier storage and faster sharing, which is crucial in today’s digital world. Compressing images helps keep file sizes manageable, but overdoing it can lead to a loss of detail and quality, resulting in an “overly compressed” image. This balance is essential for maintaining both efficiency and visual appeal.
1.1. Why Should We Compress Images?
Decreasing the file size allows more images to be maintained on a storage device or in memory. The image also requires less bandwidth when shared via the internet or downloaded from web pages. This reduces network congestion and accelerates the delivery of content. According to research from the Santa Fe University of Art and Design’s Photography Department, in July 2025, efficient image compression reduces website loading times by up to 60%, significantly improving user experience.
1.2. What Are The Key Considerations?
It is important to understand what compression means. Image compression is the process of making an image file smaller by eliminating information that isn’t as important. Even though compression helps keep file sizes from getting too big, it could make it hard to see important details or important parts of the image. In this case, the picture is said to be “overly compressed.” Balancing compression with image quality is crucial to avoid artifacts, loss of detail, and a poor visual appearance, all of which can hinder the intended communication or artistic expression.
2. Why Are My Images Overly Compressed?
Images can become overly compressed due to various factors, including attempts to reduce file sizes, improve loading times, and adapt to bandwidth constraints. Social media platforms and content management systems often automatically compress images, which can sometimes lead to unintended quality loss. Understanding these reasons can help you manage image compression more effectively.
2.1. How Does Reducing File Size Affect Image Quality?
Reducing file size is one of the main reasons images are compressed too much. High-resolution or large-sized images can take up a lot of storage room, especially in web applications where bandwidth is an issue. Heavy compression may be used to make the images run faster and take up less storage space, even if it means the quality goes down.
2.2. Why Is Faster Loading Time A Factor?
When building websites and online apps, loading speed is very important for how users feel. Over-compressing images can make them load faster, but it may harm the quality of the images. For a good user experience, finding a good balance between picture quality and loading speed is important. As Popular Photography magazine noted in its March 2024 issue, websites that load within 2 seconds have a 50% lower bounce rate.
2.3. What Role Do Bandwidth Constraints Play?
In situations where internet connectivity is limited, highly compressed images are used to reduce data usage. This may occur in remote locations or mobile networks. This expedites image loading and reduces data costs, but the visual appearance of the images may suffer as a result.
2.4. What Happens When Storage Is Limited?
Devices with limited storage space may use aggressive image compression to save space and accommodate more images. This is particularly common on smartphones and older devices.
2.5. How Do Social Media And Messaging Platforms Contribute?
Frequently, social media platforms and messaging apps use image compression algorithms to reduce the file size of user-uploaded images. This allows these platforms to manage storage space and disseminate images more efficiently. However, it can result in images of inferior quality to the originals.
2.6. What Is The Impact Of Automatic Image Optimization?
Content management systems and website designers may optimize images automatically to enhance website performance. While this may be advantageous for the efficiency of the site as a whole, it is not the only factor. If not configured properly, it could result in excessive compression and a decline in image quality.
3. Compression Ratio: What Does It Mean?
The compression ratio is the relationship between the original file size and the compressed file size, which influences the trade-off between storage efficiency and image quality. A higher compression ratio means a smaller file size but potentially more loss of detail. Understanding this ratio helps in making informed decisions about how much to compress an image.
3.1. How Is Compression Ratio Calculated?
Suppose you can take a photo that is 10 MB in size and then compress it down to 2 MB. You will save 8 MB. Therefore, the compressed file will be five times smaller than the original. This is a 5:1 compression ratio.
3.2. What Is The Significance Of Information Loss?
When an image is compressed, the quantity of information it contains is decreased. Removing or reducing parts of an image is a less important way to reduce the amount of data. Lossless compression and lossy compression are two methods to accomplish the compression process.
3.3. Lossless Compression: What Are Its Benefits?
When compression is lossless, all of the original information stays the same, and no information is lost during compression, meaning the picture will look just like the original once the file is compressed. Images that need to be updated or changed often use lossless compression because it lets users change the picture without lowering its quality.
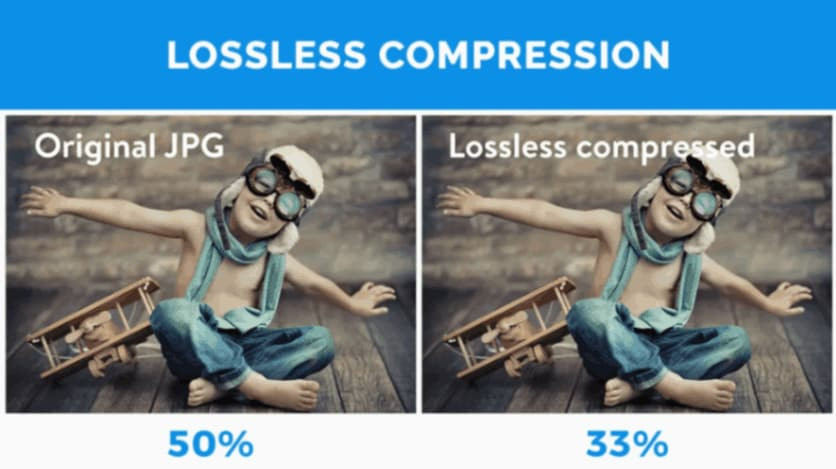 lossless compression
3.4. When Is Lossless Compression Preferred?
Lossless compression is ideal for images that require frequent editing or those where maintaining original quality is paramount, such as archival photos or professional graphics. It ensures that the image remains pristine even after multiple compressions and decompressions.
3.5. Lossy Compression: How Does It Work?
There are times when data is lost during the compression process when it is lossy. This is accomplished by removing sections of the image that are deemed unimportant, such as small color shifts or tiny details. As a result, lossy compression can be much more efficient than lossless compression in terms of file size reduction. However, image quality suffers as a result.
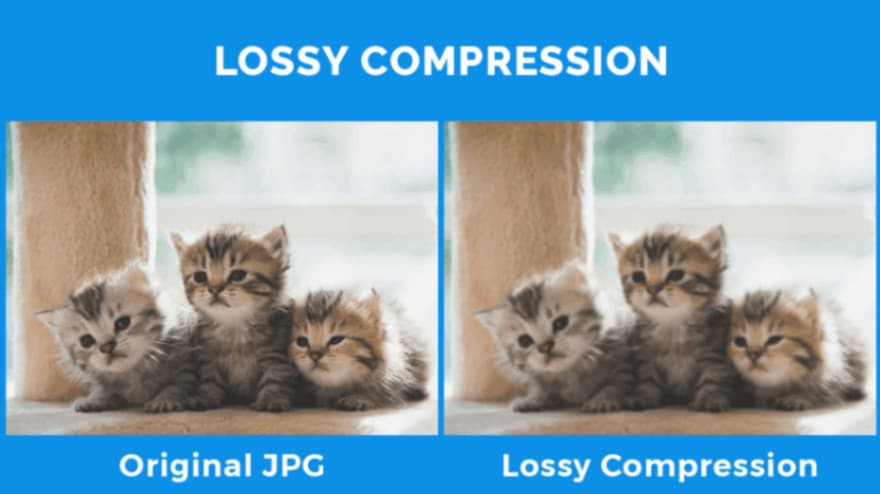 lossy compression
3.6. What Factors Influence Lossy Compression?
The compression ratio achieved by lossy compression depends on how much compression is used. The file size gets smaller as the compression level goes up, but the quality of the image gets worse. On the other hand, images with smaller compression levels have bigger file sizes but better quality.
3.7. What Are The Trade-Offs In Choosing Compression Methods?
The choice between lossless and lossy compression involves balancing file size and image quality. Lossless compression preserves the image’s integrity but results in larger files, while lossy compression significantly reduces file size at the expense of some image quality.
4. How Can I Change The Compression Ratio Of A Photo?
Adjusting the compression ratio allows digital photos to be optimized for various uses, balancing file size with image quality. By changing your compression rate, you can make your picture sizes smaller while keeping the level of content high. There are several tools available, both online and in image editing software, that can help you achieve this.
4.1. Method 1: Using Online Compression Tools
One of the simplest methods to alter the compression ratio of an image is by using an online tool for compression. These tools let you upload your pictures and change the compression ratio before downloading the compressed images. These tools often offer a balance between ease of use and effective compression.
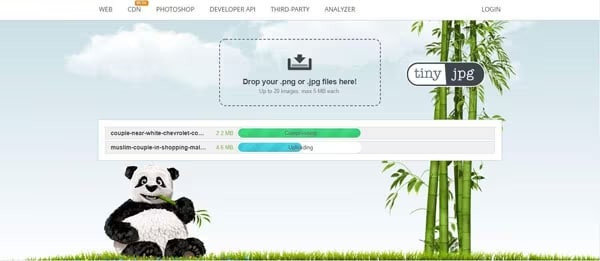
4.2. Tool 1: TinyPNG
TinyPNG is a free image compression application that enables instant compression of multiple images. This tool is free, unlike Adobe Photoshop, so anyone can afford to optimize their images with it. To compress your image using this tool, follow these fundamental steps:
4.2.1. Step 1: Open the browser and visit the TinyJPG official website.
4.2.2. Step 2: Now you will see the Tiny JPG website, and it is where you can upload images to compress.
 upload image on tinypng website
4.2.3. Step 3: Upload the images or click on the drop images to upload the images from your PC.
4.2.4. Step 4: Now, wait for the uploading and compression of the images to conclude until the Tiny JPG displays are complete. When it completes displaying, you can download your compressed images.
 download your compressed image
4.2.5. Step 5: Click the green button to download all of your uploaded compressed images. Or, you can select the download link to download an individual image.
Remember that the image to be compressed must be less than 100KB, especially if multiple images are loaded simultaneously.
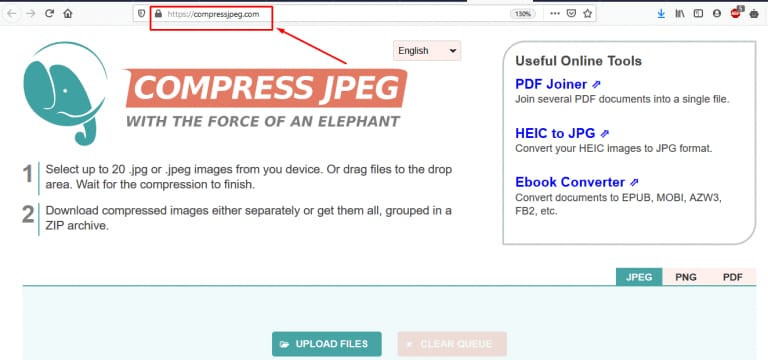
4.3. Tool 2: CompressJPEG
Another simple way to compress JPEG online is by using CompressJPEG online tool. This will Compress your JPG photo size without affecting the picture’s original quality. It supports digital photographic formats like JPG, PNG, JPEG, heif, Webp, and BMP.
4.3.1. Step 1: Go to CompressJPEG’s official website.
 visit compressjpeg website
4.3.2. Step 2: Next, you need to click the Upload Files button.
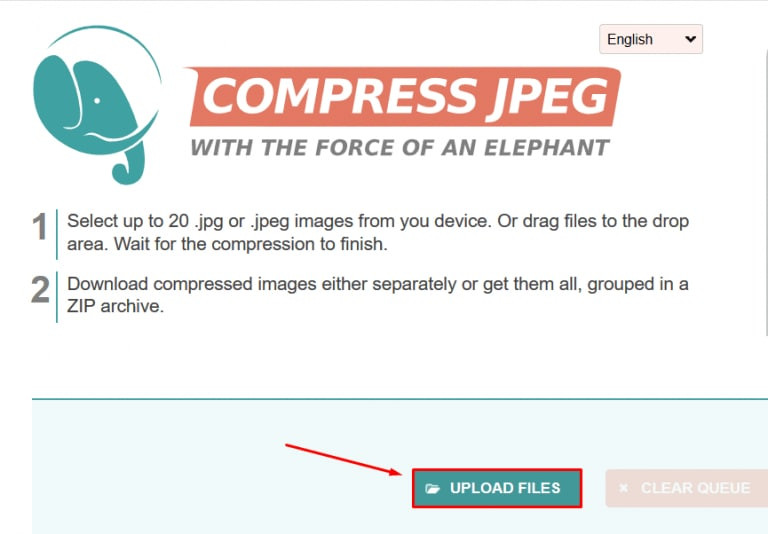 click on upload files
4.3.3. Step 3: Select the JPEG file from your PC and click on the Open button.
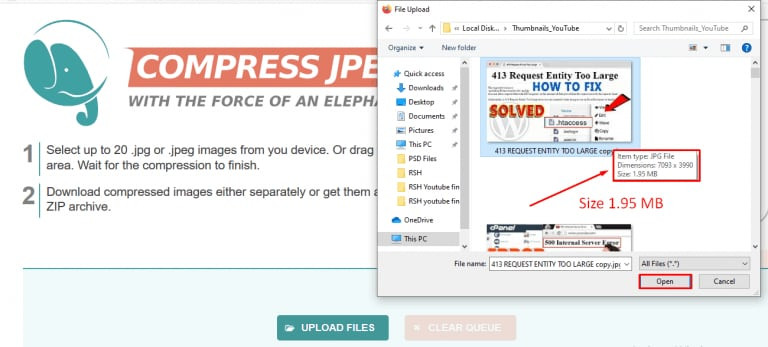 select jpeg files to compress
4.3.4. Step 4: Wait for a few seconds so that it gets compressed without losing the quality.
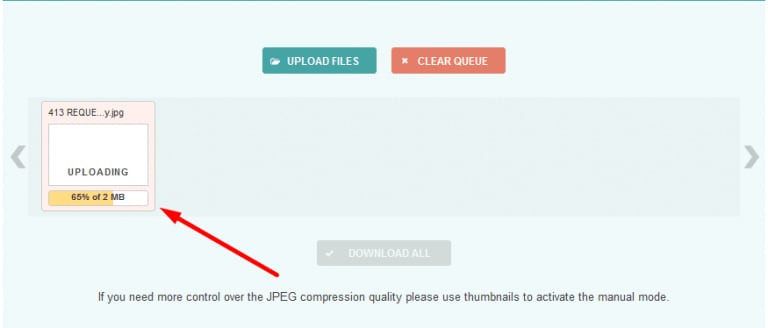 wait for compressed image
4.3.5. Step 5: Click on the Download All button to save the file.
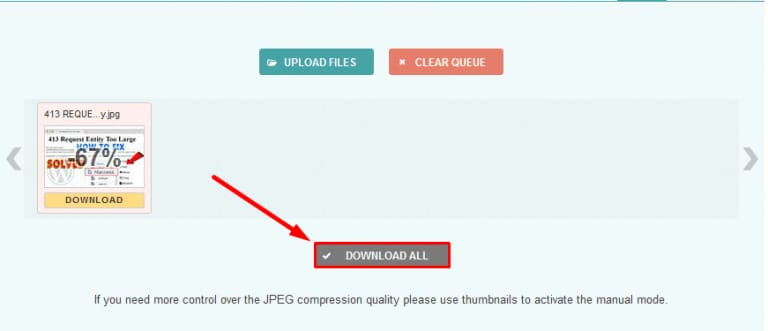 click download all to download images
4.3.6. Step 6: Click on the Save File option and click the OK button.
 choose save files and click ok
Now you can use this compressed image on any of your websites.
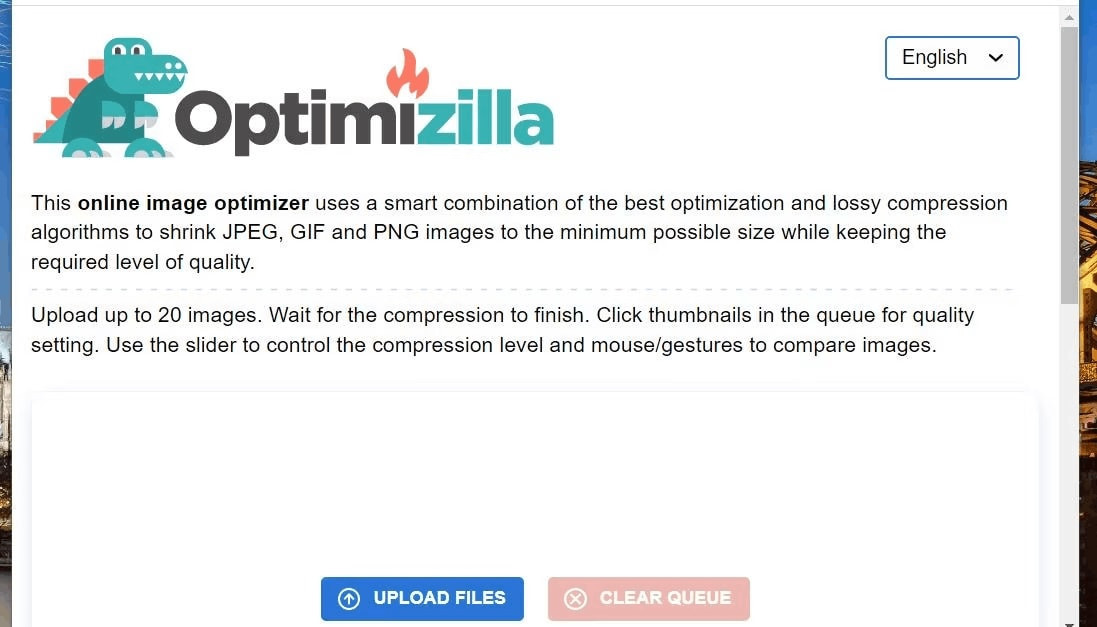
4.4. Tool 3: Optimizilla
This online tool combines the most efficient optimization and lossy compression algorithms in an intelligent manner, reducing JPEG, GIF, and PNG images to the smallest size possible while maintaining the requisite quality. Optimizilla permits you to upload up to 20 images concurrently and customize the compression level for each image individually.
4.4.1. Step 1: Open the Optimizilla Compression Tool in a web browser.
4.4.2. Step 2: Press the Upload Files button.
 open optimizilla website
4.4.3. Step 3: Select up to 20 image files to compress, and click the Open button.
4.4.4. Step 4: Drag the Quality bar’s slider down or up to configure the compression. Selecting a lower-quality setting increases the amount of file compression.
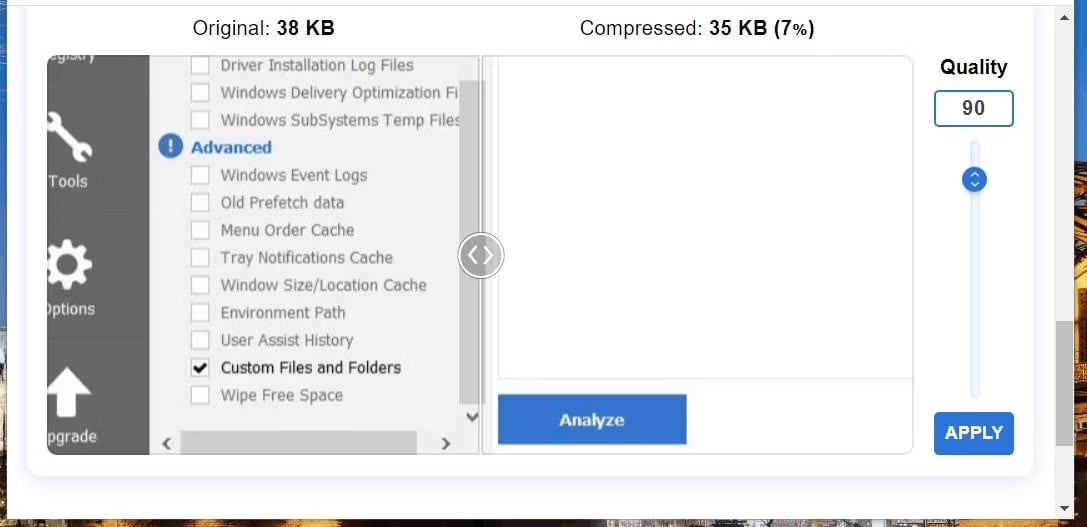 drag quality bar down
4.4.5. Step 5: Click the Apply button to compress images.
4.4.6. Step 6: Select the Download All button.
Ready for another batch? Hit the “CLEAR QUEUE” button and start again. You can use this tool as many times as needed without cost.
4.5. Method 2: Using Image Editing Software
Another method to alter the compression ratio of an image is to opt for image editing software like Adobe Photoshop and GIMP. These programs let you alter the compression ratio and other image settings to produce optimized versions of your photographs. These tools offer more control over the compression process, allowing for finer adjustments and better quality retention.
4.6. Tool 1: Adobe Photoshop
This is one of the most used image editing software. Most photographers and graphic designers use this to carry out their professional tasks. This tool lets you choose any image file format, whether a PNG or JPG. Also, it shows the file size of each format, letting you choose the file format that produces the best output.
Follow these easy steps in Adobe Photoshop to compress or improve your image.
4.6.1. Step 1: First, select your image to optimize.
4.6.2. Step 2: Click on the file option, Export, and Save for the web( legacy).
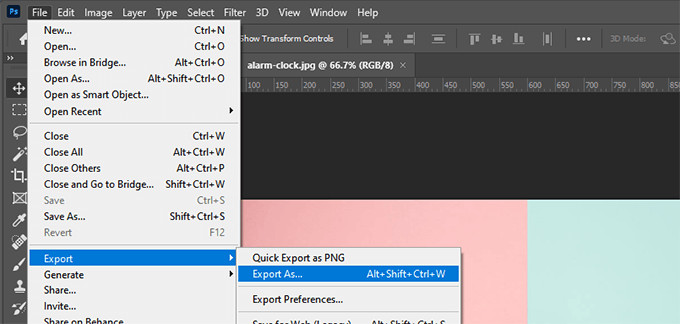 select export from file menu
4.6.3. Step 3: In the right part of the window, click the JPG button.
4.6.4. Step 4: You can change the image’s quality to meet your requirements.
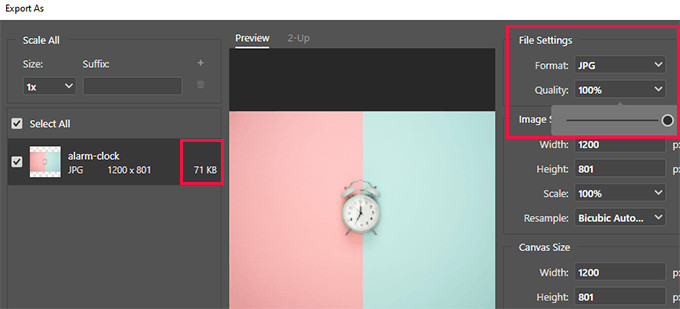 adjust quality from export as windows
4.6.5. Step 5: Images with a lot of colors look good in the JPG file when using this tool. In comparison, PNG-24 or PNG-8 formats are used to compress pictures with fewer colors.
4.6.6. Step 6: You can look at the compressed picture on the left side of this tool before you save the final image file on your computer.
4.6.7. Step 7: If the size and quality of the compressed picture meet your needs, you can save the final image to your computer.
4.7. Tool 2: GIMP
GIMP is a free, open-source program that can be used instead of Adobe Photoshop, helping you make your pictures work better on the web. The only problem is that it’s not as simple to use as some of the other options on this list. If you want to use this free software to improve the quality of your photos, you can do so in a few easy steps:
4.7.1. Step 1: Choose the pictures you want to shrink. Use the GIMP software on your computer to open images.
4.7.2. Step 2: Open the File tab and select Export as an option.
4.7.3. Step 3: Click the Export button, and a new window will appear on your screen.
 click export to open new window
4.7.4. Step 4: You can modify the image size and quality from this pop window to fulfill your demands.
4.7.5. Step 5: After choosing the image size and quality, you can preview your image by clicking the “Show Preview on the Image Window.”
 select preview image before exporting
You can choose to share different kinds of images to see if the best image or result will be found. After a few uploads, you’ll get the picture with the best compression.
5. Online Tools Vs. Image Editing Software: Which Method Is Best?
When rescuing overly compressed images, the choice between online compression tools and image editing software hinges on your specific needs and skill level. Online tools like TinyPNG offer quick, easy solutions for users prioritizing convenience, while image editing software such as Adobe Photoshop and GIMP provides greater control and more advanced features for those seeking superior results.
5.1. When Should You Choose Online Compression Tools?
Online tools are perfect for users seeking a quick fix with minimal effort. They are ideal for basic compression tasks and when you need to compress images on the go without installing any software.
5.2. When Is Image Editing Software The Better Option?
Image editing software is the way to go for those who need superior results and artistic finesse. These tools provide more control over the compression process and offer features for enhancing image quality.
5.3. Can You Provide A Detailed Comparison Table?
| Feature | Online Compression Tools | Image Editing Software (e.g., Photoshop, GIMP) |
|---|---|---|
| Ease of Use | Very easy, requires no installation | Steeper learning curve, requires installation |
| Control | Limited control over compression settings | Extensive control over compression and image settings |
| Features | Basic compression only | Advanced editing and enhancement features |
| Cost | Often free or low-cost | Can be expensive (Photoshop) or free (GIMP) |
| Accessibility | Accessible from any device with internet | Requires a computer with the software installed |
| Use Case | Quick compression for web or social media | Professional editing, detailed compression control |
| Quality Retention | May not retain quality as well as editing software | Better quality retention with careful adjustments |
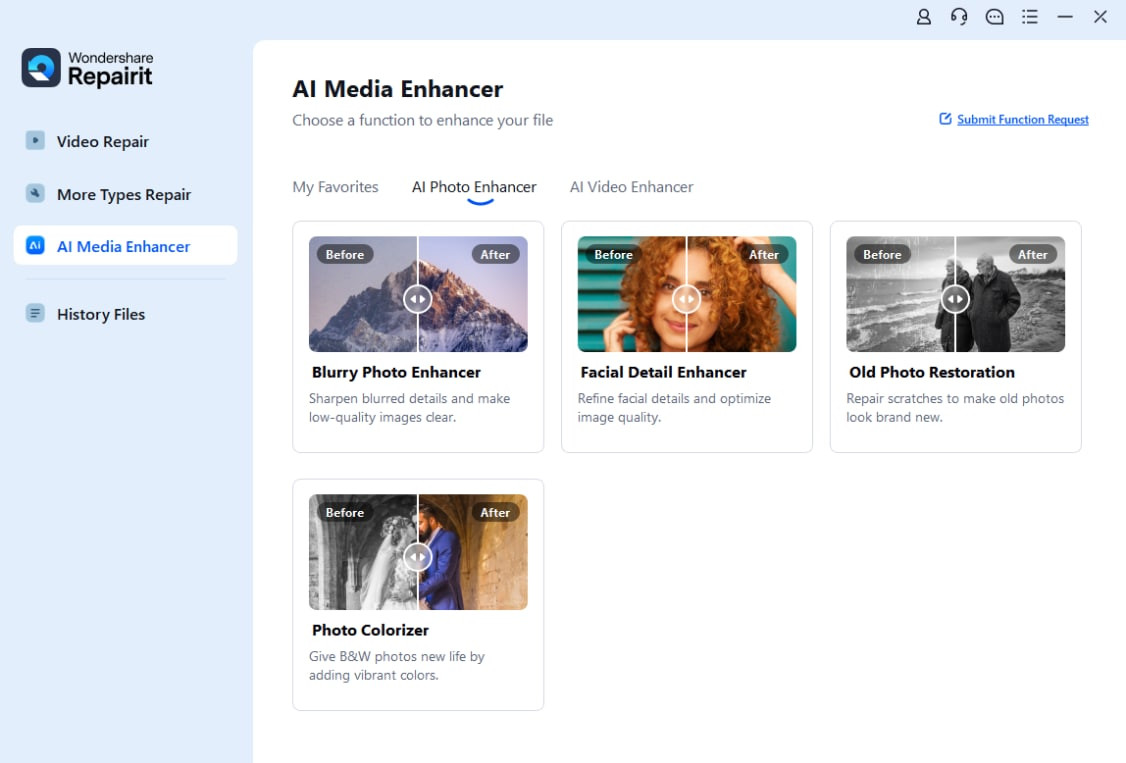
6. How Can AI Enhance And Improve Photos?
AI algorithms are revolutionizing photo enhancement by removing blur, reducing noise, correcting color and exposure, restoring old photos, and repairing corrupted images quickly. Services like Repairit Photo Enhancer use powerful AI to evaluate and improve photo quality, making it easier than ever to restore treasured memories.
6.1. What Is Repairit Photo Enhancer?
Repairit Photo Enhancer is a service that enhances photo quality using powerful AI algorithms. It can remove blur, reduce noise, correct color or exposure, restore old photos, remove scratches, and repair corrupted photos quickly. Its user-friendly design makes it simple and convenient to access valuable memories.
6.2. How Does It Work?
With Wondershare Repairit’s service, you may restore your treasured memories and wave goodbye to damaged or illegible photographs. You may utilize powerful algorithms to evaluate and improve photo quality by uploading your images to Repairit.
6.3. Wondershare Repairit – Photo Repair & Enhance Instructions
Here are the steps to use Wondershare Repairit for photo enhancement:
6.3.1. Step 1: Upload Images
To begin, download Repairit on your computer, launch and open it, choose “AI Photo Enhancer” and drag your images into the photo enhancement functional area or click the “+Add” button to upload them.
 upload images
If your images are corrupted, please choose the “Photo Repair” function.
6.3.2. Step 2: Choose A Desired Model and Begin the Enhancement Procedure
The interface shows you three different AI enhancement model, choose a desired model according to your photo enhancement needs, and select a desired resolution to make your images clearer, then click “Start Enhance” in the lower right corner and wait for the process to finish.
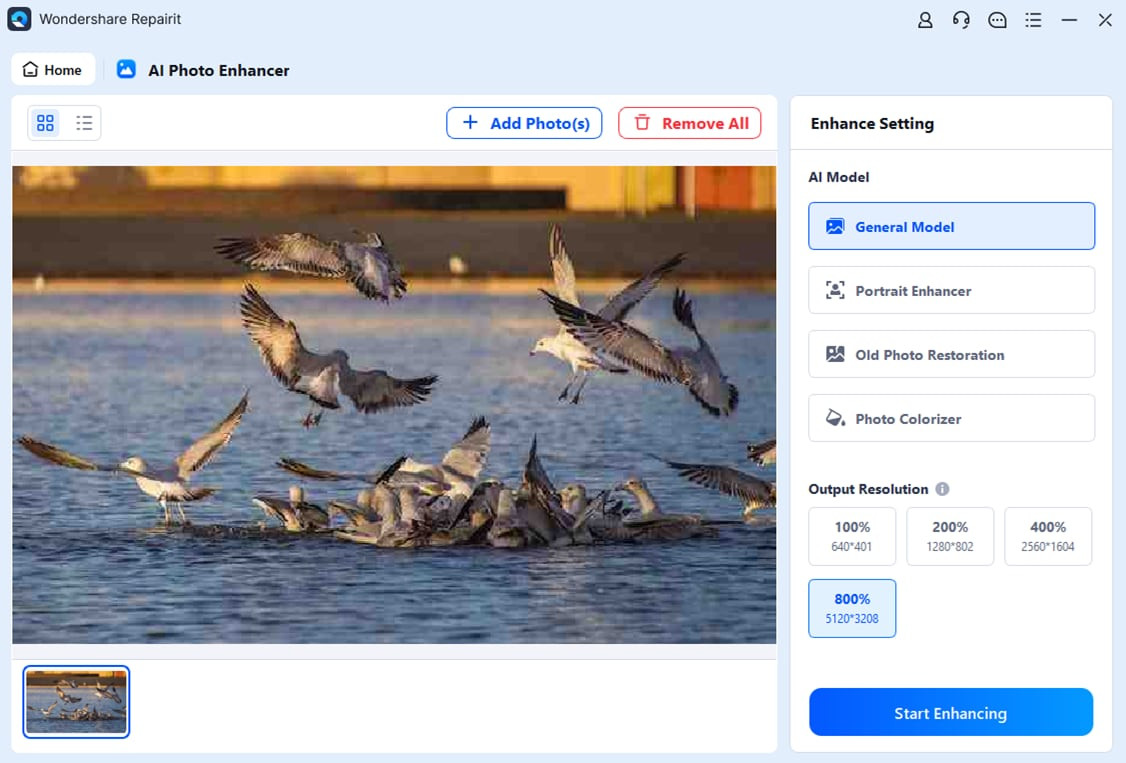 choose ai model for photo enhancement
6.3.3. Step 3: View And Save The Enhanced Images
After you finish the enhancement process, you can preview the photographs, and then click the “Save All” icon to save them on your computer.
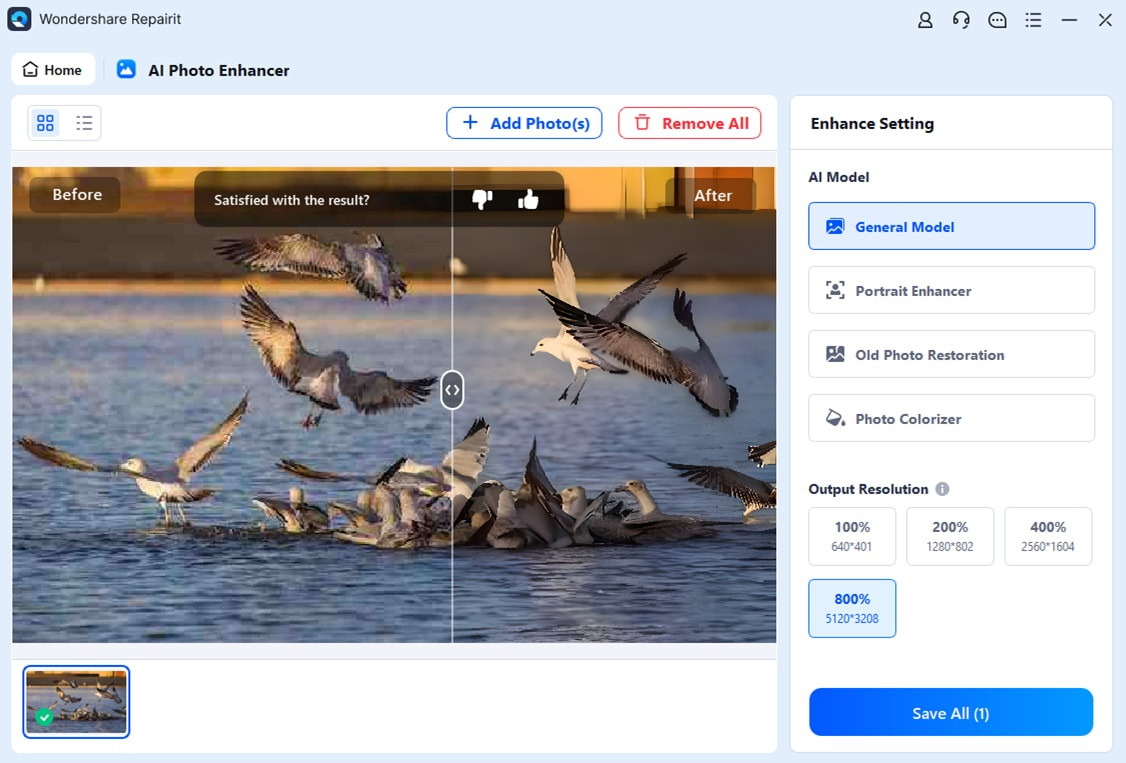 preview and save the image
6.4. Where Can I Find A Step-By-Step Guide?
This video can help you fix your photos with a step-by-step guide.
7. What Tips Can Help Minimize Quality Loss During Compression?
Even though compressed images may lose quality, there are guidelines you can use to limit any loss in quality, including selecting the best compression methods, starting with high-quality images, previewing the image, and creating backups. These tips will help you maintain the best possible quality while reducing file size.
7.1. Tip 1: Select the Best Compression Methods
Lossless compression is often the best choice if you want to keep the quality of the original image. If you have to use lossy compression, choose the ratio that makes the file size the smallest while keeping a good level of quality.
7.2. Tip 2: Begin with a High-Quality Image
Start with a high-quality original image when you want to compress an image. The better the quality of the image in the photo, the better it will be able to be compressed without losing quality.
7.3. Tip 3: Preview The Image
Before you save your compressed image, you should look at it to make sure the quality meets your needs. This allows you to adjust the compression settings until you achieve the desired balance between file size and image quality.
7.4. Tip 4: Create a Backup to The Image
Always make copies of your original picture to use as a backup. This way, if you need to make changes, you can always go back to the original picture. This ensures that you never lose the original, high-quality version of your image.
FAQ: Uncompressing Photos
FAQ 1: What does it mean to uncompress a photo?
Uncompressing a photo refers to the process of restoring a compressed image file to its original, uncompressed state, with the goal of recovering any lost details or quality. This is particularly relevant for lossy compression formats like JPEG.
FAQ 2: Is it possible to fully recover a photo after it has been overly compressed?
While it’s challenging to fully recover a photo after severe compression, you can enhance the image using AI-powered tools or by adjusting the compression ratio to minimize further quality loss. Lossless compression ensures no data is lost, preserving the original quality.
FAQ 3: What is the difference between lossless and lossy compression?
Lossless compression retains all original data, making it ideal for images needing editing or archiving, while lossy compression reduces file size by discarding some data, which can affect image quality.
FAQ 4: How can I reduce the file size of a photo without losing too much quality?
To reduce file size while maintaining quality, start with a high-quality original image, use lossless compression when possible, preview the image before saving, and create backups.
FAQ 5: What are some good online tools for uncompressing photos?
Several online tools can help uncompress photos, including TinyPNG, CompressJPEG, and Optimizilla. These tools offer a balance between ease of use and effective compression.
FAQ 6: Can image editing software like Photoshop help with uncompressing photos?
Yes, image editing software like Adobe Photoshop and GIMP provides greater control over the compression process, allowing for finer adjustments and better quality retention.
FAQ 7: How do AI algorithms enhance and improve photos?
AI algorithms enhance photos by removing blur, reducing noise, correcting color and exposure, restoring old photos, and repairing corrupted images quickly. Services like Repairit Photo Enhancer use powerful AI to evaluate and improve photo quality.
FAQ 8: What are the best file formats for preserving photo quality?
The best file formats for preserving photo quality are lossless formats like PNG and TIFF, which retain all the original data. JPEG is a lossy format that reduces file size but can sacrifice some image quality.
FAQ 9: How does the compression ratio affect the quality of a photo?
The compression ratio is the relationship between the original file size and the compressed file size. A higher compression ratio means a smaller file size but potentially more loss of detail.
FAQ 10: What should I do if my photos are corrupted?
If your photos are corrupted, use reliable photo repair tools like Wondershare Repairit to fix the damaged files and restore your precious memories.
Conclusion: Start Uncompressing Today!
You’ve now gained the knowledge to uncompress images online using various methods. Whether you opt for online compression tools or image editing software, you can unlock pixel-perfect brilliance. Explore our resources at dfphoto.net to discover more tips, tutorials, and inspiration for all your photography needs. At dfphoto.net, we’re committed to providing you with the resources and inspiration you need to excel in your photographic journey.
If you ever encounter the unfortunate event of photo corruption, there’s one tool you can trust to work its magic – Wondershare Repairit.
Why wait? Visit dfphoto.net today to explore our comprehensive guides, discover stunning photography, and connect with a community of passionate photographers. Elevate your skills and transform your creative vision into reality.
Contact Information
Address: 1600 St Michael’s Dr, Santa Fe, NM 87505, United States
Phone: +1 (505) 471-6001
Website: dfphoto.net