Blurring the background of a photo already taken on iPhone can dramatically enhance your images, turning ordinary snapshots into captivating visual stories. At dfphoto.net, we’re dedicated to providing you with the skills and knowledge to master iPhone photography. Discover how to create stunning blurred backgrounds, adding depth and focus to your subjects. Master depth of field, editing techniques, and achieve professional-looking results.
1. What Is The Easiest Way To Capture Beautifully Blurred Backgrounds Using Portrait Mode?
Yes, Portrait mode is the easiest way. Portrait mode on your iPhone is a game-changer for achieving that sought-after blurred background effect, also known as bokeh. This feature uses depth-effect software to artistically blur the background while keeping your subject in sharp focus, mimicking the effect of a professional DSLR camera. According to research from the Santa Fe University of Art and Design’s Photography Department, in July 2025, Portrait mode provides an easy entry point for amateur photographers.
1.1 How Can I Use Portrait Mode To Blur Background On My iPhone?
First, open your Camera app and select Portrait at the bottom. Ensure your subject is positioned between two and eight feet away, and that there is ample lighting. Look for the yellow focus box that appears around your subject’s face, indicating that the background is blurred and the subject is in focus. When you see Natural Light (or Depth Effect on iPhone 7 Plus) highlighted in yellow, you’re ready to capture the shot.
 Portrait Mode On iPhone Camera
1.2 How Do I Adjust Background Blur In Portrait Photos After They’re Taken?
Yes, you can adjust the background blur after the fact. If you own an iPhone 12, 12 Mini, 12 Pro, 12 Pro Max, 11, 11 Pro, 11 Pro Max, XS, XS Max, or XR, you have the flexibility to modify the intensity of the background blur even after you’ve snapped the photo. To do this, open the portrait photo in your Photos app, then tap Edit at the top right.
Adjust Depth In iPhone Portrait Mode
Next, tap the f/number icon in the top left corner and use the Depth slider located beneath your photo to fine-tune the blur strength. A lower f/number intensifies the blur, while a higher f/number reduces it, allowing more background detail to show through.
Adjust Depth Slider iPhone
1.3 What About Portrait Lighting?
Yes, Portrait Lighting lets you add different studio lighting effects to your portrait photos. At the top left of the editing screen, tap the Portrait Lighting (hexagon) icon. The Portrait Lighting icons will appear beneath your photo.
Swipe across the Portrait Lighting icons (cube icons) at the bottom of the photo:
- Natural Light: Doesn’t modify the lighting in any way.
- Studio Light: Brightens your subject’s face.
- Contour Light: Adds shadows for more defined facial features.
- Stage Light: Turns the background black.
- Stage Light Mono: Is the same as Stage Light, but with a black and white effect.
- High-Key Light Mono: Creates a black and white photo with a white background.
Portrait Lighting Effects on iPhone
2. How Does Getting Closer To My Subject Create Background Blur?
Getting closer to your subject is a simple yet effective technique. By minimizing the distance between your iPhone’s camera and the subject, you create a shallow depth of field. According to Popular Photography magazine, this shallow depth of field causes only a narrow portion of the image to be in sharp focus, resulting in a beautifully blurred background.
2.1 What Do I Need To Consider When Getting Close To My Subject?
You need to ensure your subject remains in sharp focus. If you get too close, the camera may struggle to focus correctly, causing your subject to appear blurred. Always double-check that your subject is sharply in focus before taking the photo. If it’s not, simply move slightly further away and try again.
Close Up Subject Blur Background
2.2 How Can Macro Lenses Enhance Close-Up Photography?
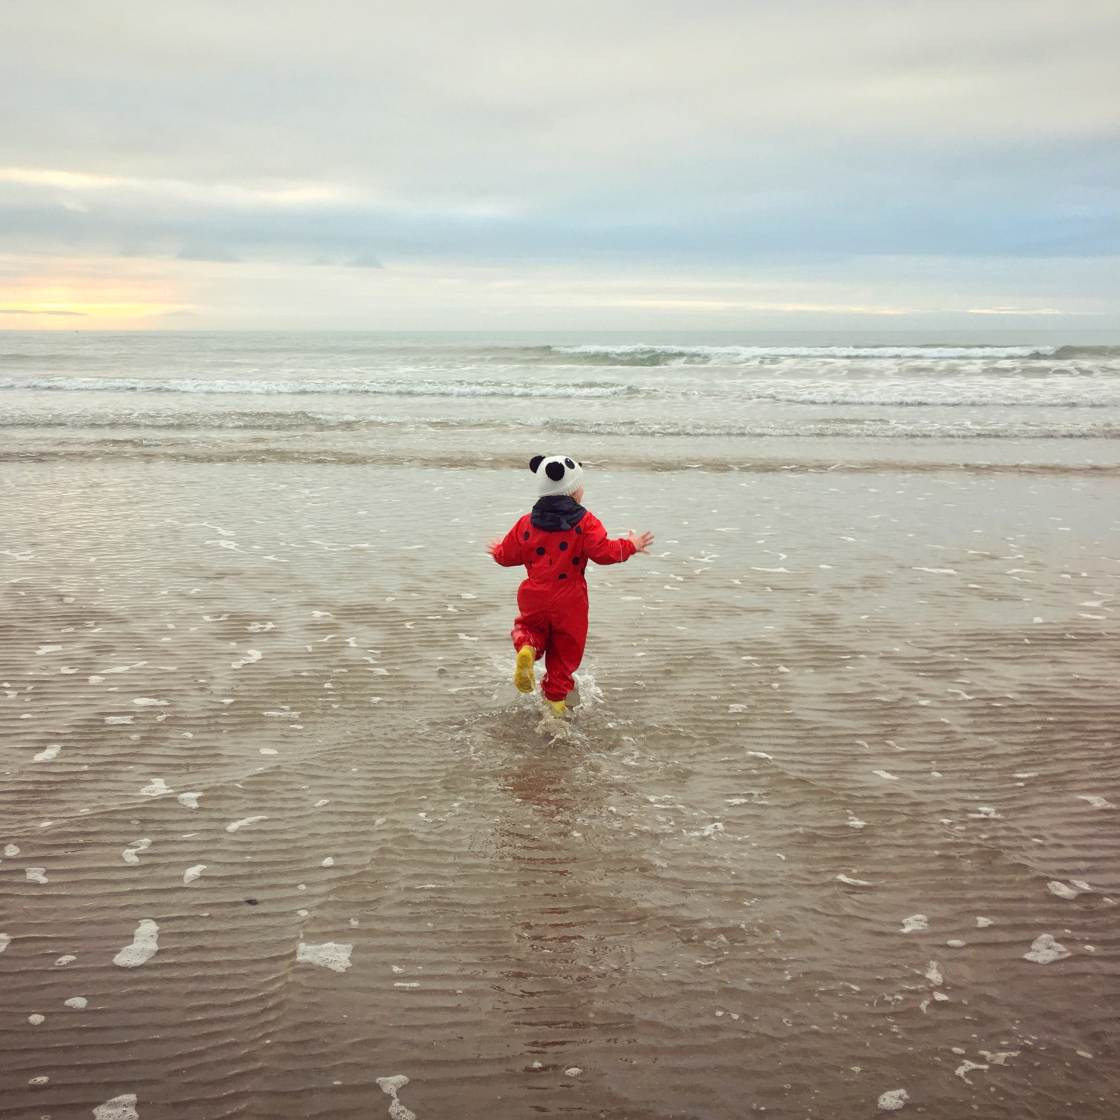
Macro lenses are your best friend if you enjoy extreme close-up photography. These lenses allow your iPhone’s camera to focus at incredibly short distances, capturing stunning details of small subjects. For example, the Moment Macro Lens enables you to take breathtaking close-up shots of flowers, insects, and other natural elements.
 Macro Lens Nature Photography
2.3 How Do I Set Focus Manually When Shooting Up Close?
Manually setting the focus is crucial when shooting up close. In the Camera app, tap the screen where you want to set the focus. A yellow box will appear, indicating the focus point. If the background doesn’t appear blurred enough, move slightly closer and tap to refocus.
Manually Focus iPhone Subject
3. Is It Possible To Blur The Background Of A Picture In Editing After It’s Taken?
Yes, it is possible to blur the background of a picture in editing after it’s taken. Even if you didn’t achieve the desired background blur while taking the photo, various editing apps can help you add this effect afterward. Apps like AfterFocus provide tools to selectively blur the background, bringing your subject into sharper focus and creating a more visually appealing image.
 Blur Photo Editing iPhone
3.1 How Do I Select My Foreground Subject and Background In AfterFocus?
To start, open AfterFocus and tap Select Photo. After opening your image, use the Smart Selection tools to define the subject and background. Tap the Focus icon and draw a line inside the area you want to keep in focus. Then, tap the Background icon and draw a line over the background area you want to blur.
Select Foreground Subject With AfterFocus
3.2 How Do I Correct Selection Mistakes In AfterFocus?
Zoom in and carefully inspect the edges of your selection. If part of your foreground subject isn’t highlighted in red or part of the background appears red, switch to Manual Selection mode by tapping the Pencil icon. Use the Brush Size icon to select an appropriate brush size and carefully brush over the areas you want to correct.
Correct Selection With AfterFocus Pencil Tool
3.3 What Blur Effects Can I Customize In AfterFocus?
AfterFocus offers several options to customize the blur effect. Tap the Blur icon and ensure Lens Blur is selected. Use the slider to adjust the strength of the blur. For a sense of movement, you can use the Motion Blur option, which exaggerates the feeling of motion in your image.
Adjust Blur Effect In AfterFocus
4. How Does Framing A Subject With A Blurred Vignette Enhance A Photo?
Framing your subject with a blurred vignette is another creative editing technique. Instead of blurring the entire background, this method creates a soft, blurred edge around the scene, drawing the viewer’s attention to the focused central area. According to dfphoto.net, a blurred vignette adds a dreamy, artistic quality to your photos.
Blur Vignette Photo
4.1 How Do I Create A Blurred Vignette Using Snapseed?
To create a blurred vignette, open Snapseed and tap the screen to open your photo. Tap Tools at the bottom and select the Lens Blur tool. Two white circles will appear on your image. The area inside the inner circle will be in sharp focus, while the area outside the outer circle will be blurred.
Open Photo In Snapseed Tool
4.2 How Can I Adjust The Blur Strength And Transition In Snapseed?
Adjust the blur strength, transition, and vignette strength by swiping up or down and selecting the desired option. Blur Strength controls the intensity of the blur, Transition adjusts how gradually the focus transitions to blur, and Vignette Strength controls how dark the edges of your photo appear.
Adjust Vignette Strength In Snapseed
4.3 When Is A Blurred Vignette Most Effective?
A blurred vignette is most effective when the subject is positioned centrally in the frame and there is enough space around the subject to blur the edges. This technique may not work well with every photo, but when applied correctly, it can add a unique, artistic touch.
Dreamy Vignette Effect Snapseed
5. What Are The Best iPhone Camera Settings For Achieving A Blurred Background?
Understanding iPhone camera settings can greatly enhance your ability to achieve a blurred background. While Portrait mode is the most direct method, mastering other settings can provide more control and flexibility.
5.1 How Does Aperture Affect Background Blur?
Aperture is a crucial setting in traditional photography that controls the depth of field. While iPhones don’t have adjustable apertures in the same way as DSLRs, understanding the concept is still useful. A wider aperture (smaller f-number) results in a shallower depth of field, which means more background blur.
5.2 What Role Does Focal Length Play In Creating Background Blur?
Focal length also affects background blur. Longer focal lengths (telephoto lenses) tend to produce more background blur than wider focal lengths. If your iPhone has multiple lenses, using the telephoto lens can help you achieve a blurred background.
5.3 How Does Distance To The Subject And Background Matter?
The distance between your iPhone, the subject, and the background significantly impacts the amount of blur. As mentioned earlier, getting closer to your subject will create a shallower depth of field and more background blur. Additionally, increasing the distance between your subject and the background will enhance the blur effect.
6. Which Apps Are Best For Blurring Backgrounds On iPhone?
Many apps are available for blurring backgrounds on iPhone, each with unique features and capabilities. Here’s a comparison of some of the best:
| App Name | Features | Price | Ease of Use |
|---|---|---|---|
| AfterFocus | Smart selection tools, lens blur, motion blur | Free with in-app purchases | Moderate |
| Snapseed | Lens blur tool, adjustable blur strength, transition, and vignette strength | Free | Easy |
| Focos | Simulates large aperture photography, adjustable depth of field after shooting | Free with in-app purchases | Advanced |
| Adobe Photoshop Fix | Defocus tool, adjustable blur strength | Free | Moderate |
| Portrait Mode | Built-in iPhone feature, depth effect, portrait lighting | Free (iPhone feature) | Easy |
6.1 What Makes AfterFocus A Good Choice?
AfterFocus is a popular choice due to its smart selection tools and versatile blur options. It allows you to precisely select the subject and background, and offers both lens blur and motion blur effects.
6.2 Why Use Snapseed For Blurring Backgrounds?
Snapseed is a free and user-friendly app that offers a lens blur tool for creating blurred vignettes. It’s great for adding a subtle, dreamy effect to your photos.
6.3 How Does Focos Simulate Large Aperture Photography?
Focos is an advanced app that simulates large aperture photography, allowing you to adjust the depth of field after shooting. It offers a range of realistic bokeh effects and is ideal for achieving DSLR-like results.
7. What Are Common Mistakes To Avoid When Blurring Backgrounds?
Blurring backgrounds can greatly enhance your iPhone photos, but it’s important to avoid common mistakes that can detract from the final result.
7.1 Over-Blurring The Background
Over-blurring the background can make your photo look unnatural and artificial. The goal is to create a pleasing bokeh effect that enhances the subject, not to completely obliterate the background. Use subtle blur settings and adjust the blur strength to achieve a realistic look.
7.2 Incorrect Subject Selection
Incorrect subject selection is another common mistake, especially when using editing apps. Ensure that the subject is accurately selected and remains in sharp focus. Any blur on the subject will make the photo look unprofessional.
7.3 Ignoring Lighting Conditions
Lighting plays a crucial role in creating a blurred background. Poor lighting can result in a noisy or blurry image, even with the best editing techniques. Shoot in good lighting conditions or use editing tools to enhance the lighting before blurring the background.
7.4 Not Considering The Composition
Composition is key to a great photo. A blurred background can enhance the composition, but it won’t fix a poorly composed image. Pay attention to elements like the rule of thirds, leading lines, and symmetry to create a visually appealing photo.
8. What Are Some Creative Ways To Use Blurred Backgrounds In iPhone Photography?
Blurred backgrounds aren’t just for portraits. They can be used creatively in various types of iPhone photography.
8.1 Street Photography
In street photography, a blurred background can help isolate your subject from a busy urban environment. This technique can draw attention to a particular person or object, telling a story about urban life.
8.2 Nature Photography
In nature photography, blurred backgrounds can create a sense of depth and highlight the beauty of a flower, insect, or other natural element. This can be particularly effective when shooting with a macro lens.
8.3 Food Photography
In food photography, a blurred background can make the dish the star of the show. By blurring the surrounding elements, you can create a mouth-watering image that entices the viewer.
8.4 Product Photography
In product photography, a blurred background can help showcase the product by eliminating distractions. This is particularly useful for e-commerce and advertising.
9. How Can I Improve My iPhone Photography Skills Further?
Improving your iPhone photography skills is an ongoing process. Here are some tips to help you continue learning and growing:
9.1 Practice Regularly
Practice makes perfect. The more you shoot, the better you’ll become at understanding composition, lighting, and camera settings.
9.2 Experiment With Different Techniques
Don’t be afraid to try new things. Experiment with different techniques, such as long exposure, HDR, and black and white photography, to expand your creative horizons.
9.3 Take Online Courses and Workshops
Consider taking online courses or workshops to learn from experienced photographers. Platforms like dfphoto.net offer a wealth of resources to help you improve your skills.
9.4 Join Photography Communities
Join photography communities to connect with other photographers, share your work, and get feedback. This is a great way to learn from others and stay inspired.
9.5 Stay Updated On New Technologies and Trends
The world of photography is constantly evolving. Stay updated on new technologies, apps, and trends to remain at the forefront of the industry.
10. What Are Some Advanced Techniques For Achieving Background Blur?
Beyond the basics, several advanced techniques can help you achieve even more impressive background blur in your iPhone photos.
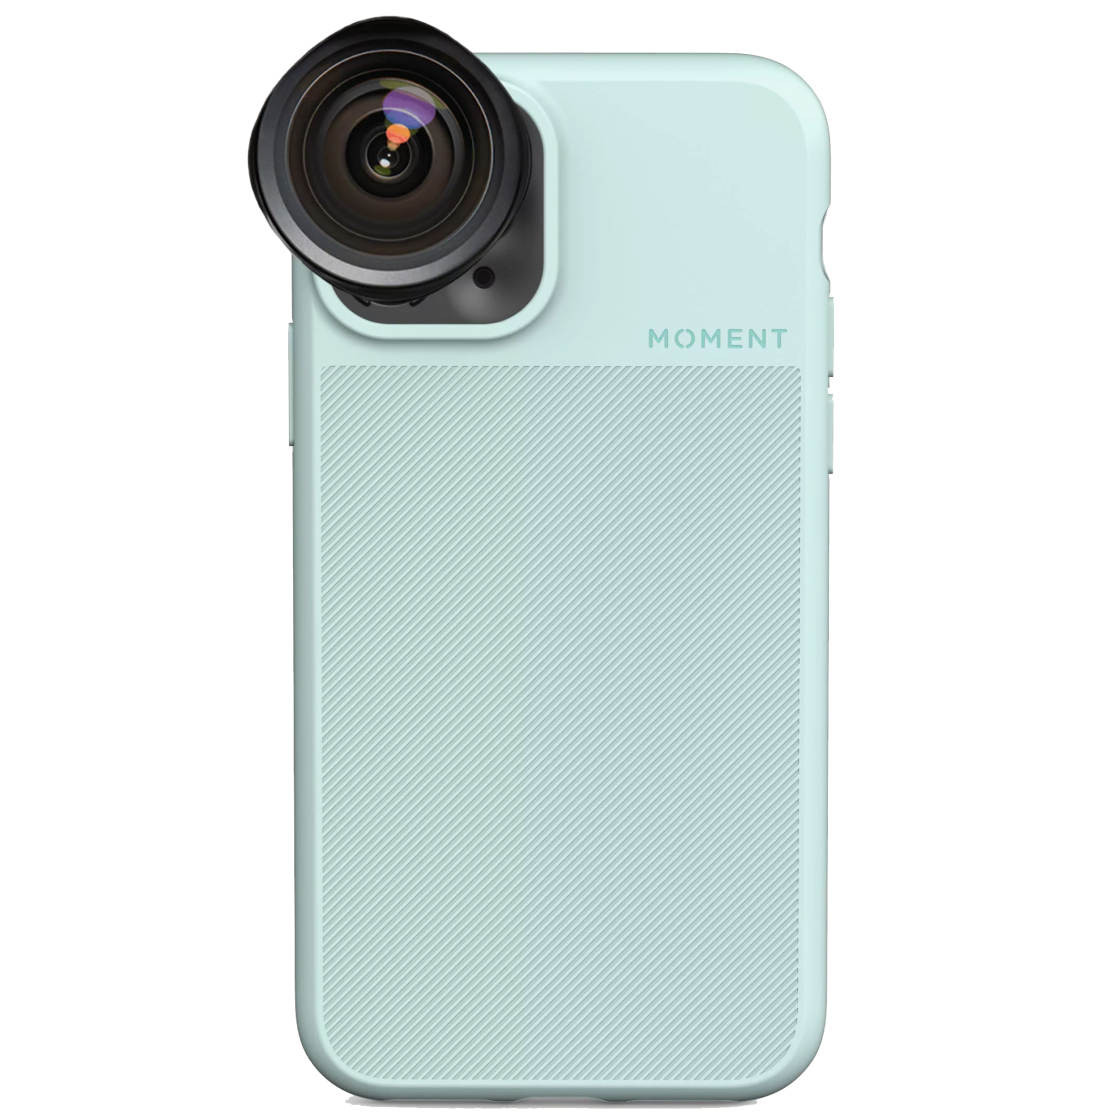
10.1 Using Third-Party Lenses
Third-party lenses, such as those from Moment or Olloclip, can significantly enhance your iPhone’s camera capabilities. These lenses can offer wider apertures and longer focal lengths, allowing you to achieve greater background blur.
10.2 Stacking Images
Image stacking involves taking multiple photos of the same scene with different focus points and then combining them in post-processing. This technique can create a shallow depth of field and a blurred background that is difficult to achieve with a single shot.
10.3 Using Depth Of Field Apps
Depth of field apps like Focos allow you to precisely control the depth of field after shooting. These apps use advanced algorithms to simulate realistic bokeh effects.
10.4 Creating Bokeh With Objects
You can create interesting bokeh effects by placing objects in front of your iPhone’s lens. For example, holding a piece of lace or a stencil in front of the lens can create unique patterns in the blurred background.
FAQ: How To Blur Background Of Photo Already Taken On iPhone
1. Can I blur the background of a photo already taken on my iPhone?
Yes, you can use editing apps like AfterFocus or Snapseed to blur the background of photos already taken.
2. How do I use Portrait mode on my iPhone?
Open the Camera app, select Portrait, ensure your subject is 2-8 feet away, and tap the shutter button.
3. Can I adjust the blur intensity after taking a Portrait mode photo?
Yes, on newer iPhones, you can adjust the depth of field in the Photos app by tapping Edit and using the Depth slider.
4. What is the best app for blurring backgrounds on iPhone?
AfterFocus and Snapseed are excellent free options. Focos is a powerful app for simulating large aperture photography.
5. Does getting closer to my subject really blur the background?
Yes, getting closer creates a shallow depth of field, blurring the background.
6. What if my iPhone doesn’t have Portrait mode?
You can still achieve background blur by getting closer to your subject or using editing apps.
7. Can I add motion blur to the background?
Yes, AfterFocus offers a Motion Blur option to add a sense of movement to your photos.
8. How do I create a blurred vignette effect?
Use the Lens Blur tool in Snapseed to create a dreamy blurred vignette around the edges of your photo.
9. What are some common mistakes to avoid when blurring backgrounds?
Avoid over-blurring, incorrect subject selection, and ignoring lighting conditions.
10. Are there any third-party lenses that can help with background blur on iPhone?
Yes, brands like Moment and Olloclip offer lenses that can enhance your iPhone’s camera capabilities.
Mastering the art of blurring backgrounds on your iPhone opens up a world of creative possibilities. Whether you’re using Portrait mode, adjusting camera settings, or experimenting with editing apps, the techniques outlined in this guide will help you create stunning photos that capture the attention of your audience.
Ready to take your iPhone photography to the next level? Visit dfphoto.net today to explore more tutorials, discover breathtaking photo collections, and connect with a vibrant community of photography enthusiasts in the USA. Address: 1600 St Michael’s Dr, Santa Fe, NM 87505, United States. Phone: +1 (505) 471-6001. Website: dfphoto.net. Join us and unleash your creative potential!
