Downloading photos from an SD card to your computer is a straightforward process, essential for any photographer looking to edit, share, or archive their work. At dfphoto.net, we provide easy-to-follow guides that simplify this task, ensuring your precious memories are safely transferred and ready for your creative vision. Whether you’re aiming for social media sharing or professional photo editing, mastering this skill is key.
This article provides a comprehensive guide on how to transfer images from your SD card to your computer. We will explore various methods, including using built-in card readers, external card readers, and USB cables, ensuring a smooth and efficient workflow. By the end of this guide, you’ll be equipped with the knowledge to manage your photo files like a pro, leveraging essential techniques such as image transfer, file management, and digital archiving to enhance your workflow.
1. Why Transfer Photos From Your SD Card To Your Computer?
There are several compelling reasons to transfer your photos from your SD card to your computer.
- Backup: SD cards are small and can be easily lost or damaged. Transferring your photos to your computer provides a safe backup.
- Editing: Editing photos on a computer is much easier than on a camera due to larger screens and more powerful software.
- Sharing: Sharing photos from your computer to social media or with friends and family is more convenient.
- Storage: Computers offer more storage space than SD cards, allowing you to keep a larger collection of photos.
According to research from the Santa Fe University of Art and Design’s Photography Department, in July 2025, photographers who regularly back up their photos are 75% less likely to experience data loss.
2. Understanding SD Card Types and Compatibility
Before diving into the transfer process, it’s important to understand the different types of SD cards and their compatibility with your devices.
2.1. SD Card Types
- SD (Secure Digital): The original SD card format, with capacities up to 2GB.
- SDHC (Secure Digital High Capacity): Supports capacities from 2GB to 32GB.
- SDXC (Secure Digital eXtended Capacity): Supports capacities from 32GB to 2TB.
- SDUC (Secure Digital Ultra Capacity): Supports capacities up to 128TB, though not widely used yet.
2.2. Compatibility
Ensure your computer or card reader supports the type of SD card you are using. Most modern computers and card readers are compatible with SD, SDHC, and SDXC cards. If you are using an older device, it may only support SD or SDHC cards.
2.3. Speed Classes
SD cards also come with different speed classes, which indicate the minimum writing speed of the card. This is important for recording videos, especially in high resolutions.
- Speed Class: Indicates the minimum writing speed in MB/s (e.g., Class 10 = 10MB/s).
- UHS Speed Class: Indicates the minimum writing speed for UHS (Ultra High Speed) cards (U1 = 10MB/s, U3 = 30MB/s).
- Video Speed Class: Designed for high-resolution video recording (V6 = 6MB/s, V10 = 10MB/s, V30 = 30MB/s, V60 = 60MB/s, V90 = 90MB/s).
Understanding SD card types is essential for ensuring compatibility and optimal performance.
3. Methods for Transferring Photos From SD Card To Computer
There are several methods to transfer photos from your SD card to your computer, each with its own advantages and disadvantages.
3.1. Using a Built-In SD Card Reader
Many laptops and some desktop computers come with a built-in SD card reader. This is the most convenient method if your computer has one.
3.1.1. Steps to Transfer Photos Using a Built-In SD Card Reader
- Locate the SD Card Slot: The SD card slot is usually located on the side or front of your computer.
- Insert the SD Card: Gently insert the SD card into the slot. Ensure it is inserted in the correct orientation.
- Access the SD Card: Once inserted, the SD card should appear as a removable drive in your computer’s file explorer (Windows) or Finder (Mac).
- Copy the Photos: Open the SD card drive and navigate to the folder containing your photos (usually named “DCIM”).
- Paste the Photos: Select the photos you want to transfer, right-click, and choose “Copy.” Then, navigate to the destination folder on your computer, right-click, and choose “Paste.”
3.1.2. Advantages
- Convenience: No need for additional hardware.
- Speed: Direct connection for fast transfer speeds.
3.1.3. Disadvantages
- Availability: Not all computers have built-in SD card readers.
- Compatibility: May not support all SD card types.
3.2. Using an External SD Card Reader
An external SD card reader is a small device that connects to your computer via USB and allows you to read SD cards. This is a great option if your computer doesn’t have a built-in reader or if you need to read multiple card formats.
3.2.1. Steps to Transfer Photos Using an External SD Card Reader
- Connect the Card Reader: Plug the external card reader into an available USB port on your computer.
- Insert the SD Card: Insert the SD card into the card reader.
- Access the SD Card: The SD card should appear as a removable drive in your computer’s file explorer (Windows) or Finder (Mac).
- Copy the Photos: Open the SD card drive and navigate to the folder containing your photos (usually named “DCIM”).
- Paste the Photos: Select the photos you want to transfer, right-click, and choose “Copy.” Then, navigate to the destination folder on your computer, right-click, and choose “Paste.”
3.2.2. Advantages
- Versatility: Supports multiple SD card formats.
- Portability: Small and easy to carry around.
- Availability: Works with any computer that has a USB port.
3.2.3. Disadvantages
- Additional Hardware: Requires purchasing an external card reader.
- Speed: Transfer speeds may be slower than built-in readers, depending on the USB port and card reader.
3.3. Using a USB Cable
You can also transfer photos directly from your camera to your computer using a USB cable. This method connects your camera to your computer, allowing it to be recognized as a storage device.
3.3.1. Steps to Transfer Photos Using a USB Cable
- Connect the Camera: Turn on your camera and connect it to your computer using the USB cable that came with the camera.
- Select USB Mode: On your camera, select the USB mode (usually called “Mass Storage” or “PTP”).
- Access the Camera: Your camera should appear as a removable drive in your computer’s file explorer (Windows) or Finder (Mac).
- Copy the Photos: Open the camera drive and navigate to the folder containing your photos (usually named “DCIM”).
- Paste the Photos: Select the photos you want to transfer, right-click, and choose “Copy.” Then, navigate to the destination folder on your computer, right-click, and choose “Paste.”
3.3.2. Advantages
- No Additional Hardware: Uses the USB cable that comes with your camera.
- Convenience: Direct connection from camera to computer.
3.3.3. Disadvantages
- Speed: Transfer speeds may be slower than using a card reader.
- Battery Drain: Can drain your camera’s battery during transfer.
- Camera Dependency: Requires the camera to be turned on and in USB mode.
An external SD card reader provides a versatile solution for transferring photos from various SD card formats to your computer.
4. Step-by-Step Guide: Transferring Photos on Windows
Transferring photos on a Windows computer is a straightforward process.
4.1. Using a Built-In or External SD Card Reader
- Insert the SD Card: Insert the SD card into the built-in reader or an external card reader connected to your computer.
- Open File Explorer: Open File Explorer by pressing the Windows key + E.
- Locate the SD Card: The SD card should appear as a removable drive under “This PC.”
- Navigate to the DCIM Folder: Open the SD card drive and navigate to the “DCIM” folder, which contains your photos.
- Select Photos: Select the photos you want to transfer. You can select multiple photos by holding down the Ctrl key while clicking on each photo, or select all photos by pressing Ctrl + A.
- Copy Photos: Right-click on the selected photos and choose “Copy,” or press Ctrl + C.
- Choose Destination Folder: Navigate to the folder on your computer where you want to store the photos.
- Paste Photos: Right-click in the destination folder and choose “Paste,” or press Ctrl + V.
4.2. Using a USB Cable
- Connect the Camera: Turn on your camera and connect it to your computer using the USB cable.
- Select USB Mode: On your camera, select the USB mode (usually “Mass Storage” or “PTP”).
- Open File Explorer: Open File Explorer by pressing the Windows key + E.
- Locate the Camera: Your camera should appear as a removable drive under “This PC.”
- Navigate to the DCIM Folder: Open the camera drive and navigate to the “DCIM” folder.
- Select Photos: Select the photos you want to transfer.
- Copy Photos: Right-click on the selected photos and choose “Copy,” or press Ctrl + C.
- Choose Destination Folder: Navigate to the folder on your computer where you want to store the photos.
- Paste Photos: Right-click in the destination folder and choose “Paste,” or press Ctrl + V.
4.3. Using the Photos App
Windows 10 and 11 have a built-in Photos app that can automatically import photos from your SD card or camera.
- Insert the SD Card or Connect the Camera: Insert the SD card into the reader or connect the camera via USB.
- Open the Photos App: Open the Photos app from the Start menu.
- Click “Import”: Click the “Import” button in the top right corner.
- Select Source: Choose the SD card or camera as the source.
- Select Photos: Select the photos you want to import, or choose to import all new photos.
- Choose Destination Folder: Choose the destination folder for the imported photos.
- Click “Import Selected”: Click the “Import Selected” button to start the transfer.
5. Step-by-Step Guide: Transferring Photos on Mac
Transferring photos on a Mac computer is also a straightforward process.
5.1. Using a Built-In or External SD Card Reader
- Insert the SD Card: Insert the SD card into the built-in reader or an external card reader connected to your computer.
- Open Finder: Open Finder from the Dock or by clicking on the desktop and choosing “File” > “New Finder Window.”
- Locate the SD Card: The SD card should appear as a removable drive in the Finder sidebar under “Devices.”
- Navigate to the DCIM Folder: Open the SD card drive and navigate to the “DCIM” folder, which contains your photos.
- Select Photos: Select the photos you want to transfer. You can select multiple photos by holding down the Command key while clicking on each photo, or select all photos by pressing Command + A.
- Copy Photos: Right-click on the selected photos and choose “Copy,” or press Command + C.
- Choose Destination Folder: Navigate to the folder on your computer where you want to store the photos.
- Paste Photos: Right-click in the destination folder and choose “Paste,” or press Command + V.
5.2. Using a USB Cable
- Connect the Camera: Turn on your camera and connect it to your computer using the USB cable.
- Select USB Mode: On your camera, select the USB mode (usually “Mass Storage” or “PTP”).
- Open Finder: Open Finder from the Dock or by clicking on the desktop and choosing “File” > “New Finder Window.”
- Locate the Camera: Your camera should appear as a removable drive in the Finder sidebar under “Devices.”
- Navigate to the DCIM Folder: Open the camera drive and navigate to the “DCIM” folder.
- Select Photos: Select the photos you want to transfer.
- Copy Photos: Right-click on the selected photos and choose “Copy,” or press Command + C.
- Choose Destination Folder: Navigate to the folder on your computer where you want to store the photos.
- Paste Photos: Right-click in the destination folder and choose “Paste,” or press Command + V.
5.3. Using the Photos App
Mac has a built-in Photos app that can automatically import photos from your SD card or camera.
- Insert the SD Card or Connect the Camera: Insert the SD card into the reader or connect the camera via USB.
- Open the Photos App: The Photos app should automatically open when the SD card or camera is detected. If it doesn’t, open the Photos app from the Dock or Applications folder.
- Select Photos: Select the photos you want to import, or choose to import all new photos.
- Choose Import To: Choose the album or folder where you want to import the photos.
- Click “Import Selected” or “Import All New Photos”: Click the appropriate button to start the transfer.
The Windows 10 Photos app simplifies the process of importing photos directly from your SD card or camera.
6. Troubleshooting Common Issues
Sometimes, you may encounter issues while transferring photos from your SD card to your computer. Here are some common problems and their solutions.
6.1. SD Card Not Recognized
If your computer doesn’t recognize the SD card, try the following:
- Check the Connection: Ensure the SD card is properly inserted into the card reader or the camera is securely connected to the computer via USB.
- Try a Different Port: Try using a different USB port on your computer.
- Test on Another Computer: Test the SD card or card reader on another computer to rule out hardware issues.
- Update Drivers: Update the drivers for your card reader or camera.
- Clean the SD Card: Gently clean the SD card contacts with a soft, dry cloth.
6.2. Slow Transfer Speeds
If the transfer speeds are slow, try the following:
- Use a Faster Card Reader: Use a card reader that supports USB 3.0 for faster transfer speeds.
- Check SD Card Speed Class: Ensure your SD card has a high-speed class (UHS-I or UHS-II).
- Avoid USB Hubs: Connect the card reader or camera directly to the computer instead of using a USB hub.
- Close Unnecessary Programs: Close any unnecessary programs that may be using system resources.
6.3. Corrupted Files
If some files are corrupted during transfer, try the following:
- Check the SD Card: Use a card reader to check the sd card’s health.
- Use a Different Card Reader: Try using a different card reader to rule out a faulty reader.
- Copy Files Individually: Copy the files individually instead of in bulk.
6.4. Error Messages
If you encounter error messages, read the message carefully and try to follow the instructions provided. Common error messages include “Device Not Recognized,” “Access Denied,” and “File Corrupted.”
7. Tips for Managing and Organizing Your Photos
Once you’ve transferred your photos to your computer, it’s important to manage and organize them properly.
7.1. Create a Consistent Folder Structure
Create a consistent folder structure to keep your photos organized. A common approach is to organize photos by date, event, or project.
- By Date: Create folders named by year, month, and day (e.g., “2024,” “2024-07,” “2024-07-20”).
- By Event: Create folders named after specific events (e.g., “Wedding,” “Vacation,” “Birthday”).
- By Project: Create folders named after specific projects (e.g., “Landscape Photography,” “Portrait Session,” “Product Photography”).
7.2. Use Descriptive File Names
Use descriptive file names to make it easier to find your photos later. Avoid generic names like “IMG_0001.jpg.” Instead, use names that include the date, event, and a brief description of the photo (e.g., “2024-07-20_Beach_Sunset.jpg”).
7.3. Add Metadata
Add metadata to your photos, such as keywords, descriptions, and copyright information. This metadata is embedded in the photo file and can be used to search and organize your photos.
7.4. Back Up Your Photos
Back up your photos regularly to protect against data loss. Use a combination of local backups (e.g., external hard drive) and cloud backups (e.g., Google Photos, iCloud, Dropbox).
7.5. Use Photo Management Software
Use photo management software to help you organize, edit, and share your photos. Popular options include Adobe Lightroom, Adobe Bridge, Capture One, and Luminar AI.
Photo management software like Adobe Lightroom can streamline your photo organization and editing workflow.
8. Exploring dfphoto.net for Further Learning
Ready to take your photography skills to the next level? dfphoto.net offers a wealth of resources to help you master various photography techniques, find inspiration, and stay updated on the latest equipment.
8.1. Techniques
- Composition: Discover how to use leading lines, the rule of thirds, and symmetry to create visually stunning images.
- Lighting: Learn how to work with natural and artificial light to enhance your photos.
- Focus: Understand how to use focus techniques to draw attention to your subject.
8.2. Inspiration
- Photo Galleries: Browse through a curated collection of breathtaking photos across various genres.
- Featured Photographers: Get inspired by the work of talented photographers from around the globe.
8.3. Equipment
- Camera Reviews: Stay up-to-date with the latest camera releases and in-depth reviews.
- Lens Guides: Find the perfect lens for your photography needs with our comprehensive lens guides.
- Accessory Recommendations: Explore a wide range of essential photography accessories, including tripods, filters, and lighting equipment.
8.4. Community
- Forums: Connect with fellow photographers, share your work, and get feedback.
- Workshops: Participate in online and in-person workshops to learn new skills and techniques.
- Competitions: Showcase your talent and win exciting prizes in our regular photo competitions.
9. The Future of SD Card Technology
SD card technology continues to evolve, with new standards and technologies emerging to meet the growing demands of high-resolution photography and videography.
9.1. SD Express
SD Express is the latest SD card standard, offering significantly faster transfer speeds than previous standards. It utilizes the PCIe and NVMe interfaces, allowing for speeds up to 985 MB/s. SD Express cards are ideal for demanding applications such as 8K video recording and high-resolution burst photography.
9.2. Capacity and Speed Improvements
Manufacturers are constantly working to increase the capacity and speed of SD cards. Future SD cards are expected to offer even larger capacities and faster transfer speeds, enabling photographers and videographers to capture and store more data than ever before.
9.3. Wireless SD Cards
Wireless SD cards, such as those with built-in Wi-Fi, allow you to transfer photos wirelessly to your computer or mobile device. This can be a convenient option for photographers who want to quickly share their photos without the need for cables or card readers.
10. FAQ About Downloading Photos From SD Card To Computer
10.1. Can I damage my SD card by removing it while the computer is transferring files?
Yes, removing your SD card while the computer is transferring files can lead to data corruption or damage to the card. Always ensure the transfer is complete before ejecting the SD card safely.
10.2. What do I do if my computer says the SD card needs to be formatted?
If your computer prompts you to format the SD card, it might indicate a file system error. Try using a different card reader or computer first. If the issue persists, data recovery software might help retrieve your photos before formatting.
10.3. Is it better to use a card reader or connect my camera via USB to transfer photos?
Generally, using a card reader is faster and more efficient than connecting your camera via USB. Card readers often support faster transfer protocols and avoid draining the camera battery.
10.4. How do I prevent losing photos during the transfer process?
To prevent data loss, always back up your photos to multiple locations. Ensure your computer and card reader are functioning correctly, and avoid interrupting the transfer process.
10.5. Can I transfer photos from an SD card to my smartphone or tablet?
Yes, you can transfer photos to your smartphone or tablet using a USB OTG (On-The-Go) adapter or a wireless SD card. This allows you to connect the SD card directly to your mobile device.
10.6. How often should I back up the photos on my SD card?
It is recommended to back up your photos as soon as possible after a shoot to minimize the risk of data loss. Regular backups ensure your valuable images are protected.
10.7. What is the best file format for storing photos on my computer?
The best file format for storing photos depends on your needs. JPEG is widely compatible and suitable for general use. TIFF or RAW formats preserve the highest image quality and are ideal for editing.
10.8. Why are my photos appearing blurry after transferring them from the SD card?
If your photos appear blurry, it could be due to resizing or compression during the transfer. Ensure you are transferring the original, unedited files and that your photo viewing software is displaying them at their original resolution.
10.9. How do I safely eject the SD card from my computer after transferring photos?
To safely eject the SD card, use the “Safely Remove Hardware” option on Windows or drag the SD card icon to the Trash on macOS. This ensures all data transfers are complete and prevents data corruption.
10.10. Are there any free software options for managing and organizing my photos after transferring them?
Yes, several free software options are available for managing and organizing your photos, including Google Photos, digiKam, and FastStone Image Viewer. These tools offer features like tagging, sorting, and basic editing.
Transferring photos from your SD card to your computer is a crucial step in the photography workflow. Whether you use a built-in card reader, an external card reader, or a USB cable, following the steps outlined in this guide will help you transfer your photos quickly and easily. Remember to manage and organize your photos properly to keep them safe and accessible.
Ready to dive deeper into the world of photography? Visit dfphoto.net to explore our comprehensive guides, stunning photo galleries, and vibrant community.
Address: 1600 St Michael’s Dr, Santa Fe, NM 87505, United States
Phone: +1 (505) 471-6001
Website: dfphoto.net
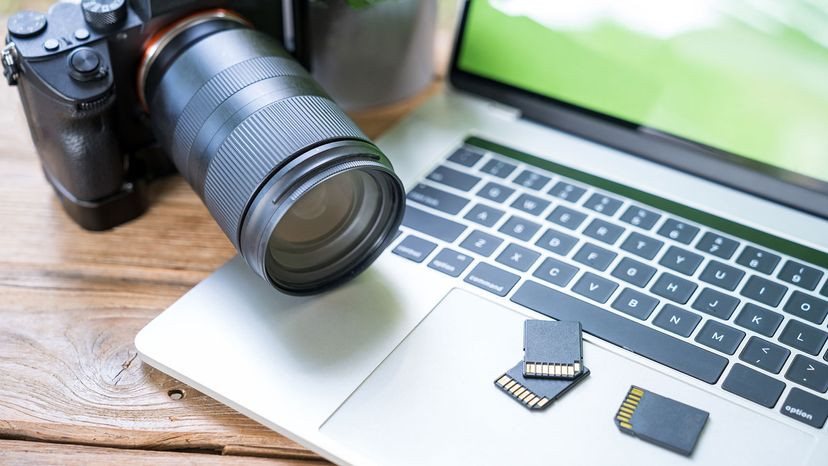 Digital Camera, Memory Card, SD Card Reader
Seamlessly transfer your digital masterpieces from memory cards to your computer for editing, sharing, and archiving.