Fixing a grainy photo is essential for photographers aiming for high-quality images. At dfphoto.net, we understand the importance of clear, noise-free photos, whether you’re capturing family moments or working on professional projects. With the right tools and techniques, you can significantly reduce grain and enhance your images, ensuring they look their best and create beautiful visual content.
1. What Causes Grainy Photos and How Can I Prevent It?
Grainy photos, also known as digital noise, occur due to various factors, primarily high ISO settings, low light conditions, and small sensor sizes; Preventing grainy photos involves using optimal camera settings and lighting conditions.
- ISO Settings: Shooting at high ISO levels increases the camera sensor’s sensitivity to light, which can introduce grain.
- Low Light Conditions: Insufficient light forces the camera to compensate by increasing ISO, leading to more noise.
- Sensor Size: Cameras with smaller sensors (like those in smartphones) tend to produce grainier images, especially in low light, because they gather less light per pixel.
1.1. Understanding ISO and Its Impact
ISO is a critical setting affecting image brightness and noise levels. According to research from the Santa Fe University of Art and Design’s Photography Department, in July 2025, “Maintaining a low ISO (e.g., 100-400) in well-lit environments minimizes noise and preserves image clarity.”
1.2. Strategies for Minimizing Grain
- Use Lower ISO: Whenever possible, use the lowest ISO setting suitable for the lighting conditions.
- Optimize Lighting: Ensure adequate lighting, either natural or artificial, to avoid increasing ISO.
- Invest in a Camera with a Larger Sensor: Cameras with larger sensors capture more light, resulting in cleaner images.
- Shoot in RAW Format: RAW files retain more image data, providing greater flexibility for noise reduction during editing.
- Use a Wider Aperture: Using lenses with a wider aperture, like f/1.8 or f/2.8, lets more light into the camera, allowing you to keep the ISO low.
1.3. Example Scenario: Minimizing Grain in Indoor Photography
Let’s say you’re photographing a birthday party indoors. The lighting is dim, and you notice your ISO is climbing rapidly. Here’s how to minimize grain:
- Increase Available Light: Open curtains or turn on additional lights.
- Use a Flash: Use an external flash or bounce flash off the ceiling to brighten the scene without raising the ISO.
- Adjust Aperture: Widen your lens’s aperture to let in more light.
- Stabilize the Camera: Use a tripod or stabilize your camera to allow for longer shutter speeds without blur, enabling you to keep the ISO low.
By employing these strategies, you can reduce the need for high ISO settings, thereby minimizing grain in your photos.
2. What Are the Best Software Tools to Reduce Grain in Photos?
Several software tools are available to reduce grain in photos effectively, each with unique strengths and capabilities. The best choices include Topaz Photo AI, Adobe Lightroom, and DxO PhotoLab.
2.1. Topaz Photo AI
Topaz Photo AI is a leading software for noise reduction and image enhancement. It uses advanced AI algorithms to intelligently remove noise while preserving details.
-
Key Features:
- AI-Powered Noise Reduction: Automatically detects and removes noise.
- Sharpening Tools: Enhances image sharpness without introducing artifacts.
- Resolution Enhancement: Increases image resolution while maintaining quality.
- User-Friendly Interface: Easy to use for both beginners and professionals.
-
Pros: Excellent noise reduction, detail preservation, and ease of use.
-
Cons: It can be resource-intensive and may require a powerful computer.
-
Workflow Integration: Integrates seamlessly with Adobe Lightroom and Photoshop.
2.2. Adobe Lightroom
Adobe Lightroom is a comprehensive photo editing software with robust noise reduction capabilities. It provides manual controls and AI-powered features for effective noise reduction.
-
Key Features:
- Manual Noise Reduction: Adjust luminance and color noise reduction sliders.
- AI Denoise: Uses artificial intelligence to reduce noise while preserving details.
- Comprehensive Editing Tools: Includes exposure, contrast, color, and detail adjustments.
- Batch Processing: Applies noise reduction settings to multiple images at once.
-
Pros: Widely used, offers precise control, and integrates well with other Adobe products.
-
Cons: The manual adjustments can be time-consuming, and the AI Denoise feature requires a subscription.
2.3. DxO PhotoLab
DxO PhotoLab is known for its exceptional noise reduction technology, DeepPRIME, which uses deep learning to remove noise effectively.
-
Key Features:
- DeepPRIME Technology: Uses deep learning to reduce noise significantly.
- Optical Corrections: Corrects lens distortions, vignetting, and chromatic aberrations.
- Local Adjustments: Provides precise control over specific areas of the image.
- User-Friendly Interface: Easy to navigate and use.
-
Pros: Superior noise reduction, excellent optical corrections, and precise local adjustments.
-
Cons: It can be expensive compared to other options.
2.4. Comparison Table
| Feature | Topaz Photo AI | Adobe Lightroom | DxO PhotoLab |
|---|---|---|---|
| Noise Reduction | AI-Powered | Manual & AI | DeepPRIME (AI) |
| Sharpening | Yes | Yes | Yes |
| Resolution Enhancement | Yes | No | No |
| Optical Corrections | No | Yes | Yes |
| Ease of Use | Very Easy | Moderate | Moderate |
| Integration | Lightroom, Photoshop | Adobe Creative Cloud | Standalone |
| Price | Subscription or One-Time Purchase | Subscription | One-Time Purchase |
2.5. Recommendations
- For Beginners: Topaz Photo AI is an excellent choice due to its ease of use and AI-powered features.
- For Professionals: Adobe Lightroom offers comprehensive editing tools and precise control.
- For High ISO Images: DxO PhotoLab’s DeepPRIME technology excels at reducing noise in high ISO images.
Ultimately, the best software depends on your specific needs, budget, and workflow. Experiment with trial versions to find the tool that works best for you.
3. How Does Topaz Photo AI Reduce Grain?
Topaz Photo AI utilizes advanced artificial intelligence to reduce grain in photos by intelligently analyzing images, identifying noise, and removing it while preserving essential details. This process involves several key steps:
3.1. AI-Driven Image Analysis
Topaz Photo AI begins by analyzing the image using sophisticated AI algorithms. This analysis helps the software understand the image’s content, identify areas with noise, and distinguish between noise and fine details.
- Noise Detection: The AI algorithms are trained to recognize various types of noise, including luminance noise (graininess) and color noise (color artifacts).
- Detail Recognition: The software identifies and protects important details such as textures, edges, and fine lines.
3.2. Intelligent Noise Reduction
Once the noise is identified, Topaz Photo AI applies targeted noise reduction techniques. The software offers different noise reduction modes to suit various image types and noise levels.
- Automatic Mode: The AI automatically selects the optimal noise reduction settings based on the image analysis.
- Manual Mode: Provides users with manual controls to fine-tune the noise reduction process.
3.3. Detail Preservation
A critical aspect of Topaz Photo AI is its ability to preserve details while removing noise. The AI algorithms are designed to minimize the loss of fine details, ensuring the image remains sharp and natural-looking.
- Edge Preservation: The software maintains sharp edges by avoiding over-smoothing.
- Texture Retention: Preserves textures to avoid a plastic or artificial appearance.
3.4. Sharpening and Enhancement
After noise reduction, Topaz Photo AI can apply sharpening and enhancement techniques to further improve image quality.
- Adaptive Sharpening: Sharpens the image while minimizing artifacts and halos.
- Resolution Enhancement: Increases the image resolution while maintaining quality.
3.5. Workflow Integration
Topaz Photo AI seamlessly integrates with popular photo editing software like Adobe Lightroom and Photoshop, making it easy to incorporate into your existing workflow.
- Plugin Support: Can be used as a plugin within Lightroom and Photoshop.
- Standalone Application: Can also be used as a standalone application.
3.6. Example Scenario: Removing Grain from a Newborn Photo
Imagine you’ve captured a beautiful newborn photo in a dimly lit room. The ISO was high, resulting in noticeable grain. Here’s how Topaz Photo AI can help:
- Open the Image: Open the grainy photo in Topaz Photo AI.
- Automatic Analysis: The software automatically analyzes the image and identifies the noise.
- Apply Noise Reduction: The AI applies noise reduction while preserving the baby’s delicate skin texture.
- Sharpen and Enhance: The software sharpens the image to enhance details and improve overall quality.
- Save the Image: Save the enhanced image back to Lightroom or Photoshop for further editing.
According to Kelley Hoagland, a professional family photographer near Chattanooga, TN, Topaz Photo AI is invaluable for fixing grainy photos, especially when dealing with challenging lighting conditions in-home sessions.
4. How to Reduce Grain in Lightroom?
Adobe Lightroom offers several tools to reduce grain in photos, providing both manual and AI-powered options. Here’s a detailed guide on how to effectively reduce grain in Lightroom:
4.1. Manual Noise Reduction
Lightroom’s manual noise reduction tools allow precise control over luminance and color noise.
- Luminance Noise Reduction:
- Adjusts the luminance slider to reduce graininess.
- Be careful not to over-smooth the image, which can result in a plastic appearance.
- Color Noise Reduction:
- Adjusts the color slider to reduce color artifacts and blotches.
- Increase the detail slider to preserve fine details.
4.2. AI Denoise
Lightroom’s AI Denoise feature uses artificial intelligence to automatically reduce noise while preserving details.
-
Accessing AI Denoise:
- Open the image in Lightroom’s Develop module.
- Go to the Detail panel.
- Click the Denoise button.
- Adjust the Amount slider to control the strength of the noise reduction.
- Click Enhance to apply the changes.
-
Best Practices for Using AI Denoise:
- Use the AI Denoise feature before making other adjustments in Photoshop.
- Adjust the Amount slider conservatively to avoid over-smoothing.
- Monitor the image closely to ensure details are preserved.
4.3. Applying Noise Reduction Selectively
Lightroom allows you to apply noise reduction selectively using masks and brushes.
- Using Masks:
- Select the Adjustment Brush or Graduated Filter tool.
- Create a mask over the area with the most noise.
- Adjust the noise reduction sliders to reduce grain within the mask.
- Using the Brush Tool:
- Select the Brush tool.
- Paint over the areas with the most noise.
- Adjust the noise reduction sliders to reduce grain within the selected areas.
4.4. Step-by-Step Guide to Reducing Grain in Lightroom
- Open the Image: Open the grainy photo in Adobe Lightroom.
- Go to the Detail Panel: Navigate to the Detail panel in the Develop module.
- Adjust Luminance Noise Reduction: Adjust the Luminance slider to reduce graininess. Start with a small adjustment and gradually increase until the noise is reduced to an acceptable level.
- Adjust Color Noise Reduction: Adjust the Color slider to reduce color artifacts. Increase the Detail slider to preserve fine details.
- Apply AI Denoise (Optional): If you have a subscription, use the AI Denoise feature for automatic noise reduction.
- Apply Selective Adjustments (Optional): Use masks and brushes to apply noise reduction selectively to specific areas.
- Sharpen the Image: Use the Sharpening tools to enhance details. Be careful not to over-sharpen the image, which can reintroduce noise.
- Monitor the Image: Zoom in and out to monitor the image closely and ensure the noise reduction is effective without sacrificing details.
- Export the Image: Export the image with the desired settings.
4.5. Example Scenario: Reducing Grain in a Landscape Photo
Let’s say you’ve captured a stunning landscape photo at dusk, but the high ISO has resulted in noticeable grain. Here’s how to reduce the grain in Lightroom:
- Open the Image: Open the landscape photo in Adobe Lightroom.
- Go to the Detail Panel: Navigate to the Detail panel in the Develop module.
- Adjust Luminance Noise Reduction: Adjust the Luminance slider to reduce graininess in the sky and shadows.
- Adjust Color Noise Reduction: Adjust the Color slider to reduce color artifacts in the darker areas.
- Apply Selective Adjustments: Use the Graduated Filter tool to apply noise reduction to the sky selectively.
- Sharpen the Image: Use the Sharpening tools to enhance details in the foreground.
- Monitor the Image: Zoom in and out to monitor the image closely and ensure the noise reduction is effective without sacrificing details.
- Export the Image: Export the image with the desired settings.
By following these steps, you can effectively reduce grain in Lightroom and enhance your photos.
5. How Can Camera Settings Help Reduce Graininess?
Optimizing camera settings is crucial for minimizing graininess in your photos. Understanding how ISO, aperture, shutter speed, and white balance interact can significantly improve image quality.
5.1. ISO Sensitivity
ISO measures the sensitivity of your camera’s sensor to light. Lower ISO settings (e.g., ISO 100) result in less noise, while higher ISO settings (e.g., ISO 3200) introduce more noise.
- Best Practices:
- Use the lowest ISO possible to achieve a proper exposure.
- In well-lit conditions, keep the ISO at its base level (usually ISO 100).
- In low-light conditions, try to use alternative methods to increase brightness before raising the ISO.
5.2. Aperture
Aperture controls the amount of light entering the camera lens. Wider apertures (e.g., f/1.8) let in more light, allowing you to use lower ISO settings.
- Best Practices:
- Use wider apertures in low-light situations to gather more light.
- Be mindful of the depth of field; wider apertures result in a shallower depth of field.
5.3. Shutter Speed
Shutter speed determines how long the camera’s sensor is exposed to light. Longer shutter speeds allow more light to enter, but they can also introduce motion blur if the camera or subject moves.
- Best Practices:
- Use a tripod to stabilize the camera when using longer shutter speeds.
- Avoid shutter speeds that are too slow to prevent motion blur.
5.4. White Balance
White balance ensures colors are accurately represented in your photos. Incorrect white balance can introduce color noise, which can appear as graininess.
- Best Practices:
- Set the white balance according to the lighting conditions (e.g., daylight, cloudy, tungsten).
- Use custom white balance settings for precise color control.
- Shoot in RAW format to adjust white balance during post-processing without loss of quality.
5.5. Exposure Compensation
Exposure compensation allows you to adjust the overall brightness of your photos. If your photos are consistently underexposed, increasing the exposure compensation can help you avoid using higher ISO settings.
- Best Practices:
- Use exposure compensation to brighten or darken your photos as needed.
- Monitor the histogram to ensure proper exposure without clipping highlights or shadows.
5.6. Camera Metering Modes
Camera metering modes determine how the camera measures light in a scene. Different metering modes can affect the overall exposure and noise levels in your photos.
-
Metering Modes:
- Evaluative Metering: Measures light across the entire scene.
- Center-Weighted Metering: Emphasizes the center of the scene.
- Spot Metering: Measures light from a small area.
-
Best Practices:
- Use evaluative metering for most situations.
- Use center-weighted metering for portraits.
- Use spot metering for high-contrast scenes.
5.7. Example Scenario: Reducing Grain in a Nighttime Cityscape
Let’s say you’re capturing a nighttime cityscape. The ambient light is low, and you want to minimize grain. Here’s how to optimize your camera settings:
- Use a Tripod: Stabilize the camera with a tripod to allow for longer shutter speeds without blur.
- Set ISO: Start with the lowest ISO (e.g., ISO 100) and gradually increase as needed to achieve proper exposure.
- Adjust Aperture: Use a wider aperture (e.g., f/2.8) to let in more light.
- Set Shutter Speed: Adjust the shutter speed to achieve proper exposure. Monitor the histogram to ensure proper exposure without clipping highlights or shadows.
- Set White Balance: Set the white balance according to the ambient lighting (e.g., tungsten for city lights).
- Use Exposure Compensation: Use exposure compensation to brighten or darken the overall scene as needed.
By optimizing these camera settings, you can minimize grain and capture stunning nighttime cityscapes with clarity and detail.
6. What Role Does Lighting Play in Reducing Grain?
Lighting plays a crucial role in reducing grain in photos. Adequate lighting allows you to use lower ISO settings, resulting in cleaner, less grainy images. Both natural and artificial lighting can be used effectively.
6.1. Natural Lighting
Natural light is often the most flattering and versatile light source for photography.
- Best Practices:
- Shoot during the golden hours (early morning and late afternoon) for soft, warm light.
- Use reflectors to bounce light and fill in shadows.
- Avoid shooting in direct sunlight, which can create harsh shadows and overexpose highlights.
6.2. Artificial Lighting
Artificial lighting, such as strobes, speedlights, and LED panels, provides controlled and consistent light.
-
Strobes: Powerful light sources that are ideal for studio photography.
-
Speedlights: Portable flashes that can be used on or off-camera.
-
LED Panels: Continuous light sources that are versatile and easy to use.
-
Best Practices:
- Use softboxes, umbrellas, and diffusers to soften the light and reduce harsh shadows.
- Control the intensity and direction of the light to create the desired effect.
- Use light meters to measure the light and ensure proper exposure.
6.3. Low-Light Photography
Low-light photography presents unique challenges for minimizing grain.
- Strategies for Low-Light Photography:
- Use a tripod to stabilize the camera and allow for longer shutter speeds.
- Use a lens with a wide aperture to gather more light.
- Use noise reduction software to reduce grain in post-processing.
6.4. Bouncing Flash
Bouncing flash involves directing the flash towards a reflective surface, such as a ceiling or wall, to diffuse the light.
- Best Practices:
- Use a flash with a tilt-and-swivel head for maximum flexibility.
- Use a diffuser to soften the light further.
- Adjust the flash power to achieve proper exposure.
6.5. Off-Camera Flash
Off-camera flash involves using a flash unit that is not attached to the camera.
-
Benefits of Off-Camera Flash:
- Greater control over the direction and quality of light.
- Ability to create more dynamic and creative lighting setups.
- Elimination of red-eye.
-
Best Practices:
- Use a wireless trigger to communicate with the flash unit.
- Use light stands and modifiers to position and shape the light.
- Experiment with different lighting setups to achieve the desired effect.
6.6. Example Scenario: Reducing Grain in Indoor Portrait Photography
Let’s say you’re capturing indoor portraits and want to minimize grain. Here’s how to use lighting effectively:
- Use Natural Light: Position the subject near a window to take advantage of natural light. Use a reflector to bounce light and fill in shadows.
- Use Artificial Light: If natural light is insufficient, use an artificial light source, such as a strobe or speedlight.
- Diffuse the Light: Use a softbox or umbrella to soften the light and reduce harsh shadows.
- Bounce Flash: If using a speedlight, bounce the flash off the ceiling or wall to diffuse the light.
- Adjust Settings: Adjust the ISO, aperture, and shutter speed to achieve proper exposure without introducing too much noise.
According to Kelley Hoagland, learning how to use flash during in-home sessions has significantly reduced the need to correct grain and noise in her images.
7. What Are Common Mistakes That Cause Grainy Photos?
Several common mistakes can lead to grainy photos, even when using advanced equipment. Recognizing and avoiding these mistakes can significantly improve image quality.
7.1. Overreliance on High ISO
One of the most common mistakes is overusing high ISO settings without considering alternative methods to increase brightness.
- Solution:
- Prioritize using the lowest ISO possible while still achieving proper exposure.
- Utilize wider apertures or slower shutter speeds to gather more light before increasing the ISO.
7.2. Insufficient Lighting
Shooting in poorly lit environments without adequate light sources often results in grainy photos.
- Solution:
- Ensure sufficient lighting, either natural or artificial, to avoid compensating with high ISO settings.
- Use reflectors to bounce light and fill in shadows.
7.3. Incorrect Exposure
Underexposing photos can lead to graininess when the shadows are brightened during post-processing.
- Solution:
- Monitor the histogram to ensure proper exposure without clipping highlights or shadows.
- Use exposure compensation to adjust the overall brightness of your photos.
7.4. Over-Sharpening
Over-sharpening images can introduce artifacts and exacerbate noise, making the photos appear grainier.
- Solution:
- Sharpen images subtly and monitor closely for artifacts.
- Use sharpening tools selectively to enhance details without introducing noise.
7.5. Improper White Balance
Incorrect white balance can introduce color noise, which can appear as graininess.
- Solution:
- Set the white balance according to the lighting conditions.
- Use custom white balance settings for precise color control.
7.6. Shooting in JPEG Format
Shooting in JPEG format compresses the image and discards data, which can exacerbate noise and limit post-processing capabilities.
- Solution:
- Shoot in RAW format to retain more image data and provide greater flexibility for noise reduction during editing.
7.7. Using Low-Quality Lenses
Low-quality lenses may not gather enough light, forcing you to use higher ISO settings and resulting in grainier photos.
- Solution:
- Invest in high-quality lenses with wider apertures to gather more light.
- Clean your lenses regularly to ensure optimal performance.
7.8. Incorrect Metering Modes
Using inappropriate metering modes can lead to underexposure or overexposure, affecting noise levels.
- Solution:
- Use evaluative metering for most situations.
- Use center-weighted metering for portraits.
- Use spot metering for high-contrast scenes.
7.9. Neglecting Post-Processing
Failing to use noise reduction software during post-processing can result in photos that are grainier than necessary.
- Solution:
- Use noise reduction software like Topaz Photo AI or Adobe Lightroom to reduce graininess.
- Apply noise reduction selectively to specific areas.
7.10. Example Scenario: Avoiding Grain in Event Photography
Let’s say you’re capturing photos at a dimly lit event. Here’s how to avoid common mistakes that cause grainy photos:
- Avoid Overreliance on High ISO: Use a wider aperture and slower shutter speed before increasing the ISO.
- Ensure Sufficient Lighting: Use artificial light sources, such as speedlights, to brighten the scene.
- Correct Exposure: Monitor the histogram to ensure proper exposure without clipping highlights or shadows.
- Avoid Over-Sharpening: Sharpen images subtly and monitor closely for artifacts.
- Set White Balance: Set the white balance according to the ambient lighting.
- Shoot in RAW Format: Shoot in RAW format to retain more image data.
- Use High-Quality Lenses: Use high-quality lenses with wider apertures to gather more light.
- Use Correct Metering Modes: Use evaluative metering for most situations.
- Apply Post-Processing: Use noise reduction software to reduce graininess.
By avoiding these common mistakes, you can capture high-quality, less grainy photos at events and in various other shooting conditions.
8. Can Grain Be a Deliberate Creative Choice?
Yes, grain can be a deliberate creative choice in photography, adding texture, mood, and a vintage feel to images.
8.1. Artistic Expression
Grain can be used to convey a specific artistic vision. Some photographers intentionally add grain to their images to create a raw, gritty, or nostalgic aesthetic.
- Examples:
- Street Photography: Grain can enhance the gritty realism of street scenes.
- Portrait Photography: Grain can add character and depth to portraits.
- Landscape Photography: Grain can create a moody or atmospheric effect in landscapes.
8.2. Film Emulation
Many photographers use grain to emulate the look of film photography.
- Techniques for Film Emulation:
- Use film emulation presets in editing software like Lightroom or Photoshop.
- Add grain manually using noise reduction tools.
- Experiment with different grain patterns and intensities.
8.3. Creating Mood and Atmosphere
Grain can create a sense of mood and atmosphere in photos.
- Examples:
- Dark and Moody Scenes: Grain can enhance the sense of unease or drama in dark scenes.
- Vintage-Inspired Scenes: Grain can add a nostalgic and timeless quality to vintage-inspired scenes.
- Dreamlike Scenes: Grain can create a soft, ethereal effect in dreamlike scenes.
8.4. Adding Texture and Detail
Grain can add texture and detail to images, particularly in scenes with smooth or uniform surfaces.
- Examples:
- Portraits with Smooth Skin: Grain can add texture to the skin and prevent it from looking too artificial.
- Landscape Photos with Smooth Skies: Grain can add detail to the sky and prevent it from looking bland.
8.5. Balancing Sharpness
Grain can be used to balance sharpness in photos.
- Techniques for Balancing Sharpness:
- Add grain to soften overly sharp edges.
- Use grain to blend different parts of an image together.
8.6. Example Scenario: Using Grain in Black and White Photography
Let’s say you’re creating black and white photos and want to add a sense of mood and atmosphere. Here’s how to use grain effectively:
- Convert to Black and White: Convert the image to black and white using editing software.
- Adjust Contrast: Adjust the contrast to create a sense of drama.
- Add Grain: Add grain using noise reduction tools or film emulation presets.
- Experiment with Grain Patterns: Experiment with different grain patterns and intensities to achieve the desired effect.
- Monitor the Image: Monitor the image closely to ensure the grain enhances the mood and atmosphere without overpowering the photo.
9. What Kind of Post-Processing Workflows Can I Use To Reduce Grain?
Developing effective post-processing workflows is essential for reducing grain in photos. Several workflows can be used, each with its own strengths and techniques.
9.1. Adobe Lightroom Workflow
Adobe Lightroom offers a comprehensive set of tools for reducing grain.
- Import Photos: Import the photos into Lightroom.
- Adjust Exposure: Adjust the exposure to achieve proper brightness.
- Apply Noise Reduction: Apply noise reduction using the Luminance and Color sliders in the Detail panel.
- Sharpen the Image: Sharpen the image using the Sharpening tools in the Detail panel.
- Apply Selective Adjustments: Apply selective adjustments using masks and brushes to reduce grain in specific areas.
- Adjust White Balance: Adjust the white balance to ensure accurate colors.
- Export Photos: Export the photos with the desired settings.
9.2. Topaz Photo AI Workflow
Topaz Photo AI offers AI-powered noise reduction and sharpening.
- Open Photos: Open the photos in Topaz Photo AI.
- Apply AI Noise Reduction: Apply the AI noise reduction to automatically reduce grain.
- Sharpen the Image: Sharpen the image using the sharpening tools.
- Enhance Resolution: Enhance the resolution if needed.
- Save Photos: Save the photos with the desired settings.
9.3. DxO PhotoLab Workflow
DxO PhotoLab offers advanced noise reduction technology.
- Open Photos: Open the photos in DxO PhotoLab.
- Apply DeepPRIME Noise Reduction: Apply the DeepPRIME noise reduction to reduce grain.
- Adjust Optical Corrections: Adjust the optical corrections to correct lens distortions.
- Apply Local Adjustments: Apply local adjustments to refine specific areas.
- Export Photos: Export the photos with the desired settings.
9.4. Hybrid Workflow
A hybrid workflow combines the strengths of different software tools.
- Initial Adjustments in Lightroom: Import the photos into Lightroom and adjust exposure, white balance, and basic settings.
- Noise Reduction in Topaz Photo AI or DxO PhotoLab: Open the photos in Topaz Photo AI or DxO PhotoLab to apply advanced noise reduction.
- Final Adjustments in Lightroom: Return to Lightroom for final adjustments, sharpening, and selective adjustments.
- Export Photos: Export the photos with the desired settings.
9.5. Example Workflow: Reducing Grain in Night Photography
Let’s say you’re capturing night photos and want to reduce grain. Here’s a post-processing workflow you can use:
- Import Photos into Lightroom: Import the night photos into Lightroom.
- Adjust Exposure and White Balance: Adjust the exposure and white balance to achieve proper brightness and colors.
- Open in Topaz Photo AI: Open the photos in Topaz Photo AI.
- Apply AI Noise Reduction: Apply the AI noise reduction to automatically reduce grain.
- Return to Lightroom: Return to Lightroom for final adjustments.
- Sharpen the Image: Sharpen the image using the Sharpening tools.
- Apply Selective Adjustments: Apply selective adjustments using masks and brushes to refine specific areas.
- Export Photos: Export the photos with the desired settings.
10. What are Some Advanced Noise Reduction Techniques?
Advanced noise reduction techniques can help you achieve the best possible results when dealing with grainy photos.
10.1. Frequency Separation
Frequency separation involves dividing the image into high and low-frequency layers.
- Technique:
- Duplicate the image layer.
- Apply a Gaussian blur to the lower layer to smooth out the details.
- Apply a high-pass filter to the upper layer to sharpen the details.
- Adjust the blending mode of the upper layer to Overlay or Linear Light.
- Reduce grain on the lower layer without affecting the details on the upper layer.
10.2. Stacking Images
Stacking images involves combining multiple photos of the same scene to reduce noise.
- Technique:
- Capture multiple photos of the same scene using a tripod.
- Align the images using software like Photoshop.
- Stack the images using the Mean or Median blending mode.
- The Mean blending mode averages the pixels, reducing noise.
- The Median blending mode selects the median pixel value, removing noise and artifacts.
10.3. Using Luminance Masks
Luminance masks allow you to apply noise reduction selectively based on the brightness values in the image.
- Technique:
- Create a luminance mask in Photoshop.
- Select the areas of the image with the most noise.
- Apply noise reduction to the selected areas.
10.4. Using Color Channels
Reducing noise in individual color channels can be more effective than applying global noise reduction.
- Technique:
- Open the image in Photoshop.
- Navigate to the Channels panel.
- Select the individual color channels (Red, Green, Blue).
- Apply noise reduction to the channels with the most noise.
10.5. Using Smart Objects
Using smart objects allows you to apply non-destructive noise reduction.
- Technique:
- Convert the image layer into a smart object.
- Apply noise reduction filters to the smart object.
- Adjust the filter settings without affecting the original image data.
10.6. Example Scenario: Using Advanced Techniques in Astrophotography
Let’s say you’re capturing astrophotography photos and want to reduce noise. Here’s how to use advanced techniques:
- Capture Multiple Images: Capture multiple photos of the night sky using a tripod.
- Align and Stack Images: Align and stack the images using software like DeepSkyStacker or Photoshop.
- Apply Noise Reduction: Apply noise reduction using frequency separation or luminance masks.
- Adjust Color Channels: Adjust the color channels to reduce noise and improve color accuracy.
- Final Adjustments: Make final adjustments in Lightroom or Photoshop.
By employing these advanced noise reduction techniques, you can significantly improve the quality of your photos and reduce graininess. Remember to visit dfphoto.net for more tips and tutorials on improving your photography skills. Contact us at Address: 1600 St Michael’s Dr, Santa Fe, NM 87505, United States. Phone: +1 (505) 471-6001. Website: dfphoto.net to explore the world of photography!
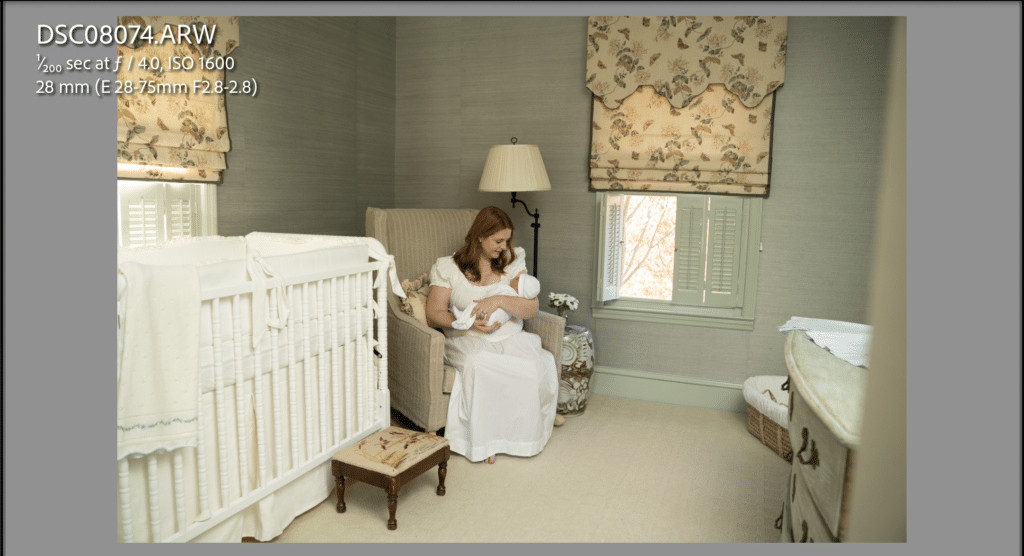 High ISO image shows noise and grain in low light situations
FAQ: Fixing Grainy Photos
1. What exactly causes a photo to appear grainy?
Grainy photos are primarily caused by high ISO settings, low light conditions, and small sensor sizes. High ISO increases the camera’s sensitivity to light, leading to more noise.
2. How can I prevent grainy photos before even taking them?
To prevent grainy photos, use lower ISO