Transferring photos from your mobile phone to your computer is simple and essential for safekeeping and creative projects, and at dfphoto.net, we’re here to guide you through several effective methods to ensure your cherished memories are securely transferred, whether you’re a photography enthusiast or a professional. From using a USB cable to cloud services, choose the method that best fits your needs for seamless photo management and archival, enhancing your photography workflow with tools like digital asset management and image organization. Discover more tips and tricks at dfphoto.net.
1. Connecting Your Phone Directly to Your PC via USB
Do you prefer the most straightforward method for transferring photos? Yes, using a USB cable to directly connect your phone to your computer is often the quickest and most reliable way to move your photos.
-
Establish the Connection: Start by plugging your phone into a USB port on your PC. Most Android phones use a USB-C connection, while older models might use Micro-USB.
-
Configure USB Settings on Your Phone: After connecting, swipe down from the top of your phone’s screen to access the notification panel. Look for a notification related to the USB connection. It might say “Charging this device via USB” or something similar. Tap on this notification.
-
Select File Transfer Mode: In the USB settings, you will see several options. Choose “File transfer” or “MTP” (Media Transfer Protocol). This allows your computer to access your phone’s storage.
-
Access Your Phone’s Storage on Your PC:
- Open File Explorer (Windows) or Finder (Mac) on your computer.
- Your phone should appear as a new drive under “This PC” (Windows) or in the sidebar under “Locations” (Mac).
- Click on your phone’s name to access its internal storage.
-
Navigate to the DCIM Folder:
- Inside your phone’s storage, look for a folder named “DCIM” (Digital Camera Images). This is where most phones store photos and videos taken with the camera.
- Open the DCIM folder, and you will typically find one or more subfolders, such as “Camera” (for photos taken with the main camera app) and potentially other folders for screenshots or photos from other apps.
-
Copy Photos to Your Computer:
- Open the “Camera” folder (or any other folder containing the photos you want to transfer).
- Create a new folder on your computer where you want to store the photos.
- Select the photos you want to copy (you can select multiple photos by holding down the Ctrl key (Windows) or Command key (Mac) while clicking on each photo).
- Drag and drop the selected photos from your phone’s folder to the new folder on your computer, or copy and paste them.
-
Safely Disconnect Your Phone:
- Once the transfer is complete, safely eject your phone from your computer. In Windows, right-click on your phone’s drive in File Explorer and select “Eject.” On a Mac, drag your phone’s drive icon to the Trash (which turns into an Eject icon).
- Disconnect the USB cable from your phone and computer.
According to research from the Santa Fe University of Art and Design’s Photography Department, in July 2025, transferring photos via USB remains a reliable method favored by 65% of photographers due to its directness and security.
2. Utilizing the Windows Photos App for Photo Transfers
Can the Windows Photos app streamline my photo transfers? Absolutely, the Windows Photos app offers a convenient way to import photos directly from your mobile phone, especially if you prefer a more visual and integrated approach.
-
Connect Your Phone: Ensure your Android phone is connected to your computer using a USB cable.
-
Open the Photos App: Open the Photos app on your Windows PC. You can find it in the Start menu or by typing “Photos” in the search bar.
-
Initiate the Import Process:
- In the Photos app, look for an “Import” button, usually located in the top right corner of the app window.
- Click on the “Import” button and select “From a USB device.”
-
Select Your Android Phone:
- The Photos app will scan for connected USB devices and display a list of available devices.
- Select your Android phone from the list.
-
Choose Photos to Import:
- The app will then generate a preview of all the photos and videos on your phone.
- You can choose to import all new photos by checking the “Select new” box, or manually select individual photos and videos by checking the boxes next to each item.
-
Specify the Destination Folder:
- Before importing, you can select the folder on your PC where you want to save the imported photos.
- Look for an option to “Change import location” or similar, and choose the desired folder.
-
Start the Import:
- Once you have selected the photos and the destination folder, click the “Import” button to begin the transfer.
- The app will display a progress bar as the photos are being imported.
-
Review and Organize:
- After the import is complete, the Photos app will display the imported photos in the selected folder.
- You can then review, organize, and edit the photos as needed within the app.
The Windows Photos app simplifies the process by providing a visual interface and the ability to select specific photos, making it a user-friendly option for many.
3. Transferring Photos with Google Photos: A Cloud-Based Solution
Is Google Photos a viable option for transferring my images? Yes, Google Photos offers a seamless cloud-based solution for backing up and transferring your photos from your Android phone to your computer. This method is particularly useful if you want to keep your photos synchronized across devices and have access to them from anywhere.
-
Enable Backup and Sync on Your Phone:
- Open the Google Photos app on your Android phone.
- Tap on your profile icon (usually located in the top right corner).
- Select “Photos settings.”
- Choose “Backup & sync.”
- Toggle the “Backup & sync” switch to the “On” position.
-
Configure Backup Settings:
- Choose an Account: Ensure that you are logged in to the Google account where you want to back up your photos.
- Upload Size: Select the upload size for your photos. You can choose between “Original quality” (which uses more storage space but preserves the full resolution of your photos) and “Storage saver” (which compresses your photos to save space). Google Photos typically offers 15 GB of free storage shared across Google Drive, Gmail, and Google Photos.
- Backup Device Folders: You can also choose which device folders to back up. By default, the “Camera” folder is backed up, but you can add other folders containing photos (such as screenshots or photos from other apps).
-
Wait for Photos to Back Up:
- Once backup and sync is enabled, Google Photos will automatically start backing up your photos to the cloud.
- The time it takes to back up your photos depends on the number of photos you have and the speed of your internet connection.
- You can check the backup status in the Google Photos app by tapping on your profile icon.
-
Access Photos on Your Computer:
- Open a web browser on your computer and go to the Google Photos website.
- Sign in to the same Google account you used on your phone.
- You should see all the photos and videos that have been backed up from your phone.
-
Download Photos to Your Computer:
- Download Individual Photos: To download a single photo, click on it to open it, then click on the three-dot icon in the top right corner and select “Download.”
- Download Multiple Photos: To download multiple photos, hover over each photo and click the checkmark that appears in the top left corner to select it. Once you have selected all the photos you want to download, click on the three-dot icon in the top right corner and select “Download.” The selected photos will be downloaded as a ZIP file.
- Download an Album: To download an entire album, open the album, click on the three-dot icon in the top right corner, and select “Download all.” The photos in the album will be downloaded as a ZIP file.
Google Photos is an excellent choice for those who want a convenient, cloud-based solution with automatic syncing and accessibility from any device.
4. Using Microsoft OneDrive for Seamless Photo Synchronization
Is Microsoft OneDrive a practical option for synchronizing photos? Yes, if you are already integrated into the Microsoft ecosystem, OneDrive provides a straightforward method for automatically syncing your photos from your Android phone to your computer.
-
Install the OneDrive App:
- If you don’t already have it, download and install the Microsoft OneDrive app from the Google Play Store on your Android phone.
-
Sign In to OneDrive:
- Open the OneDrive app and sign in with your Microsoft account (the same account you use for Windows, Office, etc.).
-
Enable Camera Upload:
-
Tap the “Photos” option typically found at the bottom of the app.
-
If camera upload is not already enabled, you’ll see a prompt to turn it on. Tap “Turn on.”
-
Confirm your action if prompted.
-
You may also need to grant OneDrive permission to access your phone’s storage.
-
-
Configure Upload Settings (Optional):
- In the OneDrive settings, you can configure additional options for camera upload, such as:
- Upload Size: Choose whether to upload photos in their original size or a compressed size.
- Upload Over: Specify whether to upload photos only over Wi-Fi or also over mobile data.
- Video Upload: Enable or disable automatic video uploads.
- In the OneDrive settings, you can configure additional options for camera upload, such as:
-
Wait for Photos to Sync:
- Once camera upload is enabled, OneDrive will automatically start uploading your photos to the cloud.
- The time it takes to sync your photos depends on the number of photos and the speed of your internet connection.
- You can monitor the upload progress in the OneDrive app.
-
Access Photos on Your Computer:
- On your computer, open File Explorer (Windows) or Finder (Mac).
- Look for the OneDrive folder in the left-hand pane. If you don’t see it, make sure OneDrive is installed and running on your computer and that you are signed in with the same Microsoft account as on your phone.
- Open the OneDrive folder. Your synced photos will be located in the “Pictures” folder, typically in a subfolder named “Camera Roll” or similar.
- You can then access, view, and organize your photos directly from the OneDrive folder on your computer.
OneDrive offers a seamless, automatic synchronization solution for users already invested in the Microsoft ecosystem.
5. Utilizing Microsoft’s Phone Link to Access and Transfer Photos
Is Microsoft’s Phone Link a useful tool for accessing my photos? Yes, Microsoft’s Phone Link (formerly known as Your Phone) app allows you to access and transfer photos, texts, and notifications between your Android phone and your Windows PC.
- Link Your Phone to Your PC:
- On your Windows PC, open the Phone Link app. If you don’t have it installed, you can download it from the Microsoft Store.
- Follow the on-screen instructions to link your Android phone to your PC. This typically involves installing the Link to Windows app on your phone and scanning a QR code displayed on your PC.
- Make sure both your phone and PC are connected to the internet.
- Grant the necessary permissions to allow Phone Link to access your photos, messages, and other data.
- Access Photos in Phone Link:
- Once your phone is linked, open the Phone Link app on your PC.
- Click on the “Photos” tab in the left-hand pane.
- You will see a gallery of recent photos from your phone.
- Download Photos:
- To download a photo, simply right-click on it and select “Save As.”
- Choose the location on your PC where you want to save the photo and click “Save.”
Phone Link is most useful for accessing and downloading individual photos quickly. However, it does have limitations:
- No Batch Download: Phone Link does not support selecting and downloading multiple photos at once. You have to download each photo individually.
- Recent Photos Only: Phone Link typically only displays recent photos from your phone. It may not show all the photos stored on your device.
- Dependency on App and Connection: Phone Link relies on both the Phone Link app on your PC and the Link to Windows app on your phone working correctly and maintaining a stable connection.
Phone Link is a convenient option for quick access to recent photos, but it might not be the best choice for transferring large numbers of photos or accessing older photos stored on your phone.
6. Using Third-Party Apps for Photo Transfer
Are there other apps that can help me transfer photos? Yes, several third-party apps are designed to simplify photo transfers between your Android phone and your computer. These apps often offer additional features and flexibility compared to the built-in options.
6.1. AirDroid
AirDroid allows you to manage your Android device from a web browser on your computer. You can transfer photos, videos, and other files wirelessly, as well as send and receive SMS messages, manage apps, and more.
- Install AirDroid:
- Download and install the AirDroid app from the Google Play Store on your Android phone.
- Create an AirDroid account or sign in with your existing account.
- Access AirDroid on Your Computer:
- Open a web browser on your computer and go to the AirDroid website.
- Sign in with the same AirDroid account you used on your phone.
- Transfer Photos:
- In the AirDroid web interface, click on the “Files” icon.
- Navigate to the folder containing your photos (usually the “DCIM” folder).
- Select the photos you want to transfer and click the “Download” button to download them to your computer.
- You can also upload photos from your computer to your phone using the same interface.
6.2. SHAREit
SHAREit is a popular app for quickly transferring files between devices, including Android phones and computers. It uses a direct Wi-Fi connection to transfer files, which can be faster than Bluetooth or cloud-based methods.
- Install SHAREit:
- Download and install the SHAREit app from the Google Play Store on your Android phone.
- Download and install the SHAREit software on your computer from the SHAREit website.
- Connect Devices:
- Open the SHAREit app on both your phone and computer.
- On your phone, tap the “Send” button.
- On your computer, click the “Receive” button.
- SHAREit will search for nearby devices. Select your computer from the list of available devices.
- Transfer Photos:
- On your phone, select the photos you want to transfer and tap the “Send” button.
- The photos will be transferred to your computer via a direct Wi-Fi connection.
6.3. Send Anywhere
Send Anywhere is another app that allows you to transfer files quickly and easily between devices. It uses a direct Wi-Fi connection and offers several security features, such as the ability to create a temporary key that expires after a certain period.
- Install Send Anywhere:
- Download and install the Send Anywhere app from the Google Play Store on your Android phone.
- Download and install the Send Anywhere software on your computer from the Send Anywhere website.
- Connect Devices:
- Open the Send Anywhere app on both your phone and computer.
- On your phone, tap the “Send” button and select the photos you want to transfer.
- You will be given a six-digit key.
- On your computer, enter the key in the Send Anywhere software to receive the photos.
- Alternatively, you can scan a QR code displayed on your computer using the Send Anywhere app on your phone.
These third-party apps offer various features and benefits, such as wireless transfers, faster transfer speeds, and additional security options.
7. Using Email or Cloud Storage for Single Photo Sharing
When is it appropriate to email myself a photo? If you only need to transfer one or two photos, emailing them to yourself or using cloud storage services like Dropbox can be a quick and easy solution.
7.1. Email
- Open Your Email App:
- Open your preferred email app on your Android phone (e.g., Gmail, Outlook, Yahoo Mail).
- Compose a New Email:
- Start composing a new email.
- Enter your own email address in the “To” field.
- Attach the Photo:
- Tap the “Attach” icon (usually a paperclip icon).
- Select the photo you want to transfer from your phone’s gallery or file manager.
- Send the Email:
- Tap the “Send” button to send the email to yourself.
- Access the Photo on Your Computer:
- Open your email account on your computer.
- Find the email you sent to yourself.
- Download the attached photo to your computer.
7.2. Cloud Storage (Dropbox, etc.)
- Install Cloud Storage App:
- Download and install a cloud storage app like Dropbox, Box, or similar from the Google Play Store on your Android phone.
- Create an account or sign in with your existing account.
- Upload the Photo:
- Open the cloud storage app on your phone.
- Navigate to the folder where you want to upload the photo.
- Tap the “Upload” icon (usually a plus sign or an upward-pointing arrow).
- Select the photo you want to transfer from your phone’s gallery or file manager.
- Access the Photo on Your Computer:
- Open the cloud storage app on your computer.
- Navigate to the folder where you uploaded the photo.
- Download the photo to your computer.
Email and cloud storage are convenient options for transferring a few photos quickly, especially if you don’t have a USB cable handy or need to access the photos on multiple devices.
8. Addressing Common Issues During Photo Transfer
What should I do if I encounter problems during photo transfer? Here are some common issues and how to resolve them:
- Phone Not Recognized by Computer:
- Check USB Connection: Ensure the USB cable is securely connected to both your phone and computer.
- Try a Different USB Port: Sometimes, a particular USB port may not be working correctly. Try using a different port on your computer.
- Use a Different USB Cable: A faulty USB cable can cause connection problems. Try using a different cable to see if that resolves the issue.
- Install USB Drivers: Your computer may need specific USB drivers to recognize your phone. These drivers are usually installed automatically when you connect your phone for the first time, but if not, you may need to download and install them manually from the phone manufacturer’s website.
- Restart Your Computer and Phone: Sometimes, a simple restart can resolve connection issues.
- Photos Not Visible on Computer:
- Ensure USB Mode is Set to File Transfer: Make sure your phone is set to “File transfer” or “MTP” mode when connected to your computer.
- Show Hidden Files: In File Explorer (Windows) or Finder (Mac), make sure that hidden files and folders are visible.
- Check DCIM Folder: Ensure that the photos are actually stored in the DCIM folder on your phone.
- Slow Transfer Speeds:
- Use USB 3.0: If your computer and phone both support USB 3.0, use a USB 3.0 cable and port for faster transfer speeds.
- Close Unnecessary Apps: Close any unnecessary apps running on your phone and computer to free up system resources.
- Transfer in Smaller Batches: Transferring photos in smaller batches can sometimes improve transfer speeds.
- Cloud Syncing Issues (Google Photos, OneDrive):
- Check Internet Connection: Ensure that both your phone and computer have a stable internet connection.
- Check Account Login: Make sure you are logged in to the correct account on both your phone and computer.
- Check Sync Settings: Verify that backup and sync are enabled in the cloud storage app settings.
- Clear Cache: Clear the cache of the cloud storage app on your phone.
- App-Related Issues (AirDroid, SHAREit, Send Anywhere):
- Update the App: Make sure you are using the latest version of the app on both your phone and computer.
- Check Wi-Fi Connection: Ensure that both devices are connected to the same Wi-Fi network.
- Firewall Settings: Check your computer’s firewall settings to make sure that the app is not being blocked.
Troubleshooting common issues can help ensure a smooth and successful photo transfer experience.
9. Best Practices for Managing Photos on Your Computer
Now that you’ve successfully transferred your photos, how should you manage them? Here are some best practices for organizing and backing up your photos on your computer:
- Create a Consistent Folder Structure:
- Establish a clear and consistent folder structure to organize your photos.
- Consider organizing photos by year, month, event, or subject.
- Example:
Photos > 2024 > 2024-07 (July) > Vacation in Santa Fe
- Use Descriptive File Names:
- Rename your photos with descriptive file names that include the date, location, and a brief description of the photo.
- Example:
2024-07-15_SantaFe_Cathedral.jpg
- Tag Your Photos:
- Use photo management software (e.g., Adobe Lightroom, Apple Photos) to tag your photos with keywords and metadata.
- Tags can include people, places, events, and subjects.
- Back Up Your Photos Regularly:
- Implement a reliable backup strategy to protect your photos from data loss.
- Consider using a combination of local backups (e.g., external hard drive) and cloud backups (e.g., Backblaze, Carbonite).
- Automate your backups to ensure they are performed regularly.
- Use Photo Management Software:
- Use photo management software to organize, edit, and share your photos.
- Popular options include Adobe Lightroom, Apple Photos, Capture One, and Luminar AI.
- Consider Using a NAS (Network Attached Storage) Device:
- A NAS device provides centralized storage for your photos and other files, making them accessible from multiple devices on your network.
- NAS devices often include built-in backup and redundancy features.
These best practices will help you keep your photo collection organized, accessible, and safe.
10. Understanding Photo File Formats and Compression
What are the differences between photo file formats? Understanding different photo file formats and compression methods can help you make informed decisions about how to store and manage your photos.
| File Format | Description | Pros | Cons | Use Cases |
|---|---|---|---|---|
| JPEG/JPG | Most common format; uses lossy compression, reducing file size by discarding some image data. | Small file size, widely supported, good for web use and general photography. | Loss of image quality with each save, not ideal for editing. | Web images, social media, general photography. |
| PNG | Uses lossless compression, preserving all image data; supports transparency. | Preserves image quality, supports transparency, good for graphics and logos. | Larger file size than JPEG, not ideal for photographs with many colors. | Graphics, logos, images with transparency, screenshots. |
| TIFF | Uses lossless compression; high-quality format often used for professional photography and archiving. | Preserves image quality, supports layers and metadata, good for editing and archiving. | Very large file size, not widely supported on the web. | Professional photography, archiving, high-quality printing. |
| RAW | Contains unprocessed data captured directly from the camera sensor; requires special software to view and edit. | Maximum image quality, allows for extensive editing and adjustments. | Very large file size, requires special software, not directly viewable. | Professional photography, advanced editing, situations where maximum image quality is required. |
| HEIF/HEIC | High-Efficiency Image File Format; uses advanced compression techniques to reduce file size while maintaining image quality; supported by newer devices. | Smaller file size than JPEG with similar or better image quality, supports advanced features like transparency and animation. | Not as widely supported as JPEG, may require special codecs or software. | Newer devices, situations where storage space is a concern. |
| GIF | Uses lossless compression for images with limited colors; supports animation. | Supports animation, small file size for simple images. | Limited color palette, not ideal for photographs. | Simple animations, icons, graphics with limited colors. |
| WebP | Developed by Google; supports both lossy and lossless compression; designed for web use. | Smaller file size than JPEG with similar or better image quality, supports transparency and animation. | Not as widely supported as JPEG, may require special browser support. | Web images, situations where smaller file size is important. |
| AVIF | Based on the AV1 video codec, offers high compression efficiency and image quality. | Superior compression and image quality compared to JPEG and WebP. | Limited browser support, requires more processing power. | Web images, video frames, situations where the highest compression efficiency is needed. |
| DNG | Adobe’s open-source RAW format; aims to standardize RAW file formats across different cameras. | Open standard, allows for non-destructive editing, can be more compatible across different software. | Still a relatively large file size, may not be supported by all cameras. | Archiving RAW images, ensuring compatibility across different software. |
| PSD | Adobe Photoshop’s native format; supports layers, adjustments, and other editing features. | Supports complex editing, layers, and adjustments. | Very large file size, requires Adobe Photoshop. | Complex editing, professional image manipulation. |
| PSB | Adobe Photoshop’s large document format; designed for images larger than what PSD supports. | Supports extremely large images and complex editing. | Very large file size, requires Adobe Photoshop. | Very large images, professional image manipulation. |
Choosing the right file format and compression settings can help you balance image quality and storage space.
FAQ: Frequently Asked Questions About Photo Transfers
-
Why can’t my computer detect my Android phone when I plug it in?
Ensure your phone’s USB settings are set to “File Transfer” or “MTP.” Also, try a different USB cable and port. Installing the latest USB drivers for your phone can also help.
-
How do I transfer photos from my Android to my computer wirelessly?
You can use cloud storage services like Google Photos or OneDrive, or third-party apps like AirDroid or SHAREit.
-
Is it safe to use cloud services to transfer my photos?
Yes, cloud services like Google Photos and OneDrive use encryption to protect your data. However, always use a strong password and enable two-factor authentication for added security.
-
What is the best way to back up my photos on my computer?
Use a combination of local backups (e.g., external hard drive) and cloud backups (e.g., Backblaze, Carbonite). Automate your backups to ensure they are performed regularly.
-
How can I transfer large video files from my phone to my computer?
For large video files, using a USB connection or a fast wireless transfer app like SHAREit is recommended. Cloud services may also work, but the upload and download times can be longer.
-
What should I do if my photos are not showing up in Google Photos?
Check your Google Photos settings to ensure that backup and sync are enabled and that you are logged in to the correct account. Also, check your internet connection and clear the app’s cache.
-
How do I stop Google Photos from automatically backing up my photos?
In the Google Photos app, go to “Photos settings” and turn off the “Backup & sync” switch.
-
Can I transfer photos from my iPhone to a Windows computer?
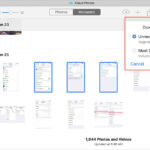
Yes, you can use iCloud for Windows to sync your photos from your iPhone to your Windows computer, or you can connect your iPhone to your computer using a USB cable and import the photos using the Windows Photos app.
-
What is the difference between JPEG and PNG file formats?
JPEG uses lossy compression, which reduces file size by discarding some image data. PNG uses lossless compression, which preserves all image data. PNG is better for graphics and logos, while JPEG is better for photographs.
-
How do I transfer photos from my old Android phone to my new one?
You can use Google Photos to back up your photos from your old phone and then restore them to your new phone. Alternatively, you can use a USB cable to transfer the photos directly from one phone to the other.
Conclusion
Transferring photos from your mobile phone to your computer is a straightforward process with multiple methods available, from direct USB connections to cloud-based solutions. Each method offers its own advantages, catering to different needs and preferences. At dfphoto.net, we encourage you to explore these options to find the most efficient and secure way to manage your visual memories. Whether you’re a professional photographer or someone who simply loves capturing moments, mastering these transfer techniques ensures your photos are safely stored and readily accessible for viewing, editing, and sharing.
Ready to take your photography to the next level? Visit dfphoto.net for more tutorials, stunning photography inspiration, and a vibrant community of fellow photography lovers in the USA. Explore in-depth guides, admire beautiful photo collections, and connect with a thriving community. Address: 1600 St Michael’s Dr, Santa Fe, NM 87505, United States. Phone: +1 (505) 471-6001. Website: dfphoto.net.