Taking photos on an iPhone can produce stunning results if you know how to use its features, so this guide from dfphoto.net will teach you tips, tricks, and tools to elevate your iPhone photography. This article will cover topics such as using portrait mode, adjusting focus and exposure, and stabilizing your phone with a tripod. Discover mobile photography and visual storytelling through your iPhone today.
Here are 5 search intents for the keyword “How To Take Photos In Iphone”:
- Instructional: Users are seeking step-by-step guides on how to use specific iPhone camera features and settings (e.g., adjusting exposure, using Portrait mode).
- Troubleshooting: Users are looking for solutions to common iPhone photography problems (e.g., blurry photos, poor lighting).
- Equipment Recommendations: Users want to find the best accessories (e.g., lenses, tripods) to enhance their iPhone photography.
- Creative Inspiration: Users are seeking ideas for unique and interesting photos they can take with their iPhone.
- Comparative: Users are trying to determine how iPhone photography compares to traditional camera photography, or how different iPhone models compare in terms of camera capabilities.
1. Understanding iPhone Photography
As a professional photographer who has used a lot of cameras, I am always impressed by the iPhone cameras. When I first got interested in food photography, I used my iPhone and the natural light coming in through my apartment window to take pictures.
My interest in food photography grew, so I started learning about other cameras and equipment. My camera collection includes the Nikon D750, the FujiFilm XT3, and the FujiFilm XT4.
Even though I don’t use my iPhone for client work, I still take a lot of pictures with it. I’ve learned a lot of tips and tricks that I’m excited to share with you to improve your skill of iPhone image-making. Let’s get started with some iPhone photography tips to help you take better pictures!
1.1. The Convenience of iPhone Photography
One of the most appealing aspects of iPhone photography is its sheer convenience. It is the perfect fusion of accessibility and quality. The ability to capture high-quality images with a device that fits in your pocket has transformed how we document and share our experiences. The iPhone is always with you and ready to capture any fleeting moment.
1.2. Overcoming iPhone Photography Challenges
While the iPhone offers many advantages, it also presents some challenges. Small sensor size and fixed lens limitations can impact image quality and creative control. Overcoming these challenges requires understanding how to maximize the iPhone’s capabilities and using accessories to expand its functionality.
1.3. iPhone Photography vs. Traditional Photography
Comparing iPhone photography to traditional camera photography reveals significant differences and unique strengths. Traditional cameras offer superior image quality, lens versatility, and manual control. However, the iPhone’s computational photography capabilities, portability, and ease of use make it a formidable tool for everyday photography.
2. Essential iPhone Camera Settings
To take full advantage of your iPhone’s camera, you need to know how to change its settings. These settings can affect everything from how the camera focuses to the quality of the images it produces. Here are some essential settings that every iPhone photographer should be familiar with.
2.1. Cleaning Your Lenses
 Close up of a dirty iPhone lens
It’s easy to forget how dirty the iPhone lenses can get because they’re always out in the open and can easily pick up dust, smudges, or other particles. If your pictures look hazy, it’s because your lens is dirty. Make sure to wipe it off gently so that nothing gets in the way of taking a clear picture. I’ve used my shirt sleeve to do this, but I also have these wipes on hand, which come with microfiber cloths. These wipes also work well on other sensitive surfaces that you don’t want to scratch, like computer screens and sunglasses.
2.2. Turning On the Grid
 iPhone camera grid overlay
Image composition is very important in photography. It has to do with how you arrange things or subjects in the frame. To help you practice different compositions, I suggest turning on the grid on your iPhone.
When you turn on the grid, it will look like a faint overlay on your screen, but it won’t show up in your pictures. The grid will have two vertical and two horizontal lines, making nine squares. You might want to put your subject where the grid lines meet. This is known as the Rule of Thirds, and it’s a great place to start when trying out different ways to frame your subject.
To turn on the grid, go to Settings / Camera / Grid and make sure it’s turned on (green).
2.3. Adjusting Your Focus & Exposure
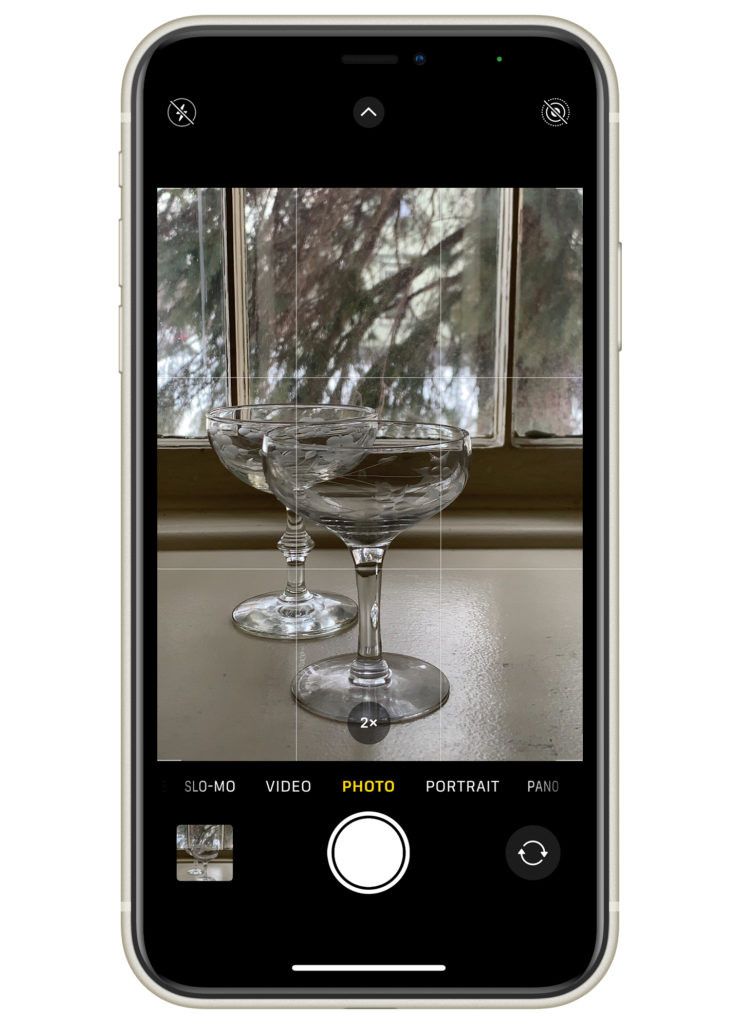
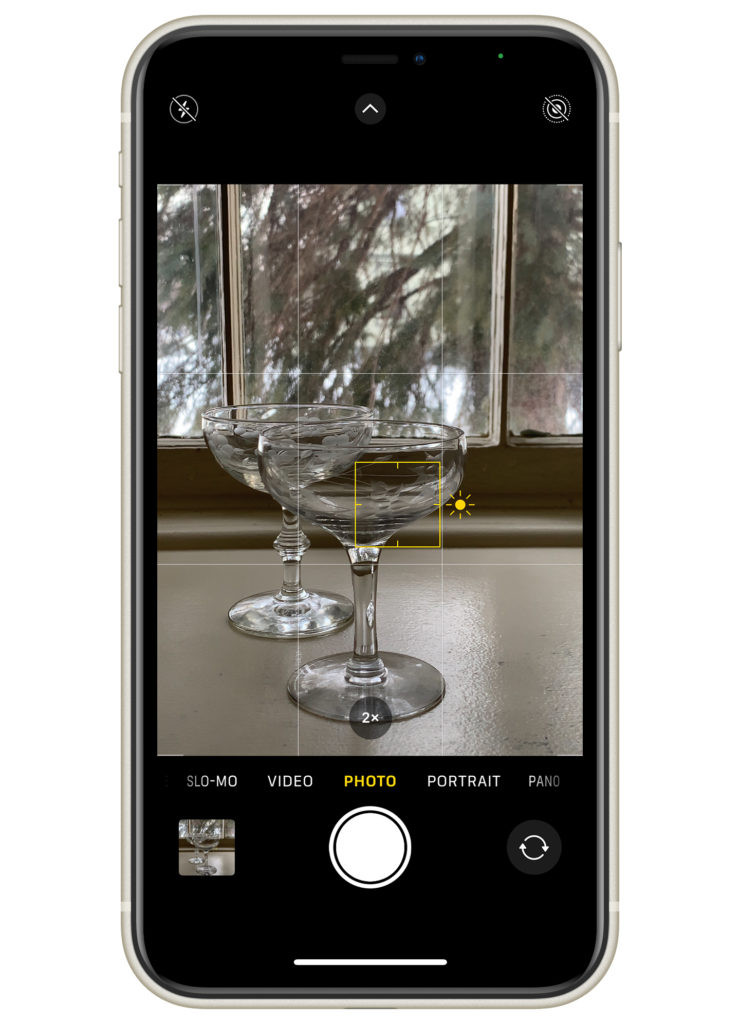
Focus: Have you ever taken a picture and then realized it wasn’t in focus? It’s the worst, right? To make sure your picture is in focus, tap the screen where you want your iPhone camera to focus. Where the phone is focusing will be marked with a yellow box. I call this the focus box.
Exposure: Next to the focus box, you’ll also see a sun icon. This lets you change how much light you let in. You can make your picture brighter by moving the sun icon up. Moving the sun icon down will make the picture darker. This is a great way to start playing around with the exposure of your pictures.
 iPhone screen showing manual focus and exposure controls
2.4. Locking Your Focus & Exposure
Manually focusing (tapping) and changing the exposure is easy and convenient, but you can lock your focus and exposure if you don’t want to do it every time you take a picture.
To do this, tap and hold your finger on the screen. At the top of the screen, you’ll see a yellow block that says “AE/AF Lock.” This means that your focus will be locked while you take pictures. It will also keep the exposure the same unless you want to change it a little by moving the sun icon up or down. To unlock the focus, just tap the screen again.
 iPhone screen showing AE/AF lock
3. Mastering iPhone Camera Modes
The iPhone camera has a number of modes that let you take different kinds of pictures, such as panoramic shots, time-lapses, and portraits. It is important to know how to use these modes to get the most out of your iPhone photography.
3.1. Using the Volume Buttons
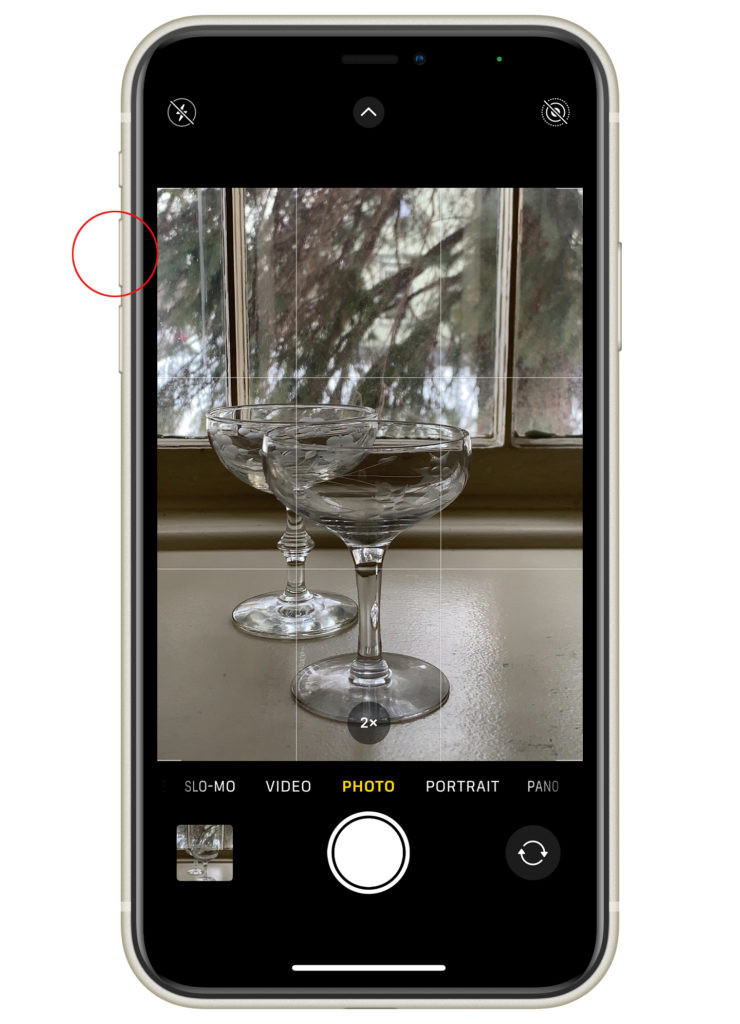
Did you know that the volume buttons are more than just for changing the volume on your iPhone? When the camera app is open, the volume buttons become your shutter button. If tapping the circle isn’t as easy, use them to take a picture.
 Using the volume buttons to take a photo on iPhone
3.2. Exploring Portrait Mode
Portrait mode is a fun option to play with because it makes the background behind your subject look dreamy and “blurred.” This is also called your depth of field.
There are a lot of very expensive DSLR lenses that make this happen in professional photography. The cool thing about the iPhone is that you don’t need a separate lens to change your depth of field.
How to Change Portrait Mode
To change how much blur you see in the background, do the following:
- Pick Portrait mode.
- Click the “f” in the circle in the upper right corner.
- Use the slider below the picture to change how strong you want the blur to be.
The iPhone lens has a portrait mode range of f1.8 to f16. The lower the number, the more blurred the background will be. The higher the number, the sharper the background will be. Pretty cool, huh?
Look at my examples below and note the setting in the red circle.
The phone on the far left is set to f1.4 (the lowest number), and the background is very blurred. It’s a little too much for me, though. 😉
The phone in the middle is set to f5.6, and the background is blurred more subtly.
The phone on the far right is set to f16, and the background is much sharper.
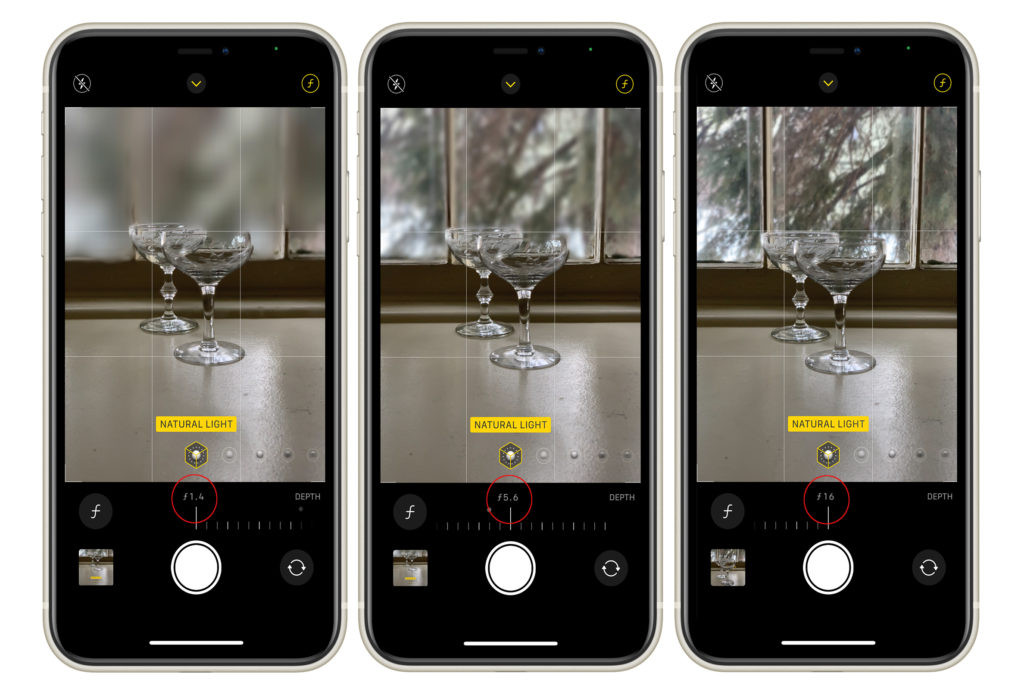 Examples of different portrait mode settings on iPhone
3.3. Panorama Mode for Wide Shots
Panorama mode is great for taking wide shots of landscapes or cityscapes. It lets you capture a field of view that is wider than what the iPhone camera can normally see. To use Panorama mode, open the Camera app, swipe to the “Pano” option, and follow the on-screen instructions to pan across the scene.
3.4. Time-Lapse Mode for Dynamic Scenes
Time-lapse mode lets you capture a series of photos over a period of time, which are then put together into a video. This mode is great for showing slow changes over time, such as clouds moving, flowers blooming, or the sun setting. Choose the “Time-Lapse” option in the Camera app and let your iPhone do the work.
4. iPhone Photography Composition Techniques
Composition is key to taking interesting and engaging photos, no matter what camera you’re using. Here are some composition techniques that can help you take your iPhone photography to the next level.
4.1. The Rule of Thirds
The Rule of Thirds involves dividing your frame into nine equal parts using two horizontal and two vertical lines. Place key elements of your scene along these lines or at their intersections to create a more balanced and visually appealing composition.
4.2. Leading Lines
Leading lines are lines that lead the viewer’s eye into the photo. They can be roads, rivers, fences, or any other linear feature that guides the viewer’s attention to the main subject. Using leading lines can add depth and interest to your photos.
4.3. Symmetry and Patterns
Symmetry and patterns can create visually stunning photos. Look for symmetrical scenes or repeating patterns in your environment, and use them to create a sense of balance and harmony in your images.
4.4. Using Negative Space
Negative space refers to the empty areas around your subject. Using negative space can help to isolate your subject and create a sense of simplicity and calm in your photos. It can also draw attention to the main subject and make it stand out more.
5. Editing Your iPhone Photos
Editing is an important part of taking pictures. I’ve noticed that many people take pictures with their smartphones but don’t change them at all. No matter what kind of camera you use, your pictures may look dull and muted if you don’t edit them.
You can start playing around with editing by using the regular camera app on your iPhone. It has some basic features that will show you how powerful editing can be.
Open the picture you want to change, tap Edit, and you’ll see three icons below the picture.
Adjust Tool
The first icon on the left looks like a circle with dots around it. This is the ADJUST option, which lets you change things like the exposure, brightness, shadows, contrast, saturation, and so on. There are a lot of things to play around with in the Adjust option, so take some time to make different changes and watch how they affect your picture.
Filters Tool
The second icon in the middle looks like three circles that cross each other. This is the default FILTERS option, which lets you scroll through different filters that you can put on your picture.
Crop Tool
The third icon looks like a square with arrows. This is the CROP option, which lets you crop, straighten, or turn your picture.
Have fun with each of these, because there are many ways to change your pictures with these three simple features that are built right into your smartphone camera.
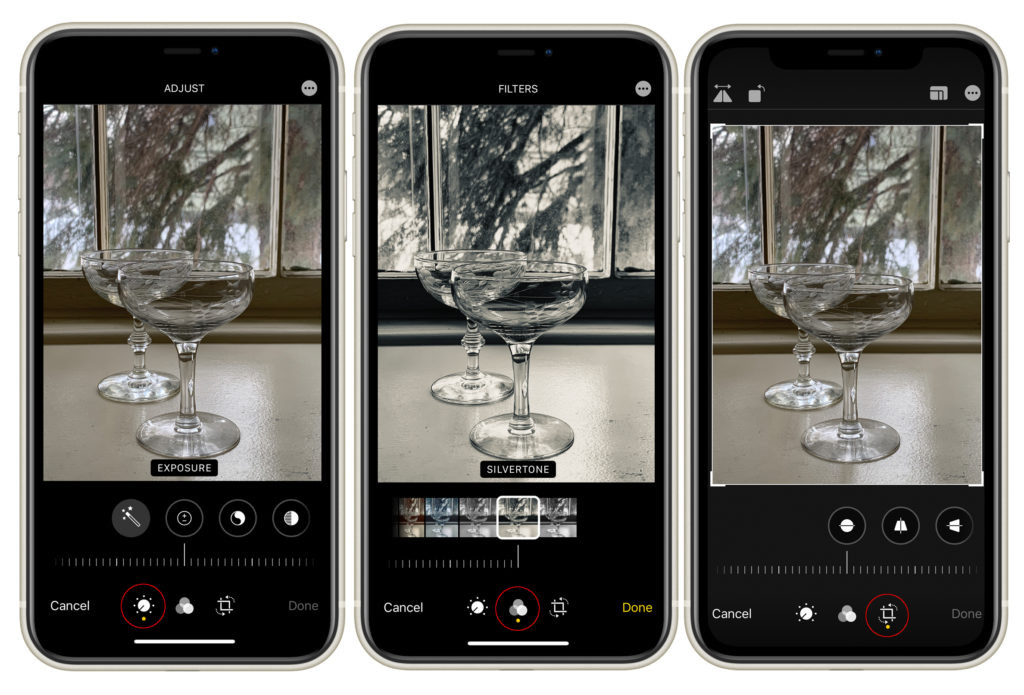 iPhone standard editing app interface
Check out these great editing apps below if you want to go beyond the standard iPhone camera app.
5.1. Built-In iPhone Editing Tools
The iPhone has a number of built-in editing tools that let you make basic adjustments to your photos. These tools include options for adjusting exposure, contrast, brightness, saturation, and sharpness. You can also crop, rotate, and straighten your photos using the built-in editing tools.
5.2. Third-Party Photo Editing Apps
There are many third-party photo editing apps available for the iPhone that offer more advanced editing features. Popular apps like Adobe Lightroom Mobile, Snapseed, and VSCO let you fine-tune your photos with professional-grade tools. These apps offer features like selective adjustments, healing brushes, and advanced color grading.
5.3. Basic Editing Techniques
Some basic editing techniques can significantly improve your iPhone photos. Start by adjusting the exposure and contrast to bring out the details in your image. Then, adjust the white balance to correct any color casts. Finally, use the sharpness tool to add clarity and definition to your photos.
6. Essential iPhone Photography Tools
When taking pictures with your iPhone camera, you are probably using natural light. Natural light is beautiful, but it’s always changing, which can be hard to control without some basic tools to help you.
I recommend looking into light modifiers. Light modifiers are things like diffusers and black and white foam boards. They come in different sizes, and you can find many on Amazon.
6.1. Light Modifiers
Diffusers: Diffusers will help you soften strong sunlight and spread it out more evenly over your subject. All you have to do is put the diffuser between your subject and the light source. For example, when I shoot food with natural light, I often put diffusers over my window. It doesn’t block the light, it just makes it softer.
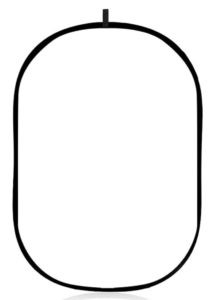 Large Diffuser for Photography
Foam Boards: Foam boards are great for changing the light’s shape and bouncing it back to your subject.
If one side of your picture is getting too dark, white foam boards will bounce light back to your subject. For example, if you have a plate of food by the window, the side that is furthest away from the window may look darker. If you put a piece of white foam board across from the window (and next to your food), it will bounce light back from the window and make that darker side look brighter. This is a very cool trick that can make a big difference in how well your pictures are lit.
 White Foam Board for Photography
Black foam boards can help you add more contrast and shadows to your picture. You can put these near your subject and move them around to see how different placements can change and affect the shadows in your picture.
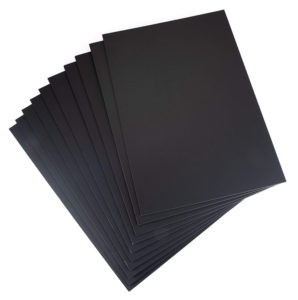 Black Foam Board
6.2. Tripods and Stabilizers
Holding the smartphone is a very easy way to shoot, but I want to push you to try something different. Being able to keep your iPhone steady on a tripod is one of the biggest things that can change your iPhone photography.
The best tripod setup for your iPhone is made up of:
The tripod with a center column lets you put your iPhone at any angle, even overhead shots. You’d be surprised how many iPhone tripods don’t allow for an overhead angle, so this is a great choice for capturing any angle you want.
MANFROTTO 055 TRIPOD WITH CENTER COLUMN & BALL HEAD
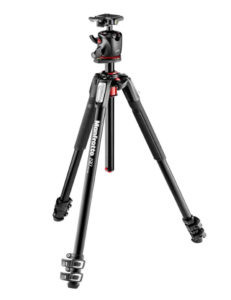 Manfrotto Tripod
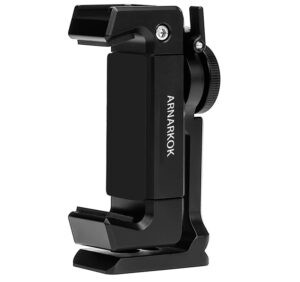
A metal iPhone tripod mount will help keep your iPhone safe on the tripod. It’s made of metal, very safe, and makes it easy to put the iPhone camera in a vertical or horizontal position. Also, it doesn’t get in the way of your iPhone screen at all. Check out the post below to learn more about my favorite tripod setup for iPhone photography.
READ MORE ABOUT: THE BEST TRIPOD FOR IPHONE FOOD PHOTOGRAPHY
6.3. External Lenses
METAL IPHONE TRIPOD MOUNT
 iPhone on a tripod for photography
6.4. Remote Shutters
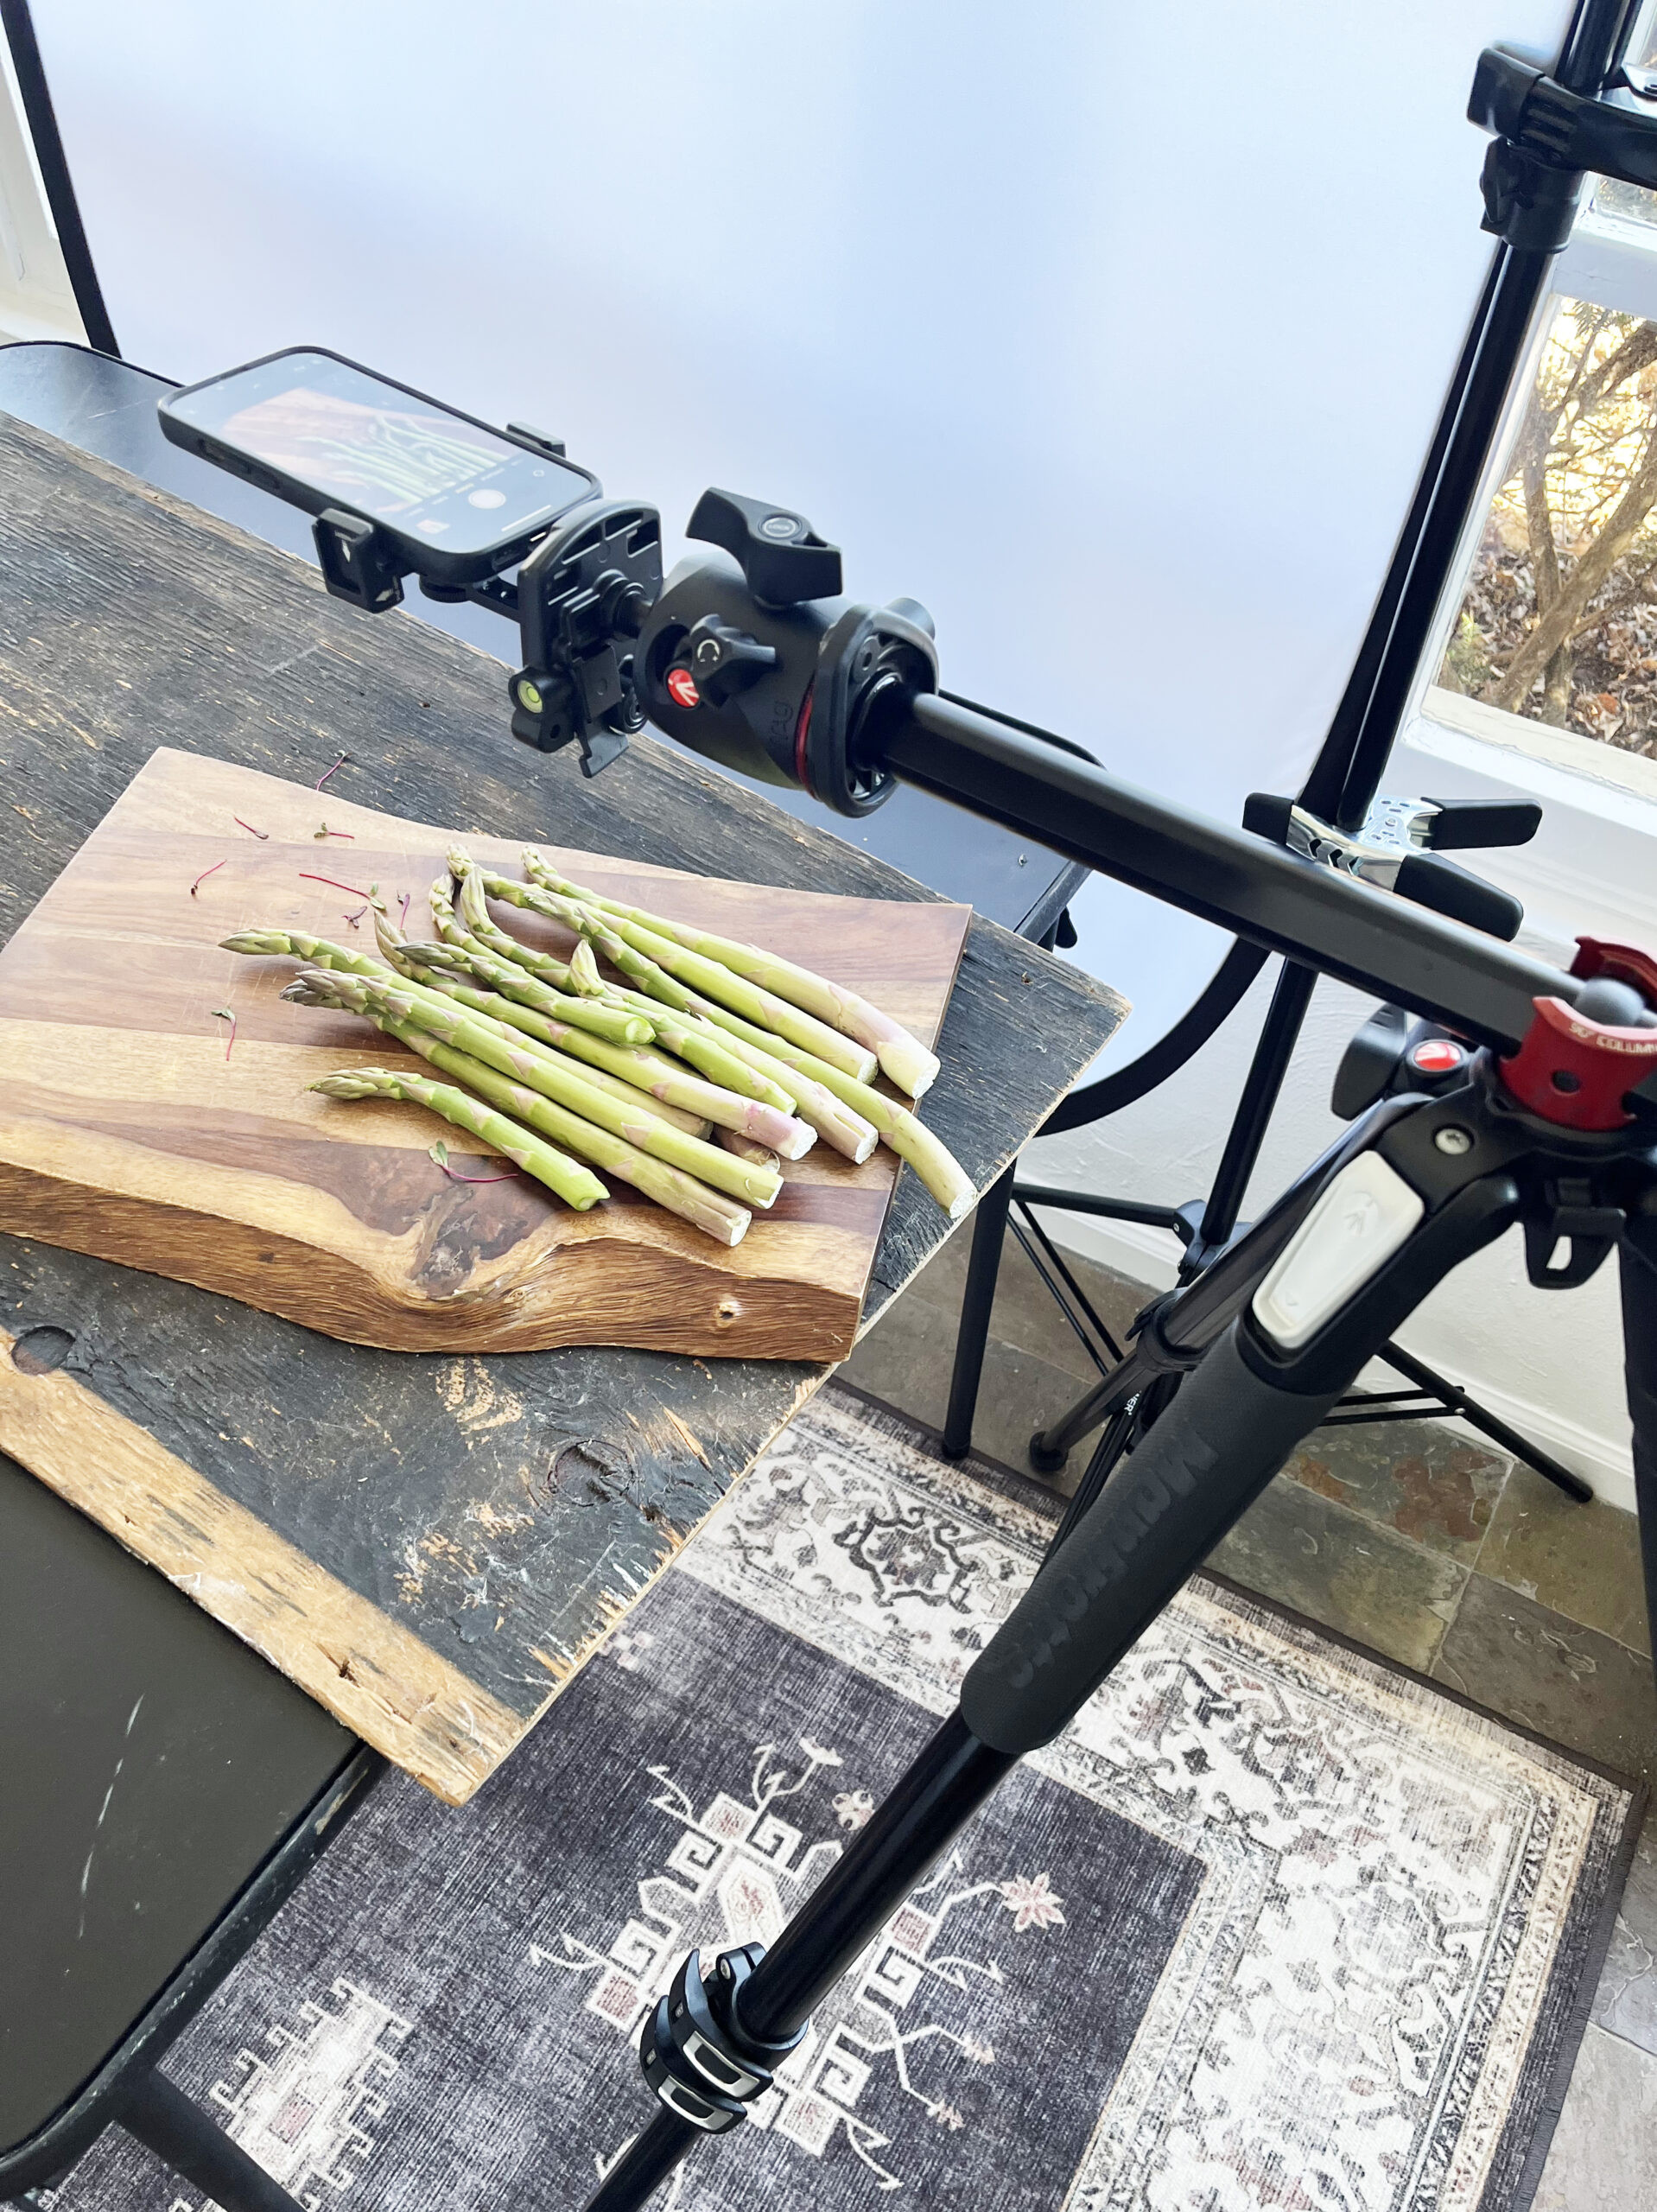
 iPhone photography setup with tripod and lighting
Now that we’ve talked about getting a tripod for your iPhone, the next thing I recommend is a remote camera shutter release. This tool is helpful for two reasons:
- Pressing the shutter button on your iPhone could cause the camera to shake a little, which would make your pictures blurry.
- To take the picture, you might not be close to your iPhone.
I have this bluetooth remote shutter, which works with most smartphones on the market. It’s very small and easy to take with you, and it’s been very reliable for me.
 Smartphone Remove Shutter
6.5. Portable Chargers
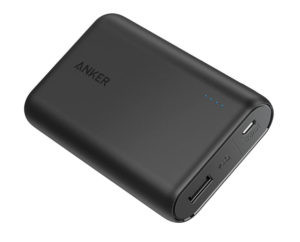 Portable charger for smartphones
Smartphone batteries can be unpredictable, and some run out of power quickly. Having a fast portable charger with you is helpful, especially if you need to charge up quickly.
Did you know you can use different lenses with your smartphone? Not only are the cameras getting much better, but you can now use different lenses to capture different points of view.
I’ve tried out a lot of smartphone lenses on the market, but I haven’t been impressed with most of them. It’s really hard to get the “clip-on” lenses in the right spot over your smartphone lens, and they will get in the way if they’re not just right. Clip-on lenses might be cheaper, but believe me when I say that cheaper is not better when it comes to camera lenses.
The Moment lenses are the ones that I can confidently recommend for smartphone cameras.
You’ll need to download a third-party camera app called Pro Camera by Moment from the app store to use Moment Lenses. When using this camera app, the lenses will work easily; however, if you use the regular iPhone camera app, there may be some problems.
To attach the Moment lenses to your smartphone, you’ll also need to buy a separate phone case. It’s an extra thing to buy, but they look great and are very easy to use.
The Moment lenses twist right into the case, so the lens stays in the right place. To take it off, just untwist it. Not to mention, the glass is top-notch, which helps you take sharp pictures from far away or up close. I’m going to share two lens suggestions below.
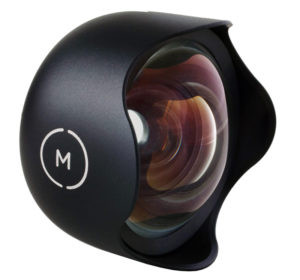
6.6. Wide Angle Lens
If you’re looking for a beautiful, ultra-wide angle lens for your iPhone that doesn’t distort too much, this Moment Wide Lens is a great choice. It’s great for travel, landscapes, and indoor spaces.
 Wide Angle Lens for iPhone
 Wide angle interior shot of a restaurant
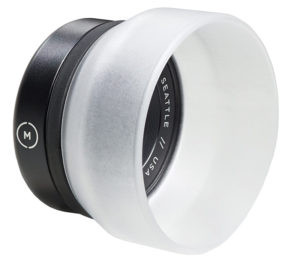
6.7. Macro Lens
Macro lenses let you get very close to your subject so you can capture every little detail with amazing clarity. If you want to get up close and personal with the details of your subject, this Moment Macro Lens is a great one to check out.
Remember that you need to be about an inch away from your subject to take a sharp, close-up picture. It’s amazing what it can do, but it won’t work well if you can’t get that close to your subject.
 Macro Lens iPhone
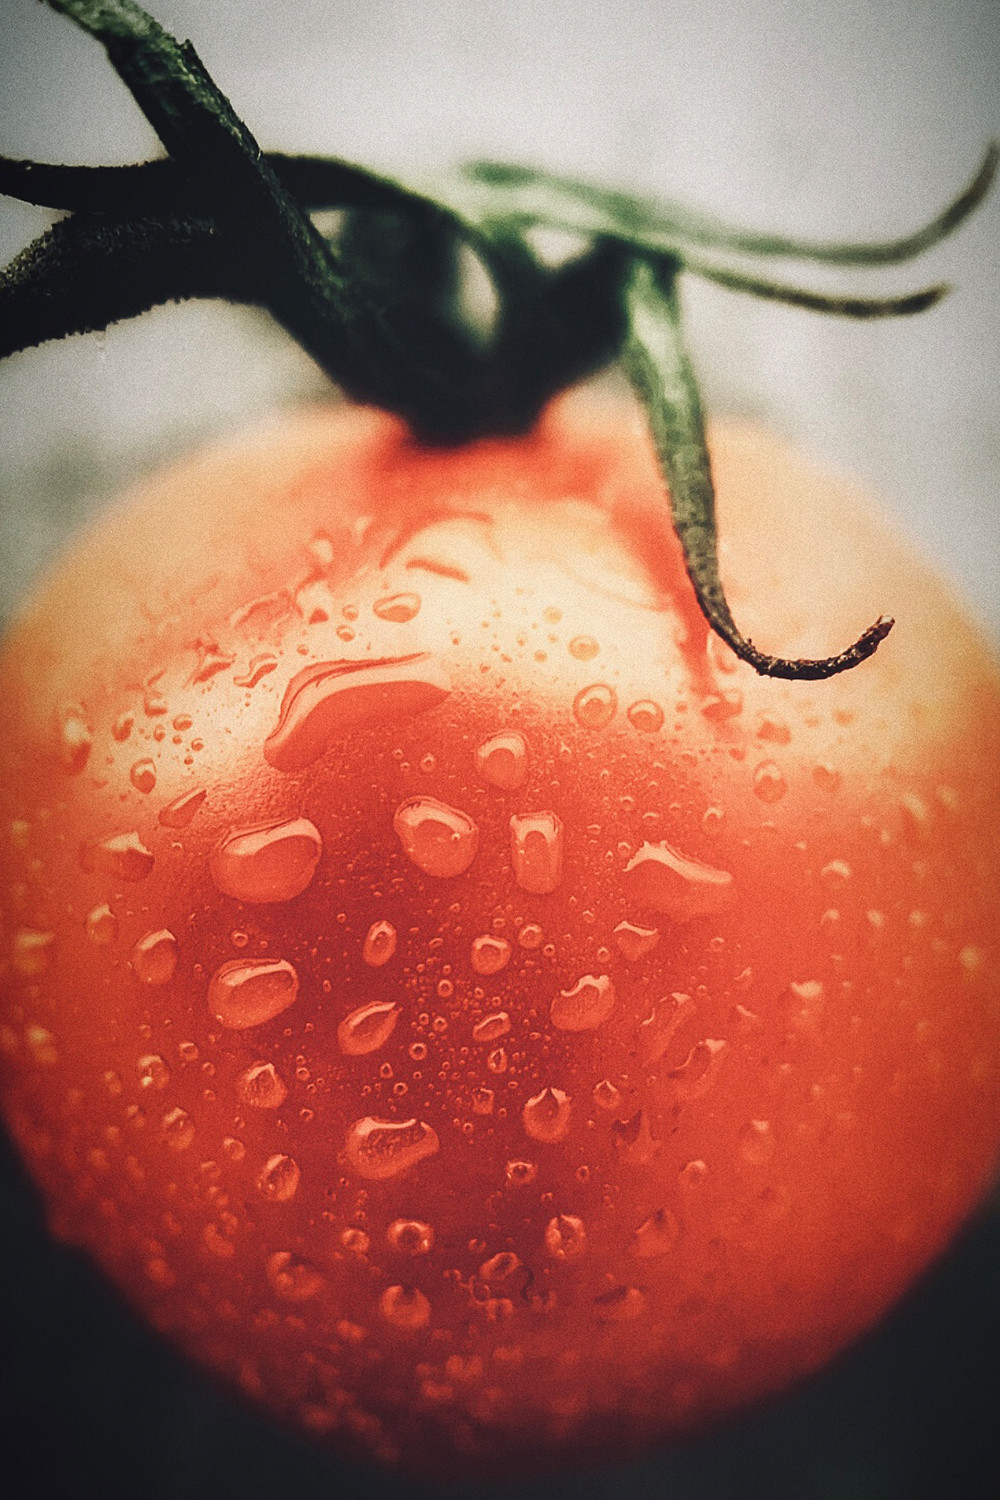 Close up image of a tomato using a macro lens
7. Online Courses and Resources
To quickly improve your photography skills, taking an online course is a great option. I have a couple of options for you to look into.
7.1. Mastering iPhone Food Photography
 Raspberry pie photo
My signature course, Mastering iPhone Food Photography, is a beginner-friendly, comprehensive course that will quickly teach you everything you need to know about iPhone food photography.
This course has everything you need to improve your iPhone food images, including videos, screen recordings, and behind-the-scenes demos. The course is currently under 4 hours long, and when you sign up, you get lifetime access to it, including all future updates I make. Sign up, take the course when you have time, and come back to it whenever you need it. 😍
FULL COURSE
7.2. Free Online Tutorials
Many free online tutorials can help you improve your iPhone photography skills. Websites like YouTube, Skillshare, and CreativeLive offer a wide range of tutorials on various iPhone photography topics. These tutorials can provide valuable insights and tips on how to take better photos with your iPhone.
7.3. Photography Communities
Joining a photography community can be a great way to learn from other photographers and get feedback on your work. Online forums, social media groups, and local photography clubs can provide a supportive environment for sharing your photos, asking questions, and getting inspired.
8. Advanced iPhone Photography Techniques
Once you’ve mastered the basics, you can start experimenting with more advanced iPhone photography techniques. These techniques can help you create unique and stunning images that stand out from the crowd.
8.1. Long Exposure Photography
Long exposure photography involves using a slow shutter speed to capture motion blur and create ethereal effects. To take long exposure photos with your iPhone, you’ll need a tripod and a third-party app that allows you to control the shutter speed.
8.2. Macro Photography
Macro photography involves capturing extreme close-up images of small subjects. To take macro photos with your iPhone, you can use an external macro lens or the iPhone’s built-in macro mode (if available).
8.3. Night Photography
Night photography can be challenging, but it can also produce stunning results. To take night photos with your iPhone, you’ll need a tripod and a third-party app that allows you to control the ISO and shutter speed. You can also use the iPhone’s Night mode (if available) to capture brighter and more detailed night photos.
9. Inspiration and Creativity
One of the most important aspects of photography is finding inspiration and developing your creative vision. Here are some ways to find inspiration and spark your creativity in iPhone photography.
9.1. Studying the Work of Other Photographers
Studying the work of other photographers can provide inspiration and help you develop your own style. Look at the work of famous photographers and contemporary iPhone photographers to see how they use light, composition, and editing to create compelling images.
9.2. Experimenting with Different Styles and Subjects
Don’t be afraid to experiment with different styles and subjects in your iPhone photography. Try shooting different genres, such as portraiture, landscape, street photography, or abstract photography. Experiment with different editing techniques and find what works best for you.
9.3. Finding Your Unique Vision
Ultimately, the goal is to develop your own unique vision and style in iPhone photography. What do you want to say with your photos? What stories do you want to tell? By exploring your interests and passions, you can find your unique voice and create photos that are authentic and meaningful.
10. iPhone Photography FAQs
Here are some frequently asked questions about iPhone photography:
- What is the best iPhone for photography? The best iPhone for photography depends on your budget and needs. Newer models typically have better camera systems.
- How do I improve the quality of my iPhone photos? Clean your lens, use good lighting, adjust focus and exposure, and edit your photos.
- What are some essential iPhone photography accessories? Tripod, external lenses, portable charger, and light modifiers are all valuable accessories.
- How do I take sharp photos with my iPhone? Stabilize your iPhone, use proper focus, and avoid shooting in low light conditions.
- What are the best photo editing apps for iPhone? Adobe Lightroom Mobile, Snapseed, and VSCO are popular choices.
- How do I take long exposure photos with my iPhone? Use a tripod and a third-party app with shutter speed control.
- How do I take macro photos with my iPhone? Use an external macro lens or the iPhone’s built-in macro mode.
- How do I take good photos in low light with my iPhone? Use a tripod, adjust ISO and shutter speed, and use the iPhone’s Night mode.
- How do I protect my iPhone while taking photos? Use a sturdy case and lens protectors to prevent damage.
- Where can I learn more about iPhone photography? dfphoto.net offers a wealth of resources, tips, and tutorials to help you master iPhone photography.
I hope these iPhone photography tips were helpful. I’m only touching the surface of all the fun things you can do to make your iPhone photos better. Remember that photography is about how you use the camera you have, not what kind of camera you have. Take the time to learn more about your iPhone camera. You’ll be amazed at what it can do.
Contact us if you have any questions, and don’t forget to follow me on Instagram!
NOTE: The doors to my signature course, Mastering iPhone Food Photography are open! This is your one-stop-shop that includes professional guidance through a variety of videos, screen recordings and behind-the-scenes demonstrations to help you learn how to improve your iPhone food photography quickly!
Happy Creating!
This post may contain affiliate links which means if you click or make a purchase through my site, I might make a small commission (at no extra cost to you). I only promote products and equipment that I actually use for my photography business. Your support helps me continue to produce educational content about photography. Thank you!
All images ©Regan Baroni 2021.
Ready to take your iPhone photography to the next level? Visit dfphoto.net for more in-depth guides, stunning photo collections, and a vibrant community of photographers. Discover new techniques, find inspiration, and connect with fellow photography enthusiasts today! Address: 1600 St Michael’s Dr, Santa Fe, NM 87505, United States. Phone: +1 (505) 471-6001.