Are you wondering How To Recover Photos On Google Photos? At dfphoto.net, we understand how devastating it can be to accidentally delete precious memories. That’s why we’ve created this comprehensive guide to help you navigate the recovery process and restore your photos with ease, covering everything from the recycle bin to advanced data recovery techniques. Learn how to undelete, unerase, and retrieve your cherished images using Google Photos’ built-in features and other recovery methods. We’ll also cover preventative measures to ensure your photos remain safe in the future with cloud storage and backup solutions.
1. Understanding Google Photos and Photo Loss
Google Photos is a popular photo storage and sharing service. Imagine it as a digital album where you can keep all your photos safe and organized. But what happens when you accidentally delete a photo or video? Understanding how Google Photos handles deletions is the first step in knowing how to recover them. It provides a secure platform that offers both convenience and organization but doesn’t eliminate the risk of accidental data loss, highlighting the need for reliable recovery strategies.
1.1. Common Reasons for Photo Loss
Several reasons can lead to photo loss in Google Photos:
- Accidental Deletion: This is the most common reason. A slip of the finger, especially on mobile devices, can send your precious photos to the trash.
- Intentional Deletion: Sometimes, you might delete photos thinking you no longer need them, only to realize later that you want them back.
- Software Glitches: Though rare, bugs in the Google Photos app or your device’s operating system can sometimes cause photos to disappear.
- Account Issues: Problems with your Google account, such as unauthorized access or syncing errors, could also lead to photo loss.
- Device Issues: If your device malfunctions, photos that haven’t been backed up to Google Photos might be lost.
1.2. The Google Photos Trash/Bin
When you delete a photo or video in Google Photos, it doesn’t immediately disappear forever. Instead, it goes to the Trash (or Bin on some devices). This is like the recycle bin on your computer, providing a temporary holding place for deleted items.
- Retention Period: Photos and videos remain in the Trash for 60 days. This gives you a generous window to recover accidentally deleted items. After 60 days, Google Photos permanently deletes them.
- Emptying the Trash: You can manually empty the Trash at any time. However, be very careful when doing this, as it permanently removes all items in the Trash, making recovery impossible through Google Photos itself.
1.3. Permanently Deleted Photos
If a photo or video has been in the Trash for more than 60 days, or if you’ve manually emptied the Trash, it’s considered permanently deleted. Recovering permanently deleted photos can be more challenging, but it’s not always impossible. We’ll explore methods for recovering permanently deleted photos later in this guide.
2. Immediate Steps After Deletion
The moment you realize you’ve accidentally deleted a photo from Google Photos, time is of the essence. Acting quickly can significantly increase your chances of a successful recovery.
2.1. Checking the Google Photos Trash/Bin
Your first action should be to check the Google Photos Trash (or Bin). This is the most straightforward way to recover recently deleted photos.
Steps:
- Open Google Photos: Launch the Google Photos app on your Android or iOS device, or visit the Google Photos website on your computer.
- Navigate to Trash/Bin:
- On Mobile: Tap the “Library” tab at the bottom, then select “Trash.”
- On Web: Click the “Bin” option in the left-hand menu.
- Locate the Photo(s): Scroll through the Trash to find the photo(s) you want to recover. You can sort by date to make it easier to find recently deleted items.
- Restore the Photo(s):
- On Mobile: Tap and hold the photo(s) to select them, then tap the “Restore” button at the bottom.
- On Web: Hover over the photo(s), click the checkmark to select them, and then click the “Restore” button at the top right.
Once restored, the photo(s) will be returned to their original location in your Google Photos library.
2.2. Stop Syncing Immediately
If you realize a deletion error, immediately stop syncing Google Photos across your devices. This prevents the deletion from propagating to other devices and potentially overwriting any chances of recovery. To halt the synchronization process, navigate to the settings within the Google Photos app and disable the “Back up & sync” option. Doing so can prevent further loss of photos.
Steps:
- Open Google Photos Settings:
- On Mobile: Tap your profile picture, then select “Google Photos settings.”
- On Web: Click the settings gear icon in the top right corner.
- Disable Sync: Turn off the “Back up & sync” option.
Remember to re-enable sync once you’ve completed the recovery process to ensure your photos are safely backed up in the future.
2.3. Check Other Devices
If you use Google Photos on multiple devices, check each one to see if the photo is still present. It’s possible that the deletion hasn’t synced to all devices yet.
Steps:
- Open Google Photos on Each Device: Launch the Google Photos app or visit the website on each device you use.
- Check the Main Library: Look for the photo in the main library.
- Check the Trash/Bin: If the photo isn’t in the main library, check the Trash/Bin on each device.
If you find the photo on one device, immediately copy it to a safe location or restore it to Google Photos on that device before re-enabling sync.
3. Recovering Photos Within 60 Days
As mentioned earlier, Google Photos keeps deleted photos in the Trash for 60 days, providing a convenient window for recovery. This section will guide you through the process of recovering photos within this period.
3.1. Step-by-Step Guide to Restoring from Trash
The process for restoring photos from the Trash is similar on both Android, iOS, and the web. Here’s a detailed step-by-step guide:
On Android:
-
Open Google Photos: Tap the Google Photos app icon on your home screen.
-
Go to Library: Tap “Library” at the bottom of the screen.
-
Select Trash: Tap “Trash.”
-
Choose Photos to Restore: Tap and hold the photos you want to restore. A checkmark will appear on each selected photo.
-
Tap Restore: Tap the “Restore” button at the bottom of the screen.
On iOS:
- Open Google Photos: Tap the Google Photos app icon on your home screen.
- Go to Library: Tap “Library” at the bottom of the screen.
- Select Trash: Tap “Trash.”
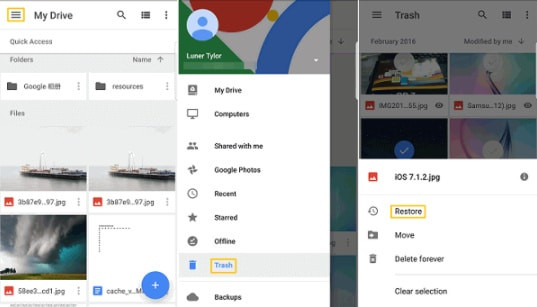 ios trash
 - Choose Photos to Restore: Tap and hold the photos you want to restore. A checkmark will appear on each selected photo.
- Tap Restore: Tap the “Restore” button at the bottom of the screen.
On Web:
- Open Google Photos: Go to the Google Photos website in your browser.
- Go to Bin: Click “Bin” in the left-hand menu.
- Choose Photos to Restore: Hover over the photos you want to restore and click the checkmark in the top left corner of each photo.
- Click Restore: Click the “Restore” button in the top right corner of the screen.
3.2. Common Issues and Troubleshooting
While restoring photos from the Trash is usually straightforward, you might encounter some issues. Here are a few common problems and how to troubleshoot them:
- Photos Not Appearing in Trash:
- Check the Correct Account: Ensure you’re logged into the correct Google account.
- Check Sync Status: Make sure sync is enabled on your device.
- Wait for Sync: If you recently deleted the photos, it might take some time for them to appear in the Trash.
- Restore Button Not Working:
- Try a Different Browser: If you’re using the web version, try a different browser.
- Clear Cache and Cookies: Clearing your browser’s cache and cookies can sometimes resolve the issue.
- Update the App: Make sure you have the latest version of the Google Photos app installed.
- Photos Not Restoring to Original Location:
- Check Date and Time: Sometimes, restored photos might appear out of order. Check the date and time of the photos to find them.
- Check Albums: The photos should be restored to their original albums.
3.3. Tips for Efficiently Managing Your Trash
To avoid losing important photos, it’s a good practice to manage your Trash regularly:
- Review the Trash Periodically: Make it a habit to check the Trash every few weeks to ensure you haven’t accidentally deleted anything important.
- Restore Important Photos Immediately: If you find any photos you want to keep, restore them right away.
- Be Careful When Emptying the Trash: Only empty the Trash if you’re absolutely sure you don’t need any of the photos in it.
4. Recovering Permanently Deleted Photos
What happens if you’ve emptied the Trash or the 60-day retention period has passed? Recovering permanently deleted photos from Google Photos can be more challenging, but it’s not always impossible.
4.1. Checking Google Account Activity
Sometimes, photos might appear to be deleted when they’ve actually been moved or hidden. Check your Google account activity to see if you can find any traces of the missing photos.
Steps:
- Go to Google Account Activity: Visit the Google Account Activity page.
- Filter by Google Photos: Filter the activity to show only Google Photos activity.
- Look for Anomalies: Look for any unusual activity, such as photos being moved, shared, or deleted from a different device.
If you find any anomalies, it might give you a clue as to where the photos have gone or how they were deleted.
4.2. Using Google Takeout
Google Takeout allows you to download a copy of your data from various Google services, including Google Photos. Even if photos have been permanently deleted from Google Photos, there’s a small chance they might still be included in your Google Takeout archive.
Steps:
- Go to Google Takeout: Visit the Google Takeout page.
- Select Google Photos: Choose “Google Photos” from the list of services.
- Customize the Export:
- Choose whether to include all photo albums or specific albums.
- Select the file type (.zip or .tgz) and the archive size.
- Create Export: Click “Create export.”
- Download the Archive: Google will create an archive of your Google Photos data. This process might take a few hours or even days, depending on the amount of data. Once the archive is ready, you’ll receive an email with a download link.
- Extract and Search: Download the archive and extract its contents. Search through the folders to see if you can find the missing photos.
4.3. Contacting Google Support
If you’ve tried all the above methods and still can’t recover your photos, you can try contacting Google Support for assistance. While they might not be able to recover permanently deleted photos, they might be able to offer additional guidance or investigate any potential issues with your account.
Steps:
- Go to Google Photos Help: Visit the Google Photos Help Center.
- Browse Help Articles: Look for articles related to photo recovery.
- Contact Support: If you can’t find a solution in the help articles, look for a “Contact Us” option to get in touch with Google Support.
4.4. Third-Party Data Recovery Software
In some cases, third-party data recovery software might be able to recover permanently deleted photos from your device’s storage. These tools scan your device for deleted files and attempt to recover them.
Popular Data Recovery Software:
- EaseUS Data Recovery Wizard: A user-friendly data recovery tool that supports various file types and storage devices.
- Recuva: A free data recovery tool that’s easy to use and can recover files from hard drives, USB drives, and memory cards.
- Disk Drill: A powerful data recovery tool that offers advanced scanning algorithms and supports various file systems.
Important Considerations:
- Stop Using Your Device: To maximize your chances of successful recovery, stop using your device immediately after realizing the photos are missing. This prevents new data from overwriting the deleted files.
- Install the Software on a Different Drive: Install the data recovery software on a different drive than the one you’re trying to recover from. This prevents the software from overwriting the deleted files.
- Scan the Correct Drive: Make sure you scan the correct drive or storage device where the photos were originally stored.
- Preview Before Recovering: Most data recovery tools allow you to preview the recovered files before saving them. This ensures you’re recovering the correct photos.
Disclaimer: Using third-party data recovery software can be risky, as it might not always be effective and could potentially cause further damage to your data. Always download software from reputable sources and follow the instructions carefully.
5. Prevention is Better Than Cure
While it’s helpful to know how to recover deleted photos, it’s even better to prevent photo loss in the first place. Here are some tips to help you keep your photos safe:
5.1. Regular Backups
The most effective way to prevent photo loss is to regularly back up your photos. Google Photos provides automatic backup, but it’s also a good idea to have additional backups in case something goes wrong with your Google account.
Backup Options:
- Google Photos: Ensure that “Back up & sync” is enabled in the Google Photos settings.
- External Hard Drive: Regularly copy your photos to an external hard drive.
- Cloud Storage: Use other cloud storage services like Dropbox, OneDrive, or iCloud to back up your photos.
- NAS (Network-Attached Storage): A NAS device provides a centralized storage location for all your devices on your home network.
5.2. Organize Your Photos
Keeping your photos organized makes it easier to find them and reduces the risk of accidental deletion.
Tips for Organizing Photos:
- Use Albums: Create albums to group photos by event, date, or location.
- Add Descriptions and Tags: Add descriptions and tags to your photos to make them easier to search for.
- Delete Duplicates: Regularly remove duplicate photos to save storage space and reduce clutter.
5.3. Be Careful When Deleting
Always double-check before deleting photos to ensure you’re not accidentally deleting anything important.
Tips for Careful Deletion:
- Review Before Deleting: Take a moment to review the photos before deleting them.
- Select Carefully: Be careful when selecting multiple photos to delete.
- Empty the Trash Regularly: But only after you’ve reviewed the contents and restored any important photos.
5.4. Secure Your Google Account
Protecting your Google account is crucial to prevent unauthorized access and potential photo loss.
Tips for Securing Your Google Account:
- Use a Strong Password: Choose a strong, unique password that’s difficult to guess.
- Enable Two-Factor Authentication: Two-factor authentication adds an extra layer of security to your account.
- Review Account Permissions: Regularly review the apps and devices that have access to your Google account and revoke access for any that you no longer use.
- Be Wary of Phishing: Be cautious of phishing emails or messages that might try to trick you into revealing your Google account credentials.
5.5. Understanding Google Photos Settings
Take the time to understand the various settings in Google Photos to ensure your photos are being backed up and stored in the way you want.
Important Settings to Review:
- Backup Quality: Choose the backup quality that best suits your needs. “Original Quality” preserves the original resolution of your photos, while “Storage Saver” (formerly “High Quality”) compresses them to save storage space.
- Backup Folders: Select which folders on your device you want to back up to Google Photos.
- Daily Limit: Set a daily limit for backups to prevent excessive data usage.
- Partner Sharing: Consider using the Partner Sharing feature to automatically share photos with a trusted friend or family member.
6. Advanced Recovery Techniques
If you’ve exhausted all the standard recovery methods and still haven’t found your photos, here are some advanced techniques to consider.
6.1. Data Recovery Services
Professional data recovery services specialize in recovering data from damaged or corrupted storage devices. If your photos were stored on a device that has failed, a data recovery service might be able to retrieve them.
Popular Data Recovery Services:
- DriveSavers: A well-known data recovery service with a high success rate.
Address: 1600 St Michael’s Dr, Santa Fe, NM 87505, United States
Phone: +1 (505) 471-6001
Website: dfphoto.net - Ontrack: A global data recovery company with extensive experience in recovering data from various storage devices.
- Secure Data Recovery: A data recovery service that specializes in recovering data from encrypted devices.
Important Considerations:
- Cost: Data recovery services can be expensive, so get a quote before proceeding.
- Success Rate: Data recovery is not always guaranteed, and the success rate depends on the severity of the damage to the storage device.
- Confidentiality: Choose a data recovery service that has a strong reputation for protecting your privacy and confidentiality.
6.2. Forensic Analysis
In extreme cases, forensic analysis might be necessary to recover permanently deleted photos. Forensic analysis involves using specialized tools and techniques to examine storage devices at a low level and recover data that might not be accessible through standard recovery methods.
When to Consider Forensic Analysis:
- High-Value Photos: If the photos are of significant personal or sentimental value.
- Legal Reasons: If the photos are needed for legal or investigative purposes.
- Data Corruption: If the storage device is severely damaged or corrupted.
Important Considerations:
- Cost: Forensic analysis is very expensive and should only be considered as a last resort.
- Expertise: Forensic analysis requires specialized expertise and equipment.
- Legal Implications: Forensic analysis might have legal implications, so consult with an attorney before proceeding.
6.3. Cloud Forensics
Cloud forensics is a specialized field that focuses on recovering data from cloud storage services like Google Photos. Cloud forensics experts use specialized tools and techniques to analyze cloud storage accounts and recover deleted or lost data.
When to Consider Cloud Forensics:
- Account Compromise: If your Google account has been compromised and photos have been deleted by an unauthorized user.
- Data Breach: If Google Photos has experienced a data breach and your photos have been affected.
- Legal Investigations: If you need to recover photos from Google Photos for legal investigations.
Important Considerations:
- Expertise: Cloud forensics requires specialized expertise and knowledge of cloud storage systems.
- Legal Issues: Cloud forensics might involve legal issues related to data privacy and access.
7. The Importance of Metadata
Metadata is data about data. In the context of photos, metadata includes information such as the date, time, location, camera settings, and copyright information. Metadata can be invaluable in recovering and organizing your photos.
7.1. What is Photo Metadata?
Photo metadata is typically stored within the photo file itself, using formats such as EXIF, IPTC, and XMP. This metadata can be viewed and edited using photo editing software or metadata editing tools.
Common Types of Photo Metadata:
- EXIF (Exchangeable Image File Format): Contains information about the camera settings used to take the photo, such as aperture, shutter speed, ISO, and focal length.
- IPTC (International Press Telecommunications Council): Contains information about the photo’s content, such as the photographer, caption, keywords, and copyright information.
- XMP (Extensible Metadata Platform): A more flexible metadata format that can store a wide range of information about the photo.
7.2. How Metadata Helps in Recovery
Metadata can help in photo recovery in several ways:
- Identifying Missing Photos: Metadata can help you identify missing photos by providing information about when and where they were taken.
- Sorting and Organizing Recovered Photos: Metadata can be used to sort and organize recovered photos by date, time, location, or other criteria.
- Verifying Authenticity: Metadata can help verify the authenticity of recovered photos by providing information about the camera and settings used to take the photo.
7.3. Preserving Metadata During Recovery
When recovering photos, it’s important to preserve the metadata to maintain the integrity of the photos. Some data recovery tools might strip the metadata from the recovered photos, so choose a tool that preserves metadata.
Tips for Preserving Metadata:
- Choose a Metadata-Preserving Tool: Select a data recovery tool that specifically states that it preserves metadata.
- Check Metadata After Recovery: After recovering the photos, check the metadata to ensure it’s still intact.
- Use Metadata Editing Tools: If the metadata is missing or corrupted, you can use metadata editing tools to restore or correct it.
8. Future-Proofing Your Photo Collection
Once you’ve recovered your photos, it’s important to take steps to future-proof your photo collection to prevent future data loss.
8.1. Implement a 3-2-1 Backup Strategy
The 3-2-1 backup strategy is a widely recommended approach to data backup. It involves keeping three copies of your data on two different types of storage media, with one copy stored offsite.
Applying the 3-2-1 Strategy to Photos:
- Three Copies: Keep three copies of your photos: one on your computer or mobile device, one on an external hard drive or NAS device, and one in the cloud (e.g., Google Photos, Dropbox, or OneDrive).
- Two Different Types of Storage Media: Use two different types of storage media, such as a hard drive and a cloud storage service.
- One Copy Offsite: Store one copy of your photos offsite, such as in a different building or in a secure cloud storage location.
8.2. Regularly Test Your Backups
It’s not enough to simply create backups. You should also regularly test your backups to ensure they’re working correctly.
Tips for Testing Backups:
- Restore a Few Files: Periodically restore a few files from your backups to ensure they can be recovered.
- Verify Data Integrity: Check the restored files to ensure they’re not corrupted or damaged.
- Document the Process: Document the backup and restoration process to make it easier to repeat in the future.
8.3. Consider Professional Archiving Services
For valuable or irreplaceable photos, consider using professional archiving services. These services specialize in preserving digital photos for the long term, using specialized storage media and environmental controls.
Benefits of Professional Archiving Services:
- Long-Term Preservation: Professional archiving services use storage media and environmental controls designed to preserve digital photos for decades or even centuries.
- Data Migration: Archiving services can migrate your photos to new storage media as technology evolves, ensuring they remain accessible.
- Disaster Recovery: Archiving services can provide disaster recovery services to protect your photos from fire, flood, or other disasters.
9. Google Photos Alternatives
While Google Photos is a popular choice for photo storage and sharing, there are several alternatives to consider.
9.1. Cloud-Based Alternatives
- iCloud Photos: Apple’s cloud-based photo storage service, tightly integrated with iOS and macOS devices.
- Microsoft OneDrive: Microsoft’s cloud storage service, which includes photo storage and sharing features.
- Dropbox: A popular cloud storage service that can be used to store and share photos.
- Amazon Photos: Amazon’s cloud-based photo storage service, which offers unlimited photo storage for Amazon Prime members.
9.2. Self-Hosted Alternatives
- Nextcloud: An open-source, self-hosted cloud storage platform that allows you to store and share photos.
- Seafile: Another open-source, self-hosted cloud storage platform with photo storage and sharing features.
9.3. Local Storage Alternatives
- External Hard Drives: A simple and affordable way to store photos locally.
- NAS (Network-Attached Storage): A centralized storage location for all your devices on your home network.
Each of these services provides different levels of storage and security, so it’s important to evaluate each based on your individual needs.
10. Frequently Asked Questions (FAQ)
Here are some frequently asked questions about recovering photos on Google Photos:
Q1: How long do photos stay in the Google Photos Trash?
Photos and videos stay in the Google Photos Trash for 60 days before being permanently deleted.
Q2: Can I recover photos that have been permanently deleted from Google Photos?
Recovering permanently deleted photos is more challenging, but not always impossible. You can try using Google Takeout, third-party data recovery software, or contacting Google Support.
Q3: How do I prevent photo loss in Google Photos?
To prevent photo loss, regularly back up your photos, organize your photos, be careful when deleting, secure your Google account, and understand Google Photos settings.
Q4: What is Google Takeout and how can it help me recover photos?
Google Takeout allows you to download a copy of your data from various Google services, including Google Photos. Even if photos have been permanently deleted from Google Photos, there’s a small chance they might still be included in your Google Takeout archive.
Q5: What is metadata and why is it important for photo recovery?
Metadata is data about data. In the context of photos, metadata includes information such as the date, time, location, camera settings, and copyright information. Metadata can be invaluable in recovering and organizing your photos.
Q6: What is the 3-2-1 backup strategy and how can I apply it to my photos?
The 3-2-1 backup strategy involves keeping three copies of your data on two different types of storage media, with one copy stored offsite. To apply this strategy to your photos, keep one copy on your computer or mobile device, one on an external hard drive or NAS device, and one in the cloud.
Q7: What are some alternatives to Google Photos for photo storage and sharing?
Some alternatives to Google Photos include iCloud Photos, Microsoft OneDrive, Dropbox, Amazon Photos, Nextcloud, and Seafile.
Q8: Can data recovery software recover permanently deleted photos from my device?
Yes, in some cases, third-party data recovery software might be able to recover permanently deleted photos from your device’s storage. However, success is not guaranteed.
Q9: How do I stop Google Photos from syncing and potentially deleting photos from other devices?
To stop syncing Google Photos, go to the Google Photos settings on your device and turn off the “Back up & sync” option.
Q10: What should I do immediately after realizing I’ve accidentally deleted a photo from Google Photos?
Immediately check the Google Photos Trash/Bin to see if the photo is there. If it is, restore it right away. Also, stop syncing Google Photos to prevent the deletion from propagating to other devices.
We hope this comprehensive guide has been helpful in understanding how to recover photos on Google Photos. Remember, prevention is always better than cure, so take steps to protect your precious memories.
Ready to learn more about photography and keep your photos safe? Visit dfphoto.net for detailed tutorials, stunning photo collections, and a vibrant photography community in the USA. Discover expert guides, explore beautiful images, and connect with fellow photography enthusiasts today.