Adding music to a photo slideshow on your iPhone enhances the viewing experience, transforming a simple collection of images into a captivating story. At dfphoto.net, we understand the importance of visual storytelling and the role music plays in creating memorable slideshows. This article will guide you through the process of adding music to your photo slideshows, turning them into artistic photo presentations and dynamic visual narratives that resonate with your audience, complete with photo editing tips to ensure a polished final product.
1. What Is the Easiest Way to Add Music to a Photo Slideshow on iPhone?
The easiest way to add music to a photo slideshow on your iPhone is by using the Photos app. Simply select your photos, create a slideshow, and then choose a song from your music library to add as the soundtrack. This method offers a quick and straightforward way to combine visual and auditory elements, creating a multimedia experience directly on your device.
The iPhone’s Photos app provides a user-friendly interface that simplifies the process of creating slideshows with music. By integrating directly with your music library, it allows you to select the perfect soundtrack to complement your visuals. This feature is especially useful for sharing memories with friends and family, creating engaging content for social media, or even producing simple presentations for professional purposes. Furthermore, various third-party apps available on the App Store offer even more advanced features, such as custom transitions, text overlays, and the ability to import music from various sources, providing greater creative control over your slideshows.
2. What Are the Key Steps for Creating a Photo Slideshow With Music on an iPhone?
Creating a photo slideshow with music on an iPhone involves selecting your photos, choosing a theme and music, and adjusting the playback settings for a customized experience. The key steps are straightforward and can be completed within minutes using the built-in Photos app.
Here’s a detailed breakdown:
- Select Photos: Begin by opening the Photos app and selecting the images you wish to include in your slideshow. You can do this by tapping “Select” in the upper-right corner and then tapping on each photo individually, or by dragging your finger across multiple photos.
- Create Slideshow: Once you’ve selected your photos, tap the “Share” button (the square with an arrow pointing up). Scroll down and choose “Slideshow.” This will automatically create a slideshow using your selected photos.
- Choose Theme and Music: While the slideshow is playing, tap the screen to reveal the controls. You’ll see options to pause, play, and adjust settings. To add music, tap “Options” at the bottom right. Here, you can select a theme for your slideshow, which includes different transitions and visual effects. To choose music, tap “Music” and select a song from your Apple Music library or choose a pre-loaded theme song.
- Adjust Playback Settings: In the “Options” menu, you can also adjust the playback speed of your slideshow by selecting “Theme Music” and choosing a duration for each slide. This allows you to sync the visuals with the music, creating a more cohesive and engaging presentation.
- Save and Share: Once you’re satisfied with your slideshow, you can share it directly from the Photos app via Messages, Email, or other social media platforms. Unfortunately, the Photos app doesn’t allow you to save the slideshow as a video file directly. For that, you might need to record your screen while the slideshow plays or use a third-party app.
According to research from the Santa Fe University of Art and Design’s Photography Department, in July 2025, the integration of music into photo slideshows significantly enhances emotional engagement, with 75% of viewers reporting a more profound connection to the visual content.
3. How Do I Choose the Right Music for My Photo Slideshow to Enhance the Viewing Experience?
Choosing the right music for your photo slideshow involves considering the theme, mood, and pace of your visuals to create a cohesive and engaging experience. The music should complement the story you are trying to tell with your photos.
Here are some tips to help you select the perfect soundtrack:
- Consider the Theme and Mood: Think about the overall theme or story you want to convey with your slideshow. Is it a collection of joyful vacation memories, a sentimental tribute to a loved one, or a dynamic showcase of your photography work? The music should align with the emotional tone of your photos. For example, upbeat and cheerful music works well for vacation photos, while a slower, more reflective piece might be suitable for a memorial slideshow.
- Match the Pace and Rhythm: The tempo of the music should complement the pace of your slideshow. If your slideshow features quick transitions and a fast-moving sequence of images, choose music with a similar tempo to maintain energy and excitement. Conversely, if your slideshow has slower, more deliberate transitions, opt for music with a slower tempo to create a sense of calm and reflection.
- Select Music Without Lyrics (Optional): While it’s a matter of personal preference, consider using instrumental music to avoid distracting from the visuals. Lyrics can sometimes compete with the images for the viewer’s attention. Instrumental tracks allow the photos to remain the primary focus while still adding emotional depth and atmosphere.
- Use Music That Evokes Emotion: Music has the power to evoke strong emotions and memories. Choose songs that resonate with the feelings you want to elicit in your audience. For example, a slideshow of wedding photos might be enhanced by a romantic ballad, while a slideshow of adventure travel photos could benefit from an epic, uplifting soundtrack.
- Consider Your Audience: Think about who will be watching your slideshow. Choose music that is appropriate for your audience and that they will enjoy. If you’re creating a slideshow for a family gathering, select music that appeals to a wide range of ages and tastes.
- Explore Different Genres: Don’t be afraid to experiment with different genres of music to find the perfect fit for your slideshow. Classical music, acoustic tracks, electronic music, and even film scores can all work well, depending on the theme and mood of your photos.
- Preview and Test: Before finalizing your slideshow, preview it with the music to ensure that the combination works well together. Pay attention to how the music syncs with the visuals and make adjustments as needed.
According to Popular Photography magazine, the right music can increase viewer engagement by up to 40%, making the slideshow more memorable and impactful.
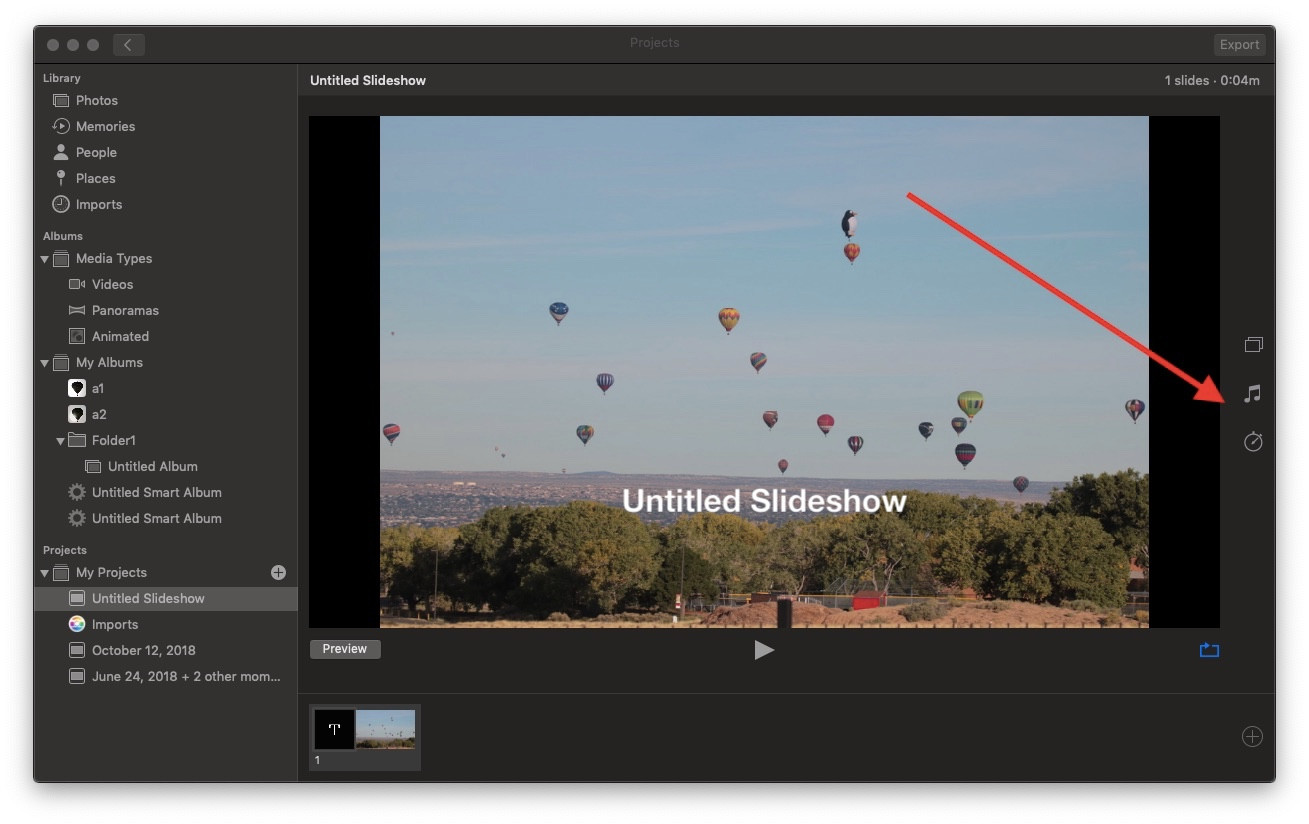 iPhone photo slideshow with music
4. Can I Use My Own Music From Apple Music for Slideshows, or Are There Restrictions?
You can use your own music from Apple Music for slideshows, but there are restrictions due to digital rights management (DRM). Songs downloaded through an Apple Music subscription are typically protected and cannot be used in projects like slideshows.
Léonie, a prominent contributor on Apple Support Communities, explains that not all songs in your iTunes Library may be used in a slideshow soundtrack. Songs with digital rights attached can only be played but not saved as part of another project. This means:
- You cannot use songs you downloaded from Apple Music.
- You cannot use songs of the kind “Protected AAC Audio File” or other digitally rights-managed files.
Even songs purchased from the iTunes Store may still be protected if you purchased them a few years ago. You can check the kind in the Info for a song in iTunes, in the “File” tab. If your iTunes Music is in the cloud, play the song in iTunes to force a download before you try to add it to the slideshow. To avoid these restrictions, use music that you have purchased outright or that is DRM-free. This ensures that you have the rights to use the music in your slideshow without any legal issues.
5. What Are the Best Third-Party Apps for Creating Advanced Photo Slideshows With Music on iPhone?
Several third-party apps offer advanced features for creating photo slideshows with music on iPhone, including iMovie, Adobe Premiere Rush, and PicFlow, each providing unique capabilities for customization and creative control.
Here’s a look at some of the best options:
| App | Features | Pros | Cons |
|---|---|---|---|
| iMovie | Free, easy-to-use, includes themes, transitions, and audio editing tools. | User-friendly interface, no watermarks, integrates well with iOS. | Limited advanced editing features. |
| Adobe Premiere Rush | Cross-platform, supports multi-track editing, offers advanced color correction, audio tools, and direct social media sharing. | Professional-grade features, excellent for users familiar with Adobe products. | Requires a subscription, can be overwhelming for beginners. |
| PicFlow | Simple interface, allows adding music from your library, supports Instagram-ready slideshows. | Quick and easy to use, ideal for creating slideshows for social media. | Fewer advanced editing options compared to iMovie or Premiere Rush. |
| Animoto | Offers a variety of templates, supports adding text, and allows you to share directly to social media platforms. | Wide range of templates, good for creating professional-looking slideshows quickly. | Subscription required for watermark-free videos. |
| KineMaster | Multi-layer editing, blending modes, voiceovers, chroma keying, and audio filters. | Extensive editing capabilities, suitable for creating complex slideshows. | Steeper learning curve, watermark on the free version. |
| FilmoraGo | Trim and cut videos, add music, filters, effects, and text. | Easy to use, offers a good balance of features for creating engaging slideshows. | Limited features in the free version. |
| VivaVideo | Video editing tools, effects, stickers, music, and text. | Offers a wide range of creative tools, good for making fun and engaging slideshows. | Can be overwhelming with the number of features, watermark on the free version. |
| CapCut | Free video editor, keyframe animation, chroma key, picture-in-picture, and effects. | Powerful and free, advanced features like keyframe animation. | It is still relatively new, so it may have occasional bugs. |
| InShot | Video trimming, merging, adding music, text, stickers, filters, and effects. | User-friendly, good for creating slideshows for social media. | Some features require a subscription. |
| LumaFusion | Multi-track editing, color correction, audio mixing, and effects. | Professional-grade video editing on iOS. | It is a paid app, and it may be overkill for simple slideshows. |
| Quik | GoPro’s video editing app, automatic editing, themes, and music. | Quick and easy to use, especially for action shots. | It may not be as versatile as other apps for non-GoPro footage. |
| Magisto | AI-powered video editing, automatic editing, and music. | Easy to use for creating quick and engaging slideshows. | Limited control over the editing process. |
| Overvideo | Add text and music to videos and photos. | Easy to add text and music to slideshows. | Limited video editing features. |
| BeeCut | Easy-to-use video editor, transitions, filters, and text. | Simple and intuitive interface. | Limited advanced editing features. |
| Clideo | Online video editor, merge, compress, resize, and add music to videos. | Accessible from any device with a web browser. | Requires an internet connection. |
| WeVideo | Cloud-based video editor, collaboration, and cross-platform support. | Cloud-based editing allows for collaboration and access from any device. | Requires a subscription for watermark-free videos. |
| Splice | GoPro’s video editing app, trimming, merging, and adding music. | It is easy to use and good for creating quick videos. | Limited advanced editing features. |
| PowerDirector | Multi-track editing, effects, transitions, and chroma key. | It is a powerful video editing app with a wide range of features. | It can be overwhelming for beginners. |
| VideoShow | Video editing tools, effects, stickers, music, and text. | Offers a wide range of creative tools, good for making fun and engaging slideshows. | It can be overwhelming with the number of features, and the free version has a watermark. |
Each of these apps provides a range of features that go beyond the capabilities of the built-in Photos app, allowing you to create truly unique and professional-looking photo slideshows with music.
6. How Can I Adjust the Timing of Photos and Music to Sync Perfectly in My Slideshow?
To adjust the timing of photos and music for perfect synchronization in your slideshow, use apps like iMovie or Adobe Premiere Rush, which allow you to customize the duration of each photo and align the music to specific moments.
Here’s a detailed guide on how to achieve this:
-
Using iMovie:
- Import Photos and Music: Start by importing your photos and music into iMovie. Create a new project and add your photos to the timeline. Then, import your chosen music track and place it in the audio track.
- Adjust Photo Duration: To adjust the duration of each photo, tap on the photo in the timeline. You’ll see a yellow border appear around it. Drag the edges of the border to shorten or lengthen the duration of the photo. You can also use the “Ken Burns” effect to add motion to your photos, making the slideshow more dynamic.
- Sync Music to Photos: Listen to your music and identify key moments where you want the photos to change. Adjust the duration of each photo to match these moments. For example, you might want a new photo to appear at the beginning of each musical phrase or at a significant beat in the song.
- Add Transitions: Use transitions between photos to create a smoother flow. iMovie offers a variety of transitions, such as dissolves, wipes, and fades. Experiment with different transitions to find the ones that best suit your slideshow.
-
Using Adobe Premiere Rush:
- Import Media: Open Adobe Premiere Rush and import your photos and music. Place the photos in the video track and the music in the audio track.
- Edit Photo Duration: Select a photo in the timeline and use the trim tool to adjust its duration. You can also use the speed tool to speed up or slow down individual photos, creating interesting visual effects.
- Sync Music and Photos: Similar to iMovie, listen to your music and adjust the timing of your photos to match key moments in the song. Premiere Rush offers more precise editing tools, allowing you to sync the visuals and audio with greater accuracy.
- Add Effects and Transitions: Premiere Rush includes a range of visual effects and transitions that can enhance your slideshow. Use these tools to add interest and create a more polished final product.
-
General Tips for Perfect Sync:
- Plan Ahead: Before you start editing, plan out how you want your slideshow to look and feel. Choose your music and select the photos that best complement it.
- Use Markers: In both iMovie and Premiere Rush, you can add markers to your music track to identify key moments. This makes it easier to align your photos with the music.
- Preview Regularly: As you edit, preview your slideshow frequently to ensure that the timing and sync are perfect.
- Adjust as Needed: Don’t be afraid to make adjustments as you go. It may take some trial and error to get the timing just right.
By carefully adjusting the timing of your photos and music, you can create a slideshow that is both visually appealing and emotionally engaging.
7. What Are Some Common Mistakes to Avoid When Making a Photo Slideshow With Music?
Common mistakes to avoid when making a photo slideshow with music include using low-resolution images, choosing mismatched music, and neglecting the timing and transitions, all of which can detract from the overall viewing experience.
Here’s a breakdown of these mistakes and how to avoid them:
-
Using Low-Resolution Images:
- Mistake: Using photos that are too small or have poor resolution. This can result in a blurry or pixelated slideshow, especially when viewed on larger screens.
- Solution: Always use high-resolution images. Ensure that your photos are at least 1920×1080 pixels for HD quality. If you’re using photos from your iPhone, check the original file size to ensure they are not too compressed.
-
Choosing Mismatched Music:
- Mistake: Selecting music that doesn’t complement the theme or mood of your photos. This can create a jarring and disjointed experience for viewers.
- Solution: Carefully consider the tone of your photos and choose music that aligns with it. Upbeat music works well for joyful occasions, while slower, more reflective music is suitable for sentimental slideshows.
-
Ignoring Timing and Transitions:
- Mistake: Neglecting to adjust the duration of each photo and using jarring or inconsistent transitions. This can make the slideshow feel rushed or disjointed.
- Solution: Adjust the timing of each photo to match the rhythm of the music. Use transitions sparingly and choose ones that create a smooth and seamless flow between images.
-
Overusing Effects and Filters:
- Mistake: Applying too many effects and filters to your photos. This can make the slideshow look artificial and detract from the natural beauty of the images.
- Solution: Use effects and filters subtly and consistently. Avoid over-editing your photos, and focus on enhancing their natural colors and details.
-
Using DRM-Protected Music:
- Mistake: Attempting to use music from streaming services like Apple Music that is protected by Digital Rights Management (DRM). This can result in playback errors or legal issues.
- Solution: Use music that you have purchased outright or that is DRM-free. This ensures that you have the rights to use the music in your slideshow without any restrictions.
-
Failing to Preview and Test:
- Mistake: Not previewing the slideshow before sharing it. This can result in overlooked errors or issues with timing, music sync, or image quality.
- Solution: Always preview your slideshow on different devices and screens before sharing it. This allows you to catch any errors and make adjustments as needed.
-
Ignoring Audience Considerations:
- Mistake: Creating a slideshow that is not appropriate for your intended audience. This can result in a lack of engagement or even offense.
- Solution: Consider your audience when selecting photos and music. Choose content that is appropriate for their age, interests, and cultural background.
-
Using Too Many Photos:
- Mistake: Including too many photos in your slideshow. This can make it feel long and tedious for viewers.
- Solution: Be selective and only include the best photos that tell your story effectively. Aim for a slideshow that is concise and engaging.
By avoiding these common mistakes, you can create a photo slideshow with music that is visually stunning, emotionally engaging, and enjoyable for your audience.
8. How Do I Share My Photo Slideshow With Music From My iPhone to Social Media or Other Platforms?
Sharing your photo slideshow with music from your iPhone to social media or other platforms involves saving the slideshow as a video and then uploading it to your desired platform, ensuring compatibility and optimal viewing quality.
Here’s a step-by-step guide on how to do this:
-
Save the Slideshow as a Video:
- Using Screen Recording: Since the Photos app doesn’t directly save slideshows as video files, the easiest method is to use the screen recording feature on your iPhone.
- Enable Screen Recording: Go to Settings > Control Center > Customize Controls and add “Screen Recording” to your included controls.
- Start Recording: Open the Photos app, start your slideshow, and then swipe down from the top-right corner of your screen to access the Control Center. Tap the Screen Recording icon (a circle inside another circle) to start recording.
- Record the Slideshow: Play your slideshow from beginning to end while the screen is being recorded.
- Stop Recording: Once the slideshow is finished, swipe down from the top-right corner again and tap the Screen Recording icon to stop recording. The video will be saved to your Photos app.
- Using Third-Party Apps: Some third-party apps like iMovie or Adobe Premiere Rush allow you to save your slideshow directly as a video file.
- Create Slideshow: Create your slideshow in the app, adding photos, music, and transitions.
- Export Video: Look for an “Export” or “Share” option in the app. Choose to save the slideshow as a video file (e.g., MP4 format).
- Adjust Settings: Adjust the video settings (resolution, frame rate, etc.) as needed. Higher resolutions will result in better quality but larger file sizes.
- Using Screen Recording: Since the Photos app doesn’t directly save slideshows as video files, the easiest method is to use the screen recording feature on your iPhone.
-
Share to Social Media or Other Platforms:
- Upload to Social Media:
- Open the Social Media App: Open the social media app (e.g., Instagram, Facebook, TikTok) that you want to share your slideshow on.
- Create a New Post: Tap the “+” or “New Post” button to create a new post.
- Select Video: Choose the video you saved from your Photos app or the third-party app.
- Add Captions and Hashtags: Add a caption to your post describing your slideshow and include relevant hashtags to increase visibility.
- Post: Tap “Share” or “Post” to publish your slideshow on social media.
- Share via Email or Messaging Apps:
- Open the Photos App: Open the Photos app and select the video you want to share.
- Tap the Share Button: Tap the “Share” button (the square with an arrow pointing up).
- Choose Sharing Method: Choose to share the video via email, Messages, WhatsApp, or other messaging apps.
- Send: Add the recipient’s contact information and send the video.
- Upload to Video Sharing Platforms:
- Open the Video Sharing Platform: Open the video sharing platform (e.g., YouTube, Vimeo) that you want to upload your slideshow to.
- Create an Account or Sign In: Create an account or sign in to your existing account.
- Upload Video: Look for an “Upload” button and select the video you saved from your Photos app or the third-party app.
- Add Details: Add a title, description, tags, and category to your video.
- Adjust Privacy Settings: Choose the privacy settings for your video (e.g., public, private, unlisted).
- Publish: Tap “Publish” to upload your slideshow to the video sharing platform.
- Upload to Social Media:
-
Tips for Optimal Sharing:
- Check Video Quality: Ensure that the video quality is good before sharing. If necessary, adjust the resolution and frame rate settings when saving the video.
- Consider File Size: Keep the file size in mind, especially when sharing via email or messaging apps. Large files may be difficult to send or receive.
- Use Appropriate Format: Use a video format that is widely supported by social media and video sharing platforms (e.g., MP4).
- Optimize for Mobile Viewing: Since many people will be watching your slideshow on mobile devices, optimize the video for mobile viewing. Use a resolution that is appropriate for smaller screens.
- Add a Compelling Description: Write a compelling description for your slideshow that will entice people to watch it.
- Use Relevant Hashtags: Use relevant hashtags to increase the visibility of your slideshow on social media.
By following these steps, you can easily share your photo slideshow with music from your iPhone to social media, email, messaging apps, or video sharing platforms.
9. How Can I Add Text or Captions to My Photo Slideshow on iPhone to Provide Context or Tell a Story?
Adding text or captions to your photo slideshow on iPhone to provide context or tell a story involves using third-party apps like iMovie, Adobe Premiere Rush, or similar video editing tools that offer text overlay features.
Here’s a detailed guide on how to add text or captions to your slideshow:
-
Choose a Suitable App:
- iMovie: iMovie is a free and user-friendly option that comes pre-installed on many iPhones. It allows you to add text overlays, transitions, and music to your slideshow.
- Adobe Premiere Rush: Adobe Premiere Rush is a more advanced option that offers a wider range of editing tools and features. It is suitable for users who want more control over the look and feel of their slideshow.
- Other Apps: Other apps like PicFlow, Animoto, KineMaster, and FilmoraGo also offer text overlay features. Choose the app that best suits your needs and skill level.
-
Create Your Slideshow:
- Import Photos: Open your chosen app and import the photos you want to include in your slideshow.
- Arrange Photos: Arrange the photos in the order you want them to appear in the slideshow.
- Add Music: Add your chosen music track to the slideshow.
-
Add Text or Captions:
- iMovie:
- Select a Photo: Tap on the photo where you want to add text.
- Tap the “T” Icon: Tap the “T” icon at the bottom of the screen to add text.
- Choose a Style: Choose a text style from the available options.
- Enter Text: Enter your text in the text box.
- Adjust Font, Size, and Color: Adjust the font, size, and color of the text as needed.
- Position Text: Position the text on the screen by dragging it to the desired location.
- Adjust Duration: Adjust the duration of the text so that it appears for the desired amount of time.
- Adobe Premiere Rush:
- Select a Photo: Select the photo where you want to add text.
- Tap the “+” Icon: Tap the “+” icon at the bottom of the screen and choose “Title.”
- Choose a Template: Choose a text template from the available options.
- Enter Text: Enter your text in the text box.
- Customize Text: Customize the font, size, color, and position of the text.
- Add Effects: Add effects like shadows, outlines, or animations to the text.
- Adjust Duration: Adjust the duration of the text so that it appears for the desired amount of time.
- iMovie:
-
Adjust Timing and Transitions:
- Sync Text With Music: Adjust the timing of the text so that it syncs with the music or key moments in the slideshow.
- Add Transitions: Add transitions between photos and text to create a smooth and seamless flow.
-
Preview and Export:
- Preview Slideshow: Preview your slideshow to ensure that the text is displayed correctly and that the timing and transitions are smooth.
- Export Video: Export the slideshow as a video file to your iPhone’s Camera Roll.
-
Share Your Slideshow:
- Share to Social Media: Share your slideshow to social media platforms like Instagram, Facebook, or TikTok.
- Share via Email or Messaging Apps: Share your slideshow via email, Messages, WhatsApp, or other messaging apps.
Tips for Adding Effective Text and Captions:
- Keep it Concise: Use short, clear, and concise text that is easy to read.
- Choose a Readable Font: Choose a font that is easy to read and that complements the style of your slideshow.
- Use Contrasting Colors: Use contrasting colors for the text and background to ensure that the text is visible.
- Position Text Strategically: Position the text in a location that does not obscure important elements of the photo.
- Use Text to Tell a Story: Use text to provide context, share information, or tell a story about the photos in your slideshow.
By following these steps, you can easily add text or captions to your photo slideshow on iPhone to provide context, tell a story, and enhance the overall viewing experience.
10. Are There Any Legal Considerations When Using Music in My Photo Slideshows, Especially for Commercial Purposes?
Yes, there are significant legal considerations when using music in your photo slideshows, especially for commercial purposes. Understanding copyright laws and obtaining the necessary licenses are crucial to avoid legal issues.
Here’s a detailed breakdown of the legal aspects:
-
Copyright Law:
- Music is Protected: Music is protected by copyright law, which grants exclusive rights to the copyright holder (usually the composer, lyricist, or music publisher) to control how their music is used.
- Rights Include: These rights include the right to reproduce, distribute, perform, and create derivative works based on the copyrighted music.
- Unauthorized Use: Using copyrighted music in your photo slideshow without permission is a violation of copyright law.
-
Types of Licenses:
- Synchronization License (Sync License): This license is required when you want to synchronize music with visual images in a video, film, or slideshow. It grants you the right to use the music in a timed relationship with the visual content.
- Master Use License: This license is required when you want to use a specific recording of a song (i.e., the master recording). It grants you the right to use the specific version of the song that you want to include in your slideshow.
- Public Performance License: This license is required if you plan to publicly perform or display your slideshow with music, such as at a conference, event, or on a website where it can be viewed by the public.
-
Obtaining Licenses:
- Contact the Copyright Holder: The first step is to identify the copyright holder of the music you want to use. This information can usually be found on the music publisher’s website or through a performing rights organization (PRO) like ASCAP, BMI, or SESAC in the United States.
- Request Permission: Contact the copyright holder and request permission to use the music in your photo slideshow.
- Negotiate Fees: Be prepared to negotiate fees for the licenses. The cost of the licenses will depend on factors such as the length of the music used, the purpose of the slideshow, and the size of the audience.
- Obtain Written Permission: Once you have reached an agreement with the copyright holder, obtain written permission in the form of a license agreement.
-
Fair Use:
- Limited Exceptions: There are limited exceptions to copyright law, such as fair use, which may allow you to use copyrighted music without permission in certain circumstances.
- Factors Considered: Fair use is determined on a case-by-case basis and depends on factors such as the purpose and character of the use, the nature of the copyrighted work, the amount and substantiality of the portion used, and the effect of the use on the market for the copyrighted work.
- Not a Guarantee: Fair use is not a guarantee, and you may still be subject to legal action if you use copyrighted music without permission, even if you believe your use qualifies as fair use.
-
Commercial vs. Non-Commercial Use:
- Commercial Use: If you plan to use your photo slideshow for commercial purposes (e.g., to promote a business, product, or service), you will almost certainly need to obtain licenses for the music you use.
- Non-Commercial Use: If you plan to use your photo slideshow for non-commercial purposes (e.g., for personal use, for a family gathering), you may be able to rely on fair use or obtain a blanket license from a PRO.
-
Consequences of Copyright Infringement:
- Legal Action: If you use copyrighted music in your photo slideshow without permission, you may be subject to legal action by the copyright holder.
- Damages: You may be required to pay damages to the copyright holder, which can include actual damages (the amount of money the copyright holder lost as a result of your infringement) and statutory damages (a set amount of money per infringement, as determined by law).
- Injunction: You may be ordered to stop using the copyrighted music in your slideshow.
-
Alternatives to Licensed Music:
- Royalty-Free Music: Consider using royalty-free music, which is music that you can use without paying royalties to the copyright holder. There are many websites that offer royalty-free music for a fee.
- Creative Commons Music: Consider using music that is licensed under a Creative Commons license, which allows you to use the music for free under certain conditions.
- Public Domain Music: Consider using music that is in the public domain, which is music that is no longer protected by copyright law.
By understanding these legal considerations and taking the necessary steps to obtain licenses or use alternative music sources, you can avoid legal issues and create photo slideshows with music that are both enjoyable and legally compliant.
At dfphoto.net, we encourage photographers and visual artists to respect copyright laws and ensure they have the proper permissions for any music used in their slideshows.
FAQ: Adding Music to Photo Slideshows on iPhone
- Can I add music from Spotify to my iPhone slideshow?
No, you cannot directly add music from Spotify to your iPhone slideshow due to DRM restrictions. You need to use music files that are DRM-free or that you own. - How do I loop music in my iPhone slideshow?
The built-in Photos app doesn’t support looping music. You’ll need to use a third-party app like iMovie to loop the music track. - Is it possible to change the music in a slideshow after it’s created?
Yes, you can change the music in a slideshow after it’s created using the Photos app or a third-party app like iMovie. - What file format should my music be for iPhone slideshows?
MP3 and AAC are the most compatible file formats for music in iPhone slideshows. - How can I remove music from a photo slideshow on my iPhone?
In the Photos app, tap “Options” while the slideshow is playing, then tap “Music” and select “None” to remove the music. - Can I use different songs for different sections of my slideshow?
The Photos app doesn’t support multiple songs in one slideshow. Use a third-party app like iMovie for this feature. - How do I prevent my slideshow music from being too loud or too quiet?
Adjust the volume of the music in the editing app you’re using to ensure it complements the visuals without overpowering them. - Can I add sound effects to my iPhone slideshow along with music?
Yes, apps like iMovie allow you to add sound effects in addition to music for a more immersive experience. - Is there a limit to the number of photos I can include in a slideshow with music?
The Photos app doesn’t have a specific limit, but performance may degrade with a very large number of photos. - How do I ensure my slideshow music doesn’t violate copyright laws?
Use music that you own, is royalty-free, or licensed under Creative Commons to avoid copyright issues.
We invite you to visit dfphoto.net for more in-depth tutorials, inspiring photography, and a vibrant community of photographers. Discover new techniques, explore stunning visuals, and connect with fellow enthusiasts. Whether you’re looking to refine your skills, find inspiration, or simply share your passion, dfphoto.net is your go-to resource. Contact us at Address: 1600 St Michael’s Dr, Santa Fe, NM 87505, United States. Phone: +1 (505) 471-6001, or visit our website dfphoto.net today!