Transferring iPhone photos to a PC running Windows 7 can seem tricky, but it’s a straightforward process with several methods available. At dfphoto.net, we are committed to giving you effective solutions to ensure your precious memories are safely backed up and accessible on your computer. This guide explores various techniques, addressing common issues and offering tips for a smooth photo transfer experience, with the goal to give you the tools and insights you need to easily manage your iPhone photos on your Windows 7 PC using several photo management techniques and digital image transfer protocols.
1. Understanding the User’s Search Intent
Before diving into the methods, let’s clarify the search intent behind “How To Transfer Iphone Photos To Pc With Windows 7.” Users typically want to:
- Find a simple, step-by-step guide: They need clear, easy-to-follow instructions for transferring photos.
- Troubleshoot common issues: They might be facing problems like photos not showing up or errors during transfer.
- Discover alternative methods: They are looking for different ways to transfer photos, including using iCloud, third-party software, or other cloud services.
- Ensure photo quality is maintained: They want to avoid losing image quality during the transfer process.
- Learn how to manage photos on their PC: They need tips on organizing, editing, and backing up photos after the transfer.
2. Direct Transfer via USB Cable
The most direct and often simplest method is using a USB cable. Here’s how:
2.1 Connecting Your iPhone
- Connect: Plug your iPhone into your Windows 7 PC using a USB cable.
- Trust This Computer: On your iPhone, a prompt may appear asking “Trust This Computer?”. Tap “Trust.” If you’ve previously trusted the computer, this prompt might not appear.
- iPhone as Storage: Your PC should recognize your iPhone as an external storage device.
2.2 Accessing Photos
- Open Windows Explorer: Click the Start button and select “Computer” (or “This PC”).
- Locate Your iPhone: Look for your iPhone listed under “Portable Devices” or “Devices with Removable Storage.” It might be labeled with your iPhone’s name.
- Navigate to DCIM Folder: Double-click on your iPhone’s icon. You should see a folder named “Internal Storage.” Open it, and you’ll find one or more folders named “DCIM” (Digital Camera Images). These folders contain your photos and videos. The DCIM folder is a standard naming convention for digital cameras, including the iPhone’s camera. Inside the DCIM folder, you’ll find subfolders like “100APPLE,” “101APPLE,” etc., where your photos and videos are stored. The numbering helps organize files as you take more pictures.
 Accessing DCIM folder in Windows Explorer to transfer iPhone photos to PC
2.3 Copying Photos
- Select Photos: Open the DCIM folder and browse through the subfolders to find the photos you want to transfer.
- Copy and Paste: Select the desired photos and videos, then right-click and choose “Copy.”
- Choose Destination: Navigate to the folder on your PC where you want to save the photos (e.g., “Pictures” folder). Right-click in the folder and choose “Paste.”
- Wait: Allow the transfer to complete. The time it takes will depend on the number and size of the files.
2.4 Troubleshooting Direct Transfer
- iPhone Not Recognized:
- Ensure the USB cable is properly connected to both your iPhone and PC.
- Try a different USB port on your PC.
- Restart both your iPhone and PC.
- Update your iPhone’s iOS to the latest version.
- Install the latest version of iTunes (even if you don’t use it for music, it provides necessary drivers).
- Missing Photos:
- Make sure your iPhone is unlocked when connected to the PC. An iPhone security feature prevents access to photos if the device is locked.
- Check the “Recently Deleted” album on your iPhone, as photos might have been accidentally deleted.
- Ensure that iCloud Photos is not set to “Optimize iPhone Storage.” If it is, full-resolution photos might not be stored on your device.
3. Using iCloud for Windows
iCloud for Windows allows you to automatically sync your photos between your iPhone and PC. This is a convenient method, but it requires an active iCloud account and sufficient iCloud storage.
3.1 Setting Up iCloud for Windows
- Download iCloud for Windows: Visit the Apple website and download iCloud for Windows.
- Install: Run the downloaded file and follow the on-screen instructions to install iCloud for Windows.
- Sign In: Launch iCloud for Windows and sign in with your Apple ID and password.
- Select Photos: In the iCloud for Windows control panel, check the box next to “Photos.”
- Options: Click the “Options” button next to “Photos.” Here, you can choose the location on your PC where iCloud Photos will be stored. You can also enable “Download new photos and videos to my PC” and “Keep high-efficiency original.”
3.2 Accessing Photos
- iCloud Photos Folder: Your photos will be automatically downloaded to the iCloud Photos folder on your PC. The default location is usually in your “Pictures” folder.
- Photo Stream: If you have “My Photo Stream” enabled on your iPhone and in iCloud for Windows, new photos will automatically appear in the Photo Stream folder.
3.3 Troubleshooting iCloud for Windows
- Photos Not Syncing:
- Ensure your iPhone is connected to Wi-Fi. iCloud syncing requires an internet connection.
- Check your iCloud storage. If you’re running out of space, new photos won’t sync.
- Make sure iCloud Photos is enabled on both your iPhone and in iCloud for Windows.
- Restart both your iPhone and PC.
- Sign out of iCloud on both devices and sign back in.
- Slow Syncing:
- Large photo libraries can take a long time to sync. Be patient and allow the process to complete.
- Close unnecessary apps on your iPhone and PC to free up bandwidth.
4. Using Third-Party Software
Several third-party software options are available for transferring photos from iPhone to PC. These tools often offer additional features like photo management, editing, and conversion. One example mentioned is Apowersoft Phone Manager.
4.1 Apowersoft Phone Manager
- Download and Install: Download Apowersoft Phone Manager from the Apowersoft website and install it on your PC.
- Connect iPhone: Launch the software and connect your iPhone to your PC using a USB cable.
- Trust: Tap “Trust” on your iPhone if prompted.
- Manage Photos: In Apowersoft Phone Manager, navigate to the “Pictures” tab.
- Export: Select the photos you want to transfer and click “Export.” Choose a destination folder on your PC.
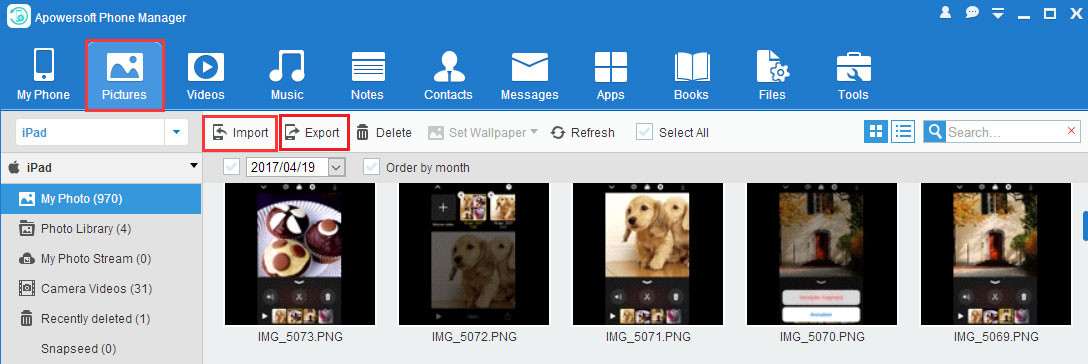 Apowersoft Phone Manager interface for transferring iPhone photos to PC
4.2 Other Third-Party Options
- WinX MediaTrans: This software is known for its fast transfer speeds and ability to handle large photo libraries. According to user reviews, WinX MediaTrans efficiently detects and transfers photos, even when other methods fail.
- iMazing: iMazing offers advanced features like backing up and restoring iOS devices, as well as transferring photos, music, and other files.
- AnyTrans: AnyTrans is another popular option with a user-friendly interface and support for various file types.
4.3 Considerations When Choosing Third-Party Software
- Cost: Some software is free, while others require a paid license.
- Features: Consider what features are important to you, such as photo management, editing, or conversion.
- Compatibility: Ensure the software is compatible with your iPhone model and version of Windows 7.
- Security: Download software from reputable sources to avoid malware or viruses.
5. Addressing Specific User Challenges
Based on user feedback, here are some common challenges and solutions:
5.1 Photos Not Showing Up in DCIM Folder
- Unlock iPhone: Ensure your iPhone is unlocked when connected to the PC. As mentioned earlier, a locked iPhone restricts access to the DCIM folder.
- Check iCloud Settings: If iCloud Photos is enabled with “Optimize iPhone Storage,” full-resolution photos might not be on your device. Download them from iCloud first.
- Restart: Restart your iPhone and PC.
5.2 Transferring HEIC Photos
iPhones running iOS 11 and later capture photos in HEIC (High Efficiency Image File Format) by default. Windows 7 doesn’t natively support HEIC files, so you might encounter issues when transferring them.
- Convert to JPEG: Before transferring, you can set your iPhone to capture photos in the “Most Compatible” format (JPEG) under Settings > Camera > Formats.
- Use a HEIC Converter: Transfer the HEIC files to your PC and use a HEIC converter to convert them to JPEG. Many free online converters are available.
- Install HEIC Codec: You can install a HEIC codec on your Windows 7 PC to enable native support for HEIC files. However, this option might not be reliable or recommended for all users.
5.3 Preventing Photo Loss
- Backup: Regularly back up your iPhone photos to your PC or another storage device.
- Verify Transfer: After transferring photos, verify that they are intact and not corrupted.
- Multiple Copies: Consider keeping multiple copies of your photos in different locations for added security.
6. Best Practices for Photo Management
Once you’ve transferred your iPhone photos to your Windows 7 PC, it’s essential to manage them effectively.
6.1 Organizing Photos
- Create Folders: Create folders based on date, event, or subject.
- Rename Files: Rename your photo files with descriptive names that include the date and subject.
- Tag Photos: Use photo management software to tag your photos with keywords.
6.2 Editing Photos
- Windows Photo Gallery: Windows 7 includes Windows Photo Gallery, which offers basic photo editing features like cropping, adjusting brightness and contrast, and removing red eye.
- Third-Party Software: Consider using third-party photo editing software like Adobe Photoshop Elements or GIMP for more advanced editing capabilities.
6.3 Backing Up Photos
- External Hard Drive: Back up your photos to an external hard drive for safe storage.
- Cloud Storage: Use cloud storage services like Google Drive, Dropbox, or OneDrive to back up your photos online.
- Burn to Disc: Burn your photos to a CD or DVD for archival purposes.
7. Understanding Photo Resolution and Quality
When transferring photos, it’s crucial to maintain the original image quality. Here’s what you need to know:
7.1 Original Resolution
- Check iPhone Settings: Ensure your iPhone camera is set to capture photos at the highest possible resolution. Go to Settings > Camera > Formats and choose “High Efficiency” for HEIF/HEVC format or “Most Compatible” for JPEG format, then check the Photo Quality settings if available.
- Avoid Compression: When transferring photos, avoid using methods that compress the images, as this can reduce quality.
7.2 File Formats
- JPEG: JPEG is a common image format that offers good compression while maintaining reasonable quality. It’s widely supported and suitable for most purposes.
- HEIF/HEIC: HEIF/HEIC is a more efficient image format that offers better compression than JPEG while maintaining similar quality. However, it might not be supported by all devices and software.
- RAW: Some advanced iPhone photography apps allow you to capture photos in RAW format, which preserves the maximum amount of image data. RAW files are larger than JPEGs or HEIFs and require special software for editing.
7.3 Preserving Quality During Transfer
- Avoid Emailing: Emailing photos can often compress them, reducing quality.
- Use Original Files: Always transfer the original photo files from your iPhone to your PC.
- Check File Size: After transferring, check the file size of the photos on your PC to ensure they are similar to the original file sizes on your iPhone.
8. The Importance of Regular Photo Backups
Regularly backing up your iPhone photos is crucial to prevent data loss due to device failure, theft, or accidental deletion.
8.1 Backup Strategies
- 3-2-1 Rule: Follow the 3-2-1 backup rule: Keep three copies of your data, on two different media, with one copy offsite.
- Automated Backups: Set up automated backups to your PC, external hard drive, or cloud storage service.
- Regular Schedule: Create a regular backup schedule and stick to it.
8.2 Backup Options
- iCloud Backup: iCloud automatically backs up your iPhone data, including photos, to the cloud. However, it offers limited free storage, so you might need to purchase additional storage.
- iTunes Backup: You can back up your iPhone to your PC using iTunes. This creates a local backup of your device data.
- Third-Party Backup Software: Several third-party backup software options are available with advanced features like incremental backups and file versioning.
9. Exploring Advanced Techniques
For more advanced users, here are some additional techniques for transferring and managing iPhone photos on a Windows 7 PC:
9.1 Using FTP (File Transfer Protocol)
FTP allows you to transfer files between your iPhone and PC over a network.
- Install FTP Server App: Install an FTP server app on your iPhone (e.g., FTPManager).
- Configure FTP Server: Configure the FTP server app with a username and password.
- Connect from PC: Use an FTP client on your PC (e.g., FileZilla) to connect to your iPhone’s FTP server.
- Transfer Photos: Transfer photos between your iPhone and PC using the FTP client.
9.2 Using WebDAV (Web Distributed Authoring and Versioning)
WebDAV is another protocol for transferring files over a network.
- Install WebDAV Server App: Install a WebDAV server app on your iPhone (e.g., WebDAV Server).
- Configure WebDAV Server: Configure the WebDAV server app with a username and password.
- Connect from PC: Use a WebDAV client on your PC (e.g., Cyberduck) to connect to your iPhone’s WebDAV server.
- Transfer Photos: Transfer photos between your iPhone and PC using the WebDAV client.
9.3 Using Cloud Storage Services
Cloud storage services like Google Drive, Dropbox, and OneDrive can be used to transfer photos between your iPhone and PC.
- Install Cloud Storage App: Install the cloud storage app on your iPhone and PC.
- Upload Photos: Upload photos from your iPhone to the cloud storage service.
- Download Photos: Download photos from the cloud storage service to your PC.
10. Keeping Up With Technological Changes
While Windows 7 is an older operating system, it’s still widely used. However, it’s essential to be aware of technological changes and how they might impact your ability to transfer iPhone photos to your PC.
10.1 Software Updates
- iOS Updates: Keep your iPhone’s iOS updated to the latest version.
- App Updates: Keep your photo transfer apps and software updated to the latest versions.
- Windows Updates: Although Windows 7 is no longer officially supported by Microsoft, consider installing security updates if available.
10.2 Hardware Compatibility
- USB Ports: Ensure your PC’s USB ports are functioning correctly.
- Cables: Use high-quality USB cables for reliable data transfer.
- Storage Devices: Consider upgrading to larger storage devices if you have a large photo library.
10.3 Future-Proofing Your Workflow
- Cloud Storage: Embrace cloud storage services for long-term photo storage and access.
- Newer Operating Systems: Consider upgrading to a newer operating system like Windows 10 or 11 for better compatibility and features.
- Modern Software: Explore modern photo management and editing software that is compatible with the latest file formats and technologies.
FAQ: Transferring iPhone Photos to PC with Windows 7
- Question 1: Why aren’t all my iPhone photos showing up when I connect to my Windows 7 PC?
- Answer: Ensure your iPhone is unlocked, and check iCloud settings to verify full-resolution photos are on your device. Restarting both devices can also help. If iCloud Photos is enabled with “Optimize iPhone Storage”, download them from iCloud first.
- Question 2: How can I transfer HEIC photos from my iPhone to my Windows 7 PC?
- Answer: Convert your iPhone’s camera settings to “Most Compatible” (JPEG) before taking photos or use a HEIC converter after transferring the files.
- Question 3: Is it possible to transfer photos from my iPhone to my Windows 7 PC wirelessly?
- Answer: Yes, using iCloud for Windows, third-party apps, or cloud storage services like Google Drive and Dropbox.
- Question 4: What should I do if my Windows 7 PC doesn’t recognize my iPhone when I plug it in?
- Answer: Verify the USB connection, try a different port, restart both devices, and ensure iTunes is installed for necessary drivers.
- Question 5: How can I ensure that my photos maintain their original quality when transferring from my iPhone to my Windows 7 PC?
- Answer: Use direct transfer via USB, avoid compressing images, and check file sizes to match originals. Use original files and avoid emailing.
- Question 6: What are some good third-party software options for transferring photos from iPhone to PC?
- Answer: Apowersoft Phone Manager, WinX MediaTrans, iMazing, and AnyTrans are popular choices with various features.
- Question 7: How do I set up iCloud for Windows to automatically sync my iPhone photos to my PC?
- Answer: Download and install iCloud for Windows, sign in with your Apple ID, and select “Photos” in the iCloud control panel.
- Question 8: What is the best way to organize my iPhone photos once they are on my Windows 7 PC?
- Answer: Create folders by date, event, or subject, rename files descriptively, and tag photos with keywords using photo management software.
- Question 9: How often should I back up my iPhone photos to my Windows 7 PC?
- Answer: Regularly, following the 3-2-1 rule: three copies of data, on two different media, with one copy offsite.
- Question 10: Where can I find reliable information about the latest techniques for transferring iPhone photos to PC?
- Answer: Trusted tech websites, photography forums, and dfphoto.net are great resources for staying updated on the newest methods and tips.
Conclusion
Transferring iPhone photos to a Windows 7 PC doesn’t have to be a daunting task. Whether you prefer the simplicity of a USB connection, the convenience of iCloud, or the advanced features of third-party software, there’s a method that suits your needs. By understanding the potential challenges and following the best practices outlined in this guide, you can ensure your precious memories are safely backed up and easily accessible on your computer.
Remember to regularly back up your photos and stay informed about the latest technological changes. With the right tools and knowledge, you can confidently manage your iPhone photos on your Windows 7 PC for years to come.
For more in-depth guides, tutorials, and inspiration, visit dfphoto.net. Explore our extensive collection of articles, stunning photo galleries, and a vibrant community of photographers ready to share their expertise. Elevate your photography skills and connect with fellow enthusiasts today. Interested in discovering new photography techniques or showcasing your work? Contact us at Address: 1600 St Michael’s Dr, Santa Fe, NM 87505, United States or call us at Phone: +1 (505) 471-6001. Visit our website dfphoto.net. Your photographic journey awaits! Let your creativity shine with digital imagery and photo management tools.