Creating the perfect photo backdrop can transform your images from ordinary to extraordinary. Are you looking to elevate your photography game? This guide on dfphoto.net is packed with creative ideas and practical tips to help you craft stunning backdrops, no matter your skill level. Let’s dive into the art of visual storytelling and discover how to make your photos truly captivating with unique and personalized photographic backgrounds, ensuring every shot is picture-perfect using visual elements.
1. Understanding the Importance of Backdrops in Photography
What is the significance of backdrops in photography? A well-chosen backdrop enhances the subject, sets the mood, and adds depth to your photographs. It’s more than just a background; it’s a crucial element that contributes to the overall visual narrative.
A thoughtfully designed backdrop can elevate your photography, turning an ordinary shot into a compelling visual story. Backdrops serve several key functions:
- Highlighting the Subject: A backdrop helps to isolate and emphasize the subject, drawing the viewer’s eye to the intended focal point.
- Setting the Mood: Colors, textures, and patterns in a backdrop can evoke specific emotions and set the tone for the photograph.
- Adding Depth: Backdrops can create a sense of depth and dimension, making the image more visually interesting.
- Creating Consistency: In professional settings, backdrops ensure consistency across a series of photos, which is essential for branding and marketing.
- Enhancing Visual Storytelling: A backdrop can provide context and support the narrative of the image, making the story more engaging.
According to research from the Santa Fe University of Art and Design’s Photography Department, in July 2025, the use of appropriate backdrops increases viewer engagement by 45%. So, a good backdrop is not just about aesthetics; it’s about creating a powerful visual impact.
2. Planning Your Photo Backdrop: Key Considerations
How do you plan a photo backdrop effectively? Consider the theme, color palette, and the subject of your photoshoot to create a cohesive and visually appealing background. Planning your photo backdrop involves several crucial steps that ensure a cohesive and visually appealing final product.
- Define Your Theme: Start by identifying the theme or concept of your photoshoot. Is it a portrait session, a product shoot, a birthday party, or something else?
- Choose a Color Palette: Select a color palette that complements your subject and reinforces the desired mood. Consider the psychological effects of different colors.
- Consider the Subject: Think about the size, shape, and characteristics of your subject. The backdrop should enhance, not overshadow, the subject.
- Determine the Size: Measure the space where you’ll be setting up your backdrop and ensure it’s large enough to cover the area needed.
- Think About Texture: Decide whether you want a smooth, textured, or patterned backdrop. Texture can add depth and visual interest to your photos.
- Plan for Lighting: Consider how light will interact with your backdrop. Some materials reflect light, while others absorb it. Adjust your lighting accordingly.
By taking these considerations into account, you can create a backdrop that perfectly complements your subject and enhances the overall aesthetic of your photos.
3. DIY Photo Backdrop Ideas for Studio Photography
What are some DIY backdrop ideas for professional studio photography? Elevate your studio sessions with geometric designs, 3D triangles, tissue paper flowers, and magical fairy lights.
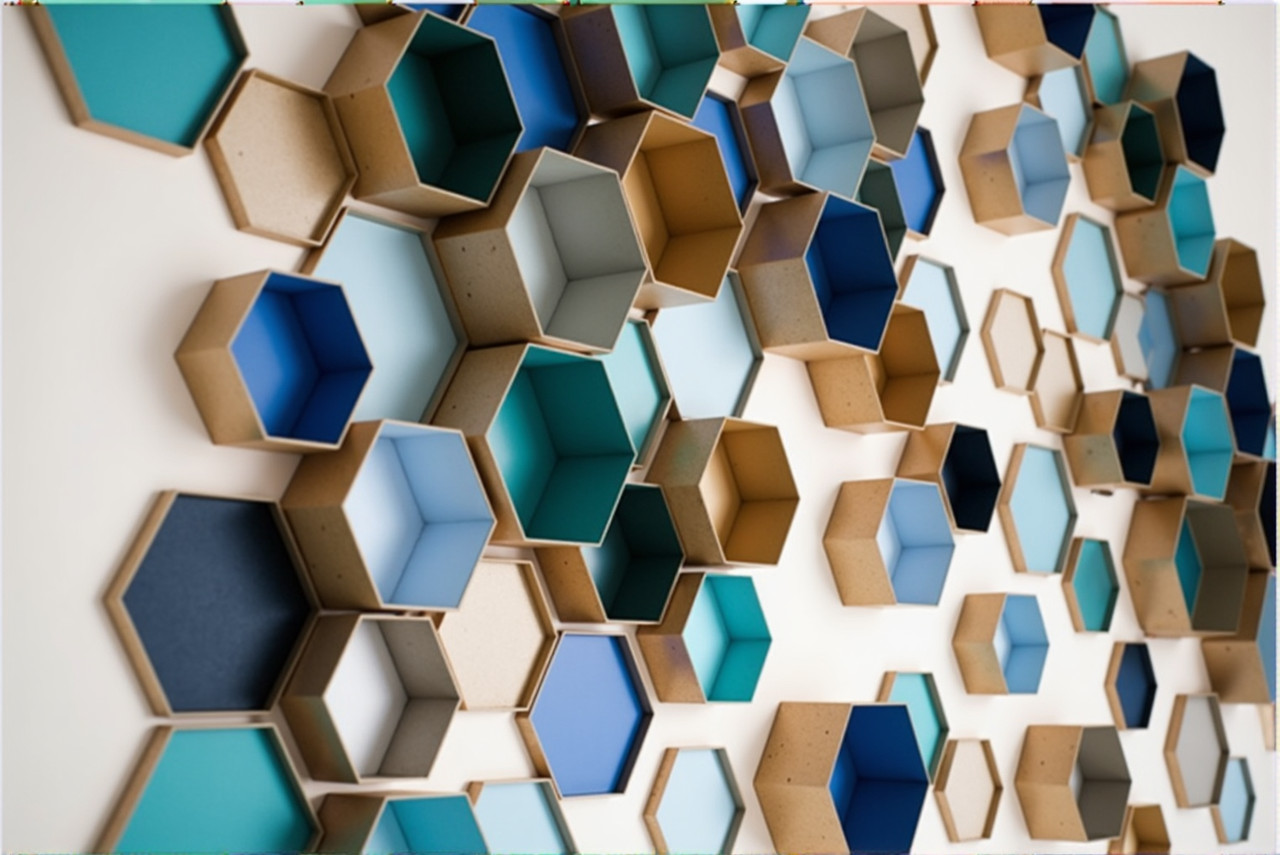
3.1. Geometric DIY Photo Backdrop
Want to give your portraits a modern twist? Geometric backdrops are your answer. They’re easy to make with cardboard and acrylics, adding a touch of style and personality.
Be creative with the shapes—triangles, circles, rhombuses, and hexagons all work! Color them with acrylics according to the color palette your model(s) are going to wear! Then, attach them to a plain-colored wall, cloth, or paper.
 Geometric DIY wall
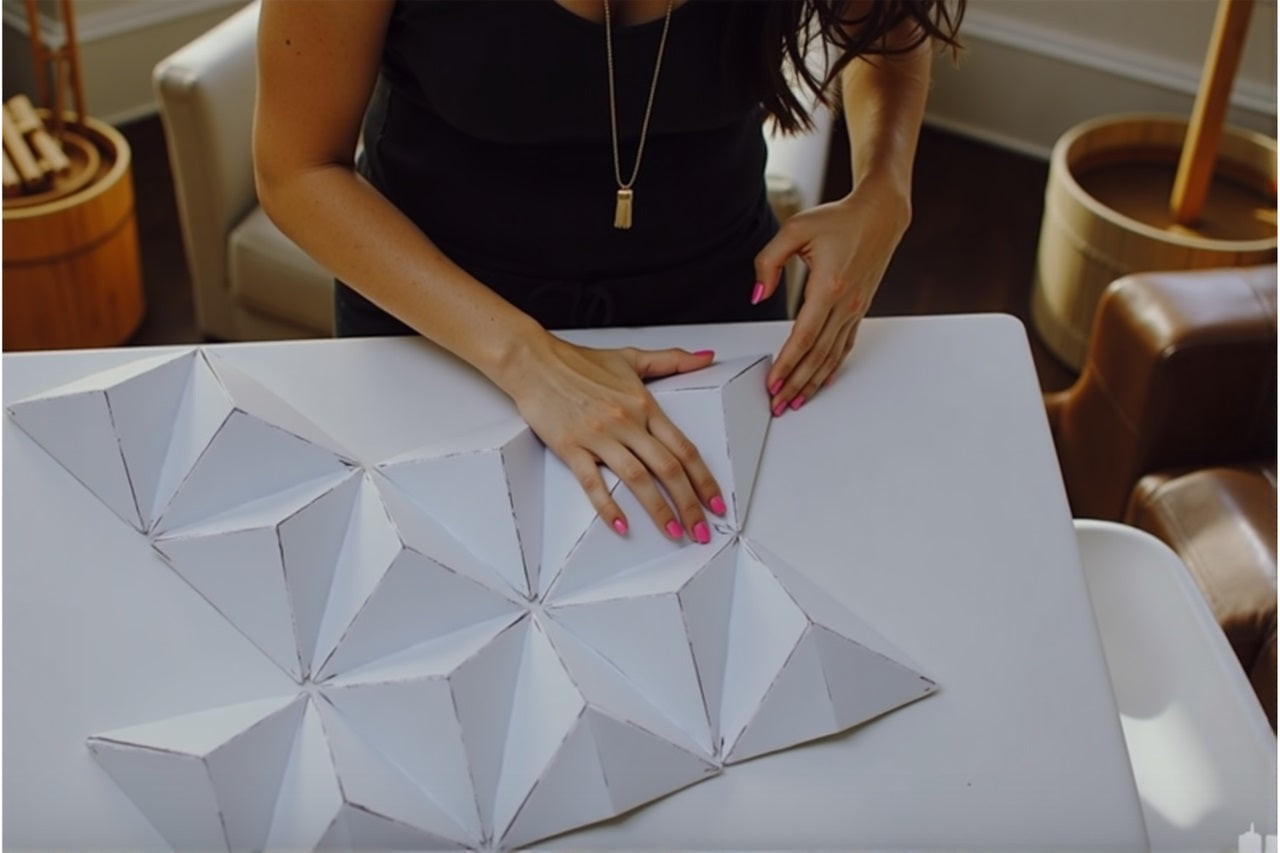
3.2. 3D Triangles for the Trippy Backdrops
Looking for something that pops? 3D triangles add a three-dimensional effect to your photos. Create paper pyramids and attach them to a plain surface for an easy optical illusion.
You can easily create them by attaching 4 plain triangles into one paper pyramid. Place them, and attach them, all together on your favorite plain background. Now, see your pictures drastically coming to life with this easy-to-make optical effect.
 3D Triangles
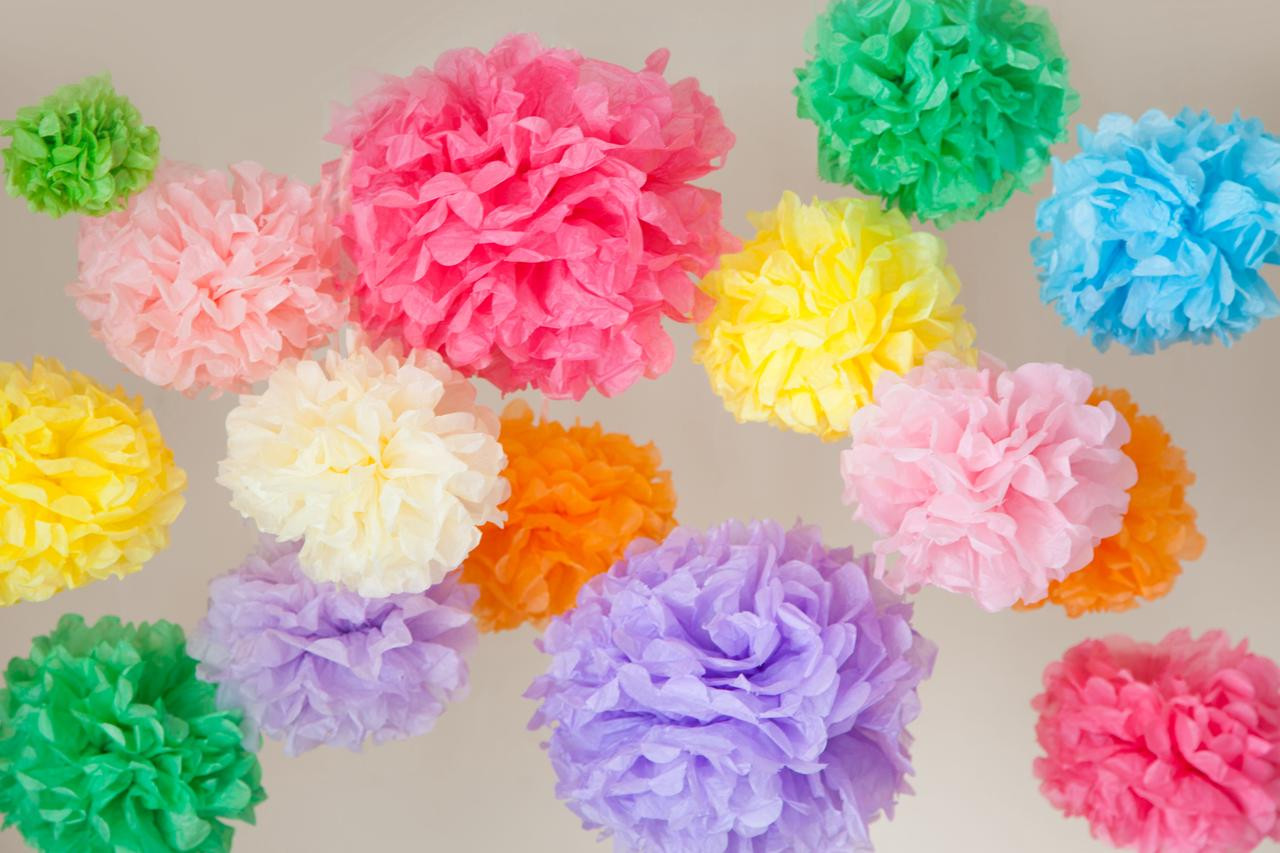
3.3. Tissue Paper or Flower Photo Backdrop
Who knew tissue paper could be so versatile? Create a beautiful, flower-like backdrop by painting, wrinkling, and attaching tissue paper to a cloth or cardboard. Harmonious colors make all the difference.
For a very simple outcome, get a bunch of tissue paper and paint it with your favorite colors. Then, wrinkle them and attach them to a piece of cloth or cardboard. Make sure you choose harmonious colors that go well together! You’ll see how placed together and colored, the tissue paper will resemble flowers.
 Tissue Paper for Flower Backdrop
3.4. Magic Fairy Lights Backdrop
Want to add a cozy, mystical vibe? Fairy lights are your best friend. Hang them over a plain setting and let them work their magic. Personalize the scene according to your shooting.
Hang fairy lights all over a plain, clear setting and let them do the rest! You can add more personality according to the shooting.
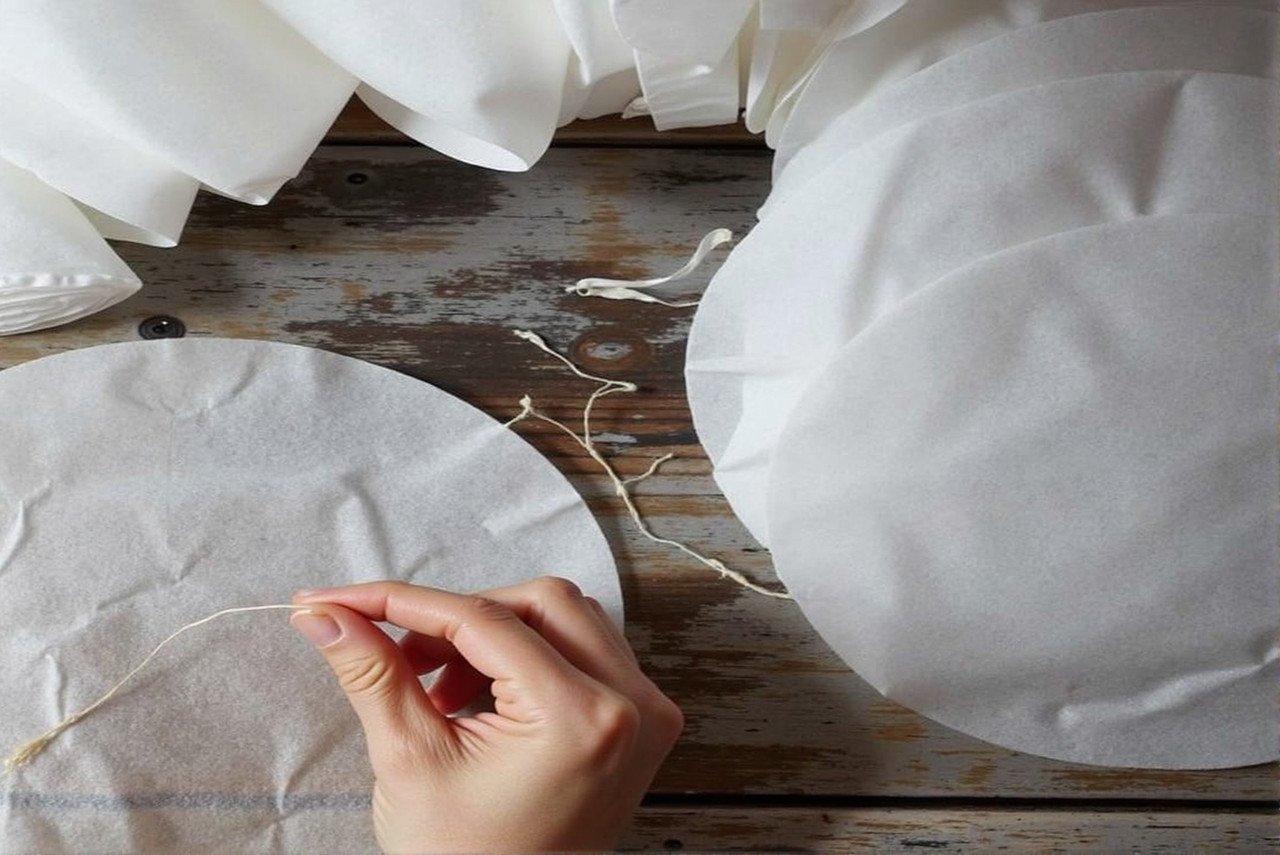
3.5. Coffee Filter Anyone
Looking for a sustainable backdrop? Reuse coffee filters! Color them with watercolors, string them together, and hang them close to one another. It’s eco-friendly and visually appealing.
Color them with your favorite color scheme (watercolors will work too!) Then, take a needle and thread and make sure the thread is long enough to cover all the background space needed. Fill several threads with your colored coffee filters! Finally, hang them close to one another. Voilà!
 Coffee Filter
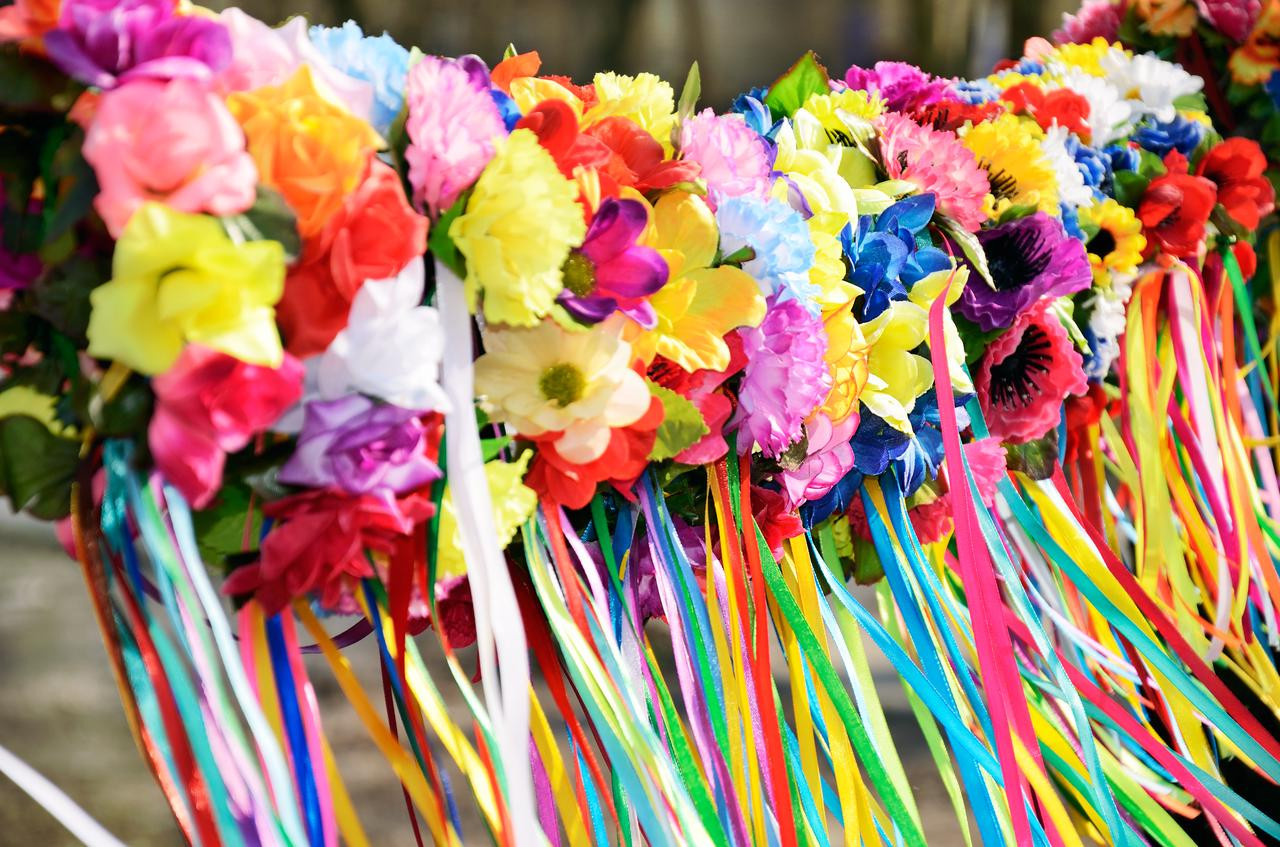
3.6. Ribbon Drape and Flowers
Are you the romantic, and poetic kind? If you aim to decorate a large surface with something cute and charming check this out! Go buy your favorite colored ribbon drape out there! Then find some flowers that match their colors (or vice versa).
Spend a creative afternoon attaching your fresh colorful flowers to the ribbon drape and then hang them on your chosen surface! Now your homemade picturesque backdrop is ready for shootings.
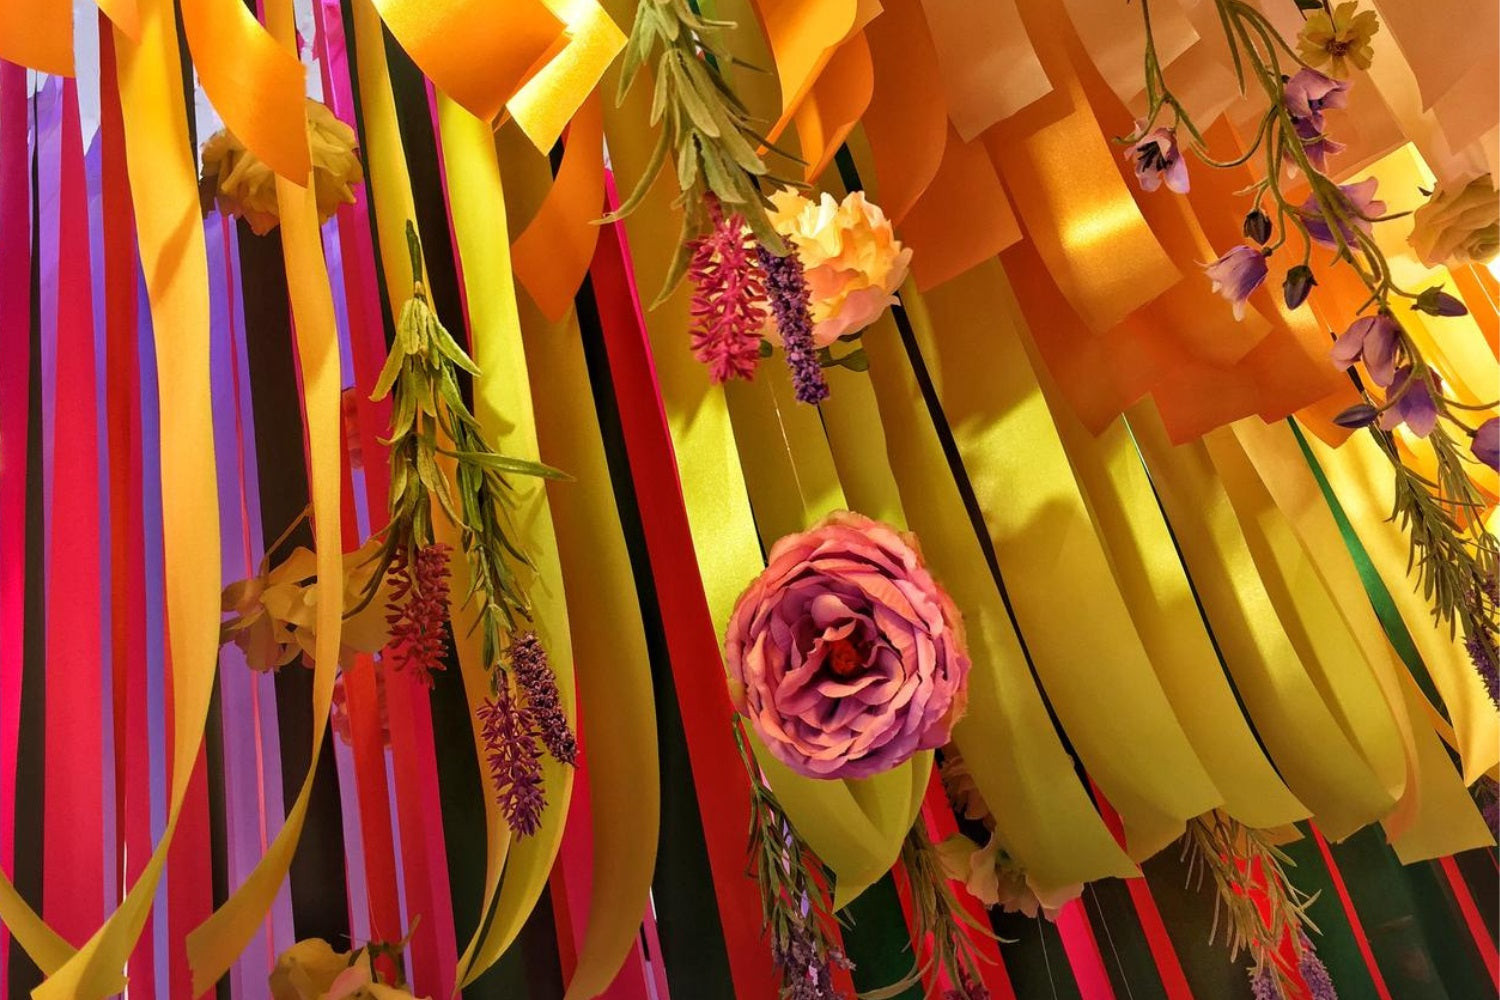 Ribbon drape and flowers
3.7. Fabric Garland Aesthetic Backdrop
Looking to personalize your backdrop? Fabric garlands are a great way to showcase your style. Cut fabric pieces and hang them together on a large surface for a customized, aesthetic backdrop.
Find different bits and pieces, cut them to your preferred size then hang them together on a large surface. Here’s your customized, aesthetic backdrop.
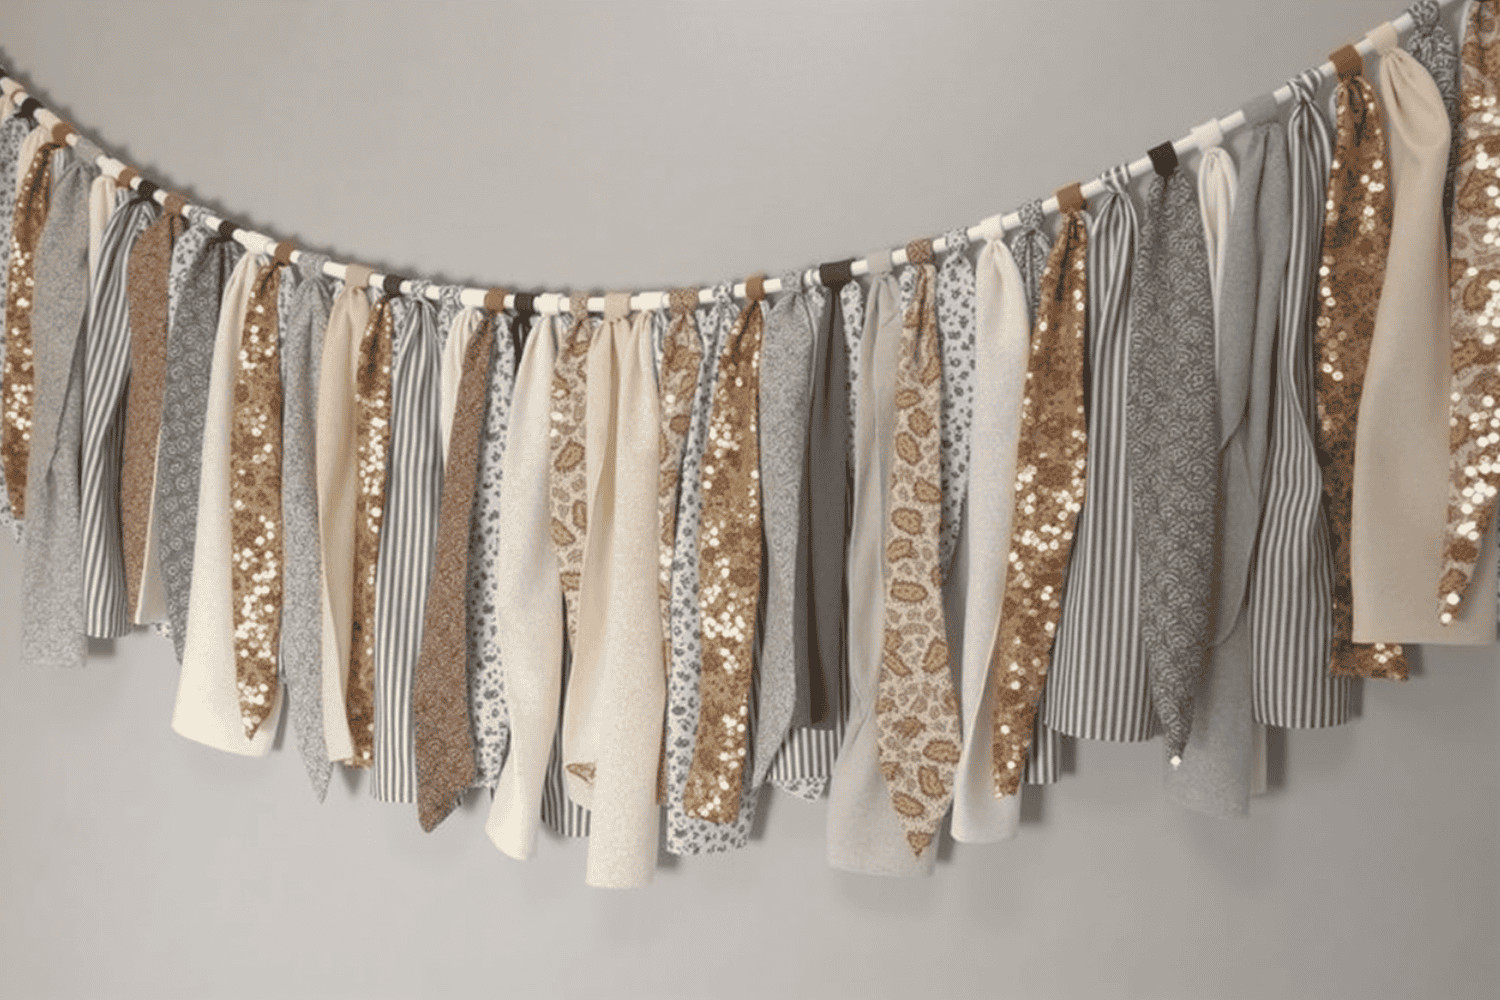 Fabric Garland Aesthetic
3.8. Paper Floral Backdrop
Want a backdrop that lasts longer? Create paper flowers with crepe paper. Cut petals, attach them to a card paper, and arrange them on a large surface. You can fill the entire backdrop or just create a frame.
Cut your favorite-looking petals and attach them to a round card paper. After you’ve created a good amount, proceed with putting them together on a large surface! You can either fill the backdrop surface or just attach some as a frame.
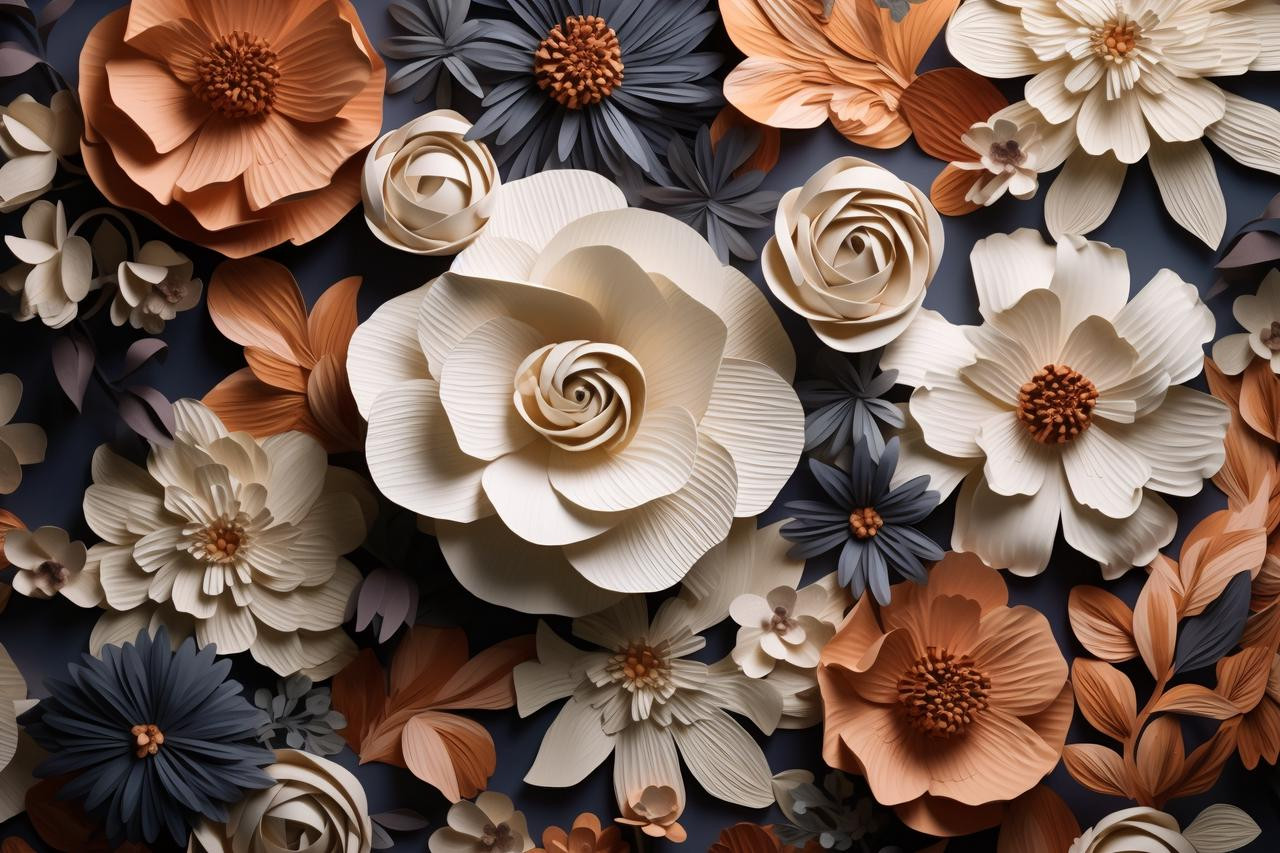 Paper Floral Backdrop
3.9. DIY Paper Chain Backdrop
Looking for a less demanding option? Paper chains are your go-to. Cut colored card paper into stripes, create circles, and link them together. Aim for about 25 chains with 20 circles each for a colorful effect.
You can easily do so by cutting some stripes out of colored-card paper or seamless background papers. Then, attach the end to create a little circle. Once you have plenty of colorful card circles, you can proceed with attaching them together like chains.
Make sure you create 25 chains of about 20 circles each so that the backdrop outcome can feel colorful and cool.
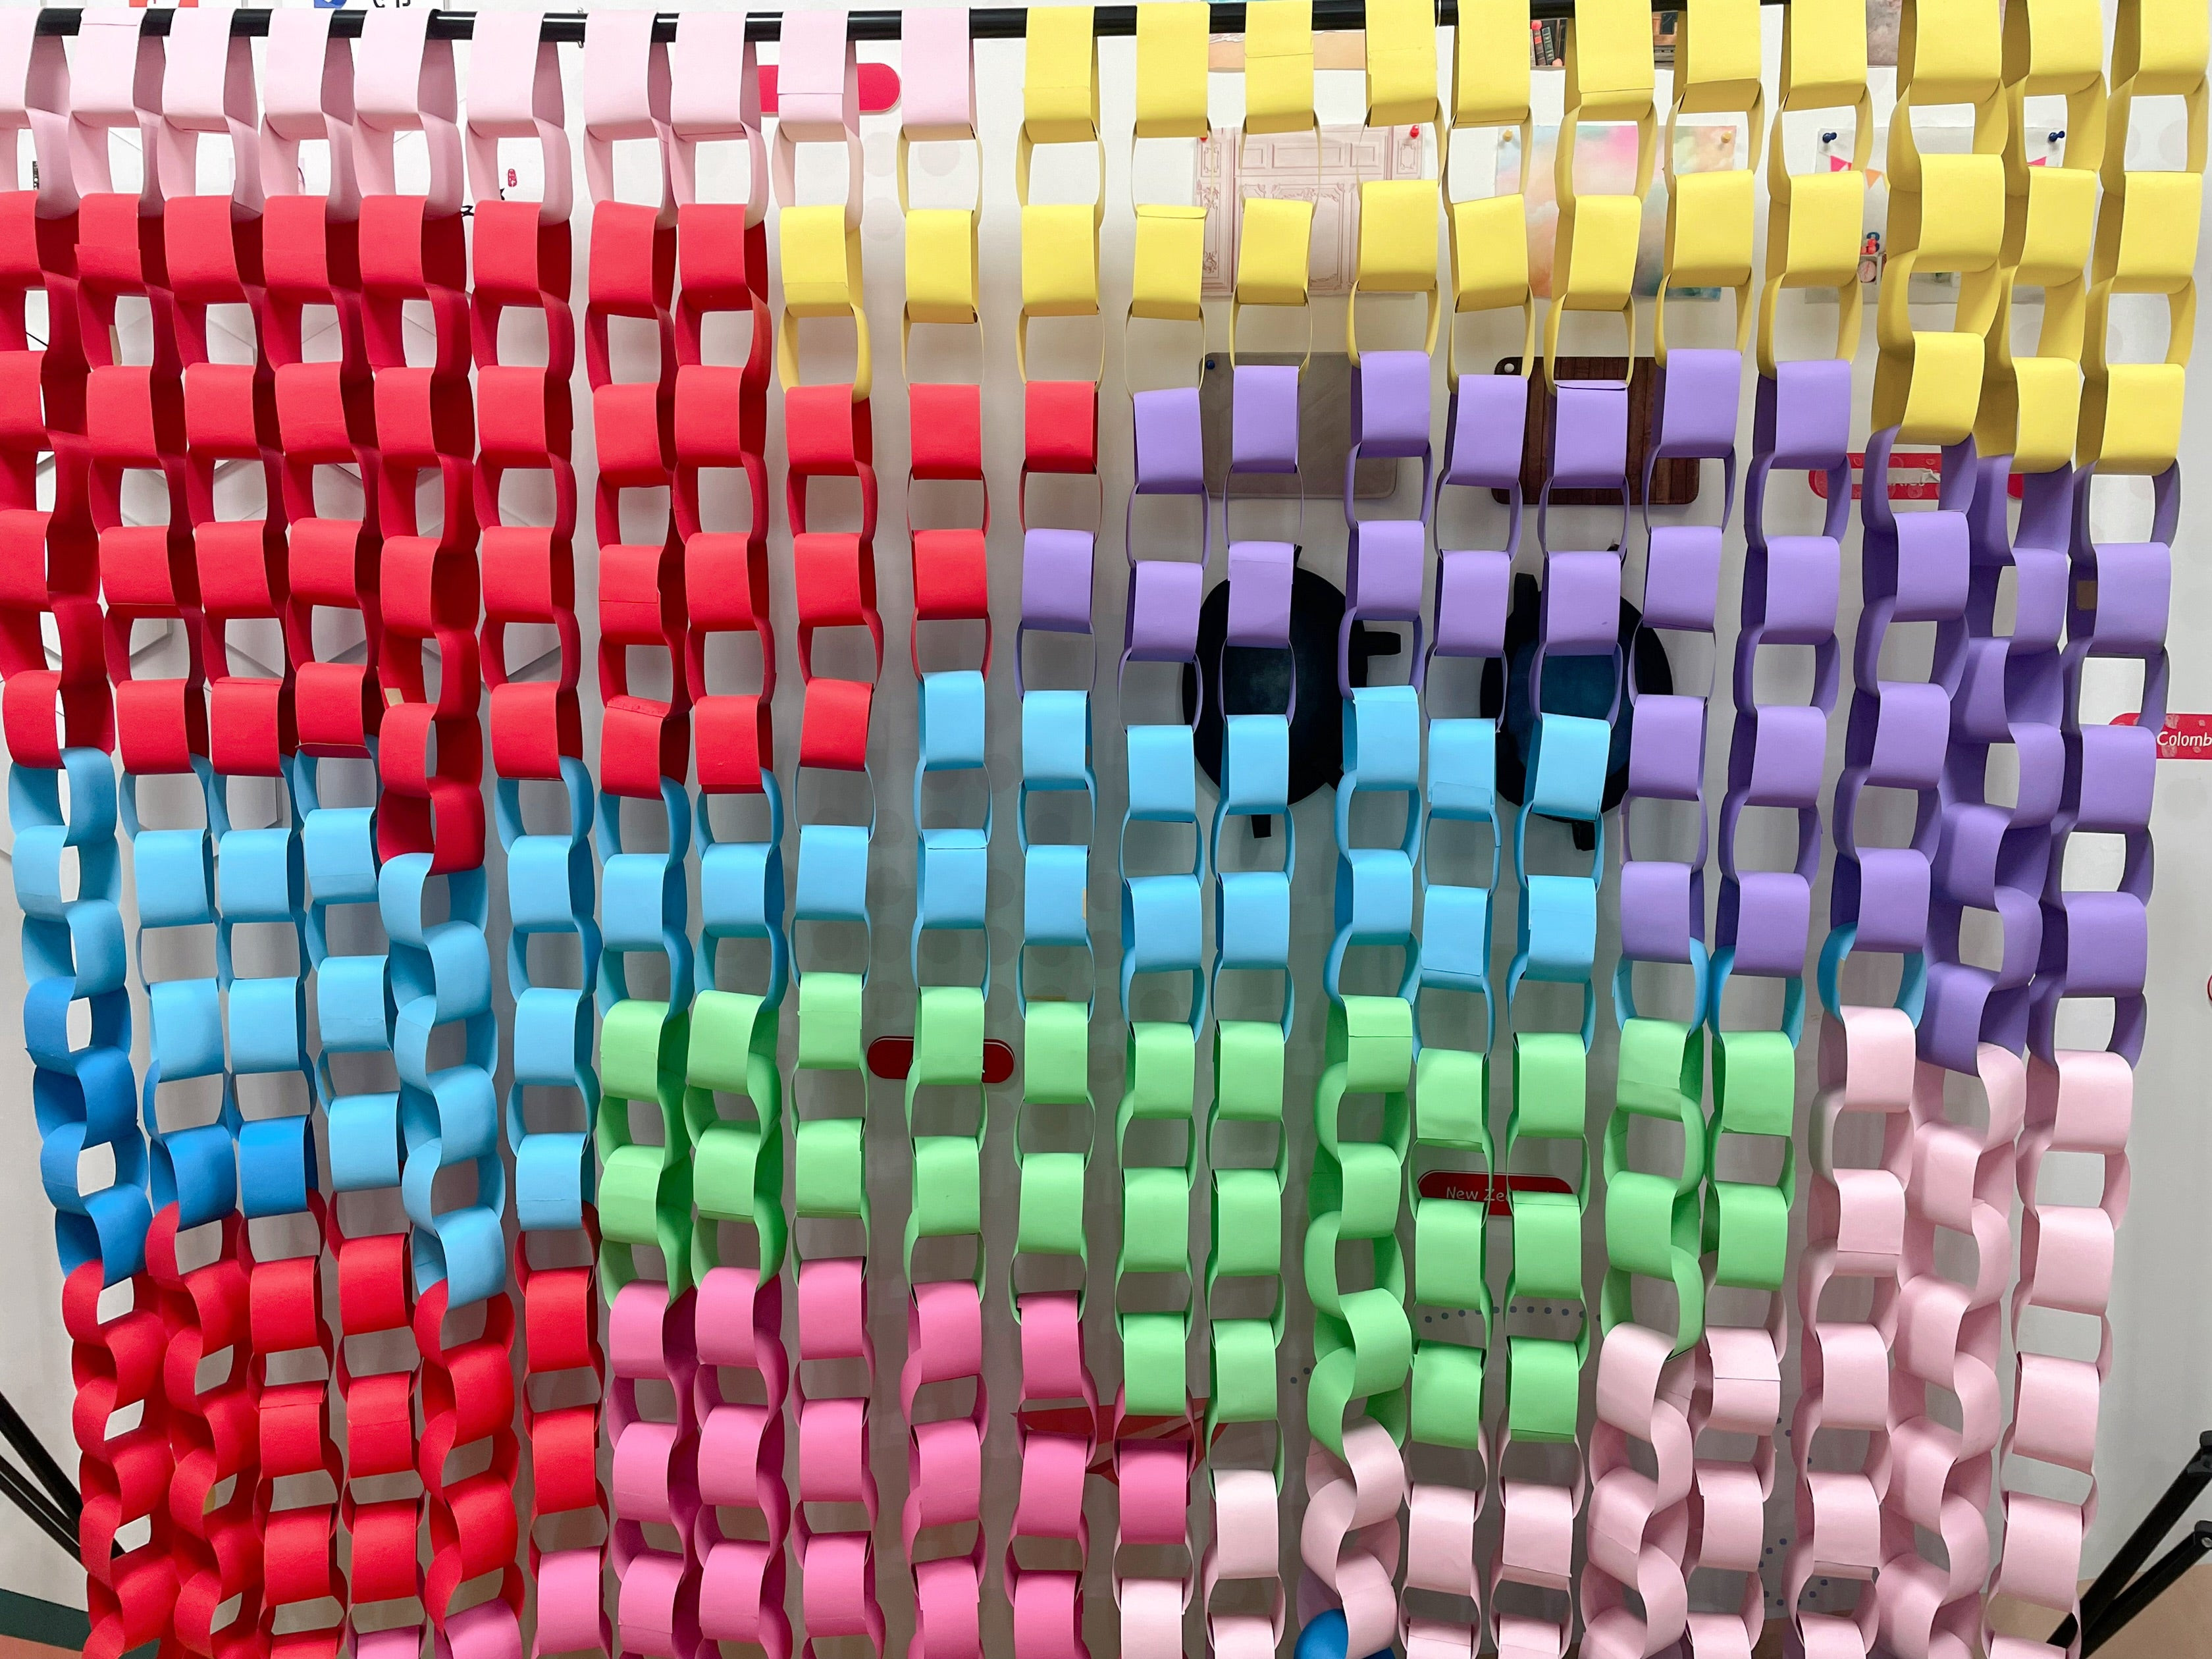 DIY Paper Chain Backdrop
3.10. Woodsy Photo Backdrop
Ready to embrace nature? A wood photography backdrop adds a country, aesthetic, warm look to your photos. Whether you build it yourself or have a wood platform made, ensure it’s well-lit.
Whether you want to give it a go with carpentry, or you want to have a nice wood platform made, it’s up to you! Make sure you give it good lighting once it’s done.
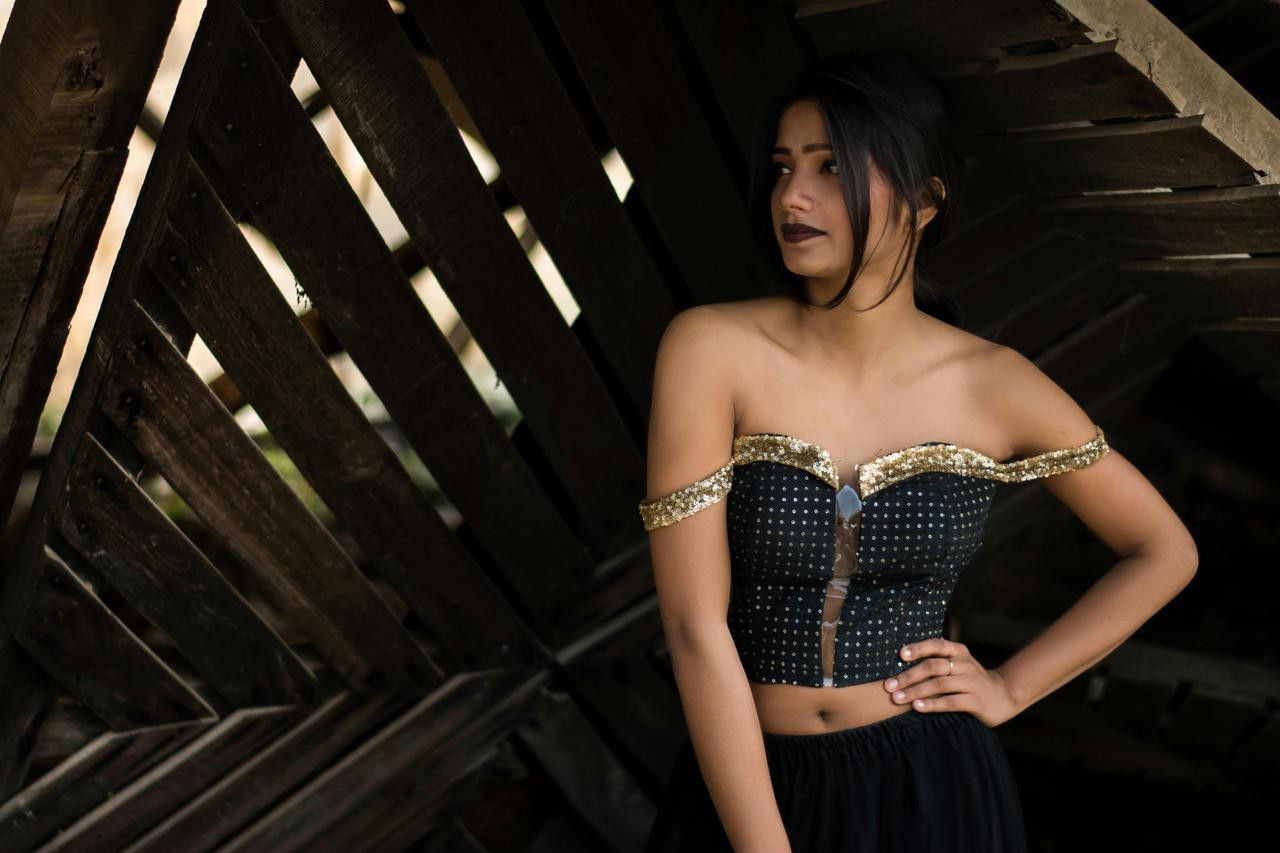 A woman in front of Wooden Backdrop
3.11. DIY Citrus Backdrop
Want to infuse warmth and fragrance? A citrus backdrop adds a yellow, orange touch to your photos. Slice oranges, lemons, and grapefruits, let them dry, and tie them together. Bonus points for adding fairy lights!
Cut them into slices and let them dry for one day. Once dried, tie them together with a clear-colored string. Add them to any plain – yellow, beige, brown – surface. A bonus tip is to add some atmospheric fairy lights to them too!
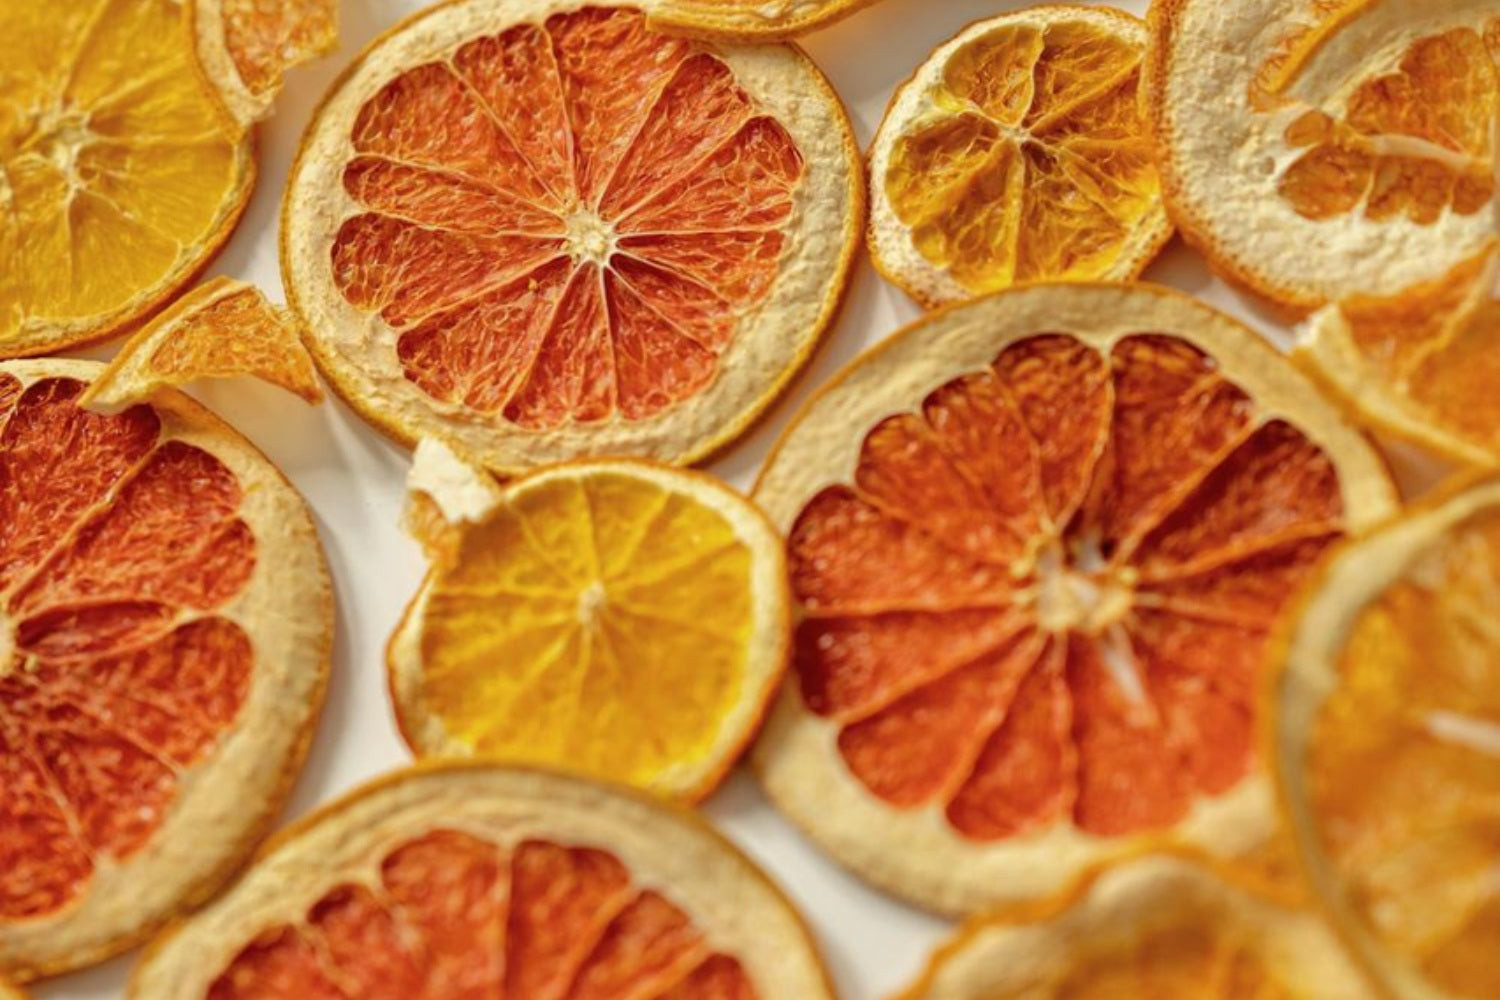 Citrus Backdrop
3.12. DIY Cotton Cloth Backdrop
On a budget? A cotton cloth backdrop is plain, simple, and affordable. Paint it naturally, draw on it, or try wood print serigraphy. You can also find well-designed fabric backdrops online.
Simply buy a cotton cloth, big enough to fit your photo requirements. Then paint it accordingly. You could paint it naturally with earth-looking colors, draw on it if you feel artistic enough, or practice some wood print serigraphy.
You can also choose some well-designed fabric backdrop.
 A black woman pose in front of Pink Cotton Cloth Backdrop.
4. DIY Photo Booth Backdrop Ideas for Events
How can you create fun and interactive photo booth backdrops? Tailor creative backdrops for parties, weddings, and festive events with friends using scalloped paper, colorful tissue paper, and streamers.
4.1. Scalloped Paper DIY Backdrop
Dreaming of a mermaid theme? A scalloped paper backdrop is perfect. Cut round ends from colored paper and arrange them on a cardboard platform. Customize it with your colors for a unique touch.
Simply buy some colored paper (alternatively paint white paper with acrylics or watercolors). Then cut round ends, and place them all together on a cardboard platform. Add any personalized decoration, or keep it simple! It’s the perfect DIY backdrop for mermaid theme parties!
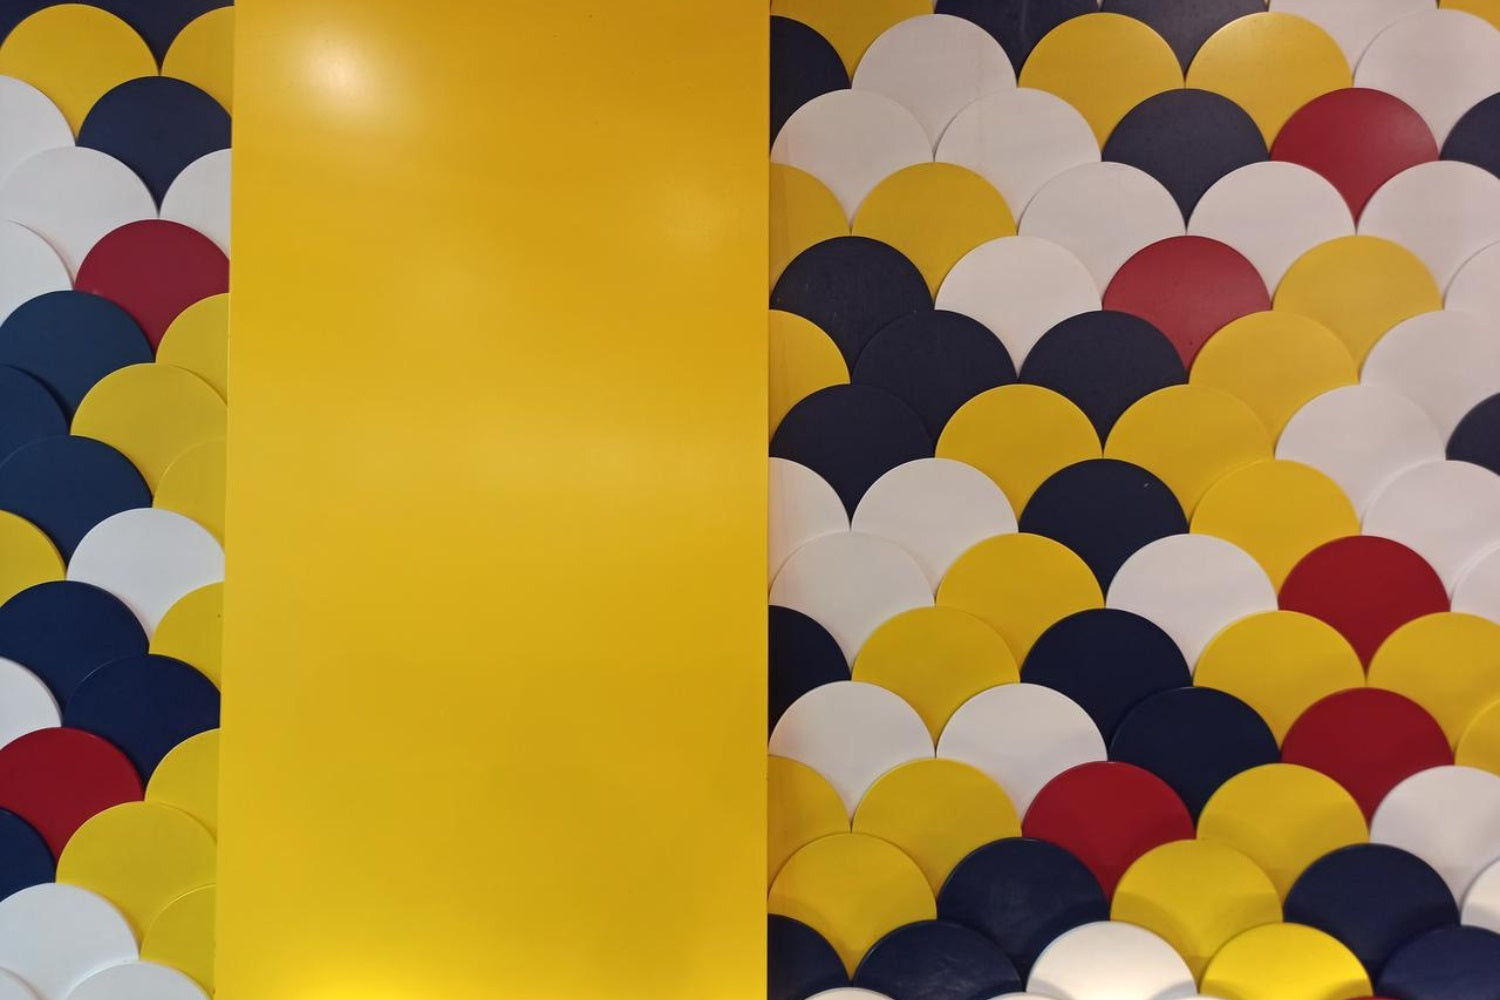 Scalloped Paper Backdrop
4.2. Cut-out Colorful Tissue Paper Backdrop
Need a budget-friendly photo booth backdrop? Colorful tissue paper is your answer. Tailor it to your themed event by arranging it to resemble a symbol, sentence, or name.
Tailoring some colorful tissue paper according to your themed event! For example, place it in such a way that it resembles a symbol, a sentence, or a name. Everyone at your photo booth will love shooting in front, or with it!
 Colorful Tissue Paper Backdrop.
4.3. Streamers’ Photo Backdrop
Looking for a classic touch? Streamers add light and life to any event. Select glittery, color-fitting streamers for a vibrant photo booth backdrop.
Make sure you select some glitter-looking, color-fitting ones that will bring that extra life to your unique event.
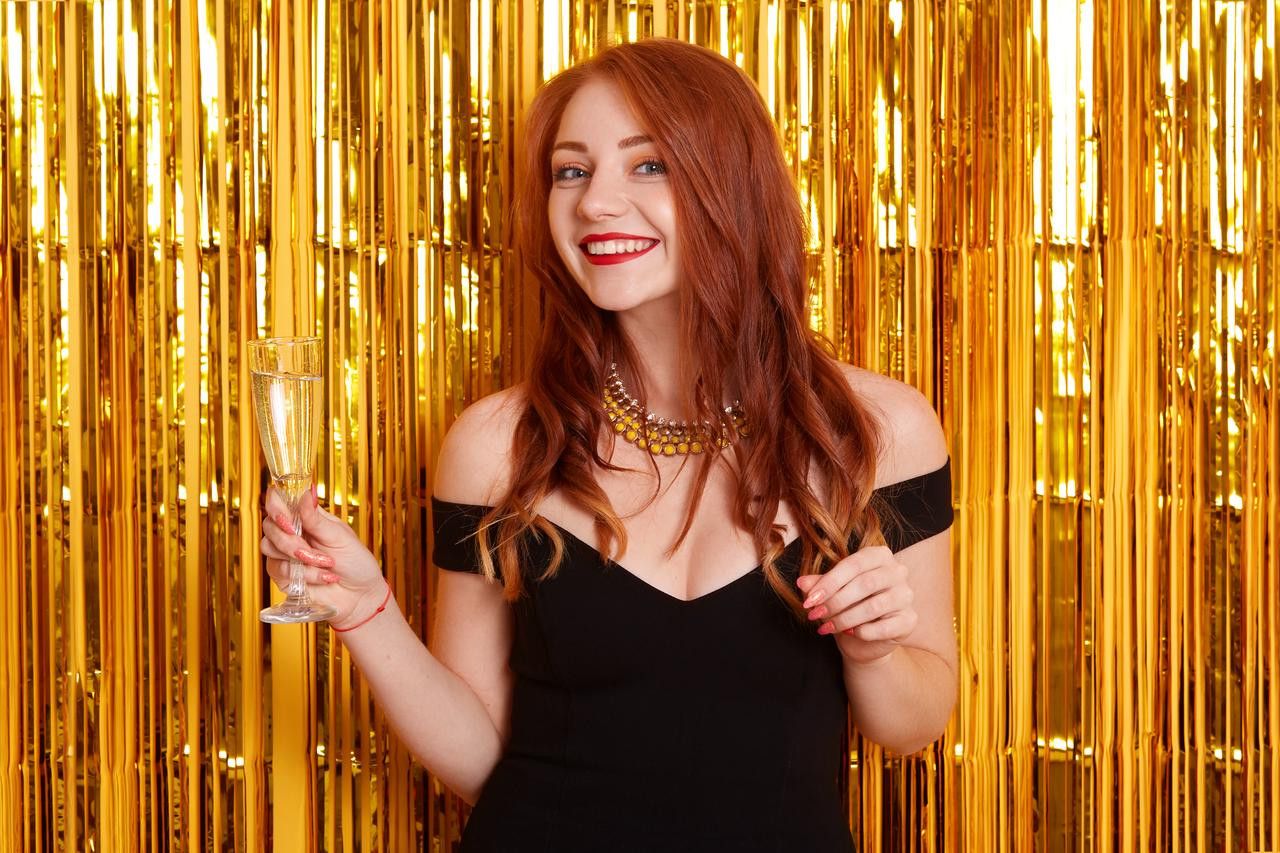 A girl with a glass of wine pose in front of the streamers backdrop.
4.4. Creased Tin Foil
Want a disco vibe? Creased tin foil is simple, cheap, and effective. Glue it to a cardboard surface and the floor for a shiny, lively photo booth.
Simply glue as much as possible (and as much as you want) to a cardboard surface. Attach some on the floor too, for some extra disco vibe. Try it to believe it.
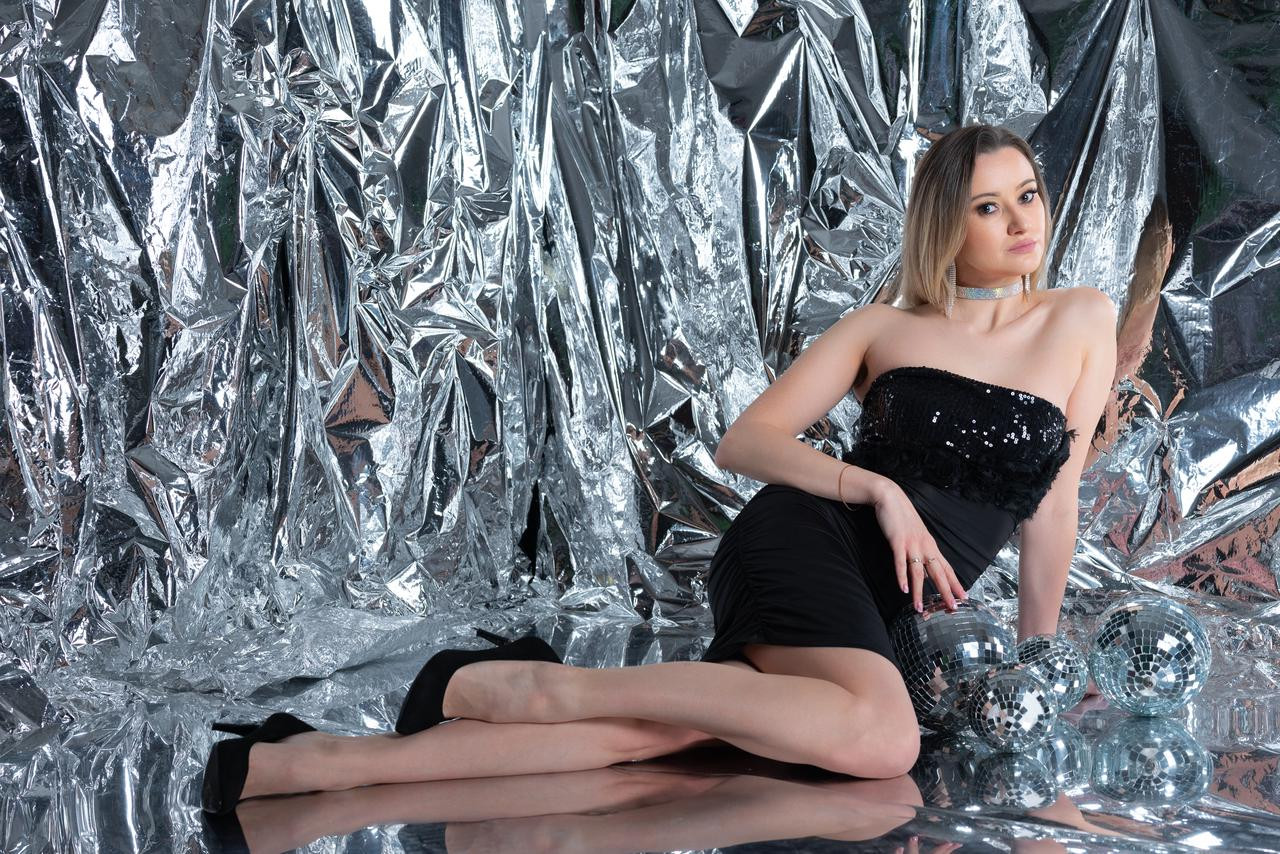 Creased Tin Foil Backdrop
4.5. Popsicle Backdrop for Endless Summer Lovers
Bring summer vibes with a popsicle backdrop! Use real popsicle sticks or cardboard cutouts. Draw, cut, and paint popsicle shapes, then attach them to a string for a fun, summery effect.
Then, be creative by drawing, cutting, and painting some popsicle shapes out of cardboard or card paper. Attach them on a string, then place them on a plain background. Prepare for some fun, summery, colorful shoots in front of it!
Bonus tip: you can save some to use as props to play around with too.
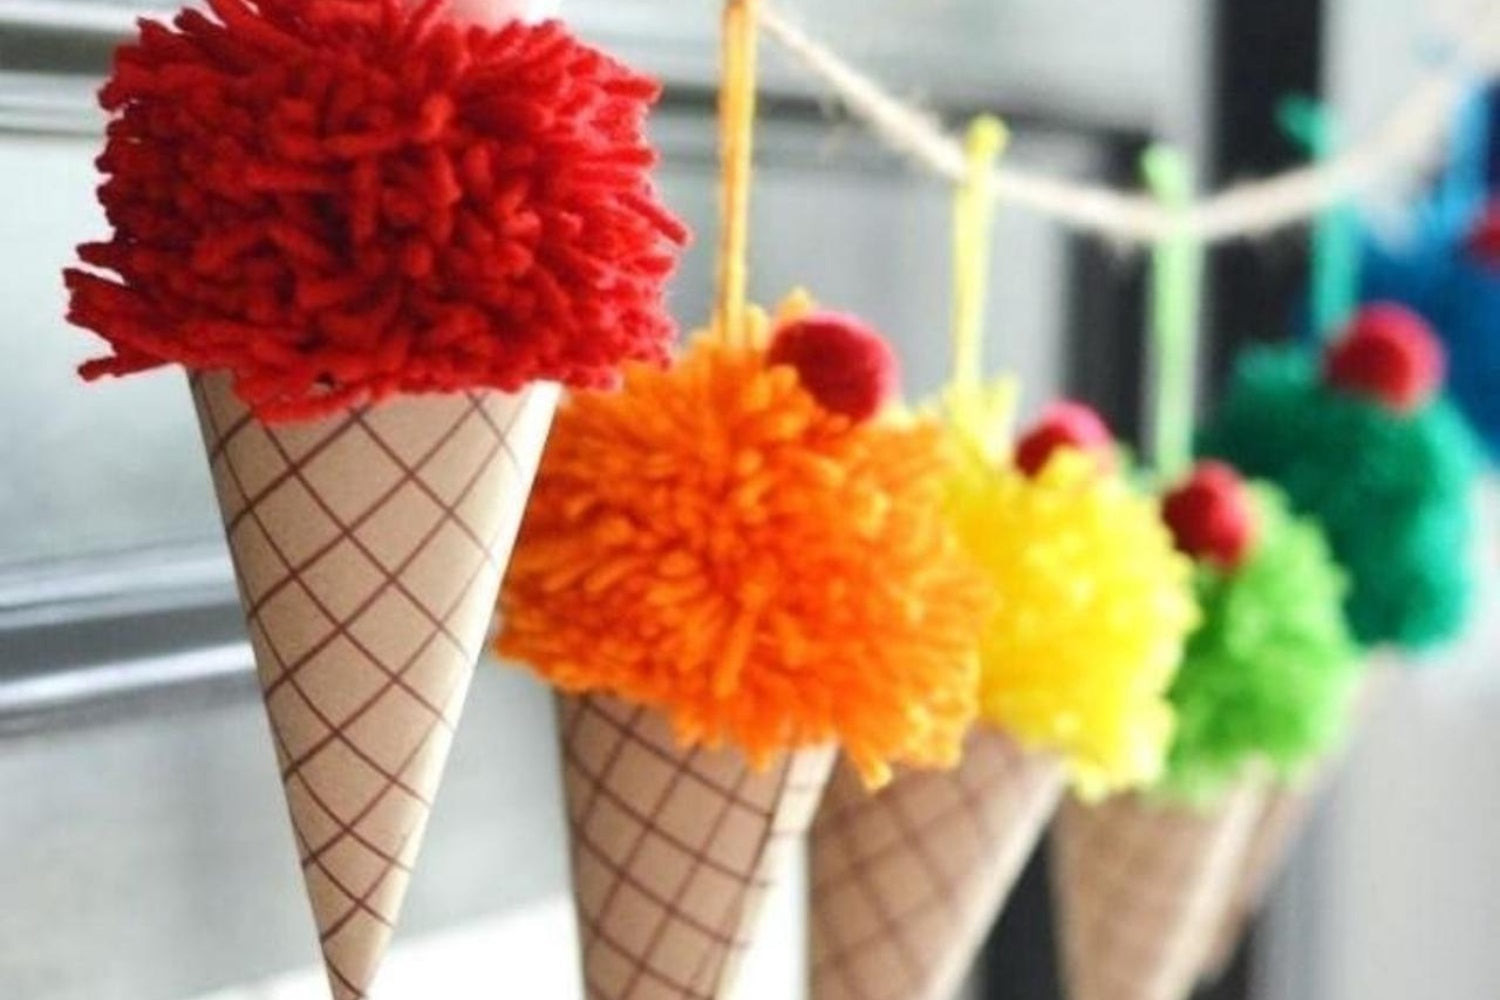 Summer Ice-cream and Popsicle Backdrop
4.6. DIY Paper Fan Photo Backdrop
Looking for something elegant? Create paper fans by accordion-folding colored papers and gluing them together. Arrange them on a plain background or use them as a frame.
 Coloful Paper Fan Backdrop
4.7. Fringe Backdrop
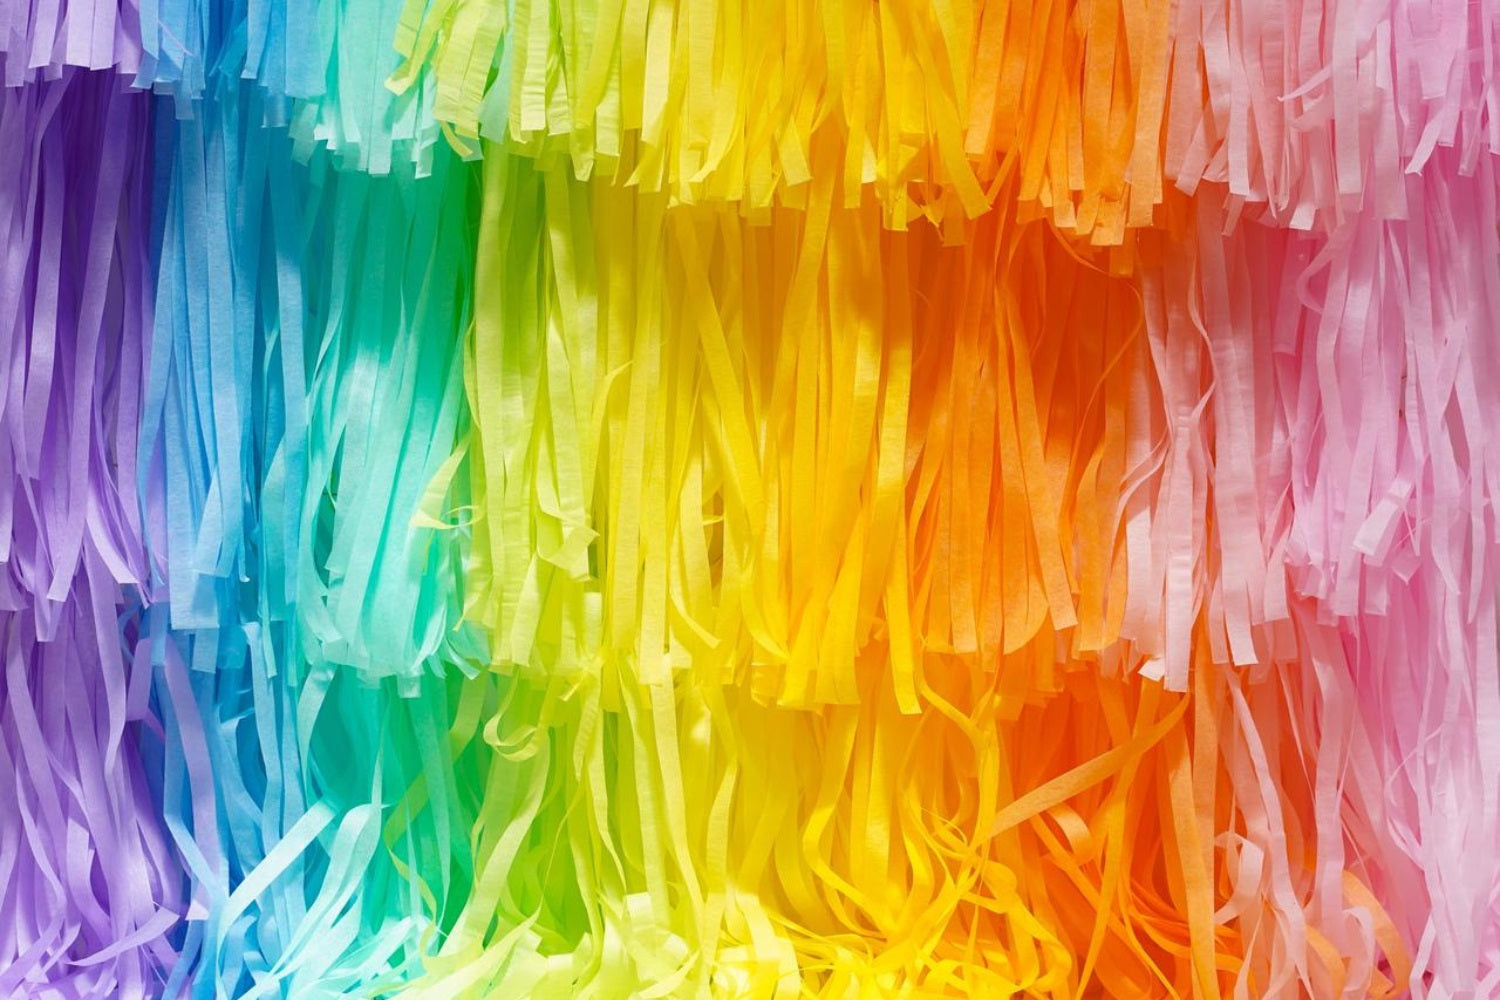
Want something fancy and easy? A fringe backdrop is your answer. Cut cloth, paper, fabric, or ribbon into stripes and attach them together in a unique color combination.
Once you choose, simply proceed with cutting your material into little stripes. Attach them all together, making a unique color combination according to your taste! Here’s your personalized fringe backdrop ready to be posed with.
 A woman in front of Fringe Backdrop.
4.8. DIY Macrame Backdrop
Ready for a creative challenge? Try macrame! This art form involves knotting textiles to create beautiful pieces. The result is aesthetically powerful and long-lasting.
Macrame is a way of knotting a certain textile in such a way that creates beautiful art. It can be used to create bags, jewelry, clothing, and yes… backdrops too!
So if you feel inspired to try this beautiful art, definitely go for it! Because we’ll assure the outcome will be truly worth it, aesthetically powerful, and long-lasting.
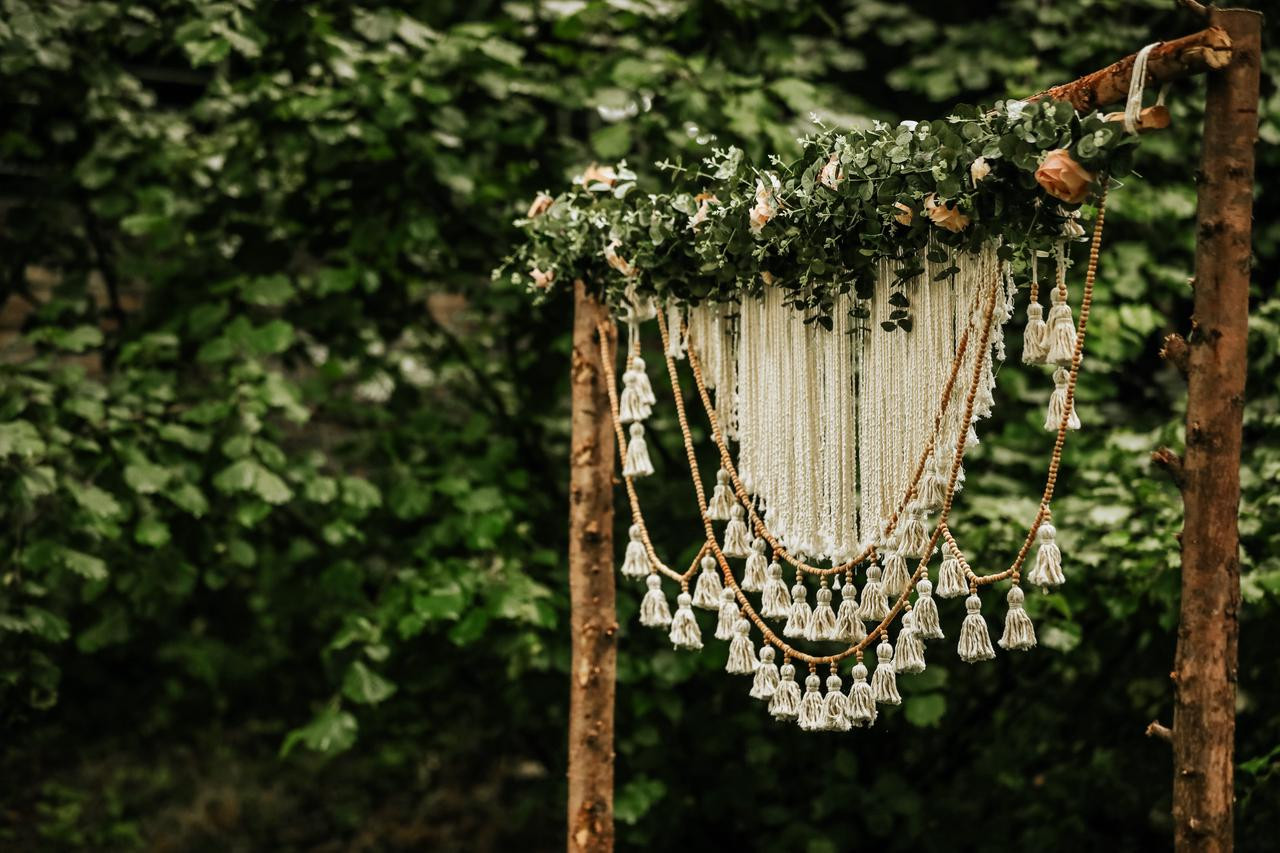 The Macrame Backdrop
4.9. DIY Wooden Crate Backdrop
Want simplicity and vibe? Use wooden crates and personalize them with plants, fabric, and signs that represent your event.
Personalize them with plants, fabric, and unique signs that represent your festivity. This simple homemade backdrop will add attraction, simplicity, and vibe to your event.
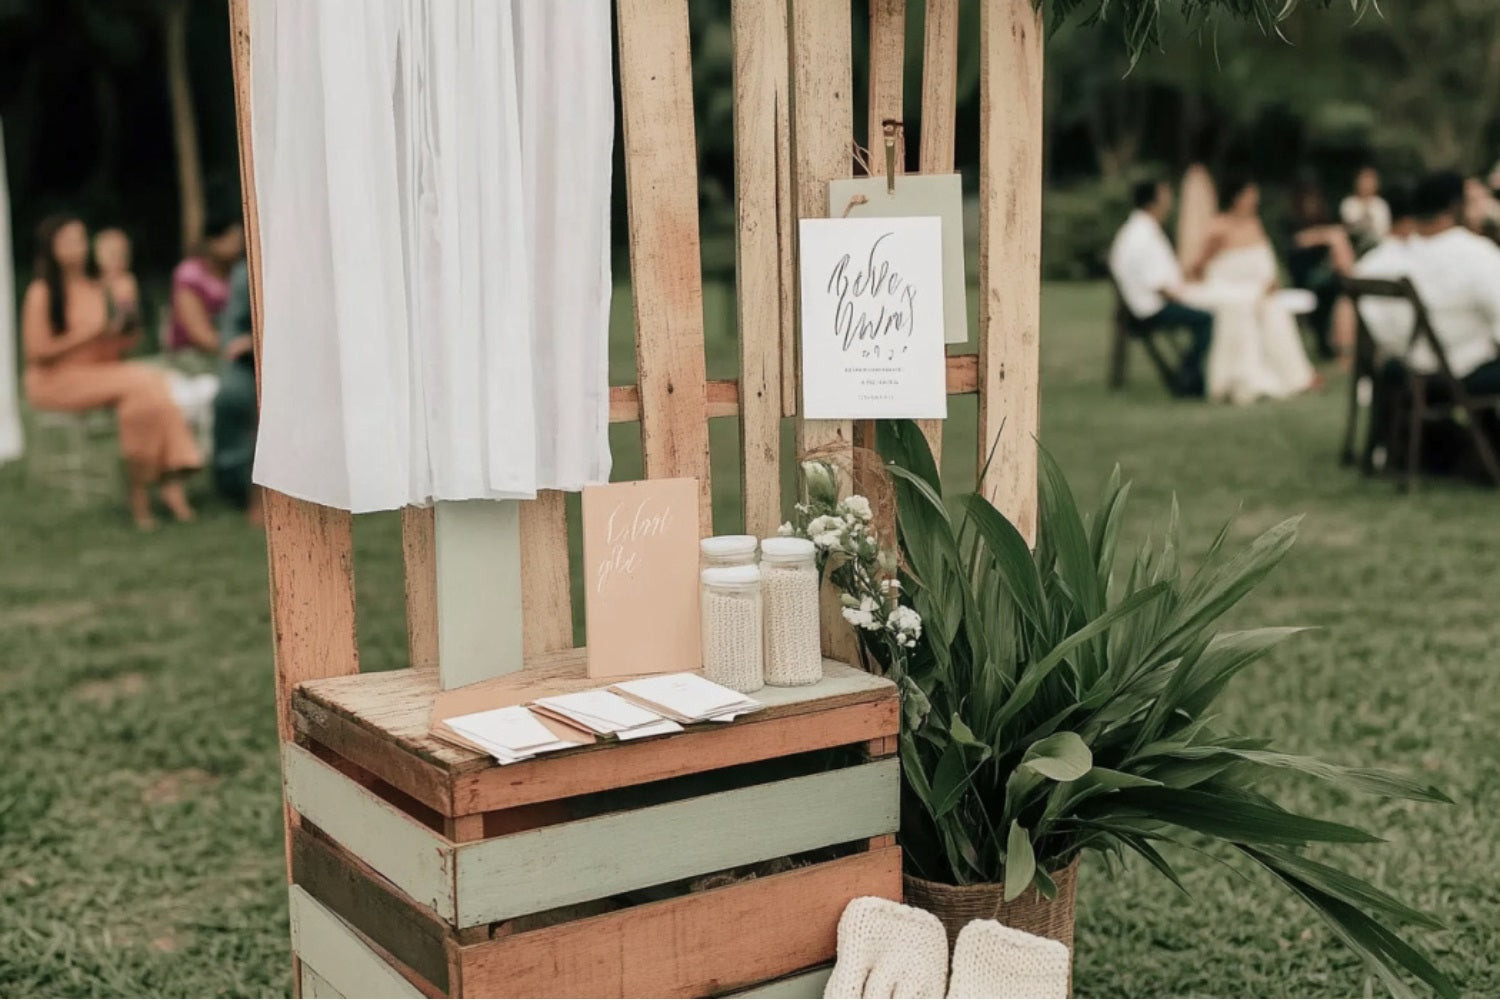 The Wooden Crate Backdrop
4.10. Cardboard Backdrop DIY
Need a last-minute idea? Use cardboards from your basement. Break them into pieces, glue them flat, and add a plain frame. It’s casual, unique, and budget-friendly.
Then break them into pieces and glue them flat on your preferred background. Add a plain-looking frame in front of it, that people at your event could be playing with! Here’s your last-minute, casual, and oh, so original photo booth backdrop ready!
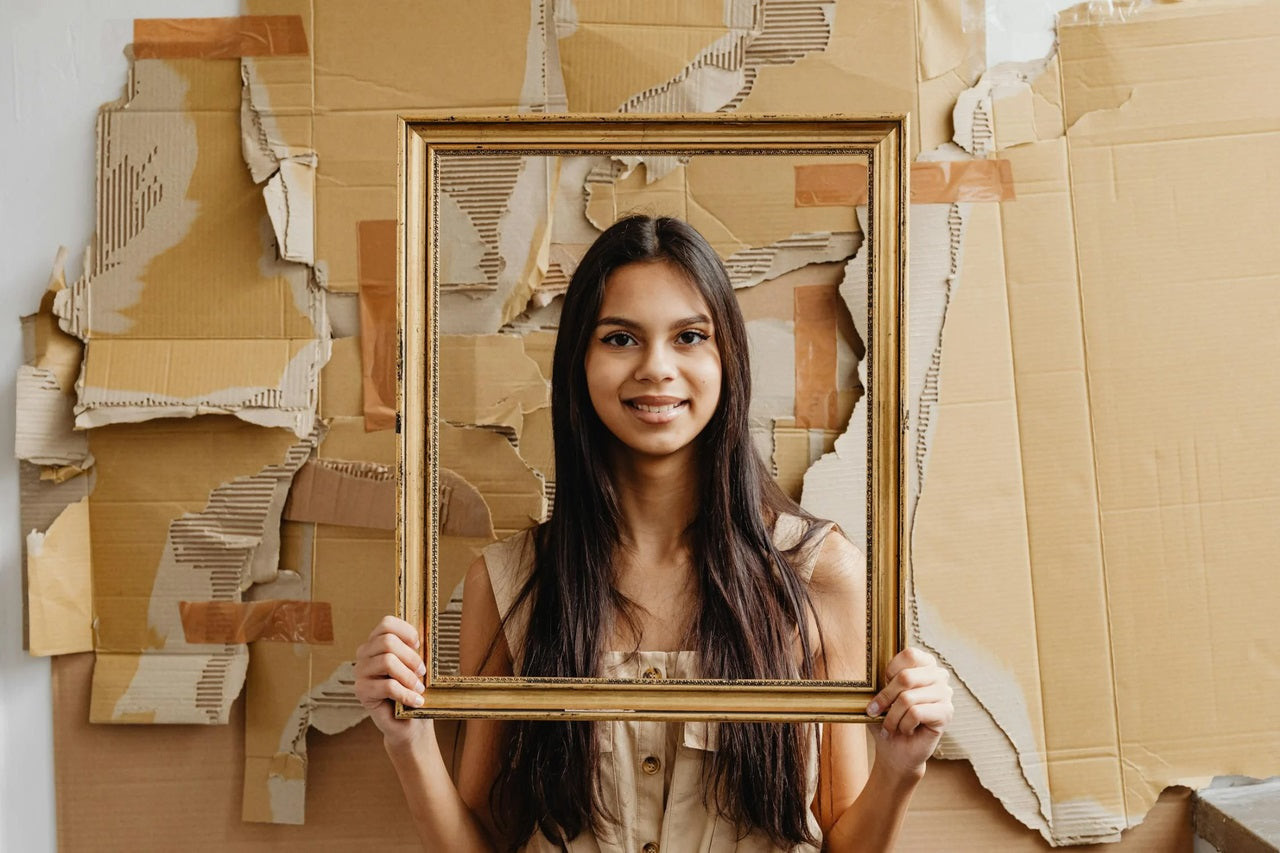 A girl pose in front of the Cardboard Backdrop.
4.11. Let’s Go Down Memory Lane Wall
For a meaningful backdrop, go down memory lane! Print nostalgic pictures, notes, cards, and drawings. Hang them on a wall or wooden crate for a crowded, popular photo spot.
Be even more extra with the addition of notes, cards, drawings, and anything that can feel truly meaningful. Have it all printed, or hanging from a wall or wooden crate. I’m sure it’s going to be the most popular and crowded part of the event.
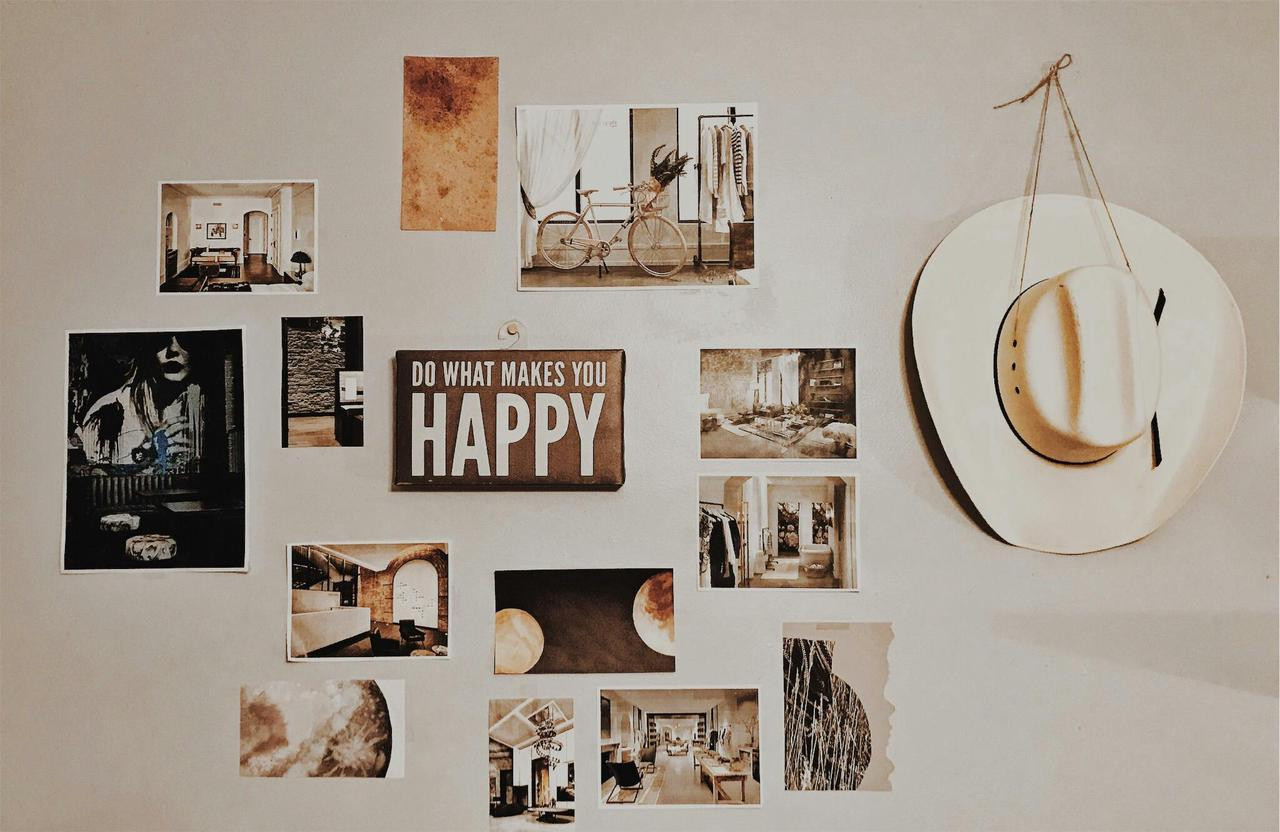 The Memory Photos Wall.
4.12. Book Wall DIY
Want to leave everyone speechless? Create a book-themed photo booth. Hang books or glue book pages on a wall. It’s magical and perfect for weddings or artistic events.
Whether you want to take books and hang them, or select your favorite book’s pages, cut them, and glue them on a wall… it’s up to you! What matters is that you create a magical, literal wall that everyone will feel absolutely attracted to.
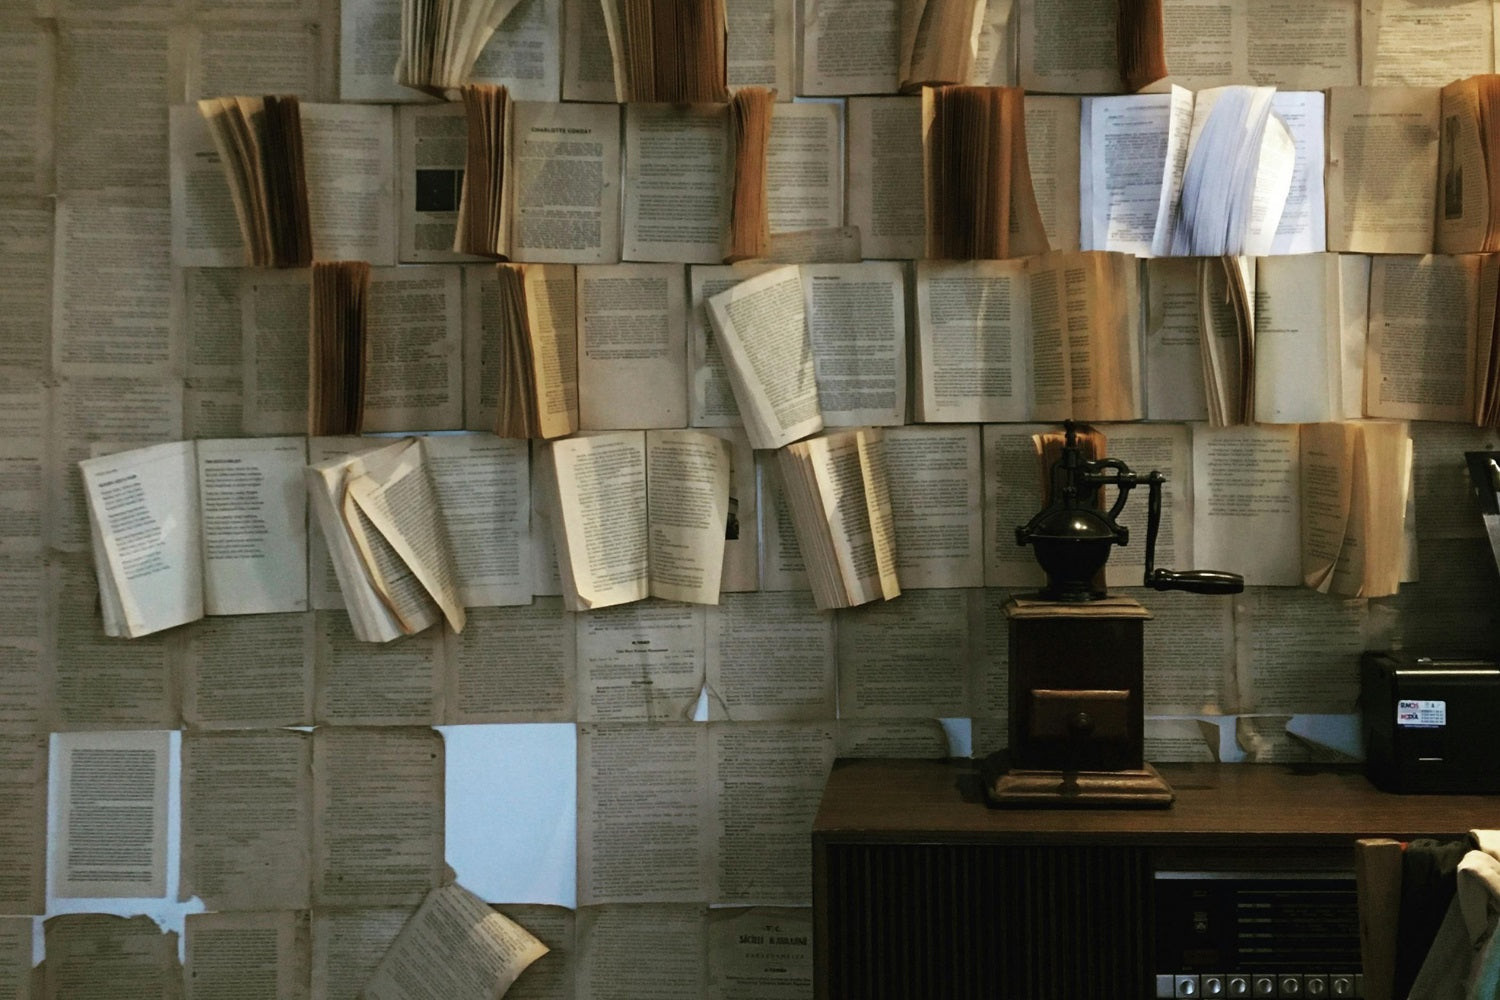 DIY Book Wall.
5. DIY Birthday Backdrop Ideas for Celebrations
What are some creative backdrop ideas for birthday parties? Customize your birthday celebrations with plate backdrops, floral numbers, pom poms, and origami.
5.1. DIY Plate Photo Backdrop
Want to use birthday plates creatively? Color them with birthday-themed colors and glue them on a wall, cardboard, or cloth. It adds color, personality, and style.
A way you can do so is by coloring them with your favorite, birthday-themed colors and gluing them on a wall, cardboard, or cloth. It will effortlessly add color, personality, and a touch of style to any birthday party.
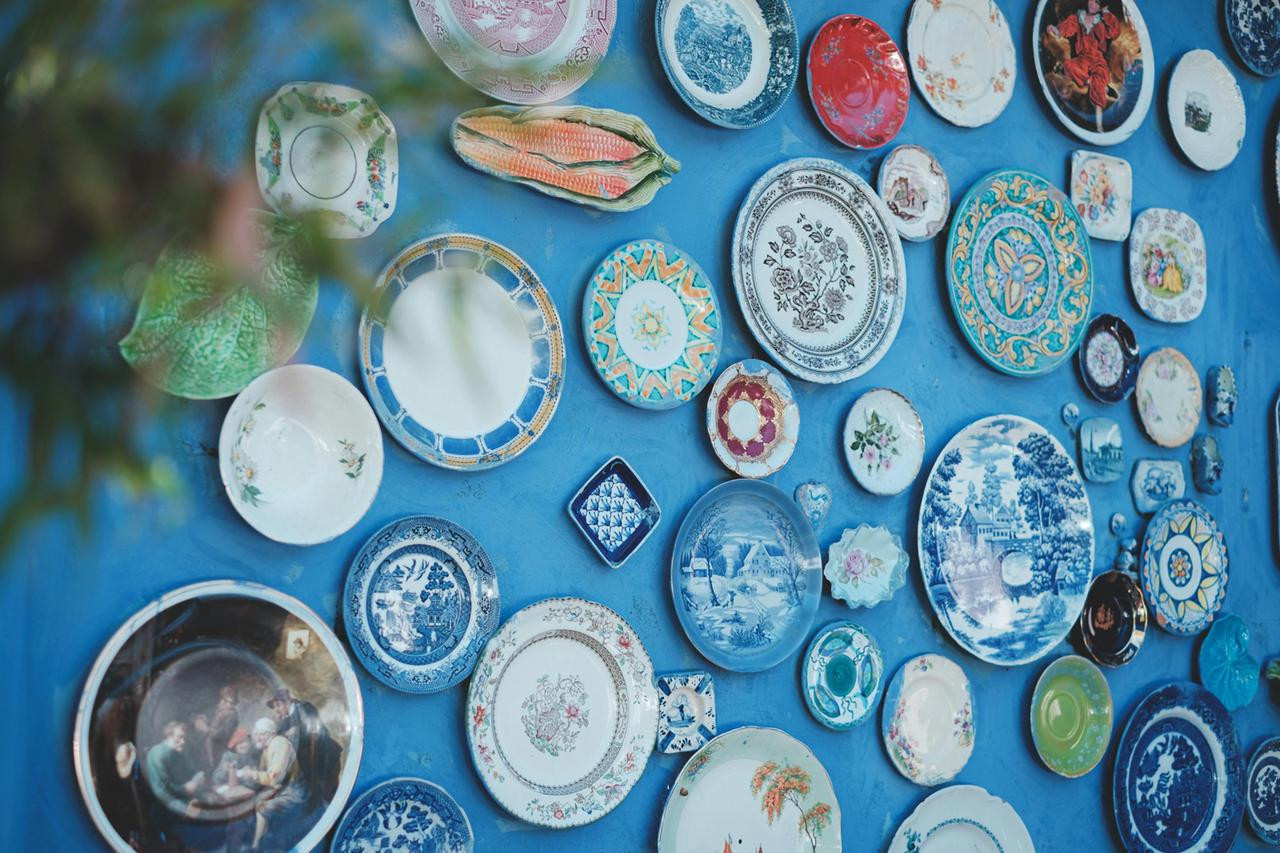 The Plate Backdrop
5.2. DIY Floral Birthday Number Backdrops
What shouts “birthday” more than the age? Glue flowers or crepe paper in the shape of the birthday boy/girl’s age for a standout backdrop.
So consider buying some flowers, or making some yourself with crepe paper and gluing them all together in the shape of the birthday boy/girl’s turning age.
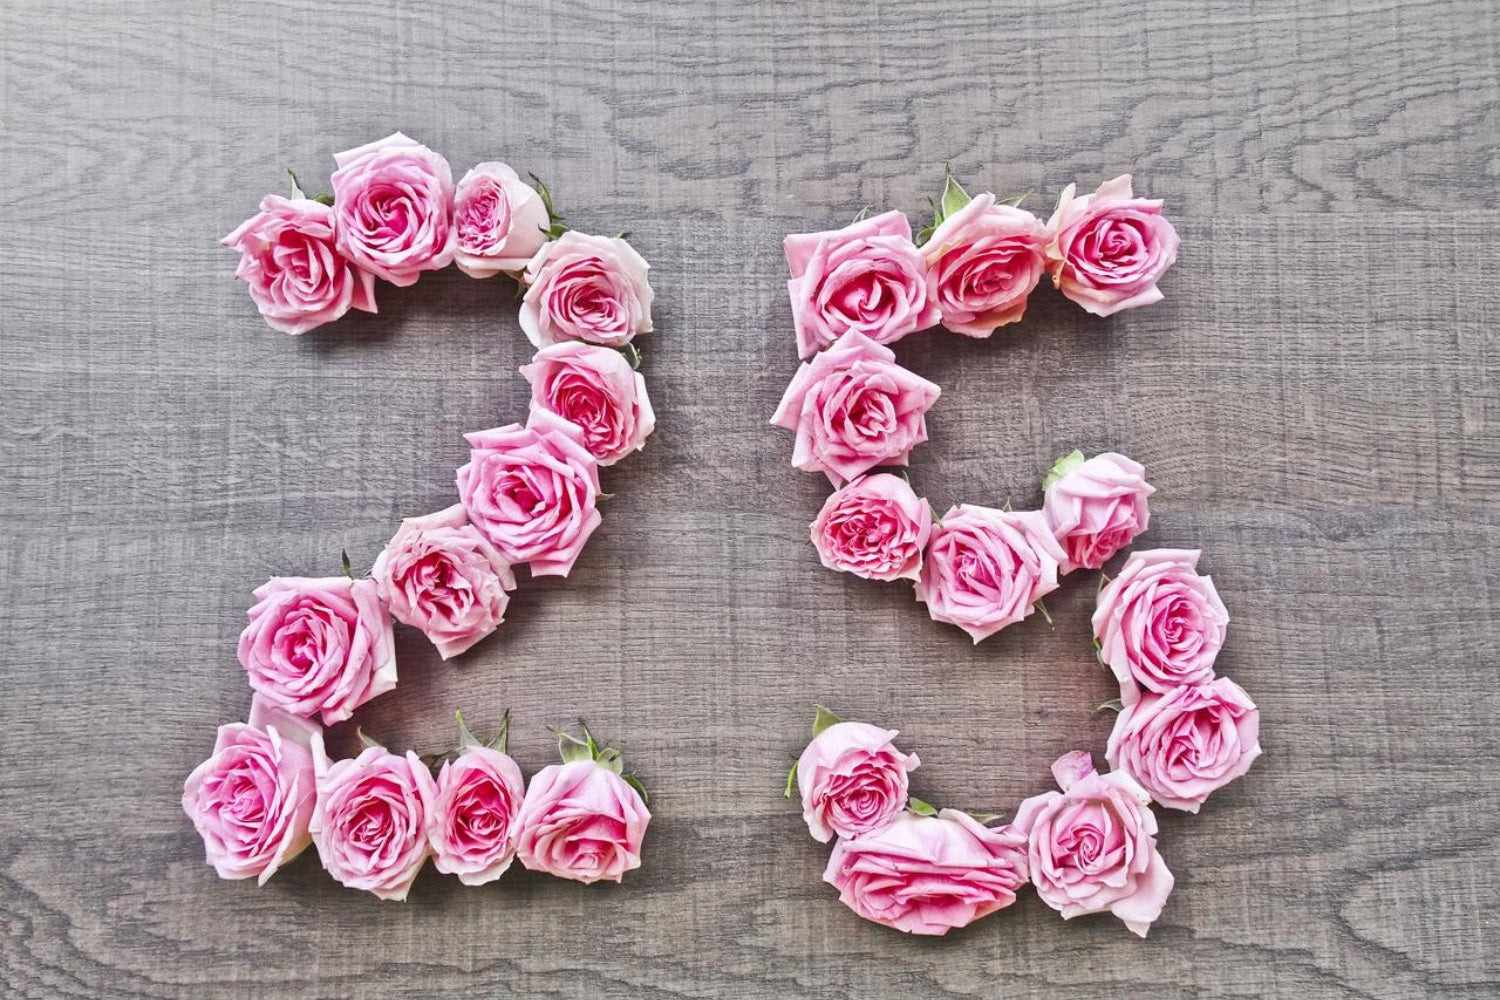 Floral Birthday Number Backdrop.
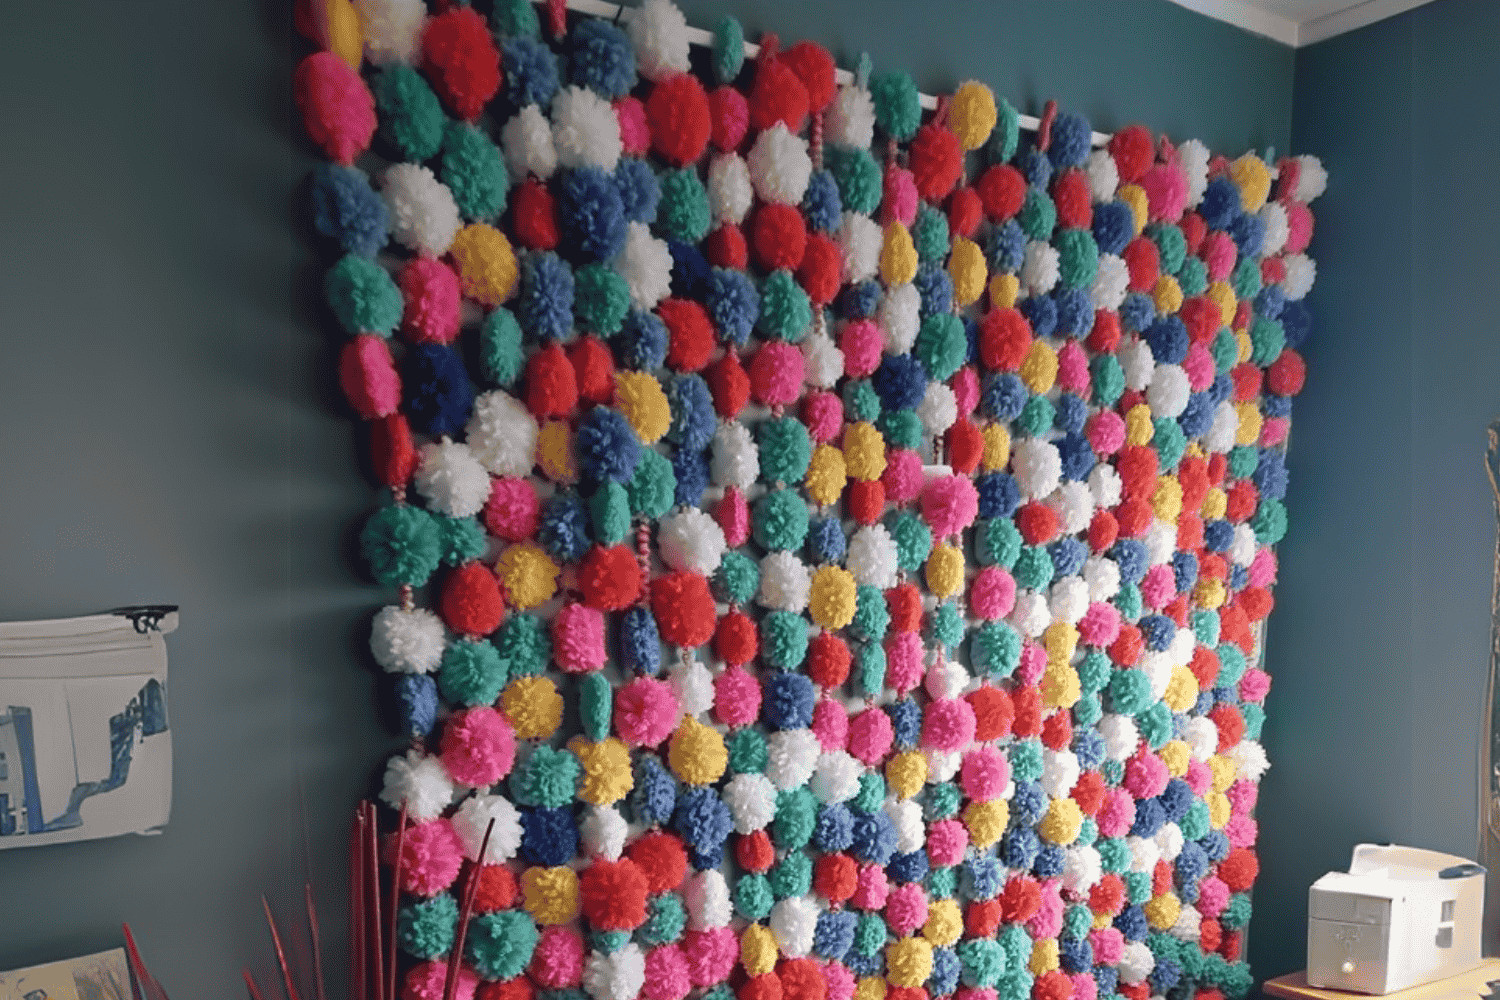
5.3. DIY Pom Pom Backdrop
Never underestimate pom poms! Buy or make colorful pom poms and attach them to strings. Hang many strings for a brimming, aesthetic effect.
You can do so by buying little colorful pom poms (or easily making some yourself with wool and needles) and attaching them with a string.
Have many hanging out from one string and have many strings prepared so that the effect will feel brimming and aesthetic. You’ll see how many people will want to pose in front and with this unique and fun DIY backdrop.
 DIY Pom Pom Backdrop
5.4. Origami Backdrop
Want to learn a new art? Origami is beautiful and creative. Make birds, boats, flowers, and figures to match your birthday party’s vibe.
There are so many different origamis you can consider making. From little birds to boats, flowers, and figures… you name it!
So once you learn how to make them, you can totally be creative and make origami to your own needs, vibe, and birthday party. Making it extra unique and filled with art that everyone at the party will love to admire.
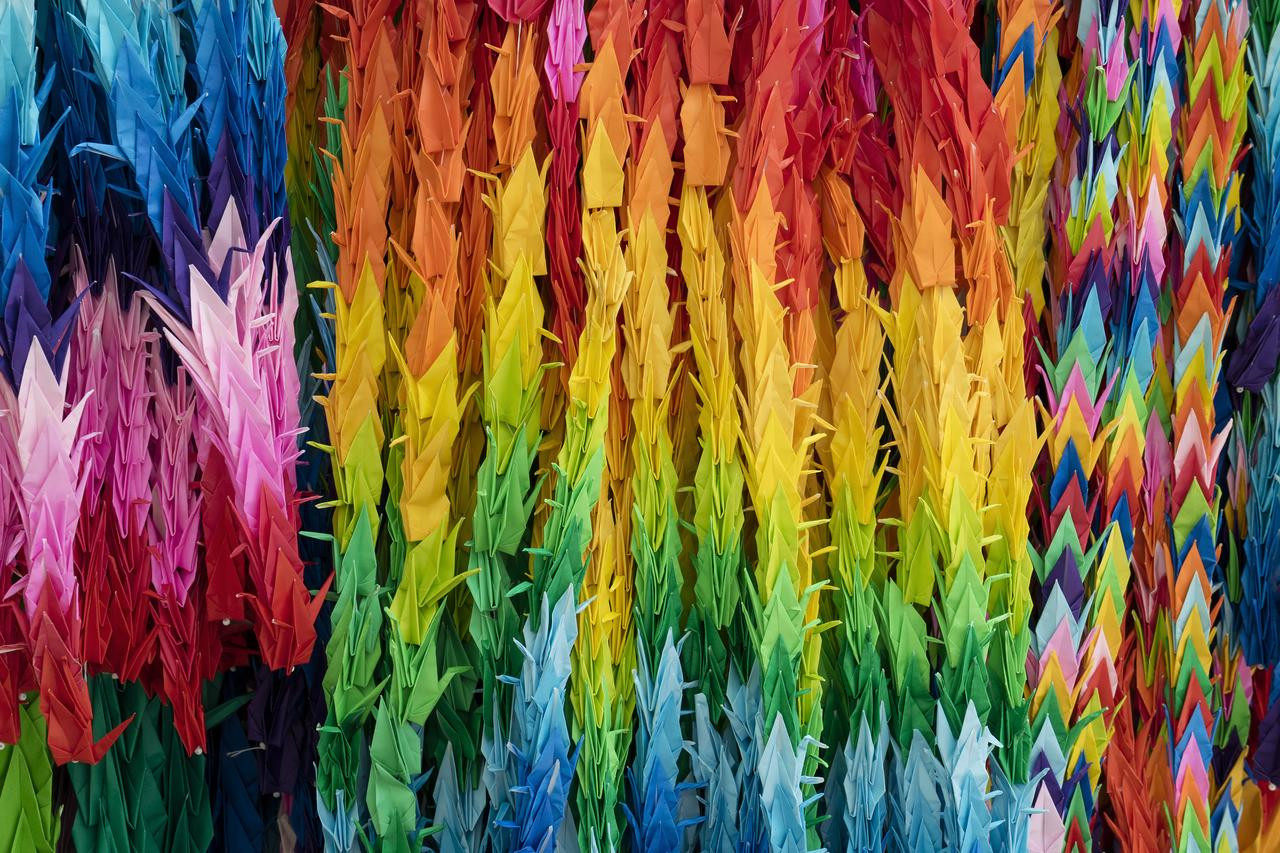 Origami Backdrop
5.5. Gift Wrapping Paper
What’s a birthday without gifts? Use gift wrapping paper to create a festive backdrop. Wrap empty boxes for a fuller effect and choose aesthetically-looking paper.
You can choose if you’d like it to be simply with paper or filled with fake birthday gifts (you can simply wrap empty boxes) that you can glue on a cardboard wall.
Choose aesthetically-looking wrapping paper that will enhance the overall birthday party vibe.
5.6. Ribbon Flower Backdrop
Create a personalized backdrop with ribbons. Stitch ribbons together to resemble flowers and glue them on a background, either filling a wall or creating a frame.
You can easily do so by stitching the ribbons together in a way that resembles a flower. Do as much as you can so to glue them all over a background either to fill a wall or to create a frame! A perfect birthday decoration for your festive photo.
 Ribbon Flower Backdrop
5.7. The Good Old Classic Balloon Backdrop
Can’t forget balloons! DIY a backdrop with balloons by creating a rainbow cloud, a balloon arch, or a balloon wall. It’s a safe, cheap way to enhance photos.
You can DIY a classy, cute backdrop filled with balloons in many ways. An idea is to buy all kinds of colored balloons and create a rainbow cloud setting.
Alternatively, you could create a balloon arch. Or, of course, you can fill your selected background with balloons, making a balloon wall. Whatever you pick is going to be a safe and cheap way to enhance any birthday party’s photos!
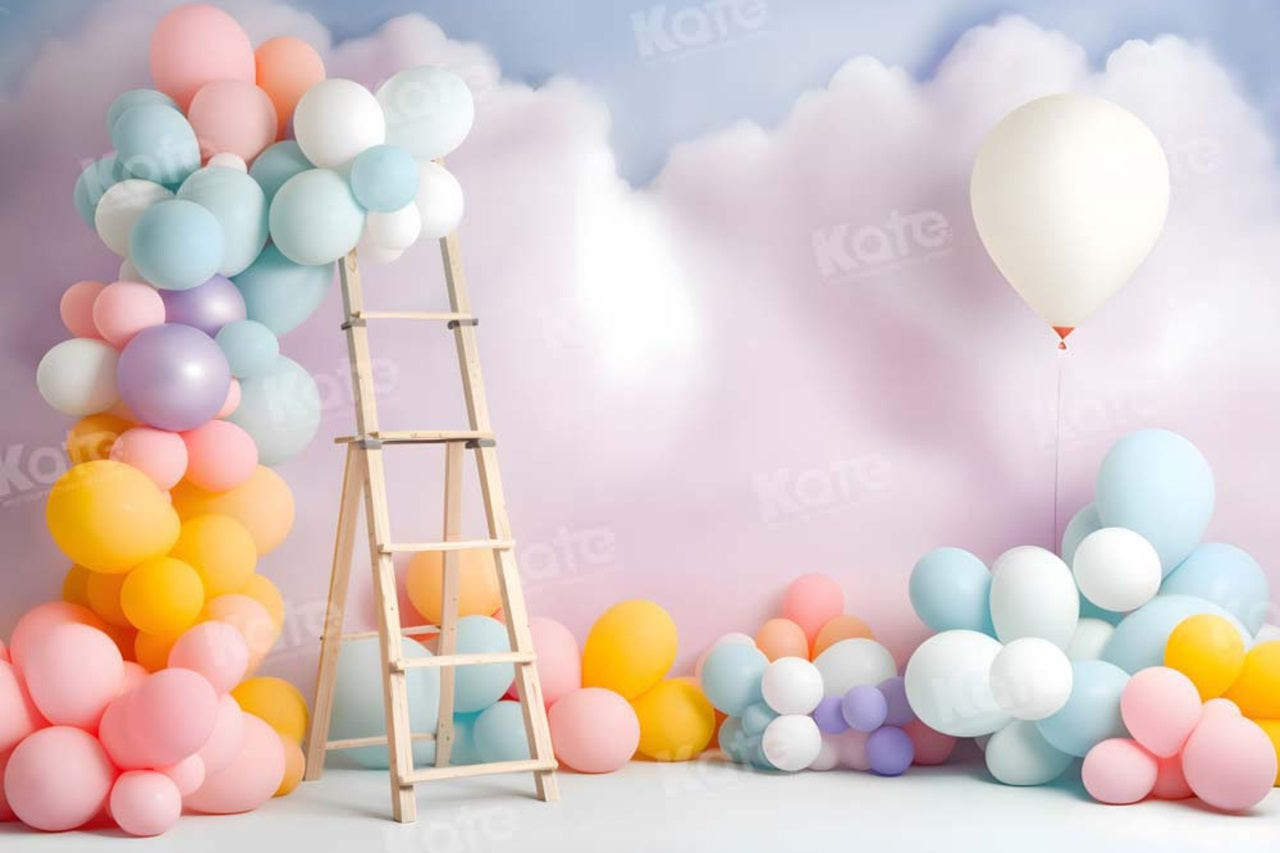 The colorful Balloon Backdrop
5.8. Personalized Birthday Backdrop
Want a unique touch? Use backdrop paper and write or paint the birthday boy/girl’s name, age, and drawings. Make it personal and special.
Get your preferred type of backdrop paper out there. Make sure it’s one you can write or paint on. Then, get crazy creative with it! Be unique and deep.
Pain the birthday boy/girl’s name, the age, some nice elements, and drawings. Anything that will make it personalized and unique. Something that everyone would want to check out and pose with.
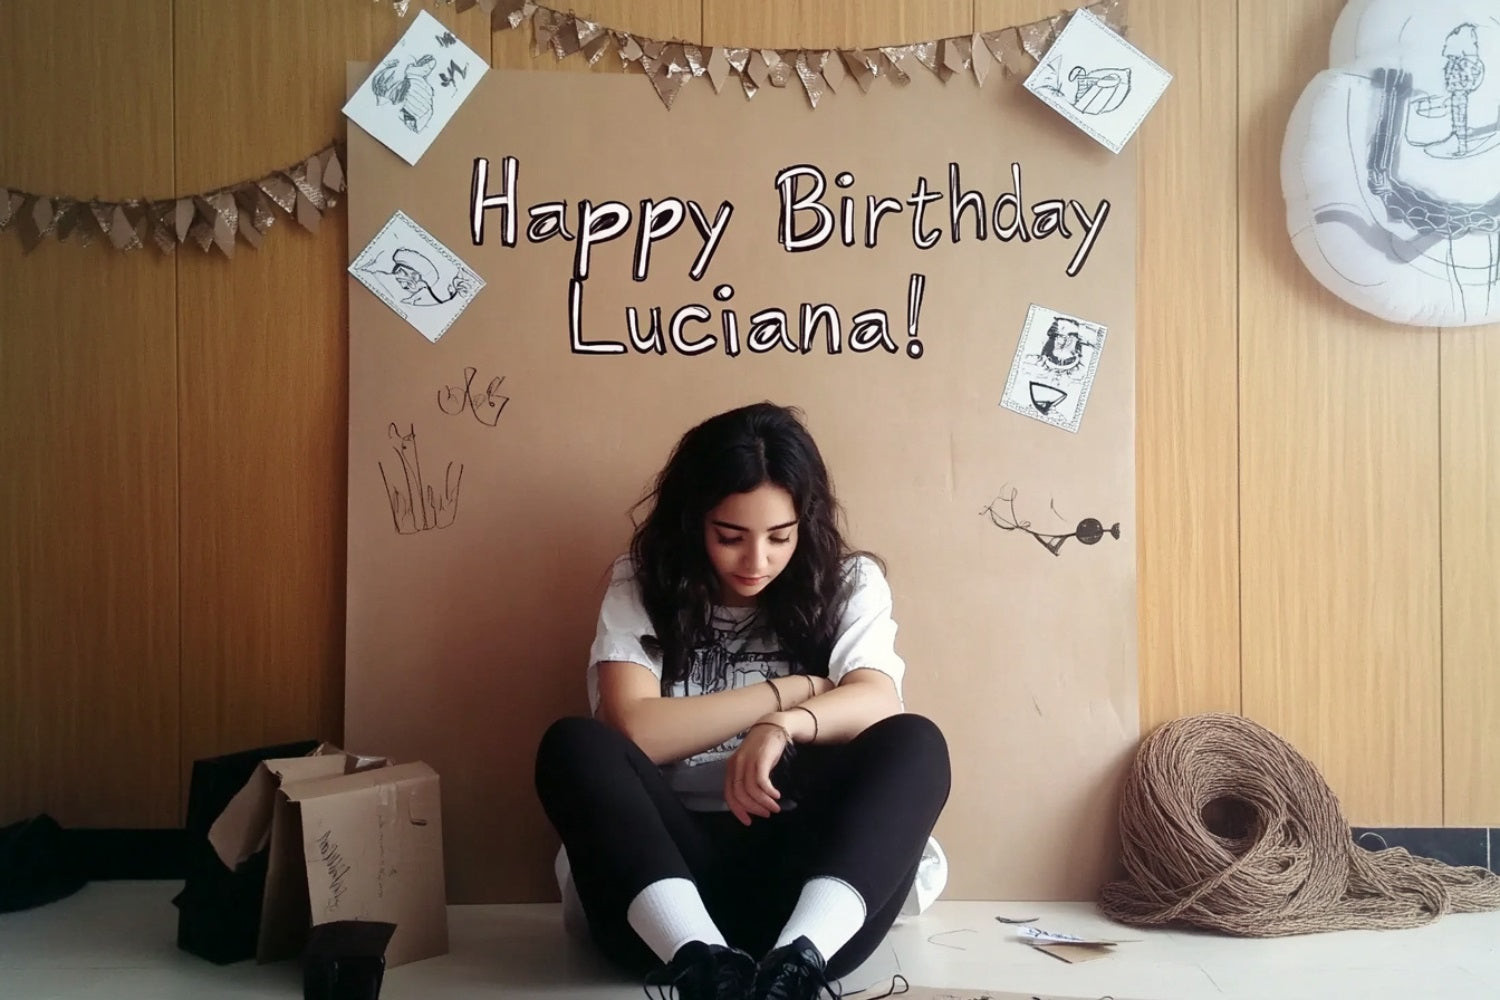 A girl sits in front of the DIY Birthday Backdrop.
5.9. Polaroid Frame Backdrop
Want an Instagram-worthy backdrop? Create a polaroid-looking frame and hang it in your favorite area. Add a “Happy Birthday” message and flowers for extra flair.
Paint a “Happy Birthday” right under it and add flowers, candles, or any other element you love around it! This will smoothly add up to your party and most probably, make it viral on Instagram too! Indeed, an effective DIY backdrop.
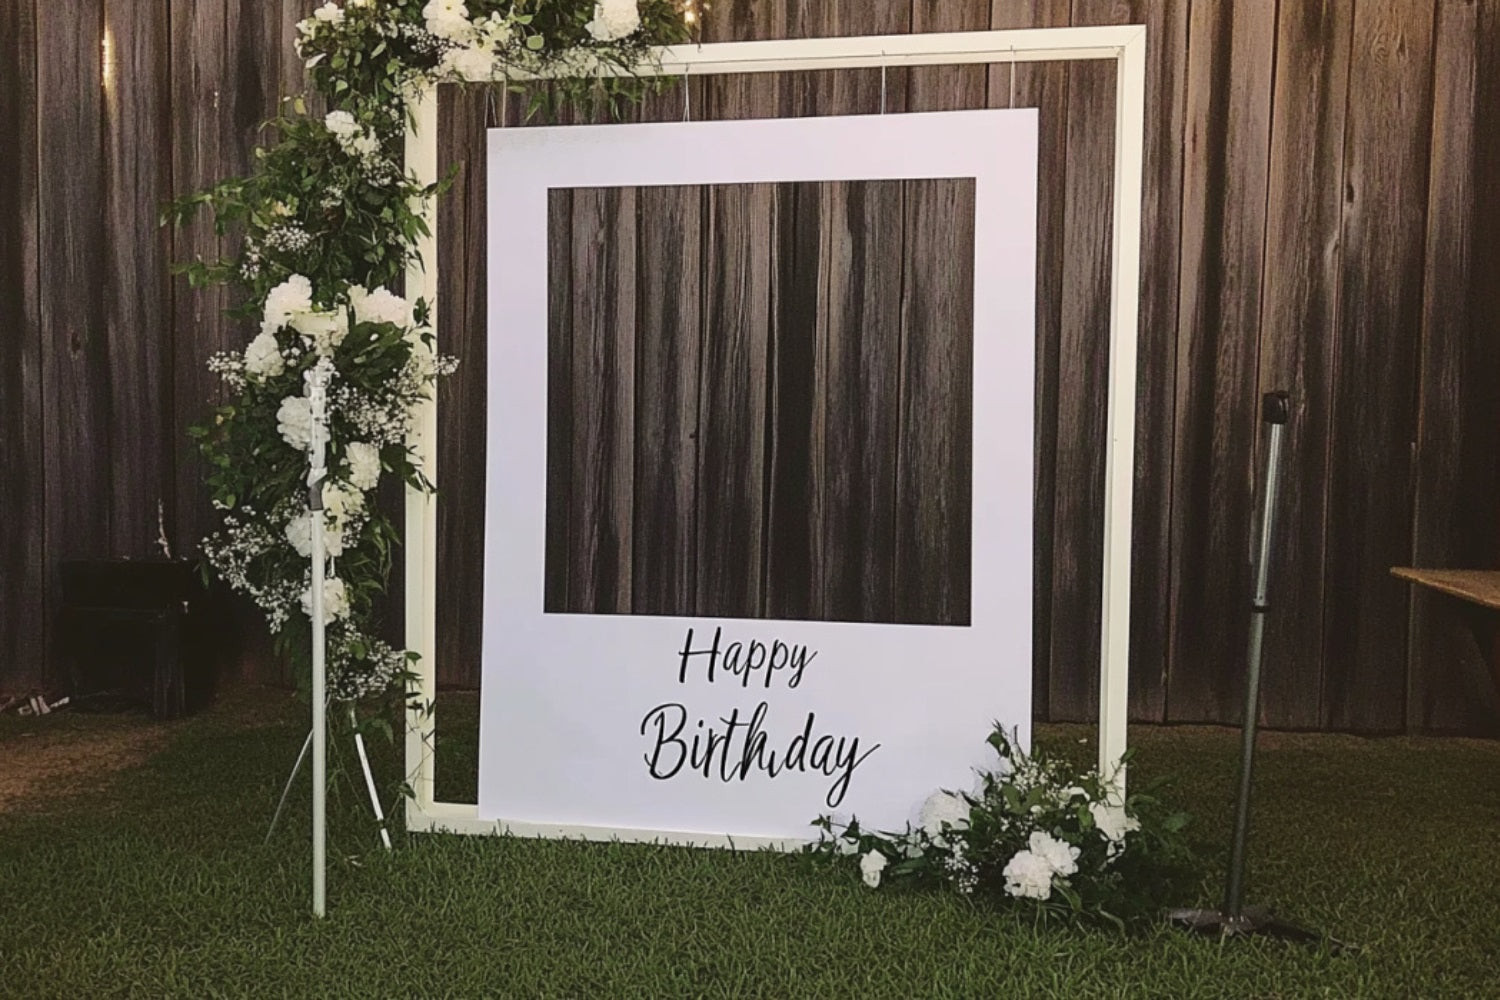 Polaroid Frame Backdrop
5.10. The Disco DIY Backdrop
For a disco theme, go all out with glitter! Add silver or golden streamers (or shiny mirrors) and frame it with gold or silver balloons. Add a neon “Happy Birthday” sign and a fancy armchair.
Attach them on a wall or cardboard. Then proceed with framing it with gold or silver balloons! Add the cherry on the cake with a neon “Happy Birthday” sign. Have a fancy armchair or stool placed in front, where people at the party could be sitting and have their birthday party shot taken!
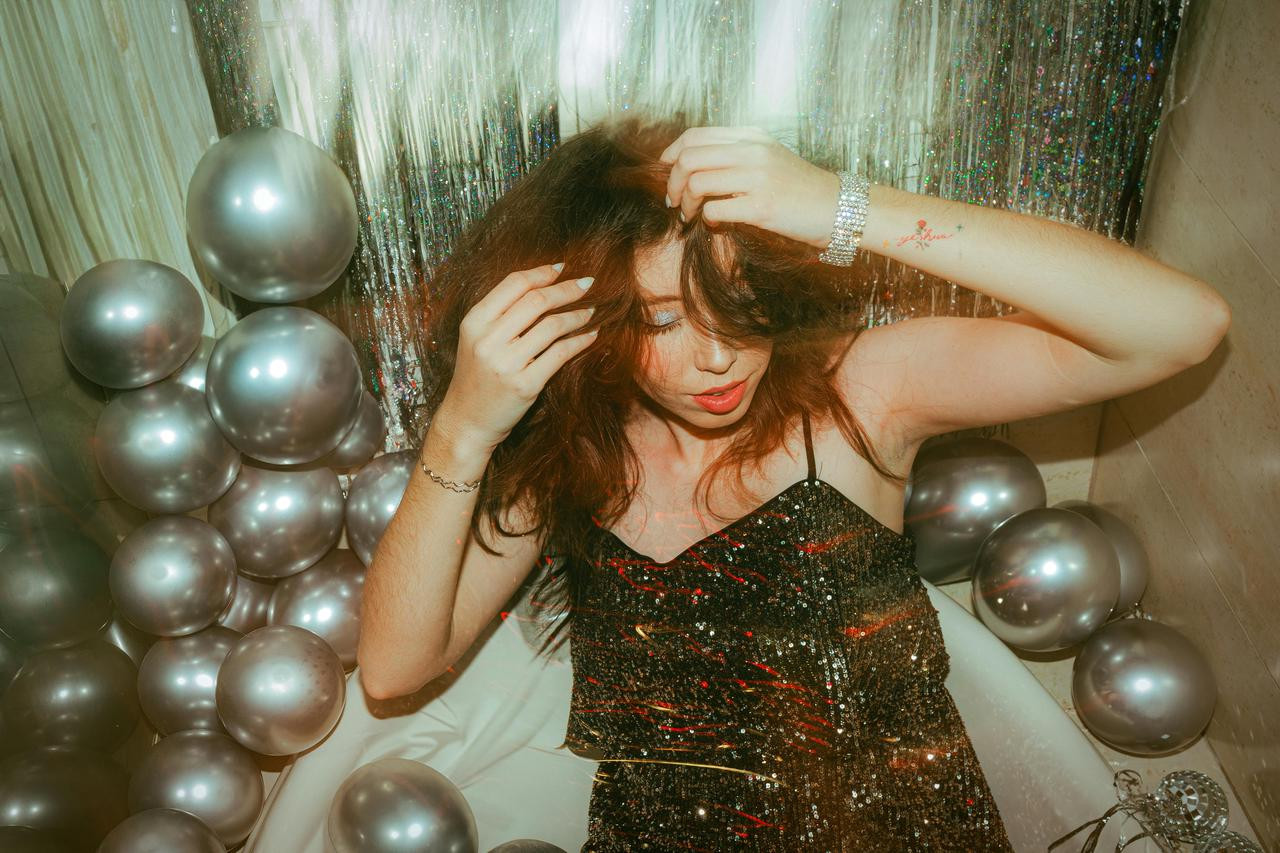 A girl poses in front of the silver balloon disco backdrop.
5.11. The Party Anemone DIY Backdrop
Want a cute, less glittery effect? Cut large red petals from card paper, glue them together, and add black wool pom poms in the middle. Frame it with black balloons for a creative birthday shot.
Buy some red card paper and cut out some large petals from it. Glue five red petals together and add some black wool pom poms in the middle. Attach these paper blossom flowers on a red, black, or white surface. Frame your backdrop with black balloons and be ready for the cutest, most creative birthday shot!
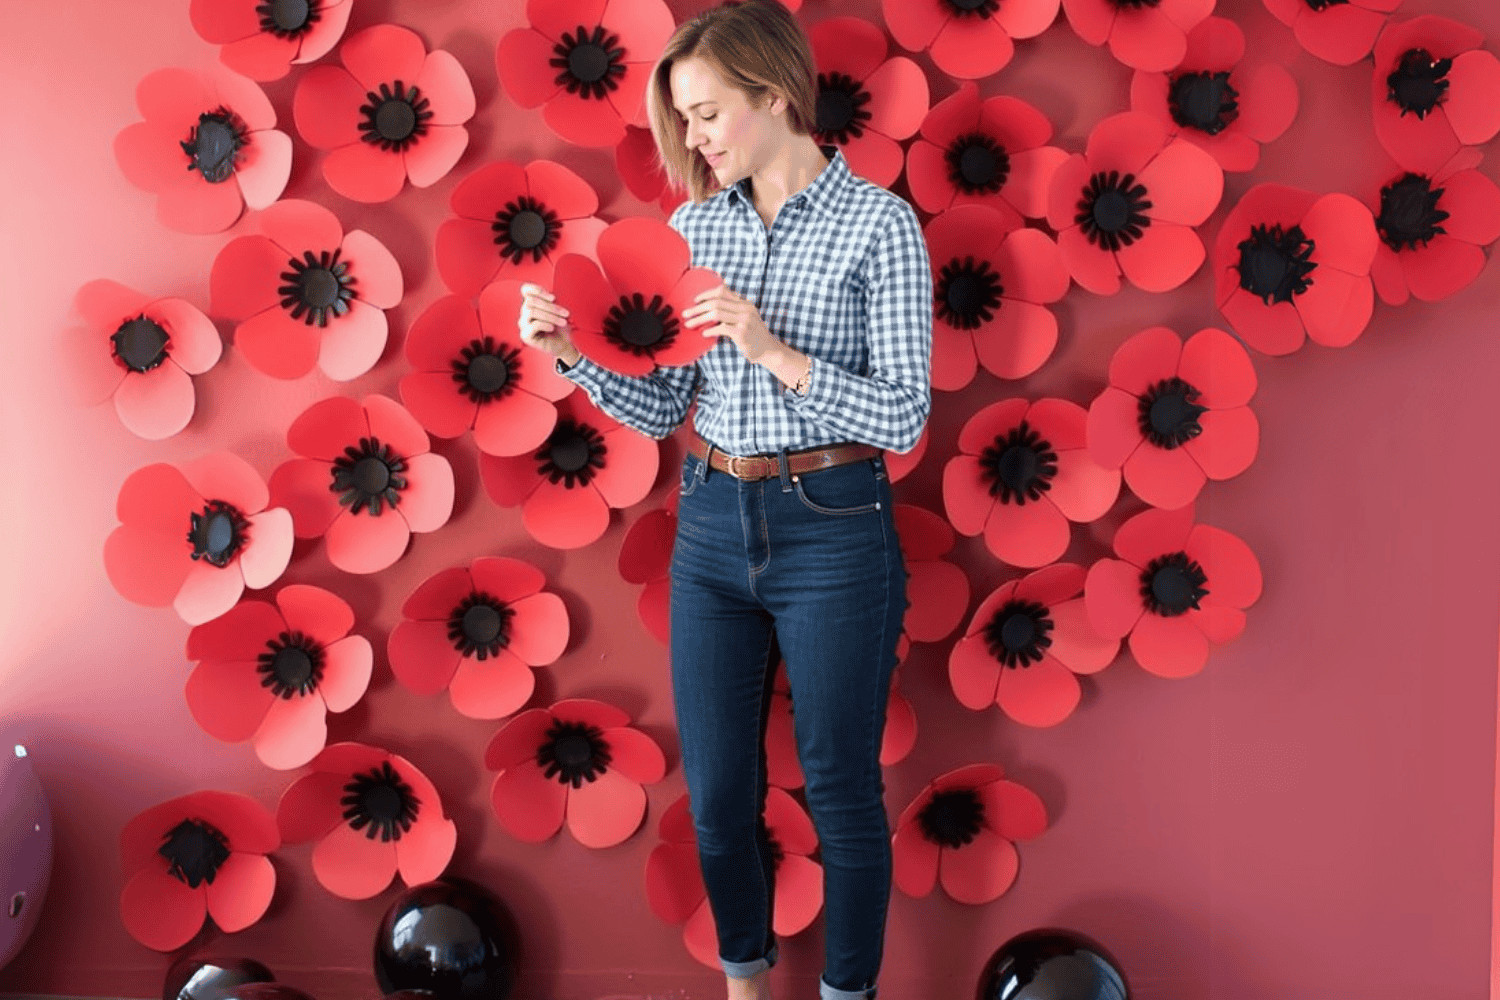 The Party Anemone DIY Backdrop
6. Essential Materials for DIY Photo Backdrops
What materials are essential for creating DIY photo backdrops? Stock up on cardboard, fabric, paint, lights, and various decorative elements to bring your creative visions to life.
| Material | Use |
|---|---|
| Cardboard | Base for geometric shapes, 3D structures, and textured backdrops |
| Fabric | Drapes, garlands, and textured backgrounds |
| Paint | Coloring and customizing backdrops |
| Lights | Adding ambiance and highlighting specific areas |
| Tissue Paper | Creating flower-like textures and colorful effects |
| Streamers | Adding sparkle and festivity |
| Balloons | Decorating birthday backdrops and adding color |
| Wooden Crates | Building rustic and unique structures |
| Ribbons | Creating flower accents and decorative drapes |
| Floral Elements | Adding natural beauty and elegance |
7. Step-by-Step Guide to Creating a Simple Fabric Backdrop
How do you create a simple fabric backdrop? Choose your fabric, prepare your space, hang the fabric, and adjust the lighting for a seamless and professional look.
- Choose Your Fabric: Select a fabric that complements your subject and theme. Cotton, muslin, and velvet are popular choices.
- Prepare Your Space: Clear the area where you’ll be setting up the backdrop and ensure you have enough space to work comfortably.
- Hang the Fabric: Use a backdrop stand, clamps, or tape to hang the fabric smoothly. Ensure there are no wrinkles or creases.
- Adjust the Lighting: Position your lights to eliminate shadows and highlight the fabric’s texture. Experiment with different angles and intensities.
- Test Your Setup: Take a few test shots to ensure the backdrop looks seamless and professional. Make any necessary adjustments to the fabric or lighting.
8. Tips for Lighting Your Photo Backdrop
What are some tips for lighting your photo backdrop effectively? Master the use of natural and artificial light to enhance the texture, color, and overall mood of your backdrops.
- Use Natural Light: Position your subject near a window to take advantage of soft, diffused natural light.
- Incorporate Artificial Light: Use studio lights, reflectors, and diffusers to control the intensity and direction of light.
- Experiment with Angles: Adjust the angle of your lights to create different shadows and highlights.
- Control the Intensity: Use dimmers or diffusers to soften the light and prevent harsh shadows.
- Consider Color Temperature: Choose light bulbs with a color temperature that complements your backdrop and subject.
- Use Reflectors: Reflectors bounce light back onto your subject, filling in shadows and creating a more balanced exposure.
According to Popular Photography magazine, using a combination of natural and artificial light sources can enhance the depth and texture of your backdrops, resulting in more visually appealing images.
9. Incorporating Textures and Patterns into Backdrops
How do textures and patterns enhance photo backdrops? Add depth, visual interest, and personality to your backdrops with textured fabrics, patterned paper, and natural elements.
| Texture/Pattern | Effect |
|---|---|
| Wood | Adds warmth, rustic charm, and natural elegance |
| Brick | Creates an urban, edgy, and industrial feel |
| Floral | Provides a soft, romantic, and whimsical aesthetic |
| Geometric | Adds a modern, structured, and visually striking element |
| Glitter | Infuses a glamorous, celebratory, and sparkling vibe |
| Velvet | Offers a luxurious, sophisticated, and dramatic touch |
| Abstract | Provides an artistic, creative, and unique background |
| Solid Colors | Offers a clean, versatile, and minimalist backdrop |
10. The Art of Color Coordination in Photo Backdrops
Why is color coordination crucial in photo backdrops? Create harmonious and visually appealing images by understanding color theory and selecting palettes that complement your subject.
- Understand Color Theory: Learn about primary, secondary, and tertiary colors, as well as complementary, analogous, and triadic color schemes.
- Choose a Color Palette: Select a palette that complements your subject’s skin tone, clothing, and the overall theme of the photoshoot.
- Consider the Mood: Different colors evoke different emotions. Use colors that reinforce the desired mood of your images.
- Use Color Contrast: Contrast helps to highlight your subject and create visual interest.
- Balance Warm and Cool Tones: Balancing warm and cool colors creates a more harmonious and visually appealing image.
- Test Your Colors: Before the photoshoot, test your color palette to ensure it looks good on camera and complements your subject.
11. Budget-Friendly DIY Backdrop Ideas
What are some creative and affordable DIY backdrop ideas? Transform everyday materials like paper, fabric scraps, and household items into stunning photo backdrops without breaking the bank.
| Idea | Materials |
|---|---|
| Paper Streamers | Crepe paper, scissors, tape |
| Fabric Scraps Garland | Fabric scraps, scissors, twine |
| Balloon Wall | Balloons, balloon pump, tape |
| Paper Flower Wall | Colored paper, scissors, glue |
| Chalkboard Backdrop | Chalkboard, chalk |
| Book |