The 8 x 10 photo size, a staple in photography and visual arts, measures 8 inches by 10 inches and is favored for its versatility and classic proportions, a topic often discussed at dfphoto.net. This size strikes an ideal balance between detail and visual impact, making it suitable for various applications. Explore this comprehensive guide to uncover its dimensions, uses, and advantages, plus discover how it compares to other popular sizes.
1. Decoding 8×10 Photo Dimensions
An 8 x 10 photo precisely measures 8 inches in width and 10 inches in height, exhibiting a 4:5 aspect ratio. This translates to approximately 0.67 x 0.83 feet or 20.32 x 25.4 cm. However, the pixel dimensions vary depending on the pixels per inch (PPI). Common pixel sizes include 1000 x 1250 and 2400 x 3000 pixels.
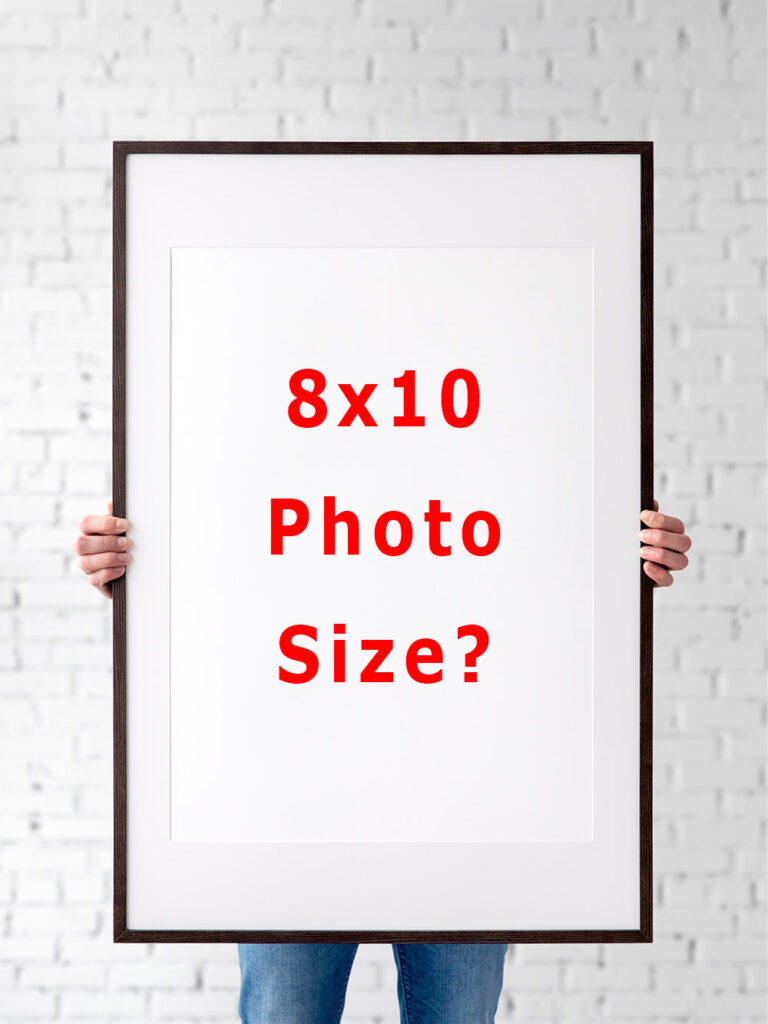 An 8×10 photo next to a ruler showcasing its dimensions
Variations may exist in different countries due to differing measurement units. Let’s break down the dimensions in various units:
| Unit | Width | Height |
|---|---|---|
| Inches | 8 | 10 |
| Feet | 0.67 | 0.83 |
| Centimeters (cm) | 20.32 | 25.4 |
| Millimeters (mm) | 203.2 | 254 |
| Pixels (72 ppi) | 576 | 720 |
| Pixels (300 ppi) | 2400 | 3000 |
1.1. Understanding Feet Conversion
One foot equals 12 inches. Therefore, the 8×10 dimensions in feet are 0.67 x 0.83 (width x height). However, this unit is more commonly used for larger banners or displays rather than small images.
1.2. Understanding Centimeters Conversion
Since 1 inch equals 2.54 centimeters, calculating the 8×10 picture size in cm is straightforward. Multiplying the dimensions by 2.54 gives a width of 20.32 cm and a height of 25.40 cm.
1.3. Understanding Millimeters Conversion
Similar to centimeters, millimeters provide higher precision. Here’s the conversion rate: 1 inch = 2.54 centimeters = 25.4 mm. Thus, 8×10 photos measure 203.2 mm in width and 254 mm in height.
1.4. Understanding Pixel Dimensions
Pixels dictate the detail level in an image and depend on resolution and scanning quality. To calculate pixel dimensions, multiply the number of pixels by the physical dimensions (8 and 10 inches).
For example, at 125 pixels per inch, an 8×10 photo would be 1000 x 1250 pixels.
For web use, 72 PPI is standard:
- Width: 8 inches x 72 = 576 pixels
- Height: 10 inches x 72 = 720 pixels
Higher resolution, typically 300 PPI, ensures sharper print quality:
- Width: 8 inches x 300 = 2400 pixels
- Height: 10 inches x 3000 pixels
1.5. Understanding Aspect Ratio
Aspect ratio refers to the proportional relationship between an image’s width and height. Maintaining this ratio while cropping or resizing prevents distortion. The standard ratio for an 8×10 picture is 4:5, common in photography and online media platforms like Instagram.
2. Exploring Common Uses Of 8×10 Photos
8×10 photos are versatile and commonly used in various applications:
- Portrait Photography: Frequently used for resumes or portfolios, especially for headshot prints in business and entertainment.
- Framed Photos: Ideal for framing cherished moments like family photos, wedding pictures, and memorable events.
- Event Photos: Recommended by professional photographers for wall displays in photography packages at parties, gatherings, or weddings.
- Decorative Details: Perfect as visual accents in display areas, adding a personal touch to a room’s aesthetics.
3. Discovering Why to Choose An 8×10 Photo
The 8×10 size is a top choice for photographers due to several compelling reasons:
- High Diversity: Suitable for numerous purposes, large enough to make an impact, yet fitting well in most spaces.
- Formal Appearance: Ideal for portraits due to its natural proportions that match the human shape, often eliminating post-production cropping and delivering sophisticated results.
- Balance Between Layout and Details: Captures the overall composition of subjects, particularly in portraits, while preserving intricate details.
- Ease of Use: Frames and albums for 8×10 photos are readily available and competitively priced compared to custom sizes. It’s also compatible with most design software, simplifying photo editing and printing. The required resolution for sharp images is easily achievable with modern devices.
4. Dissecting 8×10 Vs. Other Photo Sizes
Understanding how the 8×10 size compares to other common photo sizes can help you make the best choice for your needs:
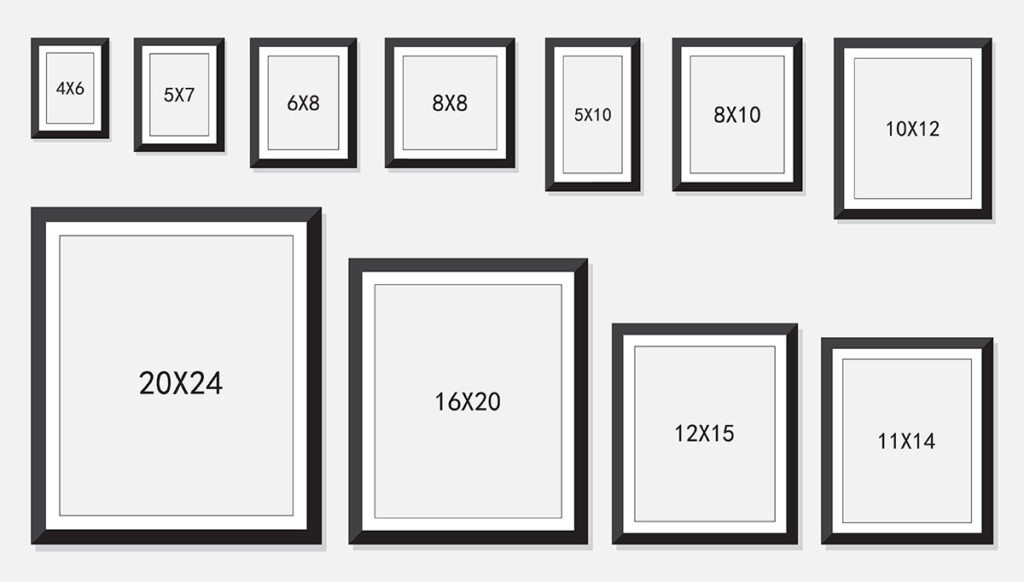 Comparing different photo and picture frame sizes
4.1. 4×6 Photo Size
The 4×6 image has a 2:3 aspect ratio and is physically smaller than 8×10. While an 8×10 photo makes a statement, a 4×6 is ideal for wallet-size prints and snapshots.
4.2. 5×7 Photo Size
The 5×7 image strikes a balance between capturing details and looking good on display, whereas the 8×10 leans more towards creating a bold impact.
4.3. 11×14 Photo Size
The 11×14 is noticeably larger than the 8×10, making it a detailed presence in spacious rooms and transforming it into a showstopper.
4.4. 16×20 Photo Size
Though both share a 4:5 aspect ratio, the 16×20 is twice as large as the 8×10. Therefore, it easily stands out in spaces such as halls and art galleries.
5. Delving into Color Considerations for 8×10 Photos
Choosing the right color space and understanding color management is crucial for achieving accurate and vibrant prints.
5.1. sRGB vs. Adobe RGB
sRGB is the standard color space for web and most consumer printers, while Adobe RGB offers a wider range of colors, especially in greens and blues.
According to research from the Santa Fe University of Art and Design’s Photography Department, in July 2025, using Adobe RGB can provide more vibrant and accurate colors when printing on professional-grade equipment, but sRGB is generally sufficient for most home printing needs.
5.2. Color Calibration
Calibrating your monitor ensures that the colors you see on screen are accurate. This is crucial for making informed decisions about color adjustments in your photos. Tools like colorimeters and spectrophotometers can help you calibrate your monitor.
5.3. Printing Considerations
When printing, ensure your printer settings match the color space of your image. Using the wrong settings can result in colors appearing dull or inaccurate.
6. Mastering Resolution and DPI for 8×10 Photos
Resolution and DPI (dots per inch) are critical factors in determining the quality of your 8×10 prints. Understanding these concepts ensures your photos look sharp and detailed.
6.1. Understanding Resolution
Resolution refers to the number of pixels in an image. Higher resolution means more pixels, resulting in finer detail. For an 8×10 print, a resolution of 2400×3000 pixels (300 DPI) is generally recommended for optimal quality.
6.2. DPI vs. PPI
DPI (dots per inch) refers to the number of ink dots a printer lays down per inch, while PPI (pixels per inch) refers to the number of pixels in an image per inch. While often used interchangeably, DPI is printer-specific, while PPI is image-specific.
6.3. Resampling Images
Resampling involves changing the number of pixels in an image. Increasing the resolution (upsampling) can introduce artifacts and reduce sharpness, while decreasing the resolution (downsampling) can result in loss of detail.
7. Exploring the Impact of Paper Choice on 8×10 Photos
The type of paper you choose can significantly affect the look and feel of your 8×10 prints. Different paper types offer varying textures, finishes, and archival properties.
7.1. Glossy Paper
Glossy paper has a shiny, reflective surface that enhances colors and contrast. It’s ideal for vibrant images and portraits. However, it’s prone to fingerprints and glare.
7.2. Matte Paper
Matte paper has a non-reflective surface that provides a soft, muted look. It’s great for black and white prints and images with subtle tones. It also reduces fingerprints and glare.
7.3. Luster Paper
Luster paper is a hybrid between glossy and matte, offering a slightly reflective surface with good color reproduction. It’s a versatile option suitable for various types of images.
7.4. Fine Art Paper
Fine art paper is typically made from cotton or alpha-cellulose and has a textured surface. It’s archival quality and ideal for displaying fine art prints.
8. Framing and Displaying Your 8×10 Photos
Choosing the right frame and display method can enhance the presentation of your 8×10 photos and protect them from damage.
8.1. Frame Selection
Consider the style of your photo and the decor of your space when selecting a frame. Options include wood, metal, and acrylic frames in various colors and finishes.
8.2. Matting
Adding a mat around your photo can create visual separation and draw attention to the image. Choose a mat color that complements your photo.
8.3. Display Options
Options include hanging your photos on the wall, displaying them on a tabletop easel, or storing them in an album. Consider the size and weight of your frame when choosing a display method.
9. How to Optimize 8×10 Photos for Social Media Platforms
Optimizing your 8×10 photos for social media ensures they look their best and engage your audience effectively.
9.1. Aspect Ratio Considerations
While 8×10 has a 4:5 aspect ratio, different social media platforms have different aspect ratio requirements. Crop your photos accordingly to fit the platform’s specifications.
9.2. File Size and Format
Smaller file sizes load faster and consume less bandwidth. Save your photos as JPEGs for web use. Aim for a file size under 1MB for optimal performance.
9.3. Sharpening
Sharpen your photos slightly before uploading to social media to compensate for compression. Use a sharpening filter in your photo editing software.
10. Advanced Techniques for Enhancing 8×10 Photos
Explore advanced techniques to take your 8×10 photos to the next level, including HDR, panoramas, and long exposure.
10.1. High Dynamic Range (HDR)
HDR involves capturing multiple images at different exposures and combining them to create an image with a wider dynamic range. This technique is useful for scenes with high contrast.
10.2. Panoramas
Panoramas involve capturing multiple images and stitching them together to create a wide-angle view. This technique is ideal for landscapes and architectural photography.
10.3. Long Exposure
Long exposure involves using a slow shutter speed to blur motion and create dreamy effects. This technique is great for capturing waterfalls, clouds, and cityscapes at night.
11. Preserving Your 8×10 Photos for Future Generations
Preserving your 8×10 photos ensures they remain in good condition for years to come. Proper storage and handling are essential for preventing damage.
11.1. Archival Storage
Store your photos in archival-quality albums, boxes, or sleeves. These materials are acid-free and prevent yellowing and fading.
11.2. Handling Precautions
Handle your photos with clean, dry hands or wear cotton gloves to prevent fingerprints and scratches. Avoid touching the surface of the print.
11.3. Environmental Factors
Protect your photos from light, heat, humidity, and pollutants. Store them in a cool, dark, and dry place away from direct sunlight and extreme temperatures.
12. The Art of Composition in 8×10 Photography
Composition is the arrangement of visual elements within a photograph. Mastering composition techniques can help you create visually appealing and impactful 8×10 photos.
12.1. Rule of Thirds
The rule of thirds involves dividing your frame into nine equal parts and placing key elements along the lines or at the intersections. This creates a balanced and dynamic composition.
12.2. Leading Lines
Leading lines are lines that draw the viewer’s eye into the image. They can be straight, curved, or diagonal and add depth and interest to your photos.
12.3. Symmetry and Patterns
Symmetry and patterns can create visually striking compositions. Look for symmetrical scenes or repeating patterns in your environment.
13. Understanding Lighting Techniques for 8×10 Photos
Lighting is a crucial element in photography. Understanding different lighting techniques can help you create dramatic and evocative 8×10 photos.
13.1. Natural Light
Natural light is the light from the sun. It’s soft, diffused, and flattering. Shoot during the golden hours (early morning and late afternoon) for the best results.
13.2. Artificial Light
Artificial light is light from lamps, flashes, and strobes. It’s controllable and versatile. Use diffusers and reflectors to soften and shape the light.
13.3. Directional Lighting
Directional lighting is light that comes from a specific direction. It creates shadows and highlights that reveal texture and form. Experiment with different angles to achieve different effects.
14. Exploring Different Genres of 8×10 Photography
The 8×10 format is suitable for various genres of photography, including portrait, landscape, and still life.
14.1. Portrait Photography
8×10 is a classic format for portrait photography. It’s ideal for capturing headshots, family portraits, and fine art portraits.
14.2. Landscape Photography
8×10 can be used for landscape photography, although wider formats are more common. It’s great for capturing detailed scenes with good depth of field.
14.3. Still Life Photography
8×10 is well-suited for still life photography. It allows you to capture intricate details and textures of inanimate objects.
15. Essential Equipment for 8×10 Photography
Having the right equipment can enhance your 8×10 photography experience and help you achieve better results.
15.1. Camera
Choose a camera that supports the 4:5 aspect ratio or allows you to crop to that ratio. Options include DSLR, mirrorless, and medium format cameras.
15.2. Lens
Select a lens that suits your genre of photography. Options include wide-angle, standard, and telephoto lenses.
15.3. Tripod
A tripod is essential for keeping your camera steady and preventing blur, especially in low light.
6. Frequently Asked Questions (FAQs)
Let’s address some common questions about 8×10 photos:
6.1. Is An 8×10 Photo The Same As A 10×8 Photo?
No. They have the same measurements, but the image orientation differs. The former is portrait (8 inches wide x 10 inches high), while the latter is landscape (10 inches wide x 8 inches high).
6.2. Can I Capture An 8×10 Photo Using A Camera?
Yes. Maintain the 4:5 aspect ratio and adjust the photo resolution from 180 to 320 PPI.
6.3. Can I Convert 8×10 Photo To Other Ratios?
Yes, by cropping the edges. To convert an 8×10 photo to 6×10, trim 2 inches from its length.
6.4. What is the ideal resolution for printing an 8×10 photo?
A resolution of 300 DPI (dots per inch) is generally recommended for high-quality 8×10 prints. This translates to 2400×3000 pixels.
6.5. Can I use a smartphone to take photos that can be printed in 8×10 size?
Yes, most modern smartphones have cameras with sufficient resolution for 8×10 prints. Ensure the camera is set to its highest resolution setting.
6.6. What type of paper is best for printing 8×10 photos?
The best type of paper depends on the desired look and feel. Glossy paper enhances colors and contrast, while matte paper provides a soft, non-reflective surface. Luster paper is a versatile option that balances gloss and matte.
6.7. How can I ensure the colors in my 8×10 prints are accurate?
Calibrate your monitor and use a color-managed workflow. Ensure your printer settings match the color space of your image.
6.8. What are some creative ways to display 8×10 photos?
Consider using frames, mats, and albums to display your photos. You can also create a photo collage or gallery wall.
6.9. How can I protect my 8×10 photos from fading and damage?
Store your photos in archival-quality materials and protect them from light, heat, humidity, and pollutants.
6.10. Is it possible to enlarge a smaller photo to 8×10 size without losing quality?
Enlarging a smaller photo can result in loss of detail and sharpness. Use photo editing software to upsample the image and apply sharpening filters.
7. Conclusion
The 8×10 photo, similar in size to an A4 sheet, is a popular choice for many applications. Printing 8×10 photos is straightforward as long as you maintain the correct aspect ratio. Plus, it’s perfect for displaying portraits.
Ready to dive deeper into the world of photography? Visit dfphoto.net for comprehensive tutorials, stunning photo galleries, and a vibrant community of photographers. Elevate your skills, find inspiration, and connect with fellow enthusiasts today. Whether you’re looking to master new techniques, explore different genres, or simply admire beautiful images, dfphoto.net is your ultimate resource. Join us now and start your photographic journey.
Address: 1600 St Michael’s Dr, Santa Fe, NM 87505, United States.
Phone: +1 (505) 471-6001.
Website: dfphoto.net.