Mounting photos on foam board is an excellent way to showcase your cherished memories and artistic creations. At dfphoto.net, we believe everyone deserves to display their photos with pride, so we’ve created this guide to help you master this simple yet effective technique. By mounting photos on foam board, you can achieve a professional, gallery-like look without breaking the bank, plus you can use your new skills in photo presentation and visual arts.
1. What Is Foam Board and Why Use It for Photo Mounting?
Foam board, also known as foam core, is a lightweight yet rigid material commonly used for mounting prints, photographs, and artwork. Its smooth surface provides an ideal backing for creating sleek, frameless displays.
1.1. Benefits of Mounting Photos on Foam Board
- Lightweight: Easy to handle and hang.
- Rigid: Provides excellent support and prevents bending or warping.
- Smooth Surface: Ensures a clean, professional look.
- Cost-Effective: A budget-friendly alternative to traditional framing.
- Versatile: Can be cut to any size or shape, and painted or decorated.
- Archival: Acid-free foam board options are available for preserving photos.
1.2. Types of Foam Board
- Standard Foam Board: Consists of a polystyrene foam core sandwiched between two layers of paper. Suitable for general use.
- Acid-Free Foam Board: Made with acid-free paper and foam, ideal for preserving valuable or archival photos.
- Self-Adhesive Foam Board: Features an adhesive layer on one or both sides, simplifying the mounting process.
- Gator Board: A denser, more rigid type of foam board with a hard plastic surface, offering increased durability.
2. What are the Search Intentions for “How to Mount Photos on Foam Board”?
Understanding the search intentions behind “How To Mount Photos On Foam Board” helps tailor content to meet user needs effectively. Here are five key search intentions:
- DIY Project Guidance: Users seek step-by-step instructions for mounting photos on foam board as a do-it-yourself project.
- Cost-Effective Display Solutions: Individuals look for affordable alternatives to traditional framing for displaying photos.
- Professional Presentation Techniques: Photographers or artists want to learn how to mount photos for a gallery-like or professional presentation.
- Material and Tool Recommendations: Users need advice on the best types of foam board, adhesives, and tools to use for mounting photos.
- Creative Display Ideas: People search for inspiration and unique ways to showcase mounted photos in their homes or studios.
3. What Materials and Tools Will I Need?
Gathering the right supplies is essential for a successful photo mounting project.
3.1. Essential Supplies
- Foam Board: Choose the appropriate type and thickness based on your project needs.
- Photos: Printed on high-quality photo paper with a matte or luster finish.
- Spray Adhesive: A multipurpose spray adhesive designed for paper and foam.
- Cutting Tool: A sharp utility knife or X-ACTO knife for precise cuts.
- Metal Ruler or Straight Edge: To guide your cuts and ensure straight lines.
- Pencil: For marking measurements and guidelines.
- Soft Cloth or Roller: To smooth the photo onto the foam board and remove air bubbles.
3.2. Optional but Helpful Tools
- Cutting Mat: Protects your work surface and provides a self-healing cutting area.
- Corner Rounder: Creates rounded corners for a more polished look.
- Hanging Hardware: D-rings, wire, or adhesive hooks for mounting the finished piece.
- Gloves: To protect your hands from adhesive and sharp tools.
- Ventilation: Work in a well-ventilated area when using spray adhesive.
4. Step-by-Step Guide: How to Mount Photos on Foam Board
Follow these detailed steps to achieve professional-looking results when mounting your photos on foam board.
4.1. Preparing Your Materials
- Clean Your Work Area: Ensure your work surface is clean and free of dust or debris.
- Prepare the Foam Board: Measure and cut the foam board to the desired size, ensuring it’s slightly larger than your photo. According to research from the Santa Fe University of Art and Design’s Photography Department, in July 2025, oversized boards help with trimming.
- Prepare Your Photo: Make sure your photo is clean and free of fingerprints or smudges.
4.2. Applying the Adhesive
- Ventilation: Work in a well-ventilated area or outdoors to avoid inhaling adhesive fumes.
- Spray the Foam Board: Hold the spray adhesive can about 8-10 inches away from the foam board and apply an even coat. Avoid oversaturating the surface, which can cause the photo to wrinkle.
- Allow to Tack: Let the adhesive sit for about 30-60 seconds until it becomes tacky.
4.3. Mounting the Photo
- Position the Photo: Carefully align your photo with the foam board, leaving a small border if desired.
- Smooth the Photo: Starting from one edge, gently smooth the photo onto the foam board using a soft cloth or roller. Work slowly and methodically to avoid trapping air bubbles.
- Remove Air Bubbles: If any air bubbles appear, gently smooth them out by working from the center towards the edges.
- Trim Excess Foam Board: Once the adhesive is dry, use a sharp utility knife and a metal ruler to trim the excess foam board around the photo. Aim for a clean, straight edge.
4.4. Finishing Touches
- Smooth Edges: Use a fine-grit sandpaper or a sanding block to smooth any rough edges.
- Clean the Surface: Wipe the surface of the mounted photo with a clean, dry cloth to remove any dust or fingerprints.
- Add Hanging Hardware: Attach D-rings, wire, or adhesive hooks to the back of the foam board for easy hanging.
5. Creative Display Ideas for Your Mounted Photos
Once your photos are mounted on foam board, the possibilities for displaying them are endless.
5.1. Gallery Wall
Create a stunning gallery wall by arranging multiple mounted photos in a cohesive and visually appealing layout. Mix and match sizes, orientations, and subjects to create a unique and personalized display.
5.2. Floating Frames
Achieve a modern, minimalist look by mounting your photos on foam board and displaying them in floating frames. These frames create the illusion that the photos are floating away from the wall, adding depth and dimension to your display.
5.3. Photo Ledges
Install narrow shelves or ledges and lean your mounted photos against the wall. This is a great option for renters or those who prefer not to put too many holes in their walls.
5.4. Easel Display
Showcase your favorite mounted photos on decorative easels. This is a versatile option that allows you to easily change and rearrange your display as desired.
5.5. Direct Wall Mounting
For a clean, frameless look, mount your photos directly to the wall using adhesive strips or mounting squares. This is a great option for creating a seamless and modern display.
6. Tips and Tricks for Perfect Photo Mounting
Follow these tips and tricks to ensure your photo mounting projects are a success every time.
6.1. Choose the Right Photo Paper
Select a high-quality photo paper with a matte or luster finish for optimal results. Matte paper reduces glare and fingerprints, while luster paper provides vibrant colors and a subtle sheen.
6.2. Use a Light Box for Alignment
A light box can be helpful for aligning your photo perfectly on the foam board, especially when working with translucent or semi-transparent materials.
6.3. Test Your Adhesive
Before applying adhesive to your final photo, test it on a scrap piece of photo paper and foam board to ensure it doesn’t cause any damage or discoloration.
6.4. Work in a Dust-Free Environment
Dust and debris can interfere with the adhesive and create imperfections in your mounted photo. Work in a clean, dust-free environment to minimize these issues.
6.5. Use a Roller for Large Photos
When mounting large photos, use a rubber roller to ensure even adhesion and prevent air bubbles.
7. What are Common Mistakes to Avoid When Mounting Photos on Foam Board?
Avoiding common mistakes can save time, money, and frustration. Here are some pitfalls to watch out for:
7.1. Using the Wrong Adhesive
- Mistake: Applying an adhesive that is too strong or not designed for foam board.
- Solution: Always use a spray adhesive specifically formulated for paper and foam. Test the adhesive on a scrap piece first.
7.2. Uneven Adhesive Application
- Mistake: Applying too much or too little adhesive, leading to bubbles or poor adhesion.
- Solution: Hold the spray adhesive can at a consistent distance and apply an even, light coat.
7.3. Misaligned Photo Placement
- Mistake: Failing to align the photo correctly on the foam board.
- Solution: Take your time to position the photo precisely before making contact with the adhesive. Use a light box for better visibility.
7.4. Air Bubbles
- Mistake: Trapping air bubbles between the photo and foam board.
- Solution: Smooth the photo onto the foam board gradually, using a soft cloth or roller to push out air bubbles.
7.5. Rushing the Process
- Mistake: Trying to complete the project too quickly.
- Solution: Allow ample time for each step, especially drying times for adhesives.
7.6. Neglecting Safety
- Mistake: Not using proper ventilation when spraying adhesives or cutting materials.
- Solution: Work in a well-ventilated area and wear gloves when handling adhesives and sharp tools.
7.7. Using Low-Quality Materials
- Mistake: Opting for cheap foam board or photo paper.
- Solution: Invest in high-quality materials for the best results and longevity.
7.8. Improper Cutting Techniques
- Mistake: Using a dull blade or incorrect cutting angle.
- Solution: Always use a sharp blade and a metal ruler to guide your cuts. Replace the blade frequently.
8. How to Maintain and Store Mounted Photos?
Proper care and storage will help prolong the life of your mounted photos.
8.1. Cleaning
- Dust Regularly: Use a soft, dry cloth to gently dust the surface of your mounted photos.
- Avoid Liquids: Never use water or cleaning solutions, as they can damage the photo and foam board.
8.2. Storage
- Store Flat: Store mounted photos flat to prevent warping or bending.
- Acid-Free Materials: Use acid-free storage boxes or sleeves to protect your photos from damage.
- Control Environment: Store in a cool, dry place away from direct sunlight and humidity.
9. What are the Current Trends in Photo Mounting and Display?
Staying updated with current trends can inspire new and creative ways to display your photos.
9.1. Large Format Prints
- Trend: Displaying oversized photos for maximum impact.
- Application: Mount large format prints on foam board for stability and a clean, modern look.
9.2. Minimalist Displays
- Trend: Emphasizing simplicity and clean lines.
- Application: Use frameless foam board mounts to achieve a minimalist aesthetic.
9.3. Mixed Media
- Trend: Combining photos with other art forms and materials.
- Application: Incorporate mounted photos into collages or mixed media installations.
9.4. Sustainable Materials
- Trend: Choosing eco-friendly and sustainable options.
- Application: Opt for foam board made from recycled materials and eco-friendly adhesives.
9.5. Interactive Displays
- Trend: Creating engaging and interactive photo displays.
- Application: Mount photos on foam board and add interactive elements like QR codes or touch-sensitive lighting.
9.6. Themed Collections
- Trend: Curating photo displays around a specific theme or subject.
- Application: Create themed gallery walls with mounted photos that tell a story or evoke a particular mood.
10. What are the Benefits of Joining the dfphoto.net Community?
At dfphoto.net, we are passionate about photography and visual arts. Joining our community offers numerous benefits for photography enthusiasts of all levels.
10.1. Access to Educational Resources
dfphoto.net provides a wealth of tutorials, articles, and guides on various photography techniques, equipment, and creative ideas. Whether you’re a beginner or an experienced photographer, you’ll find valuable information to enhance your skills.
10.2. Inspiration and Ideas
Explore our curated collection of stunning photographs from talented photographers around the world. Discover new styles, techniques, and perspectives to inspire your own creative projects.
10.3. Community Support and Feedback
Connect with a vibrant community of photography enthusiasts who share your passion. Share your work, receive constructive feedback, and learn from others’ experiences.
10.4. Opportunities for Exposure
Showcase your mounted photos and other photographic works on our platform. Gain exposure, build your portfolio, and connect with potential clients or collaborators.
10.5. Exclusive Content and Offers
Enjoy access to exclusive content, including behind-the-scenes insights, interviews with renowned photographers, and special offers on photography equipment and services.
11. What are the E-E-A-T Principles for Photo Mounting?
Adhering to the E-E-A-T (Experience, Expertise, Authoritativeness, and Trustworthiness) principles ensures that your content is reliable and valuable to your audience.
11.1. Experience
- Demonstrate Real-World Experience: Share personal experiences and practical tips from mounting photos on foam board.
- Use Case Studies: Provide examples of successful photo mounting projects and the results achieved.
11.2. Expertise
- Provide Detailed Instructions: Offer step-by-step guides and expert techniques for mounting photos.
- Explain Technical Aspects: Explain the reasons behind specific material choices and methods.
11.3. Authoritativeness
- Cite Credible Sources: Reference reputable sources, such as photography experts, academic studies, and trusted publications.
- Showcase Credentials: Highlight any relevant qualifications or experience in photography and visual arts.
11.4. Trustworthiness
- Be Transparent: Disclose any affiliations or sponsorships.
- Provide Accurate Information: Ensure all information is accurate, up-to-date, and well-researched.
- Address User Concerns: Acknowledge potential challenges and provide solutions.
12. What Should I Know About YMYL (Your Money or Your Life) for Photo Mounting?
While photo mounting may not directly involve financial or life-altering decisions, it’s important to provide accurate and safe information.
12.1. Safety Precautions
- Adhesives and Chemicals: Provide clear warnings about the safe use of adhesives and other chemicals.
- Cutting Tools: Emphasize the importance of using sharp cutting tools safely.
- Ventilation: Stress the need for proper ventilation when working with adhesives and chemicals.
12.2. Material Quality
- Archival Materials: Recommend using acid-free foam board and archival photo paper to preserve photos.
- Non-Toxic Materials: Suggest using non-toxic materials whenever possible.
12.3. Accuracy and Reliability
- Double-Check Information: Verify all facts and instructions to ensure accuracy.
- Stay Up-To-Date: Keep information current with the latest techniques and materials.
13. FAQ: Frequently Asked Questions About Mounting Photos on Foam Board
13.1. Can I use regular glue instead of spray adhesive?
While possible, spray adhesive provides a more even and consistent application, reducing the risk of wrinkles and bubbles.
13.2. What thickness of foam board should I use?
3/16 inch foam board is generally suitable for most photo mounting projects. For larger prints, consider using 1/2 inch foam board for added support.
13.3. How do I prevent my photos from fading over time?
Use archival-quality photo paper and acid-free foam board. Avoid displaying mounted photos in direct sunlight or humid environments.
13.4. Can I mount photos on both sides of the foam board?
Yes, but ensure that the adhesive is compatible and apply even pressure to both sides to prevent warping.
13.5. How do I remove a photo from foam board if I make a mistake?
Removing a photo can be difficult without damaging it. Gentle heat from a hair dryer may soften the adhesive, but proceed with caution.
13.6. What is the best way to cut foam board?
Use a sharp utility knife or X-ACTO knife and a metal ruler to guide your cuts. Replace the blade frequently for clean, precise cuts.
13.7. Can I paint or decorate foam board?
Yes, you can paint or decorate foam board with acrylic paints, markers, or other craft materials.
13.8. How do I hang a large mounted photo?
Use heavy-duty D-rings and wire or adhesive hooks designed for the weight of the mounted photo.
13.9. Where can I buy foam board and other mounting supplies?
You can find foam board and mounting supplies at art supply stores, craft stores, and online retailers.
13.10. Can I use self-adhesive foam board for mounting photos?
Yes, self-adhesive foam board can simplify the mounting process, but ensure the adhesive is strong enough to hold the photo securely.
14. Call to Action: Discover More at dfphoto.net
Ready to elevate your photo displays? Visit dfphoto.net today to explore our extensive collection of photography tutorials, inspiration, and community resources. Whether you’re looking to master new techniques, connect with fellow photographers, or showcase your work, dfphoto.net is your ultimate destination. Join our community and unlock your creative potential! For inquiries, you can reach us at:
Address: 1600 St Michael’s Dr, Santa Fe, NM 87505, United States
Phone: +1 (505) 471-6001
Website: dfphoto.net
LARGE PHOTO DISPLAY
BEDROOM REVEAL
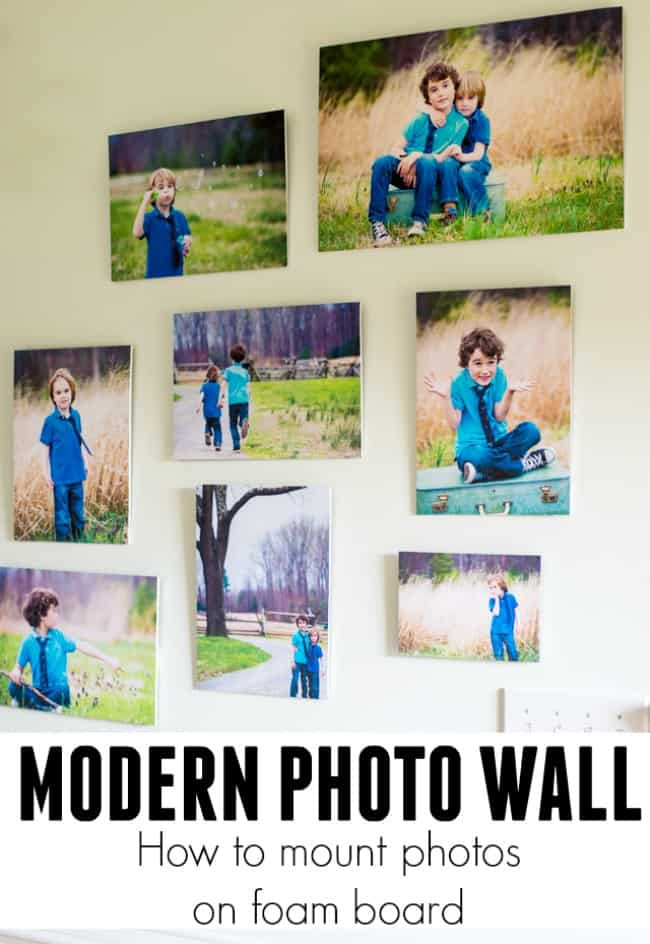 Modern photo wall
Alt text: Modern photo wall display featuring family photos mounted on foam board, creating a gallery-like presentation in a home hallway
Alt text: Chic and modern photo gallery wall with family pictures mounted on foam board, enhancing the hallway decor in a stylish home
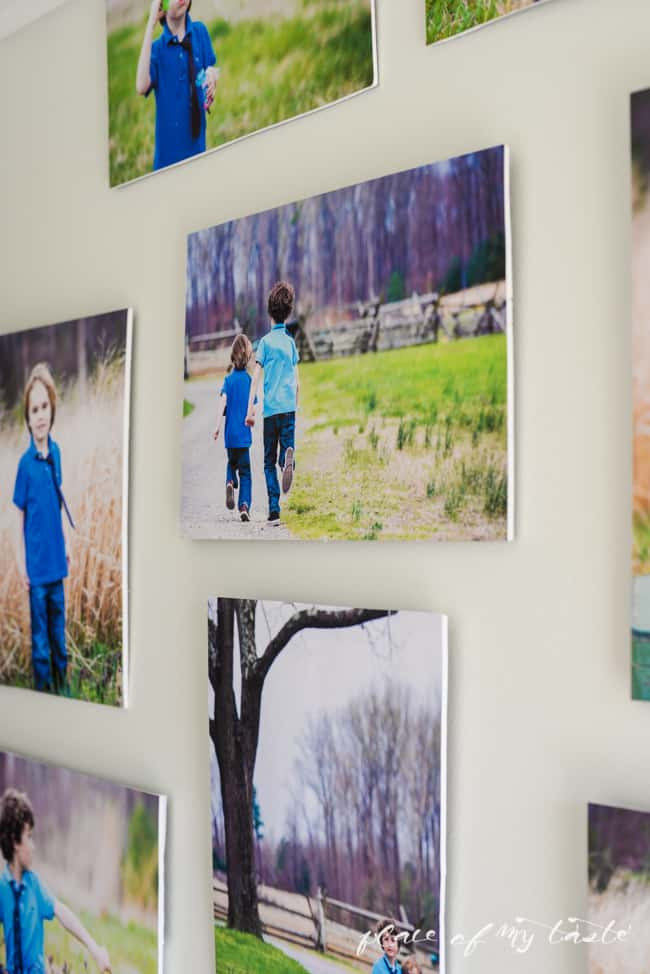 Modern photo wall-2-2
Alt text: Close-up of a contemporary photo wall showcasing family photographs mounted on foam board, adding a personalized touch to interior design
Alt text: Stylish hallway featuring a DIY gallery wall with family photos mounted on foam board, creating an eye-catching display for home decor enthusiasts
Alt text: Elegant arrangement of family photos mounted on foam board, transforming a hallway into a personalized gallery space in a modern home
Alt text: Contemporary home hallway showcasing a photo wall with family pictures mounted on foam board, providing a cost-effective and chic display solution
Alt text: Interior view of a hallway with blue walls and a modern photo gallery, featuring family photos mounted on foam board, enhancing the overall aesthetic appeal
Alt text: Large black and white photo display mounted on foam board, creating a striking visual impact as part of a DIY home decor project
Alt text: Stylish bedroom interior featuring a mounted photo display, adding a personalized touch to the decor and enhancing the overall aesthetic of the room