Are you struggling to adjust the photo size on your devices? On dfphoto.net, we’ll guide you through simple techniques to resize your photos, whether for printing, sharing online, or optimizing storage. With our tips, resizing photos becomes an easy part of your photography workflow. We provide you with the essential knowledge to master your image editing, so let’s begin with mastering your digital photography using image resizing, pixel dimensions, and aspect ratio.
1. Why Change the Size of a Photo?
Changing the size of a photo is a common task with various important reasons:
- Reducing File Size for Sharing: Large image files can be difficult to share via email or social media. Reducing the size makes them easier to send and upload.
- Optimizing for Web Use: Web pages load faster with smaller image files. Resizing images can significantly improve website performance and user experience.
- Preparing for Printing: Different print sizes require different resolutions. Resizing ensures your photos look their best when printed.
- Saving Storage Space: Smaller image files take up less space on your devices, which is useful when managing large photo collections.
2. Understanding Image Size Terminology
Before diving into the how-to, it’s helpful to understand the key terms related to image size:
- Resolution: This refers to the number of pixels in an image, typically measured in pixels per inch (PPI) or dots per inch (DPI). Higher resolution means more detail and larger file size.
- Dimensions: This indicates the width and height of an image in pixels. For example, an image with dimensions of 1920×1080 pixels is 1920 pixels wide and 1080 pixels high.
- File Size: This is the amount of storage space an image occupies, usually measured in kilobytes (KB) or megabytes (MB). File size depends on resolution, dimensions, and file format.
- Aspect Ratio: This is the ratio of the width to the height of an image. Common aspect ratios include 4:3, 3:2, and 16:9.
3. How to Change Photo Size on iPhone and iPad
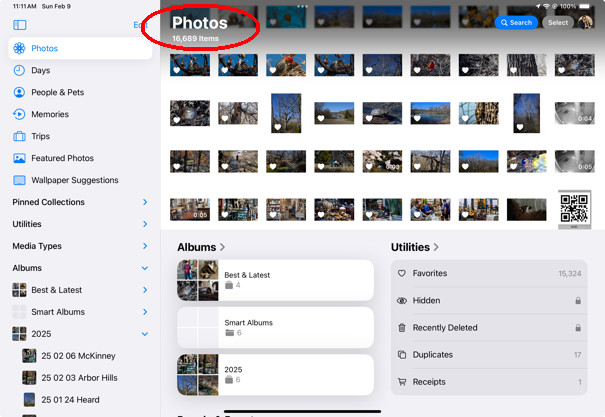
Many users, like those in the Apple Support Communities, have encountered issues with thumbnail sizes on their iPads after software updates. Here’s how to adjust photo sizes on your iOS devices:
3.1. Using the Built-In Photos App
While the Photos app doesn’t offer direct resizing, you can influence the display size of thumbnails.
- Adjusting Thumbnail Size:
- Open the Photos app.
- Navigate to the “Library” view.
- Scroll up to fill the screen with photos, and a double arrow will appear at the bottom.
- Tap the double arrow and select “View Options.”
- Choose “Zoom In” or “Zoom Out” to change the thumbnail size.
- Limitations:
- This method primarily changes the thumbnail view and doesn’t permanently resize the actual image file.
- Some users have reported that the settings revert after closing and reopening the app.
3.2. Using Third-Party Apps
For more control over image resizing, consider using third-party apps available on the App Store. Some popular options include:
- Image Size: A straightforward app for resizing images with options for custom dimensions and file formats.
- Resize Image: Offers batch resizing, compression, and preset sizes for various platforms.
- Adobe Photoshop Express: A free app with basic editing features, including resizing and cropping.
3.3. Steps to Resize Using a Third-Party App (Example: Image Size)
- Download and Install: Get “Image Size” from the App Store.
- Open the App and Select Image: Launch the app and choose the photo you want to resize from your library.
- Enter Desired Dimensions: Input the new width and height in pixels, inches, or centimeters. You can maintain the aspect ratio to avoid distortion.
- Save the Resized Image: Choose the output format (JPEG, PNG, etc.) and save the resized image to your device.
 Screenshot of Image Size app on iPad showing options to input desired dimensions to resize a photo, demonstrating resizing functionality for mobile devices
4. How to Change Photo Size on Android
Android devices also offer several ways to resize photos, both through built-in features and third-party apps.
4.1. Using the Built-In Gallery App
Some Android devices have built-in options to resize images directly from the Gallery app.
- Open the Gallery App: Launch the Gallery app and select the photo you want to resize.
- Look for Edit Options: Tap the “Edit” icon (usually a pencil or slider).
- Find Resize Option: Look for a “Resize” or “Adjust Size” option. If available, tap it.
- Choose a Preset Size or Custom Dimensions: Select a preset size (small, medium, large) or enter custom dimensions.
- Save the Resized Image: Save the changes, and a resized copy of the image will be created.
4.2. Using Google Photos
Google Photos, a popular photo management app on Android, offers a simple way to resize photos.
- Open Google Photos: Launch the Google Photos app and select the photo you want to resize.
- Edit the Photo: Tap the “Edit” icon (three sliders).
- Crop and Rotate: While not directly resizing, cropping can reduce the image size. Use the crop tool to select the desired area.
- Save a Copy: Save the changes as a copy to keep the original image intact.
4.3. Using Third-Party Apps
Like iOS, Android has many third-party apps for resizing images. Some popular choices include:
- Photo & Picture Resizer: A simple app with batch resizing and custom size options.
- Reduce Photo Size: Focuses on reducing file size with minimal quality loss.
- Adobe Photoshop Express: Available on Android with similar features as the iOS version.
4.4. Steps to Resize Using a Third-Party App (Example: Photo & Picture Resizer)
- Download and Install: Download “Photo & Picture Resizer” from the Google Play Store.
- Open the App and Select Photo: Launch the app and select the photo you want to resize.
- Choose a Size: Select a preset size (small, medium, large) or enter custom dimensions.
- Resize: Tap “Resize” and wait for the process to complete.
- Save the Resized Image: The resized image will be saved in a separate folder.
5. How to Change Photo Size on Windows
Windows offers multiple ways to resize photos, from the built-in Photos app to more advanced software.
5.1. Using the Built-In Photos App
The Photos app in Windows 10 and 11 provides basic resizing capabilities.
- Open the Photo: Right-click the photo and select “Open with” > “Photos.”
- Resize:
- Click the three dots in the top right corner and select “Resize.”
- Choose one of the preset sizes (S, M, L) or define custom dimensions.
- Save the Resized Copy: The app saves a resized copy of the image in the same folder.
5.2. Using Microsoft Paint
Paint is a basic image editing program included with Windows that can be used for resizing.
- Open the Photo in Paint: Right-click the photo and select “Open with” > “Paint.”
- Resize:
- Click “Resize” in the “Image” group on the “Home” tab.
- Choose to resize by percentage or pixels.
- Enter the desired percentage or dimensions. Ensure “Maintain aspect ratio” is checked to prevent distortion.
- Save the Resized Image: Go to “File” > “Save As” and choose the file format (JPEG, PNG, etc.) for the resized image.
5.3. Using Third-Party Software
For more advanced resizing and editing options, consider using third-party software:
- Adobe Photoshop: The industry-standard image editing software with extensive resizing and editing capabilities.
- GIMP: A free and open-source image editor that offers similar features to Photoshop.
- IrfanView: A lightweight image viewer and editor with batch resizing and conversion options.
5.4. Steps to Resize Using Photoshop
- Open the Image: Launch Photoshop and open the image you want to resize (“File” > “Open”).
- Image Size: Go to “Image” > “Image Size.”
- Set Dimensions and Resolution:
- Enter the desired width and height in pixels, inches, or centimeters.
- Adjust the resolution (PPI) as needed. For web use, 72 PPI is common. For printing, 300 PPI is recommended.
- Ensure “Resample” is checked and choose an appropriate resampling method (e.g., Bicubic Sharper for reduction).
- Save the Resized Image: Go to “File” > “Save As” and choose the file format and quality settings.
 Screenshot of the Image Size dialog box in Adobe Photoshop, showing options to adjust width, height, and resolution for resizing an image
6. How to Change Photo Size on Mac
macOS offers built-in tools and third-party options for resizing photos.
6.1. Using Preview
Preview is the default image viewer on macOS and includes a resizing tool.
- Open the Photo in Preview: Double-click the photo to open it in Preview.
- Adjust Size:
- Go to “Tools” > “Adjust Size.”
- Enter the desired width and height in pixels, inches, or centimeters.
- Ensure “Scale proportionally” is checked to maintain the aspect ratio.
- Save the Resized Image: Go to “File” > “Export” and choose the file format and quality settings for the resized image.
6.2. Using Photos App
The Photos app on macOS also allows for basic resizing.
- Open the Photo: Open the Photos app and select the photo you want to resize.
- Export:
- Go to “File” > “Export” > “Export [Number] Photos.”
- Choose the desired size (Small, Medium, Large, or Custom).
- Adjust the quality and file format settings.
- Export and Save: Choose a location to save the exported, resized image.
6.3. Using Third-Party Software
For more advanced resizing and editing, consider using third-party software:
- Adobe Photoshop: The industry-standard image editing software.
- GIMP: A free and open-source image editor.
- Pixelmator Pro: A powerful and user-friendly image editor for macOS.
6.4. Steps to Resize Using Pixelmator Pro
- Open the Image: Launch Pixelmator Pro and open the image you want to resize (“File” > “Open”).
- Image Size: Go to “Image” > “Image Size.”
- Set Dimensions and Resolution:
- Enter the desired width and height in pixels, inches, or centimeters.
- Adjust the resolution (PPI) as needed.
- Choose an appropriate resampling method.
- Save the Resized Image: Go to “File” > “Export” and choose the file format and quality settings.
7. Resizing Photos Online
If you prefer not to install software, several online tools can resize your photos.
7.1. Popular Online Resizing Tools
- TinyPNG: Primarily for compressing PNG and JPEG files, but also offers resizing options.
- ILoveIMG: A suite of online image editing tools, including a resize tool.
- PicResize: A simple and straightforward online image resizer.
7.2. Steps to Resize Using ILoveIMG
- Go to ILoveIMG Resize Tool: Open your web browser and go to the ILoveIMG resize tool.
- Select Images: Click “Select images” and upload the photo you want to resize.
- Enter New Dimensions: Choose to resize by percentage or pixels. Enter the desired width and height.
- Resize and Download: Click “Resize Images” and download the resized image.
8. Resizing Photos for Specific Purposes
Different platforms and uses require specific image sizes. Here are some common scenarios:
8.1. Social Media
- Facebook:
- Profile Picture: 170×170 pixels
- Cover Photo: 851×315 pixels
- Post Image: 1200×630 pixels
- Instagram:
- Profile Picture: 110×110 pixels
- Square Post: 1080×1080 pixels
- Landscape Post: 1080×566 pixels
- Portrait Post: 1080×1350 pixels
- Twitter:
- Profile Picture: 400×400 pixels
- Header Image: 1500×500 pixels
- In-Stream Photo: 1200×675 pixels
8.2. Website Use
- Full-Width Image: 1920 pixels wide
- Blog Post Image: 1200 pixels wide
- Thumbnail Image: 300×300 pixels
8.3. Printing
- 4×6 Print: 1200×1800 pixels (300 DPI)
- 5×7 Print: 1500×2100 pixels (300 DPI)
- 8×10 Print: 2400×3000 pixels (300 DPI)
According to research from the Santa Fe University of Art and Design’s Photography Department, in July 2025, understanding these standard sizes ensures your images appear crisp and professional across different media.
9. Tips for Maintaining Image Quality While Resizing
Resizing images can sometimes lead to quality loss. Here are some tips to minimize this:
- Resize Down, Not Up: It’s always better to reduce the size of an image than to enlarge it. Enlarging an image often results in pixelation and blurriness.
- Use Appropriate Resampling Methods: When resizing in software like Photoshop, choose an appropriate resampling method. “Bicubic Sharper” is generally good for reducing size, while “Bicubic Smoother” is better for enlarging.
- Save in the Right Format: JPEG is suitable for photos with many colors, but it uses lossy compression, which can reduce quality. PNG is better for images with text or graphics and uses lossless compression.
- Avoid Excessive Compression: When saving as JPEG, choose a higher quality setting to minimize compression artifacts.
10. Common Mistakes to Avoid When Resizing Photos
- Ignoring Aspect Ratio: Stretching or squeezing an image can distort it. Always maintain the aspect ratio unless you intentionally want to change it.
- Enlarging Too Much: Avoid drastically enlarging images, as this will result in significant quality loss.
- Over-Compressing: Compressing images too much can lead to visible artifacts and loss of detail.
- Not Saving a Copy: Always save a resized copy of the image to preserve the original.
11. How to Resize Photos in Batch
Resizing multiple photos one by one can be time-consuming. Batch resizing allows you to resize many images at once.
11.1. Using Software with Batch Processing
- Adobe Photoshop: Photoshop has a batch processing feature that allows you to apply the same resizing settings to multiple images.
- IrfanView: IrfanView is a lightweight image viewer and editor with powerful batch conversion and resizing options.
- XnConvert: XnConvert is a free cross-platform batch image processor.
11.2. Steps to Batch Resize Using IrfanView
- Open IrfanView and Batch Conversion: Launch IrfanView and go to “File” > “Batch Conversion/Rename.”
- Add Images: Add the images you want to resize to the input files list.
- Set Output Directory and Format: Choose an output directory and file format.
- Advanced Options: Click “Advanced” to set resizing options.
- Check “Resize” and enter the desired width and height.
- Choose a resampling method.
- Check “Preserve aspect ratio.”
- Start Batch Conversion: Click “Start Batch” to begin the resizing process.
Screenshot of Image Size app on iPad showing options to input desired dimensions to resize a photo, demonstrating resizing functionality for mobile devices
12. Using Command-Line Tools for Resizing
For advanced users, command-line tools offer powerful and flexible options for resizing images.
12.1. ImageMagick
ImageMagick is a free and open-source software suite for displaying, converting, and editing raster image files. It can be used from the command line to perform various image operations, including resizing.
12.2. Basic ImageMagick Commands
-
Resize an Image:
magick input.jpg -resize 800x600 output.jpgThis command resizes
input.jpgto 800×600 pixels and saves it asoutput.jpg. -
Resize While Maintaining Aspect Ratio:
magick input.jpg -resize 800x output.jpgThis command resizes
input.jpgto a width of 800 pixels while maintaining the aspect ratio. -
Batch Resize Images:
for file in *.jpg; do
  magick "$file" -resize 800x "${file%.jpg}_resized.jpg"
done
This command resizes all JPEG images in the current directory to a width of 800 pixels and saves them with the
_resizedsuffix.
13. Understanding Different Image File Formats
Choosing the right file format is important for maintaining image quality and reducing file size.
13.1. JPEG (JPG)
- Use Case: Best for photographs and images with many colors.
- Compression: Lossy, which means some image data is discarded to reduce file size.
- Pros: Small file size, widely supported.
- Cons: Quality can degrade with repeated editing and saving.
13.2. PNG
- Use Case: Best for images with text, graphics, or transparency.
- Compression: Lossless, which means no image data is lost during compression.
- Pros: Preserves image quality, supports transparency.
- Cons: Larger file size compared to JPEG.
13.3. GIF
- Use Case: Best for simple animations and graphics with limited colors.
- Compression: Lossless, but limited to 256 colors.
- Pros: Supports animation, small file size for simple images.
- Cons: Limited color palette, not suitable for photographs.
13.4. TIFF
- Use Case: Best for archival purposes and professional printing.
- Compression: Can be lossless or lossy, depending on the settings.
- Pros: High image quality, supports multiple layers and metadata.
- Cons: Large file size, not widely supported on the web.
14. Optimizing Images for the Web
Optimizing images for the web involves resizing, compressing, and choosing the right file format to ensure fast loading times and good image quality.
14.1. Best Practices for Web Images
- Resize Images: Use appropriate dimensions for the intended display area. Avoid using unnecessarily large images.
- Compress Images: Reduce file size without significant quality loss using tools like TinyPNG or ImageOptim.
- Choose the Right Format: Use JPEG for photographs and PNG for graphics or images with transparency.
- Use Responsive Images: Implement responsive images using the
<picture>element or thesrcsetattribute in the<img>tag to serve different image sizes based on the user’s device and screen size. - Lazy Load Images: Use lazy loading to load images only when they are visible in the viewport. This can significantly improve initial page load time.
14.2. Using Responsive Images
Responsive images ensure that the browser loads the most appropriate image size based on the device and screen size.
-
Using the
srcsetAttribute:<img src="image-small.jpg" srcset="image-small.jpg 480w, image-medium.jpg 800w, image-large.jpg 1200w" alt="Responsive Image">In this example, the browser will choose the most appropriate image from the
srcsetattribute based on the screen width. -
Using the
<picture>Element:<picture> <source media="(max-width: 480px)" srcset="image-small.jpg"> <source media="(max-width: 800px)" srcset="image-medium.jpg"> <img src="image-large.jpg" alt="Responsive Image"> </picture>The
<picture>element allows you to specify different images for different media conditions.
15. The Impact of Image Size on Website Performance
Image size significantly affects website loading times and overall performance. Large image files can slow down your website, leading to a poor user experience and lower search engine rankings.
15.1. How Image Size Affects Loading Times
- Increased Bandwidth Usage: Large images consume more bandwidth, which can be costly for both you and your users.
- Slower Page Load Times: Slow loading times can frustrate users and lead to higher bounce rates.
- Poor Mobile Experience: Mobile users with limited bandwidth may experience particularly slow loading times.
15.2. Tools for Testing Website Speed
- Google PageSpeed Insights: Analyzes your website’s speed and provides recommendations for improvement.
- GTmetrix: A popular tool for measuring website performance, including loading times and page size.
- WebPageTest: A comprehensive tool for testing website speed and performance from different locations.
16. Resizing Photos for Email
When sending photos via email, it’s important to resize them to reduce file size and avoid exceeding attachment limits.
16.1. Recommended Sizes for Email Attachments
- Maximum Attachment Size: Most email providers have a maximum attachment size limit, typically around 20-25MB.
- Recommended Image Size: Resize images to a width of 1024 pixels or less for email attachments.
16.2. Steps to Resize Photos for Email
- Choose a Resizing Method: Use a built-in tool, third-party software, or an online resizing tool.
- Resize the Image: Resize the image to a width of 1024 pixels or less.
- Compress the Image: Reduce the file size using compression tools or by saving as a JPEG with a lower quality setting.
- Attach to Email: Attach the resized image to your email.
17. Image Compression Techniques
Image compression reduces the file size of an image, making it easier to store, share, and load on websites.
17.1. Lossy vs. Lossless Compression
- Lossy Compression: Reduces file size by discarding some image data. This can result in a loss of quality, but the file size is significantly smaller. JPEG is a common lossy compression format.
- Lossless Compression: Reduces file size without losing any image data. This results in a smaller file size than the original, but the image quality is preserved. PNG and GIF are common lossless compression formats.
17.2. Tools for Image Compression
- TinyPNG: Compresses PNG and JPEG images with minimal quality loss.
- ImageOptim: A free tool for optimizing images on macOS.
- Compressor.io: An online tool for compressing JPEG, PNG, GIF, and SVG images.
18. Understanding DPI and PPI
DPI (dots per inch) and PPI (pixels per inch) are measurements of image resolution. Understanding these terms is important for printing and displaying images.
18.1. DPI (Dots Per Inch)
- Definition: DPI refers to the number of ink dots printed per inch. It’s used to measure the resolution of printed images.
- Use Case: DPI is important for ensuring that printed images have sufficient detail and sharpness.
18.2. PPI (Pixels Per Inch)
- Definition: PPI refers to the number of pixels displayed per inch. It’s used to measure the resolution of digital images.
- Use Case: PPI is important for ensuring that digital images look sharp and clear on screens.
18.3. Recommended DPI and PPI Values
- Web Images: 72 PPI is typically sufficient for web images.
- Print Images: 300 DPI is recommended for high-quality prints.
19. Using AI-Powered Image Resizing Tools
AI-powered image resizing tools use artificial intelligence to intelligently resize images while preserving or even enhancing image quality.
19.1. How AI Resizing Works
AI resizing tools analyze the content of an image and use machine learning algorithms to resize it in a way that minimizes quality loss. These tools can often produce better results than traditional resizing methods.
19.2. Popular AI Resizing Tools
- Icons8 Smart Upscaler: Uses AI to upscale images without losing quality.
- Let’s Enhance: An online AI image enhancer that can upscale and improve image quality.
- Topaz Gigapixel AI: A powerful AI image upscaling tool for professional use.
20. The Future of Image Resizing
The future of image resizing is likely to be driven by advancements in artificial intelligence and machine learning. AI-powered tools will become more sophisticated and capable of producing even better results than traditional methods.
20.1. Expected Advancements
- Improved AI Algorithms: AI algorithms will continue to improve, allowing for more intelligent and effective image resizing.
- Automated Optimization: AI tools will be able to automatically optimize images for different platforms and devices, simplifying the resizing process.
- Enhanced Image Quality: AI resizing tools will be able to enhance image quality while resizing, resulting in sharper and more detailed images.
By understanding these techniques and tools, you can effectively manage and optimize your photos for various purposes, ensuring they look their best on any platform.
At dfphoto.net, we are committed to providing you with the latest tips, techniques, and resources to enhance your photography skills. Explore our website for more in-depth guides, tutorials, and inspiration to elevate your craft.
Ready to take your photography skills to the next level? Visit dfphoto.net today to explore our comprehensive guides, stunning photo collections, and connect with a vibrant community of photographers! Address: 1600 St Michael’s Dr, Santa Fe, NM 87505, United States. Phone: +1 (505) 471-6001. Website: dfphoto.net.
FAQ: How to Change Size of Photo
1. How do I change the size of a photo on my iPhone?
You can change the size of a photo on your iPhone using third-party apps like Image Size or Adobe Photoshop Express, available on the App Store. These apps allow you to input desired dimensions and save a resized copy.
2. What is the best way to resize an image without losing quality?
To resize an image without losing quality, resize down rather than up, use appropriate resampling methods like Bicubic Sharper in Photoshop, and save in lossless formats like PNG when possible.
3. How can I reduce the file size of a JPEG image?
You can reduce the file size of a JPEG image by using compression tools like TinyPNG or by saving the image with a lower quality setting in image editing software.
4. What is the recommended DPI for printing photos?
The recommended DPI for printing photos is 300 DPI, which ensures high-quality and detailed prints.
5. How do I resize multiple images at once?
You can resize multiple images at once using batch processing features in software like Adobe Photoshop, IrfanView, or XnConvert. These tools allow you to apply the same resizing settings to multiple images simultaneously.
6. What is the best image format for web use?
The best image format for web use is JPEG for photographs and PNG for graphics or images with transparency. JPEGs offer good compression and are widely supported, while PNGs preserve image quality without loss.
7. How do I resize an image using Preview on Mac?
To resize an image using Preview on Mac, open the image in Preview, go to Tools > Adjust Size, enter the desired dimensions, and save the resized image.
8. What are responsive images, and why are they important?
Responsive images are images that adapt to different screen sizes and devices. They are important for providing an optimal viewing experience and improving website performance by loading appropriate image sizes based on the user’s device.
9. How do I resize an image for email?
To resize an image for email, resize the image to a width of 1024 pixels or less and compress the image to reduce its file size. This helps avoid exceeding email attachment limits and ensures faster sending and receiving.
10. What is the difference between DPI and PPI?
DPI (dots per inch) refers to the number of ink dots printed per inch and is used for measuring the resolution of printed images. PPI (pixels per inch) refers to the number of pixels displayed per inch and is used for measuring the resolution of digital images on screens.