Changing the login photo on your Mac is a simple way to personalize your device and add a touch of your own style. At dfphoto.net, we understand the importance of customization in creating a unique user experience, especially when it comes to visual elements like your login picture, profile picture, and user account settings. This comprehensive guide will provide you with detailed instructions and troubleshooting tips to easily change your Mac’s login photo, ensuring you can showcase your personality and preferences every time you start your computer.
1. Why Change Your Login Photo on a Mac?
Changing your login photo on a Mac allows you to personalize your user experience. It also enhances visual recognition and adds a personal touch to your device, making it easier to identify your account, especially if multiple users share the same Mac. Customization options, such as using a favorite image or a fun avatar, can make your Mac feel more like your own.
2. How to Change Your Login Photo on macOS Ventura and Later
If you’re using macOS Ventura or a later version, the process for changing your login photo is straightforward.
2.1. Access System Settings
To begin, click on the Apple menu in the top-left corner of your screen and select “System Settings.”
2.2. Navigate to Users & Groups
In System Settings, find and click on “Users & Groups” in the sidebar.
2.3. Select Your User Account
On the right side, you will see a list of user accounts on your Mac. Select your account, which is usually labeled as “Current User.”
2.4. Edit Your Profile Picture
Hover over your current profile picture, and you will see an “Edit” button appear. Click on this button to open the profile picture editor.
2.5. Choose a New Photo
In the editor, you can choose from several options:
- Default Avatars: Select one of the pre-installed avatars provided by macOS.
- Photos Library: Choose a photo from your Photos library.
- Camera: Take a new photo using your Mac’s built-in camera.
- Upload Image: Upload an image from your files.
Select your preferred method and choose or take your new login photo.
2.6. Adjust the Photo
If you choose a photo from your library or upload an image, you can adjust its size and position within the circular frame. Use the slider to zoom in or out and drag the image to center it as desired.
2.7. Save Your Changes
Once you are satisfied with your new login photo, click “Save” to apply the changes.
3. How to Change Your Login Photo on macOS Monterey and Earlier
For users with macOS Monterey or earlier versions, the steps are slightly different but still easy to follow.
3.1. Open System Preferences
Click on the Apple menu and select “System Preferences.”
3.2. Go to Users & Groups
In System Preferences, find and click on “Users & Groups.”
3.3. Unlock the Settings
In the Users & Groups pane, you may need to unlock the settings to make changes. Click the padlock icon in the bottom-left corner and enter your administrator password when prompted.
3.4. Select Your User Account
Select your user account from the list on the left.
3.5. Edit Your Profile Picture
Click on your current profile picture. This will open a window with options to change your photo.
3.6. Choose a New Photo
Similar to macOS Ventura, you can choose from:
- Default Avatars: Select a pre-installed avatar.
- Photos Library: Choose a photo from your Photos library.
- Camera: Take a new photo using your Mac’s camera.
- Upload Image: Upload an image from your files.
Select your preferred method and choose or take your new login photo.
3.7. Adjust the Photo
Adjust the size and position of the photo within the frame using the slider and dragging the image.
3.8. Save Your Changes
Click “Save” or “Done” to apply the changes.
4. Troubleshooting Common Issues
Sometimes, you may encounter issues while trying to change your login photo. Here are some common problems and their solutions.
4.1. The “Edit” Button Doesn’t Appear
Some users have reported that the “Edit” button does not appear when they hover over their profile picture in System Settings. Here’s how to resolve this:
- Check User Permissions: Ensure you have administrator privileges for your account. Without admin rights, you may not be able to make changes to user settings.
- Restart Your Mac: A simple restart can often resolve minor glitches.
- Safe Mode: Boot your Mac in Safe Mode to see if the issue persists. Safe Mode loads only essential system components, which can help identify if third-party software is interfering with the settings. To enter Safe Mode:
- Shut down your Mac.
- Press and hold the Shift key while restarting your Mac.
- Release the Shift key when you see the login window.
4.2. Changes Not Reflecting on the Login Screen
If you’ve changed your login photo but it’s not updating on the login screen, try these steps:
- Restart Your Mac: This is the most straightforward solution and often resolves the issue.
- Log Out and Log Back In: Sometimes, the changes need a fresh login session to take effect.
- Check iCloud Sync: If you are using iCloud to sync your account settings, ensure that iCloud is functioning correctly. Go to System Settings > Apple ID and make sure iCloud Drive is enabled and syncing properly.
- Reset NVRAM/PRAM: Resetting the NVRAM (Non-Volatile Random-Access Memory) or PRAM (Parameter RAM) can help resolve display and settings issues. To reset NVRAM/PRAM:
- Shut down your Mac.
- Press and hold the Option, Command, P, and R keys simultaneously.
- Turn on your Mac while continuing to hold the keys.
- Release the keys after about 20 seconds, during which the Apple logo may appear and disappear.
4.3. Photo Quality Issues
If your new login photo appears blurry or pixelated, consider the following:
- Use High-Resolution Images: Ensure the photo you are using is of high resolution. A minimum resolution of 512×512 pixels is recommended for a clear display.
- Image Format: Use common image formats like JPEG or PNG.
- Avoid Over-Zooming: Excessive zooming can reduce the quality of the photo. Try to use an image that fits well within the frame without needing to zoom in too much.
4.4. Unable to Access Photos Library
If you are unable to access your Photos library when trying to change your login photo:
- Check Photos Permissions: Go to System Settings > Privacy & Security > Photos and ensure that the application you are using to change the login photo has permission to access your Photos library.
- Repair Photos Library: If the Photos library is corrupted, it may not be accessible. To repair it:
- Open the Photos app.
- Hold down the Option and Command keys while opening Photos.
- Click “Repair” in the dialog box that appears.
5. Advanced Customization Options
For users who want more advanced customization options, there are a few additional techniques you can explore.
5.1. Using Custom Command-Line Commands
You can use the command line to change your login picture and further customize the user experience. This method is for advanced users comfortable with using Terminal.
-
Open Terminal: Open the Terminal application from the Utilities folder in Applications.
-
Change the Picture: Use the
dsclcommand to change the picture. Replace<username>with your actual username and<path_to_image>with the path to your image file:sudo dscl . create /Users/<username> Picture <path_to_image> -
Set the Picture Options: You can also set additional options, such as the picture style and alignment. Refer to the
dsclcommand documentation for more details.
5.2. Creating Custom Avatars
Creating custom avatars can add a unique touch to your login screen. There are several tools and websites you can use to design your own avatars:
- Adobe Illustrator: Use Adobe Illustrator to create vector-based avatars that are scalable and high-quality.
- Canva: Canva offers a variety of templates and design tools to create custom avatars easily.
- Avatar Maker Websites: Several websites, such as Avataaars Generator and UI Avatars, allow you to create random or customized avatars.
6. The Benefits of Personalizing Your Mac
Personalizing your Mac offers several benefits:
- Enhanced User Experience: Customizing your Mac to your preferences makes it more enjoyable to use.
- Improved Visual Recognition: A unique login photo makes it easier to identify your account, especially on shared devices.
- Expression of Personal Style: Customization allows you to express your personality and preferences through your device.
- Increased Productivity: A well-organized and personalized workspace can improve your focus and productivity.
7. Tips for Choosing the Perfect Login Photo
Selecting the right login photo can enhance your overall experience. Here are some tips to consider:
- Choose a High-Resolution Image: Ensure the photo is clear and not pixelated.
- Select a Photo That Represents You: Pick an image that reflects your personality or interests.
- Consider the Visual Appeal: Choose a photo that is visually pleasing and makes you happy.
- Test Different Photos: Try out a few different photos to see which one you like best.
8. Keeping Your macOS Updated
Keeping your macOS updated is essential for security, performance, and access to the latest features. Apple regularly releases updates that include bug fixes, security patches, and new functionalities.
8.1. How to Update macOS
To update your macOS:
- Click on the Apple menu.
- Select “System Settings” (or “System Preferences” on older versions).
- Click on “General” and then “Software Update.”
- macOS will automatically check for updates. If an update is available, click “Update Now” to download and install it.
8.2. Benefits of Regular Updates
- Security: Updates often include critical security patches that protect your Mac from malware and other threats.
- Performance: Updates can improve the overall performance and stability of your Mac.
- New Features: Updates introduce new features and enhancements that improve the user experience.
- Compatibility: Keeping your macOS updated ensures compatibility with the latest software and hardware.
9. Exploring dfphoto.net for Photography Inspiration
At dfphoto.net, we are passionate about photography and visual arts. Our website offers a wealth of resources for photographers of all skill levels.
9.1. Discover Stunning Photography
Browse our curated collection of stunning photographs from talented photographers around the world.
9.2. Learn Photography Techniques
Access our detailed guides and tutorials on various photography techniques, including composition, lighting, and editing.
9.3. Stay Updated with the Latest Trends
Keep up with the latest trends in photography and visual arts through our blog and news articles.
9.4. Join Our Community
Connect with fellow photographers and share your work in our vibrant community forums.
10. Understanding User Account Security
Securing your user account is crucial for protecting your personal information and data.
10.1. Strong Passwords
Use strong, unique passwords for your user account and Apple ID. A strong password should be at least 12 characters long and include a combination of uppercase and lowercase letters, numbers, and symbols.
10.2. Two-Factor Authentication
Enable two-factor authentication for your Apple ID to add an extra layer of security. With two-factor authentication, you’ll need to enter a verification code from your trusted device when you sign in on a new device.
10.3. FileVault Encryption
Enable FileVault encryption to protect the data on your Mac’s startup disk. FileVault encrypts your entire drive, making it unreadable to unauthorized users.
10.4. Regular Backups
Back up your Mac regularly using Time Machine or another backup solution. This ensures that you can restore your data in case of a hardware failure or other disaster.
11. Optimizing Your Mac for Visual Tasks
Optimizing your Mac for visual tasks, such as photo editing and graphic design, can improve its performance and efficiency.
11.1. Sufficient RAM
Ensure your Mac has enough RAM (Random Access Memory) to handle visual tasks. A minimum of 16GB of RAM is recommended for professional photo editing and graphic design.
11.2. Fast Storage
Use a fast SSD (Solid State Drive) for your startup disk and storage. SSDs offer significantly faster read and write speeds compared to traditional HDDs (Hard Disk Drives).
11.3. Dedicated Graphics Card
A dedicated graphics card can improve the performance of visual tasks, especially when working with high-resolution images and videos.
11.4. Display Calibration
Calibrate your display to ensure accurate color reproduction. This is essential for photo editing and graphic design, where color accuracy is critical.
12. Exploring macOS Accessibility Features
macOS includes a range of accessibility features that make it easier for users with disabilities to use their Macs.
12.1. VoiceOver
VoiceOver is a screen reader that provides spoken descriptions of items on the screen.
12.2. Zoom
The Zoom feature allows you to magnify the screen, making it easier to see small text and details.
12.3. Display Options
macOS offers various display options, such as increased contrast, reduced transparency, and color filters, to improve visibility.
12.4. Keyboard Navigation
Keyboard Navigation allows you to control your Mac using the keyboard instead of the mouse.
13. Understanding macOS Privacy Settings
macOS includes a range of privacy settings that allow you to control how your data is used and shared.
13.1. Location Services
Control which apps and services have access to your location.
13.2. Contacts, Calendars, and Reminders
Manage which apps can access your contacts, calendars, and reminders.
13.3. Camera and Microphone
Control which apps can access your camera and microphone.
13.4. Analytics and Advertising
Limit the amount of data that Apple collects for analytics and advertising purposes.
14. How to Reset Your Login Photo to Default
If you want to revert to the default login photo on your Mac, follow these steps:
14.1. Open System Settings
Click on the Apple menu and select “System Settings.”
14.2. Navigate to Users & Groups
In System Settings, find and click on “Users & Groups” in the sidebar.
14.3. Select Your User Account
On the right side, you will see a list of user accounts on your Mac. Select your account.
14.4. Edit Your Profile Picture
Hover over your current profile picture, and you will see an “Edit” button appear. Click on this button to open the profile picture editor.
14.5. Choose a Default Avatar
In the editor, select one of the pre-installed default avatars provided by macOS.
14.6. Save Your Changes
Click “Save” to apply the changes and revert to the default login photo.
15. The Future of macOS Customization
Apple is continuously evolving macOS with new features and customization options. In future updates, we can expect to see even more ways to personalize our Macs, including:
- Advanced Theme Options: More control over the appearance of macOS, including custom color palettes and icon sets.
- Dynamic Wallpapers: Wallpapers that change based on the time of day or other factors.
- Improved Accessibility Features: Enhanced accessibility features that make macOS even more inclusive for users with disabilities.
- Integration with Third-Party Services: Deeper integration with third-party services and applications.
16. How to Create a Guest User Account on Mac
Creating a guest user account on your Mac is a great way to let others use your computer without giving them access to your personal files and settings. Here’s how:
16.1. Open System Settings
Click on the Apple menu and select “System Settings.”
16.2. Navigate to Users & Groups
In System Settings, find and click on “Users & Groups” in the sidebar.
16.3. Add a Guest User
Click on the “Add User” button.
16.4. Select “Guest User”
In the user account creation dialog, select “Guest User” from the “New Account” dropdown menu.
16.5. Set Guest User Options
Configure the guest user options as desired. You can choose whether or not to allow guests to log in to shared folders, for example.
16.6. Save Your Changes
Click “Create User” to create the guest user account.
17. Understanding Login Screen Options
The macOS login screen offers several options and features that can enhance your user experience.
17.1. Display Options
You can customize the appearance of the login screen, including the background, font size, and cursor size.
17.2. Accessibility Features
The login screen includes accessibility features, such as VoiceOver and Zoom, that make it easier for users with disabilities to log in.
17.3. Password Hints
If you forget your password, the login screen can display a password hint to help you remember it.
17.4. Restart and Shut Down Buttons
The login screen includes buttons to restart or shut down your Mac.
18. Tips for Managing Multiple User Accounts
If you have multiple user accounts on your Mac, here are some tips for managing them effectively:
18.1. Use Strong Passwords
Ensure that each user account has a strong, unique password.
18.2. Enable FileVault Encryption
Enable FileVault encryption to protect the data on all user accounts.
18.3. Set User Permissions
Set appropriate user permissions to control which users have access to specific files and folders.
18.4. Regular Backups
Back up all user accounts regularly using Time Machine or another backup solution.
19. How to Change Your Account Name on Mac
Changing your account name on your Mac is a simple process, but it’s essential to follow the steps carefully to avoid any issues. Here’s how:
19.1. Open System Settings
Click on the Apple menu and select “System Settings.”
19.2. Navigate to Users & Groups
In System Settings, find and click on “Users & Groups” in the sidebar.
19.3. Unlock the Settings
Click the padlock icon in the bottom-left corner and enter your administrator password when prompted.
19.4. Control-Click on the User Account
Control-click on the user account you want to rename in the left sidebar.
19.5. Select “Advanced Options…”
A context menu will appear. Select “Advanced Options…” from the menu.
19.6. Change the “Full Name”
In the Advanced Options dialog, you can change the “Full Name” field. This is the name that appears on the login screen and in the menu bar.
19.7. Change the “Account Name”
Carefully change the “Account Name” field. This is the name of your home folder and is used internally by macOS. Warning: Changing the account name incorrectly can cause serious issues. Ensure you enter the new name correctly.
19.8. Verify the “Home Directory”
Verify that the “Home Directory” field is correct. It should match the new account name.
19.9. Click “OK”
Click “OK” to save your changes.
19.10. Restart Your Mac
Restart your Mac for the changes to take effect.
20. Mastering macOS Keyboard Shortcuts
Mastering macOS keyboard shortcuts can significantly improve your productivity and efficiency. Here are some essential shortcuts:
- Command-C: Copy
- Command-X: Cut
- Command-V: Paste
- Command-Z: Undo
- Command-Shift-Z: Redo
- Command-A: Select All
- Command-F: Find
- Command-S: Save
- Command-P: Print
- Command-Q: Quit
- Command-W: Close Window
- Command-Tab: Switch Applications
- Command-Space: Spotlight Search
21. Understanding Different User Account Types
macOS supports several types of user accounts, each with different privileges and capabilities.
21.1. Administrator Account
An administrator account has full control over the system and can make changes to system settings, install software, and manage other user accounts.
21.2. Standard Account
A standard account has limited privileges and cannot make changes to system settings or install software without administrator approval.
21.3. Managed Account with Parental Controls
A managed account with parental controls allows parents to monitor and restrict their children’s usage of the computer.
21.4. Guest Account
A guest account allows temporary users to access the computer without requiring a password or account.
22. Keeping Your Mac Clean and Organized
Maintaining a clean and organized Mac can improve its performance and longevity.
22.1. Regular Cleaning
Clean your Mac’s screen, keyboard, and exterior regularly using a soft, lint-free cloth.
22.2. Disk Cleanup
Use Disk Utility to repair disk permissions and free up disk space.
22.3. Uninstall Unused Apps
Uninstall apps that you no longer use to free up disk space and prevent clutter.
22.4. Organize Your Files
Organize your files into folders and use descriptive names to make them easier to find.
23. Exploring macOS Recovery Mode
macOS Recovery Mode is a special mode that allows you to troubleshoot and repair your Mac in case of a problem.
23.1. How to Enter Recovery Mode
To enter Recovery Mode:
- Shut down your Mac.
- Press and hold the Command and R keys simultaneously.
- Turn on your Mac while continuing to hold the keys.
- Release the keys when you see the Apple logo.
23.2. Recovery Mode Options
In Recovery Mode, you can:
- Restore from a Time Machine backup.
- Reinstall macOS.
- Use Disk Utility to repair your startup disk.
- Get help online.
24. Staying Safe Online
Protecting your privacy and security online is essential in today’s digital world.
24.1. Use a Firewall
Enable the built-in firewall in macOS to protect your Mac from unauthorized access.
24.2. Use a VPN
Use a VPN (Virtual Private Network) to encrypt your internet traffic and protect your privacy.
24.3. Avoid Phishing Scams
Be cautious of phishing scams and never click on suspicious links or provide personal information to untrusted sources.
24.4. Use Strong Passwords
Use strong, unique passwords for all of your online accounts.
25. Frequently Asked Questions (FAQ)
25.1. Why Can’t I See the “Edit” Button on My Profile Picture?
Ensure you have administrator privileges. If the issue persists, try restarting your Mac in Safe Mode.
25.2. How Do I Change the Login Photo on an Older Version of macOS?
The process is similar but may involve unlocking settings in System Preferences > Users & Groups.
25.3. Why Is My New Login Photo Blurry?
Use a high-resolution image (at least 512×512 pixels) and avoid excessive zooming.
25.4. Can I Use a GIF as My Login Photo?
macOS typically supports static images for login photos. Animated GIFs are not supported.
25.5. How Do I Revert to the Default Login Photo?
Select one of the pre-installed default avatars in System Settings > Users & Groups.
25.6. How Do I Change the Login Photo Using the Command Line?
Use the dscl command in Terminal. Replace <username> with your actual username and <path_to_image> with the path to your image file.
25.7. What Image Formats Are Supported for Login Photos?
Common image formats like JPEG and PNG are supported.
25.8. Can I Change the Login Photo for Other User Accounts?
You need administrator privileges to change the login photo for other user accounts.
25.9. What Happens If I Forget My Login Password?
You can reset your password using your Apple ID or a recovery key.
25.10. How Do I Secure My User Account?
Use a strong password, enable two-factor authentication, and enable FileVault encryption.
By following these detailed steps and troubleshooting tips, you can easily change your login photo on your Mac and personalize your user experience. Visit dfphoto.net for more photography inspiration and resources. Whether you’re looking to enhance your visual skills or simply add a personal touch to your device, we’ve got you covered. Explore our guides, stunning photo collections, and vibrant community to elevate your creative journey.
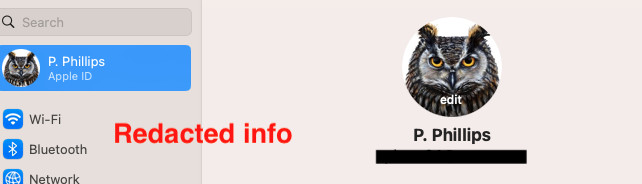 System Settings Users & Groups on macOS Ventura