Are you wondering how to share a photo album on iCloud with your friends and family? In this comprehensive guide from dfphoto.net, we’ll walk you through the easy steps to create shared albums, invite collaborators, and manage your photo sharing experience, ensuring your precious memories are shared seamlessly. With iCloud Shared Albums, you can collaborate on visual storytelling and create a shared photo library accessible across devices, enhancing the way you experience and share your photos with those who matter most. This process also optimizes the usage of photo storage and boosts your photography workflow.
1. Understanding iCloud Shared Albums
iCloud Shared Albums offers a fantastic way to share photos and videos with your chosen circle, allowing them to contribute their own media and comments. It’s a collaborative space for visual storytelling.
1.1. What Are iCloud Shared Albums?
iCloud Shared Albums (formerly known as iCloud Photo Sharing in earlier iOS versions) is a feature that allows you to share photos and videos with specific people you choose. These individuals can also add their own photos, videos, and comments to the album, making it a collaborative experience. According to Apple, a shared album can hold up to 5,000 photos and videos.
1.2. Why Use iCloud Shared Albums?
Here’s why iCloud Shared Albums are a game-changer:
- Simplicity: It’s incredibly easy to set up and manage.
- Collaboration: Everyone invited can add their own photos and videos.
- Cross-Platform: Works seamlessly across iPhones, iPads, Macs, and even the web.
- Storage Efficiency: Shared photos don’t count against your iCloud storage limit.
- Privacy Control: You decide who gets to see your photos and videos and can remove people at any time.
- Real-time updates: When new photos or videos are added, all participants are automatically notified, fostering immediate engagement.
- Event-based collection: Ideal for weddings, vacations, and parties where multiple people are capturing moments.
- Photo organization: Facilitates easy organization of shared photos into thematic albums.
1.3. Who is this guide for?
- Amateur photographers wanting to share their work easily.
- Professional photographers needing collaborative spaces for client projects.
- Individuals interested in creating shared albums for events like weddings or vacations.
- Users looking for simplified methods to consolidate and share photos with family and friends.
- Creative professionals who want to learn efficient methods for organizing visual content.
- Photography enthusiasts keen on exploring advanced features within Apple’s ecosystem.
- Tech-savvy individuals aiming to optimize the photo-sharing process on iOS and macOS devices.
1.4. What devices are compatible with iCloud Shared Albums?
iCloud Shared Albums are accessible on various Apple devices, including iPhones, iPads, and Macs. Older versions of iOS, iCloud for Windows, iPhoto, and Aperture also support Shared Albums, allowing users on different platforms to participate in shared photo experiences. To fully utilize all features, ensure your devices are updated to the latest compatible operating systems.
2. Setting Up iCloud Shared Albums
Let’s get started with setting up iCloud Shared Albums on your devices.
2.1. Turning on Shared Albums on Your Devices
Before you can start sharing, make sure Shared Albums is enabled on your devices:
On iPhone or iPad:
- Go to Settings.
- Tap on your Apple ID at the top.
- Select iCloud.
- Tap Photos.
- Toggle Shared Albums to the on position.
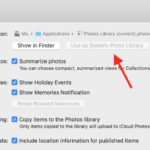
On Mac:
- Open the Photos app.
- Go to Photos in the menu bar.
- Select Settings (or Preferences).
- Click the iCloud tab.
- Check the box next to Shared Albums.
2.2. Creating a New Shared Album
Now that you have Shared Albums enabled, here’s how to create one:
On iPhone or iPad:
-
Open the Photos app.
-
Go to the Albums tab.
-
Tap the + button.
-
Select New Shared Album.
-
Give your album a name, then tap Next.
-
Choose people to invite from your contacts, or type an email address or iMessage phone number.
-
Tap Create.
On Mac:
-
Open the Photos app.
-
In the sidebar, click the + button next to Shared Albums.
-
Type a name for the Shared Album and the email addresses of people you want to share the album with. Click the Add button to select contacts from iCloud.
-
Click Create.
2.3. Naming Your Album Effectively
Choosing the right name for your album can make it easier to find and more engaging for your collaborators.
- Be Specific: Use a name that clearly indicates the album’s content (e.g., “Summer Vacation 2024,” “Wedding Day”).
- Keep it Concise: A shorter name is easier to remember and share.
- Add a Personal Touch: Include a detail that resonates with you and your collaborators.
2.4. Understanding the privacy implications of sharing albums on iCloud
Sharing albums on iCloud has significant privacy implications that users need to consider. First, when you invite someone to a shared album, they gain access to all photos and videos within that album. It is essential to ensure you are only sharing content appropriate for all members. Additionally, any participant in a shared album can potentially save or download the shared media, meaning the content may exist beyond the iCloud environment.
Second, when using the ‘Public Website’ option, your shared album becomes accessible to anyone with the link, raising broader privacy concerns. Always exercise caution when sharing personal or sensitive photos. If you want to maintain a higher level of privacy, avoid enabling the public website feature and ensure all participants are trusted.
3. Managing Shared Albums
Once your album is set up, managing it involves inviting people, adding content, and maintaining the album’s organization.
3.1. Inviting People to Your Shared Album
Adding contributors is simple and straightforward:
On iPhone or iPad:
- Open the shared album.
- Tap the More button.
- Tap Shared Album Details.
- Tap Invite, then enter the names of people that you want to share this album with.
- Tap Done.
On Mac:
-
Select a shared album that you created under Shared in the sidebar.
-
Click the People button in the toolbar.
-
In the Invite People field, click the Add button to open the Contacts panel, then choose people to invite from your contacts.
3.2. Adding Photos and Videos to a Shared Album
Contributing content is what brings a shared album to life:
On iPhone or iPad:
-
From your Library or from within an album, tap Select and then select the photos and videos that you want to share.
-
Tap the Share button, then tap Add to Shared Album.
-
Choose the album where you want to share your photos. Then tap Post.
On Mac:
-
Select the photos and videos that you want to share.
-
Click the Share button in the toolbar, then select Shared Albums.
-
Choose the album where you want to share your photos.
3.3. Setting Permissions: Controlling Who Can Contribute
Ensure everyone can add their memories by enabling contributor permissions:
-
Open the shared album.
-
Tap the More button, then choose Shared Album Details.
-
Make sure that Subscribers Can Post is turned on.
3.4. Removing a Subscriber
As the album creator, you have full control over who has access:
On iPhone or iPad:
-
Open the shared album.
-
Tap the More button, then tap Shared Album Details.
-
Select the subscriber that you want to remove.
-
Tap Remove Subscriber at the bottom of the screen.
On Mac:
- Open the shared album.
- Click the People button in the toolbar.
- Select the subscriber that you want to remove.
- Click the arrow next to their name, then Remove Subscriber.
3.5. What are the size and resolution limits for photos and videos in iCloud Shared Albums?
Photos shared in iCloud Shared Albums are reduced to 2048 pixels on the long edge, ensuring they are optimized for viewing on various devices without consuming excessive storage. Panoramic photos can be up to 5400 pixels wide. GIFs shared in albums can be 100MB or smaller.
For videos, there’s a length limit of fifteen minutes, and they are delivered at up to 720p resolution. This compression maintains acceptable video quality while managing data usage.
4. Advanced Tips and Tricks
Let’s explore some advanced tips to enhance your experience with iCloud Shared Albums.
4.1. Using Public Website for Broader Sharing
For friends and family who don’t use iCloud, the Public Website feature is invaluable:
- Open the shared album.
- Tap the More button, then tap Shared Album Details.
- Turn on Public Website.
Now, anyone with the link can view the album in an up-to-date web browser.
4.2. Deleting Photos and Videos
Keep your albums tidy by removing unwanted content:
On iPhone or iPad:
- Open the shared album.
- Tap the photo or video.
- Tap the Trash button.
- Tap Delete Photo.
On Mac:
- Open the shared album.
- Select the photo or video.
- Control-click, then click Delete from Shared Album. Click Delete.
4.3. Saving Photos and Videos from a Shared Album
To keep a copy of shared memories in your personal library:
On iPhone or iPad:
- Tap the photo or video.
- Tap the Share button.
- Tap Save Image or Save Video.
On Mac:
- Select the photo and video that you want to save.
- Control-click, then click Import.
4.4. Understanding Storage Limits
A shared album can hold up to 5,000 photos and videos. Remember, these photos don’t count against your iCloud storage, but you’ll need to delete some to make room for new ones once you hit the limit.
4.5. How can I efficiently organize large shared albums to find specific photos?
Efficiently organizing large shared albums involves employing several key strategies. Firstly, establish a consistent naming convention for albums that reflects the content (e.g., “Vacation 2023,” “Event Photography 2024”). Secondly, use the album’s description feature to add detailed notes about the context, participants, or key moments.
Thirdly, encourage all contributors to add captions or comments to their photos with relevant keywords. This will greatly enhance searchability within the album. Lastly, regularly review and archive older albums to keep the current selection manageable.
5. Troubleshooting Common Issues
Encountering issues? Here are some common problems and their solutions.
5.1. Photos Not Appearing in Shared Album
If photos aren’t showing up:
- Check Internet Connection: Ensure you have a stable internet connection.
- iCloud Status: Verify that iCloud is functioning correctly on all devices.
- Processing Time: Large files may take some time to upload and appear.
- Device Compatibility: Confirm that all devices support the file types being shared.
5.2. Invitation Issues
If invitees aren’t receiving invitations:
- Check Email/Phone Number: Make sure the contact information is correct.
- Spam Filters: Ask invitees to check their spam or junk folders.
- iCloud Account: Ensure invitees have an active iCloud account.
5.3. Storage Full Errors
If you’re running into storage issues:
- Delete Content: Remove unnecessary photos and videos from the album.
- Archive Old Albums: Save important content and delete older albums to free up space.
- Optimize Photos: Reduce file sizes by optimizing photos before uploading.
5.4. General Tips for Smooth Operation
- Keep Devices Updated: Regularly update your iOS and macOS to the latest versions.
- Restart Devices: A simple restart can often resolve minor glitches.
- Check Apple System Status: Visit the Apple System Status page to see if there are any known iCloud issues.
- Use dfphoto.net resources: Refer to our comprehensive guides and tutorials for additional help.
6. Maximizing the Photography Experience
Elevate your photography with practical tips tailored for dfphoto.net readers.
6.1. File Types Supported in Shared Albums
Know which files you can share:
- Images: HEIF, JPEG, RAW, PNG, GIF, TIFF
- Videos: HEVC, MP4, QuickTime, H.264, MPEG-4
6.2. Capturing Stunning Photos
Improve your photography skills with these tips:
- Rule of Thirds: Position key elements off-center for more engaging compositions.
- Leading Lines: Use lines to guide the viewer’s eye through the photo.
- Natural Light: Utilize natural light for softer, more flattering images.
- Focus: Ensure your subject is sharp and clear.
6.3. Editing for Impact
Enhance your photos with simple editing techniques:
- Crop: Remove distractions and improve composition.
- Adjust Exposure: Brighten or darken the image as needed.
- Color Correction: Adjust colors to create a desired mood.
- Sharpen: Add clarity and detail.
6.4. Choosing the Right Gear
Select equipment that suits your needs:
- Cameras: Consider DSLRs, mirrorless cameras, or high-end smartphones.
- Lenses: Choose lenses based on the type of photography you enjoy (wide-angle for landscapes, telephoto for wildlife).
- Accessories: Invest in tripods, filters, and external flashes to expand your capabilities.
6.5. What steps can I take to ensure the photos I share look their best on any device?
To ensure your photos look their best on any device when shared, follow these steps. Firstly, start with high-resolution images from your camera or smartphone. Secondly, edit your photos to optimize brightness, contrast, and color balance. Thirdly, before sharing, resize your images to an appropriate resolution (e.g., 2048 pixels on the long edge) to balance quality and file size.
Lastly, use file formats like JPEG for widespread compatibility or HEIF for better compression without significant quality loss.
7. Inspiration and Creativity
Get inspired by exploring different styles and techniques in photography.
7.1. Exploring Different Photography Genres
- Landscape Photography: Capture the beauty of nature.
- Portrait Photography: Focus on people and their stories.
- Street Photography: Document everyday life.
- Wildlife Photography: Showcase animals in their natural habitats.
7.2. Following Influential Photographers
Learn from the best by following renowned photographers:
- Ansel Adams: Known for his stunning black-and-white landscape photography.
- Annie Leibovitz: Famous for her celebrity portraits.
- Steve McCurry: Celebrated for his evocative photojournalism.
- Art Wolfe: Renowned for his vibrant nature and wildlife photography.
7.3. Participating in Photography Communities
Connect with fellow photographers and share your work:
- Online Forums: Engage in discussions and get feedback.
- Social Media: Share your photos on platforms like Instagram and Facebook.
- Photography Clubs: Join local clubs for in-person meetups and workshops.
7.4. Unleashing Your Creativity
- Experiment: Try new techniques and styles.
- Tell Stories: Use your photos to convey emotions and narratives.
- Find Your Niche: Develop a unique style that sets you apart.
At dfphoto.net, we encourage you to explore the world of photography, share your experiences, and continue learning.
8. Integrating dfphoto.net Resources
Discover how dfphoto.net can enhance your photography journey.
8.1. Exploring dfphoto.net for Tutorials and Guides
dfphoto.net offers a wealth of resources:
- Detailed Tutorials: Learn specific photography techniques.
- Equipment Reviews: Get unbiased opinions on cameras, lenses, and accessories.
- Inspiration Galleries: View stunning photos and get creative ideas.
8.2. Community Engagement on dfphoto.net
- Forums: Participate in discussions and share your insights.
- Photo Critiques: Get constructive feedback on your work.
- Member Galleries: Showcase your best photos and connect with other photographers.
8.3. Utilizing dfphoto.net for Portfolio Building
- Showcase Your Work: Create a professional portfolio on dfphoto.net.
- Get Exposure: Share your portfolio with a wide audience of photography enthusiasts.
- Network: Connect with potential clients and collaborators.
8.4. How can dfphoto.net support my photography learning journey beyond iCloud Shared Albums?
Beyond iCloud Shared Albums, dfphoto.net serves as an invaluable resource for photography learning. It offers comprehensive tutorials on various photography techniques, ranging from basic camera settings to advanced composition strategies. You can explore equipment reviews to make informed decisions about gear purchases, and you will find inspiration galleries showcasing diverse photographic styles.
Additionally, dfphoto.net supports community engagement through forums, where you can participate in discussions, share insights, receive photo critiques, and network with fellow photography enthusiasts. This multifaceted support helps refine your skills and encourages creativity.
9. Real-World Applications
See how iCloud Shared Albums can be used in various scenarios.
9.1. Family Vacations
- Centralized Sharing: Everyone can add their photos and videos to one album.
- Easy Access: Family members can view memories from any device.
- Preserving Memories: Create a lasting record of your adventures.
9.2. Weddings and Events
- Collaborative Coverage: Guests can contribute their perspectives.
- Comprehensive Album: Capture all the special moments from different angles.
- Easy Distribution: Share the album with everyone who attended.
9.3. Professional Photography Projects
- Client Collaboration: Share proofs and gather feedback.
- Team Projects: Allow team members to contribute and review content.
- Efficient Workflow: Streamline the sharing and review process.
9.4. Educational Purposes
- Student Collaboration: Share and discuss photos in a classroom setting.
- Workshop Reviews: Collect and review student work in workshops.
- Learning Resources: Create albums with examples and tutorials.
10. Best Practices for Security and Privacy
Protect your photos and personal information with these essential tips.
10.1. Strong Passwords and Account Security
- Use Strong Passwords: Create unique, complex passwords for your Apple ID and iCloud account.
- Enable Two-Factor Authentication: Add an extra layer of security to prevent unauthorized access.
- Regularly Update Passwords: Change your passwords periodically to maintain security.
10.2. Privacy Settings on iCloud
- Review Shared Album Settings: Regularly check who has access to your shared albums.
- Limit Public Sharing: Only use the Public Website feature when necessary.
- Be Mindful of Content: Share only appropriate content in shared albums.
10.3. Protecting Personal Information
- Avoid Sharing Sensitive Data: Do not include personal information in photo captions or comments.
- Be Aware of Geolocation: Remove location data from photos before sharing if privacy is a concern.
- Secure Your Devices: Use passcodes and encryption to protect your devices.
10.4. Reporting Security Concerns
- Contact Apple Support: Report any suspicious activity or security breaches to Apple Support.
- Stay Informed: Keep up-to-date with the latest security recommendations and updates.
11. Future Trends in Photo Sharing
Stay ahead of the curve with emerging trends in digital photography.
11.1. AI-Powered Photo Management
- Smart Albums: Automatically organize photos based on content and metadata.
- Enhanced Editing Tools: Use AI to improve image quality and create stunning effects.
- Predictive Sharing: AI suggests who to share photos with based on past interactions.
11.2. Augmented Reality (AR) Integration
- AR Photo Albums: View photos in immersive AR environments.
- Interactive Memories: Add AR elements to photos to create engaging experiences.
- Virtual Tours: Create virtual tours using shared albums.
11.3. Blockchain for Photo Ownership
- Secure Ownership: Use blockchain to verify and protect photo ownership.
- Transparent Sharing: Track how and where your photos are being used.
- Monetization Opportunities: Earn revenue from your photos through blockchain platforms.
11.4. Increased Focus on Privacy
- End-to-End Encryption: Ensure photos are protected from unauthorized access.
- Decentralized Storage: Store photos on distributed networks for enhanced security.
- User Control: Give users more control over how their photos are shared and used.
12. Frequently Asked Questions (FAQ)
Here are some common questions about iCloud Shared Albums.
12.1. What image formats are supported in Shared Albums?
Shared Albums support HEIF, JPEG, RAW, PNG, GIF, and TIFF image formats, providing flexibility for sharing different types of images.
12.2. What video formats and resolutions are supported in Shared Albums?
Shared Albums support HEVC, MP4, QuickTime, H.264, and MPEG-4 video formats with a maximum length of fifteen minutes and a resolution of up to 720p.
12.3. How many photos and videos can a shared album hold?
A shared album can hold up to 5,000 photos and videos, providing ample space for collaborative sharing and storage.
12.4. Do photos in Shared Albums count against my iCloud storage limit?
No, photos and videos in Shared Albums do not count against your iCloud storage limit, offering an efficient way to share media without impacting personal storage.
12.5. How do I invite someone to a Shared Album?
To invite someone, open the shared album, tap the More button, select Shared Album Details, tap Invite, enter the contact information, and tap Done.
12.6. How do I remove someone from a Shared Album?
To remove someone, open the shared album, tap the More button, select Shared Album Details, select the subscriber, and tap Remove Subscriber.
12.7. Can I share an album with someone who doesn’t use iCloud?
Yes, you can share an album by enabling the Public Website feature, which allows anyone with the link to view the album in a web browser.
12.8. How do I delete a photo or video from a Shared Album?
To delete a photo or video, open the shared album, tap the item, tap the Trash button, and confirm by tapping Delete Photo.
12.9. How do I save a photo or video from a Shared Album to my library?
To save an item, tap the photo or video, tap the Share button, and select Save Image or Save Video.
12.10. What should I do if photos are not appearing in the Shared Album?
Check your internet connection, verify iCloud status, allow time for processing large files, and ensure device compatibility.
iCloud Shared Albums offer a seamless and collaborative way to share your photos and videos with friends and family. By following these tips and tricks, you can create engaging albums, manage your content effectively, and protect your privacy. Visit dfphoto.net for more in-depth tutorials, equipment reviews, and inspiration to take your photography to the next level.
Are you ready to elevate your photography experience? Explore dfphoto.net today and discover a world of resources, tutorials, and a vibrant community of fellow photography enthusiasts. Dive into detailed guides, unbiased equipment reviews, and inspiration galleries to fuel your creativity. Visit our website at dfphoto.net or contact us at Address: 1600 St Michael’s Dr, Santa Fe, NM 87505, United States or Phone: +1 (505) 471-6001 to learn more. Let dfphoto.net be your companion in capturing and sharing your world through the lens.