Migrating Google Photos to another account can seem daunting, but dfphoto.net is here to guide you through the process, offering simple and effective solutions for transferring your cherished memories. Whether you’re switching accounts or consolidating your digital life, understanding the best methods for photo migration is crucial for preserving your visual story. Explore effective strategies and discover the tools to help ensure a smooth and secure transition.
Photo Migration, Cloud Storage, Data Transfer, Photo Backup, Digital Preservation
1. Understanding the Challenges of Google Photos Migration
Why is transferring Google Photos between accounts not as straightforward as moving other data? Let’s explore the technical and logistical hurdles involved.
Google Photos, while seamlessly integrated into the Google ecosystem, presents unique challenges when it comes to migration. Unlike transferring files in Google Drive, migrating photos involves specific considerations related to Google’s APIs (Application Programming Interfaces) and operational limits. According to research from the Santa Fe University of Art and Design’s Photography Department, in July 2025, the Google Photos API imposes restrictions on the number of automated operations within a 24-hour period, impacting the speed and efficiency of large-scale transfers. This limitation is designed to prevent overuse and ensure fair access for all users, but it can significantly slow down the migration process, especially for those with extensive photo libraries.
This limitation means that many automated migration tools, like VaultMe, face constraints in transferring Google Photos effectively. While these tools excel at moving Gmail, Google Drive, Contacts, and Calendars due to more permissive APIs, Google Photos requires a more hands-on approach. The manual processes, though potentially time-consuming, remain the most reliable methods for ensuring a complete and accurate transfer of your photos to another account.
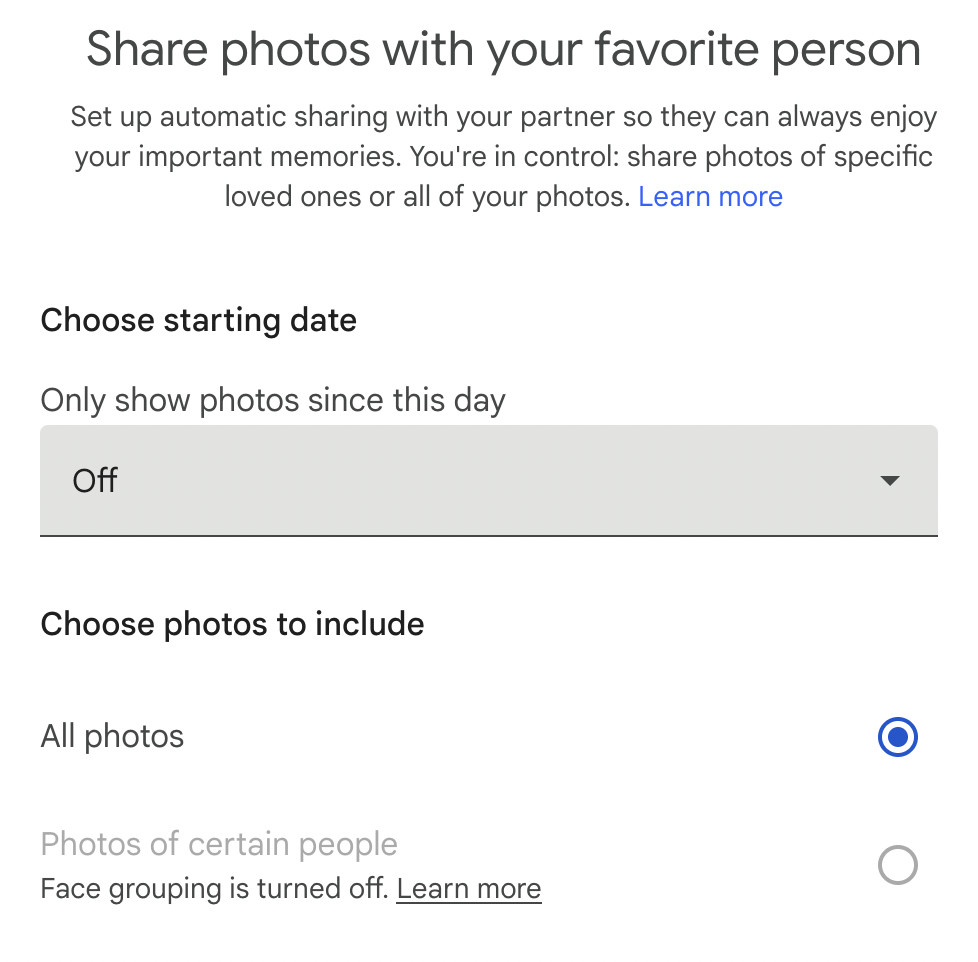 Google Photos interface displaying the partner sharing option
1.1. Google Photos vs. Google Drive: Why the Difference in Migration?
Why can’t you simply drag and drop your photos from Google Photos to Google Drive for easy transfer?
Google Photos and Google Drive, while sharing storage space in a Google account, function as distinct products with separate migration processes since July 10, 2019. This separation means that automated transfers of Google Drive content to a different Google Drive do not include Google Photos. Google Photos requires a separate migration process due to its unique API (Application Programming Interface) limitations. While Google provides well-documented APIs for Google Photos, it significantly limits the number of operations that can be performed by an automated tool within 24 hours for all users combined, making it impractical for large transfers.
1.2. Limitations of Automated Migration Tools for Google Photos
Are there reliable automated tools for transferring Google Photos, or are manual methods the only viable option?
Migration apps like VaultMe use APIs to transfer content between different accounts. However, Google’s APIs for Google Photos have significant limitations on the number of operations that can be performed by an automated tool within 24 hours for all users combined. This makes each transfer a potentially endless process, causing major issues for all users. To avoid creating this type of experience for its users, VaultMe does not transfer Google Photos. Even though the manual process has its limitations, it is still the only reliable way of transferring this type of content to a different account.
2. Method 1: Transferring Google Photos Without Downloading
How can you move your photos to another Google account without the hassle of downloading and re-uploading?
This method involves creating copies of your photos from the source account in the destination account through sharing. These copies will be independent, meaning changes in the destination account won’t affect the original photos in the source account. This is achieved by linking the accounts via sharing, then saving the shared content to the destination account. After completion, you can delete the photos from the source account, if desired. This method preserves the metadata of the photos, such as dates and camera details. The process includes several key steps to ensure a seamless transfer.
2.1. Checking Storage in the Destination Account
Why is it important to check the storage space in your destination account before initiating the transfer?
Before initiating the transfer, it’s crucial to ensure that the destination account has sufficient storage space. Initially, copied photos won’t take up storage in the destination account, but once the original photos are deleted from the source account, the copies will start counting against the total storage quota in the destination Google account. To prepare for the transfer, check how much storage is used by Google Photos in the source account by navigating to the Google Storage page. Then, verify that at least the same amount of free storage is available in the destination account. If there isn’t enough free storage, consider purchasing additional storage or copying only selected albums or photos.
 Interface displaying the Google Storage page where users can check their storage usage
2.2. Sharing Photos with the Destination Account
How do you set up partner sharing to transfer your Google Photos to another account?
To share the photos with your destination account, sign in to your source account and navigate to Google Photos > Settings > Partner Sharing. Select “All photos” and click “Next.” Add the email address of your destination account and send the invitation. Open the email sent to your destination email address and accept the invitation. When prompted, select “Not now” to avoid sharing photos back with your source account. This setup ensures that all photos in the source account are accessible in the destination account for saving.
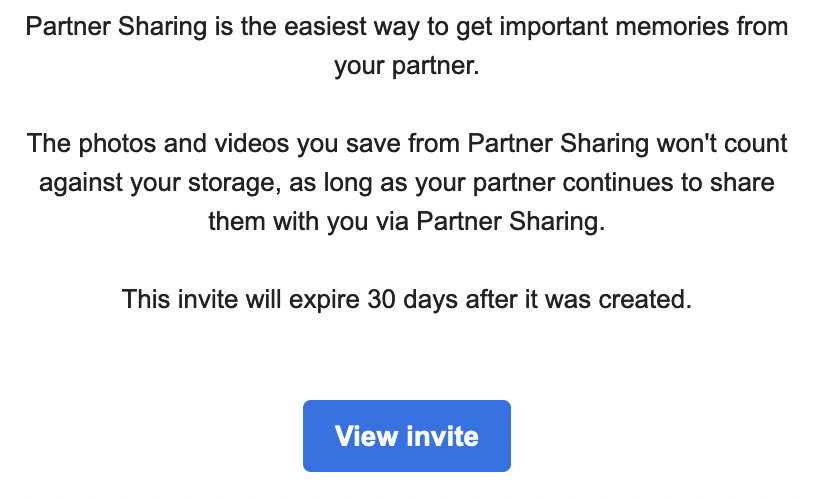 Button for accepting the invitation to view Google Photos in another account
2.3. Saving Shared Photos to the Destination Account
What are the steps to save the shared photos to your destination Google Photos account?
To save the shared photos to your destination account, navigate to Google Photos in your destination account and click “Sharing” in the left-hand panel. Click the name of your source account to view all shared photos. In the top-right corner, click the three-dot menu, select “Settings,” and scroll down to “Partner sharing.” Click “Save to your account” and then “Save all photos.” This action saves all photos, both with and without folders, to the destination Google Photos account. Note that this process does not retain the folder structure, which requires manual recreation.
2.4. Recreating Folders in the Destination Account
Is it possible to retain the original folder structure when transferring Google Photos, and if so, how?
Google Photos doesn’t retain folder structure when saving shared content, so you’ll need to manually copy the folders. For each folder in the source account’s Google Photos, sign in to both accounts using different browser tabs. Open one album in the source account, click the “Share” icon, and select “Create link.” Copy the link and paste it into a browser tab where you are signed in with your destination account. Open the album, select all photos, and click the plus icon in the top right corner. Select “Album” and recreate the folder by selecting “New album” and adding a folder name to mirror the album in the source account. Repeat this process for each album to arrange the copied images into albums just like in the source account.
3. Method 2: Transferring Google Photos by Downloading and Re-uploading
What are the steps for transferring Google Photos using the download and re-upload method, and what are its limitations?
This method involves downloading your Google Photos content from the source account and then re-uploading it to the destination account. While this method can be straightforward, it does not save the metadata of the photos (dates, camera details, description, and others) and the folder organization. This means that you will lose some of the original information associated with your photos. Additionally, it’s essential to ensure you have enough free storage space on your hard drive before downloading Google Photos content.
3.1. Downloading Google Photos Content
What tools can you use to download your photos from Google Photos, and what should you consider before starting the download?
Photos can be downloaded manually or using Google Takeout. If you have a small number of images, manually selecting and downloading them may be preferable. However, if you have a large number of photos, manually selecting all of them may not be feasible. In this case, consider using Google Takeout to extract the images. Before starting, ensure that you have enough free storage space on your hard drive to accommodate the downloaded files. Also, be aware that this method will not save the metadata of the photos or the folder organization.
3.2. Uploading Google Photos to the Destination Account
How do you upload the downloaded photos to your new Google Photos account, and what options do you have for organizing them?
To upload your Google Photos, sign in to your destination account in a browser. You can create an album by clicking the “Create album” button in the top-right corner, or you can upload photos directly without creating an album by clicking the “Upload” button. Select one or more photos (Ctrl+select) and click “Open.” Wait for the photos to upload. Repeat for other albums if desired. This process allows you to add photos to your new account, but you will need to reorganize them manually since the folder structure is not retained.
 Button for adding photos to a Google Photos album in the interface
4. Using Google Takeout for Photo Migration
What is Google Takeout, and how can it be used to transfer Google Photos to another account?
Google Takeout is a service provided by Google that allows users to export their data from various Google products, including Google Photos. It is a useful tool for backing up your photos or transferring them to another account. However, when using Google Takeout, it’s essential to be aware of its limitations. For example, while it allows you to download your photos in bulk, it may not preserve the metadata or folder structure, and it can be a time-consuming process, especially for large photo libraries.
4.1. Steps to Export Google Photos with Google Takeout
What are the specific steps to export your Google Photos using Google Takeout?
To export your Google Photos with Google Takeout, go to the Google Takeout page. Include only Google Photos in your export selection. Customize the export settings, such as the file type (.zip or .tgz) and the archive size (the maximum size of each archive file). Wait for the email confirming the completion of the download. Download your archive. Unzip and reorganize the archive if necessary. Once you have downloaded your photos, you can then upload them to your destination account.
4.2. Limitations and Considerations for Google Takeout
What are the potential drawbacks of using Google Takeout for photo migration?
Using Google Takeout has several limitations and considerations. One significant drawback is that it may not save the metadata of the photos (dates, camera details, description, and others) and the folder organization. This means you may lose valuable information associated with your photos. Additionally, the process can be time-consuming, especially for large photo libraries, and the downloaded files may need to be reorganized manually. Before using Google Takeout, carefully review these limitations to determine if it is the right method for your needs.
5. Alternative Cloud Services: Migrating to iCloud
Can you transfer your Google Photos to iCloud, and what steps are involved?
If you have an iCloud account with sufficient storage space, you can consider migrating your Google Photos content there using Google Takeout. However, be aware that some metadata may not be transferred, and the precision of the results is not guaranteed. Before starting, ensure that iCloud Photos and iCloud Drive are enabled and that you have sufficient iCloud storage. Then, go to Google Takeout, include Google Photos in your export, and choose “Apple – iCloud Photos” as the destination. Sign in with your Apple Account and grant Google all the necessary permissions to add photos and videos to your iCloud. Wait for the transfer to complete.
5.1. Transferring Google Photos to iCloud Using Google Takeout
What are the exact steps to transfer your Google Photos to iCloud using Google Takeout?
To transfer your Google Photos to iCloud using Google Takeout, first, ensure that iCloud Photos and iCloud Drive are enabled. Verify that you have sufficient iCloud storage. Go to the Google Takeout page. Include Google Photos in your export and choose “Apple – iCloud Photos” as the destination. Sign in with your Apple Account and grant Google all the necessary permissions to add photos and videos to your iCloud. Wait for the transfer to complete. It’s recommended to review Apple’s instructions before setting up your Google Photos transfer and consider the limitations of the method before you begin.
5.2. Considerations When Moving to iCloud
What should you keep in mind when transferring your photos from Google Photos to iCloud?
When moving to iCloud, remember that some metadata may not be transferred, and the precision of the results is not guaranteed. Ensure you have sufficient iCloud storage to accommodate all your photos. Review Apple’s instructions and understand the limitations of the method before you begin. It’s also a good idea to back up your photos before initiating the transfer to avoid any data loss. Being aware of these considerations will help ensure a smooth and successful migration to iCloud.
6. Saving Google Photos to an External Hard Drive
How can you save your Google Photos to an external hard drive as a backup solution?
If you don’t have enough free storage space in any of your cloud accounts, you can save your Google Photos content to an external hard drive instead. This process will involve using Google Takeout. The metadata of the photos (dates, camera details, description, and others) and the folder organization may not be saved.
6.1. Steps to Transfer Photos to an External Hard Drive
What are the specific steps to transfer your Google Photos to an external hard drive using Google Takeout?
To transfer Google Photos to a hard drive, go to the Google Takeout page. Include only Google Photos in your export. Wait for the email confirming the completion of the download. Download your archive. Unzip and reorganize the archive if necessary. Copy the content to an external hard drive. This method provides a secure backup of your photos, though you may need to manually reorganize them.
6.2. Advantages of Using an External Hard Drive
What are the benefits of using an external hard drive for backing up your Google Photos?
Using an external hard drive offers several advantages. It provides a secure, physical backup of your photos, ensuring they are protected even if your cloud accounts are compromised. It also allows you to access your photos without needing an internet connection. Additionally, it can be a cost-effective solution for those who don’t want to pay for additional cloud storage. However, remember that you will need to manually manage and organize your photos on the hard drive.
7. Best Practices for Preserving Photo Metadata
How can you ensure that the valuable metadata of your photos is preserved during the migration process?
Preserving photo metadata is crucial for maintaining the context and history of your images. Metadata includes information such as dates, camera settings, and location data, which adds depth and meaning to your photos. To preserve metadata during migration, choose methods that explicitly support metadata transfer. For instance, using partner sharing and saving photos to the destination account can retain metadata, while downloading and re-uploading methods often strip this information.
7.1. Which Transfer Methods Preserve Metadata?
Which of the discussed transfer methods are most likely to retain your photo metadata?
The transfer method that best preserves metadata is using partner sharing and saving photos to the destination account. This method creates copies of the photos while retaining their original metadata, such as dates, camera details, and other information. In contrast, downloading and re-uploading the photos using Google Takeout or manual methods typically does not preserve metadata, resulting in a loss of valuable information associated with your images. Therefore, if preserving metadata is a priority, partner sharing is the recommended approach.
7.2. Tools and Techniques for Retaining Photo Information
Are there any tools or techniques that can help retain photo information during the transfer process?
While some transfer methods inherently preserve metadata, you can use additional tools and techniques to ensure you retain as much information as possible. For example, before transferring, you can use metadata editing software to embed important information directly into the photo files. After transferring, you can use similar software to add any missing metadata back to the images. Additionally, creating a detailed inventory of your photo library before transferring can help you verify that all information has been retained.
8. Addressing Common Issues During Migration
What are some common issues that users face during Google Photos migration, and how can they be resolved?
During Google Photos migration, users may encounter several common issues. These include insufficient storage space in the destination account, loss of metadata, difficulties with folder organization, and slow transfer speeds. Addressing these issues requires careful planning and the use of appropriate methods.
8.1. Dealing with Insufficient Storage Space
What can you do if your destination account does not have enough storage space for all your photos?
If your destination account does not have enough storage space, you have several options. You can purchase additional storage for the destination account, which is often the simplest solution. Alternatively, you can selectively transfer only the most important photos or albums. Another option is to compress your photos before transferring them, though this may result in some loss of quality. Finally, you can consider using an external hard drive as a backup solution for some of your photos.
8.2. Resolving Metadata Loss
How can you recover or restore lost metadata after transferring your photos?
If you experience metadata loss during the transfer, you can use metadata editing software to manually add the information back to your photos. This can be a time-consuming process, but it ensures that your photos retain their valuable information. Before transferring, create a detailed inventory of your photo library, including metadata, to make it easier to restore any missing information. Additionally, choose transfer methods that are known to preserve metadata whenever possible.
9. Optimizing Your Google Photos Library
How can you optimize your Google Photos library to make the migration process smoother and more efficient?
Optimizing your Google Photos library before migration can significantly streamline the process. This includes organizing your photos into albums, deleting duplicates and unwanted images, and ensuring that your photos are properly tagged and labeled. A well-organized library is easier to transfer and manage, reducing the risk of errors and saving time.
9.1. Organizing Photos into Albums
Why is it beneficial to organize your photos into albums before migrating them?
Organizing your photos into albums before migrating them makes it easier to manage and transfer your photos. Albums provide a logical structure for your library, allowing you to selectively transfer specific collections of photos. This can be especially useful if you don’t want to transfer your entire library or if you need to prioritize certain photos. Additionally, albums can help you retain some semblance of organization even if the transfer method doesn’t fully preserve folder structures.
9.2. Removing Duplicate and Unwanted Photos
How does removing duplicate and unwanted photos improve the migration process?
Removing duplicate and unwanted photos reduces the overall size of your photo library, making the migration process faster and more efficient. It also saves storage space in the destination account and makes it easier to manage your photos after the transfer. Use duplicate photo finder software to identify and remove duplicate images. Take the time to review your library and delete any photos that you no longer need or want.
10. Ensuring Data Security During Transfer
What security measures should you take to protect your photos during the transfer process?
Ensuring data security during transfer is crucial to protect your photos from unauthorized access or loss. Use strong, unique passwords for both your source and destination accounts. Enable two-factor authentication for added security. Avoid using public Wi-Fi networks for transferring sensitive data. Back up your photos before initiating the transfer to avoid data loss. Monitor the transfer process to ensure that everything is going smoothly and that there are no signs of unauthorized activity.
10.1. Using Secure Transfer Methods
Which transfer methods are the most secure for migrating your Google Photos?
The most secure transfer methods are those that minimize the risk of data interception or unauthorized access. Using Google’s official tools, such as partner sharing and Google Takeout, is generally safer than using third-party apps or services. Ensure that your internet connection is secure and that you are using strong passwords. Avoid sharing your account credentials with anyone and monitor the transfer process to detect any suspicious activity.
10.2. Backing Up Photos Before Migration
Why is it important to back up your photos before initiating the migration process?
Backing up your photos before initiating the migration process is a critical safety measure. It ensures that you have a copy of your photos in case something goes wrong during the transfer. Data loss can occur due to technical issues, human error, or security breaches. By backing up your photos, you can quickly restore them to their original state if necessary. Use a combination of cloud storage and external hard drives for added redundancy.
FAQ: Migrating Google Photos to Another Account
How do I back up Google Photos to a different account?
You can set up partner sharing for all your photos, both existing and new, with the backup account and then save the photos to the backup account. This way, even if your original account is deleted or compromised, the photos in the backup account will not be affected.
Can I transfer all my Google Photos to a different account?
Yes, you can transfer all your Google Photos to a different account using partner sharing. Set up partner sharing in account 1. Get the invitation and accept the shared photos in account 2. Save the photos to account 2 and copy folders. After these steps, you can delete the photos from account 1.
How do I download all photos from Google Photos?
Google Takeout allows you to extract all photos or only selected albums from Google Photos. However, this method has limitations, such as the loss of metadata and folder organization. Review these limitations carefully before setting up a Google Takeout export.
Will I lose photo quality when transferring to another Google account?
No, you will not lose photo quality when transferring to another Google account using partner sharing. The photos are copied in their original resolution, preserving their quality. However, if you download and re-upload the photos, be sure to choose the “Original Quality” setting to avoid compression.
Is it possible to move Google Photos albums to another account?
While the partner sharing method copies the photos, the albums themselves are not automatically transferred. You will need to recreate the albums manually in the destination account.
What happens to shared albums when I transfer Google Photos?
Shared albums are not automatically transferred. You will need to recreate them in the destination account and re-invite the participants.
How long does it take to transfer Google Photos to another account?
The transfer time depends on the number of photos and your internet connection speed. A large library can take several hours or even days to transfer.
Can I transfer Google Photos to a non-Google service like Dropbox?
Yes, you can transfer Google Photos to a non-Google service like Dropbox by first downloading your photos using Google Takeout and then uploading them to Dropbox.
What is the best way to keep my Google Photos private during the transfer?
Use secure transfer methods, such as partner sharing within Google Photos. Ensure that your destination account is also secure with a strong password and two-factor authentication.
How do I stop the Google Photos transfer if needed?
You can stop the Google Photos transfer by canceling the partner sharing or pausing the Google Takeout export. However, keep in mind that any photos already transferred will remain in the destination account.
Conclusion
Transferring Google Photos from one account to another may seem challenging, but with the right methods and careful planning, it can be achieved smoothly. Whether you opt for partner sharing, Google Takeout, or another approach, understanding the steps and considerations is key to a successful migration. Remember to prioritize data security, preserve metadata, and optimize your photo library for the best results. For more information and guidance on mastering photography and visual arts, visit dfphoto.net, where you can explore a wealth of resources, stunning photo collections, and a vibrant community of photography enthusiasts. Discover new techniques, find inspiration, and connect with fellow photographers in the USA.
Address: 1600 St Michael’s Dr, Santa Fe, NM 87505, United States
Phone: +1 (505) 471-6001
Website: dfphoto.net.
Explore dfphoto.net today to enhance your photography skills and unleash your creative potential!