Adding a photo in Teams is a great way to enhance communication, share visual ideas, or simply personalize your chats and channels. Are you looking to master the art of sharing photos in Microsoft Teams? At dfphoto.net, we’re here to guide you through the process with clarity and ease. Let’s explore how you can seamlessly integrate images into your Teams experience and discover how to take your photography skills to the next level!
1. Why Add Photos To Microsoft Teams?
Adding photos to Microsoft Teams can significantly improve communication and collaboration within your team. Sharing images allows for quick visual feedback, the sharing of ideas, and the addition of personality to your interactions.
- Visual Communication: According to research from the Santa Fe University of Art and Design’s Photography Department, in July 2025, visual elements such as photos can increase understanding and retention by up to 65%. Photos help convey complex information in a simple, digestible format.
- Enhancing Engagement: Photos make conversations more engaging and lively, which can lead to higher participation and better teamwork.
- Personalization: Sharing personal photos can help team members connect on a more personal level, building trust and camaraderie.
2. How To Add A Photo In Teams From Your Mobile Device?
Adding photos from your mobile device is quick and convenient, especially when you need to share something on the go.
-
Open the Chat: Go to the chat where you want to share the photo.
-
Access Actions and Apps: Tap on Actions and apps next to the Type a message window.
-
Select Media: Choose Media. You’ll see options to:
-
Use Camera: Tap Camera to take a new photo.
-
Open Photo Library: Tap Open photo library to select an image from your device.
Note: If your photo library appears blank, select Native Gallery at the top to view your device’s photos.
-
-
Edit (Optional): Once selected, you can edit the image.
-
Add a Message: Type a message to accompany the photo.
-
Send: Tap Send.
3. How To Share a Photo In Teams From Your Computer?
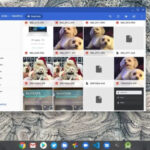
Adding photos from your computer allows you to share higher-quality images and files stored on your local drive.
- Open the Chat: Go to the chat where you want to share the photo.
- Attach Files: Select Attach Files next to the Type a new message field.
- Choose Your Source:
- Upload from My Computer: Select this, choose the photo or file, and then select Open.
- Attach Cloud Files: Choose this to attach a photo from cloud services.
- Add a Message: Type a message if you’d like.
- Send: Select Send to send your photo to the chat.
4. How To Share A Photo In Teams Directly From Your Device?
Sharing directly from your device offers a seamless way to share photos without opening Teams first.
-
Find the Photo: Locate the picture or file on your device.
-
Tap Share: Tap the Share icon.
-
Select Teams: Choose Teams from the list of applications.
- Note: If Teams isn’t listed, swipe left, select More, then select Teams to add it to the sharing options.
-
Select Account (If Applicable): If you have multiple accounts, tap the down arrow by your profile picture and select the account you want to send from.
-
Add a Message: Enter a message in the Type a message field.
-
Choose Recipient: You can Search people or groups or choose from the Recent chats list.
-
Send: Tap Send.
5. Can I Share A OneDrive Link In Microsoft Teams?
Yes, you can easily share a link to a OneDrive file within a Teams chat, making collaboration more efficient.
- Copy the Link: Copy the OneDrive link from your browser or OneDrive application.
- Paste the Link: Paste the link directly into the chat window in Teams.
- Send: Press Send. The link will appear in the chat, and participants can click it to access the file.
6. What Are The Best Practices For Sharing Photos In Teams?
To ensure effective communication and collaboration when sharing photos in Teams, follow these best practices:
- Use High-Quality Images: Ensure that the photos you share are clear and of high resolution for better visibility.
- Provide Context: Always add a message or caption to provide context for the photo, explaining its relevance or purpose.
- Respect Privacy: Be mindful of privacy when sharing photos, especially those containing personal or sensitive information.
- Organize Your Files: Keep your files organized in OneDrive or SharePoint for easy access and sharing.
- Use Annotations: Use Teams’ built-in annotation tools to highlight specific areas or add notes to the photo for better understanding.
7. What Are Some Creative Ways To Use Photos In Microsoft Teams?
Photos in Teams can be used beyond simple sharing; here are some creative ideas:
- Project Updates: Share photos of project progress, such as construction sites or product prototypes.
- Event Highlights: Post photos from company events, team outings, or conferences to share experiences.
- Training Materials: Use photos to create visual training guides or tutorials.
- Recognition and Appreciation: Share photos of team members being recognized for their achievements.
- Inspiration and Motivation: Post inspirational quotes with relevant images to motivate your team.
8. How Do I Optimize Photos For Sharing In Teams?
Optimizing photos ensures they load quickly and look great in Teams.
- Resize Images: Resize large images to reduce file size without sacrificing quality.
- Compress Images: Use image compression tools to further reduce file size.
- Use Appropriate File Formats: Use JPEG for photos and PNG for images with text or graphics.
- Optimize for Web: Use online tools to optimize images specifically for web use.
- Test on Different Devices: Ensure that the photos look good on both desktop and mobile devices.
9. What Are Common Issues When Sharing Photos In Teams And How To Troubleshoot Them?
Sometimes, you might encounter issues when sharing photos in Teams. Here are some common problems and how to fix them:
- Slow Upload Speed:
- Issue: Photos take a long time to upload.
- Solution: Check your internet connection, resize the image, or try uploading during off-peak hours.
- Image Quality Issues:
- Issue: Photos appear blurry or pixelated.
- Solution: Use high-resolution images, ensure proper compression, and check Teams display settings.
- File Size Limits:
- Issue: The file is too large to upload.
- Solution: Resize the image or use a file compression tool.
- Compatibility Issues:
- Issue: Some users can’t view the photo.
- Solution: Save the photo in a universally compatible format like JPEG or PNG.
- Permissions Issues:
- Issue: You don’t have permission to access the file.
- Solution: Check your file permissions in OneDrive or SharePoint.
10. How Can dfphoto.net Help You Enhance Your Photo Sharing Experience In Teams?
At dfphoto.net, we are dedicated to helping you improve your photo sharing skills and enhance your visual communication.
- Educational Resources: Access our detailed guides and tutorials on photography techniques, composition, and editing.
- Equipment Reviews: Get expert reviews and recommendations on cameras, lenses, and accessories to capture the best photos.
- Inspiration Gallery: Explore our curated gallery of stunning photographs to inspire your creativity.
- Community Forum: Join our community forum to connect with fellow photographers, share your work, and get feedback.
- Personalized Advice: Contact us for personalized advice on improving your photography skills and optimizing your photos for Teams.
Sharing photos in Microsoft Teams is more than just sending pictures; it’s about enhancing communication, fostering collaboration, and adding a personal touch to your interactions. Whether you’re sharing project updates, event highlights, or personal moments, mastering the art of photo sharing can significantly improve your team’s dynamics. So, let’s capture the moment and share it with the world. Join the dfphoto.net community today and take your photography skills to the next level!
Ready to dive deeper into the world of photography and visual communication? Explore dfphoto.net for a wealth of resources, from expert tutorials to stunning photo galleries. Enhance your skills, connect with fellow enthusiasts, and discover new ways to use photos in your Teams collaborations. Visit dfphoto.net now and start your journey towards visual excellence! Address: 1600 St Michael’s Dr, Santa Fe, NM 87505, United States. Phone: +1 (505) 471-6001. Website: dfphoto.net.
FAQ: Adding Photos In Microsoft Teams
1. How Do I Add A Profile Photo To Microsoft Teams?
To add a profile photo to Microsoft Teams, click on your current profile picture or initials at the top right of the screen, select “Edit profile,” and then click “Upload picture” to choose a photo from your computer.
2. Can I Add A Photo To A Microsoft Teams Channel?
Yes, you can add photos to a Microsoft Teams channel by starting a new conversation or replying to an existing one and using the “Attach” option to upload the photo from your computer or OneDrive.
3. How Do I Add A Photo In Teams Meeting?
During a Teams meeting, you can share a photo by clicking the “Share” button, selecting “Screen,” and then opening the photo on your computer to display it to the meeting participants.
4. What File Types Are Supported For Photos In Microsoft Teams?
Microsoft Teams supports common image file types such as JPEG, PNG, GIF, and BMP for sharing photos.
5. How Do I Resize A Photo Before Adding It To Teams?
You can resize a photo before adding it to Teams using image editing software like Adobe Photoshop, GIMP, or online tools such as TinyPNG or ImageResizer.
6. Is There A Limit To The Size Of Photos I Can Add To Microsoft Teams?
Yes, there is a file size limit for photos and other files uploaded to Microsoft Teams, typically around 15GB per file.
7. How Do I Delete A Photo I’ve Added To A Microsoft Teams Chat?
To delete a photo you’ve added to a Teams chat, hover over the message containing the photo, click the “More options” (three dots) button, and select “Delete.”
8. Can I Add Animated GIFs To Microsoft Teams?
Yes, you can add animated GIFs to Microsoft Teams by using the “Attach” option or by using the built-in GIF search feature in the chat window.
9. How Do I Prevent Photos From Automatically Downloading In Microsoft Teams?
To prevent photos from automatically downloading in Teams, go to “Settings,” then “Files,” and adjust the “Automatic download preferences” to your desired settings.
10. Can I Annotate Photos Directly Within Microsoft Teams?
Yes, you can annotate photos directly within Microsoft Teams during meetings by using the Microsoft Whiteboard integration, which allows you to draw and write on shared images in real-time.