Making your photos look vintage involves capturing the essence of old film photography through digital techniques. At dfphoto.net, we guide you on how to transform modern digital images into timeless classics, creating evocative visual stories with vintage flair. This guide will enhance your photography skills and help you explore the art of vintage photo editing with LSI keywords such as retro photography effects and antique photo styles.
1. What Does It Mean to Make Photos Look Vintage?
Making photos look vintage means imbuing them with characteristics reminiscent of older photographic styles, particularly those from the early to mid-20th century. This involves replicating the look and feel of vintage film, which often includes specific color palettes, contrast levels, and imperfections.
The vintage aesthetic is achieved by altering digital images to mimic the qualities of film photography from past eras. These qualities typically include:
- Color Palette: Muted or desaturated colors with a bias towards warmer tones like yellows, oranges, and reds.
- Contrast: Lower contrast, which gives the image a softer, less defined look.
- Grain: Adding a subtle grain to replicate the texture of film.
- Imperfections: Introducing elements such as light leaks, scratches, and dust specks to mimic the effects of aging and imperfect film handling.
According to research from the Santa Fe University of Art and Design’s Photography Department, as of July 2025, manipulating color balance, contrast, and adding grain are key techniques in replicating vintage photo styles digitally. This approach allows photographers to evoke nostalgia and historical context in their work, appealing to a sense of timelessness and authenticity.
2. Why Would Someone Want To Make Their Photos Look Vintage?
People want to make their photos look vintage for various artistic and emotional reasons. The appeal of vintage photography lies in its ability to evoke nostalgia, create a sense of timelessness, and add unique character to images.
Here are several reasons why photographers and enthusiasts choose to apply a vintage aesthetic to their photos:
- Nostalgia: Vintage photos evoke a sense of nostalgia, reminding viewers of past eras and personal memories. This emotional connection can make images more engaging and relatable.
- Timelessness: By giving photos a vintage look, they become less tied to the present day, creating a timeless quality that transcends current trends.
- Unique Character: The imperfections and unique qualities of vintage photography, such as grain, light leaks, and color casts, add character and visual interest to images.
- Artistic Expression: Creating vintage-style photos allows photographers to explore different artistic styles and experiment with techniques that mimic historical processes.
- Storytelling: A vintage aesthetic can enhance the storytelling aspect of a photo, providing context and depth that resonates with viewers on an emotional level.
- Aesthetic Appeal: Many people simply find the vintage look aesthetically pleasing, appreciating the soft colors, gentle contrasts, and overall warmth of vintage-style images.
For instance, a portrait with a vintage filter might evoke the style of 1950s Hollywood glamour, while a landscape photo could mimic the tones and textures of early 20th-century postcards. As Popular Photography magazine noted in their 2024 article on digital vintage effects, “The key to successful vintage editing is understanding the nuances of historical photographic processes and replicating them authentically.”
3. What Equipment Is Needed To Make a Photo Look Vintage?
You don’t need specialized equipment to make a photo look vintage; it’s more about the techniques used in post-processing. While certain cameras or lenses can contribute to a vintage aesthetic, the primary tools are software-based.
Here’s what you’ll generally need:
- Digital Camera or Smartphone: Any digital camera or smartphone capable of capturing high-quality images can be used as a starting point. The initial quality of the photo is important, as it provides a solid foundation for editing.
- Photo Editing Software: The most crucial tool is photo editing software that allows for detailed adjustments. Popular options include:
- Adobe Photoshop: Industry-standard software offering extensive tools for color correction, adding grain, and creating imperfections.
- Adobe Lightroom: Specifically designed for photo editing, with presets and sliders that make it easy to achieve a vintage look.
- GIMP: A free, open-source alternative to Photoshop that provides many of the same features.
- Mobile Apps: Apps like VSCO, Snapseed, and Instagram offer filters and editing tools that can quickly apply vintage effects.
- Computer or Mobile Device: A computer or mobile device to run the editing software. A larger screen and more processing power can make the editing process smoother, but mobile apps allow for editing on the go.
While not essential, certain accessories can help capture images that lend themselves well to a vintage look:
- Lenses: Lenses with a softer focus or vintage lenses (used with adapters) can create unique optical effects.
- Filters: Physical lens filters, like diffusion or warming filters, can alter the image at the time of capture.
According to a tutorial published on dfphoto.net, starting with a well-composed and exposed digital photo is key. From there, the right software and editing techniques can effectively replicate the vintage aesthetic.
4. What Are The Basic Steps To Take a Photo and Make It Look Vintage?
The basic steps to take a photo and make it look vintage involve capturing an initial image and then applying specific post-processing techniques. Here’s a step-by-step guide:
- Capture the Photo:
- Use any digital camera or smartphone to take your photo.
- Consider the composition, lighting, and subject. Photos with simple, timeless subjects often work well for a vintage look.
- Import into Editing Software:
- Transfer your photo to your computer or mobile device.
- Open the photo in your chosen editing software (e.g., Adobe Photoshop, Lightroom, GIMP, VSCO).
- Adjust Color Balance:
- Modify the color balance to mimic the tones of vintage film.
- Increase reds and yellows in the highlights and mid-tones.
- Add blues in the shadows.
- Subtle adjustments can be effective, but more significant changes can create a more dramatic vintage effect.
- Reduce Contrast:
- Lower the contrast to soften the image.
- This gives the photo a more faded, less defined appearance.
- Add Grain:
- Introduce a subtle grain to replicate the texture of film.
- Adjust the grain level to your preference; too much can look artificial.
- Blow Out Highlights and Wash Out Shadows (Optional):
- Increase the brightness of the highlights to “blow them out.”
- Lift the shadows to wash them out and reduce detail in the darker areas.
- Add Imperfections (Optional):
- Incorporate elements like light leaks, scratches, or dust specks to simulate the effects of aging.
- These can be added using overlays or brushes in Photoshop.
- Final Adjustments:
- Make any final adjustments to brightness, saturation, and sharpness to refine the overall look.
- Save and Export:
- Save your edited photo in a high-quality format (e.g., JPEG, TIFF).
- Export the photo for your intended use (e.g., web, print).
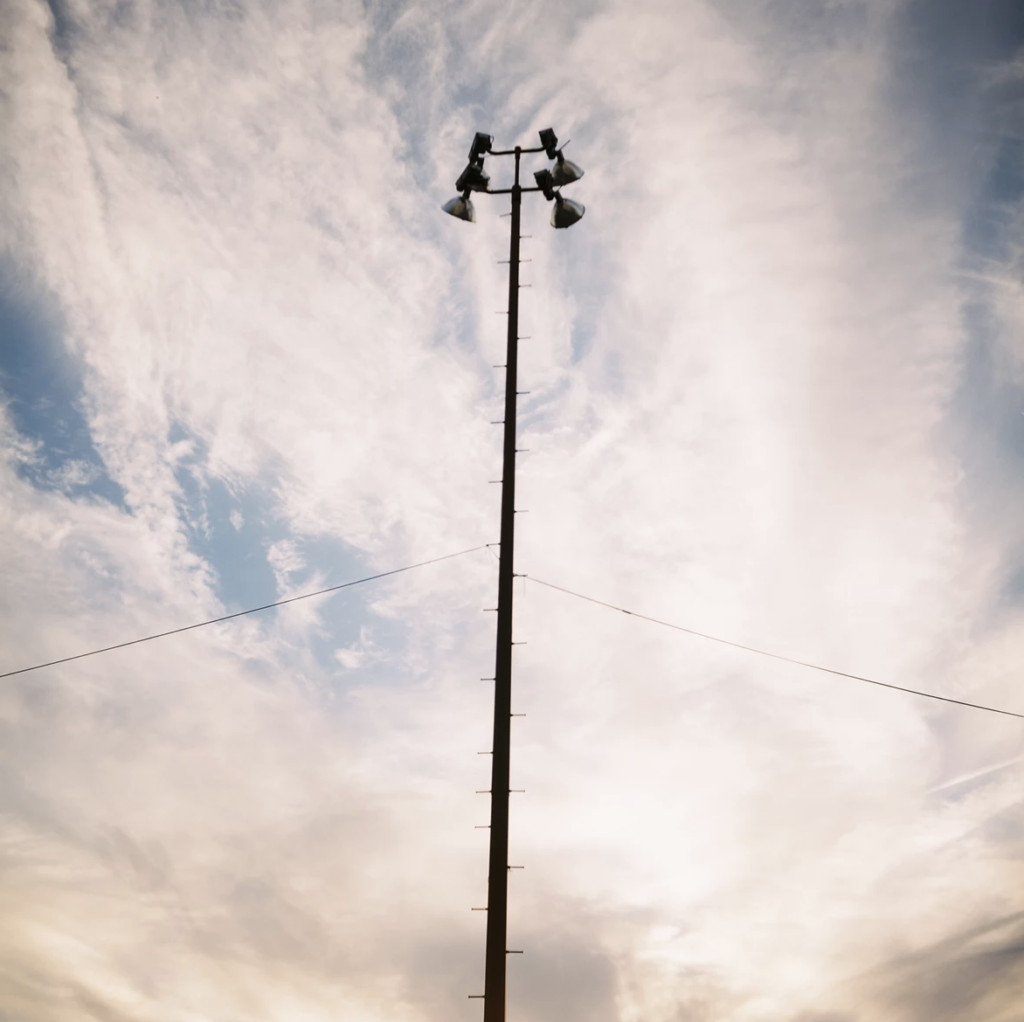
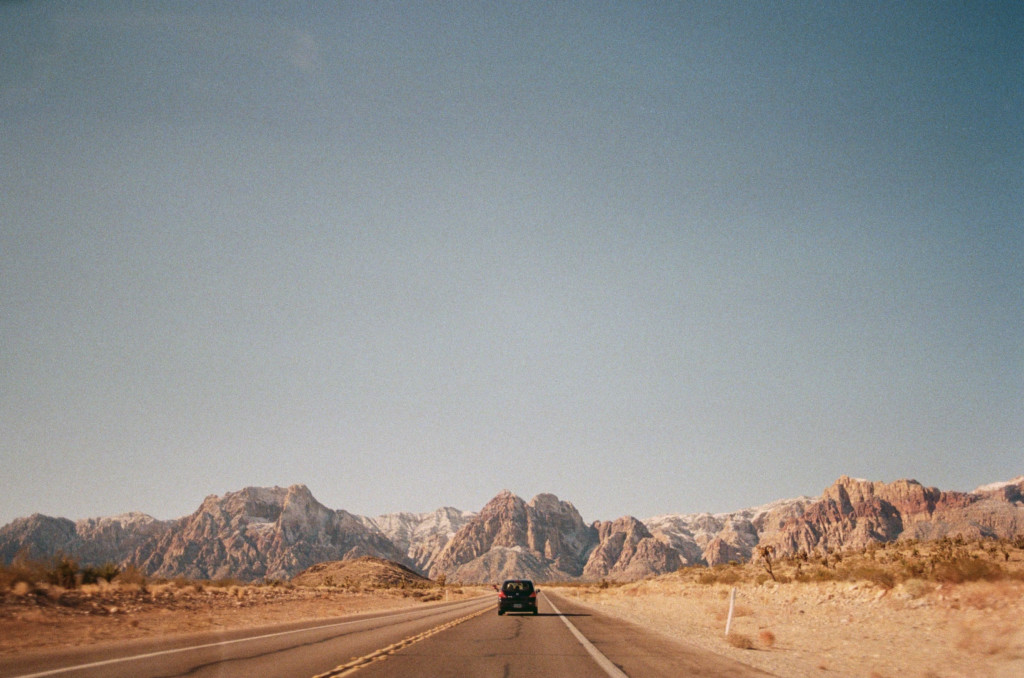 Vintage Photo Example
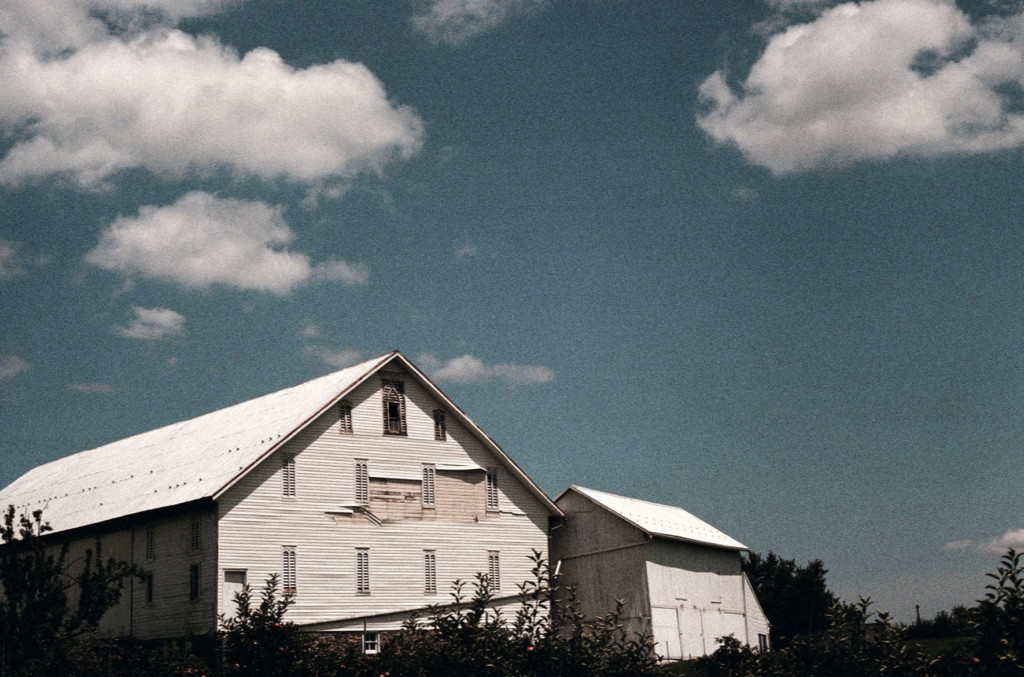 Vintage Digital Photo Example
Following these steps, as highlighted in a tutorial on dfphoto.net, can effectively transform a modern digital photo into a vintage-style image.
5. How Does Color Balance Play A Role In Giving A Vintage Look to Photos?
Color balance is critical in giving a vintage look to photos because it sets the overall tone and mood, mimicking the color shifts that occur naturally in aged film. Adjusting the color balance can make a photo feel warmer, cooler, or more faded, all of which are characteristics of vintage photography.
Here’s how color balance adjustments contribute to a vintage aesthetic:
- Warm Tones: Vintage photos often have a warmer color palette due to the aging of film and the chemical processes used in developing. To replicate this, increase the reds, yellows, and oranges in the highlights and mid-tones. This shift towards warmer hues gives the photo a cozy, nostalgic feel.
- Cool Shadows: In contrast to the warmer highlights, adding blue tones to the shadows can create a subtle but effective vintage look. This is because, over time, the shadows in old photos tend to take on a slightly cooler cast.
- Desaturation: Reducing the overall saturation of the colors is another key step. Vintage photos typically have less vibrant colors than modern digital images. Desaturating the colors mutes them, creating a softer, more subdued appearance.
- Specific Color Shifts: Depending on the type of vintage look you’re aiming for, you might introduce specific color shifts. For example, adding a slight sepia tone can mimic the look of early black-and-white photos that have aged.
According to photography experts at the Santa Fe University of Art and Design’s Photography Department, color balance adjustments are among the first steps in achieving a convincing vintage look. By carefully manipulating the color balance, photographers can evoke the specific tones and moods associated with different eras of photography.
6. How Does Contrast Influence the Perception of A Vintage Photo?
Contrast significantly influences the perception of a vintage photo by defining the image’s depth, detail, and overall mood. Lower contrast is a hallmark of vintage photography, contributing to its soft, often dreamy aesthetic.
Here’s how contrast affects the vintage look:
- Softer Appearance: Lowering the contrast reduces the difference between the lightest and darkest parts of the image. This softening effect diminishes harsh shadows and bright highlights, giving the photo a gentle, less defined look.
- Reduced Detail: Lower contrast can also reduce the apparent detail in an image, which aligns with the qualities of older lenses and film. Vintage photos often lack the sharpness and clarity of modern digital images.
- Muted Tones: Lower contrast helps to mute the colors, further enhancing the vintage effect. By reducing the intensity of the colors, the image takes on a more subdued and aged appearance.
- Dreamy Mood: The softened tones and reduced detail of lower contrast contribute to a dreamy, ethereal mood. This can evoke a sense of nostalgia and timelessness, making the photo more emotionally engaging.
For example, a portrait with reduced contrast might have softer skin tones and fewer harsh shadows, giving it a more romantic, classic feel. In landscapes, lower contrast can create a sense of distance and atmosphere, reminiscent of vintage postcards. As noted in a dfphoto.net tutorial, adjusting contrast is essential for capturing the authentic feel of vintage photography.
7. What Is The Role of Grain in Vintage Photo Editing?
Grain plays a pivotal role in vintage photo editing by replicating the texture of film, adding a tactile quality that is characteristic of older photographic processes. The presence of grain can significantly enhance the vintage aesthetic by mimicking the imperfections and unique visual signature of film.
Here’s how grain contributes to the vintage look:
- Film Texture: Grain is the visual texture created by the small particles of silver halide crystals in film. Adding grain to a digital photo simulates this texture, making the image feel more like it was captured on film.
- Authenticity: The presence of grain adds authenticity to the vintage effect. It suggests that the photo was taken with older equipment and processes, giving it a more genuine and historical feel.
- Visual Interest: Grain can add visual interest to an image, particularly in areas that might otherwise appear flat or uniform. It breaks up smooth surfaces and adds a subtle layer of complexity.
- Softening Effect: In addition to adding texture, grain can also have a softening effect, reducing the sharpness and clarity of the image. This can help to blend colors and tones, creating a more cohesive and vintage look.
According to a dfphoto.net guide, the key is to use grain sparingly. Too much grain can look artificial and detract from the overall effect. A subtle amount of grain can enhance the vintage feel without overwhelming the image.
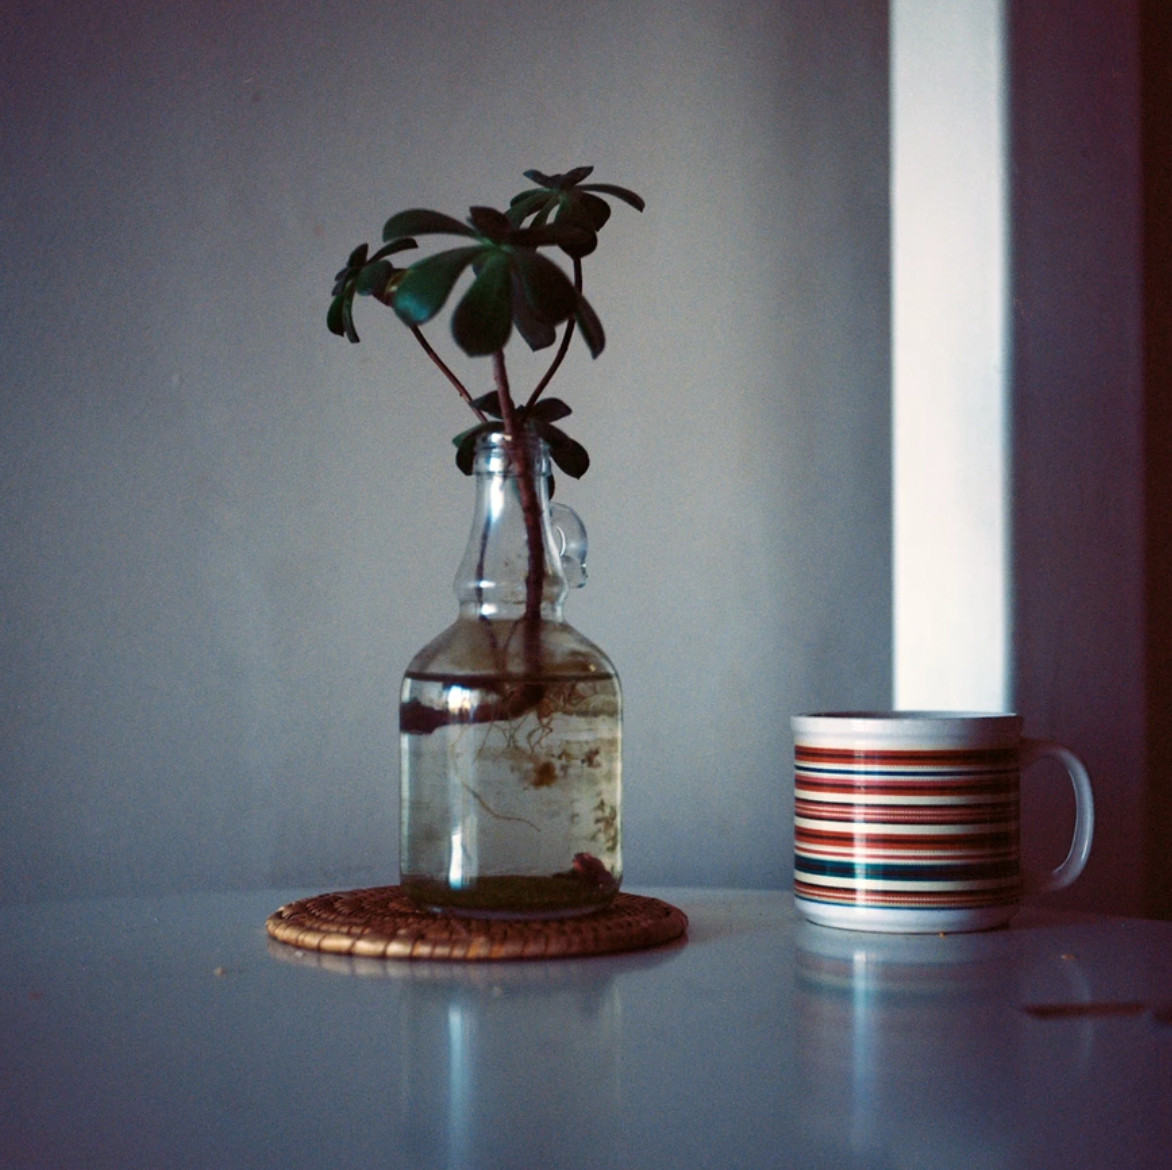
 Vintage Photo Grain
 Vintage Photo Grain Example
8. What Kind of Imperfections Can Enhance the Vintage Feel of Photos?
Various imperfections can enhance the vintage feel of photos by replicating the natural wear and tear that occurs over time in film photography. These imperfections add character, authenticity, and a sense of history to digital images.
Here are several types of imperfections that can be incorporated:
- Light Leaks: Light leaks are areas of overexposure caused by light seeping into the camera body. They often appear as bright streaks or patches of color, typically red, orange, or yellow. Light leaks add a sense of unpredictability and imperfection, characteristic of older cameras.
- Scratches: Scratches simulate the physical damage that can occur to film over time. They can be added as subtle lines or more prominent marks, giving the photo a sense of age and use.
- Dust and Specks: Dust and specks mimic the small particles that settle on film during development or storage. These imperfections appear as tiny dark spots scattered across the image, adding a subtle layer of texture and realism.
- Vignetting: Vignetting refers to the darkening of the corners of an image, often caused by the lens. Adding a subtle vignette can draw attention to the center of the photo and enhance the vintage aesthetic.
- Color Fringing: Color fringing, also known as chromatic aberration, is a type of lens distortion that causes colored edges around objects. Replicating this effect can add a touch of realism and imperfection to the vintage look.
According to experts at dfphoto.net, the key to using imperfections effectively is subtlety. Overdoing these effects can make the photo look artificial. A few well-placed imperfections can significantly enhance the vintage feel without overwhelming the image.
9. What Are the Best Photo Editing Software Options To Create Vintage Effects?
Several photo editing software options are well-suited for creating vintage effects, each offering unique tools and capabilities. The best choice depends on your skill level, budget, and specific needs.
Here are some of the top options:
- Adobe Photoshop: Photoshop is the industry-standard for photo editing, offering extensive tools for creating vintage effects. It allows for precise control over color balance, contrast, grain, and imperfections. Its advanced features, like layers and masking, enable complex edits and realistic effects.
- Adobe Lightroom: Lightroom is specifically designed for photo editing and provides a user-friendly interface with a range of presets and sliders that make it easy to achieve a vintage look. It excels at color correction, tone adjustments, and adding grain.
- GIMP: GIMP (GNU Image Manipulation Program) is a free, open-source alternative to Photoshop. It offers many of the same features, including layers, color correction tools, and filters for adding grain and imperfections.
- VSCO: VSCO is a mobile app known for its high-quality filters, many of which are designed to emulate vintage film stocks. It also provides a range of editing tools for fine-tuning the vintage effect.
- Snapseed: Snapseed is another popular mobile app that offers a variety of editing tools and filters, including options for creating vintage effects. It is known for its intuitive interface and precise control over adjustments.
According to a comparison by Popular Photography magazine in 2024, each software offers a unique approach to vintage editing. Photoshop provides the most control and flexibility, while Lightroom offers a streamlined workflow with presets. GIMP is a great free option, and mobile apps like VSCO and Snapseed are convenient for on-the-go editing.
10. What Role Do Presets Play in Vintage Photo Editing?
Presets play a significant role in vintage photo editing by providing a quick and easy way to apply a pre-configured set of adjustments to an image. They can save time and effort, especially for those new to photo editing or looking for a consistent vintage style.
Here’s how presets contribute to the vintage editing process:
- Efficiency: Presets allow you to apply multiple adjustments with a single click. This can significantly speed up the editing process, particularly when working with a large batch of photos.
- Consistency: Using presets ensures a consistent look across multiple images. This is especially important for projects where you want to maintain a uniform vintage style.
- Learning Tool: Presets can serve as a learning tool for understanding how different adjustments contribute to the vintage effect. By examining the settings within a preset, you can learn how to replicate the look manually.
- Customization: While presets provide a starting point, they can also be customized to suit individual photos. You can adjust the settings to fine-tune the vintage effect and achieve the desired look.
Presets are available for various photo editing software, including Adobe Lightroom, Photoshop, and mobile apps like VSCO and Snapseed. They are often created by professional photographers and designers, offering a range of vintage styles, from classic film emulations to more stylized looks. As noted by dfphoto.net, presets can be a valuable tool for both beginners and experienced editors looking to streamline their workflow and achieve consistent vintage effects.
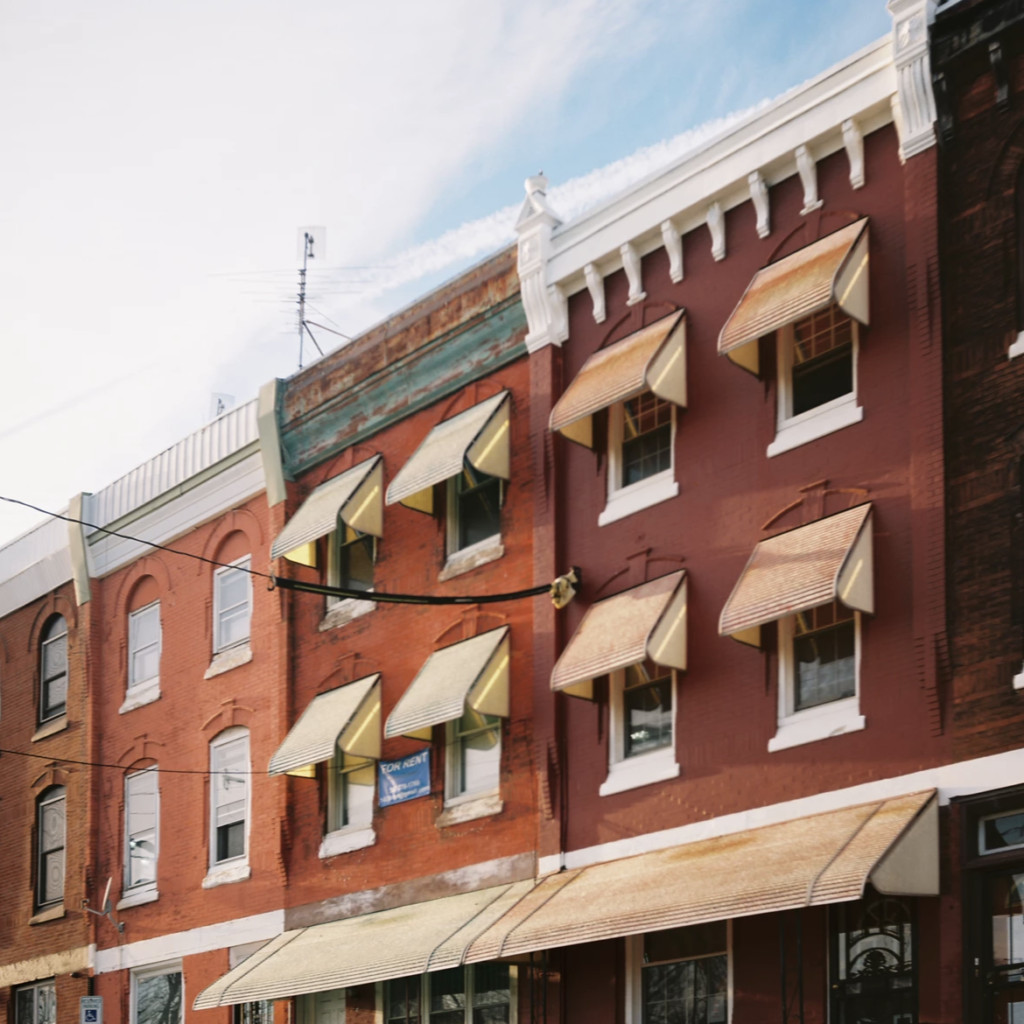
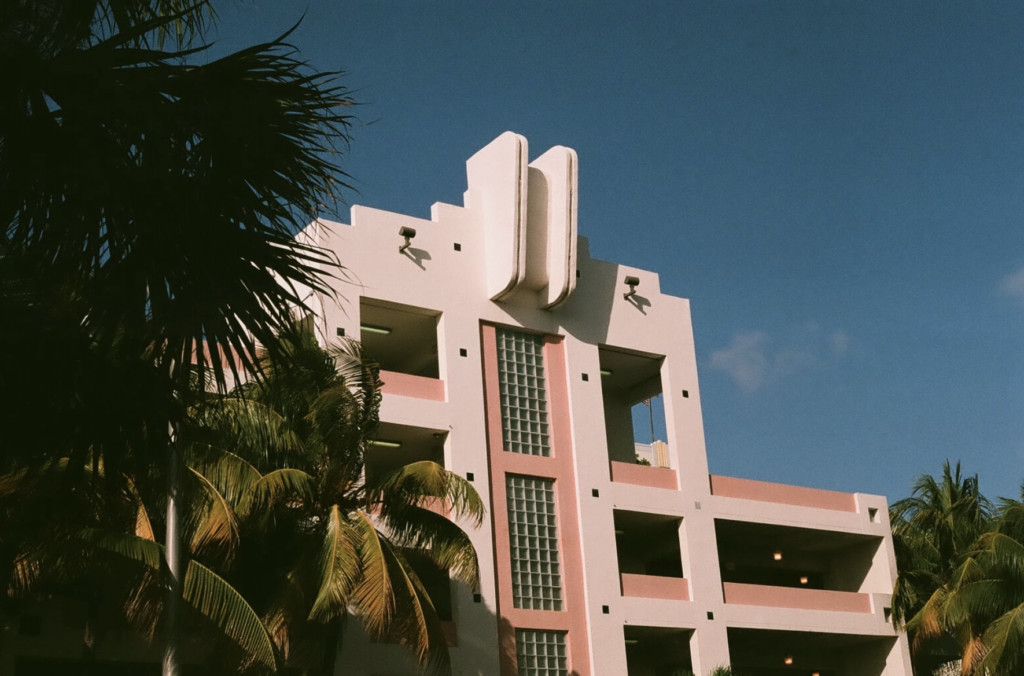
 Vintage Photo Edited
 Vintage Photo Edited Example
11. Are There Specific Color Palettes That Work Best For Vintage Photos?
Yes, there are specific color palettes that tend to work best for vintage photos, as they mimic the natural color shifts and tones that occur in aged film. These palettes often emphasize warmer hues, muted colors, and specific color combinations that evoke a sense of nostalgia and history.
Here are some color palettes that are particularly effective for vintage photography:
- Warm Sepia: This palette is based on the warm, brownish tones of sepia-toned photos, which were common in the early days of photography. It typically includes shades of brown, beige, and cream, creating a classic and timeless look.
- Muted Pastels: This palette features soft, desaturated pastel colors, such as粉色 (fěn sè) (pink), lavender, and mint green. These colors evoke a sense of nostalgia and are reminiscent of mid-century design and fashion.
- Earthy Tones: This palette includes natural, earthy colors like olive green, rust, and ochre. These tones create a warm and organic feel, reminiscent of vintage landscapes and outdoor scenes.
- Golden Hues: This palette emphasizes golden yellows, oranges, and browns, creating a warm and sunny look. It is often used to replicate the look of vintage postcards and travel photos.
- Monochrome: While not a color palette in the traditional sense, monochrome (black and white) is a classic choice for vintage photos. It can be enhanced with subtle toning, such as sepia or cyanotype, to add warmth or coolness.
According to color theory experts at the Santa Fe University of Art and Design’s Photography Department, the best color palettes for vintage photos are those that replicate the natural color shifts and tones of aged film. This often involves emphasizing warmer hues, muting colors, and using specific color combinations that evoke a sense of nostalgia and history.
12. What Are Some Common Mistakes To Avoid When Trying to Give Photos A Vintage Look?
When trying to give photos a vintage look, several common mistakes can detract from the authenticity and overall aesthetic. Avoiding these pitfalls will help you achieve a more convincing and visually appealing vintage effect.
Here are some mistakes to avoid:
- Overdoing the Effects: Applying too many vintage effects, such as excessive grain, extreme color shifts, or overly prominent imperfections, can make the photo look artificial and contrived.
- Inconsistent Style: Mixing different vintage styles or applying effects that are not cohesive can create a disjointed and unconvincing look.
- Ignoring Composition and Lighting: Vintage effects cannot compensate for poor composition or lighting. Start with a well-composed and properly exposed photo to ensure the best results.
- Excessive Sharpening: Vintage photos typically lack the sharpness of modern digital images. Over-sharpening a photo and then applying vintage effects can create a jarring and unnatural look.
- Using the Wrong Color Palette: Applying a color palette that is not appropriate for the vintage style you are trying to emulate can result in a photo that feels inauthentic.
- Neglecting Subtlety: Subtlety is key to creating a convincing vintage look. Overly dramatic adjustments can detract from the realism and make the photo look like it was obviously edited.
As highlighted in a tutorial on dfphoto.net, avoiding these common mistakes can significantly improve the quality and authenticity of your vintage photos. The goal is to enhance the image with vintage effects, not to overwhelm it.
13. How To Choose The Right Subject For Vintage Photography?
Choosing the right subject is essential for effective vintage photography because the subject matter significantly contributes to the overall mood, context, and authenticity of the image. Selecting subjects that evoke a sense of history, timelessness, or nostalgia can greatly enhance the vintage aesthetic.
Here are some tips for choosing the right subject:
- Timeless Scenes: Opt for scenes that could have existed in the past, such as classic landscapes, vintage cars, or old buildings. These subjects naturally lend themselves to a vintage look.
- Retro Fashion and Style: Incorporate elements of retro fashion, hairstyles, and accessories into your photos. These details can immediately evoke a specific era and enhance the vintage feel.
- Everyday Life: Capture scenes of everyday life that reflect the simplicity and charm of the past. This could include candid portraits, street scenes, or images of people engaged in traditional activities.
- Architectural Details: Focus on architectural details, such as ornate facades, vintage signage, or weathered textures. These elements can add a sense of history and character to your photos.
- Nature: Natural subjects, such as landscapes, flora, and fauna, can also work well for vintage photography. Emphasize the timeless beauty of nature and use vintage effects to enhance the organic feel.
For example, a portrait of a person wearing vintage clothing in a historical setting is more likely to resonate with a vintage aesthetic than a modern subject in a contemporary environment. According to photography experts at dfphoto.net, the right subject can provide a strong foundation for creating a convincing and visually appealing vintage photo.
14. How Can I Use Natural Light To Enhance the Vintage Look of My Photos?
Using natural light effectively can significantly enhance the vintage look of your photos by creating the soft, diffused, and often warm tones that are characteristic of vintage photography. Natural light can help to evoke a sense of timelessness and authenticity in your images.
Here are some tips for using natural light to enhance the vintage look:
- Golden Hour: Shoot during the golden hour (the hour after sunrise and the hour before sunset) to capture warm, golden light. This light is naturally soft and diffused, creating a flattering and nostalgic feel.
- Overcast Days: Overcast days provide soft, even lighting that minimizes harsh shadows and highlights. This type of light is ideal for creating a gentle and subdued vintage look.
- Backlighting: Use backlighting to create a soft, ethereal glow around your subject. This can add a touch of romance and nostalgia to your photos.
- Open Shade: Shoot in open shade to avoid harsh sunlight and create a soft, diffused light. This is particularly effective for portraits, as it minimizes shadows and creates a flattering look.
- Indoor Light: Use natural light from windows to create soft, directional light. This can be particularly effective for creating intimate and nostalgic portraits.
According to lighting experts at the Santa Fe University of Art and Design’s Photography Department, understanding how to use natural light effectively is crucial for creating authentic and visually appealing vintage photos. The goal is to capture light that is soft, diffused, and warm, evoking the timeless beauty of vintage photography.
 Vintage Photo Editing
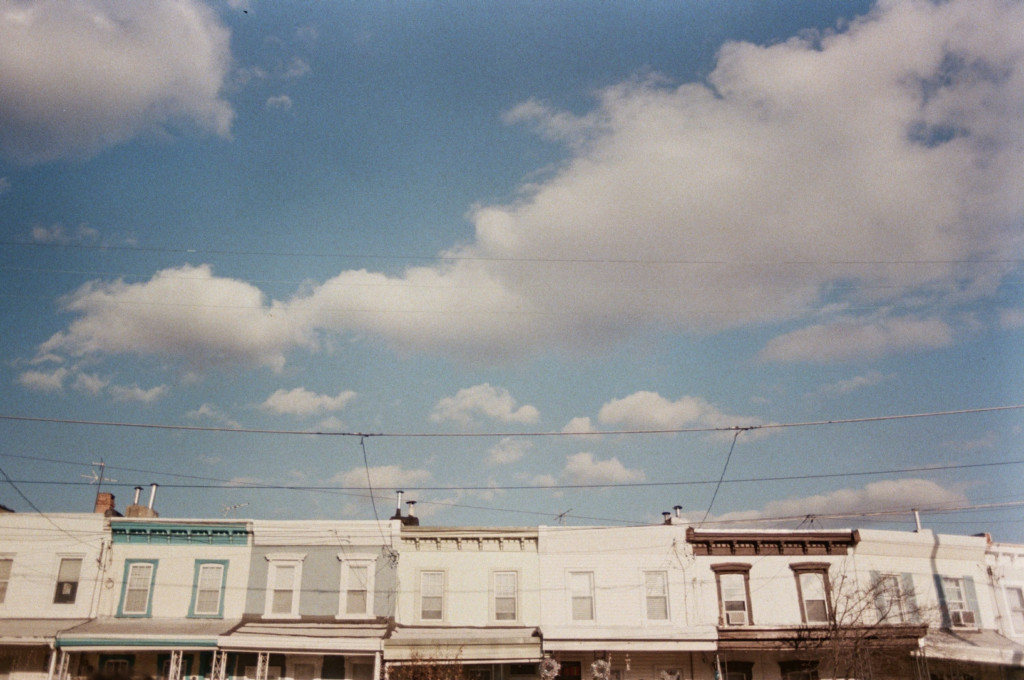 Vintage Photo Editing Example
15. What Are Some Posing Techniques That Complement The Vintage Aesthetic?
Specific posing techniques can significantly complement the vintage aesthetic by evoking the styles and attitudes of past eras. The right poses can enhance the sense of nostalgia and authenticity in your vintage photos, creating a more convincing and visually appealing result.
Here are some posing techniques that work well for vintage photography:
- Classic Portraits: Recreate classic portrait poses from the early to mid-20th century. This could include formal poses with subjects looking directly at the camera, or more candid poses with subjects engaged in everyday activities.
- Elegant Postures: Encourage subjects to adopt elegant postures, such as standing tall with shoulders back, or sitting gracefully with hands folded in their lap. These poses evoke the sophistication and poise of vintage fashion.
- Candid Moments: Capture candid moments that feel authentic and natural. This could include subjects laughing, talking, or simply relaxing in a comfortable setting. These moments add a sense of realism and intimacy to your photos.
- Stylized Poses: Use stylized poses that reflect the fashion and cultural trends of a specific era. This could include flapper poses from the 1920s, pin-up poses from the 1940s, or mod poses from the 1960s.
- Interaction: Encourage interaction between subjects, such as couples holding hands, families embracing, or friends sharing a laugh. These interactions add warmth and emotion to your photos, enhancing the vintage feel.
For example, a portrait of a woman in vintage clothing striking a classic pin-up pose is more likely to evoke a vintage aesthetic than a modern, casual pose. According to fashion and posing experts, choosing the right poses can significantly enhance the vintage aesthetic, creating a more convincing and visually appealing result.
16. How Do I Emulate The Look Of Different Vintage Film Stocks?
Emulating the look of different vintage film stocks involves understanding the unique characteristics of each film and replicating them through digital editing techniques. Each film stock has its own distinct color palette, contrast, grain, and overall aesthetic, which can be emulated to create a more authentic vintage look.
Here are some tips for emulating the look of different vintage film stocks:
- Research: Start by researching the characteristics of different vintage film stocks, such as Kodak Portra, Fujifilm Velvia, and Ilford HP5. Pay attention to their color palette, contrast, grain, and overall aesthetic.
- Color Balance: Adjust the color balance to match the color palette of the film stock you are trying to emulate. This may involve shifting the tones towards warmer or cooler hues, or adjusting the saturation of specific colors.
- Contrast: Adjust the contrast to match the contrast range of the film stock. Some films have high contrast, while others have low contrast.
- Grain: Add grain to replicate the texture of the film stock. The amount and type of grain will vary depending on the film.
- Presets: Use presets that are designed to emulate specific film stocks. These presets can provide a quick and easy way to replicate the look of different films.
According to photography experts at dfphoto.net, emulating the look of different vintage film stocks requires a deep understanding of their unique characteristics and the ability to replicate them through digital editing techniques. By carefully adjusting the color balance, contrast, grain, and other settings, you can create a more authentic and visually appealing vintage photo.
17. How To Create A Vintage Photo Effect Using Photoshop?
Creating a vintage photo effect in Photoshop involves several steps to adjust colors, contrast, and add textures that mimic the look of old photographs. Here’s a detailed guide:
- Open Your Image: Open your chosen photo in Adobe Photoshop.
- Create Adjustment Layers:
- Add a “Curves” adjustment layer to adjust the overall contrast.
- Add a “Color Balance” adjustment layer to adjust the colors.
- Adjust the Curves:
- In the “Curves” layer, create a slight S-curve to increase contrast or flatten the curve to reduce contrast for a faded look.
- Adjust Color Balance:
- In the “Color Balance” layer, adjust the midtones, highlights, and shadows.
- Midtones: Add more yellow and red.
- Highlights: Add more yellow.
- Shadows: Add more blue.
- In the “Color Balance” layer, adjust the midtones, highlights, and shadows.
- Add a Photo Filter:
- Add a “Photo Filter” adjustment layer.
- Choose a warming filter (like “Warming Filter 85”) and adjust the density to around 15-30% for a subtle warm tone.
- Add Noise:
- Go to “Filter” > “Noise” > “Add Noise.”
- Set the amount to around 2-4%, use “Gaussian” distribution, and check “Monochromatic.”
- Add a Vignette:
- Create a new layer: “Layer” > “New” > “Layer.”
- Fill the layer with black using the paint bucket tool.
- Add a layer mask: “Layer” > “Layer Mask” > “Reveal All.”
- Use the gradient tool (set to radial gradient) to create a vignette on the layer mask, making the center lighter and the edges darker.
- Adjust the layer opacity to around 20-40% for a subtle vignette effect.
- Add Texture (Optional):
- Find a texture image (e.g., old paper or grunge texture).
- Place the texture image over your photo.
- Change the blending mode to “Multiply” or “Overlay.”
- Adjust the opacity to blend the texture with your photo.
- Final Adjustments: Make any final adjustments to brightness, contrast, and color to achieve the desired vintage look.
- Save Your Image: Save your edited photo in a high-quality format.
According to Adobe Photoshop tutorials, using adjustment layers ensures non-destructive editing, allowing you to tweak the vintage effect without altering the original image permanently. This method provides flexibility and control over each aspect of the vintage transformation.
18. How To Create A Vintage Photo Effect Using Lightroom?
Creating a vintage photo effect in Lightroom involves using its sliders and tools to adjust the colors, tones, and add texture to mimic the characteristics of old photographs. Here’s how you can achieve it:
- Import Your Image: Import your photo into Adobe Lightroom.
- Basic Adjustments:
- Temperature: Increase the temperature slider to add warmth (around +5 to +15).
- Tint: Adjust the tint slider towards magenta to add a slight color cast (around +3 to +10).
- Exposure: Adjust the exposure to brighten or darken the image as needed.
- Contrast: Reduce the contrast to soften the image (around -10 to -30).
- Highlights: Lower the highlights to recover details in bright areas (around -20 to -40).
- Shadows: Increase the shadows to brighten the darker areas (around +20 to +40).
- Whites: Adjust the whites to control the brightest parts of the image.
- Blacks: Adjust the blacks to control the darkest parts of the image.
- Tone Curve:
- Go to the tone curve panel and create a slight S-curve to add contrast or flatten the curve to reduce contrast for a faded look.
- HSL/Color:
- Hue: Adjust the hue of different colors to shift them towards vintage tones.
- Saturation: Decrease the saturation of the colors to mute them.
- Luminance: Adjust the luminance of different colors to brighten or darken them as needed.
- Split Toning:
- Highlights: Add a warm color (e.g., yellow or orange) to the highlights.
- Shadows: Add a cool color (e.g., blue or purple) to the shadows.
- Adjust the balance slider to blend the colors.
- Detail:
- Sharpening: Reduce the sharpening to soften the image.
- Noise Reduction: Add a small amount of noise reduction to smooth out the image.
- Effects:
- Grain: Add grain to simulate the texture of film (around 10-30).
- Vignette: Add a vignette to darken the edges of the photo (negative value).
- Calibration: Adjust the red, green, and blue primary sliders to fine-tune the colors and tones.
- Presets: Save your adjustments as a preset to easily apply the vintage effect to other photos.
- Export Your Image: Export your edited photo in a high-quality format.
According to Adobe Lightroom tutorials, using the combination of basic adjustments, tone curve, HSL/Color, split toning, and effects panels can effectively transform a modern digital photo into a vintage-style image. Saving the settings as a preset allows for consistent application across multiple images, streamlining the editing process.
19. What Are Some Mobile Apps That Can Help To Make My Photos Look Vintage?
Several mobile apps can help you make your photos look vintage by offering a range of filters, editing tools, and effects that mimic the characteristics of old photographs. These apps are convenient for on-the-go editing and provide a quick way to achieve a vintage aesthetic.
Here are some popular mobile apps for creating vintage effects:
- VSCO: VSCO is renowned for its film-like filters that emulate classic film stocks. It also offers a variety of editing tools for fine-tuning the vintage effect, including adjustments for color, contrast, and grain.
- Snapseed: Snapseed is a powerful mobile app developed by Google that offers a comprehensive set of editing tools, including filters, textures, and vintage effects. It provides precise control over adjustments and allows for selective editing.
- Instagram: Instagram has a range of built-in filters that can add a vintage touch to your photos. It also offers basic editing tools for adjusting brightness, contrast, and saturation.
- Huji Cam: Huji Cam is a simple app that replicates the look of disposable cameras from the 1990s. It adds random light leaks, dates, and other imperfections to create a nostalgic feel.
- 1998 Cam: 1998 Cam is another app that emulates the look of vintage cameras, adding filters, light leaks, and grain to your photos. It is easy to use and provides a quick way to achieve a vintage aesthetic.
According to mobile photography experts, these apps offer a range of options for creating vintage effects, from subtle enhancements to more dramatic transformations. VSCO and Snapseed are particularly popular for their high-quality filters and precise editing tools, while Huji Cam and 1998 Cam provide a more straightforward approach with their instant vintage effects.
20. How Can I Use Textures To Enhance A Vintage Photo?
Using textures can significantly enhance a vintage photo by adding depth, character, and a tactile quality that mimics the imperfections of old photographs. Textures can replicate the look of aged paper, film