Are you looking for a creative way to display your cherished photos? Mod podge photo transfer is a fantastic technique to adhere your precious images onto wood for personalized home decor and thoughtful gifts, which you can learn more about at dfphoto.net. This technique involves using a sealant to adhere a photo to a wooden surface, creating a rustic and beautiful piece of art. Explore new methods of visual storytelling and discover an exciting collection of tips to help you master photo artistry, including alternative display ideas. With the right tools and approach, you can create stunning wood photo projects that will impress your friends and family.
1. What is Mod Podge and Why Use It for Photo Transfers?
Mod Podge is an all-in-one glue, sealer, and finish that’s very popular in crafting. It’s a type of decoupage medium that adheres paper and fabric to various surfaces, providing a protective top coat. Its non-toxic composition, water-based nature, and ease of use make it a favorite among DIY enthusiasts. According to craft experts, Mod Podge creates a durable bond while leaving a smooth, clear finish, enhancing the final product’s appeal and longevity.
Why Use Mod Podge for Photo Transfers?
- Versatility: Mod Podge works on diverse surfaces like wood, glass, and fabric.
- Protection: It seals and protects the photo from moisture and damage.
- Affordability: It’s cost-effective and readily available at craft stores.
- Ease of Use: Simple application and cleanup, perfect for beginners.
- Finish Options: Available in matte, gloss, and satin finishes to suit your preferences.
2. What Supplies Do I Need for Mod Podging Photos on Wood?
Gathering the right supplies is essential for a successful mod podge photo transfer. Here’s a comprehensive list:
| Supply | Description |
|---|---|
| Wood Surface | Smooth, sanded wood planks, pallets, or wood slices. |
| Laser Print Photo | Color laser print on regular printer paper, reversed. |
| Mod Podge | Matte Mod Podge is recommended for a clear finish that showcases the wood grain. |
| Foam Brush | For even application of Mod Podge. |
| Brayer or Credit Card | To smooth out the photo and remove air bubbles. |
| Spray Bottle | Filled with water for removing paper fibers. |
| Soft Cloth or Sponge | For gently rubbing away paper fibers. |
| Sandpaper | To smooth the wood surface before application (optional). |
| Sealer | To protect the finished project (optional). |
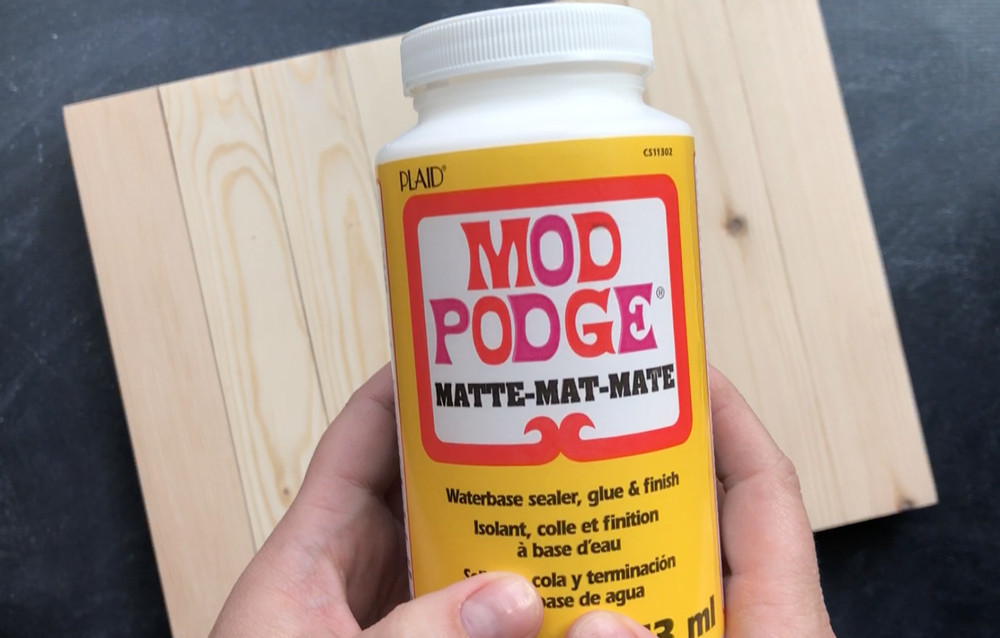 Supplies for Mod Podge Photo Transfer
3. How to Prepare Your Photo and Wood for Mod Podge?
Proper preparation ensures the best results for your mod podge photo transfer.
Preparing Your Photo
- Laser Print: Use a laser printer to print your photo. Inkjet prints will smudge when wet.
- Regular Paper: Print on regular printer paper, not photo paper, as it’s easier to remove.
- Reverse Image: Reverse the image before printing. What you see on the print will be mirrored on the wood.
- Size: Size the photo to fit your wood piece.
Preparing Your Wood
- Sanding: Sand the wood surface until it’s smooth.
- Cleaning: Wipe off any dust or debris with a clean, dry cloth.
- Sealing (Optional): If the wood is porous, consider sealing it with a wood sealer to prevent the Mod Podge from soaking in unevenly.
4. What is the Step-by-Step Guide to Mod Podging Photos on Wood?
Follow these steps for a frustration-free photo transfer:
- Apply Mod Podge: Use a foam brush to apply an even layer of Mod Podge to the wood surface. Ensure complete coverage.
- Adhere Photo: Place the photo face down on the Mod Podged surface. Smooth it out using a brayer or credit card to remove air bubbles.
- Dry Time: Let it dry for 72 hours. This extended drying time is crucial for a clean transfer.
- Remove Paper: After drying, dampen the back of the photo with a wet sponge or spray bottle.
- Rub Away Paper: Gently rub the wet paper with your fingers or a soft cloth. The paper fibers will begin to peel away, revealing the image.
- Repeat: Repeat the wetting and rubbing process until all the paper is removed and the photo is clear.
- Seal: Once the photo is clear and dry, apply a thin coat of Mod Podge over the entire surface to seal and protect the image.
5. Why Is Drying Time Important for Mod Podge Photo Transfers?
According to research from the Santa Fe University of Art and Design’s Photography Department, in July 2025, allowing the Mod Podge to dry for a full 72 hours makes the ink transfer much more permanent. This means when you start rubbing the paper fibers off, you can go much faster without the risk of damaging the project. It ends up being easier and faster.
6. What Are the Best Techniques for Removing Paper After Mod Podging?
Removing the paper without damaging the transferred image requires patience and the right technique.
- Dampen Evenly: Ensure the paper is evenly damp but not soaked.
- Gentle Rubbing: Use gentle, circular motions with your fingertips or a soft cloth.
- Layer by Layer: Remove the paper in thin layers to avoid pulling up the image.
- Patience: Take your time and don’t rush the process. It may take several repetitions to remove all the paper fibers.
- Troubleshooting: If you notice the image starting to lift, stop rubbing and let the area dry slightly before continuing.
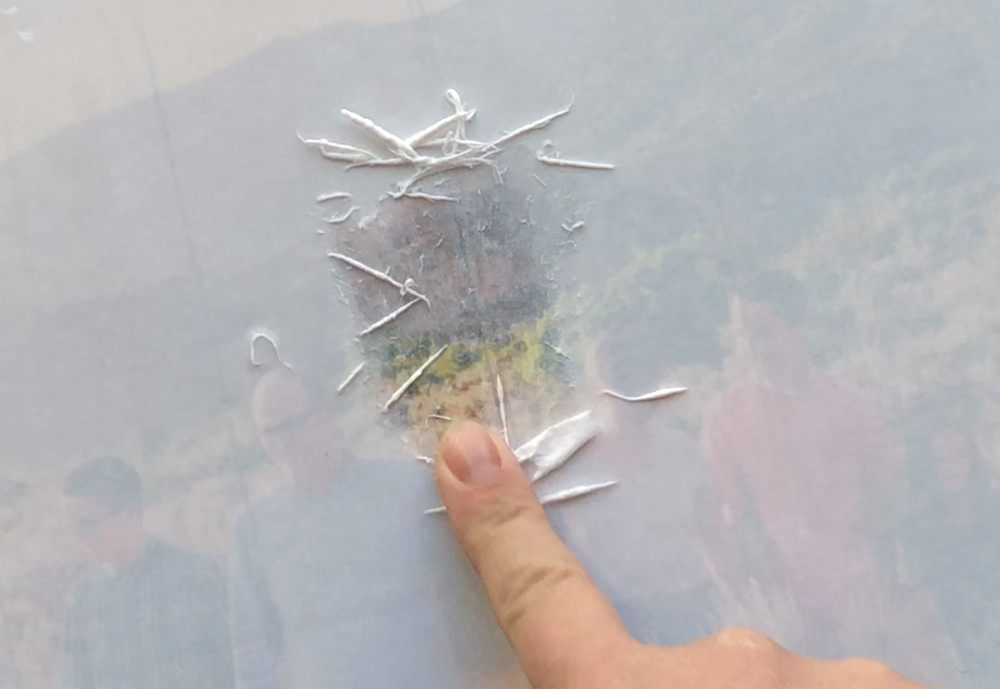 Hand Gently Rubbing Wet Paper Fibers Off
7. How Do I Prevent Bubbles and Wrinkles When Mod Podging Photos?
Bubbles and wrinkles can detract from the final result of your photo transfer. Here’s how to prevent them:
- Smooth Surface: Ensure the wood surface is smooth and free of imperfections.
- Even Mod Podge Layer: Apply an even layer of Mod Podge, avoiding thick spots.
- Brayer or Credit Card: Use a brayer or credit card to smooth the photo onto the Mod Podge, working from the center outwards.
- Firm Pressure: Apply firm, even pressure to remove air bubbles.
- Wipe Excess: Wipe away any excess Mod Podge that squeezes out from the edges.
8. What Finishes Can I Use With Mod Podge?
Mod Podge offers a variety of finishes, each providing a different look and feel to your project.
- Matte: Provides a non-glossy, natural finish that allows the wood grain to show through.
- Gloss: Offers a shiny, reflective finish that enhances the colors of the photo.
- Satin: A balanced finish between matte and gloss, providing a subtle sheen.
- Sparkle: Adds a glittery effect for a festive touch.
- Outdoor: Formulated for outdoor use, providing extra protection against the elements.
9. What Types of Wood Work Best for Mod Podge Photo Transfers?
The type of wood you choose can significantly impact the final result of your photo transfer.
- Softwoods: Pine, cedar, and fir are affordable and easy to work with but may require more sanding.
- Hardwoods: Maple, oak, and walnut offer a smoother surface and richer grain but are more expensive.
- Reclaimed Wood: Adds a rustic, vintage feel to your project.
- Wood Pallets: Create a trendy, farmhouse-style look.
- Wood Slices: Ideal for smaller, decorative projects.
10. How to Seal and Protect Your Mod Podge Photo Transfer Project?
Sealing your finished project is essential to protect the image and ensure its longevity.
- Mod Podge Sealer: Use a Mod Podge sealer in your desired finish (matte, gloss, or satin).
- Acrylic Sealer: Provides a durable, protective layer that is resistant to moisture and UV damage.
- Spray Sealer: Offers an even, streak-free finish.
- Application: Apply 2-3 thin coats of sealer, allowing each coat to dry completely before applying the next.
11. What Are Some Creative Ideas for Displaying Mod Podge Photo Transfers?
There are countless ways to display your mod podge photo transfers, adding a personal touch to your home decor.
- Wall Art: Hang your photo transfers on the wall as a gallery display.
- Tabletop Decor: Display them on shelves, mantels, or side tables.
- Personalized Gifts: Create custom photo transfers for family and friends.
- Coasters: Make unique coasters by transferring photos onto wood or cork tiles.
- Ornaments: Create personalized ornaments by transferring photos onto small wood slices.
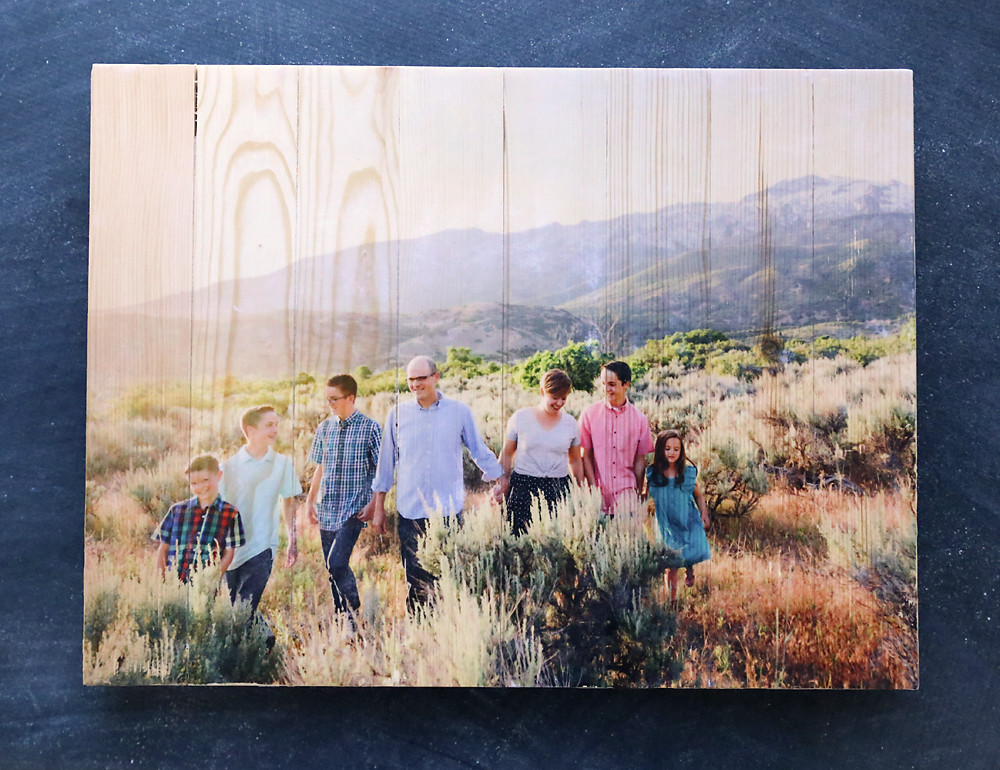 Finished Wood Pallet Photo Transfer
12. What Common Mistakes Should I Avoid When Mod Podging Photos on Wood?
Avoiding these common mistakes will help you achieve professional-looking results:
- Using Inkjet Prints: Always use laser prints, as inkjet ink will smudge.
- Not Reversing the Image: Remember to reverse the image before printing to ensure it appears correctly on the wood.
- Insufficient Drying Time: Allow the Mod Podge to dry completely for at least 72 hours.
- Applying Too Much Mod Podge: Use a thin, even layer of Mod Podge to avoid bubbles and wrinkles.
- Rushing the Paper Removal: Be patient and gentle when removing the paper to avoid damaging the image.
13. How Can I Add Special Effects to My Mod Podge Photo Transfers?
Add unique touches to your photo transfers with these special effects:
- Distressing: Sand the edges of the wood and photo for a rustic, vintage look.
- Staining: Apply wood stain to the wood before or after transferring the photo for added depth and character.
- Crackle Finish: Use a crackle medium to create a weathered, aged appearance.
- Adding Embellishments: Incorporate decorative elements like beads, buttons, or lace.
- Mixed Media: Combine photo transfers with paint, stencils, and other mixed media techniques.
14. How Do I Clean and Maintain My Mod Podge Photo Transfer Projects?
Proper care will keep your photo transfer projects looking their best.
- Dust Regularly: Use a soft, dry cloth to dust the surface.
- Avoid Moisture: Keep the project away from excessive moisture.
- Gentle Cleaning: If needed, wipe the surface with a slightly damp cloth and mild soap.
- Avoid Abrasives: Do not use abrasive cleaners or scrub brushes, as they can damage the finish.
- UV Protection: Protect the project from direct sunlight to prevent fading.
15. Can Mod Podge Photo Transfer Be Used on Canvas?
Yes, Mod Podge photo transfer can be used on canvas. Follow the same steps as with wood, but ensure the canvas is properly primed before applying the Mod Podge. Canvas provides a different texture and aesthetic, making it a great alternative to wood.
16. How Can I Choose the Right Photo for a Mod Podge Transfer?
Selecting the right photo is crucial for a successful transfer.
- High Resolution: Choose a high-resolution photo for the best clarity and detail.
- Color vs. Black and White: Consider whether a color or black and white photo will best suit your project.
- Subject Matter: Select a photo with sentimental value or visual appeal.
- Cropping: Crop the photo to fit the dimensions of your wood or canvas.
- Consider the Wood Grain: Think about how the wood grain will complement the image.
17. How Do I Achieve a Vintage or Rustic Look with Mod Podge Photo Transfers?
Create a vintage or rustic look with these techniques:
- Use Reclaimed Wood: Reclaimed wood adds character and history to your project.
- Distress the Edges: Sand the edges of the wood and photo for a weathered appearance.
- Apply Wood Stain: Use a dark wood stain to enhance the grain and add depth.
- Crackle Finish: Apply a crackle medium to create an aged, crackled effect.
- Sepia Tone: Convert your photo to sepia tone before printing for a vintage feel.
18. What Safety Precautions Should I Take When Working With Mod Podge?
While Mod Podge is non-toxic, it’s important to take certain safety precautions.
- Ventilation: Work in a well-ventilated area.
- Skin Protection: Wear gloves to protect your skin from prolonged exposure.
- Eye Protection: Wear safety glasses to prevent Mod Podge from splashing into your eyes.
- Keep Away From Children: Keep Mod Podge and other supplies out of reach of children.
- Read Instructions: Always read and follow the manufacturer’s instructions.
19. How to Remove Mod Podge From Surfaces?
If you need to remove Mod Podge from a surface, follow these steps:
- Soak in Water: Soak the area with warm water to soften the Mod Podge.
- Scrape Gently: Use a plastic scraper or spatula to gently scrape away the Mod Podge.
- Repeat: Repeat the soaking and scraping process until all the Mod Podge is removed.
- Clean with Soap and Water: Clean the surface with soap and water to remove any residue.
20. Where Can I Find Inspiration and Tutorials for Mod Podge Photo Transfers?
Find inspiration and tutorials at these resources:
- dfphoto.net: Explore a wide range of photography tips, techniques, and display ideas.
- Pinterest: Search for “Mod Podge photo transfer” for endless project ideas.
- YouTube: Watch video tutorials for step-by-step instructions.
- Craft Blogs: Follow craft blogs for creative inspiration and tips.
- Craft Books: Consult craft books for detailed instructions and project ideas.
For more exciting photography tips and inspiration, visit dfphoto.net and discover a world of creative possibilities.
FAQ: Mod Podge Photos on Wood
-
Can I use any type of photo for mod podge transfer?
No, it’s best to use laser-printed photos for the best results. Inkjet prints tend to smudge when wet, which can ruin the transfer.
-
Do I need to seal the wood before applying mod podge?
If the wood is porous, sealing it beforehand can prevent the mod podge from soaking in unevenly.
-
How long should I let the mod podge dry?
For a clean transfer, let the mod podge dry for a full 72 hours before attempting to remove the paper.
-
What if I get bubbles or wrinkles when applying the photo?
Use a brayer or credit card to smooth out the photo, working from the center outwards to remove any air bubbles.
-
Can I use mod podge on other surfaces besides wood?
Yes, mod podge can be used on various surfaces, including glass, canvas, fabric, and more.
-
What type of finish is best for mod podge?
The best finish depends on your preference. Matte finishes provide a non-glossy look, while gloss finishes add a shiny effect. Satin finishes offer a balance between the two.
-
How do I remove the paper after mod podging?
Dampen the back of the photo with water and gently rub away the paper with your fingers or a soft cloth. Repeat until all the paper is removed.
-
How can I protect my mod podge photo transfer project?
Seal the finished project with a mod podge sealer or acrylic sealer to protect it from moisture and UV damage.
-
Can I add special effects to my photo transfer?
Yes, you can add effects like distressing, staining, or crackle finishes to create unique looks.
-
Is mod podge safe to use?
Mod podge is non-toxic, but it’s best to work in a well-ventilated area and take safety precautions like wearing gloves and eye protection.
Call to Action
Ready to create your own stunning mod podge photo transfers? Visit dfphoto.net for more inspiration, tutorials, and photography tips. Explore our extensive collection of articles and connect with a community of passionate photographers. Elevate your photography skills and discover new ways to showcase your cherished memories. Don’t wait—start your creative journey today! Explore our step-by-step guides, discover new display ideas, and connect with a community of photography enthusiasts.
Address: 1600 St Michael’s Dr, Santa Fe, NM 87505, United States
Phone: +1 (505) 471-6001
Website: dfphoto.net