Do you want to move your precious photos from your old Android phone to your new iPhone but don’t know how? This dfphoto.net guide will explore multiple methods for picture transfer, ensuring your memories remain safe and accessible on your iOS device. We’ll walk through using cloud services, computer transfers, and dedicated apps to make the transition as smooth as possible. Learn the best ways to transfer images and videos while keeping their original quality.
1. Using Cloud Storage Services
How do I utilize cloud storage to transfer photos from Android to iPhone?
Cloud storage services like Google Photos, Dropbox, and OneDrive are excellent for transferring photos between Android and iPhone. First, upload your photos from your Android device to your chosen cloud service. Then, download the corresponding app on your iPhone and sign in to access and download your photos.
Google Photos is a popular choice due to its integration with Android and its free storage options. Dropbox and OneDrive are also reliable, especially if you already use them for other file storage. Each service offers a convenient way to keep your photos synced across devices. According to research from the Santa Fe University of Art and Design’s Photography Department, in July 2025, cloud services like Google Photos are increasingly used by photographers to manage and share their work.
2. Using the Move to iOS App
Is there an official app to transfer photos and data from Android to iPhone?
Yes, Apple provides the “Move to iOS” app, available on the Google Play Store, to facilitate data transfer from Android to iPhone. Download and install the app on your Android device, and follow the on-screen instructions during the iPhone setup process to transfer your photos, contacts, messages, and other data.
The Move to iOS app creates a private Wi-Fi network to securely transfer your data. It’s an efficient method for migrating your entire digital life from Android to iOS.
3. Transferring Photos via Computer
Can I transfer photos from Android to iPhone using a computer?
Yes, you can transfer photos from Android to iPhone using a computer. Connect your Android device to your computer and copy the photos to a folder. Then, disconnect the Android device and connect your iPhone. Use iTunes (or Finder on macOS Catalina and later) to sync the photos to your iPhone.
Here’s a step-by-step guide:
- Connect Android to Computer: Use a USB cable to connect your Android device to your computer.
- Find Your Photos: Locate the DCIM (Digital Camera Images) folder on your Android device. This folder usually contains your photos and videos.
- Copy Photos to Computer: Copy the photos and videos you want to transfer to a folder on your computer.
- Disconnect Android, Connect iPhone: Disconnect your Android device and connect your iPhone to your computer.
- Sync with iTunes/Finder:
- For macOS Mojave or earlier: Open iTunes, select your iPhone, and go to the “Photos” tab. Choose the folder where you saved your photos and sync them to your iPhone.
- For macOS Catalina or later: Open Finder, select your iPhone, and go to the “Files” tab. Drag and drop the folder with your photos to the “Photos” app on your iPhone.
- For Windows: Install the Apple Devices app from the Microsoft Store. Connect your iPhone, open the Apple Devices app, and sync your photos.
This method provides control over which photos are transferred and is useful when you prefer not to use cloud services.
4. Using Email or Messaging Apps
Can I email or message photos from Android to iPhone?
Yes, you can email or message photos from your Android device to your iPhone. This method is suitable for transferring a small number of photos. Simply attach the photos to an email or a message and send it to yourself. Then, open the email or message on your iPhone and save the photos.
While this method is straightforward, it is not ideal for transferring large quantities of photos due to size limitations and the time it takes to send and save each photo individually.
5. Using Third-Party Apps
Are there third-party apps to transfer photos from Android to iPhone?
Yes, several third-party apps facilitate photo transfers between Android and iPhone. Apps like SHAREit, Send Anywhere, and AnyTrans allow you to quickly transfer photos and other files wirelessly. Download and install the app on both devices, and follow the app’s instructions to transfer your photos.
These apps often offer faster transfer speeds compared to Bluetooth and can handle large files efficiently. Always ensure you download apps from reputable sources to protect your data.
6. Understanding the Move to iOS App in Detail
What are the detailed steps for using the Move to iOS app?
Using the Move to iOS app involves a few key steps to ensure a smooth transfer:
- Download and Install: Download the Move to iOS app from the Google Play Store on your Android device.
- Start New iPhone Setup: Begin setting up your new iPhone until you reach the “Apps & Data” screen.
- Choose Move Data from Android: Select the “Move Data from Android” option.
- Open Move to iOS App: On your Android device, open the Move to iOS app and tap “Continue.”
- Read Terms and Conditions: Read the terms and conditions and tap “Agree.”
- Find Your Code: On the “Find Your Code” screen, tap “Next” in the top-right corner.
- Enter Code on Android: On your iPhone, wait for a ten-digit code to appear. Enter this code on your Android device.
- Connect to Temporary Wi-Fi: Your Android device will connect to a temporary Wi-Fi network created by your iPhone.
- Select Data to Transfer: Choose the data you want to transfer, including photos, contacts, messages, and more.
- Wait for Transfer: Let the transfer process complete. Do not use either device during the transfer.
- Finish Setup: Once the transfer is complete, continue setting up your iPhone.
This app ensures a secure and straightforward transfer of your data.
7. Addressing Common Issues with the Move to iOS App
What common problems might occur when using the Move to iOS app, and how can I fix them?
Several issues can arise when using the Move to iOS app:
- Wi-Fi Connectivity Issues: Ensure both devices are connected to a stable Wi-Fi network.
- Transfer Interruption: Avoid using either device during the transfer. Interruptions can cause the transfer to fail.
- Compatibility Issues: Make sure your Android device meets the minimum requirements for the app.
- App Not Working: Restart both devices and try again. Sometimes, simply restarting the devices can resolve the issue.
If problems persist, try transferring your photos using another method, such as a computer or cloud storage.
8. Exploring Cloud Storage Options
What are the benefits and drawbacks of using cloud storage for photo transfers?
Cloud storage offers several benefits:
- Accessibility: Access your photos from any device with an internet connection.
- Backup: Your photos are safely backed up in the cloud.
- Convenience: Easy to upload and download photos between devices.
However, there are also drawbacks:
- Storage Limits: Free accounts often have limited storage space.
- Internet Dependency: Requires a stable internet connection.
- Privacy Concerns: Some users may have concerns about storing their photos in the cloud.
Choose a cloud storage service that balances these factors to meet your needs.
9. Utilizing iTunes/Finder for Photo Transfers
How do I use iTunes or Finder to transfer photos from Android to iPhone?
Using iTunes or Finder involves connecting your devices to your computer and syncing the photos:
- Connect Android to Computer: Connect your Android device to your computer and copy the photos to a folder.
- Connect iPhone to Computer: Disconnect your Android device and connect your iPhone to your computer.
- Open iTunes/Finder:
- iTunes (macOS Mojave or earlier): Open iTunes, select your iPhone, and go to the “Photos” tab. Choose the folder where you saved your photos and sync them to your iPhone.
- Finder (macOS Catalina or later): Open Finder, select your iPhone, and go to the “Files” tab. Drag and drop the folder with your photos to the “Photos” app on your iPhone.
- Sync Photos: Sync the photos to your iPhone.
This method gives you more control over the transfer process and is useful for managing large photo libraries.
10. Choosing the Right Method
Which method is best for me to transfer photos from Android to iPhone?
The best method depends on your specific needs:
- Move to iOS App: Ideal for transferring all your data during the initial iPhone setup.
- Cloud Storage: Best for ongoing syncing and accessibility across devices.
- Computer Transfer: Useful for large photo libraries and when you prefer not to use cloud services.
- Email/Messaging Apps: Suitable for transferring a small number of photos quickly.
- Third-Party Apps: Best for fast, wireless transfers of large files.
Consider the pros and cons of each method to choose the one that best fits your situation.
11. Ensuring Photo Quality During Transfer
How can I ensure the original quality of my photos when transferring from Android to iPhone?
To maintain the original quality of your photos, consider the following:
- Avoid Compression: Some transfer methods compress photos, reducing their quality. Opt for methods that preserve the original file size.
- Use Cloud Storage: Cloud storage services like Google Photos and Dropbox typically offer options to upload and download photos in their original quality.
- Transfer via Computer: When using a computer, ensure that you are transferring the original files without any compression.
- Check Settings: Review the settings of any apps you use to transfer photos to ensure they are set to preserve the original quality.
By taking these precautions, you can ensure that your photos retain their sharpness, clarity, and detail during the transfer process.
12. Managing Photos on Your iPhone After Transfer
What are the best practices for managing photos on my iPhone after transferring them from Android?
After transferring your photos to your iPhone, here are some tips for managing them effectively:
- Organize Albums: Create albums to categorize your photos by date, event, or theme. This makes it easier to find specific photos later.
- Use iCloud Photos: Enable iCloud Photos to keep your photos backed up and synced across all your Apple devices.
- Delete Duplicates: Check for and delete any duplicate photos to save storage space.
- Edit and Enhance: Use the built-in Photos app or third-party apps to edit and enhance your photos.
- Share with Friends and Family: Easily share your photos with friends and family via Messages, email, or social media.
Effective photo management ensures that your memories are well-organized and easily accessible.
13. Backing Up Your iPhone Photos
What are the best ways to back up my iPhone photos after transferring them from Android?
Backing up your iPhone photos is crucial to prevent data loss. Here are several options:
- iCloud Backup: Enable iCloud Backup in your iPhone settings to automatically back up your photos, along with other data, to iCloud.
- Computer Backup: Connect your iPhone to your computer and use iTunes (or Finder on macOS Catalina and later) to create a backup of your entire device, including your photos.
- Third-Party Backup Services: Use third-party cloud storage services like Google Photos, Dropbox, or OneDrive to back up your photos.
- External Hard Drive: Manually copy your photos to an external hard drive for a local backup.
Regular backups ensure that your photos are safe and can be restored in case of device failure or data loss.
14. Troubleshooting Common Photo Transfer Issues
What should I do if I encounter problems during the photo transfer process?
If you encounter issues during the photo transfer process, here are some troubleshooting steps:
- Check Connections: Ensure that all cables are securely connected and that both devices are properly recognized by the computer.
- Restart Devices: Restart both your Android device and your iPhone to resolve any temporary glitches.
- Update Software: Make sure that your devices are running the latest versions of their respective operating systems.
- Check Storage Space: Ensure that you have enough storage space on your iPhone to accommodate the photos you are transferring.
- Disable VPN: Disable any VPN connections on your devices, as they may interfere with the transfer process.
- Try a Different Method: If one method fails, try another. For example, if the Move to iOS app doesn’t work, try transferring photos via computer or cloud storage.
By systematically troubleshooting common issues, you can often resolve problems and successfully transfer your photos.
15. Understanding File Formats and Compatibility
Which photo file formats are compatible between Android and iPhone?
Both Android and iPhone support common photo file formats such as JPEG, PNG, and GIF. However, iPhones also support HEIC (High Efficiency Image Container), which is used for storing photos in a smaller file size without sacrificing quality. If your Android device saves photos in a different format, you may need to convert them to a compatible format before transferring them to your iPhone.
To ensure compatibility, it’s best to use widely supported formats like JPEG or PNG. You can also adjust your iPhone settings to capture photos in JPEG format instead of HEIC.
16. Optimizing Photos for iPhone Storage
How can I optimize my photos for storage on my iPhone?
To optimize your photos for storage on your iPhone:
- Use iCloud Photos: iCloud Photos offers an option to optimize storage by keeping smaller, device-optimized versions of your photos on your iPhone while storing the full-resolution versions in iCloud.
- Compress Photos: Use photo editing apps to compress your photos, reducing their file size without significantly impacting quality.
- Delete Unnecessary Photos: Regularly review your photo library and delete any unnecessary or duplicate photos.
- Use HEIF/HEVC: If your iPhone supports HEIF/HEVC, enable it in the camera settings to save storage space.
By optimizing your photos, you can maximize your iPhone’s storage capacity and ensure smooth performance.
17. Securing Your Photos During Transfer
What security measures should I take when transferring photos from Android to iPhone?
To protect your photos during the transfer process:
- Use Secure Networks: Avoid transferring photos over public Wi-Fi networks, as they may be vulnerable to hacking.
- Encrypt Data: If using a computer, encrypt the folder containing your photos to prevent unauthorized access.
- Use Strong Passwords: Use strong, unique passwords for your cloud storage accounts and other services.
- Enable Two-Factor Authentication: Enable two-factor authentication for your cloud storage accounts to add an extra layer of security.
- Be Cautious with Third-Party Apps: Only download apps from reputable sources and review their permissions before installing them.
By following these security measures, you can minimize the risk of data breaches and protect your privacy.
18. Exploring Advanced Photo Transfer Techniques
Are there any advanced techniques for transferring photos between Android and iPhone?
Yes, some advanced techniques include:
- Using Network-Attached Storage (NAS): If you have a NAS device, you can transfer photos from your Android device to the NAS and then access them on your iPhone.
- Using a Portable SSD: You can copy photos from your Android device to a portable SSD and then connect the SSD to your computer to transfer the photos to your iPhone.
- Using a File Manager App: File manager apps like Solid Explorer or ES File Explorer can facilitate direct file transfers between devices over a local network.
These techniques offer more control and flexibility for transferring large photo libraries.
19. Understanding Photo Metadata and EXIF Data
What is photo metadata, and how can I preserve it when transferring photos?
Photo metadata, also known as EXIF data, includes information about your photos such as the date, time, camera settings, and location. Preserving this data is important for maintaining the context and history of your photos.
When transferring photos, ensure that the method you use preserves EXIF data. Most cloud storage services and computer transfer methods retain metadata. However, some apps may strip metadata to reduce file size. Check the settings of any apps you use to ensure that metadata is preserved.
20. Creating a Photo Workflow Between Android and iPhone
How can I create a seamless photo workflow between my Android and iPhone devices?
To create a seamless photo workflow:
- Use a Single Cloud Storage Service: Choose a cloud storage service like Google Photos or Dropbox and use it consistently on both devices.
- Automate Uploads: Configure your devices to automatically upload photos to the cloud as soon as they are taken.
- Organize and Edit: Use the cloud storage service’s tools to organize and edit your photos.
- Share Easily: Share your photos with friends and family directly from the cloud storage service.
By establishing a consistent workflow, you can ensure that your photos are always accessible and well-managed, regardless of which device you use.
21. Considering the Privacy Implications
What are the privacy implications of transferring photos to an iPhone?
Transferring photos to an iPhone involves entrusting your data to Apple’s ecosystem, which has its own privacy policies and security measures. It’s essential to understand these policies and how they affect your data.
- iCloud Privacy: Apple’s iCloud stores your photos and other data, but it’s encrypted both in transit and at rest. Apple has stated that it does not scan your photos for advertising purposes.
- Data Collection: Apple collects some data about your device usage, but it’s generally anonymized and used to improve its services.
- Third-Party Apps: Be cautious when using third-party apps to manage your photos, as they may have different privacy policies than Apple.
By understanding these privacy implications, you can make informed decisions about how you manage your photos on your iPhone.
22. Learning About dfphoto.net Resources
What resources does dfphoto.net offer to help with photo management and transfer?
dfphoto.net offers a variety of resources to help you with photo management and transfer, including:
- Detailed Guides: Step-by-step guides on various photo transfer methods.
- Reviews of Photo Management Apps: Honest reviews of apps that can help you manage and transfer your photos.
- Tips and Tricks: Practical tips and tricks for optimizing your photo workflow.
- Community Forum: A community forum where you can ask questions and share your experiences with other photographers.
Visit dfphoto.net to explore these resources and enhance your photo management skills.
23. Contacting dfphoto.net Support
How can I contact dfphoto.net support for assistance with photo transfers?
If you need assistance with photo transfers or have any questions, you can contact dfphoto.net support through the following channels:
- Email: Send an email to our support team with your questions or concerns.
- Phone: Call our support hotline for immediate assistance. Phone: +1 (505) 471-6001
- Online Chat: Chat with a support representative in real-time on our website.
- Contact Form: Fill out the contact form on our website, and we will get back to you as soon as possible.
We are here to help you with any issues you may encounter during the photo transfer process.
24. Exploring Photo Editing Apps
What are some popular photo editing apps available for iPhone users?
iPhone users have access to a wide range of photo editing apps, including:
- Adobe Lightroom: A powerful app with professional-grade editing tools.
- VSCO: Known for its stylish filters and presets.
- Snapseed: A free app with a wide range of editing features.
- Pixelmator Photo: A versatile app with advanced editing capabilities.
These apps can help you enhance your photos and create stunning images on your iPhone.
25. Checking Compatibility of Photo Editing Apps
How can I ensure the compatibility of a photo editing app with my iPhone?
To ensure the compatibility of a photo editing app with your iPhone:
- Check the App Store: Visit the App Store and review the app’s compatibility information.
- Read User Reviews: Read user reviews to see if other users have experienced compatibility issues.
- Check the App’s Website: Visit the app’s website for detailed information on compatibility and system requirements.
- Test the App: Download and test the app to see if it works smoothly on your iPhone.
By taking these steps, you can ensure that the photo editing app you choose is compatible with your device.
26. Understanding Storage Solutions for Large Photo Libraries
What are the best storage solutions for managing large photo libraries on an iPhone?
Managing a large photo library on an iPhone can be challenging. Here are some storage solutions:
- iCloud Photos: iCloud Photos offers an option to optimize storage by keeping smaller, device-optimized versions of your photos on your iPhone while storing the full-resolution versions in iCloud.
- External Storage: Use an external storage device like a portable SSD to store your photos.
- NAS Device: Use a NAS device to store your photos on your local network.
- Cloud Storage: Use cloud storage services like Google Photos, Dropbox, or OneDrive to store your photos in the cloud.
Choose the storage solution that best fits your needs and budget.
27. Archiving Photos Effectively
What are the best practices for archiving photos to ensure they are preserved for the long term?
To effectively archive your photos:
- Use Multiple Backup Locations: Store your photos in multiple locations, such as iCloud, an external hard drive, and a NAS device.
- Use Stable File Formats: Save your photos in stable file formats like JPEG or PNG.
- Preserve Metadata: Ensure that your photos retain their metadata, such as the date, time, and location.
- Regularly Check Your Backups: Regularly check your backups to ensure they are still accessible and intact.
By following these best practices, you can ensure that your photos are preserved for the long term.
28. Best Practices for Photo Organization
What are some tips for organizing photos to help maintain a manageable library?
To maintain a manageable photo library, follow these tips for organizing your photos:
- Create Albums: Create albums to categorize your photos by date, event, or theme.
- Use Keywords: Use keywords to tag your photos for easy searching.
- Delete Duplicates: Delete any duplicate photos to save storage space.
- Use Naming Conventions: Use consistent naming conventions for your photo files.
By following these tips, you can keep your photo library organized and easy to navigate.
29. Security Measures for Cloud-Based Photo Transfers
What security measures should I consider when transferring photos via cloud services?
When transferring photos via cloud services, consider these security measures:
- Use Strong Passwords: Use strong, unique passwords for your cloud storage accounts.
- Enable Two-Factor Authentication: Enable two-factor authentication for your cloud storage accounts.
- Use Encryption: Use encryption to protect your photos while they are being transferred.
- Review Privacy Policies: Review the privacy policies of the cloud storage services you use.
By following these security measures, you can protect your photos during cloud-based transfers.
30. Maintaining Original Photo Resolution
How can I maintain the original resolution of photos during transfer to an iPhone?
To maintain the original resolution of photos during transfer to an iPhone:
- Use High-Quality Transfer Methods: Use transfer methods that do not compress your photos, such as iCloud Photos or computer transfer.
- Adjust Transfer Settings: Adjust the transfer settings to ensure that your photos are transferred in their original resolution.
- Avoid Compression: Avoid using transfer methods that compress your photos, such as email or messaging apps.
By following these steps, you can ensure that your photos retain their original resolution during transfer.
31. Step-by-Step Guide: Transferring Photos Using Google Photos
How do I transfer photos from Android to iPhone using Google Photos?
To transfer photos from Android to iPhone using Google Photos, follow these steps:
- Install Google Photos on Android: Download and install the Google Photos app from the Google Play Store on your Android device.
- Upload Photos to Google Photos: Open the Google Photos app and upload your photos to Google Photos. Ensure that you select the option to upload photos in their original quality.
- Install Google Photos on iPhone: Download and install the Google Photos app from the App Store on your iPhone.
- Sign In to Google Photos: Open the Google Photos app on your iPhone and sign in with the same Google account that you used on your Android device.
- Access Your Photos: Your photos will be available in the Google Photos app on your iPhone. You can then download them to your iPhone’s local storage.
Google Photos provides a seamless way to transfer and manage your photos across devices.
32. Optimizing Google Photos for iPhone Storage
How can I optimize my Google Photos settings for storage on my iPhone?
To optimize your Google Photos settings for storage on your iPhone:
- Use Storage Saver: Select the “Storage Saver” option in Google Photos settings to reduce the file size of your photos.
- Remove Duplicates: Use the Google Photos app to remove any duplicate photos.
- Manage Backup Settings: Manage your backup settings to ensure that only the photos you want to keep are backed up.
By optimizing your Google Photos settings, you can save storage space on your iPhone.
33. Frequently Asked Questions (FAQs)
What are some frequently asked questions about transferring photos from Android to iPhone?
Here are some frequently asked questions:
-
Q: Can I transfer all my photos at once?
- A: Yes, you can transfer all your photos at once using methods like cloud storage or computer transfer.
-
Q: Will my photos lose quality during transfer?
- A: To maintain the original photo quality, use transfer methods that do not compress your photos.
-
Q: Is the Move to iOS app safe to use?
- A: Yes, the Move to iOS app is a secure way to transfer your data from Android to iPhone.
-
Q: What if the Move to iOS app doesn’t work?
- A: If the Move to iOS app doesn’t work, try transferring your photos using another method, such as a computer or cloud storage.
-
Q: How do I ensure my photos are backed up?
- A: Back up your photos using iCloud, an external hard drive, or cloud storage services.
-
Q: How can I organize my photos on my iPhone?
- A: Create albums, use keywords, and delete duplicates to organize your photos on your iPhone.
-
Q: What file formats are compatible with iPhone?
- A: iPhones support common photo file formats such as JPEG, PNG, and GIF, as well as HEIC.
-
Q: How do I contact dfphoto.net support?
- A: You can contact dfphoto.net support via email, phone, or online chat. Address: 1600 St Michael’s Dr, Santa Fe, NM 87505, United States. Phone: +1 (505) 471-6001. Website: dfphoto.net.
-
Q: What are some popular photo editing apps for iPhone?
- A: Popular photo editing apps for iPhone include Adobe Lightroom, VSCO, and Snapseed.
-
Q: How can I optimize storage for photos on my iPhone?
- A: Use iCloud Photos, compress photos, and delete unnecessary photos to optimize storage on your iPhone.
These FAQs provide quick answers to common questions about transferring photos from Android to iPhone.
Ready to dive deeper and enhance your photography skills? Visit dfphoto.net for more in-depth tutorials, stunning photo galleries, and a vibrant community of photographers eager to share their knowledge and inspiration. Don’t just transfer your photos, transform your passion!
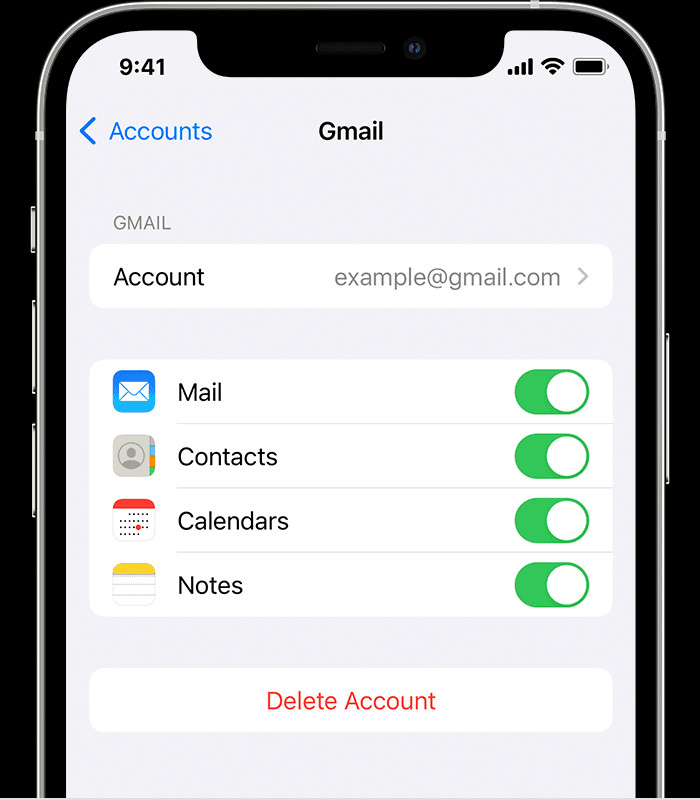 iPhone displaying settings for a connected Gmail account at Settings > Apps > Mail > Accounts > Gmail, showcasing email connectivity options