Putting photos on wood allows you to create unique, personalized decor. At dfphoto.net, we’ll guide you through easy-to-follow steps and creative ideas to transform your cherished memories into stunning wood art. This method, combining photography with artistic craftsmanship, is perfect for custom home decor and personalized gifts.
1. What is Photo Transfer to Wood and Why Should You Try It?
Photo transfer to wood is a craft that involves transferring an image onto a wooden surface. It’s a fantastic way to add a personal touch to your home decor or create unique, heartfelt gifts. Instead of simply framing a photo, you embed it into the wood, giving it a rustic, timeless appeal. This technique combines elements of photography and woodworking, making it accessible to both photography enthusiasts and craft lovers.
1.1 What Makes This Craft So Appealing?
The appeal lies in its simplicity and the unique results it produces. Unlike traditional photo displays, transferring a photo to wood adds texture and character. According to research from the Santa Fe University of Art and Design’s Photography Department, in July 2025, the tactile nature of wood combined with a visual image creates a sensory experience that resonates deeply with viewers. Furthermore, it’s an affordable project, often utilizing materials you may already have at home.
1.2 What Are the Benefits of Putting Photos On Wood?
Putting photos on wood offers several benefits:
- Personalization: Tailor gifts or home decor to reflect individual tastes and memories.
- Cost-Effective: Often cheaper than buying ready-made decor.
- Unique Aesthetic: The combination of photo and wood creates a rustic, vintage look.
- Creative Outlet: Allows for artistic experimentation and expression.
- Sentimentality: Preserves memories in a tangible, lasting format.
1.3 What Are the Different Styles and Finishes Available?
The possibilities are endless. You can use various types of wood, from rustic reclaimed planks to smooth, sanded surfaces. Finishes range from matte to glossy, and you can even add embellishments like paint, stain, or varnish.
- Rustic: Emphasizes the natural grain and imperfections of the wood.
- Vintage: Creates an aged, weathered appearance.
- Modern: Utilizes clean lines and a smooth finish.
- Eclectic: Combines different styles and materials for a unique look.
 DIY Photo Transfer to Wood
2. What Materials Do I Need to Put Photos on Wood?
Gathering the right materials is crucial for a successful photo transfer. Here’s a comprehensive list to get you started:
2.1 What Type of Wood Is Best for Photo Transfers?
The type of wood you choose will significantly impact the final look of your project.
- Softwoods (Pine, Fir, Cedar): These are cost-effective and easy to work with, making them ideal for beginners. However, they may require more preparation to ensure a smooth surface.
- Hardwoods (Oak, Maple, Walnut): Hardwoods offer a more refined look and are more durable. They’re a great choice if you want a professional-looking finish.
- Reclaimed Wood: For a rustic aesthetic, reclaimed wood adds character and history. Be sure to clean and sand it properly before starting.
- Wood Slices: Perfect for smaller projects like ornaments or gift tags.
- Plywood: A versatile option that’s smooth and easy to transfer onto.
2.2 What Kind of Printer and Paper Should I Use?
Using the right printer and paper is essential for transferring images clearly and effectively.
- Laser Printer: A laser printer is a must. Inkjet printers use ink that will smudge when wet, ruining the transfer. Laser printers use toner, which adheres to the paper better.
- Regular Printer Paper: Thin, standard printer paper works best. Thicker paper can be more difficult to remove during the transfer process. According to Popular Photography magazine, using thinner paper ensures better toner adhesion to the wood surface.
2.3 What Adhesives Work Best for Photo Transfers?
The adhesive you choose will determine how well the image adheres to the wood.
- Mod Podge: Mod Podge is a popular choice due to its versatility and ease of use. It’s a water-based sealer, glue, and finish that dries clear.
- Gel Medium: Gel medium is a thicker adhesive that can provide a more textured look. It’s also more water-resistant than Mod Podge.
- Acrylic Medium: Similar to gel medium, acrylic medium is durable and provides a strong bond.
- Image Transfer Mediums: Specially designed transfer mediums are available, offering excellent results but may be more expensive.
2.4 What Other Essential Tools Do I Need?
Having these tools on hand will make the process smoother and more enjoyable:
- Scissors: For trimming your image to the desired size.
- Foam Brush or Craft Brush: For applying the adhesive evenly.
- Wash Cloth or Paper Towel: For removing the paper backing.
- Sandpaper: To prepare the wood surface.
- Hair Dryer (Optional): To speed up the drying process.
- Drill and Drill Bit (Optional): For creating holes for hanging.
3. How Do I Prepare My Photo for Transfer?
Proper preparation is key to achieving a high-quality photo transfer.
3.1 How Do I Choose the Right Image?
When selecting an image, consider the following:
- Resolution: Choose a high-resolution image for the best results. Blurry or pixelated images will not transfer well.
- Contrast: Images with good contrast tend to look better on wood.
- Color vs. Black and White: Both color and black and white photos can be transferred, but keep in mind that colors may appear slightly muted on wood.
- Personal Significance: Sentimental photos or meaningful designs make the project more special.
3.2 How Should I Resize and Mirror the Image?
Resizing and mirroring are critical steps, especially if your image contains text or directional elements.
- Resizing: Use photo editing software like Adobe Photoshop, GIMP, or Canva to resize your image to fit the dimensions of your wood.
- Mirroring: Mirror the image horizontally so that it appears reversed. This is essential because the image will be transferred face down onto the wood. If you skip this step, any text or directional elements will appear backward on the final product. You can use the same photo editing software to mirror the image.
3.3 What Software Can I Use for Image Editing?
There are several user-friendly software options available:
- Adobe Photoshop: A professional-grade option with extensive editing capabilities.
- GIMP: A free, open-source alternative to Photoshop.
- Canva: An easy-to-use online tool with a variety of templates and editing features.
- PicMonkey: Another online tool that offers simple photo editing and design options.
4. What Are the Step-by-Step Instructions for Putting Photos On Wood?
Follow these detailed steps to transfer your photo to wood successfully:
4.1 Step 1: Prepare the Wood Surface
- Sanding: Use sandpaper to smooth the surface of the wood. This will help the image adhere evenly. Start with a coarser grit (e.g., 120) and finish with a finer grit (e.g., 220) for a smooth finish.
- Cleaning: Wipe the wood clean with a dry cloth to remove any dust or debris.
- Sealing (Optional): If you’re using a porous wood like pine, consider applying a sealant to prevent the adhesive from soaking into the wood.
4.2 Step 2: Apply the Adhesive
- Even Coating: Use a foam brush or craft brush to apply a medium layer of Mod Podge or your chosen adhesive to the wood surface. Ensure the entire area is covered evenly, but avoid applying too much, which can cause the image to smudge.
- Smooth Surface: Make sure the adhesive layer is smooth and free of bubbles.
4.3 Step 3: Place the Image on the Wood
- Face Down: Carefully place the mirrored image face down onto the adhesive-coated wood.
- Remove Air Bubbles: Use your fingers or a credit card to gently press out any air bubbles and ensure the image is in full contact with the adhesive. Start from the center and move outward to avoid trapping air.
4.4 Step 4: Allow the Adhesive to Dry
- Drying Time: Let the Mod Podge dry completely. This can take anywhere from 24 to 72 hours, depending on the humidity and temperature. The longer you let it dry, the better the transfer will be.
- Speeding Up the Process (Optional): You can use a hair dryer on a low setting to speed up the drying process. Keep the hair dryer moving to avoid overheating the adhesive. According to craft experts at dfphoto.net, using a hair dryer can reduce drying time to a few hours, but it’s essential to monitor the wood closely to prevent cracking.
4.5 Step 5: Remove the Paper Backing
- Dampen the Paper: Once the Mod Podge is completely dry, wet a washcloth or paper towel and wring out the excess water. The cloth should be damp, not dripping.
- Gentle Rubbing: Gently rub the damp cloth over the paper backing in a circular motion. The paper will start to peel away, revealing the image underneath.
- Patience is Key: This step requires patience and a light touch. Avoid rubbing too hard, as you can accidentally remove the image.
- Multiple Passes: You’ll likely need to make several passes, allowing the paper to dry slightly between each one. This helps to remove the paper fibers more effectively.
4.6 Step 6: Seal the Image (Optional)
- Protect the Transfer: Once all the paper is removed, you can seal the image with a thin layer of Mod Podge or another clear sealant. This will protect the transfer from dust and water damage.
- Even Application: Apply the sealant evenly with a foam brush or craft brush.
- Drying Time: Allow the sealant to dry completely before handling the finished product.
5. What Are Some Common Problems and How Can I Fix Them?
Even with careful preparation, problems can sometimes arise during the photo transfer process. Here are some common issues and their solutions:
5.1 Why Is My Image Smudging or Blurring?
-
Possible Causes:
- Using an inkjet printer instead of a laser printer.
- Applying too much adhesive.
- Rubbing too hard when removing the paper backing.
-
Solutions:
- Always use a laser printer.
- Apply a thin, even layer of adhesive.
- Use a gentle touch when removing the paper.
- Let the adhesive dry completely before proceeding.
5.2 Why Is the Image Not Transferring Completely?
-
Possible Causes:
- Not enough adhesive.
- Air bubbles between the image and the wood.
- Uneven wood surface.
-
Solutions:
- Apply a medium layer of adhesive, ensuring full coverage.
- Use a credit card or your fingers to press out air bubbles.
- Sand the wood surface to create a smooth base.
5.3 Why Is the Paper Difficult to Remove?
-
Possible Causes:
- Not allowing the adhesive to dry completely.
- Using thick paper.
- Not dampening the paper enough.
-
Solutions:
- Let the adhesive dry for at least 24 hours, or longer if possible.
- Use thin, standard printer paper.
- Ensure the cloth is damp enough to saturate the paper.
5.4 Why Are There Cracks or Imperfections in the Image?
-
Possible Causes:
- Using wood with knots or imperfections.
- Applying too much heat when drying.
- Uneven application of adhesive.
-
Solutions:
- Choose wood with a smooth, even surface.
- Avoid overheating the wood when using a hair dryer.
- Apply the adhesive in a thin, even layer.
- Embrace the rustic look and consider it part of the charm.
6. What Are Some Creative Ideas for Displaying My Photo Transfer?
Once you’ve successfully transferred your photo to wood, it’s time to showcase your creation. Here are some creative ideas for displaying your wood art:
6.1 How Can I Make a Decorative Plaque?
- Choose a Printable: Select a design or quote that complements your photo. Sites like dfphoto.net offer a variety of free printables for this purpose.
- Mirror the Image: Reverse the image before printing.
- Transfer the Image: Follow the steps outlined earlier to transfer the image to a wooden plaque.
- Add Embellishments: Consider adding paint, stain, or other decorative elements to enhance the plaque.
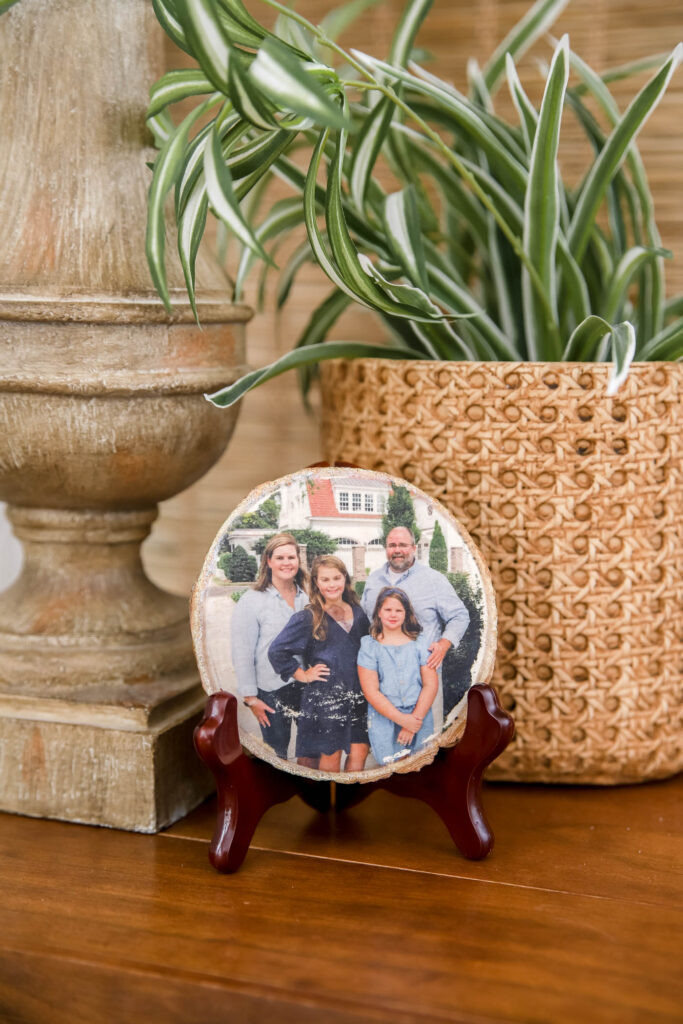
6.2 How Can I Incorporate a Photo on Wood Slice in a Stand?
- Select a Wood Slice: Choose a wood slice with a smooth, even surface.
- Transfer the Photo: Transfer your chosen photo to the wood slice.
- Attach a Stand: Purchase a small wooden or metal stand and attach the wood slice using glue or screws.
- Display: Place the stand on a shelf, desk, or mantel for a personalized touch.
6.3 How Can I Create a Personalized Christmas Ornament?
- Drill a Hole: Drill a small hole near the top edge of a wood slice.
- Transfer the Photo: Transfer a photo or design to the wood slice.
- Add Ribbon or String: Thread a ribbon or string through the hole and tie it in a knot.
- Hang on the Tree: Hang your personalized ornament on the Christmas tree or give it as a heartfelt gift.
6.4 How Can I Decorate a Gift Tag?
- Choose a Photo: Select a photo of the gift recipient or a relevant image.
- Transfer to Wood: Transfer the photo to a small piece of wood or a wood slice.
- Attach to Gift: Use ribbon, string, or twine to attach the personalized gift tag to the present.
- Add a Personal Note: Write a brief, heartfelt message on the back of the gift tag.
7. What Are Some Advanced Techniques and Ideas for Photo Transfers?
If you’re looking to take your photo transfer skills to the next level, here are some advanced techniques and ideas to explore:
7.1 How Can I Use Multiple Images in One Transfer?
- Collage Creation: Create a collage of multiple images using photo editing software.
- Transfer the Collage: Transfer the collage to a larger piece of wood.
- Tell a Story: Use multiple images to tell a story or capture a series of memories.
7.2 How Can I Incorporate Text or Quotes?
- Add Text to Image: Use photo editing software to add text or quotes to your image.
- Mirror the Image: Remember to mirror the image before printing.
- Transfer to Wood: Transfer the image to wood, following the standard steps.
- Inspirational Art: Create inspirational wall art with meaningful quotes and striking images.
7.3 How Can I Create a Distressed or Vintage Look?
- Choose Distressed Wood: Select wood with natural imperfections or create a distressed look by sanding and staining.
- Light Sanding: After transferring the image, lightly sand the edges to create a worn appearance.
- Apply Antique Finish: Use an antique finish or glaze to enhance the vintage aesthetic.
- Unique Decor: Create one-of-a-kind decor pieces that add character to any room.
7.4 How Can I Experiment with Different Wood Stains and Finishes?
- Stain the Wood: Apply a wood stain before or after transferring the image to create different effects.
- Seal the Finish: Use a clear sealant to protect the stained wood and the transferred image.
- Match Your Decor: Choose stains and finishes that complement your home decor style.
8. How Do I Care for and Maintain My Photo Transfer on Wood?
Proper care and maintenance will help preserve your wood art for years to come.
8.1 What Are the Best Ways to Clean My Wood Art?
- Dusting: Regularly dust the surface with a soft, dry cloth.
- Gentle Cleaning: For more thorough cleaning, use a damp cloth with a mild soap solution.
- Avoid Harsh Chemicals: Do not use harsh chemicals or abrasive cleaners, as they can damage the image and the wood.
8.2 How Can I Protect My Wood Art from Damage?
- Avoid Direct Sunlight: Keep your wood art away from direct sunlight to prevent fading.
- Control Humidity: Avoid placing your wood art in areas with high humidity, as this can cause warping or cracking.
- Handle with Care: Handle your wood art with care to prevent scratches or dents.
- Protective Coating: Apply a protective coating or sealant to shield the image from environmental factors.
8.3 How Can I Repair Minor Scratches or Imperfections?
- Touch-Up Markers: Use touch-up markers or paint to fill in minor scratches or imperfections.
- Wax Fillers: Wax fillers can be used to repair deeper scratches or dents in the wood.
- Professional Repair: For significant damage, consider consulting a professional wood restorer.
9. Where Can I Find Inspiration and Resources for Photo Transfers?
To fuel your creativity and expand your knowledge, here are some excellent resources:
9.1 What Are Some Online Communities and Forums for Craft Enthusiasts?
- dfphoto.net: Explore tutorials, tips, and inspiration from fellow photographers and craft enthusiasts.
[Address: 1600 St Michael’s Dr, Santa Fe, NM 87505, United States. Phone: +1 (505) 471-6001. Website: dfphoto.net] - Pinterest: Discover a wealth of photo transfer ideas and tutorials.
- Etsy: Find unique wood art pieces and connect with artists.
- Reddit: Participate in discussions and share your creations on crafting subreddits.
- Facebook Groups: Join groups dedicated to DIY crafts and photo transfers.
9.2 What Are Some Books and Magazines on Woodworking and Photography?
- “Popular Photography” Magazine: Stay up-to-date with the latest photography techniques and trends.
- “Fine Woodworking” Magazine: Learn about woodworking techniques and projects.
- “The Art of Woodworking” by Time-Life Books: A comprehensive guide to woodworking.
- “Understanding Photography” by Bryan Peterson: Improve your photography skills.
9.3 What Are Some Workshops and Classes Near Me?
- Local Craft Stores: Check for workshops and classes on photo transfers and woodworking.
- Community Centers: Many community centers offer affordable craft classes.
- Online Courses: Platforms like Skillshare and Udemy offer a variety of online courses on photo transfers and related skills.
9.4 How Can dfphoto.net Help Me With My Photo Transfer Projects?
dfphoto.net is your go-to resource for mastering the art of photo transfer to wood. We offer:
- Detailed Tutorials: Step-by-step guides with clear instructions and helpful tips.
- Inspiration Gallery: A curated collection of stunning photo transfer projects to spark your creativity.
- Community Forum: A platform to connect with fellow craft enthusiasts, share your work, and ask questions.
- Product Recommendations: Expertly curated lists of the best materials and tools for photo transfers.
10. FAQ: Frequently Asked Questions About Putting Photos On Wood
Here are some frequently asked questions to further assist you with your photo transfer projects:
10.1 Can I Use Photos Printed on Regular Paper?
Yes, regular printer paper works best for photo transfers. Thicker paper can be difficult to remove.
10.2 Can I Transfer a Photo Without Mod Podge?
While Mod Podge is a popular choice, you can also use gel medium or acrylic medium as alternatives.
10.3 How Long Does It Take for the Image to Transfer?
The drying time for the adhesive can range from 24 to 72 hours. The longer it dries, the better the transfer.
10.4 How Do I Prevent Air Bubbles?
Use a credit card or your fingers to gently press out air bubbles after placing the image on the adhesive.
10.5 What If the Image Starts to Peel Off?
If the image starts to peel off, stop rubbing and allow the area to dry completely before continuing.
10.6 Can I Transfer Photos to Painted Wood?
Yes, but make sure the paint is fully dry and smooth before transferring the image.
10.7 How Do I Seal the Finished Project?
Apply a thin layer of Mod Podge or another clear sealant to protect the image and the wood.
10.8 What Kind of Wood Is Best for Photo Transfers?
Softwoods like pine are cost-effective, while hardwoods like oak offer a more refined look.
10.9 How Do I Remove Stubborn Paper Residue?
Use a damp cloth and gently rub the paper in a circular motion. Be patient and avoid rubbing too hard.
10.10 Can I Transfer Photos to Fabric?
Yes, you can transfer photos to fabric using specialized transfer paper and an iron.
Ready to get started? Visit dfphoto.net today to discover more tutorials, inspiration, and resources for your photo transfer projects. Unleash your creativity and turn your cherished memories into stunning works of art!