Let’s be honest, we’ve all seen those Instagram feeds that stop you mid-scroll – the ones filled with captivating, high-quality images. You might think it’s all down to being a professional photographer or having access to exotic locations, but the truth is, anyone can learn how to take good Instagram photos. And no, you don’t need to be an “Instagram model” to do it! Even looking casual and comfortable is part of the charm.
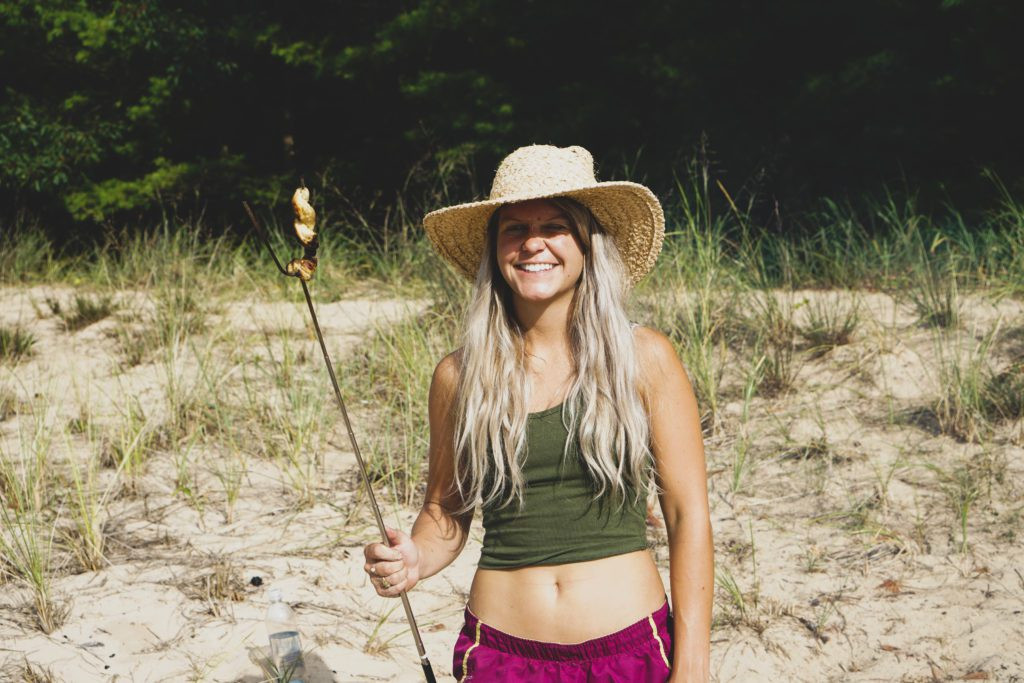
 A woman in a casual outfit and messy bun smiles naturally at the camera, emphasizing that Instagram photos don't require perfect model looks.
On most days, capturing authentic moments is more about being present and enjoying the experience, not striking a pose for the camera. But when you do want to create those eye-catching Instagram shots, it boils down to understanding a few key elements.
 A slightly blurry, candid image of a woman laughing and walking, showcasing a realistic and unposed travel moment.
Mastering the art of Instagram photography isn’t about complex techniques. It’s about focusing on three core pillars:
- Angles: Discovering perspectives that flatter your subject and create visual interest.
- Posing: Learning how to pose naturally and comfortably in front of the camera.
- Editing: Enhancing your photos to achieve a polished and consistent aesthetic.
To illustrate the impact of these elements, take a look at the evolution of my own Instagram feed, @shaleewanders. The first image represents my earlier style – decent photos, but lacking that extra something. The second image reflects my current approach, showcasing a more refined and engaging visual story.
 A side-by-side comparison of two Instagram photos. The left image shows a slightly less polished photo, while the right image is more vibrant and professionally composed, demonstrating visual improvement over time.
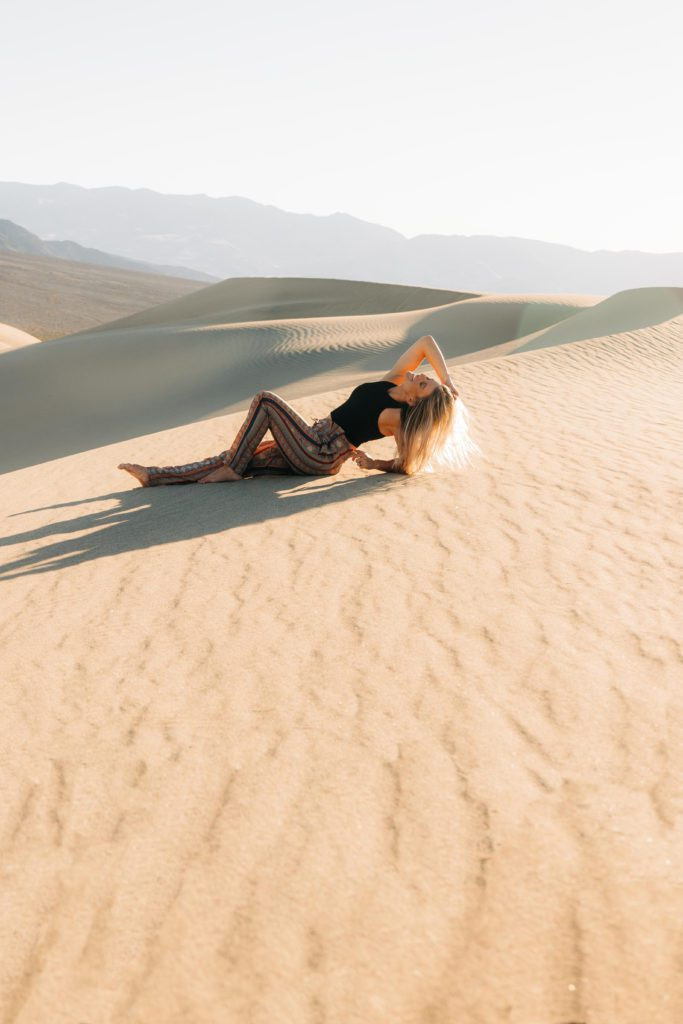
 A vibrant and well-composed travel photo featuring a woman in a red dress standing in a picturesque landscape, exemplifying a high-quality Instagram image.
Essential Equipment for Instagram Photography
While professional gear can certainly elevate your photography, you don’t need to break the bank to take great Instagram photos. As of 2024, I utilize a range of equipment, proving that versatility is key.
If you’re looking to invest in a dedicated camera that balances performance, portability, and image quality, I highly recommend considering either the Canon 80d or the Sony a6000. I personally used the Canon 70d, the predecessor to the 80d, for over five years. I still affectionately call it Nigel and occasionally use it, even after upgrading.
The Sony a6000 stands out as a mirrorless option, making it significantly more compact than the Canon. While I’ve experimented with Sony cameras, I’ve always gravitated back to the Canon ecosystem for its intuitive feel and robust performance.
In terms of price point, the Canon 80d body and kit lens typically retail around $1000. The Sony a6000 offers a more budget-friendly entry, hovering around $879. These cameras are excellent starting points for anyone serious about improving their Instagram photography.
 A woman holding a Canon DSLR camera, suggesting it as a recommended equipment for Instagram photography.
 A close-up shot of a Sony a6000 camera body, highlighting its compact and mirrorless design as a suitable option for Instagram photography.
Top Photo Tips to Elevate Your Instagram Game
Now that we’ve touched upon equipment, let’s dive into actionable photo tips that will transform your Instagram feed.
1) Master the Rule of Thirds
This fundamental photography principle is a game-changer for visual appeal. Studies have shown that positioning your subject slightly off-center makes an image more engaging and interesting to viewers. It’s all about creating a dynamic composition rather than a static, centered one.
Imagine dividing your image into a grid of nine equal rectangles using two horizontal and two vertical lines. The “rule of thirds” suggests placing your subject along these lines or at their intersections, rather than directly in the middle.
Even if the main point of interest isn’t perfectly centered, that’s perfectly fine – and often preferred! Here are a couple of visual examples to illustrate this principle:
 An image demonstrating the rule of thirds with a landscape scene where the horizon line and trees are placed along the grid lines, creating a more visually appealing composition.
2) Embrace Natural Poses
When I’m photographing clients, my priority is always to capture their authentic selves. Overly posed photos can appear stiff and unnatural, making it difficult for viewers to connect with the image. The best Instagram photos often feel spontaneous and genuine.
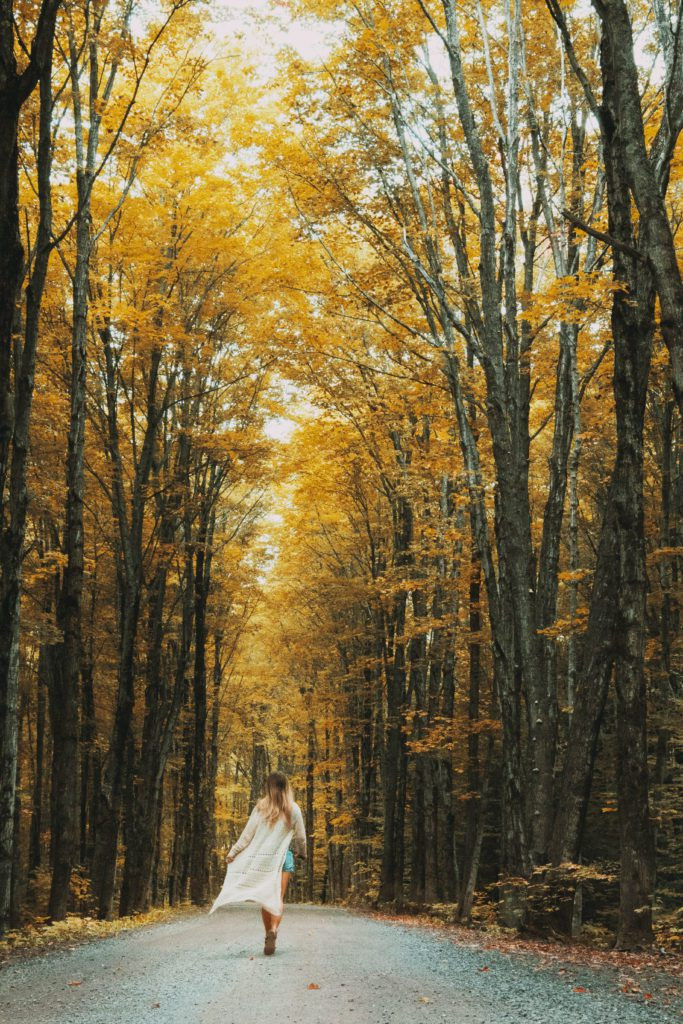
Don’t shy away from posting candid moments, even if they aren’t technically “perfect.” If a friend captures a photo of you laughing genuinely, laugh lines and all – embrace it and share it! My highest engagement photos on @shaleewanders are consistently those where I’m sharing real stories and unscripted moments. Authenticity resonates.
 A candid shot of a woman laughing outdoors, emphasizing natural posing and authentic moments for engaging Instagram content.
3) Be Authentic and Real
This tip builds directly on natural posing. As I mentioned, I’m not a professional model, and I’m perfectly comfortable with that. I don’t try to be something I’m not in my photos. If you’re genuinely enjoying a sunset at the beach, have a friend or use a self-timer to capture you standing in the waves, experiencing the moment. These are natural actions that lend a sense of realism to your photos.
It’s true that knowing you’re being photographed can sometimes make it challenging to feel natural. So, how do you overcome that self-consciousness? Laugh! Let your friends tease you about your pose (or lack thereof). Be the friend who captures the photo when someone bursts into laughter at themselves. A genuine, in-the-moment picture will almost always be more captivating than a forced, yoga-pose imitation.
 A woman walking on a beach at sunset, illustrating a natural and authentic moment captured for Instagram, rather than a forced pose.
4) Edit Smart, Not Hard
Photo editing is undeniably crucial for enhancing your Instagram photos, but often, less is more when it comes to filters and excessive edits. Subtlety is key to achieving a polished yet realistic look.
Having edited thousands of photos annually, I can confidently say that I rarely resort to heavy Photoshop manipulation. Perhaps a few times a year, I might use it to remove distracting elements like stray footprints or background people. However, I generally strive to keep my photos close to the original shot in terms of color and overall style. The goal is enhancement, not transformation.
 A before-and-after example showcasing subtle photo editing. The 'after' image shows slightly enhanced lighting and color, demonstrating a natural and refined edit rather than drastic changes.
5) Seek Unique Locations and Avoid Crowds
It only takes one viral social media post to transform a hidden gem into an influencer hotspot. Devil’s Bridge in Arizona is a prime example. When I first visited in 2016, we had the entire place to ourselves. However, I’ve heard from numerous sources that it’s now common to find lines of up to 100 people waiting to capture “the shot” on any given day.
So, when brainstorming locations for your Instagram photos, think beyond the obvious tourist traps. The slot canyon pictured below is often mistaken for the famous Antelope Canyon. In reality, it’s a lesser-known slot canyon in Utah, where we were able to explore and shoot in multiple spots without encountering anyone else.
Shooting in peaceful, uncrowded environments significantly reduces pressure and allows you to relax and experiment. This almost always translates to better, more authentic photos. Personally, I dread taking photos surrounded by crowds. I much prefer to wander around, be a little goofy, take a hundred random shots, and trust that at least one will be good enough to post.
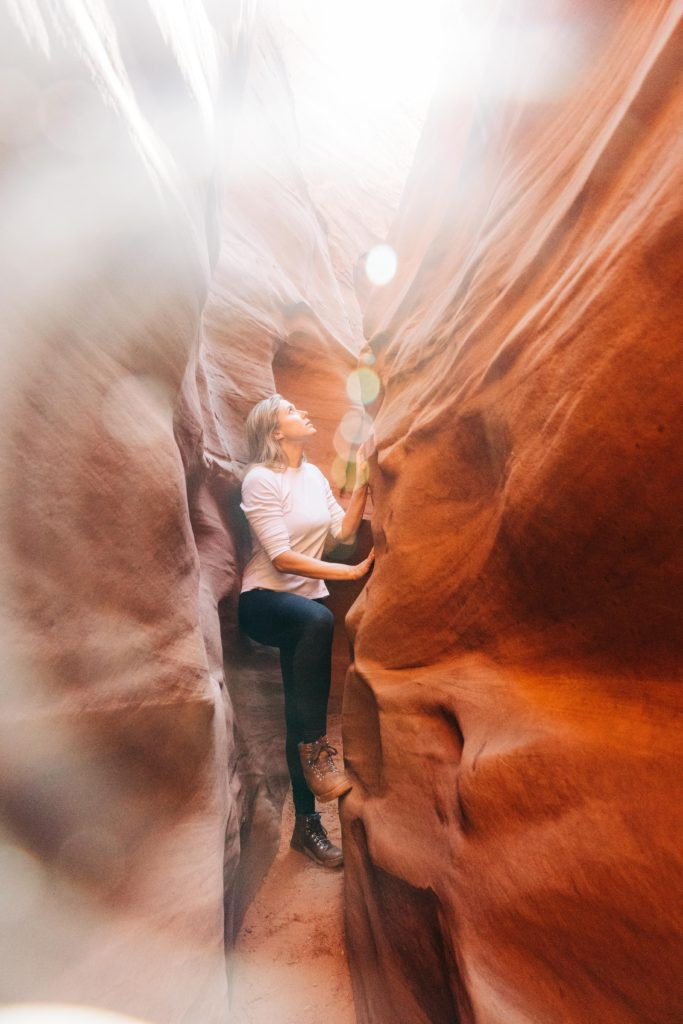 Two images of slot canyons. The left image shows a wider view of a canyon with natural light, while the right image is a closer shot inside a slot canyon, highlighting the textures and colors, both taken in less crowded, unique locations.
 Another perspective inside a slot canyon, showcasing the narrow passageways and light filtering through the rock formations, emphasizing the beauty of unique and less crowded photo locations.
6) Play with Angles to Create Impact
Mastering angles is a crucial skill for taking compelling Instagram photos. Whether you’re capturing an outfit of the day (OOTD) shot or a breathtaking travel panorama, experimenting with different angles can dramatically alter the final image. Find the perspectives that best flatter your subject and convey the desired mood.
For instance, in the photo below, it appears as if I’m perched precariously on the edge of a cliff in Canyonlands National Park, seemingly flirting with danger. In reality, it was a perfectly safe spot to sit, but the chosen angle exaggerates the sense of height and drama. To prove its safety, my friend, who is afraid of heights, even sat in the same spot (as shown in the second photo).
If you’re petite like me (5’2″) and want to appear taller in photos, try positioning your tripod low to the ground and shooting upwards. This upward angle elongates your legs and creates the illusion of height.
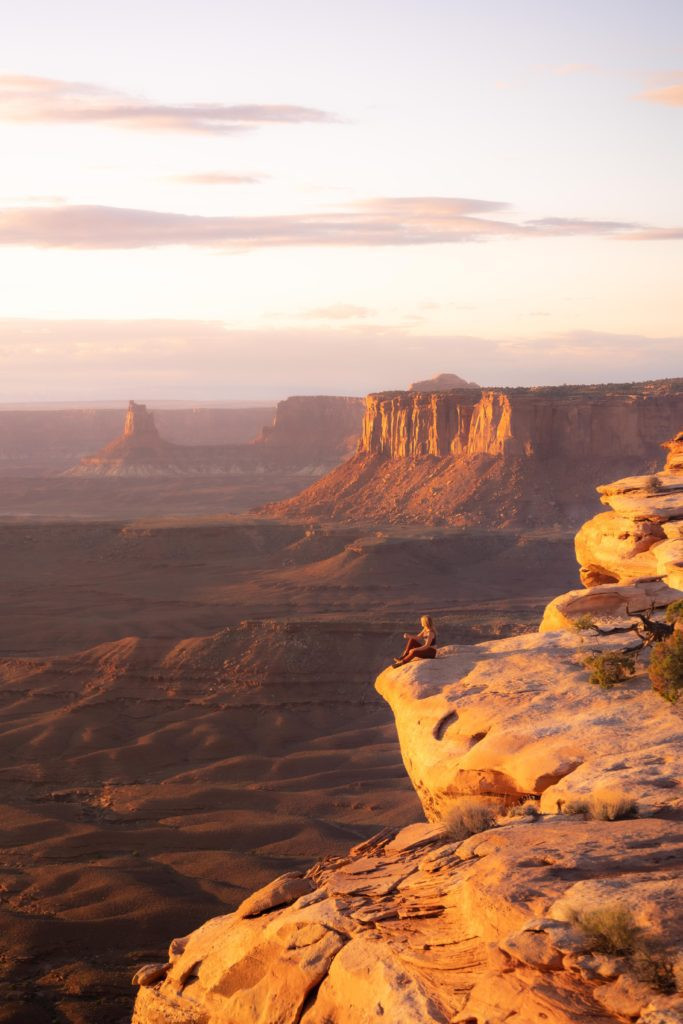 An image taken at a low angle, making a woman sitting on a cliff edge appear more dramatic and taller, showcasing the impact of angle manipulation in photography.
7) Communicate Effectively with Your Photographer
My partner Josh and I are both passionate about travel photography, but we have distinct preferences when it comes to shooting and editing styles. Clear communication is essential. We always discuss the desired angle and composition before taking a photo. Don’t simply hand your camera to someone and assume they’ll automatically capture the shot you envision. Physically position your phone or camera exactly where you want it, in the precise angle and framing, before entrusting it to someone else. Visual communication is key to getting the photo you want.
 A scenic road photo taken from a slightly elevated angle, demonstrating a well-communicated photographic vision between photographer and subject.
8) Learn Basic Photo Editing in Lightroom
Capturing the photo is just the first step. Editing is the second, equally vital, component of creating stunning Instagram photos. Adobe offers an affordable $10/month photography plan that grants access to Lightroom, Mobile Lightroom, and Photoshop – more than enough tools for all your photo editing needs.
If you’re new to photo editing, presets can be a helpful starting point to achieve a consistent aesthetic. For my photos, I typically begin with three fundamental editing adjustments in Lightroom:
- Tone Curve Adjustment: I fine-tune the tone curve for nearly every photo to optimize contrast and brightness.
- Brightness Enhancement: My overall photo “vibe” leans towards bright and vibrant. I usually adjust brightness to enhance this aesthetic.
- Contrast Increase & Clarity Decrease: This combination is my secret weapon for creating a slightly dreamy and ethereal style in my photos.
- Subject Brightening: Lightroom introduced a fantastic “Select Subject” masking tool in 2022, making it incredibly easy to selectively brighten your subject. Remember to apply subtle adjustments; over-brightening can look unnatural. Simply use the masking tool, select “Subject,” and then make brightness adjustments specifically to the highlighted subject area.
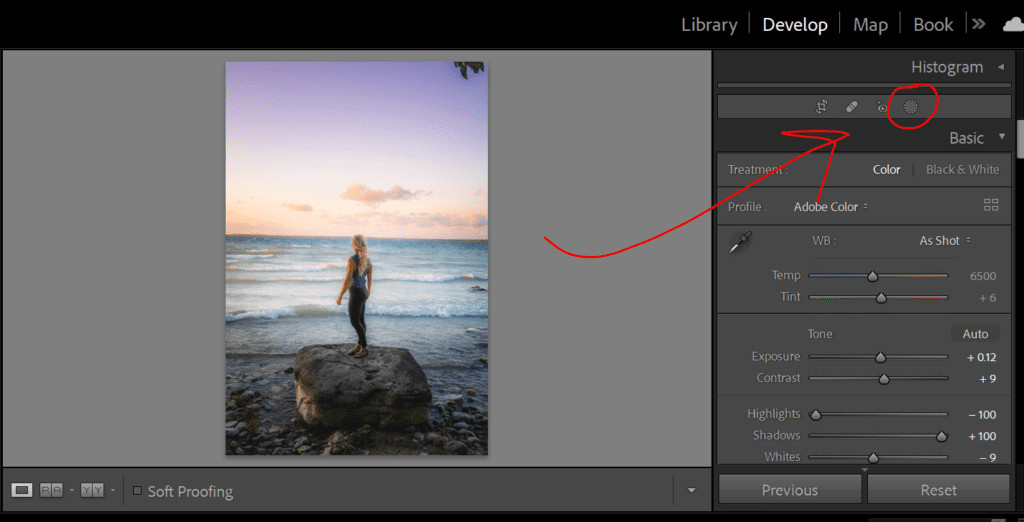 A screenshot of Lightroom editing interface highlighting tone curve adjustment, indicating its importance in photo editing for Instagram.
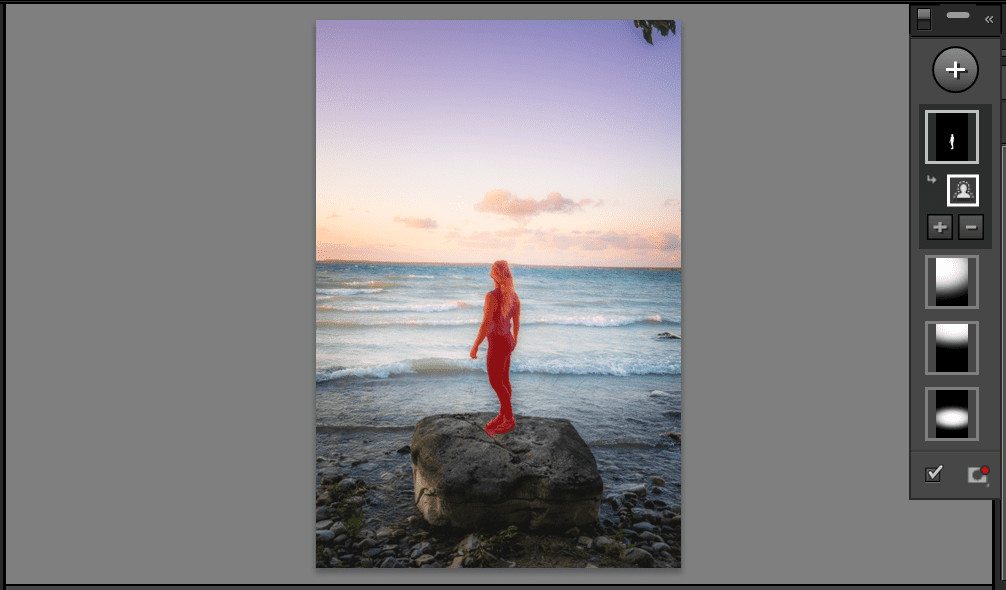 Another screenshot of Lightroom showing brightness and contrast adjustments, further illustrating basic editing techniques for Instagram photos.
9) Practice Makes Perfect: Take Lots of Photos
In the world of photography, quantity often leads to quality. For every truly great photo, there might be 99 that are less than stellar. But that single exceptional shot is all you need.
I personally prefer not to spend excessive amounts of time shooting, even though the photos are destined for Instagram. I dislike feeling like I’m experiencing a place solely for the sake of Instagram content. Especially when using DSLR cameras, utilize rapid-fire shooting modes to capture a burst of images in quick succession. Combine this with the earlier tip of acting natural and capture those candid moments in rapid bursts.
For example, try walking towards the camera while casually running your hand through your hair. In a short 10-second walk, you could easily capture 20-40 shots. Repeat this a few times, and you’ll have a substantial pool of photos to review later. Chances are, you’ll find at least one that perfectly captures the moment.
