Locking your photos on an iPhone is a great way to keep your personal moments private, and dfphoto.net is here to guide you through the process. Whether you’re looking to hide sensitive images or simply want an extra layer of security, we’ll explore several methods to safeguard your visual memories. Let’s dive into the world of iPhone photo security, exploring techniques like using built-in features, third-party apps, and secure cloud storage to help you choose the best photo privacy solutions for your needs.
1. Understanding iPhone’s Built-In Privacy Features
Yes, the iPhone has several built-in privacy features you can use to protect your photos. These features offer basic security without needing additional apps.
The iPhone provides several native features that allow you to manage and enhance the privacy of your photos. Understanding and utilizing these options is the first step in securing your personal images.
1.1 Using the Hidden Album
The Hidden Album is a built-in feature that allows you to move photos out of the main Camera Roll and into a separate, less visible album.
How to Use the Hidden Album
- Select Photos: Open the Photos app and select the photos you want to hide.
- Share Options: Tap the Share icon (the square with an arrow pointing up).
- Hide Option: Scroll down and tap “Hide.” Confirm that you want to hide the selected photos.
Once hidden, the photos are moved to the Hidden Album, which is disabled by default.
Accessing the Hidden Album
- Open Photos App: Go to the Photos app.
- Albums Tab: Tap the “Albums” tab at the bottom.
- Utilities Section: Scroll down to the “Utilities” section.
- Hidden Album: Tap “Hidden.” You may need to use Face ID, Touch ID, or your passcode to view the contents.
Considerations
While the Hidden Album provides a degree of privacy, it’s not foolproof. Anyone with access to your phone can find the Hidden Album and view its contents unless you take further steps to conceal the album itself.
Further Steps for Concealing the Hidden Album
- Go to Settings: Open the Settings app on your iPhone.
- Photos: Scroll down and tap “Photos.”
- Hide Hidden Album: Toggle the switch next to “Hidden Album” to turn it off.
Turning off this option removes the Hidden Album from the Albums view, making it less obvious to casual observers.
1.2 Setting Up a Passcode, Touch ID, or Face ID
Setting up a strong passcode, enabling Touch ID, or using Face ID are fundamental security measures for your iPhone.
Setting Up a Passcode
- Open Settings: Go to the Settings app on your iPhone.
- Face ID (or Touch ID) & Passcode: Scroll down and tap “Face ID & Passcode” (or “Touch ID & Passcode” on older models).
- Turn Passcode On: Tap “Turn Passcode On.”
- Enter a Passcode: Enter a six-digit passcode. You can tap “Passcode Options” to choose a custom alphanumeric code, a custom numeric code, or a four-digit numeric code.
- Confirm Passcode: Re-enter your passcode to confirm.
A strong passcode is the first line of defense against unauthorized access to your iPhone and its contents, including your photos.
Enabling Touch ID or Face ID
- Open Settings: Go to the Settings app.
- Face ID (or Touch ID) & Passcode: Tap “Face ID & Passcode” (or “Touch ID & Passcode”).
- Set Up Face ID (or Add a Fingerprint): Follow the on-screen instructions to set up Face ID or add a fingerprint for Touch ID.
Face ID and Touch ID provide biometric authentication, making it more difficult for someone to access your phone without your consent.
Considerations
While passcodes and biometric authentication enhance security, they are not without limitations. A determined individual who knows your passcode or can bypass biometric security could still access your photos.
1.3 Guided Access for Limiting App Usage
Guided Access is a feature that restricts your device to a single app, which can be useful if you need to let someone use your phone but want to prevent them from accessing your photos.
Enabling Guided Access
- Open Settings: Go to the Settings app.
- Accessibility: Scroll down and tap “Accessibility.”
- Guided Access: Scroll down to the “General” section and tap “Guided Access.”
- Turn On Guided Access: Toggle the switch to turn on Guided Access.
- Passcode Settings: Tap “Passcode Settings” and set a passcode that is different from your main phone passcode. You can also enable Touch ID or Face ID for Guided Access.
Using Guided Access with the Photos App
- Open Photos App: Open the Photos app and navigate to the album or specific photos you want to allow someone to view.
- Start Guided Access: Triple-click the Side button (or the Home button on older models) to start Guided Access.
- Configure Options: You can optionally circle areas of the screen to disable them.
- Start: Tap “Start” in the upper-right corner and enter your Guided Access passcode.
Now, the person can only use the Photos app, and they cannot exit the app without the Guided Access passcode.
Ending Guided Access
- Triple-Click: Triple-click the Side button (or the Home button).
- Enter Passcode: Enter your Guided Access passcode, or use Touch ID or Face ID if enabled.
- End: Tap “End” in the upper-left corner.
Considerations
Guided Access is useful for controlled situations, but it’s not a permanent solution for securing your photos. It’s more of a temporary measure to limit access when someone else is using your device.
1.4 Reviewing App Permissions
Regularly reviewing app permissions is crucial for maintaining your privacy. Apps often request access to your photos, and it’s important to ensure that only trusted apps have this permission.
How to Review App Permissions
- Open Settings: Go to the Settings app.
- Privacy: Scroll down and tap “Privacy.”
- Photos: Tap “Photos.”
- Review Apps: Review the list of apps that have requested access to your photos. You can grant or revoke access for each app individually.
Permission Options
- All Photos: Allows the app to access all photos and videos in your library.
- Selected Photos: Allows the app to access only the photos you specifically select.
- None: Revokes all access to your photos.
Considerations
Granting photo access to an app should be done cautiously. Only allow trusted apps that genuinely need access to your photos for their functionality. Regularly audit these permissions to ensure your privacy.
By understanding and using these built-in privacy features, you can significantly enhance the security of your photos on your iPhone. These tools provide a foundation for protecting your personal images, but for more sensitive content, you might consider additional security measures such as third-party apps or secure cloud storage.
2. Third-Party Apps for Enhanced Photo Security
Yes, several third-party apps offer enhanced photo security features beyond what the iPhone provides natively. These apps often include password protection, encryption, and decoy albums.
2.1 Overview of Popular Photo Locking Apps
Third-party photo locking apps provide a variety of features to secure your photos, including password protection, encryption, and the ability to create decoy albums. Here’s an overview of some popular options:
- Keepsafe Photo Vault: Known for its user-friendly interface and robust security features, Keepsafe allows you to lock photos and videos behind a PIN, fingerprint, or Face ID. It also offers features like decoy vaults and break-in alerts.
- Private Photo Vault: This app offers multiple layers of security, including password-protected albums, a decoy password, and a break-in report that captures intruder attempts.
- Secret Photo Vault: With a focus on simplicity and security, this app allows you to hide photos and videos behind a password or Touch ID. It also includes a private browser for securely downloading images from the web.
- Best Secret Folder: This app disguises itself as a utility app and provides a hidden space for your private photos and videos. It supports multiple passwords and break-in alerts.
- Lock Photos & Videos: This app offers a straightforward way to protect your media files with a password, PIN, or fingerprint. It includes features like photo editing and slideshow viewing within the secure vault.
These apps provide enhanced security options that go beyond the iPhone’s built-in features, offering a more comprehensive solution for protecting your personal photos and videos.
2.2 Setting Up and Using Keepsafe Photo Vault
Keepsafe Photo Vault is a popular app known for its user-friendly interface and robust security features. Here’s how to set it up and use it to protect your photos:
Downloading and Installing Keepsafe
- Open the App Store: On your iPhone, open the App Store app.
- Search for Keepsafe: In the search bar, type “Keepsafe Photo Vault” and tap the search button.
- Download the App: Find the Keepsafe Photo Vault app in the search results and tap the “Get” button.
- Install the App: After the app is downloaded, tap the “Open” button to launch it.
Setting Up Your Account
- Create an Account: When you open Keepsafe for the first time, you’ll be prompted to create an account. Enter your email address and create a strong password.
- Verify Your Email: Keepsafe will send a verification email to the address you provided. Open the email and click the verification link to activate your account.
- Set Up Authentication: Choose your preferred authentication method: PIN, fingerprint, or Face ID. Follow the on-screen instructions to set up your chosen method.
Importing Photos into Keepsafe
- Open Keepsafe: Launch the Keepsafe Photo Vault app on your iPhone.
- Create an Album (Optional): Tap the “+” button to create a new album for organizing your photos. Give the album a name and tap “OK.”
- Import Photos: Open the album where you want to add photos, then tap the “Add Photos” button (usually a “+” icon).
- Select Photos: Keepsafe will request access to your photo library. Grant the necessary permissions and select the photos you want to import.
- Import and Hide: After selecting the photos, tap the “Hide” button. Keepsafe will import the photos into the vault and remove them from your Camera Roll.
Using Keepsafe’s Features
- Password Protection: Access to Keepsafe and your locked photos requires your chosen authentication method (PIN, fingerprint, or Face ID).
- Decoy Vault: This feature allows you to create a fake vault with a separate password. If someone forces you to open Keepsafe, you can enter the decoy password to show them a vault with non-sensitive photos.
- Break-In Alerts: If someone enters the wrong PIN multiple times, Keepsafe can capture a photo of the intruder and save it in your vault.
- Private Cloud: Keepsafe offers a private cloud storage option for backing up your photos. This ensures that your photos are protected even if you lose your device.
- Custom Albums: Organize your photos into custom albums for easier management.
Considerations
- Security: Keepsafe provides robust security features, but it’s essential to use a strong, unique password and enable additional security options like decoy vaults and break-in alerts.
- Subscription: While Keepsafe offers a free version, some features like the decoy vault and private cloud storage require a premium subscription.
- Privacy: Always read the app’s privacy policy to understand how your data is handled and protected.
By following these steps, you can effectively use Keepsafe Photo Vault to secure your photos on your iPhone, adding an extra layer of privacy and protection.
2.3 Exploring Alternatives: Private Photo Vault and Secret Photo Vault
In addition to Keepsafe Photo Vault, Private Photo Vault and Secret Photo Vault are two other popular apps that offer enhanced security features for your photos on iPhone. Here’s a closer look at each:
Private Photo Vault
-
Overview: Private Photo Vault is designed to provide multiple layers of security for your photos and videos. It offers features such as password-protected albums, a decoy password, and break-in reports to help keep your media files safe.
-
Key Features:
- Password Protection: Secure your photos and videos behind a strong password.
- Decoy Password: Create a fake password that opens a decoy vault with non-sensitive content. This can be useful if someone forces you to open the app.
- Break-In Report: Capture intruder attempts with a photo and timestamp if someone enters the wrong password.
- Album Organization: Organize your media files into password-protected albums for easier management.
- Import/Export: Easily import photos and videos from your Camera Roll and export them back when needed.
-
How to Use:
- Download and Install: Download Private Photo Vault from the App Store.
- Set Up Password: Create a strong password when you first open the app.
- Create Albums: Create albums to organize your photos and videos.
- Import Media: Import photos and videos from your Camera Roll into the app.
- Enable Security Features: Set up the decoy password and break-in report features for added security.
Secret Photo Vault
-
Overview: Secret Photo Vault focuses on simplicity and security, providing a straightforward way to hide your private photos and videos behind a password or Touch ID. It also includes a private browser for securely downloading images from the web.
-
Key Features:
- Password Protection: Secure your photos and videos with a password, PIN, or Touch ID.
- Private Browser: Download images and videos directly from the web into the app without leaving a trace in your browser history.
- Album Management: Organize your media files into albums for easy access.
- Simple Interface: Enjoy a user-friendly interface that makes it easy to import, manage, and view your private photos and videos.
-
How to Use:
- Download and Install: Download Secret Photo Vault from the App Store.
- Set Up Authentication: Choose your preferred authentication method (password, PIN, or Touch ID) when you first open the app.
- Create Albums: Create albums to organize your photos and videos.
- Import Media: Import photos and videos from your Camera Roll into the app.
- Use Private Browser: Use the built-in private browser to download images and videos securely from the web.
Considerations for Both Apps
- Security: Both Private Photo Vault and Secret Photo Vault offer strong security features, but it’s crucial to use a unique, strong password and enable additional security options like decoy passwords and break-in reports.
- Privacy: Review the app’s privacy policy to understand how your data is handled and protected.
- Subscription: While both apps offer free versions, some features may require a premium subscription.
By exploring these alternatives, you can choose the photo locking app that best fits your needs and preferences, ensuring your personal photos and videos remain private and secure on your iPhone.
2.4 Tips for Choosing a Secure Photo App
Choosing a secure photo app is crucial for protecting your personal photos and videos. Here are some tips to help you make an informed decision:
-
Read Reviews and Ratings:
- Check App Store Reviews: Look at the reviews and ratings on the App Store to get an idea of other users’ experiences with the app.
- Consider User Feedback: Pay attention to common themes in the reviews, such as ease of use, security features, and customer support.
-
Review Privacy Policy:
- Understand Data Handling: Read the app’s privacy policy to understand how your data is collected, stored, and used.
- Look for Encryption: Ensure that the app uses encryption to protect your photos and videos.
- Check for Third-Party Sharing: Be wary of apps that share your data with third parties without your consent.
-
Assess Security Features:
- Password Protection: Ensure the app offers strong password protection, preferably with options for alphanumeric passwords.
- Biometric Authentication: Look for apps that support Touch ID or Face ID for added security.
- Decoy Vault: Consider apps that offer a decoy vault feature, which allows you to create a fake vault with non-sensitive content.
- Break-In Alerts: Check for apps that capture intruder attempts with a photo and timestamp.
-
Evaluate User Interface and Experience:
- Ease of Use: Choose an app with a user-friendly interface that makes it easy to import, organize, and view your photos and videos.
- Navigation: Ensure that the app is easy to navigate and that all features are accessible.
-
Check for Backup Options:
- Cloud Storage: Look for apps that offer secure cloud storage options for backing up your photos and videos.
- Encryption: Ensure that the cloud storage is encrypted to protect your data in transit and at rest.
-
Consider Subscription Costs:
- Free vs. Paid: Determine whether the free version of the app offers sufficient security features for your needs.
- Subscription Benefits: Evaluate the benefits of a premium subscription, such as additional storage, advanced security features, and ad-free experience.
-
Test the App:
- Trial Period: Take advantage of any trial periods to test the app and its features before committing to a subscription.
- Import Sample Photos: Import a few sample photos and videos to see how the app handles them and whether the security features work as expected.
-
Keep the App Updated:
- Regular Updates: Ensure that the app is regularly updated with the latest security patches and features.
- Enable Automatic Updates: Enable automatic updates in the App Store to ensure that you always have the latest version of the app.
By following these tips, you can choose a secure photo app that provides the best protection for your personal photos and videos on your iPhone, giving you peace of mind knowing that your media files are safe and private.
3. Utilizing Cloud Storage for Secure Photo Management
Yes, utilizing cloud storage services like iCloud, Google Photos, and Dropbox can be a secure way to manage your photos, provided you enable the necessary security features.
3.1 Overview of Secure Cloud Storage Options
Cloud storage services offer a convenient way to back up and manage your photos, but it’s essential to choose a service with robust security features to protect your privacy. Here’s an overview of some secure cloud storage options:
- iCloud Photos: Integrated with Apple devices, iCloud Photos securely stores your photos and videos in the cloud and syncs them across your devices. It offers encryption and two-factor authentication for added security.
- Google Photos: Google Photos provides unlimited storage for photos (with some compression) and offers features like automatic organization and sharing. It also supports two-factor authentication and encryption.
- Dropbox: Dropbox is a versatile cloud storage service that allows you to store and share files, including photos and videos. It offers encryption, two-factor authentication, and granular access controls for enhanced security.
- Microsoft OneDrive: OneDrive is Microsoft’s cloud storage solution, integrated with Windows and Office 365. It offers encryption, two-factor authentication, and ransomware detection for added security.
- Amazon Photos: Amazon Photos provides unlimited storage for photos for Prime members and offers features like automatic organization and sharing. It supports encryption and two-factor authentication.
These cloud storage options offer various security features to protect your photos and videos in the cloud. By enabling these features and following best practices for cloud security, you can ensure that your media files remain private and secure.
3.2 Setting Up iCloud Photos with Enhanced Security
iCloud Photos is a convenient way to store and sync your photos across Apple devices. To ensure your photos are securely stored in iCloud, follow these steps to set it up with enhanced security:
Enable Two-Factor Authentication
Two-factor authentication adds an extra layer of security to your Apple ID, making it more difficult for someone to access your account even if they know your password.
- Open Settings: Go to the Settings app on your iPhone.
- Tap on Your Name: Tap on your name at the top of the screen to access your Apple ID settings.
- Password & Security: Tap on “Password & Security.”
- Turn On Two-Factor Authentication: If two-factor authentication is not already enabled, tap “Turn On Two-Factor Authentication” and follow the on-screen instructions to set it up. You’ll need to verify your identity using a trusted device or phone number.
Use a Strong Password
Using a strong, unique password for your Apple ID is essential for protecting your account and your photos in iCloud.
- Open Settings: Go to the Settings app on your iPhone.
- Tap on Your Name: Tap on your name at the top of the screen to access your Apple ID settings.
- Password & Security: Tap on “Password & Security.”
- Change Password: Tap “Change Password” and follow the on-screen instructions to create a new, strong password. Use a combination of uppercase and lowercase letters, numbers, and symbols.
Enable iCloud Photos
- Open Settings: Go to the Settings app on your iPhone.
- Tap on Your Name: Tap on your name at the top of the screen to access your Apple ID settings.
- iCloud: Tap on “iCloud.”
- Photos: Tap on “Photos.”
- Turn On iCloud Photos: Toggle the switch to turn on “iCloud Photos.” This will automatically upload your photos and videos to iCloud.
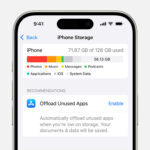
Optimize Storage
To save space on your iPhone, you can enable “Optimize iPhone Storage,” which stores smaller, optimized versions of your photos on your device while keeping the full-resolution versions in iCloud.
- Open Settings: Go to the Settings app on your iPhone.
- Tap on Your Name: Tap on your name at the top of the screen to access your Apple ID settings.
- iCloud: Tap on “iCloud.”
- Photos: Tap on “Photos.”
- Optimize iPhone Storage: Select “Optimize iPhone Storage.”
Review App Permissions
Regularly review the apps that have access to your iCloud account and revoke access for any apps that you no longer use or trust.
- Open Settings: Go to the Settings app on your iPhone.
- Tap on Your Name: Tap on your name at the top of the screen to access your Apple ID settings.
- iCloud: Tap on “iCloud.”
- Apps Using iCloud: Tap on “Apps Using iCloud” to see a list of apps that have access to your iCloud data.
- Revoke Access: Toggle the switch to turn off access for any apps that you no longer want to have access to your iCloud data.
Considerations
- Security: While iCloud Photos offers encryption and two-factor authentication, it’s essential to use a strong password and keep your Apple ID secure to protect your photos.
- Privacy: Review Apple’s privacy policy to understand how your data is handled and protected in iCloud.
- Storage: iCloud offers limited free storage, so you may need to purchase additional storage if you have a large photo library.
By following these steps, you can set up iCloud Photos with enhanced security, ensuring that your photos are safely stored in the cloud and accessible across your Apple devices.
3.3 Using Google Photos with Privacy Settings
Google Photos is a popular cloud storage service that offers a range of features for managing and sharing your photos. To ensure your photos are securely stored in Google Photos, follow these steps to set it up with privacy settings:
Enable Two-Factor Authentication
Two-factor authentication adds an extra layer of security to your Google account, making it more difficult for someone to access your account even if they know your password.
- Open Google Account: Go to your Google Account settings by visiting myaccount.google.com in a web browser or through the Google app on your iPhone.
- Security: Click on “Security” in the left-hand menu.
- 2-Step Verification: Scroll down to the “Signing in to Google” section and click on “2-Step Verification.”
- Turn On 2-Step Verification: Follow the on-screen instructions to set up two-factor authentication. You’ll need to verify your identity using a trusted device or phone number.
Use a Strong Password
Using a strong, unique password for your Google account is essential for protecting your account and your photos in Google Photos.
- Open Google Account: Go to your Google Account settings by visiting myaccount.google.com in a web browser or through the Google app on your iPhone.
- Security: Click on “Security” in the left-hand menu.
- Password: Scroll down to the “Signing in to Google” section and click on “Password.”
- Change Password: Follow the on-screen instructions to create a new, strong password. Use a combination of uppercase and lowercase letters, numbers, and symbols.
Set Up Google Photos Backup
- Download Google Photos App: Download and install the Google Photos app from the App Store on your iPhone.
- Open Google Photos App: Launch the Google Photos app and sign in with your Google account.
- Backup & Sync: Tap on your profile picture in the top-right corner, then select “Photos settings.”
- Backup & Sync: Tap on “Backup & sync” and toggle the switch to turn it on. This will automatically upload your photos and videos to Google Photos.
Choose Backup Quality
Google Photos offers two options for backup quality: “Original Quality” and “Storage Saver” (formerly known as “High Quality”).
- Original Quality: Backs up your photos and videos in their original resolution, which counts towards your Google account storage limit.
- Storage Saver: Compresses your photos and videos slightly to save storage space, without significantly affecting image quality. This option offers unlimited storage.
Choose the option that best fits your needs and storage preferences.
- Open Google Photos App: Launch the Google Photos app and tap on your profile picture in the top-right corner.
- Photos Settings: Select “Photos settings.”
- Backup & Sync: Tap on “Backup & sync.”
- Upload Size: Tap on “Upload size” and choose either “Original Quality” or “Storage saver.”
Review Sharing Settings
Google Photos allows you to share your photos and videos with others. Review your sharing settings to ensure that you’re only sharing your photos with the people you intend to.
- Open Google Photos App: Launch the Google Photos app and tap on the “Sharing” tab at the bottom of the screen.
- Review Shared Albums: Review the albums and photos that you’ve shared with others.
- Adjust Sharing Settings: Adjust the sharing settings for each album or photo as needed.
Turn Off Location Sharing
By default, Google Photos may store location information with your photos. If you prefer not to share your location, you can turn off location sharing in the app settings.
- Open Google Photos App: Launch the Google Photos app and tap on your profile picture in the top-right corner.
- Photos Settings: Select “Photos settings.”
- Privacy: Tap on “Privacy.”
- Remove Geo Location: Turn off “Remove geo location”.
Considerations
- Security: While Google Photos offers encryption and two-factor authentication, it’s essential to use a strong password and keep your Google account secure to protect your photos.
- Privacy: Review Google’s privacy policy to understand how your data is handled and protected in Google Photos.
- Storage: Google offers limited free storage, so you may need to purchase additional storage if you have a large photo library.
By following these steps, you can set up Google Photos with enhanced privacy settings, ensuring that your photos are safely stored in the cloud and accessible across your devices while maintaining control over your privacy.
4. Advanced Techniques for Securing Sensitive Photos
Yes, advanced techniques for securing sensitive photos include encryption, steganography, and using a virtual private network (VPN). These methods offer additional layers of protection for highly confidential images.
4.1 Encrypting Photos with Third-Party Apps
Encrypting your photos adds an extra layer of security by converting them into an unreadable format that can only be accessed with a decryption key. Several third-party apps offer encryption features for photos on your iPhone.
Using Cryptomator
Cryptomator is an open-source encryption tool that allows you to create secure vaults for your photos and other files. Here’s how to use it:
- Download and Install Cryptomator: Download Cryptomator from the App Store on your iPhone.
- Create a Vault: Open Cryptomator and tap the “+” button to create a new vault. Choose a name and location for your vault (e.g., iCloud Drive, Dropbox, or local storage).
- Set a Password: Create a strong password for your vault. This password will be required to unlock the vault and access your photos.
- Unlock the Vault: Once the vault is created, unlock it by entering your password.
- Add Photos: Add photos to the vault by importing them from your Camera Roll or other sources. Cryptomator will automatically encrypt the photos as they are added to the vault.
- Lock the Vault: When you’re finished, lock the vault to protect your photos. The photos will be encrypted and inaccessible until you unlock the vault again.
Using VeraCrypt
VeraCrypt is another popular encryption tool that can be used to encrypt photos on your iPhone. However, VeraCrypt requires a bit more technical expertise to set up and use.
- Install VeraCrypt on Your Computer: VeraCrypt is primarily a desktop application, so you’ll need to install it on your computer.
- Create an Encrypted Container: Use VeraCrypt to create an encrypted container on your computer. This container will serve as a secure storage space for your photos.
- Transfer Photos to the Container: Transfer your photos to the encrypted container on your computer.
- Sync the Container to Your iPhone: Use a cloud storage service like iCloud Drive or Dropbox to sync the encrypted container to your iPhone.
- Use a VeraCrypt-Compatible App on Your iPhone: Download a VeraCrypt-compatible app on your iPhone (e.g., iVeraCrypt).
- Unlock the Container: Use the app to unlock the encrypted container by entering your password.
- Access Your Photos: Access your encrypted photos through the app.
Considerations
- Password Security: The security of your encrypted photos depends on the strength of your password. Use a strong, unique password and store it in a safe place.
- Backup: Make sure to back up your encrypted vaults or containers in case of data loss or device failure.
- Compatibility: Ensure that the encryption tool you choose is compatible with your iPhone and the cloud storage service you’re using (if applicable).
4.2 Hiding Photos Using Steganography
Steganography is the technique of hiding secret information within an ordinary, non-secret file or message to avoid detection. In the context of photos, steganography can be used to hide sensitive images within other, less sensitive images.
Using Steganography Apps
Several steganography apps are available on the App Store that allow you to hide photos within other photos. Here’s how to use one of these apps:
- Download and Install a Steganography App: Download a steganography app from the App Store on your iPhone (e.g., Hide Pictures, Stego Photo).
- Choose a Cover Image: Select a cover image that will be used to hide the secret photo. This should be an image that is not sensitive and will not attract attention.
- Select the Secret Photo: Select the photo that you want to hide within the cover image.
- Hide the Photo: Use the app to hide the secret photo within the cover image. The app will typically use an encryption algorithm to embed the secret photo into the cover image in a way that is not visible to the naked eye.
- Save the Steganographic Image: Save the resulting steganographic image to your Camera Roll or other storage location.
Revealing the Hidden Photo
To reveal the hidden photo, you’ll need to use the same steganography app and the correct password or key (if applicable).
- Open the Steganography App: Open the steganography app on your iPhone.
- Load the Steganographic Image: Load the steganographic image that contains the hidden photo.
- Enter the Password or Key: If the app requires a password or key, enter it to decrypt the hidden photo.
- Reveal the Photo: Use the app to reveal the hidden photo. The app will extract the secret photo from the cover image and display it on your screen.
Considerations
- Security: The security of steganography depends on the algorithm used to hide the photo and the secrecy of the password or key (if applicable). Use a strong password and choose a steganography app that uses a robust encryption algorithm.
- Detection: While steganography can be effective at hiding photos, it’s not foolproof. Sophisticated analysis techniques can be used to detect the presence of hidden information in an image.
- File Size: Hiding a photo within another photo will typically increase the file size of the resulting steganographic image.
4.3 Using a VPN for Secure Photo Transfer
A virtual private network (VPN) encrypts your internet traffic and routes it through a secure server, protecting your data from eavesdropping and interception. Using a VPN can be especially useful when transferring sensitive photos over public Wi-Fi networks.
Setting Up a VPN on Your iPhone
- Choose a VPN Provider: Choose a reputable VPN provider and sign up for a subscription. Some popular VPN providers include NordVPN, ExpressVPN, and Surfshark.
- Download the VPN App: Download the VPN app from the App Store on your iPhone.
- Install the VPN App: Install the VPN app on your iPhone and launch it.
- Sign In: Sign in to the VPN app using your VPN account credentials.
- Connect to a VPN Server: Choose a VPN server location and connect to it. The VPN app will encrypt your internet traffic and route it through the selected server.
Transferring Photos Over VPN
Once the VPN is connected, you can securely transfer your photos using cloud storage services, email, or other methods.
- Open the Photos App: Open the Photos app on your iPhone and select the photos you want to transfer.
- Share the Photos: Share the photos using your preferred method (e.g., upload to cloud storage, attach to email, send via messaging app).
- Transfer Over VPN: The photos will be transferred over the encrypted VPN connection, protecting them from eavesdropping and interception.
Considerations
- VPN Provider: Choose a reputable VPN provider with a strong privacy policy and a proven track record of protecting user data.
- Server Location: Choose a VPN server location that is geographically close to you for optimal performance.
- VPN Security: Ensure that the VPN uses strong encryption protocols to protect your data.
By using these advanced techniques, you can add extra layers of security to your sensitive photos, protecting them from unauthorized access and interception.
5. Best Practices for Maintaining Photo Privacy
Yes, following best practices for maintaining photo privacy involves being mindful of where you store