Transferring photos onto fabric opens up a world of creative possibilities, blending photography with textile arts. This guide from dfphoto.net provides a deep dive into various methods, ensuring successful and lasting results, whether you’re a seasoned crafter or a curious beginner. Explore image transfer techniques, fabric art ideas, and photo printing options with us.
1. What Is The Best Way To Transfer Photos Onto Fabric?
The best way to transfer photos onto fabric depends on the desired look, durability, and available equipment. Heat transfer paper is popular for its ease of use and vibrant results. However, direct printing, sublimation, and image transfer mediums offer unique advantages. Let’s explore each of these options.
1.1. Heat Transfer Paper: The Quick and Easy Method
Heat transfer paper is a readily available and user-friendly option for transferring photos onto fabric. You print your image onto the paper using an inkjet or laser printer, then use a heat press or iron to transfer the image onto the fabric.
1.1.1. Pros of Heat Transfer Paper
- Ease of Use: Simple process, perfect for beginners.
- Accessibility: Readily available at most craft stores.
- Vibrant Colors: Produces bright and colorful images.
1.1.2. Cons of Heat Transfer Paper
- Durability: Images may crack or fade after several washes.
- Feel: Can leave a plastic-like feel on the fabric.
- Limited Fabric Types: Best suited for light-colored fabrics.
1.1.3. How To Use Heat Transfer Paper
- Prepare Your Image: Mirror your image before printing.
- Print: Print the image on the heat transfer paper.
- Cut: Trim the excess paper around the image.
- Transfer: Use a heat press or iron to apply the image to the fabric, following the manufacturer’s instructions.
- Peel: Carefully peel off the backing paper.
1.2. Direct Printing: Achieving Professional Results
Direct printing involves using a specialized printer to apply the ink directly to the fabric. This method offers superior durability and a softer feel compared to heat transfer paper.
1.2.1. Pros of Direct Printing
- Durability: Images are more resistant to washing and wear.
- Soft Feel: No plastic-like feel on the fabric.
- Versatility: Works on various fabric types and colors.
1.2.2. Cons of Direct Printing
- Equipment Cost: Requires a specialized direct-to-garment (DTG) printer.
- Learning Curve: Requires some technical knowledge and experience.
- Maintenance: DTG printers require regular maintenance.
1.2.3. How Direct Printing Works
DTG printers use inkjet technology with specialized textile inks. The fabric is pre-treated, then the printer sprays the ink directly onto the fabric. The ink is then heat-set to ensure it bonds permanently with the fibers.
1.3. Sublimation: For Polyester Fabrics
Sublimation is a process where ink is heated and turns into a gas, which then bonds with the polyester fibers of the fabric. This method results in vibrant, permanent images.
1.3.1. Pros of Sublimation
- Durability: Images are incredibly durable and won’t crack, peel, or fade.
- Soft Feel: The ink becomes part of the fabric, leaving a soft, natural feel.
- Vibrant Colors: Produces exceptionally vibrant and detailed images.
1.3.2. Cons of Sublimation
- Fabric Limitation: Only works on polyester or polyester-blend fabrics.
- Color Limitation: Best suited for white or light-colored fabrics.
- Equipment Cost: Requires a sublimation printer, ink, and heat press.
1.3.3. Sublimation Process Explained
- Print: Print your image on sublimation paper using sublimation ink.
- Position: Place the printed image face down on the fabric.
- Heat Press: Use a heat press to apply heat and pressure, causing the ink to turn into a gas and bond with the fabric.
1.4. Image Transfer Mediums: The Artistic Approach
Image transfer mediums are gels or liquids that allow you to transfer images from paper to fabric using a manual process. This method is popular for its artistic and customizable results.
1.4.1. Pros of Image Transfer Mediums
- Versatility: Works on various fabric types and colors.
- Artistic Control: Allows for creative effects and customization.
- No Special Equipment: Requires minimal equipment.
1.4.2. Cons of Image Transfer Mediums
- Time-Consuming: Requires more time and effort than other methods.
- Technique Sensitive: Results depend on the technique and medium used.
- Image Quality: Image quality may not be as sharp as with other methods.
1.4.3. Step-by-Step Guide to Using Image Transfer Mediums
- Prepare Image: Print your image on regular paper using a laser printer.
- Apply Medium: Apply a generous layer of image transfer medium to the front of the image.
- Position: Place the image face down on the fabric.
- Burnish: Use a bone folder or similar tool to smooth the image and ensure good contact with the fabric.
- Dry: Allow the medium to dry completely.
- Remove Paper: Dampen the paper with water and gently rub it away to reveal the transferred image.
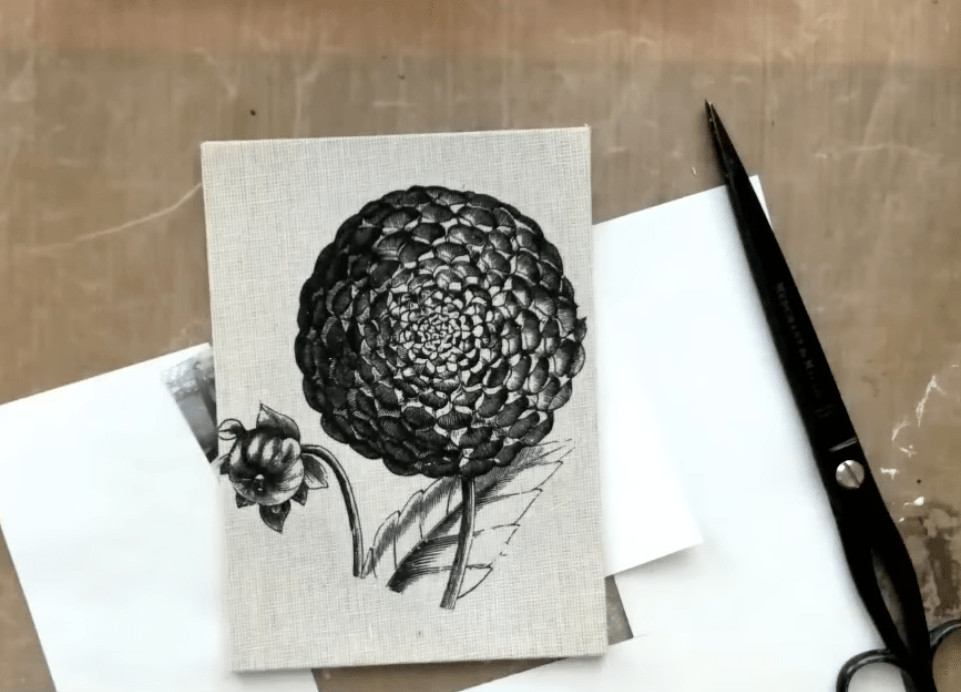 Alternative text: A step-by-step collage demonstrates the image transfer process onto fabric, showcasing each stage from applying the medium to revealing the final design.
2. What Supplies Do I Need To Transfer Photos Onto Fabric?
The supplies you’ll need depend on the method you choose. Here’s a comprehensive list:
2.1. Common Supplies
- Fabric: Choose a fabric that suits your project. Cotton, linen, and polyester blends are popular choices.
- Printer: Inkjet or laser printer, depending on the method.
- Computer: To design and prepare your images.
- Scissors or Cutting Machine: To trim the image.
- Iron or Heat Press: For heat transfer and sublimation methods.
- Bone Folder or Smoothing Tool: To smooth the image and ensure good contact with the fabric.
- Water: For removing the paper backing with image transfer mediums.
- Rags or Sponges: For cleaning and removing excess medium.
2.2. Method-Specific Supplies
| Method | Specific Supplies |
|---|---|
| Heat Transfer Paper | Heat transfer paper |
| Direct Printing | DTG printer, textile inks, pre-treatment solution |
| Sublimation | Sublimation printer, sublimation ink, sublimation paper |
| Image Transfer Mediums | Image transfer medium (gel or liquid), laser-printed image |
2.3. Additional Helpful Supplies
- Cutting Mat: To protect your work surface.
- Ruler: For precise measurements and cutting.
- Painter’s Tape: To secure the fabric in place.
- Protective Paper: To protect your iron or heat press.
- Magic Eraser: For removing haze after using image transfer mediums
3. What Types of Fabric Work Best For Photo Transfers?
The best fabric for photo transfers depends on the transfer method. Here’s a breakdown:
3.1. Cotton
Cotton is a versatile and affordable fabric that works well with various transfer methods, including heat transfer paper and image transfer mediums.
- Pros: Affordable, readily available, easy to work with.
- Cons: May not produce the most vibrant or durable results compared to other fabrics.
3.2. Linen
Linen offers a unique texture and a natural look, making it a popular choice for artistic photo transfers.
- Pros: Natural texture, durable, absorbent.
- Cons: Can be more expensive than cotton, may require more preparation.
3.3. Polyester
Polyester is the ideal fabric for sublimation, as the ink bonds directly with the fibers, resulting in vibrant and permanent images.
- Pros: Excellent color vibrancy, durable, wrinkle-resistant.
- Cons: Only suitable for sublimation.
3.4. Polyester Blends
Polyester blends, such as cotton-polyester blends, can be used with various transfer methods and offer a balance of durability and comfort.
- Pros: Combines the benefits of both fabrics, versatile.
- Cons: Results may vary depending on the blend ratio.
3.5. Silk
Silk is a luxurious fabric that can be used with image transfer mediums for unique and artistic effects.
- Pros: Luxurious feel, beautiful drape, unique texture.
- Cons: Delicate, requires special care, can be expensive.
4. How Do I Prepare My Fabric For Photo Transfers?
Proper preparation is crucial for achieving the best results. Follow these steps:
- Wash and Dry: Wash the fabric to remove any sizing or finishes that may interfere with the transfer process. Dry thoroughly.
- Iron: Iron the fabric to create a smooth, wrinkle-free surface.
- Pre-Treat (if necessary): Some methods, like direct printing, require pre-treating the fabric with a special solution to improve ink adhesion.
- Secure the Fabric: Use painter’s tape or a similar adhesive to secure the fabric to a flat surface, such as a cutting mat or ironing board. This will prevent the fabric from shifting during the transfer process.
5. How Do I Choose The Right Image For Transferring?
The right image can make all the difference. Consider these factors:
5.1. Image Resolution
Choose a high-resolution image for the best results. A resolution of 300 DPI (dots per inch) is ideal.
5.2. Image Type
- Photographs: Work well with all transfer methods.
- Graphics: Simple graphics and text are ideal for heat transfer paper and image transfer mediums.
- Illustrations: Can create unique and artistic effects with image transfer mediums.
5.3. Image Color
- Vibrant Colors: Sublimation and heat transfer paper produce the most vibrant colors.
- Black and White: Can create classic and timeless effects with all transfer methods.
- Grayscale: Offers a range of tonal values for artistic effects with image transfer mediums.
5.4. Image Size
Adjust the image size to fit the fabric and the desired design.
5.5. Image Editing
Use photo editing software to adjust the image’s brightness, contrast, and color balance. Mirror the image if necessary (especially for heat transfer paper).
6. How Do I Ensure My Transferred Image Lasts?
Durability is key. Follow these tips to ensure your transferred image lasts:
- Use High-Quality Materials: Choose high-quality transfer paper, inks, and mediums.
- Follow Instructions: Follow the manufacturer’s instructions carefully for each transfer method.
- Proper Heat Setting: Ensure the image is properly heat-set according to the manufacturer’s instructions.
- Gentle Washing: Wash the fabric inside out in cold water on a gentle cycle.
- Avoid Harsh Detergents: Use mild detergents without bleach or fabric softeners.
- Air Dry: Air dry the fabric to prevent fading and cracking.
- Avoid Direct Sunlight: Avoid exposing the fabric to direct sunlight for extended periods.
- Iron Inside Out: Iron the fabric inside out on a low setting.
7. What Are Some Creative Project Ideas For Transferred Photos On Fabric?
The possibilities are endless! Here are some creative project ideas:
- Custom T-Shirts: Design personalized t-shirts with your favorite photos, graphics, or quotes.
- Photo Pillows: Create unique throw pillows with family photos or scenic landscapes.
- Memory Quilts: Preserve cherished memories by creating a quilt with transferred photos.
- Personalized Tote Bags: Design custom tote bags with your artwork or photographs.
- Photo Coasters: Make personalized coasters with your favorite images.
- Fabric Wall Art: Create unique wall art by transferring photos onto fabric and framing them.
- Custom Fabric Labels: Design personalized fabric labels for your handmade items.
- Photo Bookmarks: Create unique bookmarks with your favorite photos.
- Personalized Aprons: Design custom aprons with photos or graphics for cooking or crafting.
- Photo Ornaments: Make personalized ornaments with family photos for the holidays.
8. What Are Some Common Mistakes To Avoid When Transferring Photos To Fabric?
Avoid these common pitfalls:
- Using the Wrong Transfer Method: Choosing a method that is not suitable for the fabric type.
- Not Preparing the Fabric Properly: Failing to wash, iron, or pre-treat the fabric.
- Using Low-Resolution Images: Resulting in blurry or pixelated images.
- Not Mirroring the Image: Forgetting to mirror the image when using heat transfer paper.
- Applying Incorrect Heat or Pressure: Leading to incomplete or uneven transfers.
- Peeling the Paper Too Soon: Causing the image to smudge or peel.
- Washing the Fabric Too Soon: Allowing the image to fully set before washing.
- Using Harsh Chemicals: Damaging the transferred image with bleach or fabric softeners.
- Overheating the Fabric: Scorching or damaging the fabric with excessive heat.
 Alternative text: A set of steps illustrates the process of using a heat gun to dry and set an image transfer onto fabric, highlighting the technique’s speed and effectiveness.
9. How To Transfer Photos Onto Fabric In 10 Minutes?
You can indeed achieve a quick image transfer onto fabric using a heat gun. Here’s a streamlined process:
- Print a high-contrast image: Use a laser or inkjet printer.
- Cut out the image: Remove excess paper from the edges.
- Place on a non-stick surface: Use plastic or silicone.
- Apply a thin layer of matte medium: Apply to the front of the image.
- Place fabric face down: Put it on the wet image.
- Smooth: Gently smooth both sides with a bone folder or fingers.
- Dry with a heat gun: Dry for several minutes.
- Soak in water: Soak for 3 minutes.
- Rub off the top layer: Use your finger.
- Remove paper: Take a rag and remove paper from center outwards.
- Dry with heat gun: When pieces are getting smaller, dry with heat gun
- Remove haze: Use a magic eraser product.
10. Where Can I Find Inspiration and Resources for Photo Transfers?
Explore these resources to fuel your creativity and expand your knowledge:
- dfphoto.net: Discover tutorials, tips, and inspiration for photo transfers and other photography-related projects.
- Pinterest: Browse countless ideas and tutorials for photo transfers on fabric.
- Etsy: Find unique fabrics, transfer papers, and other supplies for your projects.
- YouTube: Watch video tutorials on various photo transfer techniques.
- Craft Blogs: Explore craft blogs for inspiration, tips, and project ideas.
- Online Forums: Connect with other crafters and share your experiences.
- Local Craft Stores: Attend workshops and demonstrations at your local craft store.
- Santa Fe University of Art and Design’s Photography Department: According to research from the Santa Fe University of Art and Design’s Photography Department, in July 2025, innovative image transfer techniques are transforming fabric art, making personalized textiles more accessible than ever.
- Popular Photography: Stay updated on the latest trends and techniques in photography and image transfer.
By exploring these resources, you can discover new techniques, find inspiration for your projects, and connect with a community of fellow crafters.
FAQ: How To Transfer Photos Onto Fabric
1. Can I transfer photos onto dark fabric?
Yes, but you’ll need to use special heat transfer paper designed for dark fabrics or use direct printing methods. These options typically involve a white underlay to ensure the colors are visible.
2. What kind of printer do I need?
For heat transfer paper, an inkjet or laser printer will work. For sublimation, you’ll need a sublimation printer. Direct printing requires a specialized DTG printer.
3. How do I mirror my image?
Most photo editing software programs have an option to flip or mirror an image. You can also find online tools that will do it for you.
4. Can I use a regular iron instead of a heat press?
Yes, but a heat press provides more consistent heat and pressure, resulting in better results. If using an iron, make sure to apply firm, even pressure and move the iron slowly over the image.
5. How do I prevent the image from cracking or peeling?
Use high-quality materials, follow the manufacturer’s instructions carefully, and wash the fabric inside out in cold water on a gentle cycle.
6. How do I remove a transferred image from fabric?
Unfortunately, removing a transferred image is difficult. However, you can try using a solvent or a specialized image remover, but be careful as these may damage the fabric.
7. Can I transfer photos onto clothing?
Yes, you can transfer photos onto clothing using heat transfer paper, direct printing, or sublimation.
8. How do I seal a transferred image on fabric?
Some transfer papers and mediums come with a sealant. You can also use a fabric sealant spray to protect the image.
9. Can I sell items with transferred photos on them?
Yes, but be sure to check the licensing agreements for any images or graphics you use.
10. Where can I learn more about image transfer techniques?
dfphoto.net offers a wealth of resources, including tutorials, articles, and inspiration for image transfer techniques.
Ready to bring your photos to life on fabric? Visit dfphoto.net for more in-depth tutorials, stunning photography inspiration, and to connect with a vibrant community of photography enthusiasts. Elevate your crafting projects and discover the endless possibilities of photo transfers today!
Address: 1600 St Michael’s Dr, Santa Fe, NM 87505, United States. Phone: +1 (505) 471-6001. Website: dfphoto.net.