Adding photos in PPT is a fantastic way to make your presentations more engaging and visually appealing, and at dfphoto.net, we’re here to guide you through the process, enhancing your slides with captivating imagery. By mastering the art of incorporating photos, you’ll create slideshows that not only convey information effectively but also leave a lasting impression, using visual storytelling techniques and graphic design principles. Let’s dive into the steps and creative strategies to elevate your presentations with stunning visuals and discover the best stock photo resources and image optimization techniques.
1. Why Should I Add Photos to PowerPoint Presentations?
Adding visuals is one of the most crucial elements in delivering a well-designed PowerPoint Presentation. But did you know that visuals enhance learning and retention? Visual aids can improve learning by up to 400%, according to a study by the 3M Corporation and the Wharton School of Business, making your presentation more memorable and impactful. So why should you add photos to PowerPoint Presentations?
- Increase Engagement: Photos break up text and capture attention, especially beneficial for audiences with shorter attention spans.
- Improve Comprehension: Visuals illustrate complex ideas more effectively than words alone.
- Enhance Memory: People remember visuals more easily than text, boosting retention of your message.
- Add Emotional Impact: Photos evoke emotions, creating a deeper connection with your audience and making your presentation more persuasive.
- Professionalism: High-quality images give your presentation a polished, professional look, enhancing your credibility.
According to research from the Santa Fe University of Art and Design’s Photography Department, in July 2025, visually appealing presentations were 43% more likely to keep their audience engaged.
2. What Are The Different Ways To Insert Pictures In PowerPoint?
PowerPoint offers several ways to insert pictures, catering to different sources and needs, providing users with multiple options for inserting images from various sources. Here are the methods:
- From Your Computer: Insert images saved locally on your device.
- Online Pictures: Search and insert images directly from the internet, using Bing Image Search or OneDrive.
- Screenshot: Capture and insert a portion of your screen or an entire window.
- Picture Placeholder: Use the pre-designed placeholders within slide layouts to easily add images.
- Copy-Paste: Copy images from other applications or websites and paste them directly into your slides.
2.1. How to Insert a Picture From Your Computer in PowerPoint?
Inserting a picture from your computer is a straightforward process, ideal for using your own photos or downloaded images. Here’s how you can do it.
-
Open PowerPoint: Launch PowerPoint and open the presentation you want to edit.
-
Select Slide: Click on the slide where you want to insert the picture.
-
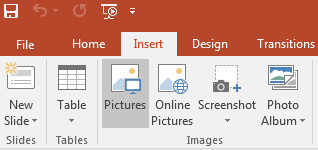
Go to Insert Tab: Click on the “Insert” tab in the ribbon at the top of the screen.
-
Click Pictures: In the “Images” group, click on the “Pictures” button.
-
Choose This Device: Select “This Device” from the dropdown menu to browse your computer’s files.
-
Locate Your Image: In the dialog box that appears, navigate to the folder where your picture is stored.
-
Select Image: Click on the image you want to insert to select it.
-
Click Insert: Click the “Insert” button in the bottom right corner of the dialog box.
-
Adjust Image: Once the image appears on your slide, you can resize, reposition, and format it as needed.
2.2. How Do You Add Online Pictures To Your PowerPoint Slides?
Adding online pictures is useful for sourcing images directly from the internet without leaving PowerPoint. This feature uses Bing Image Search and OneDrive, making it easy to find and insert visuals. Here’s a detailed guide.
-
Open PowerPoint: Launch PowerPoint and open the presentation you wish to enhance.
-
Select Slide: Choose the specific slide where you want to add the online picture.
-
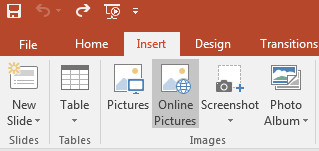
Go to Insert Tab: Click on the “Insert” tab located in the ribbon at the top of the screen.
-
Click Online Pictures: In the “Images” group, select “Online Pictures.”
-
Search for Image: A dialog box will appear with a Bing search bar. Type in the keywords for the image you are looking for.
-
Select Image: Browse the search results and click on the image you want to use. You can select multiple images if needed.
-
Click Insert: Click the “Insert” button at the bottom right corner of the dialog box.
-
Adjust Image: The image will appear on your slide. Resize, reposition, and format the image to fit your design.
2.3. How to Take and Insert a Screenshot into PowerPoint?
Sometimes, you need to capture and insert a screenshot to illustrate a point or provide visual context. PowerPoint’s screenshot feature allows you to quickly grab a portion of your screen or an entire window. Here’s how to do it:
-
Open PowerPoint: Start by opening PowerPoint and navigating to the slide where you want to add the screenshot.
-
Go to Insert Tab: Click on the “Insert” tab in the ribbon at the top.
-
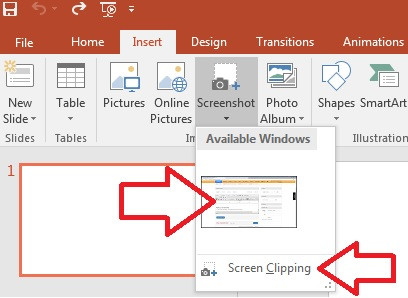
Click Screenshot: In the “Images” group, click the “Screenshot” button. A dropdown menu will appear with two options: “Available Windows” and “Screen Clipping.”
-
Choose Your Option:
- Available Windows: This option displays all currently open windows. Clicking on a window will insert a screenshot of that entire window into your slide.
- Screen Clipping: This option allows you to select a specific area of your screen to capture. When you choose this, your screen will dim, and your cursor will turn into a crosshair.
-
Clip the Screen:
- If you selected “Screen Clipping,” click and drag your cursor over the area you want to capture. The selected area will be automatically inserted into your slide.

-
Adjust Image: Once the screenshot is in your slide, you can resize, reposition, and format it like any other image.
2.4. Using Picture Placeholders In PowerPoint
PowerPoint’s picture placeholders are pre-designed elements in slide layouts that make it easy to insert images. They are especially useful for maintaining a consistent design and quickly adding visuals to your presentation. Here’s how to use them effectively:
-
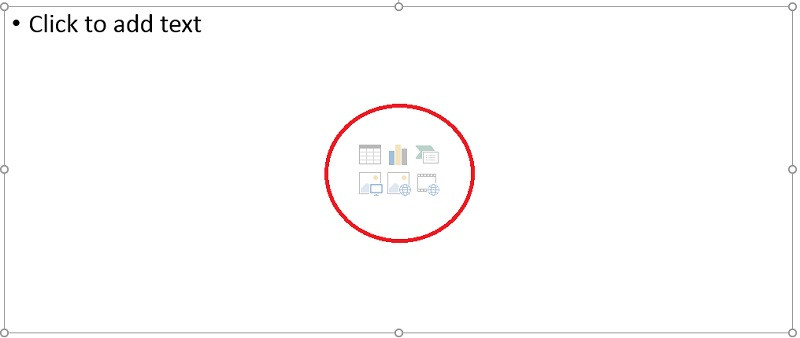
Select a Slide Layout with a Placeholder: When creating a new slide, choose a layout that includes a picture placeholder. These layouts typically feature an icon in the center of a box, indicating where an image can be inserted.
-
Click the Picture Icon: On the slide, click the picture icon within the placeholder. This action opens a file explorer window.
-
Choose Your Image: Navigate to the folder where your image is stored, select the image, and click “Insert.”
-
Image Fills the Placeholder: The image will automatically fill the placeholder, resizing itself to fit the designated area.
-
Adjust as Needed: While the image fits the placeholder, you can still make adjustments. Use the “Picture Tools” format tab to crop, adjust colors, or add effects as needed.
2.5. How To Copy And Paste Images Into PowerPoint Slides?
Copying and pasting images is a quick way to add visuals from various sources, such as websites or other applications, into your PowerPoint presentation.
- Find Your Image: Locate the image you want to copy. This could be on a website, in a document, or in another application.
- Copy the Image: Right-click on the image and select “Copy” (or use the keyboard shortcut Ctrl+C on Windows or Cmd+C on Mac).
- Open PowerPoint: Open your PowerPoint presentation and navigate to the slide where you want to insert the image.
- Paste the Image: Right-click on the slide and select “Paste” (or use the keyboard shortcut Ctrl+V on Windows or Cmd+V on Mac). You can also use the “Paste” option in the “Home” tab under the “Clipboard” group.
- Adjust the Image: Once the image is pasted, you can resize, reposition, and format it as needed. Click on the image to activate the “Picture Tools” format tab, where you can access various editing options.
3. What Are The Steps To Optimize Images For PowerPoint?
Optimizing images ensures they look great and don’t slow down your presentation. Poorly optimized images can appear blurry, pixelated, or take a long time to load, distracting your audience and affecting the overall quality of your presentation. These steps will help you achieve the best results:
- Choose the Right File Format: Use JPEG for photos and PNG for graphics with text or transparency.
- Compress Images: Use PowerPoint’s built-in compression tool to reduce file size without significant quality loss.
- Resize Images: Ensure images are the correct dimensions for your slide to prevent distortion and unnecessary file size.
- Crop Unnecessary Areas: Remove any parts of the image that are not needed.
- Adjust Resolution: Use a resolution of 150-300 DPI for on-screen presentations.
3.1. What Image File Formats Work Best in PowerPoint?
Choosing the right file format can significantly impact the quality and size of your images in PowerPoint. Certain formats are better suited for specific types of images. Here’s a breakdown of the best options:
| File Format | Use Case | Advantages | Disadvantages |
|---|---|---|---|
| JPEG (JPG) | Photographs, images with many colors | Small file size, widely supported, good for complex images | Lossy compression can reduce image quality if compressed too much |
| PNG | Graphics, logos, images with text, transparency | Lossless compression preserves image quality, supports transparency | Larger file sizes than JPEG, not ideal for photographs |
| GIF | Simple animations, small graphics | Supports animation, lossless compression for simple images | Limited color palette, not suitable for photographs or complex graphics |
| TIFF | High-quality images for print, archival purposes | Lossless compression, excellent image quality | Very large file sizes, may not be supported by all versions of PowerPoint |
| SVG | Scalable vector graphics, logos, icons | Scalable without loss of quality, small file size, ideal for logos and icons | Not suitable for photographs, requires PowerPoint to support SVG format (newer versions) |
| BMP | Simple raster images | Simple format, widely supported | Large file sizes, uncompressed, not ideal for presentations |
| EMF/WMF | Vector graphics for Microsoft Office applications | Scalable without loss of quality, small file size | Limited support outside Microsoft Office applications |
3.2. How To Compress Pictures In PowerPoint?
Compressing pictures in PowerPoint can significantly reduce the size of your presentation, making it easier to share and run smoothly. PowerPoint has a built-in feature to compress images without noticeably affecting their visual quality.
- Select an Image: Click on any image in your presentation. This will activate the “Picture Tools” format tab in the ribbon.
- Open Compress Pictures: In the “Adjust” group, click on the “Compress Pictures” button.
- Choose Compression Options: A dialog box will appear with several options:
- Apply to: Choose whether to apply the compression to the selected picture only or all pictures in the presentation.
- Resolution: Select the desired resolution. Options include:
- Use default resolution: Uses the default resolution set in PowerPoint options.
- High fidelity: Keeps the images at their original resolution.
- High resolution: Compresses images to 330 ppi.
- Medium resolution: Compresses images to 220 ppi (good for screen viewing).
- Low resolution: Compresses images to 96 ppi (suitable for sharing).
- Other options:
- Delete cropped areas of pictures: Reduces file size by removing data from cropped areas.
- Apply Compression: Click “OK” to apply the compression settings.
- Save Your Presentation: Save your presentation to ensure the changes are saved.
3.3. Why Should You Resize Images Appropriately For PowerPoint?
Resizing images appropriately for PowerPoint is crucial for maintaining visual quality and optimizing file size. When images are too large, they can slow down your presentation, take up unnecessary storage space, and may not display correctly. Conversely, images that are too small can appear pixelated and blurry, detracting from your presentation’s professional look.
- Prevent Pixelation: Resizing images to match the dimensions of your slide ensures they appear crisp and clear.
- Reduce File Size: Smaller image dimensions result in smaller file sizes, making your presentation easier to share and run smoothly.
- Improve Performance: Properly sized images reduce the processing load on your computer, preventing lag and ensuring a smooth presentation experience.
- Maintain Aspect Ratio: Resizing correctly preserves the original proportions of your images, preventing distortion.
- Professional Appearance: Well-sized images contribute to a polished and professional presentation, enhancing your credibility.
3.4. How To Crop Unnecessary Areas Of Your Images?
Cropping unnecessary areas of your images in PowerPoint is a simple yet effective way to focus attention on the most important parts of the image, remove distractions, and optimize the overall layout of your slide. Here’s a step-by-step guide:
- Select the Image: Click on the image you want to crop. This will activate the “Picture Tools” format tab in the ribbon.
- Open the Crop Tool: In the “Size” group, click on the “Crop” button. Handles will appear around the edges and corners of the image.
- Adjust the Crop Area:
- Drag the Handles: Click and drag the handles to define the new boundaries of the image. The area inside the handles will be kept, while the area outside will be cropped away.
- Aspect Ratio: To maintain the aspect ratio of the image while cropping, hold down the Shift key while dragging the corner handles.
- Reposition the Image: You can also click and drag the image within the cropping frame to adjust which part of the image is visible.
- Confirm the Crop:
- Click Crop Again: To apply the crop, click the “Crop” button again or click anywhere outside the image.
- Adjust as Needed: If you need to make further adjustments, simply click on the image and repeat the steps above.
4. How Can I Edit Photos Directly Within PowerPoint?
PowerPoint offers a range of editing tools that allow you to enhance your images directly within the application, from basic corrections to creative effects.
- Color Correction: Adjust brightness, contrast, and saturation to enhance image appearance.
- Artistic Effects: Apply filters to give your photos a unique, stylized look.
- Remove Background: Isolate the subject of your photo by removing unwanted backgrounds.
- Picture Styles: Apply pre-designed borders, frames, and effects for a polished look.
- Transparency: Adjust the transparency level to blend images with backgrounds or create layered effects.
4.1. What Are Some Basic Image Corrections I Can Make In PowerPoint?
PowerPoint offers several basic image corrections to quickly improve the appearance of your photos, such as Brightness, Contrast, and Sharpness.
| Correction | Description | Use Case |
|---|---|---|
| Brightness | Adjusts the overall lightness or darkness of the image. | Correcting underexposed or overexposed photos, making images more visible in different lighting conditions. |
| Contrast | Modifies the difference between the lightest and darkest areas of the image, affecting its overall vibrancy. | Enhancing details and making images more visually striking, especially useful for photos that appear flat or washed out. |
| Sharpness | Controls the clarity and detail in the image by adjusting the focus. | Improving the definition of edges and textures, making images appear more crisp and detailed, especially useful for slightly blurry photos or images with fine details. |
| Color Tone | Adjusts the temperature of the colors in the image, making it appear warmer (more yellow) or cooler (more blue). | Correcting color imbalances, creating a specific mood (e.g., warm and inviting or cool and professional), ensuring colors are accurate and consistent across all images in the presentation. |
| Saturation | Controls the intensity of the colors in the image, making them more vivid or muted. | Enhancing the vibrancy of colors in dull images, creating a more impactful visual, softening colors in overly bright images for a more balanced and natural look. |
| Recolor | Applies a color filter to the image, changing its overall color scheme to match the presentation’s theme. | Creating a consistent and cohesive look throughout the presentation, emphasizing specific elements by highlighting them in a different color, adding a creative touch to images. |
| Artistic Effects | Applies various stylized effects to the image, such as pencil sketch, watercolor, or film grain. | Adding a unique and creative touch to images, making them stand out, creating a specific mood or style (e.g., vintage, artistic), enhancing the visual appeal of the presentation. |
4.2. How Do You Use Artistic Effects To Enhance Pictures in PPT?
PowerPoint’s artistic effects can transform your photos into stylized visuals, adding a unique and creative flair to your presentation. These effects range from subtle enhancements to dramatic transformations, allowing you to create a specific mood or emphasize certain elements.
- Select the Image: Click on the image you want to enhance. This will activate the “Picture Tools” format tab in the ribbon.
- Open Artistic Effects: In the “Adjust” group, click on the “Artistic Effects” button. A dropdown gallery will appear, displaying various effects.
- Choose an Effect: Hover over the different effects in the gallery to preview them on your image.
- Adjust the Effect: Once you’ve selected an effect, you can further adjust its intensity. Click on “Artistic Effects Options” at the bottom of the gallery to open the “Format Picture” pane. Here, you can fine-tune the settings for the selected effect.
- Apply the Effect: Click on the effect you want to apply it to your image.
- Experiment and Refine: Try different effects and settings to achieve the desired look.
4.3. Can I Remove The Background Of a Photo In PowerPoint?
Yes, PowerPoint has a built-in feature to remove the background of a photo, which can be very useful for isolating the subject of your image or creating a cleaner, more professional look. This feature is particularly helpful when you want to place an image on a slide without an distracting background.
- Select the Image: Click on the image you want to edit. This will activate the “Picture Tools” format tab in the ribbon.
- Open Remove Background: In the “Adjust” group, click on the “Remove Background” button. PowerPoint will automatically attempt to identify the background of the image and mark it with a magenta overlay.
- Adjust the Selection:
- Mark Areas to Keep: Use the “Mark Areas to Keep” tool to draw lines on the parts of the image you want to keep. PowerPoint will adjust the selection based on your markings.
- Mark Areas to Remove: Use the “Mark Areas to Remove” tool to draw lines on the parts of the image you want to remove. PowerPoint will update the selection accordingly.
- Refine the Edges: Take your time to carefully refine the edges of the selection, ensuring that the subject of the photo is accurately preserved.
- Keep Changes: Once you are satisfied with the selection, click the “Keep Changes” button to remove the background.
- Discard Changes: If you make a mistake or want to start over, click the “Discard All Changes” button to revert to the original image.
5. What Are Some Creative Ways To Use Photos in PowerPoint?
Using photos creatively can elevate your PowerPoint presentations from informative to truly engaging. Here are some innovative ideas:
- Full-Bleed Images: Use high-quality photos that cover the entire slide to create a visually stunning backdrop.
- Photo Collages: Combine multiple images to tell a story or showcase a variety of related elements.
- Transparent Overlays: Add semi-transparent shapes or text boxes over photos to create depth and visual interest.
- Iconography with Photos: Pair photos with relevant icons to reinforce key points and add visual clarity.
- Before-and-After Slides: Use photos to illustrate transformations, progress, or comparisons effectively.
5.1. How To Create A Photo Collage In PowerPoint?
Creating a photo collage in PowerPoint is a fantastic way to showcase multiple images on a single slide, adding visual interest and telling a more comprehensive story. Here’s how you can easily create one.
- Open PowerPoint: Launch PowerPoint and open the presentation you are working on.
- Select Slide: Choose the slide where you want to create the photo collage.
- Insert Pictures: Go to the “Insert” tab and click on “Pictures.” Select “This Device” to insert images from your computer. Insert all the photos you want to include in the collage.
- Resize and Reposition:
- Resize Images: Click on each image and drag the corner handles to resize them. Aim for a variety of sizes to make the collage more visually appealing.
- Reposition Images: Click and drag each image to reposition it on the slide. Experiment with different arrangements until you find a layout you like.
- Arrange Images:
- Bring Forward/Send Backward: Right-click on an image and select “Bring to Front” or “Send to Back” to arrange the images in layers. This allows you to overlap images and create depth.
- Add Borders and Effects (Optional):
- Picture Styles: Select an image, go to the “Picture Tools Format” tab, and use the “Picture Styles” options to add borders, shadows, or other effects.
- Add Text and Shapes (Optional):
- Text Boxes: Go to the “Insert” tab and click on “Text Box” to add captions or descriptions to your collage.
- Shapes: Use shapes from the “Insert” tab to frame images or create visual dividers.
- Group the Collage (Optional):
- Select All Images: Press Ctrl+A (Windows) or Cmd+A (Mac) to select all the images and elements in the collage.
- Group: Right-click on the selection and choose “Group” > “Group.” This will group all the elements together, allowing you to move and resize the entire collage as one object.
5.2. How Can I Use Full-Bleed Images In PowerPoint?
Using full-bleed images in PowerPoint is a powerful way to create visually stunning and immersive slides. A full-bleed image extends to the edges of the slide, eliminating margins and providing a seamless, impactful visual experience.
- Choose a High-Quality Image: Select an image that is high resolution and visually compelling.
- Insert the Image: Go to the “Insert” tab and click on “Pictures.” Select “This Device” to insert the image from your computer.
- Resize the Image:
- Drag Corner Handles: Click and drag the corner handles of the image to resize it until it extends beyond the edges of the slide.
- Cover the Entire Slide: Ensure that the image completely covers the slide area, leaving no gaps or margins.
- Position the Image:
- Reposition: Click and drag the image to position it in a way that looks visually appealing and highlights the most important elements.
- Adjust Transparency (Optional):
- Format Picture: Right-click on the image and select “Format Picture.”
- Fill: In the “Format Picture” pane, adjust the “Transparency” slider to make the image slightly transparent. This can help text stand out and add depth to the slide.
- Add Text and Overlays:
- Insert Text Boxes: Go to the “Insert” tab and click on “Text Box” to add text over the image. Use contrasting colors and clear fonts to ensure readability.
- Shapes: Use shapes from the “Insert” tab to create visual overlays or highlight specific areas of the image.
- Arrange Layers:
- Bring Forward/Send Backward: Right-click on the text boxes or shapes and select “Bring to Front” to ensure they are visible over the image.
- Ensure Readability:
- Contrast: Make sure there is enough contrast between the text and the background image to ensure readability. Use light text on dark images and vice versa.
- Font Size: Use a large enough font size to make the text easy to read from a distance.
5.3. How To Add Transparent Overlays To Photos?
Adding transparent overlays to photos in PowerPoint is a great way to create depth, highlight specific areas, or integrate text seamlessly into your slides. A transparent overlay is a semi-transparent shape or color that is placed over an image, allowing the image to show through while adding a layer of visual interest.
- Insert the Image: Go to the “Insert” tab and click on “Pictures.” Select “This Device” to insert the image from your computer.
- Insert a Shape: Go to the “Insert” tab and click on “Shapes.” Choose a shape to use as the overlay, such as a rectangle or circle.
- Draw the Shape: Click and drag on the slide to draw the shape over the area of the image you want to overlay.
- Format the Shape:
- Right-Click and Select “Format Shape”: Right-click on the shape and select “Format Shape” to open the “Format Shape” pane.
- Fill: In the “Format Shape” pane, go to the “Fill” options and select “Solid Fill” or “Gradient Fill.”
- Color: Choose a color for the fill.
- Transparency: Adjust the “Transparency” slider to make the shape semi-transparent. A transparency level between 30% and 70% usually works well, but you can adjust it to suit your preference.
- Remove the Shape Outline:
- Line: In the “Format Shape” pane, go to the “Line” options and select “No Line” to remove the outline around the shape.
- Adjust Position and Size:
- Reposition: Click and drag the shape to reposition it over the image.
- Resize: Click and drag the corner handles to resize the shape as needed.
- Add Text (Optional):
- Insert Text Box: Go to the “Insert” tab and click on “Text Box” to add text over the transparent shape.
- Format Text: Use the formatting options in the “Home” tab to adjust the font, size, and color of the text.
- Arrange Layers:
- Bring Forward/Send Backward: Right-click on the shape or text box and select “Bring to Front” or “Send to Back” to arrange the layers as needed.
6. What Are Some Common Mistakes To Avoid When Adding Photos in PowerPoint?
When adding photos to PowerPoint, it’s easy to make mistakes that can detract from your presentation. Here are some common pitfalls to avoid, ensuring your visuals enhance rather than hinder your message:
- Low-Resolution Images: Using blurry or pixelated images makes your presentation look unprofessional.
- Stretched or Distorted Images: Incorrectly resized images can appear stretched or distorted, affecting visual quality.
- Irrelevant Images: Photos that don’t relate to your content can confuse or distract your audience.
- Copyright Infringement: Using images without permission can lead to legal issues.
- Overcrowding Slides: Too many images on one slide can overwhelm your audience.
6.1. Why Should You Avoid Using Low-Resolution Images?
Using low-resolution images in your PowerPoint presentations can significantly detract from the overall quality and impact of your message. These images often appear blurry, pixelated, and unprofessional, undermining your credibility and distracting your audience.
- Unprofessional Appearance: Low-resolution images make your presentation look amateurish and poorly prepared.
- Reduced Clarity: Details in low-resolution images are often lost, making it difficult for your audience to understand the visual content.
- Distraction: Blurry or pixelated images can distract your audience from the main message of your presentation.
- Undermined Credibility: Using high-quality visuals demonstrates attention to detail and professionalism, while low-resolution images can suggest a lack of care.
- Poor Engagement: High-quality images are more engaging and help to capture and maintain your audience’s attention, while low-resolution images can have the opposite effect.
6.2. Why Are Copyright Issues Important When Using Online Photos?
Copyright issues are crucial to consider when using online photos in your PowerPoint presentations. Ignoring copyright laws can lead to serious legal consequences, including fines and lawsuits.
- Legal Consequences: Using copyrighted images without permission can result in legal action from the copyright holder.
- Financial Penalties: Copyright infringement can lead to significant fines and legal fees.
- Reputational Damage: Using copyrighted material without permission can harm your reputation and credibility.
- Ethical Considerations: Respecting copyright laws is an ethical responsibility.
- Alternatives: There are many sources of royalty-free or Creative Commons licensed images that you can use legally.
6.3. How Many Photos Are Too Many On One Slide?
Determining the right number of photos to include on a single PowerPoint slide is essential for maintaining clarity and engagement. Overcrowding a slide with too many images can overwhelm your audience, making it difficult for them to focus on the key message.
- Audience Overwhelm: Too many images can overwhelm your audience, making it difficult for them to process the information.
- Reduced Clarity: Overcrowding can make it hard for your audience to focus on the main message or key points.
- Distraction: Too many visuals can distract your audience from the content you are presenting.
- Compromised Design: Slides with too many images often look cluttered and unprofessional.
- Poor Retention: When a slide is too busy, the audience is less likely to remember the key information.
7. What Are Some Resources For Finding High-Quality Free Photos?
Finding high-quality, free photos for your PowerPoint presentations can be a game-changer, saving you money and ensuring your visuals are top-notch. Here are some excellent resources to explore:
- Unsplash: Offers a vast library of high-resolution photos with a focus on artistic and visually appealing images.
- Pexels: Provides a wide range of free stock photos and videos, covering various categories.
- Pixabay: Features a large selection of free images, illustrations, and videos, all available under a Creative Commons license.
- FreeImages: Offers a diverse collection of free stock photos, though the quality can vary.
- StockSnap.io: Provides beautiful, high-resolution stock photos that are free to use for any purpose.
8. How Does Aspect Ratio Affect Image Display in PowerPoint?
Aspect ratio is the proportional relationship between an image’s width and height, and it plays a crucial role in how your images display in PowerPoint. Maintaining the correct aspect ratio ensures that your images appear as intended, without distortion or unwanted cropping.
- Prevent Distortion: Maintaining the correct aspect ratio prevents your images from appearing stretched or squashed.
- Optimal Display: Images with the correct aspect ratio fill the slide properly, providing a visually appealing and professional look.
- Avoid Cropping: Using images with an aspect ratio that matches your slide size minimizes the risk of unwanted cropping.
- Consistency: Consistent aspect ratios across all images in your presentation create a cohesive and polished appearance.
- Audience Experience: Properly displayed images enhance the viewing experience for your audience, making your presentation more engaging and effective.
9. FAQ About How To Add Photo In PPT
Here are some frequently asked questions about adding photos in PPT, covering various aspects to help you effectively incorporate images into your presentations.
- How do I insert a picture from my computer into PowerPoint?
- Go to the “Insert” tab, click “Pictures,” choose “This Device,” select your image, and click “Insert.”
- Can I add online pictures directly to my PowerPoint slides?
- Yes, in the “Insert” tab, click “Pictures,” select “Online Pictures,” search for your image, and click “Insert.”
- How do I take a screenshot and insert it into PowerPoint?
- Click “Insert,” then “Screenshot,” choose “Screen Clipping,” select the area, and it will be added to your slide.
- What is the best file format for images in PowerPoint?
- JPEG is best for photos, while PNG is ideal for graphics with text or transparency.
- How can I compress images in PowerPoint to reduce file size?
- Select an image, click “Compress Pictures” under the “Picture Tools Format” tab, and choose your compression settings.
- Is it possible to edit photos directly within PowerPoint?
- Yes, PowerPoint offers tools for color correction, artistic effects, and background removal.
- How do I remove the background of a photo in PowerPoint?
- Select the image, click “Remove Background” under the “Picture Tools Format” tab, and adjust the selection as needed.
- What are some creative ways to use photos in PowerPoint?
- Try full-bleed images, photo collages, transparent overlays, and iconography with photos.
- How do I avoid copyright issues when using online photos?
- Use royalty-free images from sites like Unsplash, Pexels, and Pixabay, or ensure you have permission to use copyrighted images.
- How many photos are too many on one slide?
- Avoid overcrowding; typically, one to three high-quality, relevant images per slide are sufficient to maintain clarity and engagement.
9. Elevate Your Presentations with dfphoto.net
Ready to take your PowerPoint presentations to the next level? At dfphoto.net, we offer a wealth of resources to help you master the art of visual storytelling. Explore our tutorials, discover stunning photography, and connect with a vibrant community of photographers.
Visit dfphoto.net today to unlock your creative potential and transform your presentations from ordinary to extraordinary. Don’t just present—captivate. For inquiries, you can reach us at Address: 1600 St Michael’s Dr, Santa Fe, NM 87505, United States, or give us a call at