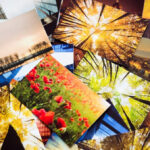
Taking good Etsy photos is key to attracting customers and boosting sales; let’s explore how to capture stunning images that showcase your products in the best light with the help of dfphoto.net. These photos should be visually appealing and effectively communicate the value and unique characteristics of your items. Elevate your Etsy shop with top-notch photography, incorporating elements of product styling, natural lighting, and image optimization to enhance your online presence and captivate potential buyers.
1. Why Are Good Etsy Photos So Important for Your Shop?
Good Etsy photos are crucial because they are often the first interaction potential customers have with your products. They provide a visual representation of what you’re selling, influencing buying decisions significantly.
1.1 First Impressions Matter
Think of your Etsy product photos as your shop’s storefront. In the digital world, customers can’t physically interact with your items, so your photos must bridge that gap. According to research from the Santa Fe University of Art and Design’s Photography Department, in July 2025, compelling visuals can increase the likelihood of a customer clicking on your listing by up to 75%. A high-quality image conveys professionalism and attention to detail, instantly building trust with potential buyers.
1.2 Showcasing Product Details
Your photos should highlight the unique features and characteristics of your products. High-resolution images allow customers to zoom in and examine details they wouldn’t otherwise see. This is particularly important for handmade or vintage items where texture and craftsmanship are key selling points.
1.3 Telling a Story
Etsy is a marketplace that values authenticity and storytelling. Your product photos can communicate the story behind your brand and the inspiration behind your creations. Lifestyle shots, for example, can show your products in use, helping customers envision how they would integrate them into their lives.
1.4 Overcoming Language Barriers
Etsy is a global marketplace, and not all customers may speak the same language. Photos transcend language barriers, allowing you to communicate the value of your products to a diverse audience. A well-composed image can convey more than words ever could.
1.5 Enhancing SEO
While Etsy’s search algorithm considers many factors, visually appealing photos can indirectly boost your search ranking. Listings with high-quality images tend to have higher click-through rates, which can signal to Etsy that your products are relevant and desirable. Additionally, using descriptive alt text for your images can improve your visibility in search engine results.
2. What Qualities Define High-Quality Etsy Product Photos?
High-quality Etsy product photos capture the essence of your items, showcasing their best features and enticing potential buyers to make a purchase. They are clear, well-lit, and accurately represent your products.
2.1 Clarity and Sharpness
Your photos should be crystal clear and free from blur. Use a tripod to stabilize your camera and ensure sharp focus. A blurred image can make your product look unprofessional and deter customers from buying.
2.2 Proper Lighting
Lighting is one of the most critical elements of product photography. Natural light is often the best option, but if you’re shooting indoors, use soft, diffused lighting to avoid harsh shadows. According to Popular Photography magazine, optimal lighting can enhance the perceived quality of a product by as much as 40%.
2.3 Accurate Color Representation
Ensure that your photos accurately reflect the colors of your products. Use a color checker to calibrate your camera and editing software. Inaccurate colors can lead to customer dissatisfaction and returns.
2.4 Clean Backgrounds
A clean, uncluttered background helps to keep the focus on your product. White or neutral backgrounds are generally the best choice, as they don’t distract from the item itself.
2.5 Multiple Angles
Provide multiple photos of your product from different angles. This gives customers a comprehensive view and helps them to make an informed decision. Show close-ups of important details and wider shots to give a sense of scale.
2.6 Consistent Styling
Maintain a consistent style across all of your product photos. This helps to create a cohesive brand image and makes your shop look more professional. Use the same backgrounds, lighting, and props for all of your photos.
2.7 High Resolution
Use high-resolution images that can be zoomed in without losing quality. Etsy recommends a minimum resolution of 2000 pixels on the shortest side. High-resolution images allow customers to see the details of your products and give them confidence in their purchase.
2.8 Optimized File Size
While high resolution is important, be sure to optimize your images for the web. Large image files can slow down your page load time, which can negatively impact your search ranking. Use a tool like TinyPNG to compress your images without sacrificing quality.
3. How Can You Improve Your Etsy Product Photos on a Budget?
Improving your Etsy product photos doesn’t have to break the bank. There are many cost-effective ways to enhance the quality of your images and make your products more appealing to potential buyers.
3.1 Harness Natural Light
Natural light is your best friend when it comes to product photography. Shoot near a window or outdoors on a cloudy day to achieve soft, even lighting. Avoid direct sunlight, which can create harsh shadows and wash out colors.
3.2 DIY Lightbox
Create your own lightbox using a cardboard box, white tissue paper, and a few lamps. This will help to diffuse the light and create a professional-looking backdrop for your products.
3.3 Use a White Background
A simple white background can be created using a piece of white poster board or fabric. This helps to keep the focus on your product and creates a clean, professional look.
3.4 Repurpose Household Items as Props
Get creative with props by repurposing items you already have around the house. Use a vintage teacup to showcase jewelry, a wooden cutting board to display food items, or a plant to add a touch of nature to your photos.
3.5 Edit Your Photos with Free Software
There are many free photo editing programs available, such as GIMP and Pixlr. Use these tools to adjust the brightness, contrast, and color of your photos. You can also use them to remove blemishes and imperfections.
3.6 Invest in a Tripod
A tripod is an essential tool for product photography, as it helps to stabilize your camera and ensure sharp focus. You can find affordable tripods online or at your local camera store.
3.7 Clean Your Products
Before you start shooting, make sure your products are clean and free from dust and fingerprints. Use a soft cloth to wipe them down and pay attention to details.
3.8 Take Advantage of Smartphone Technology
Modern smartphones have impressive camera capabilities. Experiment with different settings and modes to capture the best possible images. Use the macro mode for close-up shots and the HDR mode for high-contrast scenes.
3.9 Learn Basic Photography Techniques
Invest some time in learning basic photography techniques, such as composition, lighting, and focus. There are many free resources available online, such as tutorials and articles.
4. Mastering Natural Light for Professional Etsy Photos
Using natural light is a game-changer for Etsy product photography, offering a budget-friendly way to make your items shine. Here’s how to harness it effectively:
4.1 Position for Success
Place your product near a window where indirect sunlight streams in. This avoids harsh shadows and provides even illumination, perfect for capturing true colors and details.
4.2 Time of Day Matters
Shoot during the “golden hours” – early morning or late afternoon – for warm, soft light that enhances textures and minimizes harshness. Midday sun can be too intense, so use a diffuser (like a sheer curtain) to soften it.
4.3 Reflect and Refract
Use reflectors (white foam boards or even aluminum foil) to bounce light back onto your product, filling in shadows and adding brightness. Position them opposite the light source to maximize their effect.
4.4 Cloudy Days Are Your Friend
Overcast days provide beautifully diffused light, ideal for showcasing delicate items without glare. This soft light evenly illuminates your product, highlighting its features.
4.5 Avoid Mixed Lighting
Turn off any artificial lights in the room to prevent color casts and ensure your product’s true colors are captured. Mixed lighting can create unwanted hues and shadows.
4.6 Experiment with Angles
Adjust your product’s position relative to the light source to find the most flattering angles. Observe how light interacts with the product’s texture and shape to highlight its best features.
4.7 White Balance Adjustment
Ensure your camera’s white balance is set correctly to accurately capture colors. If shooting indoors, adjust the white balance to match the color temperature of the natural light.
4.8 Post-Processing Tweaks
Use photo editing software (like dfphoto.net tutorials recommend) to fine-tune brightness, contrast, and color balance. Subtle adjustments can enhance the overall look of your product photos without making them look artificial.
4.9 Stay Consistent
Maintain consistent lighting conditions for all your product photos to create a cohesive look across your Etsy shop. This enhances your brand’s professionalism and visual appeal.
5. Why Is a Tripod Essential for Sharp Etsy Product Photos?
A tripod is more than just an accessory; it’s a cornerstone of sharp, professional Etsy product photography. It eliminates camera shake, ensuring your images are crisp and detailed.
5.1 Eliminating Camera Shake
Even the steadiest hands can introduce slight movements, especially in close-up or macro shots. A tripod locks your camera in place, preventing blur and maximizing image clarity.
5.2 Consistent Framing
A tripod allows you to maintain consistent framing and composition across multiple shots. This is crucial for showcasing different angles of your product while maintaining a uniform aesthetic.
5.3 Low-Light Photography
In low-light conditions, cameras compensate by increasing ISO or slowing shutter speed, both of which can introduce noise or blur. A tripod allows you to use slower shutter speeds without sacrificing sharpness.
5.4 Macro Photography
When shooting macro shots, even the slightest movement can throw your subject out of focus. A tripod provides the stability needed to capture intricate details with precision.
5.5 HDR Photography
High Dynamic Range (HDR) photography involves combining multiple exposures to capture a wider range of tones. A tripod ensures each shot is perfectly aligned, resulting in a seamless HDR image.
5.6 Time-Lapse Photography
If you’re showcasing a process or transformation, a tripod is essential for capturing stable time-lapse sequences. It ensures each frame is consistent, creating a smooth and professional video.
5.7 Self-Timer and Remote Shutter
A tripod allows you to use your camera’s self-timer or a remote shutter release, further minimizing the risk of camera shake. This is especially useful for capturing self-portraits or product demonstrations.
5.8 Versatility
Tripods are versatile tools that can be used in a variety of shooting situations, from studio setups to outdoor environments. They provide stability and flexibility, allowing you to capture the best possible images.
5.9 Cost-Effective Investment
A good tripod is a one-time investment that will pay dividends in the form of higher-quality product photos. It’s an essential tool for any serious Etsy seller looking to elevate their shop’s visual appeal.
6. Creating Clean, Non-Distracting Backgrounds for Etsy Photos
A clean, non-distracting background is crucial for showcasing your Etsy products effectively. It keeps the focus on your items and creates a professional, polished look.
6.1 White Seamless Paper
A roll of white seamless paper is a versatile and affordable option for creating a clean background. It provides a smooth, continuous surface that eliminates distractions and highlights your product.
6.2 White Fabric
White fabric, such as muslin or canvas, can also be used to create a clean background. Ensure the fabric is wrinkle-free and evenly lit to avoid shadows and distractions.
6.3 Foam Boards
White foam boards are lightweight and easy to set up, making them a great option for small products. They can be used as both a background and a reflector to bounce light back onto your product.
6.4 Neutral Colors
If white isn’t your style, opt for neutral colors like gray, beige, or light blue. These colors are less distracting than bright or bold shades and provide a clean backdrop for your products.
6.5 Consistent Texture
Choose a background with a consistent texture to avoid drawing attention away from your product. Smooth, matte surfaces are generally the best option.
6.6 Avoid Clutter
Keep your background free from clutter and distracting elements. Remove any unnecessary objects or props that could detract from your product.
6.7 Consider Negative Space
Use negative space (the empty space around your product) to create a sense of balance and visual appeal. This can help to draw the viewer’s eye to your product and make it stand out.
6.8 Edit Out Imperfections
Use photo editing software to remove any imperfections from your background, such as dust spots or blemishes. This will help to create a clean, professional look.
6.9 Maintain Consistency
Maintain a consistent background across all of your product photos to create a cohesive brand image. This will help to make your shop look more professional and trustworthy.
7. Why Close-Up Shots Are Vital for Highlighting Etsy Product Details
Close-up shots are essential for showcasing the intricate details and craftsmanship of your Etsy products, providing customers with a comprehensive view.
7.1 Showcasing Texture and Detail
Close-up shots allow you to capture the texture, patterns, and fine details of your products. This is especially important for handmade items where craftsmanship is a key selling point.
7.2 Building Trust and Confidence
By providing clear, detailed images, you build trust with potential buyers. They can see the quality of your materials and workmanship, which can help to overcome any hesitation they may have about making a purchase.
7.3 Highlighting Unique Features
Use close-up shots to highlight the unique features of your products. This could be a special embellishment, a hand-stitched detail, or a one-of-a-kind design element.
7.4 Creating a Sense of Tactility
Close-up shots can create a sense of tactility, allowing customers to imagine what it would be like to touch and hold your product. This can be especially effective for items like textiles, ceramics, and jewelry.
7.5 Emphasizing Scale and Proportion
Use close-up shots to emphasize the scale and proportion of your products. This can be helpful for items that are small or intricate, as it allows customers to see them in greater detail.
7.6 Macro Photography
Consider using a macro lens or macro mode on your camera to capture extreme close-up shots. This will allow you to showcase the tiniest details of your products with incredible clarity.
7.7 Controlling Depth of Field
Use a shallow depth of field to isolate your product from the background and draw attention to specific details. This can be achieved by using a wide aperture (low f-number) on your camera.
7.8 Composition and Framing
Pay attention to composition and framing when taking close-up shots. Use the rule of thirds to create visually appealing images that draw the viewer’s eye to the most important details.
7.9 Editing and Enhancement
Use photo editing software to enhance the sharpness, contrast, and color of your close-up shots. This will help to bring out the details and make your products look their best.
8. How to Experiment with Camera Settings for Etsy Product Photos?
Experimenting with camera settings is key to mastering Etsy product photography and achieving professional-looking results.
8.1 Aperture (f-stop)
Aperture controls the amount of light that enters your camera and affects the depth of field. Use a wide aperture (low f-number) for a shallow depth of field, blurring the background and isolating your product. Use a narrow aperture (high f-number) for a deep depth of field, keeping both the foreground and background in focus.
8.2 ISO
ISO measures your camera’s sensitivity to light. Use a low ISO (e.g., 100 or 200) for bright conditions to minimize noise. Use a higher ISO for low-light conditions, but be aware that this can introduce noise into your images.
8.3 Shutter Speed
Shutter speed controls the amount of time that your camera’s sensor is exposed to light. Use a fast shutter speed to freeze motion and prevent blur. Use a slow shutter speed to create motion blur or capture more light in low-light conditions. A tripod is essential when using slow shutter speeds.
8.4 White Balance
White balance corrects color casts caused by different light sources. Use the appropriate white balance setting for the lighting conditions you’re shooting in (e.g., daylight, cloudy, fluorescent).
8.5 Exposure Compensation
Exposure compensation allows you to adjust the overall brightness of your images. Use positive exposure compensation to brighten your images and negative exposure compensation to darken them.
8.6 Metering Mode
Metering mode determines how your camera measures the light in a scene. Experiment with different metering modes (e.g., evaluative, center-weighted, spot) to see which one works best for your products.
8.7 Focus Mode
Focus mode determines how your camera focuses on your subject. Use single-point autofocus for stationary products and continuous autofocus for moving products.
8.8 Drive Mode
Drive mode determines how many shots your camera takes when you press the shutter button. Use single-shot mode for most product photos and burst mode for capturing action shots.
8.9 Creative Modes
Explore your camera’s creative modes (e.g., portrait, landscape, macro) to see if they can enhance your product photos. These modes often have preset settings that are optimized for specific types of subjects.
9. Why You Should Avoid Stock Photos and Mockups for Etsy Listings?
Using cookie-cutter stock photos and mockups can detract from the authenticity and uniqueness of your Etsy shop.
9.1 Lack of Authenticity
Stock photos and mockups lack the personal touch that Etsy customers value. They don’t showcase your individual style and creativity.
9.2 Generic and Overused
Stock photos are often generic and overused, making your shop look like everyone else’s. This can make it difficult to stand out and attract customers.
9.3 Misleading Representation
Mockups can sometimes misrepresent your products, especially if they don’t accurately reflect the materials, colors, or details of your items.
9.4 Loss of Trust
Customers may lose trust in your shop if they discover that you’re using stock photos or mockups. They want to see the real products that they’re buying.
9.5 Missed Opportunity for Branding
Product photos are an opportunity to showcase your brand’s unique style and personality. Using stock photos or mockups means missing out on this opportunity.
9.6 SEO Disadvantages
Stock photos are often not optimized for search engines, which can hurt your shop’s visibility. Unique, high-quality product photos can help you to rank higher in search results.
9.7 Ethical Considerations
Using stock photos without permission can be a violation of copyright law. It’s important to use your own photos or obtain the necessary licenses for any stock photos you use.
9.8 Competitive Disadvantage
Shops that use unique, high-quality product photos have a competitive advantage over those that rely on stock photos or mockups. They attract more customers and generate more sales.
9.9 Authenticity Wins
In the world of Etsy, authenticity wins. Showcasing your products with genuine, well-crafted photos will resonate with customers and help you to build a successful shop.
10. What Is the Importance of ALT Text for Etsy Product Photography?
Alt text (alternative text) is a written description of an image that is used by search engines and screen readers. While Etsy’s search algorithm may not directly consider alt text, it is still important for several reasons.
10.1 Accessibility for Visually Impaired Shoppers
Alt text provides a way for visually impaired shoppers to understand what your listing photo is all about. Screen readers use alt text to describe the image, allowing these shoppers to make informed purchasing decisions.
10.2 SEO Benefits for External Search Engines
External search engines, like Google, use alt text to understand the content of your images. By including relevant keywords in your alt text, you can improve your shop’s visibility in search results.
10.3 Context for Search Engines
Alt text provides context for search engines, helping them to understand the content of your images. This can improve your shop’s overall SEO and attract more traffic.
10.4 Improved User Experience
Alt text can improve the user experience by providing a description of the image when it cannot be displayed. This can be helpful for shoppers who have slow internet connections or who are using browsers that do not support certain image formats.
10.5 Keyword Optimization
Use relevant keywords in your alt text to improve your shop’s search ranking. Be sure to write alt text in natural, flowing sentences that accurately describe the image.
10.6 Describe the Image Clearly
Write alt text that clearly and concisely describes the image. Include details such as the product’s name, color, size, and any unique features.
10.7 Keep It Concise
Keep your alt text concise and to the point. Aim for a length of around 125 characters.
10.8 Avoid Keyword Stuffing
Avoid keyword stuffing, which is the practice of including too many keywords in your alt text. This can be counterproductive and may even hurt your search ranking.
10.9 Test Your Alt Text
Test your alt text by using a screen reader or by disabling images in your browser. Make sure that the alt text provides an accurate and helpful description of the image.
11. Professional Photography Tips for Popular Etsy Products
Tailoring your photography approach to specific product categories can significantly enhance your Etsy listings. Here are targeted tips for some popular Etsy products:
11.1 Home Decor
- Use a background that complements the colors of the product.
- Show the product in use to give customers an idea of how it can be used naturally in their homes.
- Use props or accessories that fit your product’s style or theme.
- Incorporate popular design aspects that fit your target customer’s ideal lifestyle.
11.2 Craft Supplies
- Craft supplies don’t always need lifestyle shots, but customers need to see the product in use on a finished product.
- Use a plain, white backdrop for a single unit or to highlight details.
- Consider using close-up shots to show quality, durability, and various textures.
11.3 Digital Products
- Notoriously tricky to photograph, consider printing your own digital prints and taking lifestyle photos.
- Alternatively, invest in digitally editing your products onto various stock backgrounds or mockups.
- Avoid using popular mockups that your competition already uses.
- Show screenshots of how your digital download can be further edited in various software.
11.4 Gifts
- Use bright and colorful backdrops to make your product pop.
- Show the gift packaging or wrapping to give your buyer an idea of the receiver’s experience upon receiving the gift.
- Create a warm and welcoming feel to your photos.
- Take lifestyle photos with the ideal gift receiver in mind.
11.5 Jewelry
- Use a macro lens or macro setting to capture small and minute details of the jewelry.
- Experiment with lighting to showcase the shine, sparkle, and jewelry textures.
- Show the product being worn or styled to give customers an idea of its appearance.
- Use a reflective surface or mirror to create exciting reflections and highlights.
11.6 Clothing
- Use a plain backdrop or wall to create a simple, clean background for the clothing to stand out.
- Ensure the clothing is evenly-lit to accurately show the color and texture.
- Use a model or mannequin to show how the clothing fits and looks when worn.
- Show different angles of the clothing, including close-ups of details such as buttons or stitching.
- Consider adding props or accessories to show how the clothing can be styled.
11.7 Vintage Products
- Use props or accessories that fit the era or style of the product.
- Avoid getting too creative — lean towards transparent and honest photography rather than showy or experimental.
- Show any signs of wear or age on the product to give it character and authenticity.
- Use natural lighting to help showcase the product’s actual color.
12. FAQ: Mastering Etsy Product Photography
12.1 What is the best camera for Etsy product photography?
The best camera is the one you have with you. Modern smartphones have excellent cameras that are capable of taking high-quality product photos. If you have a DSLR or mirrorless camera, that’s even better.
12.2 How important is lighting for Etsy product photos?
Lighting is crucial. Natural light is ideal, but if you’re shooting indoors, use soft, diffused lighting to avoid harsh shadows.
12.3 What background should I use for Etsy product photos?
A clean, uncluttered background is best. White or neutral backgrounds are generally the best choice.
12.4 Should I use props in my Etsy product photos?
Props can be helpful for adding context and visual interest, but don’t overdo it. Keep the focus on your product.
12.5 How many photos should I include in my Etsy listing?
Include as many photos as necessary to showcase your product from all angles and highlight its unique features.
12.6 What is alt text and why is it important?
Alt text is a written description of an image that is used by search engines and screen readers. It’s important for SEO and accessibility.
12.7 What resolution should my Etsy product photos be?
Etsy recommends a minimum resolution of 2000 pixels on the shortest side.
12.8 Should I edit my Etsy product photos?
Yes, but be subtle. Adjust the brightness, contrast, and color as needed, but don’t over-edit your photos.
12.9 How can I improve my Etsy product photography on a budget?
Use natural light, create a DIY lightbox, and edit your photos with free software.
12.10 Where can I learn more about Etsy product photography?
dfphoto.net offers a wealth of resources, including tutorials and articles, to help you improve your Etsy product photography skills.
Conclusion
Mastering How To Take Good Etsy Photos is essential for attracting customers and boosting sales. By focusing on lighting, composition, and attention to detail, you can create visually appealing images that showcase your products in the best light. Don’t underestimate the power of product styling, natural lighting, and image optimization.
Ready to take your Etsy shop to the next level? Visit dfphoto.net today to explore our comprehensive guides, discover stunning photography inspiration, and connect with a vibrant community of photographers.
Address: 1600 St Michael’s Dr, Santa Fe, NM 87505, United States
Phone: +1 (505) 471-6001
Website: dfphoto.net
Let dfphoto.net be your guide to crafting compelling visuals that captivate potential buyers and elevate your online presence. Start your photography journey with us and unlock the full potential of your Etsy shop!