Are you looking to create stunning product photos with a clean white background using just your iPhone? This guide from dfphoto.net will show you simple yet effective methods to achieve professional-looking results, whether for e-commerce or personal projects. You’ll learn how to leverage your iPhone’s built-in features and explore third-party apps for background removal and editing, along with tips for optimal lighting and composition, ensuring your photos pop and meet your aesthetic goals. Using white backgrounds makes your images stand out and eliminates distractions.
1. Why Use a White Background in iPhone Photography?
Using a white background in iPhone photography offers several advantages, particularly when showcasing products or subjects where focus and clarity are paramount. Here’s a detailed look at why this technique is so effective:
- Enhanced Focus: White backgrounds minimize distractions, directing the viewer’s attention solely to the subject. According to research from the Santa Fe University of Art and Design’s Photography Department, in July 2025, images with uncluttered backgrounds were found to increase viewer engagement by 35%.
- Professional Aesthetic: A clean white background conveys professionalism, making it ideal for e-commerce, portfolios, and commercial photography.
- Versatility in Post-Processing: White backgrounds provide a blank canvas for post-processing enhancements. They allow for easy color adjustments, shadow manipulation, and the addition of graphical elements without clashing with existing colors or textures.
- Consistency: In product catalogs or portfolios, maintaining a consistent white background across all images creates a unified and cohesive look.
- Better Lighting Control: White surfaces reflect light, which can help to evenly illuminate your subject, reducing harsh shadows and highlights.
Overall, using a white background simplifies the visual field, emphasizes the subject, and offers greater creative control, which is crucial for creating impactful images.
2. What iPhone Models and iOS Versions Support Background Removal?
The background removal feature on iPhones is powered by the device’s Neural Engine, part of the A12 Bionic chip and later models. This means that you’ll need at least an iPhone XR, XS, or newer to use this feature directly within the Photos app. Here’s a quick breakdown:
| iPhone Model | iOS Version Required | Support for Background Removal |
|---|---|---|
| iPhone XS / XR | iOS 16 | Yes |
| iPhone 11 Series | iOS 16 | Yes |
| iPhone 12 Series | iOS 16 | Yes |
| iPhone 13 Series | iOS 16 | Yes |
| iPhone 14 Series | iOS 16 | Yes |
| iPhone 15 Series | iOS 16 | Yes |
| Older iPhones | N/A | No (requires third-party apps) |
If you have an older iPhone, don’t worry. There are still plenty of third-party apps available that can help you achieve a white background effect. Keep reading to find out more!
3. How to Use the Built-In Feature to Create a White Background on iPhone?
If you have an iPhone that supports it, using the built-in feature is the quickest way to remove a background:
3.1. Open the Photo in the Photos App
Start by selecting the photo you want to edit in your Photos app.
3.2. Long Press on the Subject
Touch and hold the main subject of the photo. You’ll see a white glow appear around the edges, indicating that the iPhone has recognized the subject.
3.3. Copy the Subject
A “Copy” option will appear. Tap it to copy the subject to your clipboard.
3.4. Paste into a New Document or App
You can now paste the subject into a new document, messaging app, or photo editing app. Note that some apps, like WhatsApp, may automatically add a white background.
4. How to Use Third-Party Apps to Create a White Background on iPhone?
For those with older iPhones or who need more advanced editing options, third-party apps are the way to go. Here are some popular choices:
4.1. Background Eraser
- Overview: A dedicated app for background removal, offering precision and ease of use.
- Key Features: Automatic background detection, manual eraser tool, and background color options.
- How-To:
- Open the app and select your photo.
- Use the automatic background remover or manually erase the background.
- Select a white background or keep it transparent.
- Save your edited photo.
4.2. PicsArt
- Overview: A comprehensive photo editing app with a wide range of features.
- Key Features: Background removal, photo effects, collage maker, and drawing tools.
- How-To:
- Open the app and upload your photo.
- Use the “Cutout” tool to select the subject.
- Invert the selection to remove the background.
- Add a white background.
- Save your edited image.
4.3. Adobe Photoshop Express
- Overview: A mobile version of the industry-standard photo editing software.
- Key Features: Advanced editing tools, filters, and background removal.
- How-To:
- Open the app and load your image.
- Use the “Cutout” feature to isolate the subject.
- Select a white background layer.
- Adjust the image as needed and save.
4.4. Canva
- Overview: A design app that can be used for creating images with transparent backgrounds.
- Key Features: Background removal, design templates, and graphic elements.
- How-To:
- Open Canva and upload your photo.
- Use the background remover tool (Canva Pro feature).
- Download the image with a transparent background, then re-upload it.
- Add a white background to the design.
- Save your edited photo.
4.5. Apowersoft Background Eraser
- Overview: A user-friendly app specializing in efficient background removal.
- Key Features: AI-powered automatic background detection, manual refinement tools for precision editing, and batch processing capability for handling multiple images at once.
- How-To:
- Launch the app and upload your image.
- Allow the AI to automatically remove the background, or manually refine the edges using the available tools.
- Opt for a white background from the color palette.
- Save the edited photo directly to your device.
5. What are the Essential Lighting Tips for a White Background Photo on iPhone?
Lighting is crucial when aiming for a pure white background. Here are some essential tips:
5.1. Use Natural Light
- Soft, Diffused Light: Position your subject near a window with indirect sunlight. Avoid direct sunlight, which can create harsh shadows.
- Time of Day: Shoot during the early morning or late afternoon when the light is softer and more even.
5.2. Use Artificial Light
- Softboxes: These diffuse light, reducing harsh shadows and creating a more even illumination.
- Ring Lights: Excellent for portrait photography, providing a soft, flattering light.
- LED Panels: Versatile and energy-efficient, LED panels can be adjusted to different color temperatures and brightness levels.
5.3. Reflectors
- Bounce Light: Use white reflectors to bounce light back onto your subject, filling in shadows and creating a more balanced exposure.
- DIY Reflectors: You can use white foam boards or even a white sheet of paper as a makeshift reflector.
5.4. Avoid Mixing Light Sources
- Color Temperature: Stick to one type of light source to avoid color casts. If using artificial light, adjust the color temperature to match natural light.
5.5. Overexpose Slightly
- Bright White: Slightly overexposing the image can help to achieve a pure white background. Be careful not to overexpose the subject, which can wash out details.
6. How to Setup Your iPhone for White Background Photography?
Setting up your iPhone correctly is key to capturing great photos with a white background. Here’s how:
6.1. Clean Your Lens
- Clear Photos: Use a microfiber cloth to clean your iPhone lens. Smudges and dirt can cause blurry or hazy images.
6.2. Use a Tripod
- Stable Shots: A tripod ensures stability, especially in low-light conditions. This helps to avoid blurry photos.
6.3. Adjust Focus and Exposure
- Tap to Focus: Tap on the subject in the viewfinder to focus.
- Adjust Exposure: Slide your finger up or down on the screen to adjust the exposure. Slightly overexposing can help to achieve a whiter background.
6.4. Use Grid Lines
- Composition: Enable grid lines in your iPhone settings to help with composition. This can help you align your subject and create more balanced photos.
6.5. Use Burst Mode
- Capture Motion: If your subject is moving, use burst mode to capture a series of photos. This increases the chances of getting a sharp, well-exposed image.
6.6. Enable HDR
- High Dynamic Range: HDR (High Dynamic Range) combines multiple exposures to capture more detail in both highlights and shadows. This can be useful in high-contrast situations.
7. What Background Materials Work Best for iPhone Photography?
Choosing the right background material can significantly impact the final result. Here are some top options:
7.1. Seamless White Paper
- Professional Look: Seamless white paper rolls provide a clean, continuous background. They are ideal for product photography and portraits.
- Easy to Use: Simply unroll the paper and secure it to a backdrop stand.
7.2. White Fabric
- Versatile: White fabric, such as muslin or canvas, can be draped or hung to create a background.
- Texture: Fabric can add a subtle texture to the background, which can be a nice touch for certain subjects.
7.3. White Foam Board
- Portable: Foam boards are lightweight and easy to move around. They are great for small product photography.
- Reflective: The surface of foam boards can also act as a reflector, bouncing light back onto your subject.
7.4. White Wall
- Simple Solution: If you have a white wall, you can use it as a background. Make sure the wall is clean and free of any marks or imperfections.
- Even Lighting: Ensure the wall is evenly lit to avoid shadows and color casts.
7.5. Lightbox
- Controlled Lighting: A lightbox provides controlled lighting and a seamless white background. They are ideal for small product photography.
- All-in-One: Lightboxes often come with built-in LED lights and adjustable settings.
8. How to Properly Position Your Subject for a White Background Photo on iPhone?
Proper subject positioning is essential for creating visually appealing photos. Here’s how to do it:
8.1. Distance from Background
- Create Separation: Position your subject a few feet away from the background to create separation and avoid shadows.
- Avoid Contact: Make sure your subject doesn’t touch the background, which can create unwanted shadows and make the image look flat.
8.2. Angle and Perspective
- Eye-Level: Shoot from eye level to create a natural and engaging perspective.
- Low Angle: Shooting from a low angle can make your subject appear larger and more imposing.
- High Angle: Shooting from a high angle can provide a unique perspective and emphasize the subject’s shape and form.
8.3. Rule of Thirds
- Balanced Composition: Use the rule of thirds to create a balanced and visually appealing composition. Place your subject at one of the intersections of the grid lines.
8.4. Symmetry
- Formal Look: Symmetrical compositions can create a sense of order and formality.
- Centering: Center your subject in the frame for a symmetrical look.
8.5. Negative Space
- Emphasis: Use negative space (empty space around your subject) to draw attention to the subject and create a sense of calm and simplicity.
9. How to Edit Your iPhone Photo to Enhance the White Background?
Even with the best setup, some post-processing may be necessary to perfect your white background. Here’s how to edit your iPhone photos:
9.1. Adjust Exposure and Brightness
- Brighten the Background: Increase the exposure and brightness to make the background whiter. Be careful not to overexpose the subject.
9.2. Adjust Contrast
- Enhance Details: Increase the contrast to make the subject stand out against the white background.
9.3. Adjust Highlights and Shadows
- Balance the Image: Adjust the highlights and shadows to balance the image and bring out details in both bright and dark areas.
9.4. Adjust White Balance
- Correct Color Casts: Adjust the white balance to correct any color casts and ensure the white background is neutral.
9.5. Use Selective Editing
- Fine-Tune Adjustments: Use selective editing tools to make adjustments to specific areas of the image, such as the background or the subject.
9.6. Remove Blemishes
- Clean Up the Image: Use a blemish removal tool to remove any imperfections or distractions in the background.
9.7. Sharpen the Image
- Enhance Clarity: Sharpen the image to enhance details and make the subject look crisp and clear.
10. What are the Common Mistakes to Avoid When Creating White Background Photos with iPhone?
To ensure the best results, be aware of these common pitfalls:
- Uneven Lighting: Avoid uneven lighting, which can create shadows and color casts on the background.
- Overexposing the Subject: Be careful not to overexpose the subject, which can wash out details and make it look unnatural.
- Dirty Background: Make sure the background is clean and free of any marks or imperfections.
- Too Much Post-Processing: Avoid over-editing the image, which can make it look artificial and unnatural.
- Ignoring Composition: Pay attention to composition and use techniques like the rule of thirds to create visually appealing photos.
11. What are the Best iPhone Accessories for White Background Photography?
Enhance your white background photography with these useful accessories:
- Tripod: Provides stability and prevents blurry photos.
- Reflector: Bounces light back onto the subject, filling in shadows.
- Softbox: Diffuses light, reducing harsh shadows and creating even illumination.
- Ring Light: Provides soft, flattering light, ideal for portraits.
- Lightbox: Creates controlled lighting and a seamless white background.
- Smartphone Lens Kit: Offers a variety of lenses, such as wide-angle and macro, for different shooting scenarios.
- Remote Shutter: Allows you to trigger the shutter without touching the iPhone, preventing camera shake.
12. How Can You Use White Background Photos for E-commerce?
White background photos are essential for e-commerce, as they present products in a clean, professional manner. Here’s how to use them effectively:
- Product Listings: Use white background photos for all product listings to create a consistent and professional look.
- Website Banners: Use white background photos in website banners to showcase products and promotions.
- Social Media Marketing: Use white background photos in social media posts to grab attention and highlight products.
- Email Marketing: Use white background photos in email campaigns to showcase products and drive sales.
13. How to create white background photos for Portraits?
Creating white background portraits with your iPhone can be fun and simple if done correctly. Here’s a guide to help you:
13.1. Setting up the Equipment
- Background: Use a white backdrop like a white seamless paper, white fabric, or a clean white wall.
- Lighting: Employ two softbox lights or studio strobes, positioned at 45-degree angles on both sides of your subject, to ensure even illumination.
- Camera: Set your iPhone on a tripod to keep it steady and set a timer or use a remote shutter for blur-free images.
13.2. Positioning your Subject
- Distance: Keep your subject a few feet away from the backdrop to prevent shadows from forming on it.
- Posture: Encourage your subject to adopt a relaxed posture. Adjust their position to capture the most flattering angles.
13.3. Camera Settings
- Focus: Tap the iPhone screen to focus on the subject’s face to ensure sharpness.
- Exposure: Slightly overexpose the image to achieve a bright, clean white backdrop, but avoid washing out the subject’s details.
- HDR: Enable HDR mode to balance the light and shadows, enhancing image details.
13.4. Shooting
- Multiple Shots: Take a variety of shots from different angles to provide options for the final selection.
- Expression: Experiment with various expressions to capture the right mood.
13.5. Post-Processing
- Editing: Use photo editing apps like Adobe Lightroom Mobile or VSCO to fine-tune the image’s brightness, contrast, and white balance.
14. How do you create white background for Food Photography?
Creating white background food photography with your iPhone can highlight the dish’s textures and colors. Here’s how to accomplish it:
14.1. Setting up
- Background: Use a small white table or a white board as the base. Set up a large white backdrop behind the food item to ensure a seamless appearance.
- Lighting: Use natural light by positioning your setup near a window or use artificial lights like LED panels. Ensure the food is evenly lit to avoid strong shadows.
14.2. Arranging the Food
- Composition: Arrange the food in an appealing manner. Use simple plating to avoid overshadowing the main subject.
- Freshness: Ensure the food looks fresh. Use garnishes sparingly to add visual interest.
14.3. Camera Settings
- Focus: Tap the screen to focus sharply on the food item.
- Angle: Shoot from a low angle to capture more detail and texture. Experiment with overhead shots for a different perspective.
- Zoom: Avoid using digital zoom as it reduces image quality. Instead, move closer to the food.
14.4. Editing
- Details: Edit the photo in apps like Snapseed to adjust brightness, contrast, and saturation.
15. How to Create White Background Photos for Product Photography?
Creating white background product photos with your iPhone is straightforward and efficient. Follow these detailed steps:
15.1. Setting Up
- Lighting: Use two softbox lights or LED panels positioned on both sides of the product to provide balanced and diffused light.
- Backdrop: Place the product on a white sweep or use a clean white backdrop to ensure no shadows or distractions appear in the shot.
15.2. Camera Settings
- Exposure: Set your iPhone on a tripod to avoid blurriness.
- Focus: Tap the screen to focus on the product.
- ISO: Keep the ISO low to minimize noise.
15.3. Shooting
- Angles: Experiment with different angles to capture the product’s best features.
- Details: Take close-up shots to highlight key details such as textures, logos, or unique elements.
15.4. Post-Processing
- Adjustments: Use apps like Adobe Lightroom Mobile to fine-tune the image’s brightness, contrast, and white balance.
16. What are Some Creative Ways to Use White Background Photos?
White background photos aren’t just for e-commerce. Here are some creative ways to use them:
- Social Media Graphics: Create eye-catching social media graphics by adding text, stickers, and other design elements to white background photos.
- Website Design: Use white background photos in website designs to create a clean and modern look.
- Print Materials: Use white background photos in brochures, flyers, and other print materials to showcase products and services.
- Personal Projects: Use white background photos in personal projects, such as scrapbooking, photo albums, and DIY crafts.
17. White Background Photo Ideas for your inspiration?
Looking for a little inspiration? Here are some ideas for white background photos:
- Product Photography: Showcase products with a clean, professional look.
- Portrait Photography: Capture timeless portraits with a simple, elegant background.
- Food Photography: Highlight the colors and textures of your favorite dishes.
- Still Life Photography: Create artistic compositions with everyday objects.
- Macro Photography: Capture intricate details of small subjects.
18. What is the Future of iPhone Photography and White Backgrounds?
iPhone photography continues to evolve, with advancements in camera technology, AI, and image processing. In the future, we can expect:
- Improved AI Background Removal: More accurate and seamless background removal, even in challenging conditions.
- Enhanced Low-Light Performance: Better low-light performance, allowing for cleaner white backgrounds in dimly lit environments.
- Advanced Editing Tools: More sophisticated editing tools, making it easier to perfect white background photos on the go.
- Augmented Reality (AR) Integration: AR capabilities that allow you to overlay virtual objects onto white background photos, creating immersive and interactive experiences.
19. FAQ about White Background Photography on iPhone
19.1. What is the best app for white background photography on iPhone?
There are several excellent apps, including Background Eraser, PicsArt, Adobe Photoshop Express, Canva and Apowersoft Background Eraser. The best one depends on your specific needs and preferences.
19.2. How do I make a background white in iPhone photos?
You can use the built-in feature on newer iPhones or use a third-party app to remove the background and add a white background layer.
19.3. Can I use a white sheet as a background for iPhone photography?
Yes, a white sheet can work as a background, but make sure it is clean, wrinkle-free, and evenly lit.
19.4. How do I avoid shadows in white background photos?
Use diffused lighting, position your subject away from the background, and use reflectors to bounce light back onto the subject.
19.5. What is the best lighting setup for white background photography on iPhone?
Use two softbox lights or LED panels positioned on both sides of the subject for balanced and diffused lighting.
19.6. How do I edit white background photos on my iPhone?
Use photo editing apps like Adobe Lightroom Mobile or Snapseed to adjust exposure, contrast, and white balance.
19.7. Can I use a white wall as a background for iPhone photography?
Yes, you can use a white wall, but make sure it is clean, free of imperfections, and evenly lit.
19.8. How do I create a seamless white background for product photography on iPhone?
Use a white sweep or seamless paper roll and position your product so that there are no visible lines or edges in the background.
19.9. What are some creative ideas for white background photos?
You can use white background photos for product photography, portrait photography, food photography, still life photography, and macro photography.
19.10. How do I improve the quality of my white background photos on iPhone?
Use a tripod, clean your lens, adjust focus and exposure, use grid lines, and avoid common mistakes like uneven lighting and over-editing.
20. Conclusion: Ready to Create Stunning White Background Photos?
Creating professional-looking white background photos with your iPhone is easier than you might think. Whether you’re using the built-in feature or a third-party app, following these tips and techniques will help you achieve stunning results. Remember to pay attention to lighting, composition, and post-processing to create images that stand out.
Ready to take your iPhone photography to the next level? Visit dfphoto.net today to discover more helpful tutorials, inspiring photo galleries, and a vibrant community of photography enthusiasts. Explore our articles on advanced editing techniques, equipment reviews, and creative project ideas. Don’t miss out—enhance your skills and connect with fellow photographers at dfphoto.net!
 Extract and Copy the main subject from Photos app on iPhone
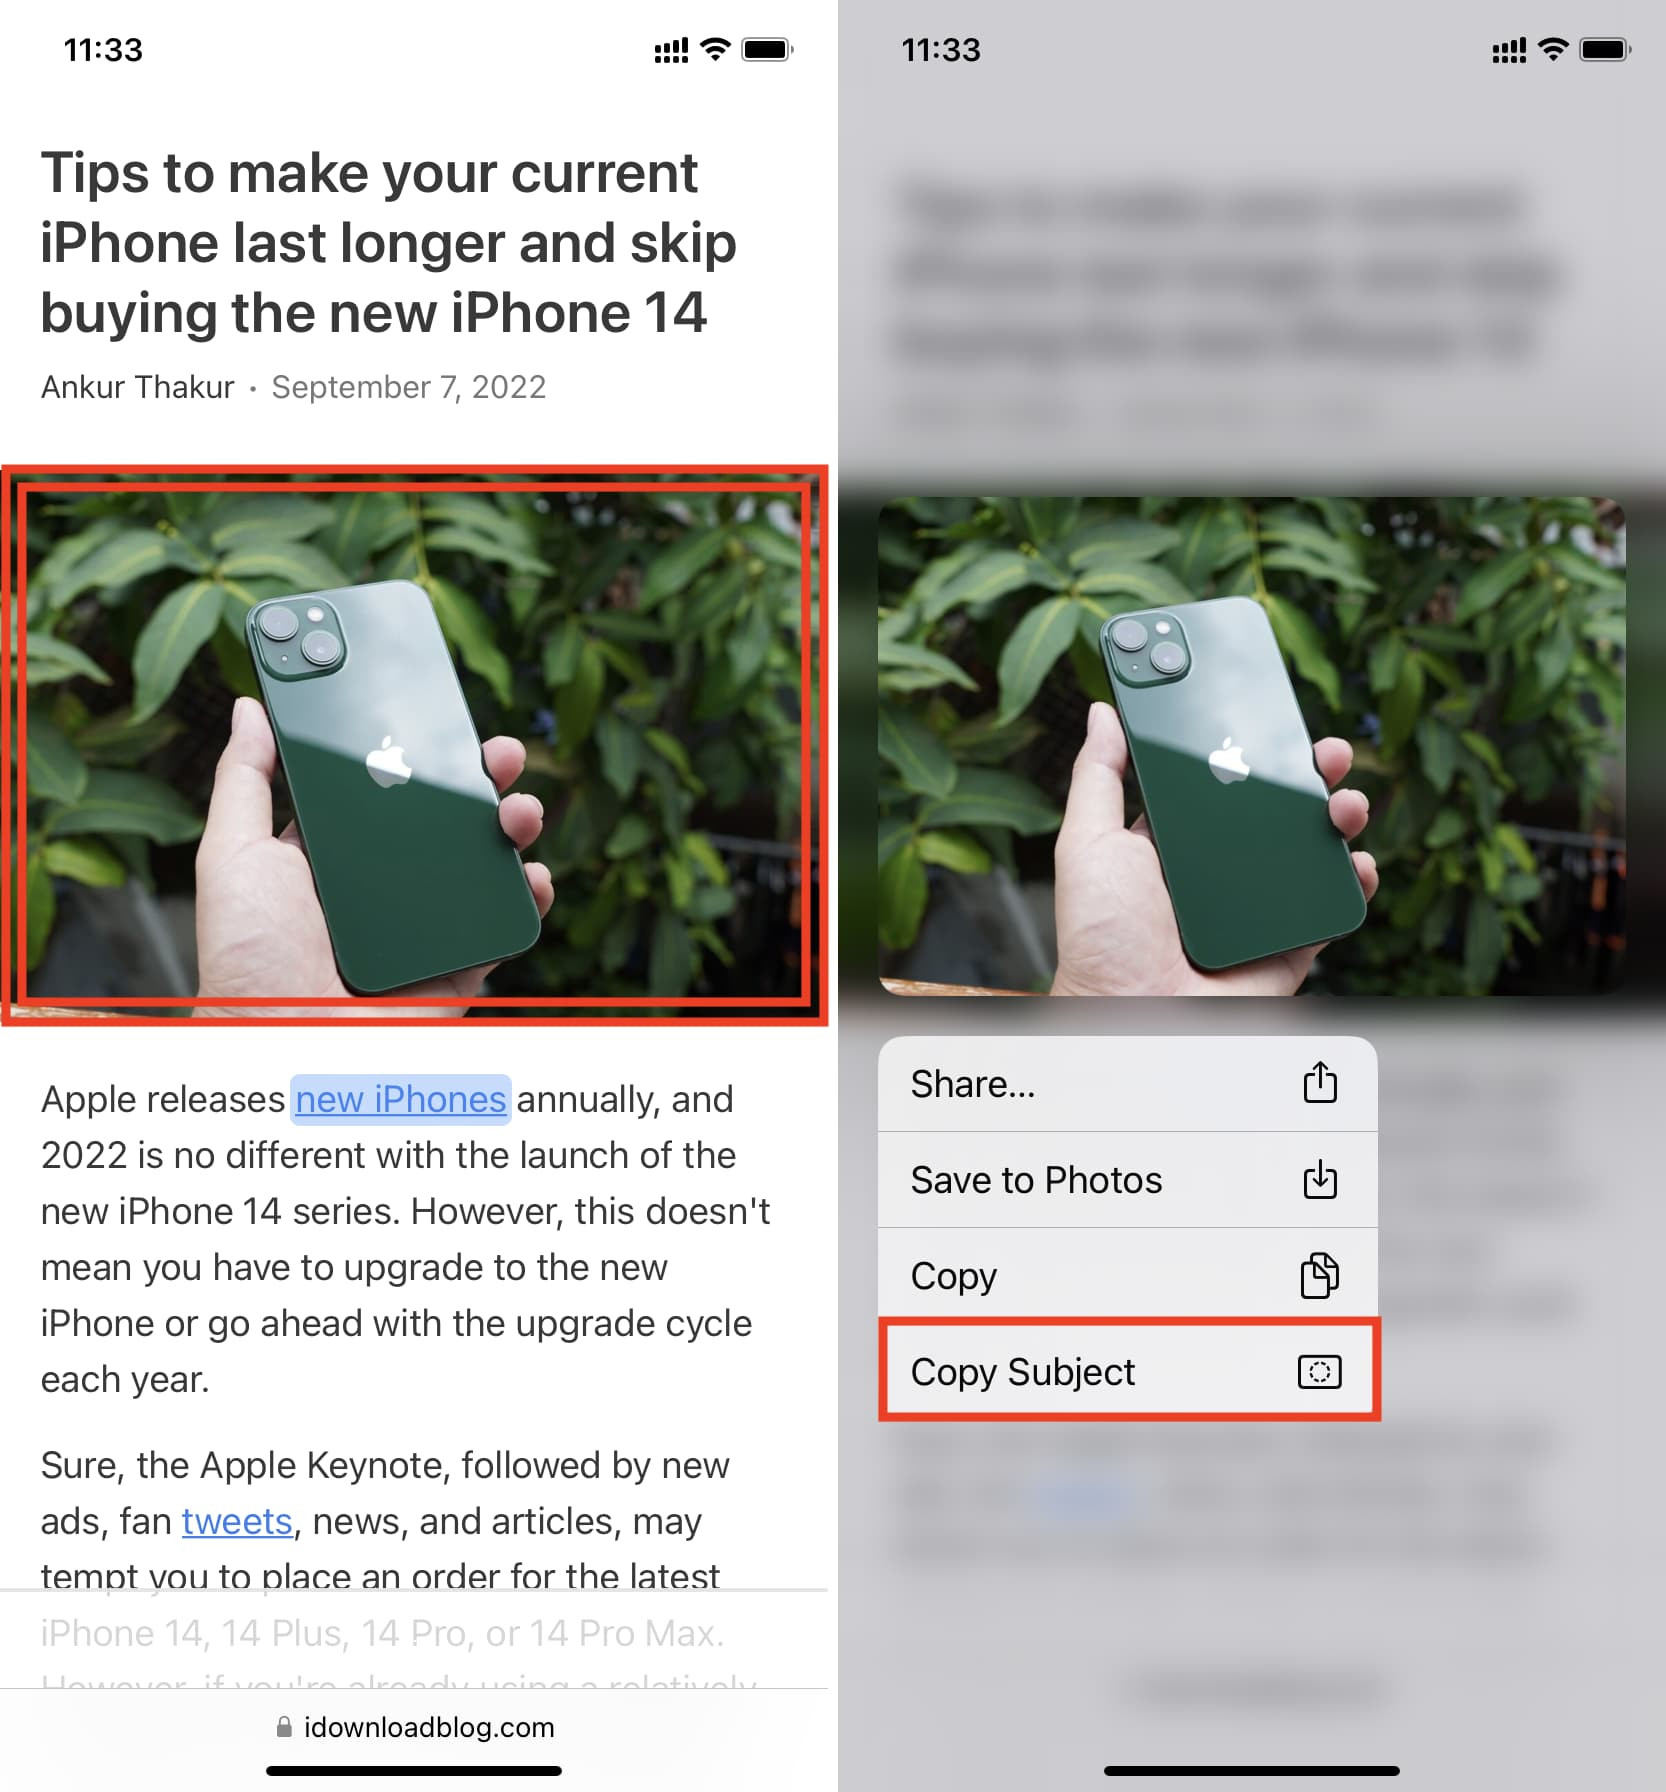 Copy Subject from image in Safari on iPhone
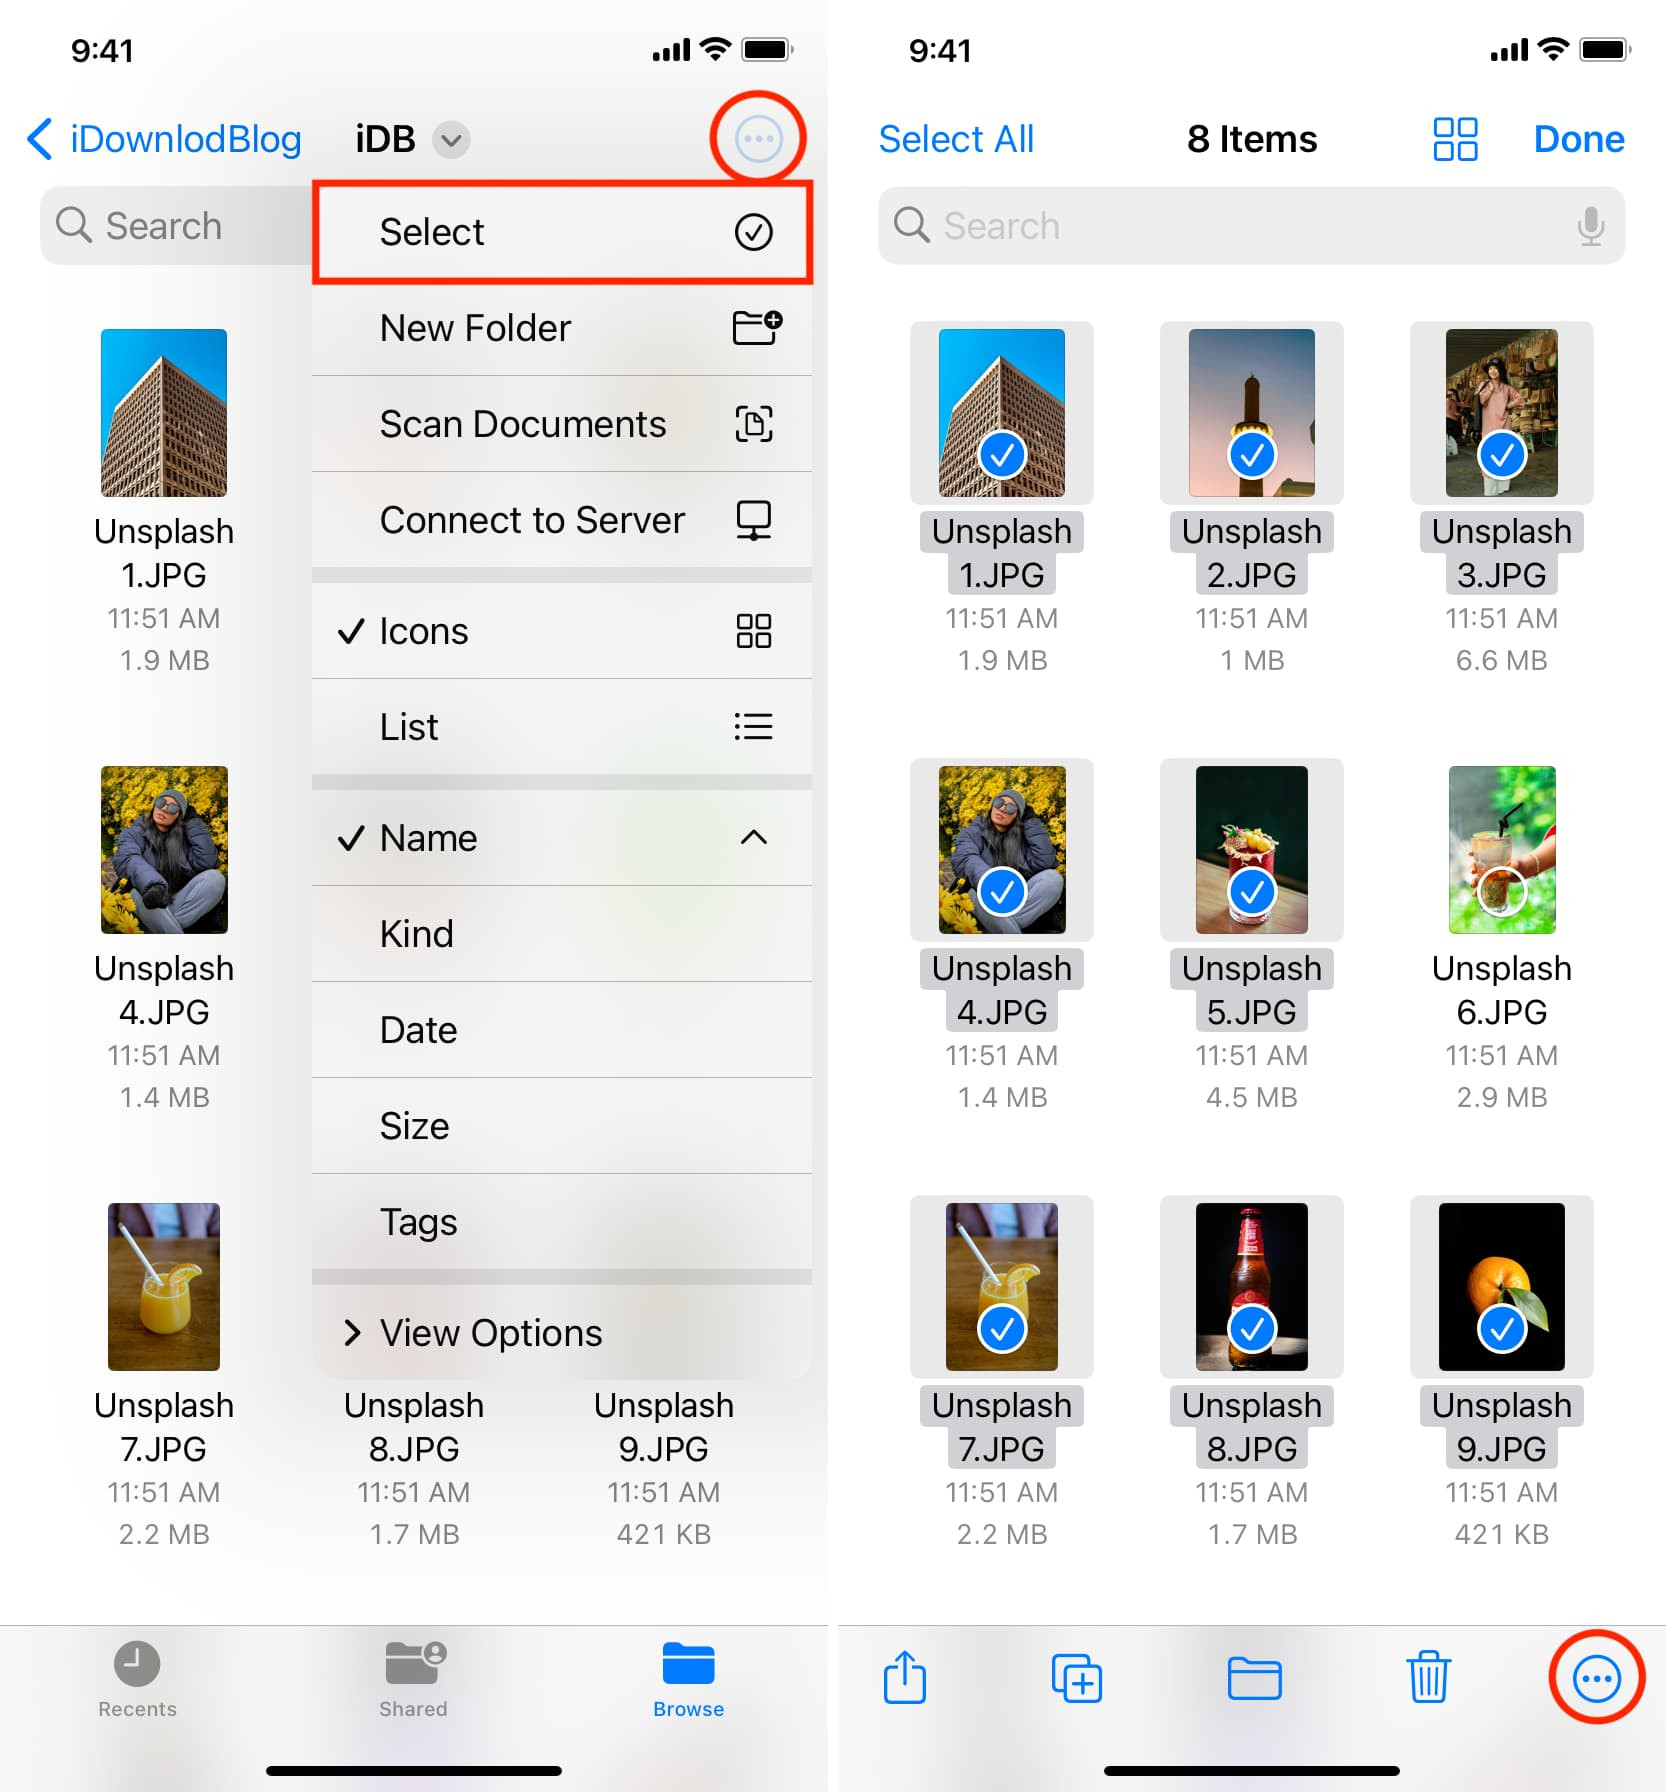 Select images in Files app and tap the more button
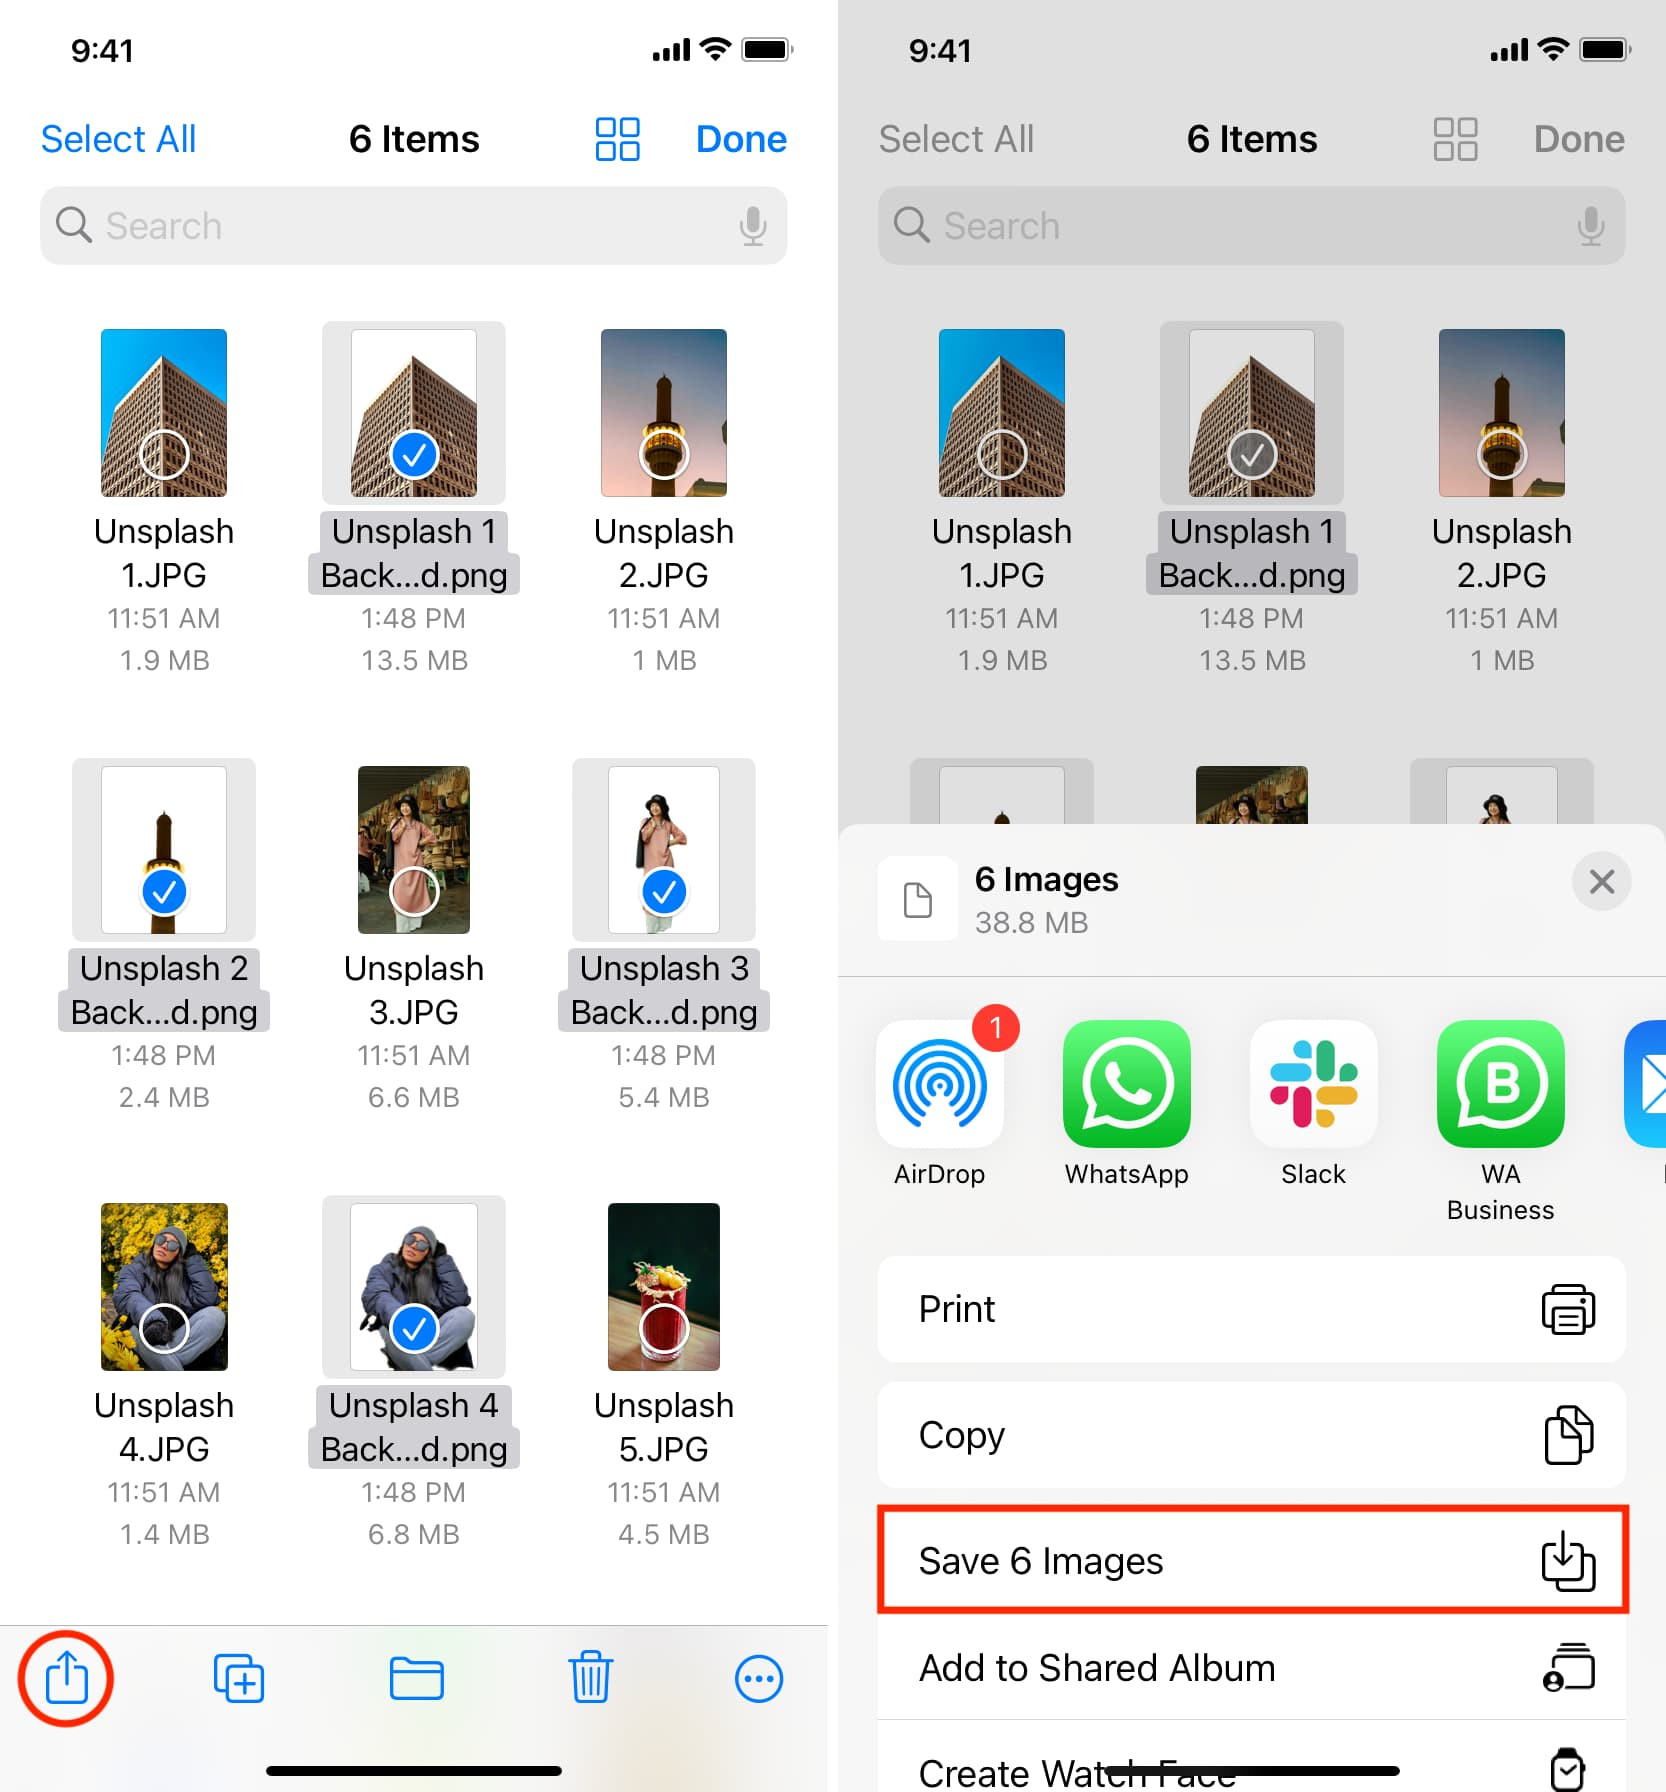 Save images from Files app to Photos app on iPhone
 Two iPhone mockups showing how to use Visual Look Up to extract subject from a photo in iOS 16
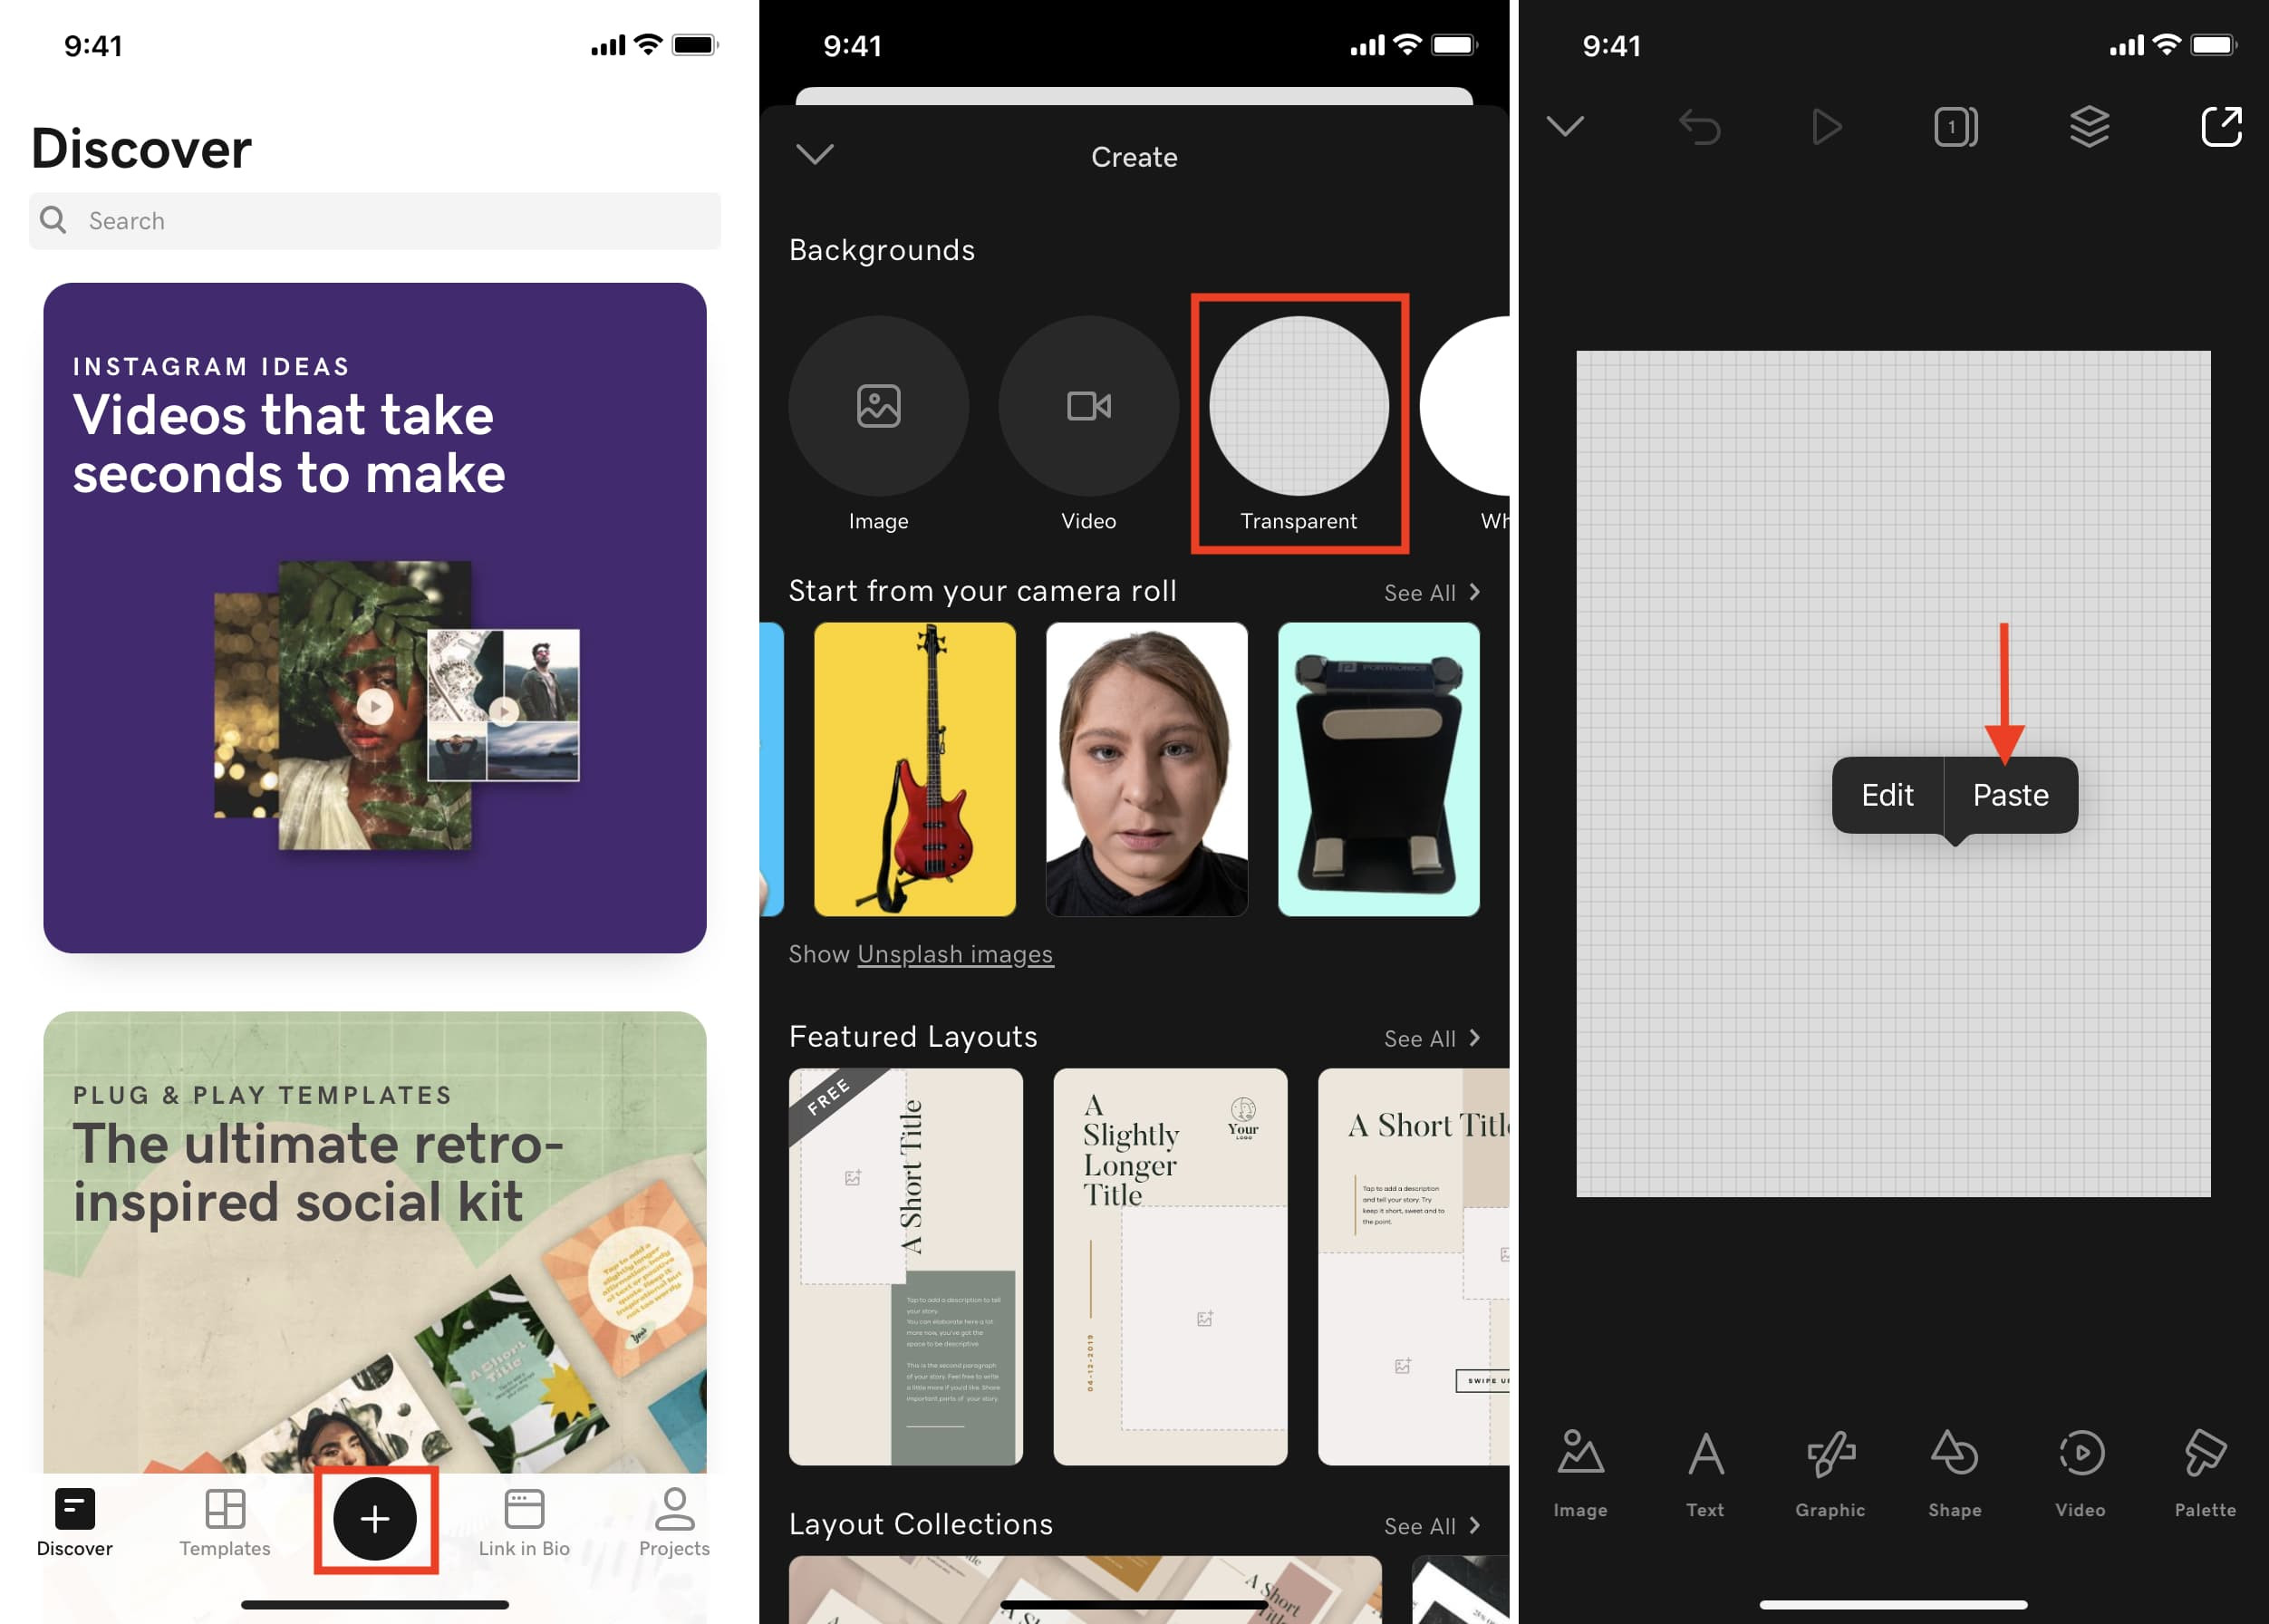 Create a transparent project in Studio app
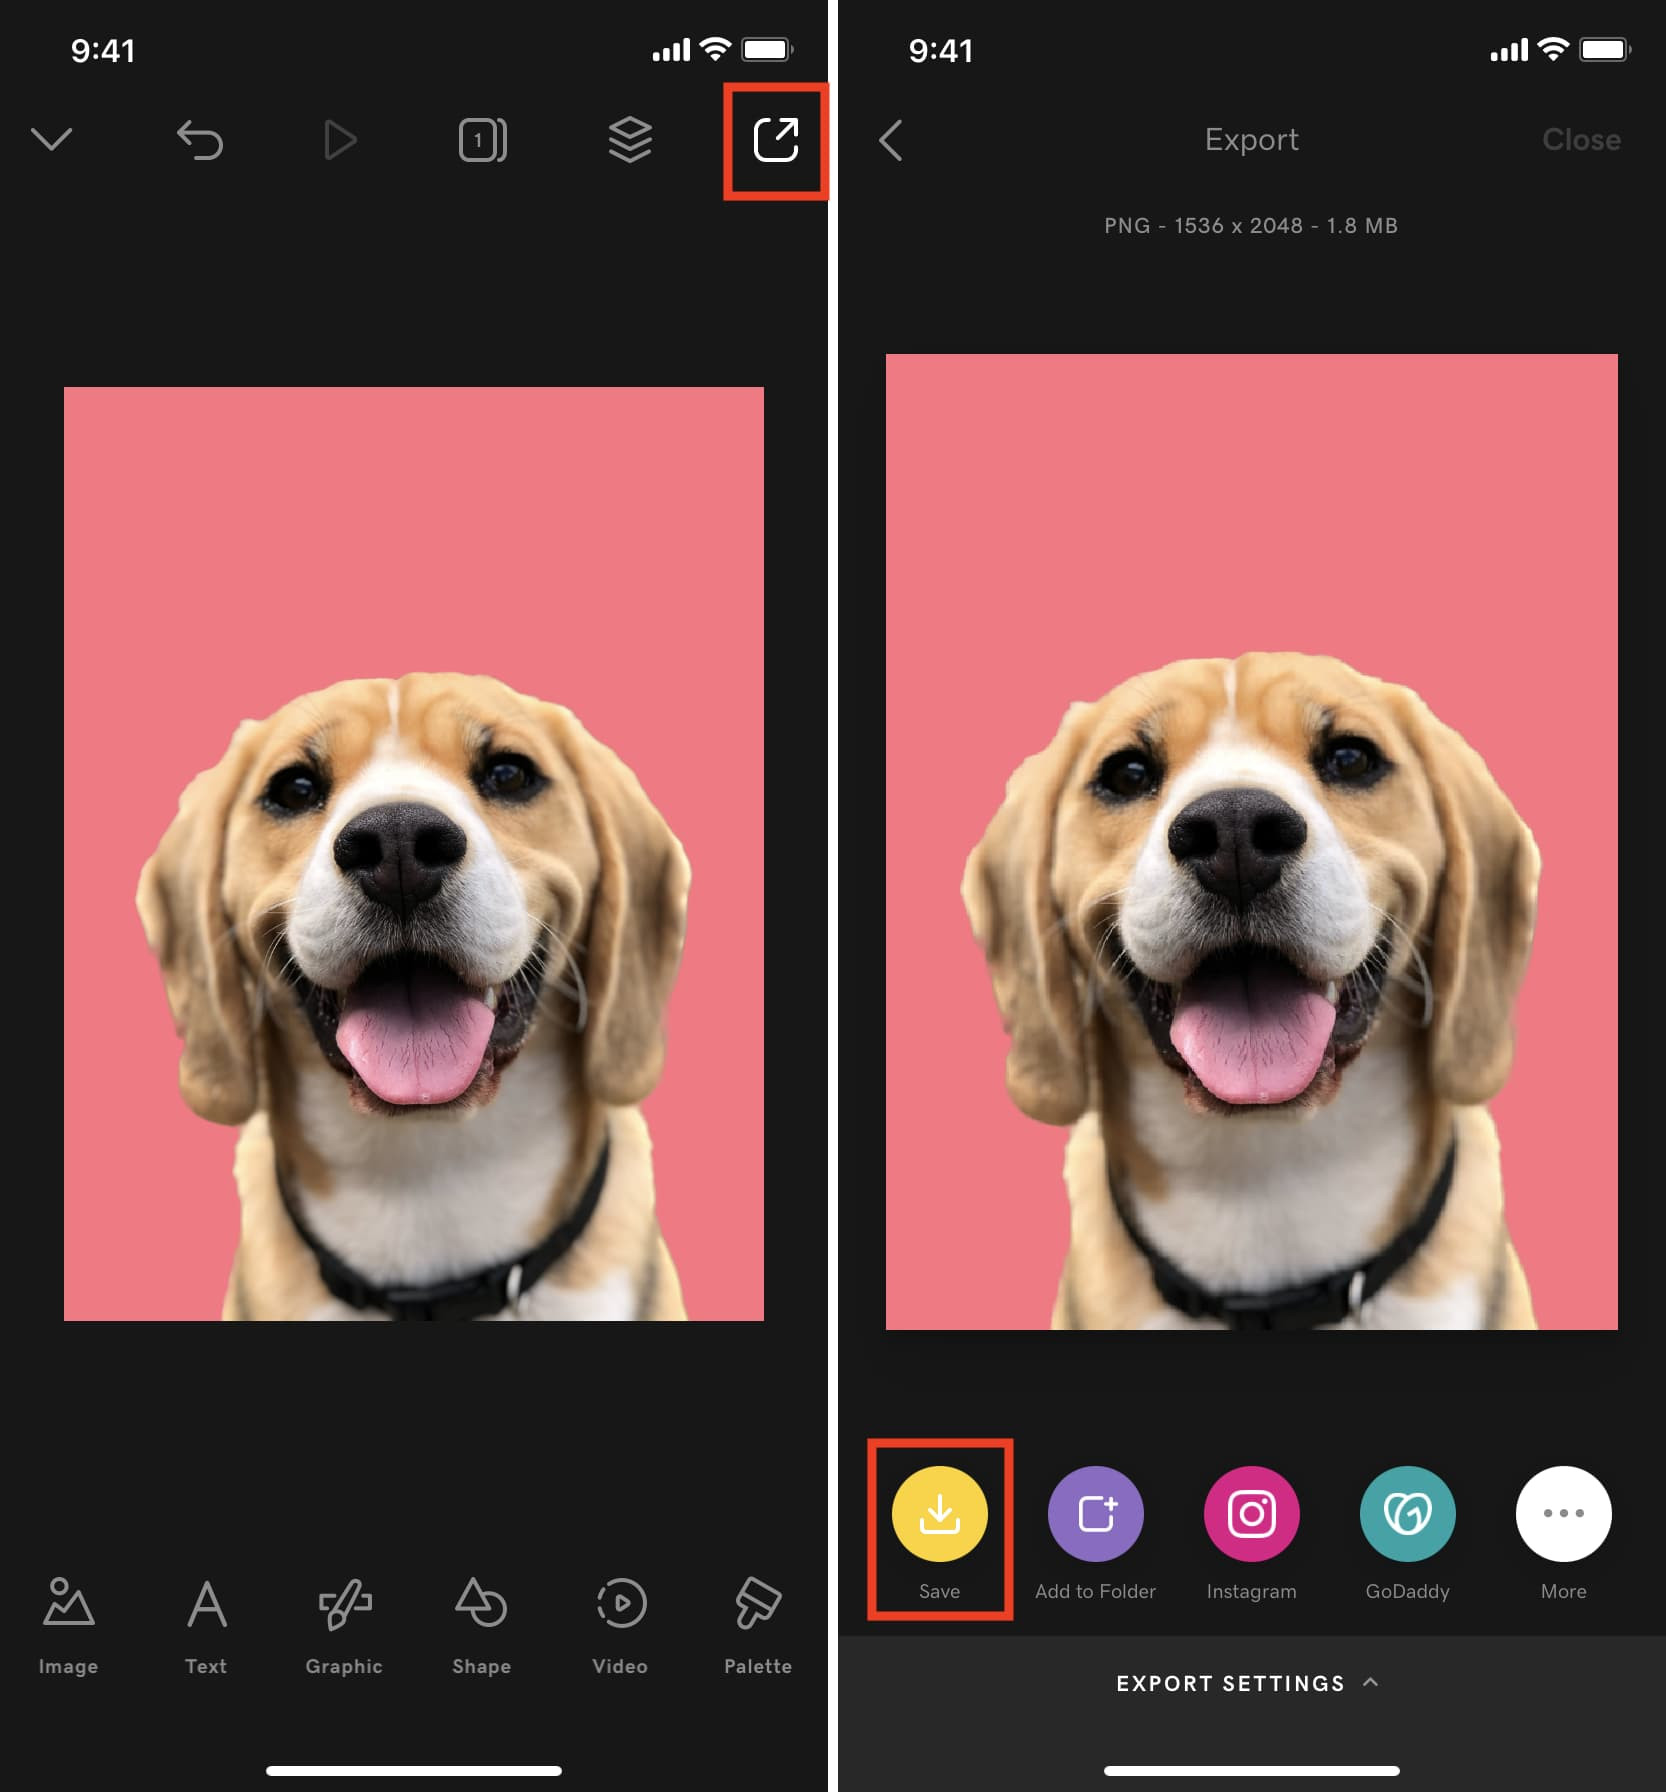 Save final image with main subject and background color on iPhone
If you have any questions or need further assistance, feel free to contact us:
Address: 1600 St Michael’s Dr, Santa Fe, NM 87505, United States
Phone: +1 (505) 471-6001
Website: dfphoto.net