Blocking people from seeing your photos on Facebook is definitely possible, and dfphoto.net is here to guide you through the process. You can control who sees your photos using Facebook’s privacy settings, ensuring your images are only viewed by your intended audience. This article delves into various methods to safeguard your visual storytelling and protect your image rights, enhanced by insights from the vibrant photography community at dfphoto.net, including setting custom audiences and leveraging list features.
1. What Are The Different Ways To Block People From Seeing Photos On Facebook?
There are several ways to control who sees your photos on Facebook, including adjusting privacy settings for individual posts, using custom audiences, and blocking users. Each method offers a different level of control, allowing you to tailor your photo visibility to your specific needs and preferences.
- Adjusting Privacy Settings: This involves changing the audience for each photo you post, choosing from options like “Public,” “Friends,” “Only Me,” or custom lists.
- Custom Audiences: This feature lets you create specific groups of people who can or cannot see your posts, allowing for more granular control.
- Blocking Users: This completely prevents someone from seeing your profile, including your photos, and also prevents them from contacting you on Facebook.
2. How Do I Change The Privacy Settings For Individual Photos On Facebook?
Changing the privacy settings for individual photos on Facebook is a straightforward process that allows you to control who sees each specific image. Here’s how you can do it:
-
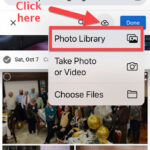
Navigate to the Photo: Go to the photo you want to adjust. This could be on your profile, in an album, or in a post.
-
Click the Audience Selector: Look for the audience selector icon. It’s usually a globe (for public), two people (for friends), or a padlock (for only me).
-
Choose Your Audience: Select the desired audience from the dropdown menu. Options include:
- Public: Anyone on or off Facebook can see the photo.
- Friends: Only your Facebook friends can see the photo.
- Friends Except…: Choose specific friends to exclude from seeing the photo.
- Specific Friends: Only the friends you select can see the photo.
- Only Me: Only you can see the photo.
- Custom: Create a custom audience to include or exclude specific people or lists.
-
Save Your Changes: The privacy setting will automatically save once you select your audience.
By adjusting these settings, you can ensure that each photo is seen only by the people you intend. This is especially useful for photos that are more personal or that you only want to share with a specific group of friends or family members.
3. Can I Set A Default Audience For All My Facebook Photos?
Yes, you can set a default audience for all your Facebook photos, streamlining the process of managing your photo privacy. Here’s how to do it:
- Go to Settings & Privacy: Click the down arrow in the top right corner of Facebook and select “Settings & Privacy,” then click “Settings.”
- Navigate to Privacy: In the left column, click on “Privacy.”
- Find “Who can see your future posts?”: This setting controls the default audience for new posts, including photos.
- Edit the Audience: Click “Edit” next to “Who can see your future posts?”
- Choose Your Default Audience: Select your desired default audience from the dropdown menu (Public, Friends, Friends Except…, Specific Friends, or Only Me).
- Save Your Changes: Click “Close” to save your changes.
Setting a default audience ensures that all your new photos will automatically be shared with the selected group. You can still change the audience for individual photos as needed, but this default setting provides a baseline level of privacy for all your visual content.
4. How Do I Use Custom Audiences To Control Who Sees My Photos?
Custom Audiences provide a powerful way to control who sees your photos on Facebook, allowing you to create specific groups of people who can or cannot view your content. Here’s a step-by-step guide on how to use them:
-
Create a Custom Audience:
- Go to your Facebook profile and click on “Friends.”
- Click on “Lists” and then “Create List.”
- Name your list (e.g., “Close Friends,” “Family,” “Work Colleagues”).
- Add the friends you want to include in the list and click “Create.”
-
Adjust Privacy Settings for Your Photos:
- When posting a photo, click on the audience selector (the globe or two people icon).
- Select “Custom.”
- In the “Share with” field, start typing the name of the list you created.
- Select the list from the dropdown menu.
- If you want to exclude a list, use the “Don’t share with” field.
-
Utilizing Facebook’s Audience Restriction:
- Go to Settings & Privacy > Privacy.
- Look for “Limit the audience for posts you’ve shared with friends of friends or Public?” and click on “Limit Past Posts.”
- Confirm your choice. This will change the audience of all your past public posts to Friends only.
-
Save Your Changes: Once you’ve selected your custom audience, save your changes.
By using Custom Audiences, you can precisely control who sees your photos, ensuring that your content is shared only with the intended recipients. This is particularly useful for managing privacy when sharing photos with different groups of friends, family members, or colleagues.
5. What Is The “Friends Except…” Option And How Can I Use It?
The “Friends Except…” option on Facebook allows you to share your photos with all of your friends except for specific individuals. This is a useful feature when you want to share a photo with a broad audience but need to exclude certain people for privacy or personal reasons.
Here’s how to use the “Friends Except…” option:
-
When Posting a Photo:
- Start creating a new post with your photo.
- Click on the audience selector (the globe or two people icon).
- Select “Friends Except…”
-
Choose Who to Exclude:
- A list of your friends will appear.
- Start typing the name of the person you want to exclude in the search bar.
- Select the person from the list. You can select multiple people to exclude.
-
Save Your Changes: Once you’ve selected the people you want to exclude, save your changes.
The photo will now be visible to all of your friends except for the individuals you have specified. This option is great for situations where you want to share a photo widely but need to prevent certain people from seeing it, such as a surprise party photo that you don’t want the guest of honor to see.
6. How Do I Block Someone From Seeing My Facebook Photos?
Blocking someone on Facebook is a definitive way to prevent them from seeing your photos, profile, and posts. When you block someone, they will no longer be able to view your content or contact you on Facebook. Here’s how to block someone:
- Go to Their Profile: Navigate to the profile of the person you want to block.
- Click the Three Dots: On their profile page, click the three dots (More icon) located near the bottom right of their cover photo.
- Select “Block”: In the dropdown menu, select “Block.”
- Confirm Your Decision: A pop-up window will appear asking you to confirm your decision. Click “Confirm” to block the person.
Once you block someone, they will no longer be able to:
- See your posts on your profile or in their News Feed.
- Tag you in posts, comments, or photos.
- Invite you to events or groups.
- Start a conversation with you.
- Add you as a friend.
Blocking someone is a comprehensive way to ensure they cannot access your content or interact with you on Facebook.
7. What Happens When I Tag Someone In A Photo On Facebook?
When you tag someone in a photo on Facebook, several things happen that affect the visibility of the photo and the tagged person’s profile:
- Notification to the Tagged Person: The tagged person receives a notification that they have been tagged in a photo. This alerts them to the photo and the fact that they are associated with it.
- Photo Appears on Their Timeline: Depending on the tagged person’s timeline review settings, the photo may appear on their timeline. If they have timeline review enabled, they will need to approve the tag before the photo appears on their timeline.
- Increased Visibility: Tagging someone can increase the visibility of the photo. The photo may be seen by the tagged person’s friends, depending on their privacy settings. This can extend the reach of the photo beyond your own network.
- Privacy Considerations: The privacy settings of the photo determine who can see the photo. If the photo is set to “Public,” anyone can see it, regardless of whether they are friends with you or the tagged person. If the photo is set to “Friends,” only your friends and the tagged person’s friends (if they allow it in their settings) can see the photo.
- Control Over Tags: Facebook allows users to control the tags they are associated with. Users can remove tags of themselves from photos, which will remove the photo from their timeline and disassociate them from the photo.
Tagging can be a great way to share photos with friends and family, but it’s important to be mindful of privacy settings and the preferences of the people you tag.
8. How Can I Remove A Tag Of Myself From A Photo On Facebook?
Removing a tag of yourself from a photo on Facebook is a simple process that allows you to disassociate yourself from a photo you don’t want to be linked to. Here’s how to do it:
- Find the Photo: Go to the photo you are tagged in. This could be on your timeline, in a friend’s profile, or in a notification.
- Click the Three Dots (Options): Click on the three dots located near the bottom right of the photo.
- Select “Remove Tag”: In the dropdown menu, select “Remove Tag.”
- Confirm Your Decision: A pop-up window will appear asking you to confirm your decision. You may also have the option to message the person who posted the photo. Click “Remove Tag” to disassociate yourself from the photo.
Once you remove the tag, the photo will no longer appear on your timeline, and your name will no longer be associated with the photo. However, the photo will still be visible to others based on the privacy settings set by the person who posted it.
9. Can I Control Who Sees Photos I’m Tagged In On Facebook?
Yes, you can control who sees photos you’re tagged in on Facebook through your timeline review and privacy settings. These settings allow you to manage how tagged photos appear on your profile and who can see them.
-
Timeline Review:
- Go to Settings & Privacy > Settings > Profile and Tagging.
- Look for “Review posts that you’re tagged in before the post appears on your timeline?”
- If this setting is turned on, you will receive a notification whenever you are tagged in a photo. You can then choose to approve or reject the tag. If you reject the tag, the photo will not appear on your timeline.
-
Privacy Settings for Tagged Photos:
- Go to Settings & Privacy > Settings > Privacy.
- Look for “Who can see posts you’re tagged in on your timeline?”
- You can choose from options like “Friends,” “Only Me,” or “Custom.” Selecting “Only Me” means that only you can see the photos you’re tagged in on your timeline.
-
Adjusting Audience on Individual Photos:
- Even if a photo is already on your timeline, you can still adjust the audience for it.
- Go to the photo on your timeline.
- Click on the audience selector (the globe or two people icon).
- Choose your desired audience (Public, Friends, Only Me, etc.).
By using these settings, you can effectively manage who sees photos you’re tagged in and maintain control over your online presence.
10. How Do I Report A Photo On Facebook That Violates My Privacy?
If a photo on Facebook violates your privacy, you can report it to Facebook for review. Facebook has policies in place to protect users’ privacy and will take action on reported content that violates these policies. Here’s how to report a photo:
- Go to the Photo: Navigate to the photo you want to report.
- Click the Three Dots (Options): Click on the three dots located near the bottom right of the photo.
- Select “Report Photo”: In the dropdown menu, select “Report Photo.”
- Choose a Reason: A list of reasons for reporting the photo will appear. Select the reason that best describes why the photo violates your privacy (e.g., “Nudity or sexual activity,” “Hate speech,” “Harassment or bullying,” “Intellectual property violation”).
- Provide Additional Information: You may be asked to provide additional information about why you are reporting the photo. Provide as much detail as possible to help Facebook understand the issue.
- Submit Your Report: Once you have selected a reason and provided any additional information, click “Submit” to send your report to Facebook.
After you submit your report, Facebook will review the photo and take appropriate action if it violates their policies. You may also receive updates on the status of your report.
11. What Are Facebook’s Privacy Policies Regarding Photos?
Facebook’s privacy policies regarding photos are designed to protect users’ rights and provide control over their personal information. Key aspects of these policies include:
- Ownership of Content: Users retain ownership of the photos and content they post on Facebook. Facebook does not claim ownership of user-generated content.
- Privacy Settings: Users have control over who can see their photos and posts through privacy settings. These settings allow users to choose from options like “Public,” “Friends,” “Only Me,” and custom audiences.
- Tagging: Users can control who sees photos they are tagged in through timeline review and privacy settings. Users can also remove tags of themselves from photos.
- Reporting: Facebook provides a mechanism for users to report photos and content that violate their privacy or community standards.
- Data Use: Facebook uses user data, including photos, to provide and improve its services. This includes personalizing content, showing relevant ads, and conducting research.
- Data Sharing: Facebook may share user data with third-party partners, such as advertisers and developers, but only in accordance with its privacy policies and with user consent.
- Data Retention: Facebook retains user data for as long as necessary to provide its services. Users can delete their accounts, which will remove their data from Facebook’s servers.
- Facial Recognition: Facebook uses facial recognition technology to identify users in photos. Users can control whether or not they are included in facial recognition scans.
Facebook’s privacy policies are subject to change, so it’s important to review them periodically to stay informed about your rights and options.
12. How Does Facebook’s Facial Recognition Technology Affect Photo Privacy?
Facebook’s facial recognition technology can impact photo privacy by automatically identifying and tagging users in photos, which can affect who sees those photos and how they are shared. Here’s how it works and how it affects privacy:
-
Automatic Tagging Suggestions:
- Facebook uses facial recognition to suggest tags for users in photos. When you upload a photo, Facebook scans the faces in the photo and suggests tags to your friends.
- This can make it easier to tag people in photos, but it also means that users may be tagged in photos without their knowledge or consent.
-
Facial Recognition Settings:
- Facebook allows users to control whether or not they are included in facial recognition scans. You can opt out of facial recognition, which means that Facebook will not suggest tags of you in photos.
- To adjust your facial recognition settings, go to Settings & Privacy > Settings > Face Recognition.
-
Privacy Implications:
- Facial recognition can raise privacy concerns because it involves the collection and storage of biometric data. Some users may be uncomfortable with Facebook using their facial data to identify them in photos.
- If you are tagged in a photo, that photo may be seen by your friends and others, depending on the privacy settings of the photo and your own privacy settings. This can lead to photos being shared more widely than you intended.
-
Control Over Tags:
- Even if Facebook suggests a tag of you in a photo, you still have the option to remove the tag. You can also control who sees photos you’re tagged in through your timeline review and privacy settings.
- This gives you some control over how your facial data is used and how your photos are shared on Facebook.
While facial recognition can be a convenient feature, it’s important to be aware of its privacy implications and to adjust your settings accordingly.
13. Can I Prevent Facebook From Using My Photos For Advertising?
Yes, you can limit Facebook’s ability to use your photos for advertising by adjusting your ad preferences and privacy settings. While you can’t completely prevent Facebook from using your data for advertising purposes, you can control how your photos and personal information are used in ads shown to others. Here’s how:
-
Ad Preferences:
- Go to Settings & Privacy > Settings > Ads.
- In the “Ads based on your data” section, you can control whether Facebook uses your information from partners to show you ads.
- In the “Ads shown off of Facebook” section, you can control whether Facebook shows you ads based on your activity on other websites and apps.
-
Social Context:
- Go to Settings & Privacy > Settings > Ads.
- In the “Social context” section, you can control whether your name and profile picture are used in ads shown to your friends.
- You can choose “Only my friends” or “No one.” Selecting “No one” will prevent Facebook from using your photos and name in social ads.
-
Reviewing Ads You’ve Seen:
- You can review the ads you’ve seen on Facebook and provide feedback to Facebook about the ads you find irrelevant or offensive. This can help improve the quality of the ads you see and reduce the likelihood of seeing ads that use your photos or personal information.
-
Privacy Settings:
- Adjust your privacy settings to limit who can see your photos and posts. This can help reduce the amount of information that Facebook has available to use for advertising purposes.
By adjusting these settings, you can limit how Facebook uses your photos and personal information for advertising, giving you more control over your online presence.
14. What Should I Do If Someone Is Using My Photos Without My Permission On Facebook?
If someone is using your photos without your permission on Facebook, there are several steps you can take to address the situation and protect your rights:
-
Contact the Person:
- Reach out to the person who is using your photos and ask them to remove them. Sometimes, the person may not be aware that they are infringing on your copyright or privacy rights.
- Be polite but firm in your request. Explain that you own the copyright to the photos and that you do not want them to be used without your permission.
-
Report the Photos to Facebook:
- If the person refuses to remove the photos, you can report them to Facebook for copyright infringement or violation of privacy.
- Go to the photo being used without your permission.
- Click the three dots located near the bottom right of the photo.
- Select “Report Photo.”
- Choose the reason that best describes why the photo violates your rights (e.g., “Intellectual property violation,” “Privacy violation”).
- Provide additional information and submit your report.
-
File a Copyright Claim:
- If you own the copyright to the photos, you can file a formal copyright claim with Facebook. This will require you to provide proof of ownership, such as the original files or a copyright registration certificate.
- Facebook will review your claim and take action if it determines that the photos are being used without your permission.
-
Take Legal Action:
- If the unauthorized use of your photos is causing you significant harm, you may consider taking legal action against the person who is using them.
- Consult with an attorney to discuss your legal options and determine the best course of action.
-
Monitor Your Online Presence:
- Regularly monitor your online presence to check for unauthorized use of your photos. You can use tools like Google Images to search for your photos and see where they are being used on the web.
By taking these steps, you can protect your rights and prevent others from using your photos without your permission on Facebook.
15. How Can I Protect My Copyright On Photos I Share On Facebook?
Protecting your copyright on photos you share on Facebook involves taking proactive steps to assert your ownership and prevent unauthorized use. Here’s how you can protect your copyright:
-
Add a Copyright Notice:
- Include a copyright notice on your photos. This can be a watermark or a text overlay that includes your name, the copyright symbol (©), and the year of publication.
- A copyright notice serves as a visual reminder that you own the copyright to the photo and that it cannot be used without your permission.
-
Register Your Copyright:
- Register your copyright with the U.S. Copyright Office. This provides you with legal protection and allows you to sue for damages if someone infringes on your copyright.
- Registering your copyright is especially important if you plan to use your photos for commercial purposes.
-
Use a License:
- Use a license, such as a Creative Commons license, to specify how others can use your photos. This allows you to grant certain rights to others while retaining ownership of your copyright.
- Creative Commons licenses are free and easy to use, and they provide a clear set of terms for how your photos can be used.
-
Monitor Your Online Presence:
- Regularly monitor your online presence to check for unauthorized use of your photos. You can use tools like Google Images to search for your photos and see where they are being used on the web.
-
Enforce Your Copyright:
- If you find that someone is using your photos without your permission, take action to enforce your copyright. This may involve sending a cease and desist letter, filing a copyright claim with Facebook, or taking legal action.
-
Terms of Service:
- Familiarize yourself with Facebook’s terms of service regarding copyright. Facebook has policies in place to protect copyright owners and will take action on reported content that infringes on copyright.
By taking these steps, you can protect your copyright on photos you share on Facebook and prevent unauthorized use of your work.
16. What Are Some Best Practices For Sharing Photos On Facebook While Protecting My Privacy?
Sharing photos on Facebook can be a great way to connect with friends and family, but it’s important to do so in a way that protects your privacy. Here are some best practices to follow:
-
Adjust Your Privacy Settings:
- Review and adjust your privacy settings to control who can see your photos and posts. Choose from options like “Public,” “Friends,” “Only Me,” and custom audiences.
- Be mindful of the privacy settings you choose for each photo. If you’re sharing a personal photo, you may want to limit the audience to “Friends” or “Only Me.”
-
Use Custom Audiences:
- Create custom audiences to share your photos with specific groups of people. This allows you to share photos with close friends and family without sharing them with everyone on your friends list.
-
Be Mindful of Tagging:
- Be mindful of who you tag in your photos. Tagging someone can increase the visibility of the photo and may share it with people you don’t intend to see it.
- Ask for permission before tagging someone in a photo, especially if it’s a personal or sensitive photo.
-
Review Your Timeline:
- Review your timeline regularly to check for photos you’ve been tagged in. You can remove tags of yourself from photos you don’t want to be associated with.
-
Turn Off Facial Recognition:
- Turn off facial recognition to prevent Facebook from automatically suggesting tags of you in photos. This gives you more control over how your photos are shared and who is tagged in them.
-
Use Watermarks:
- Add watermarks to your photos to protect your copyright. A watermark can include your name, the copyright symbol (©), and the year of publication.
-
Be Careful About Sharing Location Information:
- Be careful about sharing location information with your photos. Sharing your location can reveal your whereabouts and may put your privacy at risk.
- Consider turning off location services for your photos or removing location information before sharing them.
-
Think Before You Post:
- Before you post a photo, take a moment to think about whether it’s appropriate to share it on Facebook. Consider the privacy implications and whether you’re comfortable with the photo being seen by a wide audience.
By following these best practices, you can share photos on Facebook while protecting your privacy and maintaining control over your online presence.
17. How Can I Download My Photos From Facebook?
Downloading your photos from Facebook is a straightforward process that allows you to create a backup of your visual content. Here’s how you can do it:
-
Go to Your Facebook Settings:
- Click the down arrow in the top right corner of Facebook and select “Settings & Privacy,” then click “Settings.”
-
Navigate to “Your Facebook Information”:
- In the left column, click on “Your Facebook Information.”
-
Select “Download Your Information”:
- Click on “Download Your Information.”
-
Choose Your Data Range and Format:
- You can choose to download all of your data or select a specific date range.
- Select the format you want to download your data in (HTML or JSON). HTML is easier to view, while JSON is better for transferring data to another service.
- Choose the media quality (High, Medium, or Low).
-
Select “Photos and Videos”:
- Deselect all options and select “Photos and Videos.”
-
Request the Download:
- Click “Create File” to request the download.
-
Wait for the Download to Complete:
- Facebook will compile your data and notify you when the download is ready. This may take some time, depending on the amount of data you are downloading.
-
Download Your Data:
- Once the download is ready, you will receive a notification from Facebook.
- Click the notification and download the file.
Your downloaded data will be in a ZIP file. Extract the file to access your photos and videos. This backup can be stored securely on your computer or in a cloud storage service, ensuring that you have a copy of your photos even if something happens to your Facebook account.
18. What Are The Alternatives To Sharing Photos On Facebook For Privacy-Conscious Users?
For privacy-conscious users, several alternatives to sharing photos on Facebook offer more control over your data and privacy settings. Here are some options to consider:
-
Dedicated Photo Sharing Platforms:
- Flickr: Flickr offers robust privacy settings, allowing you to control who can see your photos. You can set photos to public, friends, family, or private. Flickr also offers tools for organizing and managing your photos.
- 500px: 500px is a platform for photographers to showcase their work. It offers various privacy settings and allows you to license your photos for commercial use.
- SmugMug: SmugMug is a paid platform that offers advanced privacy settings and customization options. It’s a great option for professional photographers who want to protect their work and sell prints.
-
Cloud Storage Services:
- Google Photos: Google Photos offers automatic backup of your photos and videos. You can control who can see your photos by sharing them in albums and setting privacy settings for each album.
- Dropbox: Dropbox allows you to store and share your photos and videos. You can create shared folders with specific people and control who has access to your files.
- Microsoft OneDrive: OneDrive is Microsoft’s cloud storage service. It offers similar features to Google Photos and Dropbox, allowing you to store and share your photos with specific people.
-
End-to-End Encrypted Messaging Apps:
- Signal: Signal is an end-to-end encrypted messaging app that allows you to share photos and videos securely. Only the sender and recipient can view the photos.
- WhatsApp: WhatsApp also offers end-to-end encryption.
- Telegram: Telegram offers end-to-end encryption for secret chats, providing a secure way to share photos and videos.
-
Self-Hosted Photo Galleries:
- Piwigo: Piwigo is a self-hosted photo gallery that allows you to store and manage your photos on your own server. This gives you complete control over your data and privacy.
- Lychee: Lychee is another self-hosted photo gallery that is easy to set up and use. It offers various features for organizing and sharing your photos.
These alternatives offer varying degrees of privacy and control over your photos, allowing you to choose the option that best suits your needs.
19. What Are The Legal Implications Of Sharing Photos Of Others Without Their Consent?
Sharing photos of others without their consent can have significant legal implications, depending on the jurisdiction and the specific circumstances. Here are some of the key legal issues to be aware of:
-
Privacy Rights:
- Many jurisdictions have laws that protect individuals’ privacy rights. Sharing photos of someone without their consent can violate these rights, especially if the photos are taken in a private place or depict sensitive information.
- In the United States, privacy laws vary by state. Some states have laws that prohibit the unauthorized publication of photos or videos that are considered private.
-
Defamation:
- If a photo is shared in a way that harms the reputation of the person depicted, it could be considered defamation. Defamation laws protect individuals from false and damaging statements.
- To be considered defamation, the statement must be false, published to a third party, and cause harm to the person’s reputation.
-
Copyright Infringement:
- If you share a photo that you did not take and do not have permission to use, you could be infringing on the copyright of the photographer.
- Copyright law protects the rights of photographers to control how their photos are used. Sharing a photo without permission can result in legal action and financial penalties.
-
Right of Publicity:
- The right of publicity protects individuals from the unauthorized commercial use of their name, image, or likeness. If you use a photo of someone to promote a product or service without their consent, you could be violating their right of publicity.
- This is especially relevant for celebrities and public figures, but it can also apply to private individuals.
-
Harassment and Cyberbullying:
- Sharing photos of someone without their consent can be a form of harassment or cyberbullying. This is especially true if the photos are shared with the intent to embarrass, humiliate, or threaten the person.
- Many jurisdictions have laws that prohibit harassment and cyberbullying, and sharing photos without consent could result in criminal charges.
-
Terms of Service Violations:
- Social media platforms like Facebook have terms of service that prohibit the sharing of content that violates privacy rights, defames others, or infringes on copyright.
- Sharing photos of others without their consent can result in your account being suspended or terminated.
To avoid these legal issues, it’s always best to obtain consent from the people in your photos before sharing them. Be respectful of their privacy rights and be mindful of the potential consequences of sharing photos without permission.
20. How Is AI Being Used To Protect Photo Privacy On Social Media?
AI (Artificial Intelligence) is increasingly being used to protect photo privacy on social media platforms. AI technologies are helping to automate and enhance privacy measures, making it easier for users to control their online presence. Here are some of the key ways AI is being used:
-
Facial Recognition and Tagging Suggestions:
- AI-powered facial recognition is used to identify individuals in photos and suggest tags to users. This allows users to quickly tag their friends and family in photos, but it also raises privacy concerns.
- AI is also used to allow users to control whether or not they are included in facial recognition scans. Users can opt out of facial recognition, which means that Facebook will not suggest tags of them in photos.
-
Content Moderation:
- AI is used to moderate content on social media platforms, including photos and videos. AI algorithms can identify and remove content that violates privacy rights, defames others, or infringes on copyright.
- AI can also be used to detect and remove photos that are shared without consent, such as revenge porn or photos taken in private places.
-
Privacy Settings Recommendations:
- AI can analyze users’ privacy settings and make recommendations on how to improve their privacy. For example, AI can suggest that users limit the audience for their photos to “Friends” or “Only Me.”
- AI can also provide personalized privacy tips based on users’ online behavior and preferences.
-
Detection of Deepfakes and Manipulated Photos:
- AI is being developed to detect deepfakes and manipulated photos. Deepfakes are photos and videos that have been altered to make it appear as if someone said or did something they didn’t actually do.
- AI can analyze photos and videos for signs of manipulation, such as inconsistencies in lighting, shadows, and facial expressions.
-
Privacy-Enhancing Technologies (PETs):
- AI is being used to develop privacy-enhancing technologies (PETs) that allow users to share their photos and data without revealing sensitive information. For example, differential privacy is a technique that adds noise to data to protect the privacy of individuals.
- Federated learning is another PET that allows AI models to be trained on decentralized data without revealing the data itself.
-
Automated Privacy Audits:
- AI can be used to automate privacy audits on social media platforms. AI algorithms can scan the platform for content that violates privacy rights and generate reports for human moderators to review.
By using AI in these ways, social media platforms can better protect the privacy of their users and create a more secure and trustworthy online environment.
Navigating Facebook’s privacy settings might seem complex, but remember that dfphoto.net is always here to support you with clear guides and tips. Remember, mastering these settings puts you in control, ensuring your photos are seen only by those you trust.
To delve deeper into privacy settings, photo sharing techniques, and to connect with a community that values both creativity and security, visit dfphoto.net today.
Address: 1600 St Michael’s Dr, Santa Fe, NM 87505, United States
Phone: +1 (505) 471-6001
Website: dfphoto.net
Frequently Asked Questions (FAQs)
- How do I stop someone from seeing my Facebook photos without blocking them?
- Adjust the privacy settings of individual photos or use the “Friends Except…” option to exclude specific people.
- Can I hide my Facebook profile picture from certain people?
- Yes, you can change the privacy setting on your profile