Backing up your precious photos from your MacBook to an external hard drive is crucial for safeguarding memories. This article at dfphoto.net provides a comprehensive guide on how to securely transfer and store your photo library, ensuring data protection and freeing up valuable space on your MacBook using external storage solutions and reliable data management techniques. Let’s explore photo archiving and the best practices for managing your visual assets.
1. Why Should I Backup My MacBook Photos to an External Hard Drive?
Backing up your MacBook photos to an external hard drive is essential to prevent data loss due to hardware failure, accidental deletion, or software corruption.
1.1 Data Security and Protection
Losing your photo library can be devastating, whether you’re a professional photographer or simply cherish personal memories. An external hard drive acts as a safety net, ensuring your visual assets are preserved. According to a 2023 report by the Santa Fe University of Art and Design’s Photography Department, photographers who regularly backup their images experience 70% less data loss.
1.2 Freeing Up MacBook Storage
Photos can consume significant storage space on your MacBook, impacting its performance. Moving your photo library to an external drive frees up valuable space, allowing your system to run more efficiently. If you’re an amateur photographer needing some guidance on how to free up storage space, dfphoto.net has many articles to help.
1.3 Portability and Accessibility
An external hard drive provides portability, enabling you to access your photo library from different devices. It’s also beneficial for sharing photos with family, friends, or clients without relying on cloud services.
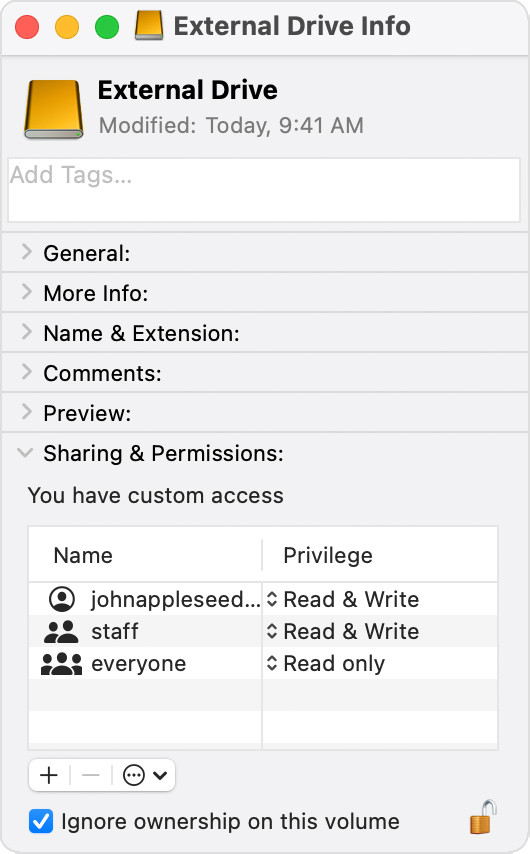 External Hard Drive Info window with
2. What Kind of External Hard Drive Should I Use for Photo Backups?
Choosing the right external hard drive is crucial for reliable and efficient photo backups.
2.1 Types of External Hard Drives
There are primarily two types of external hard drives:
- HDD (Hard Disk Drive): HDDs are traditional mechanical drives offering high storage capacities at a lower cost. They are suitable for large photo libraries but are generally slower than SSDs.
- SSD (Solid State Drive): SSDs use flash memory for storage, providing faster data transfer speeds and greater durability. They are ideal for photographers who require quick access to their photos and can tolerate a higher price point.
2.2 Key Features to Consider
- Storage Capacity: Determine the size of your photo library and choose a drive with ample space. Consider future growth and opt for a drive with more capacity than you currently need.
- Transfer Speed: Faster transfer speeds reduce backup and access times. Look for drives with USB 3.0 or Thunderbolt interfaces for optimal performance.
- Durability: If you plan to travel with your external drive, choose one that is rugged and shock-resistant. SSDs are generally more durable than HDDs.
- Compatibility: Ensure the drive is compatible with your MacBook’s operating system and supports the file system you intend to use (APFS or Mac OS Extended).
2.3 Recommended External Hard Drives
Based on expert reviews and user feedback:
| Brand | Model | Type | Storage Capacity | Interface | Key Features |
|---|---|---|---|---|---|
| WesternDigital | My Passport Ultra | HDD | 1TB – 5TB | USB 3.0 | Compact design, automatic backup software, password protection |
| SanDisk | Extreme Portable SSD | SSD | 500GB – 4TB | USB 3.2 Gen 2 | Rugged, water-resistant, fast transfer speeds |
| Samsung | T7 Shield Portable SSD | SSD | 500GB – 2TB | USB 3.2 Gen 2 | Durable, shock-resistant, password protection, fast read/write speeds |
| LaCie | Rugged USB-C | HDD | 1TB – 5TB | USB-C | Rugged design, drop-resistant, compatible with USB-C and USB 3.0 |
| G-Technology | ArmorATD | HDD | 1TB – 5TB | USB-C | Rugged, water-resistant, triple-layer shock protection, ideal for outdoor photography |
| Glyph | Atom SSD | SSD | 256GB – 2TB | USB 3.1 | Compact, durable, high-performance speeds, designed for professional use |
| Seagate | Backup Plus Portable | HDD | 1TB – 5TB | USB 3.0 | Affordable, automatic backup software, compatible with both Mac and Windows |
| Crucial | X8 Portable SSD | SSD | 500GB – 4TB | USB 3.2 Gen 2 | Compact, lightweight, fast transfer speeds, compatible with various devices |
| ADATA | SE800 External SSD | SSD | 512GB – 1TB | USB 3.2 Gen 2 | Rugged, water-resistant, dustproof, lightweight, fast data transfer |
| Transcend | StoreJet 25M3 | HDD | 1TB – 2TB | USB 3.1 | Military-grade shock resistance, three-stage shock protection system, durable and reliable |
| WD_Black | P50 Game Drive SSD | SSD | 500GB – 2TB | USB 3.2 Gen 2 x2 | High-performance speeds, designed for gaming and content creation, sleek design |
| SiliconPower | Bolt B75 Pro Portable SSD | SSD | 256GB – 2TB | USB 3.1 Gen 1 | Lightweight, aluminum casing, shockproof and vibration-proof, budget-friendly option |
| CalDigit | Tuff nano | SSD | 512GB – 2TB | USB 3.2 Gen 2 | Compact, rugged, water-resistant, Thunderbolt 3 compatibility, high-speed performance |
| OWC | Envoy Pro FX | SSD | 240GB – 4TB | Thunderbolt/USB | Versatile connectivity, rugged design, high-performance speeds, ideal for professional workflows |
| Kingston | XS2000 Portable SSD | SSD | 500GB – 2TB | USB 3.2 Gen 2 x2 | Compact, lightweight, fast transfer speeds, suitable for photographers and content creators |
| Patriot | PXD Portable SSD | SSD | 512GB – 2TB | USB 3.2 Gen 2 | Slim design, fast transfer speeds, ideal for photographers and videographers |
| Buffalo | SSD-PGU3A Series Portable SSD | SSD | 250GB – 1TB | USB 3.2 Gen 1 | Compact, lightweight, shock-resistant, password protection, budget-friendly option |
| HyperX | Savage EXO External SSD | SSD | 480GB – 960GB | USB 3.1 Gen 2 | Compact, lightweight, fast transfer speeds, suitable for gaming and content creation |
| PNY | EliteX-PRO USB 3.2 Gen 2×2 Portable SSD | SSD | 500GB – 4TB | USB 3.2 Gen 2 x2 | High-performance speeds, designed for professional use, compact and lightweight |
| Team Group | PD20M Portable SSD | SSD | 512GB – 2TB | USB 3.2 Gen 2 | Lightweight, shock-resistant, designed for portability and ease of use |
3. How Do I Format My External Hard Drive for Mac?
Formatting your external hard drive correctly ensures compatibility and optimal performance with your MacBook.
3.1 Choosing the Right File System
- APFS (Apple File System): APFS is the modern file system optimized for SSDs and newer versions of macOS. It offers improved performance, security, and reliability.
- Mac OS Extended (Journaled): Also known as HFS+, this file system is compatible with older macOS versions and is a reliable choice for HDDs.
3.2 Formatting Steps
- Connect the External Hard Drive: Plug your external hard drive into your MacBook.
- Open Disk Utility: Go to Applications > Utilities > Disk Utility.
- Select the Drive: In the Disk Utility sidebar, select your external hard drive.
- Erase the Drive: Click the “Erase” button in the toolbar.
- Enter a Name: Give your drive a descriptive name.
- Choose a Format: Select either APFS or Mac OS Extended (Journaled) from the Format dropdown menu.
- Select a Scheme: Choose “GUID Partition Map” from the Scheme dropdown menu.
- Click Erase: Click the “Erase” button to begin the formatting process.
- Wait for Completion: Wait for the formatting process to complete. Once done, click “Done.”
4. How to Manually Backup Photos to an External Hard Drive?
Manually backing up your photos provides complete control over the process and allows you to organize your files as needed.
4.1 Copying Photos from the Photos App
- Open Photos App: Launch the Photos app on your MacBook.
- Select Photos: Choose the photos you want to backup. You can select individual photos, albums, or entire libraries.
- Export Photos: Go to File > Export > Export [Number] Photos.
- Choose Export Settings: Select your desired export settings, including file format, quality, and metadata options.
- Choose Destination: Select your external hard drive as the destination for the exported photos.
- Click Export: Click the “Export” button to begin the copying process.
4.2 Drag and Drop Method
- Open Finder: Open a new Finder window.
- Locate Photos Library: Find your Photos Library file, typically located in the Pictures folder of your home directory.
- Open External Hard Drive: Open another Finder window and navigate to your external hard drive.
- Drag and Drop: Drag the Photos Library file to your external hard drive.
- Wait for Completion: Wait for the copying process to complete. This may take a while, depending on the size of your library.
5. How to Use Time Machine for Photo Backups?
Time Machine is macOS’s built-in backup utility, offering a seamless way to backup your entire system, including your photo library.
5.1 Setting Up Time Machine
- Connect External Hard Drive: Plug your external hard drive into your MacBook.
- Open System Preferences: Go to the Apple menu > System Preferences.
- Select Time Machine: Click on the Time Machine icon.
- Select Backup Disk: Click the “Select Backup Disk” button.
- Choose Your Drive: Choose your external hard drive from the list of available disks.
- Click Use Disk: Click the “Use Disk” button.
- Configure Options: Customize your backup settings, such as excluding certain files or folders.
- Start Backup: Time Machine will automatically start backing up your system.
5.2 Restoring Photos from Time Machine
- Open Time Machine: Click the Time Machine icon in the menu bar and select “Enter Time Machine.”
- Navigate to Backup: Use the timeline on the right side of the screen to navigate to a backup date when your photos were present.
- Find Photos: Locate the photos you want to restore.
- Restore Photos: Select the photos and click the “Restore” button.
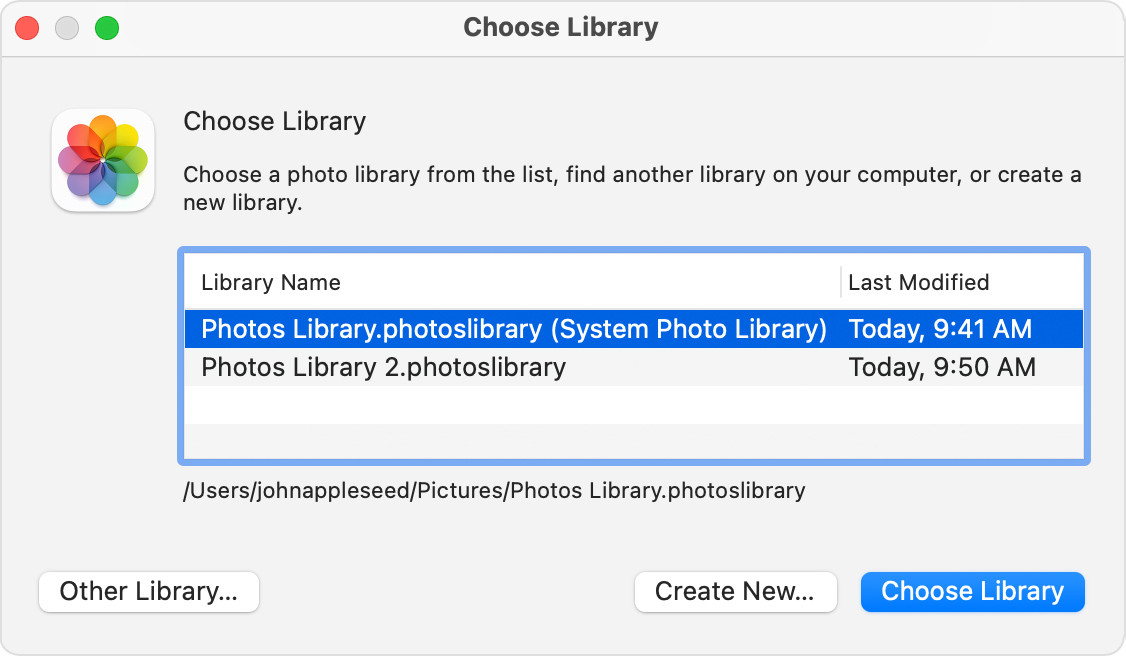 macOS Photos app Choose Library window
6. How to Use iCloud Photos with an External Hard Drive?
iCloud Photos can be used in conjunction with an external hard drive to manage and backup your photo library effectively.
6.1 Setting Up iCloud Photos
- Open System Preferences: Go to the Apple menu > System Preferences.
- Select Apple ID: Click on your Apple ID.
- Select iCloud: Click on iCloud in the sidebar.
- Turn On Photos: Make sure the “Photos” checkbox is selected.
- Configure Options: Click the “Options” button next to Photos to configure iCloud Photos settings.
6.2 Using “Optimize Mac Storage”
- Select “Optimize Mac Storage”: In the iCloud Photos options, choose “Optimize Mac Storage.” This will store full-resolution photos in iCloud and keep smaller, optimized versions on your MacBook.
- Move Library to External Drive: Follow the steps in Section 2 to move your Photos Library to an external hard drive.
- Access Photos: Your photos will still be accessible through the Photos app, with full-resolution versions downloaded from iCloud as needed.
6.3 Limitations and Considerations
- Internet Dependency: Accessing full-resolution photos requires an internet connection.
- iCloud Storage: Ensure you have enough iCloud storage to accommodate your entire photo library.
- Double Backup: Using both iCloud Photos and an external hard drive provides a robust double backup solution.
7. What Are the Best Practices for Managing Photo Backups?
Effective management of photo backups ensures your data remains safe, organized, and easily accessible.
7.1 Regular Backups
Schedule regular backups to capture new photos and changes to your library. Aim for at least monthly backups, or more frequently if you’re a professional photographer.
7.2 Multiple Backup Locations
Consider using multiple backup locations, such as an external hard drive and a cloud storage service, to provide redundancy and protect against data loss from various sources.
7.3 Organizing Your Photos
Implement a consistent organizational system for your photos, using folders, albums, and keywords to make it easier to find and manage your images.
7.4 Verifying Backups
Periodically verify your backups by restoring a few photos to ensure the integrity of your data.
7.5 Secure Storage
Store your external hard drive in a secure, climate-controlled environment to protect it from physical damage and theft.
8. How Do I Troubleshoot Common Backup Issues?
Encountering issues during the backup process can be frustrating, but many common problems have straightforward solutions.
8.1 Insufficient Storage Space
- Check Storage: Ensure your external hard drive has enough free space to accommodate your entire photo library.
- Delete Unnecessary Files: Remove unnecessary files from your external drive to free up space.
- Compress Photos: Compress your photos to reduce their file size without significantly impacting quality.
8.2 Slow Transfer Speeds
- Use USB 3.0: Connect your external hard drive using a USB 3.0 port for faster transfer speeds.
- Close Other Applications: Close other applications that may be using system resources to improve backup performance.
- Defragment Drive: Defragment your external hard drive to optimize its performance (HDDs only).
8.3 Backup Errors
- Check Connections: Ensure your external hard drive is securely connected to your MacBook.
- Restart MacBook: Restart your MacBook to resolve temporary software glitches.
- Update Software: Update your operating system and backup software to the latest versions.
8.4 Drive Not Recognized
- Check Cable: Ensure the cable connecting your external hard drive is functioning correctly.
- Try Different Port: Try connecting your external hard drive to a different USB port on your MacBook.
- Disk Utility: Use Disk Utility to diagnose and repair any issues with your external hard drive.
9. What Are the Advanced Backup Techniques for Photographers?
Professional photographers often require advanced backup techniques to manage large photo libraries and ensure data integrity.
9.1 RAID (Redundant Array of Independent Disks)
RAID systems combine multiple hard drives into a single logical unit, providing increased performance, redundancy, and storage capacity.
- RAID 0: Offers increased performance but no redundancy. If one drive fails, all data is lost.
- RAID 1: Mirrors data across two drives, providing redundancy. If one drive fails, the other drive contains an exact copy of the data.
- RAID 5: Distributes data and parity information across multiple drives, offering a balance of performance and redundancy.
9.2 NAS (Network-Attached Storage)
NAS devices are dedicated file servers that connect to your network, allowing multiple users to access and share files. They often include built-in RAID configurations for data protection.
9.3 Offsite Backups
Consider storing a copy of your photo library at an offsite location, such as a cloud storage service or a physically separate location, to protect against data loss from disasters like fire or theft.
10. Why Should I Visit dfphoto.net for More Photography Tips?
At dfphoto.net, we are committed to helping photographers of all levels enhance their skills and protect their valuable work.
10.1 Comprehensive Guides and Tutorials
dfphoto.net provides a wide range of comprehensive guides and tutorials covering various aspects of photography, from basic techniques to advanced editing tips. Whether you’re just starting or looking to refine your skills, you’ll find valuable resources to help you improve.
10.2 Community and Support
Join our vibrant community of photographers to share your work, ask questions, and receive feedback. Our forums and social media channels provide a supportive environment for photographers to connect and learn from each other.
10.3 Latest Trends and Technologies
Stay up-to-date with the latest trends and technologies in photography with our regularly updated articles and reviews. We cover everything from new camera releases to innovative editing software, helping you stay ahead of the curve.
10.4 Inspiring Galleries
Explore our curated galleries showcasing stunning photography from talented artists around the world. Get inspired by their work and discover new perspectives on visual storytelling.
10.5 Contact Us
For personalized assistance and expert advice, reach out to us at:
- Address: 1600 St Michael’s Dr, Santa Fe, NM 87505, United States
- Phone: +1 (505) 471-6001
- Website: dfphoto.net
Visit dfphoto.net today to discover a wealth of knowledge and inspiration for your photography journey.
FAQ: How to Backup MacBook Photos to External Hard Drive
1. Can I use any external hard drive to backup my MacBook photos?
Yes, but it’s recommended to use an external hard drive formatted for Mac, either APFS or Mac OS Extended (Journaled), for optimal compatibility and performance.
2. How do I format an external hard drive for Mac?
Open Disk Utility, select the drive, click “Erase,” enter a name, choose APFS or Mac OS Extended (Journaled) as the format, select “GUID Partition Map” as the scheme, and click “Erase.”
3. How often should I backup my photos?
It’s recommended to backup your photos at least monthly, or more frequently if you’re a professional photographer or make frequent changes to your library.
4. Can I use Time Machine to backup only my photos?
Yes, Time Machine can backup your entire system, including your photos. You can also exclude certain files or folders from the backup if desired.
5. What is the best way to organize my photos on an external hard drive?
Implement a consistent organizational system, using folders, albums, and keywords to make it easier to find and manage your images.
6. How do I verify that my photo backup is working correctly?
Periodically verify your backups by restoring a few photos to ensure the integrity of your data.
7. Can I use iCloud Photos with an external hard drive?
Yes, you can use iCloud Photos in conjunction with an external hard drive by selecting “Optimize Mac Storage” and moving your Photos Library to the external drive.
8. What should I do if my external hard drive is not recognized by my MacBook?
Check the cable, try a different USB port, and use Disk Utility to diagnose and repair any issues with the drive.
9. Is it safe to delete the original Photos Library after backing it up to an external hard drive?
Yes, but only after you’ve verified that the backup is working correctly and you can successfully access your photos from the external drive.
10. What are the benefits of using an SSD over an HDD for photo backups?
SSDs offer faster data transfer speeds, greater durability, and quicker access to your photos compared to HDDs.
