Google Photos serves as a smart hub for all your cherished photos and videos, adapting to modern photography practices. In this guide from dfphoto.net, we’ll explore different ways to view, manage, and enjoy your Google Photos, ensuring your memories are always at your fingertips. Discover photo organization tips, learn about image resolution options, and enhance your viewing experience with this comprehensive guide, and transform your photographic journey into an art form with visual storytelling.
1. What Are The Basic Ways To View My Google Photos?
Yes, there are several straightforward methods to view your Google Photos. Google Photos offers a flexible platform for viewing your images across various devices. You can use the Google Photos app on your smartphone or tablet, access it through a web browser on your computer, or even view your photos on your TV using Chromecast or Airplay. This multi-platform accessibility ensures you can enjoy your memories anytime, anywhere.
1.1 Viewing Google Photos on Mobile Devices
To view your Google Photos on a mobile device:
- Download the App: Install the Google Photos app from the App Store (iOS) or Google Play Store (Android).
- Sign In: Open the app and sign in with your Google account.
- Browse Your Photos: Once logged in, you can view all your backed-up photos and videos in the main timeline.
- Navigate: Use the bottom navigation bar to switch between “Photos” (timeline view), “Search,” “Albums,” and “Library”.
1.2 Accessing Google Photos on a Computer
To access Google Photos on a computer:
- Open a Browser: Use a web browser like Chrome, Firefox, or Safari.
- Go to Google Photos: Type photos.google.com into the address bar.
- Sign In: Log in with your Google account.
- View Your Photos: Your photos and videos will be displayed in the main view, similar to the mobile app.
1.3 Viewing Google Photos on TV
To view your photos on a TV:
- Chromecast: If you have a Chromecast device, open the Google Photos app on your phone or tablet. Tap the cast icon and select your Chromecast-enabled TV.
- Airplay: If you use Apple devices, you can use Airplay to stream your photos to an Apple TV.
- Smart TV Apps: Some smart TVs have a Google Photos app that you can download and sign in to directly.
1.4 Tips for a Better Viewing Experience
- Organization: Use albums to organize your photos into categories like vacations, family events, or specific projects.
- Search: Utilize the search function to quickly find photos by people, places, or things.
- Editing: Enhance your photos using the built-in editing tools to adjust lighting, color, and apply filters.
By following these steps, you can easily view and enjoy your Google Photos on any device.
2. How Do I Search For Specific Photos Within Google Photos?
Yes, Google Photos excels in its powerful search capabilities. Google Photos allows you to search for photos using various criteria, including people, places, things, and dates. This feature leverages Google’s advanced image recognition technology to identify elements within your photos, making it easy to find exactly what you’re looking for.
2.1 Using the Search Bar
The primary method for searching in Google Photos is through the search bar located at the top of the app or website.
-
Open Google Photos: Launch the Google Photos app or visit photos.google.com.
-
Locate the Search Bar: It’s prominently displayed at the top of the screen.
-
Enter Your Search Term: Type what you’re looking for. This could be:
- People: Names of people who appear in your photos (if you’ve labeled them).
- Places: Locations where the photos were taken (if location services were enabled).
- Things: Objects or subjects in the photos, such as “dog,” “beach,” “car,” or “birthday cake”.
- Dates: Specific dates, months, or years.
-
Review the Results: Google Photos will display photos that match your search term.
2.2 Searching by People
Google Photos uses facial recognition to group photos of the same person together.
- Label Faces: If you haven’t already, label the faces in your photos. To do this, go to the “Search” tab, and you’ll see “People & Pets.” Click on a face, and you’ll be prompted to add a name.
- Search by Name: Once faces are labeled, you can search for photos by typing the person’s name in the search bar.
2.3 Searching by Places
If your photos have location data, you can search for photos taken in specific locations.
- Enable Location Services: Ensure that your camera or smartphone has location services enabled when taking photos.
- Search by Location: Type the name of the city, state, or landmark in the search bar.
2.4 Searching by Things
Google Photos can identify various objects and subjects within your photos, thanks to Google Lens integration.
- Enter a Term: Type a general term like “dog,” “flower,” “food,” or “sunset” in the search bar.
- Refine Your Search: Google Photos will display relevant images. You can refine your search by adding more specific terms.
2.5 Searching by Dates
To find photos from a specific time, you can search by date.
- Enter a Date: Type the date, month, or year in the search bar. For example, “July 2023” or “2018”.
- View Results: Google Photos will show photos taken during that period.
2.6 Using Multiple Search Terms
You can combine search terms to narrow down your results.
- Combine Terms: For example, “John beach 2022” to find photos of John at the beach in 2022.
2.7 Tips for Effective Searching
- Be Specific: The more specific you are, the better the results.
- Check Your Spelling: Ensure your search terms are spelled correctly.
- Use General Terms: If you’re unsure of the exact term, start with a general one and refine as needed.
By using these search techniques, you can quickly and easily find any photo within your Google Photos library, enhancing your overall experience.
3. How Can I Organize My Google Photos Into Albums?
Yes, organizing your Google Photos into albums is a great way to manage and quickly find specific memories. Albums help you categorize and group photos from trips, events, or any other theme, making your collection more accessible and enjoyable.
3.1 Creating a New Album
- Open Google Photos: Launch the Google Photos app or go to photos.google.com.
- Navigate to Albums: In the app, tap “Library” at the bottom, then select “Albums”. On the website, click “Albums” in the left sidebar.
- Create Album: Tap or click “Create album”.
- Add Title: Enter a title for your album. This should be descriptive and help you easily identify the album later.
- Select Photos: Choose the photos you want to add to the album. You can select multiple photos at once.
- Tap Done: Once you’ve selected all the photos, tap “Done” (or the checkmark) to create the album.
3.2 Adding Photos to Existing Albums
- Open the Album: Go to the “Albums” section and open the album you want to add photos to.
- Add Photos:
- In the App: Tap “Add photos” at the top of the album.
- On the Website: Click the “+” icon (Add photos) at the top right.
- Select Photos: Choose the photos you want to add.
- Tap Done: Tap “Done” to add the photos to the album.
3.3 Organizing Tips for Effective Album Management
- Chronological Order: Arrange your photos in chronological order within the album to tell a story.
- Descriptive Titles: Use clear and descriptive titles for your albums, such as “Summer Vacation 2023” or “Family Reunion 2022”.
- Themed Albums: Create albums based on themes like “Landscapes,” “Portraits,” or “Black and White”.
- Shared Albums: Share albums with friends and family so they can view and add their own photos.
- Album Covers: Choose a representative photo as the album cover to make it visually appealing and easy to identify.
3.4 Shared Albums
Shared albums allow you to collaborate with others by sharing photos and videos.
- Create or Open an Album: Follow the steps above to create a new album or open an existing one.
- Share the Album:
- In the App: Tap the “Share” icon at the top right.
- On the Website: Click the “Share” icon at the top right.
- Choose Sharing Options: You can share the album via a link or directly with specific people.
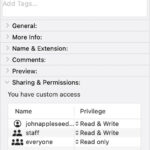
- Set Permissions: Decide whether collaborators can only view the photos or also add their own.
- Send Invitation: Send the invitation via email, messaging app, or copy the link to share it manually.
3.5 Using Folders Within Albums
While Google Photos doesn’t support folders within albums, you can achieve a similar effect by creating multiple albums and linking them together through naming conventions or descriptions.
3.6 Additional Tips for Album Organization
- Review Regularly: Periodically review and update your albums to keep them organized.
- Delete Duplicates: Remove any duplicate photos to save storage space and avoid confusion.
- Use Keywords in Descriptions: Add keywords in the album descriptions to make them searchable.
By following these steps and tips, you can effectively organize your Google Photos into albums, making it easier to find, share, and enjoy your memories.
4. Can I Edit Photos Directly Within Google Photos?
Yes, Google Photos provides a comprehensive suite of editing tools. Google Photos allows you to edit your photos directly within the app or website, offering a range of options from basic adjustments to more advanced filters and effects. This makes it convenient to enhance your photos without needing external software.
4.1 Accessing the Editing Tools
- Open Google Photos: Launch the Google Photos app or go to photos.google.com.
- Select a Photo: Choose the photo you want to edit and open it.
- Tap Edit:
- In the App: Tap the “Edit” icon at the bottom (usually represented by three horizontal lines with knobs).
- On the Website: Click the “Edit” icon at the top right (usually represented by the same three horizontal lines with knobs).
4.2 Basic Adjustments
Google Photos offers several basic adjustment tools to enhance your photos.
- Brightness: Adjust the overall brightness of the photo.
- Contrast: Modify the difference between the lightest and darkest parts of the photo.
- Highlights: Adjust the brightness of the brightest areas.
- Shadows: Adjust the brightness of the darkest areas.
- Whites: Set the white point in the photo.
- Blacks: Set the black point in the photo.
- Saturation: Increase or decrease the intensity of the colors.
- Warmth: Adjust the temperature of the colors, making them warmer or cooler.
4.3 Cropping and Rotating
- Crop: Crop the photo to improve composition or remove unwanted elements. You can choose from predefined aspect ratios or crop freely.
- Rotate: Rotate the photo to correct its orientation.
4.4 Filters
Google Photos provides a variety of filters to quickly change the look and feel of your photos.
- Apply Filters: Choose from a range of filters like “Vivid,” “Warm,” “Cool,” “B&W,” and more.
- Adjust Intensity: Adjust the intensity of the filter to achieve the desired effect.
4.5 Markup Tool
- Access Markup: Tap on the edit icon, then select “Markup”
- Annotate: Use various pen and highlighter tools to draw or write on the photo.
- Save Changes: Save your annotated photo.
4.6 Advanced Editing Features
- Color Pop: This feature desaturates the background while keeping the subject in color, making them stand out.
- Sky: (Available on some devices) This feature allows you to change the sky in your photo, adding drama and interest.
4.7 Tips for Effective Photo Editing
- Start with Basic Adjustments: Begin with brightness, contrast, and color adjustments before applying filters.
- Use Filters Sparingly: Overusing filters can make your photos look unnatural.
- Crop for Better Composition: Use the crop tool to improve the composition of your photos.
- Correct Orientation: Ensure your photos are properly oriented.
- Experiment: Don’t be afraid to experiment with different editing options to find what works best for each photo.
- Use the Undo Button: If you don’t like an edit, use the undo button to revert to the original.
4.8 Non-Destructive Editing
Google Photos uses non-destructive editing, meaning your original photo is always preserved. All edits are saved as adjustments, and you can revert to the original at any time.
- Revert to Original:
- In the App: Open the edited photo, tap “Edit,” then tap “Revert”.
- On the Website: Open the edited photo, click “Edit,” then click “Revert to original”.
By utilizing the editing tools in Google Photos, you can enhance your photos and bring out their best qualities, all within the convenience of the app or website.
5. How Do I Share My Google Photos With Others?
Yes, sharing your Google Photos with friends and family is simple and versatile. Google Photos offers multiple options for sharing your photos and videos, including creating shared albums, generating links, and sharing directly to other apps. This makes it easy to keep your loved ones updated with your latest memories.
5.1 Sharing Individual Photos or Videos
- Open Google Photos: Launch the Google Photos app or go to photos.google.com.
- Select Photo or Video: Choose the photo or video you want to share and open it.
- Tap Share:
- In the App: Tap the “Share” icon at the bottom (usually represented by a “up” arrow).
- On the Website: Click the “Share” icon at the top right (usually represented by a “up” arrow).
- Choose Sharing Method:
- Share to Apps: Select an app like Gmail, Messages, Facebook, Instagram, or Twitter to share directly.
- Create a Link: Create a shareable link that you can send via any messaging platform.
- Share to Contacts: Share directly with people in your Google Contacts.
5.2 Creating and Sharing Albums
Sharing an album allows others to view multiple photos and videos in one place.
- Create or Open an Album: Follow the steps in Section 3 to create a new album or open an existing one.
- Tap Share:
- In the App: Tap the “Share” icon at the top right.
- On the Website: Click the “Share” icon at the top right.
- Choose Sharing Options:
- Share to Apps: Select an app to share the album link.
- Share to Contacts: Share the album directly with people in your Google Contacts.
- Create a Link: Create a shareable link.
- Set Permissions: Decide whether collaborators can only view the photos or also add their own.
5.3 Shared Libraries
Shared Libraries allow you to automatically share all or specific photos with a trusted person.
- Open Google Photos: Launch the Google Photos app or go to photos.google.com.
- Go to Settings:
- In the App: Tap your profile icon at the top right, then select “Photos settings” and “Sharing”.
- On the Website: Click the settings icon (gear icon) and select “Shared library”.
- Add Partner: Click “Get started” and enter the email address of the person you want to share with.
- Choose Sharing Options:
- All Photos: Share all photos in your library.
- Photos of Specific People: Share only photos containing specific people.
- Only Since This Day: Share photos taken from a specific date forward.
- Send Invitation: Send the invitation to your partner. Once they accept, the selected photos will be automatically shared.
5.4 Tips for Effective Sharing
- Privacy Settings: Be mindful of your privacy settings when sharing photos, especially those containing sensitive information.
- Link Expiration: For added security, set an expiration date for shared links.
- Collaborative Albums: Encourage friends and family to add their own photos to shared albums for a complete collection of memories.
- Sharing Etiquette: Always ask for permission before sharing photos of others.
5.5 Stop Sharing
You can stop sharing individual photos, albums, or shared libraries at any time.
- Stop Sharing an Album:
- Open the album.
- Tap the “Share” icon.
- Tap “Stop sharing”.
- Remove a Collaborator:
- Open the album.
- Tap the “Share” icon.
- Remove the person from the list of collaborators.
- Stop Shared Library:
- Go to “Shared library” in the settings.
- Click “Remove partner”.
5.6 Sharing to Social Media
Sharing directly to social media platforms is a quick way to share your photos with a wider audience.
- Open Google Photos: Launch the Google Photos app or go to photos.google.com.
- Select Photo or Video: Choose the photo or video you want to share.
- Tap Share: Tap the “Share” icon.
- Choose Social Media App: Select the social media app you want to share to (e.g., Facebook, Instagram, Twitter).
- Add Caption: Add a caption or message to your post.
- Post: Share the photo or video on your social media profile.
By using these sharing options, you can easily share your Google Photos with anyone you choose, keeping your memories alive and connected with those you care about.
6. How Does Google Photos Storage Work?
Yes, understanding how Google Photos storage works is important for managing your photos and videos effectively. Google Photos offers different storage options that affect the quality and accessibility of your media.
6.1 Storage Options
Google Photos provides two primary storage options:
- Storage Saver (Previously High Quality):
- Compression: Photos and videos are compressed to save space.
- Image Quality: Photos are resized to a maximum of 16 megapixels, and videos are capped at 1080p.
- Benefits: Ideal for users who want to store a large number of photos and videos without using too much storage space.
- Original Quality:
- No Compression: Photos and videos are stored in their original resolution and quality.
- Storage Usage: Uses more storage space.
- Benefits: Best for users who want to preserve the highest possible quality of their photos and videos, especially for professional use or large prints.
6.2 Google Account Storage
- Free Storage: Every Google Account comes with 15 GB of free storage. This storage is shared between Gmail, Google Drive, and Google Photos.
- Paid Storage: If you need more storage, you can subscribe to Google One, which offers expanded storage plans.
6.3 Google One Storage Plans
Google One offers various storage plans, with pricing and availability varying by region. As of 2024, common plans include:
| Storage Amount | Monthly Price (USD) | Annual Price (USD) |
|---|---|---|
| 100 GB | $1.99 | $19.99 |
| 200 GB | $2.99 | $29.99 |
| 2 TB | $9.99 | $99.99 |
6.4 Checking Your Storage Usage
- Open Google Photos: Launch the Google Photos app or go to photos.google.com.
- Go to Settings:
- In the App: Tap your profile icon at the top right, then select “Photos settings” and “Backup & sync”.
- On the Website: Click the settings icon (gear icon) and select “Backup & sync”.
- View Storage: You can see your current storage usage and manage your backup settings.
6.5 Managing Your Storage
- Choose Storage Option: Select either “Storage Saver” or “Original Quality” based on your needs.
- Free Up Space: Google Photos provides tools to help you manage your storage.
- Recover Storage: Compress existing photos and videos to “Storage Saver” quality.
- Delete Unwanted Photos and Videos: Remove unnecessary files to free up space.
6.6 Transferring Existing Photos to Storage Saver
You can compress your existing photos and videos to the “Storage Saver” quality to free up storage space.
- Open Google Photos: Launch the Google Photos app or go to photos.google.com.
- Go to Settings: Follow the steps above to access the “Backup & sync” settings.
- Recover Storage: Look for the option to “Recover storage” or “Convert existing items to Storage Saver quality”.
- Confirm: Follow the prompts to compress your photos and videos.
6.7 Tips for Efficient Storage Management
- Regularly Review: Periodically review your Google Photos library to delete unwanted photos and videos.
- Backup Important Files: Ensure that important photos and videos are backed up in “Original Quality”.
- Monitor Storage Usage: Keep an eye on your storage usage to avoid running out of space.
- Consider Google One: If you consistently run out of storage, consider subscribing to a Google One plan.
By understanding and managing your Google Photos storage, you can ensure that your memories are safely backed up and accessible without exceeding your storage limits.
7. How Do I Download Photos From Google Photos?
Yes, downloading photos from Google Photos is straightforward, whether you want to save individual images or entire albums. Google Photos provides several options to download your photos and videos, ensuring you always have access to your memories offline.
7.1 Downloading Individual Photos or Videos
- Open Google Photos: Launch the Google Photos app or go to photos.google.com.
- Select Photo or Video: Choose the photo or video you want to download and open it.
- Tap More Options:
- In the App: Tap the three vertical dots (More options icon) at the top right.
- On the Website: Click the three vertical dots (More options icon) at the top right.
- Select Download: Tap or click “Download”. The photo or video will be downloaded to your device’s default download location.
7.2 Downloading an Entire Album
- Open Google Photos: Launch the Google Photos app or go to photos.google.com.
- Go to Albums:
- In the App: Tap “Library” at the bottom, then select “Albums”.
- On the Website: Click “Albums” in the left sidebar.
- Open the Album: Choose the album you want to download and open it.
- Tap More Options:
- In the App: Tap the three vertical dots (More options icon) at the top right.
- On the Website: Click the three vertical dots (More options icon) at the top right.
- Select Download All: Tap or click “Download all”. The album will be downloaded as a ZIP file.
- Extract the ZIP File: Once the download is complete, extract the ZIP file to access the photos and videos.
7.3 Using Google Takeout to Download All Your Photos
Google Takeout allows you to download all your data from Google services, including Google Photos.
- Go to Google Takeout: Visit takeout.google.com.
- Select Google Photos: Make sure only “Google Photos” is selected. You can deselect all other services by clicking “Deselect all” and then selecting “Google Photos”.
- Customize the Download:
- Multiple Albums: Choose specific albums or download all albums.
- File Type & Size: Select the file type (.zip or .tgz) and the maximum file size for the archive.
- Create Export: Click “Create export”.
- Wait for the Archive: Google will create an archive of your photos and videos. This process may take several hours or even days, depending on the amount of data.
- Download the Archive: Once the archive is ready, you will receive an email with a download link. Click the link to download the archive.
- Extract the Archive: Extract the downloaded file to access your photos and videos.
7.4 Downloading Photos on Mobile Devices
- Open Google Photos: Launch the Google Photos app.
- Select Photos: Select the photos you want to download.
- Tap More Options: Tap the three vertical dots.
- Save to Device: Tap “Save to device”. The photos will be saved to your device’s gallery.
7.5 Tips for Downloading Photos
- Ensure Sufficient Storage: Make sure your device has enough storage space before downloading large albums or archives.
- Use a Stable Internet Connection: Use a stable internet connection to avoid interruptions during the download process.
- Check the Downloaded Files: After downloading, check the files to ensure they are complete and not corrupted.
- Organize Downloaded Photos: Organize the downloaded photos into folders for easy access and management.
7.6 Downloading Photos in Original Quality
To ensure you download photos in their original quality:
- Check Backup Quality: Make sure your photos are backed up in “Original Quality” in Google Photos settings.
- Download Directly: Download individual photos or albums directly from Google Photos, rather than using third-party apps.
By following these steps, you can easily download your photos and videos from Google Photos, ensuring you have a local backup and can access your memories offline.
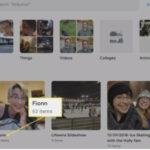
8. What Are Live Albums in Google Photos And How To Use Them?
Yes, Live Albums in Google Photos are a dynamic way to share photos of specific people and pets automatically. Live Albums automatically add photos as you take them, so you don’t have to manually update the album.
8.1 What are Live Albums?
Live Albums use facial recognition to automatically add photos of selected people or pets. As you take new photos, Google Photos identifies the subjects and adds them to the album.
8.2 Creating a Live Album
- Open Google Photos: Launch the Google Photos app or go to photos.google.com.
- Go to Albums:
- In the App: Tap “Library” at the bottom, then select “Albums”.
- On the Website: Click “Albums” in the left sidebar.
- Create Album: Tap or click “Create album”.
- Add Title: Enter a title for your Live Album, such as “Family Photos” or “Pet Adventures”.
- Select People & Pets: Choose the people and pets you want to include in the album. Google Photos will use facial recognition to identify and add their photos.
- Confirm: Tap “Confirm” or “Create” to create the Live Album.
8.3 Sharing a Live Album
- Open the Live Album: Go to the “Albums” section and open the Live Album you want to share.
- Tap Share:
- In the App: Tap the “Share” icon at the top right.
- On the Website: Click the “Share” icon at the top right.
- Choose Sharing Options:
- Share to Apps: Select an app to share the album link.
- Share to Contacts: Share the album directly with people in your Google Contacts.
- Create a Link: Create a shareable link.
- Set Permissions: Decide whether collaborators can only view the photos or also add their own.
8.4 How Live Albums Work
- Automatic Updates: Google Photos automatically adds new photos of the selected people and pets as you take them.
- Facial Recognition: The facial recognition technology identifies the subjects in your photos and adds them to the album.
- No Manual Updates: You don’t need to manually add photos to the album; Google Photos does it for you.
8.5 Managing Live Albums
- Add or Remove People & Pets:
- Open the Live Album.
- Tap the three vertical dots (More options icon) at the top right.
- Select “Edit album”.
- Add or remove people and pets as needed.
- Remove Photos:
- Open the Live Album.
- Select the photo you want to remove.
- Tap the three vertical dots (More options icon) at the top right.
- Select “Remove from album”.
- Pause Automatic Updates:
- You cannot pause automatic updates, but you can remove all people and pets to effectively stop new photos from being added.
8.6 Benefits of Using Live Albums
- Convenience: Automatically share photos without manual updates.
- Up-to-Date: Always have the latest photos of your favorite people and pets in one place.
- Easy Sharing: Share the album with family and friends, and they’ll always see the newest photos.
8.7 Tips for Using Live Albums
- Accurate Facial Recognition: Ensure that the facial recognition is accurate by labeling faces in Google Photos.
- Privacy: Be mindful of privacy when sharing Live Albums, especially if they contain photos of children.
- Regularly Review: Periodically review the album to ensure that only relevant photos are included.
By using Live Albums, you can easily share your latest photos with family and friends, keeping them updated with your most cherished moments.
9. How Can Google Lens Enhance My Google Photos Experience?
Yes, Google Lens integration significantly enhances the Google Photos experience. Google Lens allows you to interact with your photos in new ways by identifying text, objects, and providing contextual information.
9.1 What is Google Lens?
Google Lens is an image recognition technology that uses artificial intelligence to analyze images and provide relevant information or actions.
9.2 Accessing Google Lens in Google Photos
- Open Google Photos: Launch the Google Photos app or go to photos.google.com.
- Select a Photo: Choose the photo you want to analyze and open it.
- Tap Lens:
- In the App: Tap the Google Lens icon at the bottom (usually represented by a square with a dot in each corner).
- On the Website: Click the Google Lens icon at the top right (usually represented by a square with a dot in each corner).
9.3 Features of Google Lens in Google Photos
- Text Recognition (OCR):
- Function: Identifies and extracts text from images.
- Use Cases: Copy text from a photo of a document, translate text, or search for information based on the text.
- Object Recognition:
- Function: Identifies objects, landmarks, and other elements in the photo.
- Use Cases: Identify plants, animals, buildings, or products in the photo.
- Shopping:
- Function: Finds similar products online based on the photo.
- Use Cases: Shop for clothes, furniture, or other items seen in the photo.
- Places and Landmarks:
- Function: Provides information about landmarks and places in the photo.
- Use Cases: Learn about the history of a building, find reviews of a restaurant, or get directions to a location.
- Copy and Paste Text:
- Function: Allows you to copy and paste text from a photo to other apps.
- Use Cases: Copy a recipe from a photo of a cookbook, or copy an address from a photo of a sign.
- Translate
- Function: Allows you to translate text from a photo.
- Use Cases: Translate a menu, a sign, or a document.
9.4 How to Use Google Lens
- Identify Text:
- Open a photo containing text.
- Tap the Google Lens icon.
- Select the text you want to copy or translate.
- Choose “Copy text” or “Translate”.
- Identify Objects:
- Open a photo containing an object you want to identify.
- Tap the Google Lens icon.
- Google Lens will highlight the object and provide information about it.
- Shop for Products:
- Open a photo containing a product you want to buy.
- Tap the Google Lens icon.
- Google Lens will identify the product and show you similar products online.
- Learn About Places:
- Open a photo of a landmark or place.
- Tap the Google Lens icon.
- Google Lens will provide information about the place, including its history, reviews, and directions.
9.5 Benefits of Using Google Lens
- Enhanced Information: Get instant information about the objects and places in your photos.
- Convenience: Easily copy text, translate languages, and shop for products directly from your photos.
- Efficiency: Save time by quickly identifying and learning about the elements in your photos.
9.6 Tips for Using Google Lens
- Clear Photos: Use clear, well-lit photos for best results.
- Focus: Ensure the object or text you want to analyze is in focus.
- Explore: Experiment with different photos to discover the full range of Google Lens capabilities.
By integrating Google Lens into your Google Photos experience, you can unlock a wealth of information and functionality, making your photos more interactive and useful.
10. How Do I Back Up Photos From My Phone To Google Photos?
Yes, backing up photos from your phone to Google Photos is crucial for safeguarding your memories. Google Photos offers automatic backup and sync features, ensuring your photos are safely stored in the cloud.
10.1 Setting Up Backup and Sync
- Open Google Photos: Launch the Google Photos app on your Android or iOS device.
- Access Settings:
- Tap your profile icon at the top