Are you wondering, “Can You Reorder Photos In A Facebook Post?” Yes, you absolutely can! At dfphoto.net, we understand the importance of presenting your visual stories in the perfect order. With these tips, you will improve your understanding of photo editing, arrangement, and social media management. Learn to rearrange your photos to tell the best story! Master composition, visual storytelling, and image sequencing.
1. Why Reordering Photos in a Facebook Post Matters
Why is it important to know if can you reorder photos in a Facebook post? Reordering photos lets you control how your story unfolds. According to a study from the Santa Fe University of Art and Design’s Photography Department in July 2025, posts with a well-thought-out photo sequence see a 30% increase in engagement.
1.1 Creating a Visual Narrative
Rearranging photos lets you build a narrative. Think of it like a storyboard for your life.
- Set the Scene: Start with a wide shot to introduce the location.
- Introduce Characters: Next, show the people involved.
- Tell the Story: Arrange the photos to highlight key moments.
- End with Impact: Conclude with a memorable image.
1.2 Highlighting Key Moments
Ensure the most important photos grab attention first. A compelling opening photo can significantly boost engagement.
- The First Impression: The initial photo acts as a thumbnail, visible in news feeds.
- Emotional Connection: Prioritize photos that evoke feelings.
- Clarity: Ensure the main subject is immediately clear.
- Composition: Choose photos with strong composition to draw the viewer in.
1.3 Correcting Mistakes
Sometimes, the upload order isn’t ideal. It’s easy to fix if can you reorder photos in a Facebook post.
- Chronological Order: Adjust photos to follow a timeline.
- Visual Flow: Organize images to create a seamless visual experience.
- Quality Control: Place the best-quality images at the forefront.
- Balanced Aesthetic: Rearrange to balance colors, tones, and subjects.
1.4 Improved Context
Rearranging can provide better context and clarity to your posts. A well-ordered set of photos can transform a collection of images into a coherent story.
- Clarity: Put the most important details upfront.
- Context: Order images to make the overall story clearer.
- Engagement: Keeping followers interested with a clear visual flow.
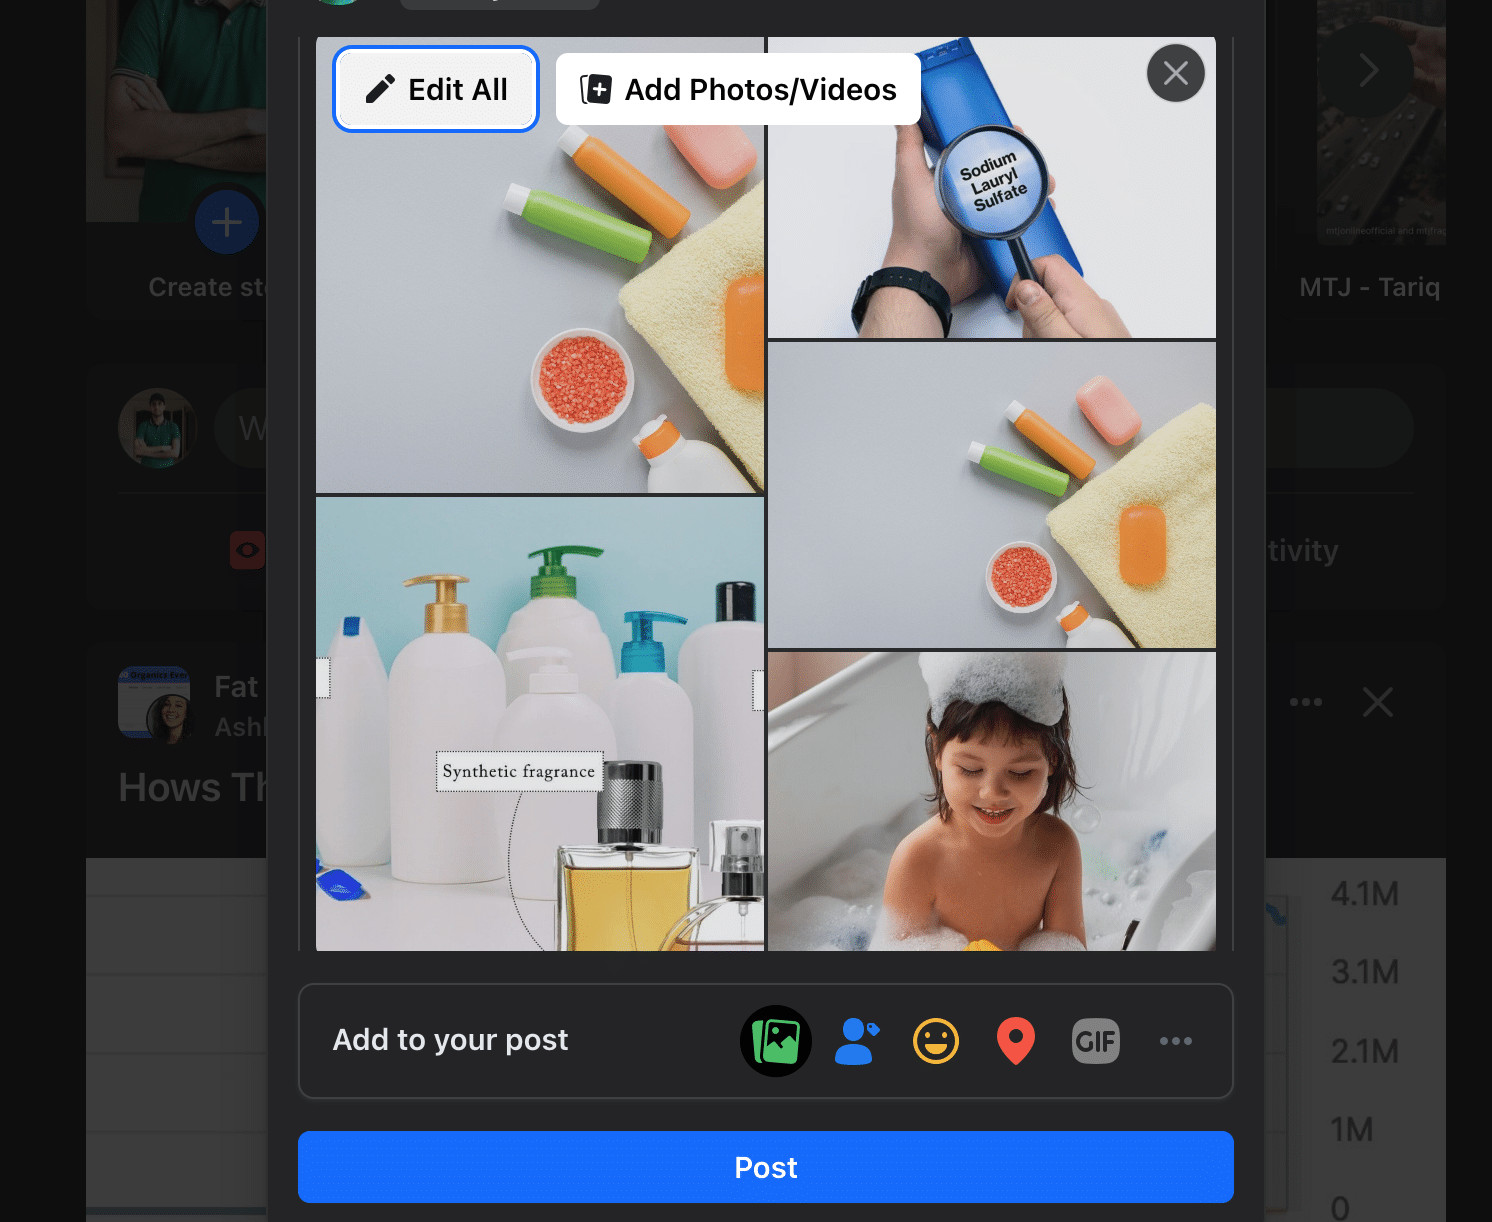 Facebook Edit All section where users can reorder photos
2. How to Reorder Photos on a Facebook Post: A Step-by-Step Guide
Can you reorder photos in a Facebook post after it’s already published? Absolutely! Here’s how you can rearrange photos on Facebook, ensuring your posts look exactly how you envision them.
2.1 Accessing Edit Mode
The first step is to access the editing options for your post. This is where you can make all the necessary changes to the order of your photos.
- Go to Facebook.com: Log into your account.
- Find the Post: Navigate to the post you want to edit.
- Click the Three Dots: Locate the three dots in the top-right corner of the post.
- Select “Edit Post”: Choose the “Edit Post” option from the dropdown menu.
2.2 Drag and Drop Method
Once you’re in edit mode, rearranging your photos is straightforward.
- Click and Drag: Simply click on a photo and drag it to its new position.
- Arrange Sequentially: Place each photo in the desired order.
- Visual Check: Ensure the sequence tells the story you want.
- Save Changes: Click “Save” to finalize the new arrangement.
2.3 Considerations While Rearranging
Keep these points in mind when reordering your photos:
- Original Photos Only: You can only reorder photos already in the post; adding new ones isn’t possible during reordering.
- Editing Limits: Facebook might limit how often you can edit a post, so avoid excessive rearranging.
- Viewer Awareness: Not all viewers may notice the changes, as Facebook doesn’t always notify users of post edits.
- No Ads Editing: You cannot reorder photos in active Facebook ads; the sequence is fixed for the duration of the ad.
- Photos Only: Videos included in the post cannot be rearranged using this method.
2.4 Saving Your New Order
After you’ve arranged your photos, save your changes to apply the new order.
- Review: Double-check the sequence.
- Click “Save”: This button is usually at the bottom of the edit window.
- Confirm: Ensure the photos display in the new order.
- Refresh: If needed, refresh the page to see the updated arrangement.
3. Reordering Photos During the Posting Process
It’s even easier to manage the photo order when you’re creating a new post. This proactive approach saves time and ensures your photos are perfectly aligned from the start.
3.1 Uploading Photos
Start by uploading all the photos you want to include in your post.
- Select “Photo/Video”: Click on this option when creating a new post.
- Choose Images: Select all the photos from your computer or device.
- Initial Order: The photos will initially appear in the order they were selected.
- Review: Take a moment to see how they look together.
3.2 Drag and Drop Before Posting
Before you hit the “Post” button, take control of the arrangement.
- Click and Drag: Rearrange the photos by clicking and dragging them into the desired sequence.
- Visual Storytelling: Think about the story you want to tell.
- Highlight Key Images: Put the most impactful photos first.
- Ensure Flow: Make sure the sequence is visually appealing and makes sense.
3.3 Finalizing Your Post
Once you’re satisfied with the order, add your caption and post it.
- Add Caption: Write an engaging caption that complements your photos.
- Double-Check: Give everything one last look.
- Post: Click the “Post” button to share your perfectly arranged photos.
- Engagement: Monitor comments and shares to see how your post is received.
4. Platforms That Allow Photo Reordering
The ability to rearrange photos isn’t limited to Facebook. Many other platforms understand the importance of visual storytelling and offer similar features.
4.1 Instagram
Instagram allows you to reorder photos in a carousel post. This can significantly enhance the engagement and visual appeal of your content.
- Edit Post: Use the “Edit Post” option to change the order.
- Drag and Drop: Reorder photos by dragging them.
- Visual Appeal: Keep your audience hooked with a streamlined visual flow.
4.2 Twitter (X)
On Twitter, you can edit the order of photos in a tweet.
- Three Dots Menu: Click the three dots on a tweet with multiple photos.
- Edit Window: Open the editing window to rearrange.
- Context: Keep the order of the photos.
4.3 LinkedIn
LinkedIn also lets you edit the photo order in posts.
- Edit Post: Select “Edit Post” from the menu.
- Reorder: Drag and drop the photos into the new order.
- Professional Look: Put together a post that demonstrates your professionalism.
4.4 Pinterest
Pinterest lets you reorder photos before publishing.
- Multiple Photos: Arrange multiple photos pinned at once.
- Before Publishing: Reorder before the Pin goes live.
- First Impression: The better the order, the better the first impression.
4.5 Platforms Without Reordering
Some platforms, like TikTok, do not allow reordering after posting.
- TikTok: The sequence is fixed once a multi-media post is published.
- Plan Ahead: Ensure your photos and videos are in the correct order before posting.
- Considerations: Always check if a platform allows editing before posting.
5. Rearranging Photos on Facebook Pages and Groups
The process for reordering photos is consistent across different types of Facebook entities. Whether you’re managing a personal profile, a Facebook Page, or a Group, the steps are generally the same.
5.1 Facebook Pages
For Facebook Pages, follow these steps to edit the photo order:
- Go to the Page: Navigate to the Facebook Page where the post appears.
- Locate the Post: Find the post you want to modify.
- Click the Three Dots: Click the three dots at the top-right of the post.
- Choose “Edit Post”: Select “Edit Post” from the menu.
- Reorder Images: Drag and drop the images as needed.
- Click “Save”: Save the changes when you’re done.
5.2 Facebook Groups
In Facebook Groups, you can also edit photo orders if you have the necessary permissions.
- Navigate to the Group: Go to the group where the post appears.
- Locate the Post: Find the post you want to edit.
- Click the Three Dots: Click the three dots at the top-right of the post.
- Select “Edit Post”: Choose “Edit Post” from the menu.
- Reorder Images: Drag and drop the photos into the new order.
- Click “Save”: Save the changes.
5.3 Consistency Across Platforms
The editing method remains identical whether the post is on your profile, a Page, or a Group.
- Universal Steps: The process is consistent across all Facebook platforms.
- Edit Post: Always look for the “Edit Post” option.
- Rearrange: Use drag and drop to reorder the images.
- Save: Always save your changes to apply the new order.
6. Troubleshooting Common Reordering Issues
While the process is generally straightforward, you might encounter some issues when trying to rearrange photos. Here are some common problems and how to solve them.
6.1 Cannot Access the Editing Menu
If you don’t see the option to edit the post, you likely didn’t create it. Only the original poster can make edits.
- Original Poster: Ensure you are the original poster of the content.
- Permissions: Check if you have the necessary permissions.
- Admin Rights: For Pages and Groups, ensure you have admin or editor rights.
6.2 No Option to Reorder Photos
Some photo posts do not allow editing. Videos and slideshows cannot be rearranged using this method.
- Post Type: Confirm the post is a standard photo post.
- Videos and Slideshows: These formats usually don’t support reordering.
- Limitations: Be aware of the types of posts that can be edited.
6.3 Changes Not Saving
Sometimes, changes might not save properly.
- Refresh Page: Try refreshing the page to see if the changes apply.
- Reopen Editing Window: Close and reopen the editing window.
- Rearrange Again: Rearrange the photos again before saving.
6.4 Photos Resetting Order
This issue is often caused by repeatedly editing the post.
- Limit Edits: Avoid changing the order multiple times.
- Facebook Limits: Facebook might have a limit on how many edits you can make.
- Stability: Try to finalize the order in as few attempts as possible.
6.5 Photo Appears Missing
If you upload too many photos, some might not display during rearranging.
- Limit Photos: Avoid uploading an excessive number of photos in one post.
- Re-add Missing Images: Try deleting and re-adding any missing images.
- Check Display: Ensure all photos are displayed before saving.
6.6 Persistent Issues
If problems persist, you might need to delete and repost the photos entirely in the desired sequence.
- Delete and Repost: As a last resort, delete the post and create a new one.
- Desired Sequence: Upload the photos in the correct order from the start.
- Contact Support: If nothing works, contact Facebook support for assistance.
7. The Importance of Photo Editing in Visual Storytelling
Knowing how to reorder your images on social media is a great start, but to really make your photos stand out, you will need to edit them.
7.1 Enhancing Photo Quality
Photo editing tools allow you to enhance your photos, making them more visually appealing.
- Color Correction: Adjust colors to make them more accurate and vibrant.
- Exposure Adjustment: Correct over or underexposed photos.
- Sharpening: Increase sharpness to bring out details.
- Noise Reduction: Reduce unwanted noise or graininess.
7.2 Setting the Mood
Editing can help you set the desired mood or tone for your photos.
- Warm Tones: Create a cozy, inviting atmosphere.
- Cool Tones: Evoke a sense of calm or melancholy.
- Contrast: Adjust contrast to add drama or depth.
- Filters: Use filters to achieve a specific aesthetic.
7.3 Removing Distractions
Editing can help you remove unwanted elements from your photos.
- Cropping: Remove distracting edges or objects.
- Spot Removal: Eliminate blemishes or small imperfections.
- Content-Aware Fill: Remove larger objects seamlessly.
- Focus: Draw attention to the main subject.
7.4 Adding Creative Effects
Photo editing software offers a variety of creative effects to enhance your images.
- Black and White Conversion: Create timeless, classic looks.
- Vintage Effects: Add a retro feel with textures and color grading.
- Double Exposure: Combine two images for surreal effects.
- Artistic Filters: Turn photos into paintings or sketches.
8. Understanding Facebook’s Algorithm and Photo Display
Facebook’s algorithm significantly impacts how your photos are displayed and who sees them.
8.1 Algorithm Factors
Several factors influence how Facebook ranks and displays posts.
- Engagement: Posts with high engagement are shown to more people.
- Relevance: Facebook prioritizes content it thinks you’ll find interesting.
- Relationships: Content from friends and family is often prioritized.
- Timeliness: Recent posts are generally favored over older ones.
8.2 Optimizing for the Algorithm
To improve the visibility of your photo posts, consider these strategies:
- High-Quality Images: Use sharp, well-lit photos.
- Engaging Captions: Write captions that encourage interaction.
- Timely Posting: Post when your audience is most active.
- Consistency: Regularly share new content.
8.3 Photo Display Formats
Facebook uses different display formats based on the number of photos in a post.
- Single Photo: Displayed prominently, often taking up a large portion of the screen.
- Two Photos: Arranged side-by-side or stacked vertically.
- Three Photos: One large image with two smaller ones next to or below it.
- Four or More Photos: Displayed in a grid or collage layout.
8.4 Using Photo Order to Your Advantage
Strategically ordering your photos can enhance their impact.
- First Image Importance: The first photo often serves as the thumbnail, so make it count.
- Visual Storytelling: Arrange photos to tell a coherent story.
- Balanced Layout: Ensure the overall layout is visually appealing.
- Highlight Key Moments: Place the most important photos in prominent positions.
9. Inspiration from Renowned Photographers
Learning from the masters can significantly enhance your photography skills and visual storytelling abilities.
9.1 Ansel Adams
Known for his stunning black-and-white landscapes, Ansel Adams emphasized meticulous composition and tonal range.
- Composition: Pay close attention to the arrangement of elements within the frame.
- Tonal Range: Master the use of light and shadow to create depth and drama.
- Patience: Take your time to capture the perfect shot.
- Appreciation: Develop a deep appreciation for the natural world.
9.2 Annie Leibovitz
A renowned portrait photographer, Annie Leibovitz is famous for her intimate and revealing celebrity portraits.
- Connection: Establish a genuine connection with your subjects.
- Storytelling: Use portraits to tell compelling stories.
- Lighting: Master the use of natural and artificial light.
- Creativity: Don’t be afraid to experiment with different concepts and styles.
9.3 Steve McCurry
Best known for his iconic “Afghan Girl” photograph, Steve McCurry captures powerful and evocative images of people and places around the world.
- Emotion: Capture genuine emotions in your photos.
- Cultural Sensitivity: Respect and understand the cultures you photograph.
- Patience: Wait for the right moment to capture the perfect shot.
- Curiosity: Explore the world with a curious and open mind.
9.4 Dorothea Lange
A documentary photographer, Dorothea Lange captured poignant images of the Great Depression, highlighting the human cost of economic hardship.
- Empathy: Approach your subjects with empathy and compassion.
- Social Commentary: Use photography to raise awareness about important social issues.
- Documentary Style: Capture authentic, unposed moments.
- Impact: Strive to make a difference through your work.
10. Advanced Techniques for Visual Storytelling
Beyond basic photo reordering, several advanced techniques can elevate your visual storytelling.
10.1 Rule of Thirds
The rule of thirds is a fundamental composition guideline.
- Divide the Frame: Mentally divide your frame into nine equal parts.
- Place Key Elements: Position key elements along these lines or at their intersections.
- Balance: Create a balanced and visually appealing composition.
- Interest: Add interest and dynamism to your photos.
10.2 Leading Lines
Leading lines draw the viewer’s eye into the scene.
- Natural Lines: Use roads, rivers, or fences as leading lines.
- Converging Lines: Create depth by using converging lines.
- Direction: Guide the viewer’s eye to the main subject.
- Storytelling: Enhance the narrative by using lines to connect different elements.
10.3 Framing
Framing involves using elements within the scene to frame the main subject.
- Natural Frames: Use trees, arches, or doorways as frames.
- Depth: Add depth and dimension to your photos.
- Focus: Draw attention to the main subject.
- Creativity: Experiment with different framing techniques.
10.4 Color Theory
Understanding color theory can help you create visually appealing and harmonious photos.
- Complementary Colors: Use colors that are opposite each other on the color wheel.
- Analogous Colors: Use colors that are next to each other on the color wheel.
- Monochromatic: Use different shades of the same color.
- Emotion: Understand how different colors evoke different emotions.
FAQ: Reordering Photos on Facebook Posts
1. Can you reorder photos in a Facebook post after it’s posted?
Yes, you can reorder photos in a Facebook post after it has been published. Simply edit the post and drag the photos into the desired order.
2. How do I edit a Facebook post to reorder photos?
Go to the post, click the three dots in the top-right corner, select “Edit Post,” and then drag and drop the photos to rearrange them.
3. Is there a limit to how many times I can reorder photos in a Facebook post?
Facebook may limit how often you can edit a post, so avoid excessive rearranging to prevent potential issues.
4. Can my friends see that I reordered photos in a Facebook post?
Facebook doesn’t always notify users of post edits, so some viewers may not realize the photo order has changed.
5. Can I add new photos while reordering existing ones in a post?
No, you can only reorder photos that were originally included in the post. You cannot add new photos during the reordering process.
6. Can I reorder photos in Facebook ads?
No, you cannot reorder photos in active Facebook ads; the photo sequence is fixed for the duration of the ad.
7. Can I reorder videos in a Facebook post?
No, videos included in the post cannot be rearranged using this method. You can only change the order of photos.
8. What if I don’t see the “Edit Post” option?
If you don’t see the option to edit the post, you likely didn’t create it. Only the original poster can make edits.
9. What should I do if my changes are not saving?
Try refreshing the page. If that fails, close and reopen the editing window and rearrange photos again before saving.
10. Can I reorder photos on a Facebook Page or in a Facebook Group?
Yes, the process is the same for Facebook Pages and Groups. Just navigate to the post and select “Edit Post” to rearrange the images.
Conclusion
The ability to reorder photos on Facebook posts provides valuable creative control, allowing you to present your images in the most impactful sequence. Whether you’re sharing personal memories or marketing content, mastering this feature can significantly enhance your visual storytelling.
At dfphoto.net, we’re committed to providing you with the knowledge and tools you need to excel in the world of photography and digital media. We hope this guide has been helpful, and we encourage you to explore our site for more tips, tutorials, and inspiration.