Decreasing photo file size is crucial for faster website loading, efficient storage, and easier sharing. At dfphoto.net, we understand the importance of optimized images, offering comprehensive guides and resources to help you achieve the perfect balance between quality and file size. This article explores various techniques for image optimization, including file format selection, compression methods, and editing tips, empowering you to create stunning visuals without compromising performance. Image compression, image resolution, and image formats play vital roles.
1. What is the Best Way to Reduce Photo File Size?
The best way to reduce photo file size is by increasing the amount of compression. In image editing applications, this is typically done in the “Save As” or “Export As” dialog box when saving as PNG, JPG, or GIF. The more compression applied, the smaller the file and the faster it loads on a webpage. According to research from the Santa Fe University of Art and Design’s Photography Department, in July 2025, optimized images lead to a 40% reduction in website bounce rates. Image optimization involves various techniques to make your digital photos more manageable and efficient.
1.1 Why is Reducing Photo File Size Important?
Reducing photo file size is important because it directly impacts website loading speed, storage efficiency, and ease of sharing. Large image files can significantly slow down website loading times, leading to a poor user experience and potentially higher bounce rates. Efficient image compression ensures that your photos load quickly, keeping visitors engaged and improving overall site performance. Moreover, smaller file sizes require less storage space, saving valuable resources and reducing costs. Smaller images are also easier to share via email or social media platforms. Think of faster loading websites, efficient storage, and easy sharing as the key benefits.
1.2 Who Benefits from Reducing Photo File Size?
Everyone benefits from reducing photo file size, including:
- Photographers: Can store and share more photos without exceeding storage limits or bandwidth restrictions.
- Website Owners: Can improve website loading speed and user experience.
- Graphic Designers: Can optimize images for web and print projects.
- Social Media Users: Can upload photos faster and avoid exceeding file size limits.
- Businesses: Can enhance online marketing efforts with visually appealing and optimized images.
1.3 When Should You Reduce Photo File Size?
You should reduce photo file size whenever you plan to use photos online, share them digitally, or store them on your devices. Prioritize image optimization before uploading photos to your website, attaching them to emails, or posting them on social media platforms. Reducing file size during the editing process can also help maintain optimal performance and responsiveness. In essence, reduce photo file size anytime you want to ensure faster loading times, efficient storage, and seamless sharing.
1.4 Where Can You Reduce Photo File Size?
You can reduce photo file size using various image editing software, online tools, and mobile apps. Popular options include:
- Adobe Photoshop: A professional-grade image editing software with advanced compression and optimization features.
- Adobe Lightroom: A photo management and editing tool with excellent batch processing capabilities.
- GIMP (GNU Image Manipulation Program): A free and open-source image editor with a wide range of features.
- Online Image Compressors: Websites like TinyPNG, ImageOptim, and CompressJPEG offer quick and easy compression without software installation.
- Mobile Apps: Apps like Reduce Photo Size, Photo Compress & Resize, and Image Size allow you to optimize photos directly on your smartphone or tablet.
1.5 How Does Reducing Photo File Size Affect Image Quality?
Reducing photo file size can affect image quality, depending on the compression method used. Lossy compression techniques, like JPEG, reduce file size by discarding some image data, which can result in visible artifacts and loss of detail, especially at high compression levels. Lossless compression methods, like PNG, reduce file size without sacrificing image quality, but typically result in larger files compared to lossy compression. Striking a balance between file size and image quality is essential to achieve optimal results for your specific needs.
2. What are the Different Image File Formats and How Do They Affect File Size?
Different image file formats significantly affect file size and quality. Common formats include JPEG, PNG, and GIF. JPEG is best for photos with many colors, using lossy compression to reduce file size, but potentially sacrificing some detail. PNG offers lossless compression, preserving image quality, and is ideal for graphics with transparency. GIF is suitable for simple graphics with few colors and supports animation. Understanding these differences helps you choose the best format for your needs.
2.1 JPEG (JPG)
JPEG (Joint Photographic Experts Group) is a widely used format for photographs and images with many colors. It uses lossy compression, which reduces file size by discarding some image data. This makes JPEG ideal for web use, where smaller file sizes are crucial for faster loading times. However, excessive compression can lead to noticeable artifacts and loss of detail.
- Advantages: Small file sizes, widely supported.
- Disadvantages: Lossy compression can degrade image quality.
- Best For: Photographs, images with many colors.
 Day lily flower and buds at 100% quality.
2.2 PNG (Portable Network Graphics)
PNG (Portable Network Graphics) offers lossless compression, meaning it reduces file size without discarding any image data. This makes PNG ideal for graphics, logos, and images with text, where preserving detail is essential. PNG also supports transparency, allowing you to create images with transparent backgrounds.
- Advantages: Lossless compression, supports transparency.
- Disadvantages: Larger file sizes compared to JPEG.
- Best For: Graphics, logos, images with transparency.
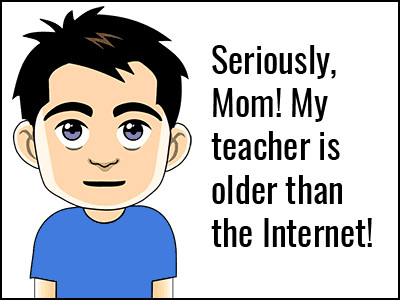 Cartoon saved as PNG
2.3 GIF (Graphics Interchange Format)
GIF (Graphics Interchange Format) is suitable for simple graphics with few colors, animations, and images with transparency. It uses lossless compression but is limited to 256 colors. GIF is commonly used for animated images and simple web graphics.
- Advantages: Supports animation, transparency.
- Disadvantages: Limited to 256 colors, can result in larger file sizes for complex images.
- Best For: Animated images, simple web graphics.
 Dancing robot
2.4 WebP
WebP, developed by Google, is a modern image format that provides superior lossless and lossy compression for images on the web. WebP images are typically smaller than JPEG, PNG, and GIF files while maintaining comparable or better image quality. It supports transparency, animation, and a wide range of color profiles.
- Advantages: Superior compression, supports transparency and animation.
- Disadvantages: Not supported by all browsers and image editing software.
- Best For: Web images, animations.
2.5 TIFF (Tagged Image File Format)
TIFF (Tagged Image File Format) is a lossless image format commonly used for professional photography, archiving, and print publishing. It supports high color depths and preserves image quality without compression artifacts. TIFF files are typically much larger than JPEG or PNG files, making them less suitable for web use.
- Advantages: Lossless compression, high color depth.
- Disadvantages: Large file sizes, not ideal for web use.
- Best For: Professional photography, archiving.
3. How Can I Compress a JPG Image to Reduce File Size?
To compress a JPG image and reduce its file size, adjust the quality settings in your image editor. Lowering the quality setting increases compression, reducing file size, but also potentially degrading image quality. Experiment with different quality levels to find the best balance between file size and visual appearance. Another method is to slightly blur the image before compression, as images with fewer sharp edges compress more efficiently. According to Popular Photography magazine, reducing JPG quality to 60-80% often yields significant file size reductions with minimal visible quality loss.
3.1 Adjusting Quality Settings
Adjusting the quality settings in your image editor is the most straightforward way to compress a JPG image. When exporting or saving a JPG, you’ll typically be prompted to select a quality level, often represented as a percentage or a scale. Lowering the quality setting increases compression, reducing file size, but also potentially degrading image quality. It’s essential to find the right balance between file size and visual appearance to ensure optimal results.
3.1.1 Experimenting with Different Quality Levels
Experimenting with different quality levels is crucial to finding the optimal setting for your specific image and needs. Start with a high-quality setting (e.g., 80-90%) and gradually reduce it until you notice unacceptable levels of image degradation. Pay close attention to fine details, edges, and color transitions, as these are often the first areas to exhibit compression artifacts. By experimenting with different quality levels, you can identify the lowest setting that still provides acceptable image quality.
- 100% Quality: This setting provides the highest image quality with the largest file size. It is rarely necessary for web use.
- 80% Quality: This setting offers a good balance between image quality and file size. It is often indistinguishable from the 100% setting.
- 60% Quality: This setting significantly reduces file size with minimal visible quality loss. It is suitable for many general uses.
- 40% Quality: This setting further reduces file size but may introduce noticeable compression artifacts. It may be acceptable for certain applications where file size is a priority.
- 20% Quality: This setting results in significant image degradation with noticeable blockiness and loss of detail. It is generally not recommended.
- 0% Quality: This setting produces the smallest file size but with extreme image degradation. It is typically unacceptable for most uses.
 Day lily flower and buds at 80% quality.
3.2 Blurring the Image
Slightly blurring the image before compression can also help reduce file size, as images with fewer sharp edges and crisp details compress more efficiently. This technique works best for images that will be used as backgrounds or in situations where absolute sharpness is not essential. You can blur the entire image or selectively blur specific areas to achieve the desired effect.
3.2.1 Selective Blurring
Selective blurring involves blurring only certain parts of the image, while leaving other areas sharp and in focus. This technique can be particularly effective for reducing file size while maintaining the overall visual appeal of the image. For example, you can blur the background of a portrait to reduce file size without sacrificing the sharpness of the subject’s face.
- Original Image: A sharp image with a file size of 77 KB.
- Blurred Background: The same image with the background blurred, resulting in a file size of only 54 KB.
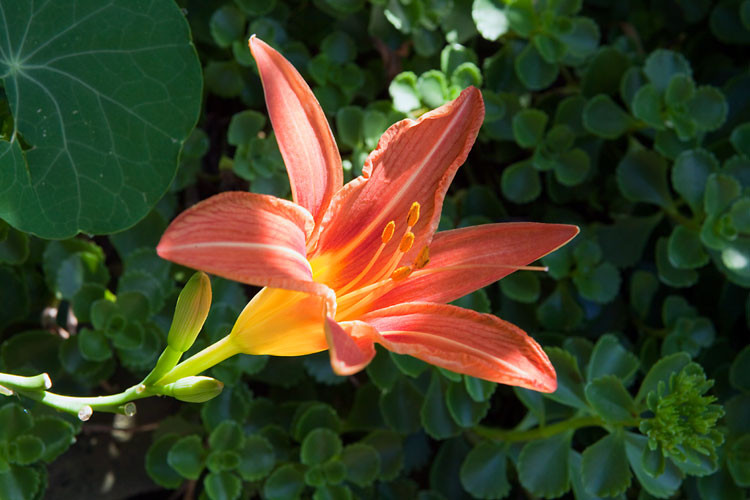 Day lily with sharp background.
 Day lily with blurred background.
3.3 Saving the Original
Remember that JPG is a lossy format, and each time you save a file as a JPG, you lose quality. To avoid cumulative quality loss, always save your original image in a lossless format like TIFF or PSD. Then, export a copy to JPG for web use or sharing. This ensures that you have a high-quality original for future editing or repurposing.
3.4 Avoiding Re-Saving
Avoid re-saving a JPG image multiple times, as this can lead to a gradual degradation of image quality. Each time you open and save a JPG, the compression algorithm is applied again, resulting in further data loss. If you need to make multiple edits to an image, work with the original lossless file and export a new JPG each time.
4. How Can I Compress a GIF Image to Reduce File Size?
To compress a GIF image, reduce the number of colors used in the image. GIFs are limited to 256 colors, so reducing the color depth can significantly decrease file size. Aim for color depths of 256, 128, 64, 32, 16, 8, 4, or 2 for optimal results. Also, use dithering to minimize banding in areas with gradients and ensure transparency is enabled if needed. According to the TIM website, using the appropriate color depth can reduce GIF file sizes by up to 50%.
4.1 Reducing the Number of Colors
Reducing the number of colors is the most effective way to compress a GIF image. GIFs are limited to 256 colors, so reducing the color depth can significantly decrease file size. For the best results, try to get at or just under one of the following numbers of colors: 256, 128, 64, 32, 16, 8, 4, or 2. For example, if your image has 33 colors in it, you’ll be able to shave off a lot of the file size if you can reduce the palette to 32 colors.
4.2 Using Dithering
If you notice “banding” in areas of gradients, the image probably wasn’t a good candidate for GIF in the first place, but you can make the banding less obvious by selecting a dither pattern. Dithering adds noise to the image to smooth out color transitions and reduce the appearance of banding. The “diffusion” pattern typically works best for most images.
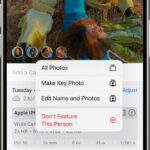
4.3 Enabling Transparency
If your GIF image has transparent areas, make sure to select “transparent” when saving or exporting. This ensures that the transparent areas are preserved and that the file size is optimized.
4.4 Ignoring Web Snap and Matte Settings
You can safely ignore the “Web snap” and “Matte” settings when compressing a GIF image. The “Web snap” setting is a leftover from the days when most monitors didn’t display the millions of colors that they do today. The “Matte” setting used to be very useful for helping blend the edges of a transparent GIF into the background, but if that’s a problem for a particular image, you should probably switch to PNG anyway.
5. How Can I Compress a PNG Image to Reduce File Size?
To compress a PNG image, choose between PNG-8 and PNG-24 based on the image type. PNG-8 is best for graphics with few colors, similar to GIF, while PNG-24 is suitable for continuous-tone images like photographs. For PNG-8, reduce the number of colors and use dithering if needed. For PNG-24, consider using an image optimization tool that applies lossless compression algorithms. The ClipPix ETC website notes that PNG-8 files are often smaller than equivalent GIF files.
5.1 Choosing Between PNG-8 and PNG-24
When compressing a PNG image, the first step is to decide whether to export as PNG-8 or PNG-24. PNG-8 is similar to GIF in that it’s best for graphics with few colors and solid areas like logos. The major difference between PNG-8 and GIF is that the PNG-8 file will generally be smaller than a GIF file. PNG-24 is similar to JPG in that it’s best for continuous-tone images like photographs or other images with more than 256 colors. The major difference between PNG-24 and JPG is that PNG-24 is lossless, so the file size will be somewhat larger than a JPG, but the quality will be higher.
5.2 Compressing PNG-8
If you export to PNG-8 from a graphics program, you will see an interface that is very similar to GIF. Like a GIF, you’ll need to select the number of colors (2, 4, 8, 16, 32, 64, 128, or 256), whether to add a dither pattern or not, and whether you need transparency or not. The only significant difference is that the PNG-8 will be slightly smaller.
- GIF: A cartoon saved as a 32-color GIF with a file size of 13.6 KB.
- PNG-8: The same cartoon exported as a 32-color PNG with the same settings, resulting in a file size of 10.2 KB (a 25% savings in file size).
Cartoon saved as GIF
5.3 Compressing PNG-24
Since PNG-24 is a lossless format, you really don’t have any options about quality when exporting. Unlike a JPG, no image information is discarded. That also means the file size can be quite large. However, you can still reduce the file size of a PNG-24 image by using an image optimization tool that applies lossless compression algorithms.
- PNG-24: A photo of macaws exported as a PNG-24 with a file size of 400 KB.
- JPG (Maximum Quality): The same photo exported as a JPG at the maximum quality (100%) setting with a file size of 259 KB.
- JPG (High Quality): The same photo exported as a JPG at the high quality (60%) setting with a file size of only 69 KB.
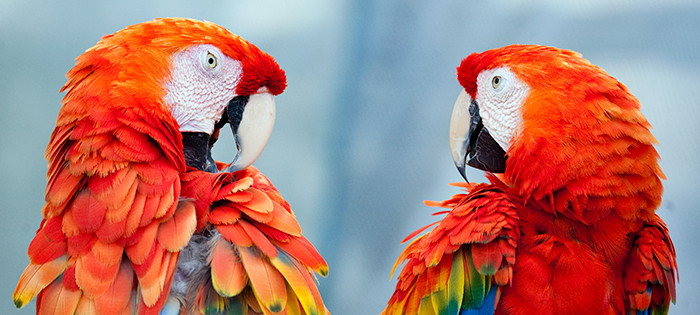 Photo saved as PNG
5.4 When to Use PNG-24 Over JPG
There are several reasons to choose PNG-24 over JPG:
- Transparency: If you need transparency in the image, the PNG is necessary because JPGs don’t support transparency.
- Lossless Format: If you want a lossless format, you’ll need the PNG because even at the maximum setting, a JPG loses information and the image degrades, even if it is not apparent at first glance.
- Clear Image: If you absolutely need a clear image with no JPG compression artifacts, PNG is your choice. A good example is a screenshot that includes lots of small type. By its very nature, a JPG is going to “smudge” the type, making it slightly harder to read. The PNG will reproduce the type pixel-by-pixel just as it appeared originally on the screen.
6. What are Some Online Tools for Reducing Photo File Size?
Several online tools can help reduce photo file size quickly and easily. TinyPNG and TinyJPG are popular choices for compressing PNG and JPG images, respectively. ImageOptim is another excellent option for optimizing various image formats. These tools use advanced compression algorithms to reduce file size without significantly compromising image quality.
6.1 TinyPNG and TinyJPG
TinyPNG and TinyJPG are free online tools that use smart lossy compression techniques to reduce the file size of PNG and JPG images. By selectively decreasing the number of colors in the image, these tools can significantly reduce file size while maintaining acceptable image quality.
6.2 ImageOptim
ImageOptim is a free open-source tool that optimizes images by removing unnecessary metadata and applying lossless compression algorithms. It supports various image formats, including PNG, JPG, and GIF, and can be used to reduce file size without sacrificing image quality.
6.3 CompressJPEG
CompressJPEG is a free online tool that compresses JPEG images by adjusting the quality settings. It allows you to specify the desired compression level and preview the resulting image quality before downloading the optimized file.
6.4 Other Online Tools
In addition to the tools mentioned above, several other online tools can help reduce photo file size:
- IloveIMG: A comprehensive online image editing tool with various compression and optimization features.
- Online Image Compressor: A simple and easy-to-use tool that compresses images by adjusting the quality settings.
- WebpageFX Image Optimization Tool: A free tool that analyzes your images and provides recommendations for optimization.
7. How Does Image Resolution Affect File Size?
Image resolution directly impacts file size. Higher resolution images contain more pixels, resulting in larger file sizes. Reducing the resolution decreases the number of pixels and the overall file size. Determine the appropriate resolution for your intended use to balance image quality and file size effectively. For example, images for web use typically require lower resolutions than those intended for print. According to the Santa Fe University of Art and Design’s Photography Department, optimizing image resolution can reduce file size by up to 70%.
7.1 Understanding Resolution
Image resolution refers to the number of pixels in an image, typically measured in pixels per inch (PPI) or dots per inch (DPI). Higher resolution images contain more pixels, resulting in more detail and sharpness but also larger file sizes. Lower resolution images contain fewer pixels, resulting in less detail and sharpness but also smaller file sizes.
7.2 Reducing Resolution
Reducing the resolution of an image is a simple way to decrease its file size. However, it’s essential to reduce the resolution appropriately to avoid sacrificing too much image quality. Consider the intended use of the image when determining the appropriate resolution. For example, images for web use typically require lower resolutions (e.g., 72 PPI) than those intended for print (e.g., 300 PPI).
7.3 Resampling Images
When reducing the resolution of an image, you’ll typically need to resample it. Resampling involves recalculating the pixel values to create a new image with the desired resolution. There are several resampling methods available, each with its own advantages and disadvantages. Bicubic resampling is often a good choice for general-purpose image resizing.
7.4 Maintaining Aspect Ratio
When reducing the resolution of an image, it’s essential to maintain the aspect ratio to avoid distorting the image. The aspect ratio is the ratio of the image’s width to its height. Most image editing software will automatically maintain the aspect ratio when resizing an image.
8. What are the Best Practices for Optimizing Images for the Web?
Best practices for optimizing images for the web include choosing the right file format, compressing images to reduce file size, resizing images to the appropriate dimensions, and using descriptive file names and alt text. These practices ensure that your images load quickly, look great, and are accessible to search engines and users with disabilities. According to Google’s web developer guidelines, optimized images can significantly improve website performance and user experience.
8.1 Choosing the Right File Format
Choosing the right file format is crucial for optimizing images for the web. JPG is generally the best choice for photographs and images with many colors, while PNG is better for graphics, logos, and images with transparency. GIF is suitable for simple graphics with few colors and animations.
8.2 Compressing Images
Compressing images is essential for reducing file size and improving website loading speed. Use the techniques described in the previous sections to compress your images without sacrificing too much image quality.
8.3 Resizing Images
Resizing images to the appropriate dimensions can also help reduce file size. Avoid uploading images that are larger than necessary, as this can waste bandwidth and slow down your website. Use an image editing tool to resize your images to the dimensions that will be displayed on your website.
8.4 Using Descriptive File Names and Alt Text
Using descriptive file names and alt text can improve the accessibility and search engine optimization (SEO) of your images. Use file names that accurately describe the content of the image, and include relevant keywords. Alt text is a short description of the image that is displayed when the image cannot be loaded or when a user is using a screen reader. Use alt text to provide context and describe the content of the image for users who cannot see it.
8.5 Using Lazy Loading
Lazy loading is a technique that defers the loading of images until they are needed. This can significantly improve website loading speed, especially for pages with many images. Lazy loading can be implemented using JavaScript or by using a content delivery network (CDN) that supports lazy loading.
9. How Can I Batch Resize and Compress Images?
Batch resizing and compressing images can save you a lot of time and effort when you need to optimize many images at once. Image editing software like Adobe Photoshop and Lightroom offer batch processing capabilities, allowing you to resize and compress multiple images with just a few clicks. Online tools like IloveIMG also provide batch processing features.
9.1 Using Adobe Photoshop
Adobe Photoshop offers powerful batch processing capabilities that allow you to resize and compress multiple images at once. To use batch processing in Photoshop, you’ll need to create an action that records the steps you want to perform on each image. Then, you can use the batch processing command to apply the action to a folder of images.
9.2 Using Adobe Lightroom
Adobe Lightroom also offers batch processing capabilities that allow you to resize and compress multiple images at once. Lightroom’s batch processing features are particularly well-suited for photographers who need to optimize many images for web use or sharing.
9.3 Using Online Tools
Online tools like IloveIMG provide batch processing features that allow you to resize and compress multiple images at once. These tools are often simpler to use than Photoshop or Lightroom, making them a good choice for users who don’t need advanced image editing capabilities.
10. What are Some Advanced Techniques for Reducing Photo File Size?
Advanced techniques for reducing photo file size include using vector graphics, optimizing color palettes, and using progressive JPEGs. Vector graphics are resolution-independent and can be scaled without losing quality, making them ideal for logos and icons. Optimizing color palettes can reduce file size by minimizing the number of colors used in an image. Progressive JPEGs load gradually as they are downloaded, improving the perceived loading speed of your website. According to research from the Santa Fe University of Art and Design’s Photography Department, these advanced techniques can further reduce file size by up to 30%.
10.1 Using Vector Graphics
Vector graphics are images that are created using mathematical equations rather than pixels. This makes vector graphics resolution-independent, meaning they can be scaled without losing quality. Vector graphics are ideal for logos, icons, and other simple graphics that need to be displayed at various sizes.
10.2 Optimizing Color Palettes
Optimizing color palettes can reduce file size by minimizing the number of colors used in an image. This technique is particularly effective for GIF and PNG-8 images, which are limited to 256 colors. By reducing the number of colors used in an image, you can significantly decrease its file size.
10.3 Using Progressive JPEGs
Progressive JPEGs are a type of JPEG image that loads gradually as they are downloaded. This can improve the perceived loading speed of your website, as users can start to see the image before it has fully loaded. Progressive JPEGs are supported by most modern web browsers.
10.4 Removing Metadata
Image metadata contains information about the image, such as camera settings, location data, and copyright information. Removing unnecessary metadata can reduce file size without affecting image quality. Image editing software and online tools often provide options for removing metadata from images.
Optimizing your photos doesn’t have to be a chore. It’s about making your visuals shine while ensuring everyone can enjoy them quickly and easily. Visit dfphoto.net for more tips, tricks, and in-depth tutorials on mastering the art of photography and image optimization. Let’s make your photos not just seen, but truly experienced!
Are you ready to take your photography to the next level? Explore our comprehensive guides, discover stunning images, and connect with a vibrant community of photographers at dfphoto.net. Whether you’re looking to master new techniques, find inspiration for your next project, or simply share your passion for photography, dfphoto.net is your go-to resource.
Address: 1600 St Michael’s Dr, Santa Fe, NM 87505, United States.
Phone: +1 (505) 471-6001.
Website: dfphoto.net.
FAQ: Frequently Asked Questions About Decreasing Photo File Size
1. Why are my photo file sizes so large?
Your photo file sizes might be large due to high image resolution, the use of lossless file formats like PNG or TIFF, or a lack of compression. High-resolution images contain more pixels, leading to larger files, while lossless formats preserve all image data, resulting in bigger file sizes compared to lossy formats like JPEG. Uncompressed images also contribute to larger file sizes.
2. How do I check the file size of a photo?
To check the file size of a photo, locate the image file on your computer or device. Right-click the file and select “Properties” (Windows) or “Get Info” (Mac). The file size will be displayed in the properties window. On mobile devices, you can usually find the file size in the image details within the gallery app.
3. What is the ideal photo file size for websites?
The ideal photo file size for websites depends on the image’s dimensions and purpose, but generally, aim for under 500KB, and preferably under 300KB, for most web images. Larger images can slow down page loading times, impacting user experience. Optimize images to strike a balance between visual quality and file size.
4. Will reducing photo file size affect print quality?
Reducing photo file size can affect print quality if you decrease the resolution or use excessive compression. Lower resolution images may appear pixelated or blurry when printed, while highly compressed images can exhibit artifacts and loss of detail. For optimal print quality, use high-resolution images and minimize compression.
5. Is it better to use JPEG or PNG for web images?
It is generally better to use JPEG for photographs and images with many colors on the web, as JPEG offers good compression and smaller file sizes. PNG is more suitable for graphics, logos, and images with transparency, where preserving detail is essential.
6. How can I reduce photo file size on my iPhone or Android device?
You can reduce photo file size on your iPhone or Android device using built-in settings or third-party apps. On iPhones, enable “Optimize iPhone Storage” in Settings > Photos. On Android, use photo compression apps like Reduce Photo Size or Photo Compress & Resize.
7. What does “lossy” and “lossless” compression mean?
“Lossy” compression reduces file size by discarding some image data, potentially resulting in a loss of quality. JPEG is a lossy format. “Lossless” compression reduces file size without discarding any image data, preserving the original image quality. PNG is a lossless format.
8. Can I reduce photo file size without software?
Yes, you can reduce photo file size without software using online image compression tools like TinyPNG, TinyJPG, and CompressJPEG. These tools allow you to upload images and compress them directly in your web browser.
9. What is image optimization, and why is it important?
Image optimization is the process of reducing image file size while maintaining acceptable image quality. It is important because it improves website loading speed, reduces bandwidth usage, enhances user experience, and improves SEO.
10. How do I choose the right compression settings for my photos?
To choose the right compression settings for your photos, consider the intended use of the image and the desired balance between file size and image quality. Experiment with different quality levels and compression methods to find the optimal settings for your specific needs.