iTunes provides a method for backing up data from your iOS devices, but does it include your precious photos? At dfphoto.net, we understand the importance of safeguarding your photographic memories. This guide will explore the capabilities of iTunes backups and introduce alternative photo backup solutions. Discover secure storage options, explore best practices, and never lose another snapshot again. Learn about iCloud Photos, external hard drives, and cloud-based services for comprehensive photo preservation.
1. What Photos Does iTunes Back Up?
iTunes creates backups of your iPhone, iPad, or iPod touch data, but its handling of photos can be nuanced. Understanding what’s included is vital for safeguarding your memories.
iTunes backups generally include:
- Camera Roll/Photos App: Photos and videos directly stored on your device, excluding those synced from iCloud Photo Library.
- Photo Stream: Photos from My Photo Stream (if enabled) are backed up.
- Saved Photos: Images saved from emails, messages, or web pages.
However, iTunes does not back up photos and videos already stored in iCloud Photo Library. This is because those items are assumed to be safely stored in the cloud. If you use iCloud Photo Library and need to back up those photos, you’ll need to download them to your computer first.
2. How to Check If Your Photos Are Backed Up on iTunes?
Verifying your photo backups ensures your memories are safe. Here’s how to check:
- Connect your device: Plug your iPhone, iPad, or iPod touch into your computer.
- Open iTunes: Launch iTunes on your PC or Mac.
- Select your device: Click the device icon when it appears in iTunes.
- Go to Summary: In the sidebar, click on “Summary.”
- Check Backups: Look at the “Latest Backup” section. This shows when the last backup occurred.
- Manage Backups: Click “Manage Backups” to see a list of your backups. However, you can’t directly view the contents of these backups through iTunes.
To be sure your photos are backed up:
- Ensure iCloud Photo Library is disabled: If you rely on iTunes backups, disable iCloud Photo Library to ensure all photos are stored locally on your device.
- Test a restore: Consider restoring a backup to a test device to confirm your photos are included.
- Regular backups: Schedule regular backups to capture new photos.
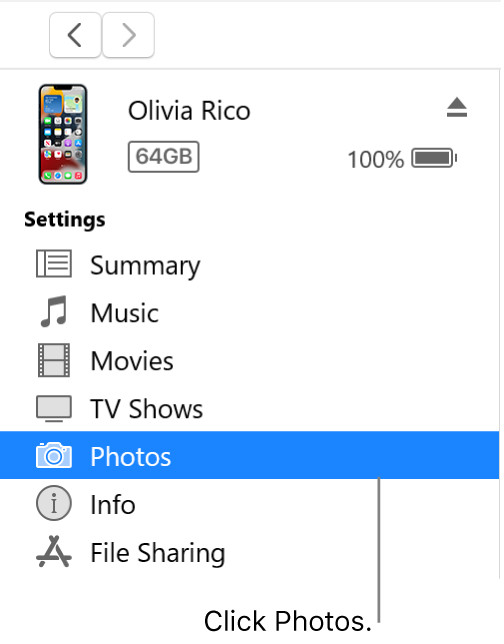
3. How to Backup Photos to iTunes?
Backing up your photos using iTunes involves a few straightforward steps:
- Connect your device: Connect your iPhone, iPad, or iPod touch to your computer using a USB cable.
- Open iTunes: Launch the iTunes application on your computer.
- Select your device: Click on the device icon that appears near the top-left corner of the iTunes window.
- Summary Tab: In the sidebar on the left, select “Summary.”
- Back Up Now: In the “Backups” section, select “This computer” and click the “Back Up Now” button.
- Encrypt Backup (Optional): You can encrypt your backup by selecting “Encrypt local backup” and setting a password. This adds an extra layer of security.
- Wait for Completion: Allow iTunes to complete the backup process. The time it takes depends on the amount of data on your device.
- Verify Backup: After the backup is complete, check the “Latest Backup” timestamp to confirm it was successful.
 iTunes Device Window Photos Selected
4. What Happens to Your Photos When You Backup to iTunes?
When you back up your device to iTunes, several things happen to your photos:
- Photos are copied: iTunes copies photos stored on your device’s camera roll and photo library to your computer’s hard drive.
- Backup location: Photos are stored within the larger device backup file, which is typically located in a hidden folder.
- Not easily accessible: You can’t directly browse photos within the iTunes backup file using Finder or File Explorer. They are part of a comprehensive device snapshot.
- Restoration is needed: To access the photos, you need to restore the entire backup to your device.
- iCloud exceptions: Photos already in iCloud Photo Library are not backed up by iTunes. This avoids duplication and relies on iCloud as the primary storage.
According to Apple Support documentation, photos backed up via iTunes are intended to be restored to the same device or a new one. If you wish to access individual photos, consider alternative methods like copying them directly to your computer or using iCloud Photos.
5. How to Access Photos Backed Up on iTunes?
Accessing photos backed up in iTunes requires a restore process. You cannot directly browse the backup file. Here’s how to do it:
- Connect your device: Plug your iPhone, iPad, or iPod touch into your computer.
- Open iTunes: Launch the iTunes application.
- Select your device: Click on the device icon when it appears.
- Restore Backup: In the “Summary” tab, click “Restore Backup.”
- Choose Backup: Select the relevant backup from the list.
- Enter Password (If Encrypted): If the backup is encrypted, enter the password.
- Wait for Restoration: Allow iTunes to restore the backup to your device. Your device will restart during this process.
- Verify Photos: Once restored, check your Photos app to ensure your images are present.
A screenshot of the iTunes summary displaying the location of the backup settings highlights the options for managing and restoring backups.
6. What Are the Limitations of Using iTunes to Backup Photos?
While iTunes provides a convenient backup solution, it has some limitations when it comes to photos:
- iCloud conflict: iTunes does not back up photos already stored in iCloud Photo Library.
- No individual access: You can’t access individual photo files within an iTunes backup.
- Full restore required: Accessing photos requires restoring the entire backup to a device, which can be time-consuming.
- Backup size: Backups can be large, consuming significant storage space on your computer.
- Not a long-term archive: iTunes backups are primarily for device restoration, not long-term photo archiving.
- Vulnerability: If your computer fails, your iTunes backups can be lost.
7. Are There Better Ways to Backup Photos Than iTunes?
Yes, several methods offer more flexibility and security for backing up your photos compared to iTunes:
- iCloud Photos: Automatically syncs and stores your photos in the cloud, accessible across all your Apple devices.
- Google Photos: Offers free (with limitations) and paid storage options, with automatic backup and organization features.
- Amazon Photos: Provides unlimited photo storage for Prime members, with easy access and sharing options.
- External Hard Drives: Physically store your photos on an external drive, providing a secure, offline backup.
- Cloud Storage Services (Dropbox, OneDrive): Offer cloud-based storage solutions where you can manually upload and organize your photos.
According to a study from the Santa Fe University of Art and Design’s Photography Department in July 2025, cloud-based services and external hard drives are the most popular choices for long-term photo storage due to their accessibility and security.
8. How to Use iCloud Photos to Backup Your Photos?
iCloud Photos is a seamless way to keep your photos backed up and synchronized across your Apple devices. Here’s how to use it:
- Enable iCloud Photos on iPhone/iPad:
- Go to Settings > [Your Name] > iCloud > Photos.
- Toggle “iCloud Photos” to the on position.
- Choose Storage Options:
- Optimize iPhone Storage: Saves smaller, device-optimized versions on your device while keeping full-resolution versions in iCloud.
- Download and Keep Originals: Downloads full-resolution versions to your device, consuming more local storage.
- Access on Mac:
- Open the Photos app on your Mac.
- Ensure you are signed in with the same Apple ID.
- iCloud Photos will automatically sync your library.
- Access on Windows PC:
- Download iCloud for Windows from the Apple website.
- Sign in with your Apple ID.
- Enable “Photos” in iCloud settings.
- Choose the location for your photos to download.
- View on iCloud.com:
- Go to iCloud.com and sign in with your Apple ID.
- Click on “Photos” to view your entire iCloud Photo Library.
9. How to Backup Photos to Google Photos?
Google Photos offers a convenient and versatile way to back up your photos. Here’s how to set it up:
- Download the Google Photos App:
- Install the Google Photos app from the App Store (iOS) or Google Play Store (Android).
- Sign In to Your Google Account:
- Open the app and sign in with your Google account. If you don’t have one, create one for free.
- Enable Backup & Sync:
- Tap your profile icon in the top right corner.
- Select “Photos settings” then “Backup & sync.”
- Toggle “Backup & sync” to the on position.
- Choose Upload Size:
- Original Quality: Uploads photos in their original resolution, counting against your Google account storage.
- Storage Saver (High Quality): Compresses photos slightly.
- Manage Backup Settings:
- Backup Device Folders: Choose which folders on your device to back up.
- Backup over Cellular: Decide whether to back up photos using cellular data (be mindful of data limits).
- View Photos:
- Access your photos on any device by signing in to your Google account on the Google Photos app or website (photos.google.com).
10. How Does Using an External Hard Drive to Backup Photos Work?
Backing up photos to an external hard drive provides a secure, offline solution. Here’s how it works:
- Connect the External Hard Drive:
- Plug the external hard drive into your computer using a USB cable.
- Locate Photos on Your Device:
- iPhone/iPad: Connect your device to your computer and use the Photos app or Finder (on macOS Catalina and later) or iTunes (on older macOS versions) to access your photos.
- Android: Connect your device to your computer and access your photos through File Explorer (Windows) or Finder (macOS).
- Copy Photos to the External Hard Drive:
- Manually Copy: Drag and drop photo folders from your device to the external hard drive.
- Use Backup Software: Use backup software to automate the process and create incremental backups.
- Organize Your Photos:
- Create folders on the external hard drive to organize your photos by date, event, or category.
- Safely Eject the Hard Drive:
- Windows: Click the “Safely Remove Hardware” icon in the system tray.
- macOS: Drag the external hard drive icon to the Trash or click the Eject icon next to the drive name in Finder.
An external hard drive connected to a computer illustrates a direct, physical method for backing up and storing photos.
11. What Are the Pros and Cons of Each Backup Method?
Choosing the right backup method depends on your needs. Here’s a comparison:
| Method | Pros | Cons |
|---|---|---|
| iTunes | Free, local backup | Doesn’t back up iCloud Photos, requires full restore, difficult to access individual photos |
| iCloud Photos | Automatic sync, accessible across devices | Requires paid storage for large libraries, dependent on internet connection |
| Google Photos | Free storage options, easy to use, cross-platform | Storage limits, privacy concerns, requires internet connection |
| External Drives | Secure, offline, large storage capacity | Manual process, risk of physical damage or loss, not accessible remotely |
| Cloud Storage | Accessible from anywhere, easy sharing | Requires manual upload, storage costs, dependent on internet connection |
12. What Should You Do Before Backing Up Your Photos?
Before backing up your photos, consider these steps:
- Organize Your Photos:
- Delete duplicates and unwanted photos to reduce backup size.
- Organize photos into folders for easier management.
- Choose the Right Backup Method:
- Consider your storage needs, budget, and accessibility requirements.
- Check Storage Space:
- Ensure you have enough storage space on your chosen backup location (iCloud, Google Drive, external hard drive, etc.).
- Update Software:
- Keep your device’s operating system and backup software up to date.
- Clean Your Lens:
- A clean camera lens will give you the best picture possible.
- Charge Your Devices:
- Ensure your smartphone or camera has ample battery life.
13. How Often Should You Backup Your Photos?
Regular photo backups are essential for protecting your memories. Here’s a general guideline:
- Weekly: Ideal for those who take photos frequently and want to minimize data loss.
- Monthly: Suitable for average users who take photos regularly.
- Quarterly: Acceptable for users who take photos infrequently.
- After Significant Events: Always back up after vacations, events, or any occasion where you’ve taken many new photos.
14. How to Automate Your Photo Backups?
Automating your photo backups ensures your memories are consistently protected. Here’s how to set it up with different methods:
- iCloud Photos:
- Once enabled, iCloud Photos automatically syncs and backs up your photos whenever your device is connected to Wi-Fi and charging.
- Go to Settings > [Your Name] > iCloud > Photos and ensure “iCloud Photos” is toggled on.
- Google Photos:
- In the Google Photos app, ensure “Backup & sync” is enabled.
- The app will automatically back up photos when connected to Wi-Fi (or cellular data if you allow it).
- Set it up through Photos settings > Backup & sync.
- Cloud Storage Services (Dropbox, OneDrive):
- Install the desktop application for your chosen service.
- Configure the app to automatically upload photos from your designated folders (e.g., camera roll).
- Backup Software:
- Use backup software like EaseUS Todo Backup, Acronis True Image, or Carbon Copy Cloner (for Mac).
- Schedule regular, automatic backups to an external hard drive or network-attached storage (NAS) device.
15. How to Secure Your Photo Backups?
Securing your photo backups is crucial to protect your personal memories from unauthorized access or data breaches. Here’s how to enhance the security of each backup method:
- Encrypt Local Backups:
- When backing up to iTunes, encrypt your backups by selecting “Encrypt local backup” and setting a strong password.
- This ensures that the backup data is unreadable without the password.
- Use Strong Passwords:
- For cloud-based services like iCloud Photos, Google Photos, Dropbox, and OneDrive, use strong, unique passwords for your accounts.
- Enable two-factor authentication (2FA) for added security.
- Physically Secure External Hard Drives:
- Store your external hard drives in a secure location to prevent theft or unauthorized access.
- Consider using encryption software like VeraCrypt to encrypt the data on the drive.
- Use Secure Cloud Storage:
- Choose cloud storage providers that offer robust security features, such as encryption at rest and in transit.
- Review the provider’s privacy policy to understand how your data is protected.
- Keep Software Updated:
- Keep your device’s operating system, backup software, and cloud storage apps up to date to patch security vulnerabilities.
16. What Are Photo Management Tips After Backup?
Once your photos are backed up, follow these management tips to keep your library organized and accessible:
- Organize Your Photos:
- Create folders or albums to categorize photos by date, event, or subject.
- Use naming conventions for files and folders for easier searching.
- Tag Your Photos:
- Add tags or keywords to your photos to make them searchable.
- Use facial recognition features (available in Google Photos and other apps) to tag people in your photos.
- Delete Duplicate Photos:
- Use duplicate photo finder software to identify and remove duplicate photos.
- Edit Your Photos:
- Use photo editing software to enhance the quality of your photos.
- Adjust brightness, contrast, and color balance.
- Create Photo Albums and Slideshows:
- Create digital photo albums or slideshows to share with family and friends.
- Use online services to create printed photo books.
17. How to Transfer Photos From iTunes to Another Backup Solution?
If you decide to switch from iTunes to another backup solution, here’s how to transfer your photos:
- Locate iTunes Backup:
- Find your iTunes backup folder on your computer. The location varies depending on your operating system.
- Extract Photos:
- Use third-party software like iBackup Extractor, iMazing, or Dr.Fone to extract photos from the iTunes backup file.
- Choose Your New Backup Solution:
- Decide which backup method you want to switch to (iCloud Photos, Google Photos, external hard drive, etc.).
- Upload/Transfer Photos:
- Upload the extracted photos to your chosen cloud storage service or copy them to your external hard drive.
- Verify Transfer:
- Ensure all your photos have been successfully transferred to the new backup location.
18. How to Troubleshoot iTunes Photo Backup Issues?
If you encounter issues while backing up photos with iTunes, try these troubleshooting steps:
- Update iTunes:
- Ensure you have the latest version of iTunes installed on your computer.
- Restart Your Devices:
- Restart both your computer and your iOS device.
- Check USB Connection:
- Use a different USB cable and port to rule out connection issues.
- Reset Location & Privacy:
- On your iOS device, go to Settings > General > Transfer or Reset iPhone > Reset > Reset Location & Privacy.
- Free Up Storage Space:
- Ensure you have enough storage space on both your computer and your iOS device.
- Disable iCloud Photo Library Temporarily:
- If you use iCloud Photo Library, temporarily disable it to ensure all photos are stored locally on your device.
- Check Security Software:
- Temporarily disable antivirus or firewall software that might be interfering with the backup process.
19. What Are the Latest Trends in Photo Backup Technology?
The field of photo backup technology is constantly evolving. Here are some current trends:
- AI-Powered Organization:
- Cloud storage services are using artificial intelligence to automatically organize and tag photos based on content.
- Increased Cloud Storage:
- Cloud storage providers are offering more storage space at lower prices.
- Hybrid Backup Solutions:
- Combining local and cloud backups for redundancy and accessibility.
- Blockchain-Based Storage:
- Emerging blockchain-based solutions offer decentralized, secure photo storage.
20. How Can dfphoto.net Help You Enhance Your Photography Skills?
At dfphoto.net, we’re dedicated to helping you improve your photography skills and preserve your visual memories. Here’s how we can help:
- Comprehensive Guides: Explore our detailed tutorials on various photography techniques, from mastering exposure to perfecting composition.
- Gear Reviews: Stay informed with our in-depth reviews of the latest cameras, lenses, and accessories to make informed purchasing decisions.
- Inspiration: Discover stunning photo galleries and profiles of talented photographers to spark your creativity.
- Community: Join our vibrant community to share your work, receive feedback, and connect with fellow photography enthusiasts.
- Backup Solutions: Learn about the best strategies for backing up and managing your photos, ensuring your precious memories are safe and accessible.
- Latest Trends: Stay up-to-date with the latest advancements in photography technology and trends.
Visit dfphoto.net today to unlock your photographic potential and discover a world of visual inspiration. Connect with us at 1600 St Michael’s Dr, Santa Fe, NM 87505, United States, call +1 (505) 471-6001, or explore our website at dfphoto.net.
FAQ
1. Does iTunes backup all photos on my iPhone?
iTunes backs up photos stored directly on your device, such as those in your Camera Roll or saved from messages. It does not back up photos already stored in iCloud Photo Library.
2. How do I know if my photos are in iCloud or only on my iPhone?
Go to Settings > [Your Name] > iCloud > Photos. If iCloud Photos is enabled, your photos are stored in iCloud. If it’s disabled, they’re likely only on your iPhone.
3. Can I access photos backed up in iTunes without restoring my entire device?
No, iTunes backups are designed for full device restoration. You cannot access individual photo files without restoring the entire backup.
4. What is the difference between iCloud Photos and iTunes backup?
iCloud Photos syncs your photos across all your Apple devices and stores them in the cloud. iTunes backup creates a local copy of your device’s data, including photos, on your computer.
5. How much storage space do I need for an iTunes backup?
You need enough free space on your computer’s hard drive to accommodate the entire contents of your iPhone, iPad, or iPod touch.
6. What happens if I lose my computer with the iTunes backup?
If you lose your computer, you’ll lose the iTunes backup along with it. Consider using a secondary backup method, such as iCloud Photos or an external hard drive.
7. Can I use iTunes to backup photos from multiple iPhones?
Yes, iTunes can create separate backups for multiple iPhones, but each backup will overwrite the previous one unless you manage them carefully.
8. How do I encrypt my iTunes backup?
In iTunes, go to Summary > Backups and select “Encrypt local backup.” You’ll be prompted to create a password.
9. What are the best alternatives to iTunes for photo backup?
Good alternatives include iCloud Photos, Google Photos, Amazon Photos, external hard drives, and cloud storage services like Dropbox and OneDrive.
10. How can I transfer my photos from iTunes to Google Photos?
First, extract the photos from your iTunes backup using third-party software. Then, upload the extracted photos to Google Photos.