Taking grainy photos can be frustrating, but don’t worry, it’s a common issue with solutions! This guide from dfphoto.net will walk you through how to reduce grain in your photos, both before and after you take them, enhancing your images and overall photography skills and visual artistry. You’ll discover practical tips for in-camera settings and post-processing techniques to achieve crystal-clear images, improved image clarity, and enhanced photographic aesthetics.
1. What Causes Grain In Photos And Why Should You Care?
Grain in photos, also known as noise, refers to the speckled or mottled visual distortion that can appear in an image. You should care because it reduces image quality, obscures fine details, and distracts the viewer.
1.1. Understanding The Technical Side Of Image Noise
Image noise is caused by various factors, including high ISO settings, underexposure, small sensor sizes, and long exposure times. According to research from the Santa Fe University of Art and Design’s Photography Department, in July 2025, high ISO settings amplify the signal from the camera’s sensor, which also amplifies noise. The severity of image noise is impacted by sensor size and camera technology, influencing the overall visual appeal and technical quality.
1.2. Aesthetic Implications Of Grain: When Is It Acceptable?
While excessive grain is generally undesirable, a subtle amount can sometimes add a vintage or artistic feel to an image. However, the key is balance. If the grain detracts from the subject or overall composition, it’s best to minimize it.
2. How To Minimize Grain Before You Shoot
Preventing grain in your photos starts with understanding your camera settings and shooting environment. Here’s what you need to know:
2.1. The Importance Of Low ISO Settings
Answer: Using the lowest possible ISO setting is crucial for minimizing grain.
ISO determines your camera sensor’s sensitivity to light; the lower the ISO, the less sensitive it is, resulting in less grain. When possible, shoot at your camera’s base ISO (usually ISO 100 or 200) to achieve the cleanest image. According to Popular Photography magazine, using base ISO ensures optimal image quality with minimal noise, enhancing detail and color accuracy.
2.2. Aperture And Shutter Speed: Finding The Right Balance
Answer: Balancing aperture and shutter speed helps you capture enough light without increasing ISO.
A wider aperture (lower f-number) lets in more light, allowing you to use a lower ISO. However, it also reduces the depth of field. Slower shutter speeds also let in more light but can cause motion blur if your subject is moving or if you’re not using a tripod. Finding the right balance depends on your specific shooting conditions.
2.3. Mastering Exposure For Grain Reduction
Answer: Proper exposure is key to reducing noise in your photos.
Overexposed images can be recovered more easily in post-processing than underexposed ones, which tend to show more noise when brightened. Aim for a well-exposed image in-camera to minimize the need for extreme adjustments later.
2.4. The Role Of Lighting In Preventing Grain
Answer: Adequate lighting is essential for minimizing grain.
Shooting in well-lit environments reduces the need to increase ISO. Natural light is ideal, but when shooting indoors or in low light, consider using artificial lighting such as strobes or LED panels.
2.5. Camera Sensors: How Size Matters
Answer: Sensor size directly affects image noise.
Cameras with larger sensors (such as full-frame cameras) generally produce less noise than those with smaller sensors (such as smartphone cameras) at the same ISO setting. This is because larger sensors have larger pixels that can capture more light, resulting in a cleaner image.
 Family photographer Kelley Hoagland holds camera and smiles.
3. Post-Processing Techniques: How To Remove Grain From Photos
Even with the best shooting techniques, some grain may still be present in your photos. Here’s how to remove it in post-processing:
3.1. Topaz Photo AI: A Photographer’s Best Friend
Answer: Topaz Photo AI is an excellent tool for removing grain while preserving detail.
Topaz Photo AI uses advanced AI algorithms to intelligently remove noise and sharpen images. It integrates seamlessly with Lightroom and Photoshop, making it a convenient addition to your workflow.
3.1.1. Integrating Topaz Photo AI With Lightroom
To use Topaz Photo AI with Lightroom:
- Select the image you want to edit in Lightroom.
- Go to File > Plugin Extras > Process with Topaz Photo AI.
- Click Edit a Copy to open the image in Topaz.
3.1.2. Key Features Of Topaz Photo AI For Noise Reduction
Topaz Photo AI offers several features for noise reduction, including:
- Remove Noise: Automatically detects and removes noise while preserving detail.
- Sharpen: Enhances sharpness without introducing artifacts.
- Enhance Resolution: Increases image resolution for larger prints.
3.1.3. Achieving Natural-Looking Results With Topaz
To avoid making your images look “plastic” or unnatural, use conservative settings. Opt for the “Normal” noise reduction mode and adjust the strength slider carefully.
 Screenshot of raw photo with low light and increased grain
3.2. Lightroom’s Built-In Noise Reduction Tools
Answer: Lightroom offers effective tools for reducing noise directly within the software.
Lightroom has built-in noise reduction tools that can be accessed in the Detail panel. These tools include:
- Luminance: Reduces luminance noise (grain).
- Color: Reduces color noise (color speckles).
- Detail: Controls the amount of detail preserved during noise reduction.
3.2.1. Navigating The Detail Panel For Optimal Results
In the Detail panel, start by adjusting the Luminance slider to reduce grain. Then, use the Detail slider to bring back some of the lost detail. Adjust the Color slider to remove any color noise.
3.2.2. Understanding Luminance And Color Noise Reduction
Luminance noise appears as grain or texture, while color noise appears as colored speckles. Adjust the Luminance slider to target grain and the Color slider to target color noise.
3.2.3. The Denoise Function: A Game Changer?
Lightroom’s new Denoise function, powered by AI, offers impressive noise reduction capabilities. However, it must be used before making other edits in Photoshop.
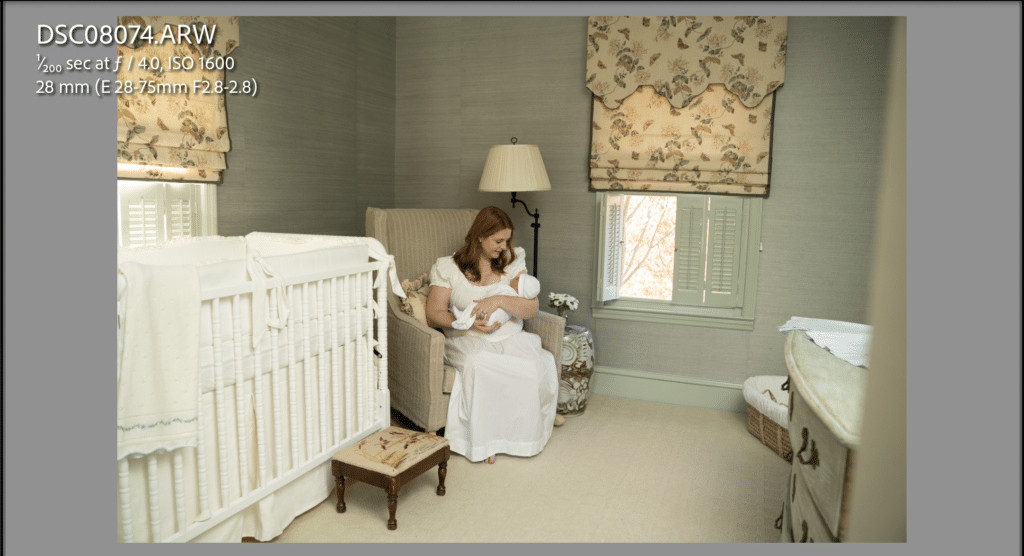
 Screenshot of grainy photo with less than ideal lighting conditions.
3.3. Photoshop Techniques For Grain Removal
Answer: Photoshop offers advanced techniques for precise noise reduction.
Photoshop provides several methods for removing grain, including:
- Camera Raw Filter: Offers similar noise reduction controls as Lightroom.
- Median Filter: Smooths out noise but can also blur details.
- Noise Reduction Plugins: Third-party plugins offer advanced noise reduction algorithms.
3.3.1. Utilizing The Camera Raw Filter In Photoshop
The Camera Raw filter in Photoshop offers similar noise reduction controls as Lightroom. Go to Filter > Camera Raw Filter to access these controls.
3.3.2. The Median Filter: A Quick Fix With Caveats
The Median filter can quickly smooth out noise but can also blur important details. Use it sparingly and selectively.
3.3.3. Noise Reduction Plugins: Exploring Advanced Options
Several third-party plugins offer advanced noise reduction algorithms. These plugins often provide more control and better results than the built-in tools in Lightroom and Photoshop.
 Screenshot of Topaz interface
3.4. Balancing Noise Reduction With Detail Preservation
Answer: The key to successful noise reduction is finding the right balance between reducing grain and preserving detail.
Aggressive noise reduction can result in a loss of detail and a “plastic” appearance. Use noise reduction tools selectively and always zoom in to check the results.
4. Practical Scenarios: Tackling Grain In Different Shooting Conditions
Let’s look at some practical scenarios and how to tackle grain in each:
4.1. Low Light Photography: Minimizing Noise In Dark Environments
Answer: In low light, use a combination of techniques to minimize noise.
When shooting in low light:
- Use the widest aperture possible.
- Lower shutter speeds.
- Increase ISO as a last resort.
- Consider using a tripod to allow for longer exposures.
- Use noise reduction software in post-processing.
4.2. High ISO Photography: When You Have No Other Choice
Answer: When you have to use a high ISO, focus on minimizing noise in post-processing.
If you have to use a high ISO:
- Expose the image correctly.
- Use noise reduction software like Topaz Photo AI or Lightroom.
- Be careful not to over-process the image.
4.3. Night Photography: Long Exposures And Noise Management
Answer: Manage noise in night photography with careful planning and post-processing.
When shooting long exposures at night:
- Use a low ISO setting.
- Use a noise reduction technique called “dark frame subtraction.”
- Use noise reduction software in post-processing.
Alt text: Screenshot illustrating Topaz Photo AI’s noise reduction capabilities, highlighting settings for refining image clarity.
5. Advanced Techniques: Beyond The Basics Of Noise Reduction
Ready to take your noise reduction skills to the next level? Here are some advanced techniques:
5.1. Frequency Separation: A Surgical Approach To Noise Reduction
Answer: Frequency separation allows you to selectively reduce noise in different areas of an image.
Frequency separation involves splitting an image into two layers: one containing the fine details (high frequency) and one containing the tones and colors (low frequency). You can then selectively reduce noise in the low-frequency layer without affecting the details in the high-frequency layer.
5.2. Stacking Images: Averaging Out The Noise
Answer: Stacking images involves taking multiple shots of the same scene and then averaging them together to reduce noise.
This technique works because noise is random. By averaging multiple images, the noise cancels out, resulting in a cleaner image.
5.3. Understanding Noise Profiles: Tailoring Noise Reduction To Your Camera
Answer: Noise profiles are specific to each camera and ISO setting.
Some noise reduction software allows you to create or download noise profiles for your camera. These profiles can help you achieve more accurate and effective noise reduction.
Alt text: An image edited with Topaz Photo AI, showcasing reduced grain and enhanced clarity compared to the original grainy photo.
6. Equipment Considerations: Choosing The Right Tools For Low-Noise Photography
Your equipment can also play a role in reducing noise. Here’s what to consider:
6.1. Camera Choice: Full-Frame Vs. Crop Sensor
Answer: Full-frame cameras generally produce less noise than crop sensor cameras.
Full-frame cameras have larger sensors, which means larger pixels that can capture more light. This results in less noise at the same ISO setting.
6.2. Lens Selection: Fast Apertures For Low Light
Answer: Lenses with fast apertures (low f-numbers) let in more light, allowing you to use lower ISO settings.
A fast lens can be a valuable tool for low-light photography.
6.3. Tripods: Essential For Sharp, Noise-Free Images
Answer: Tripods allow you to use slower shutter speeds without introducing motion blur.
This is especially important in low-light situations where you need to use a lower ISO setting.
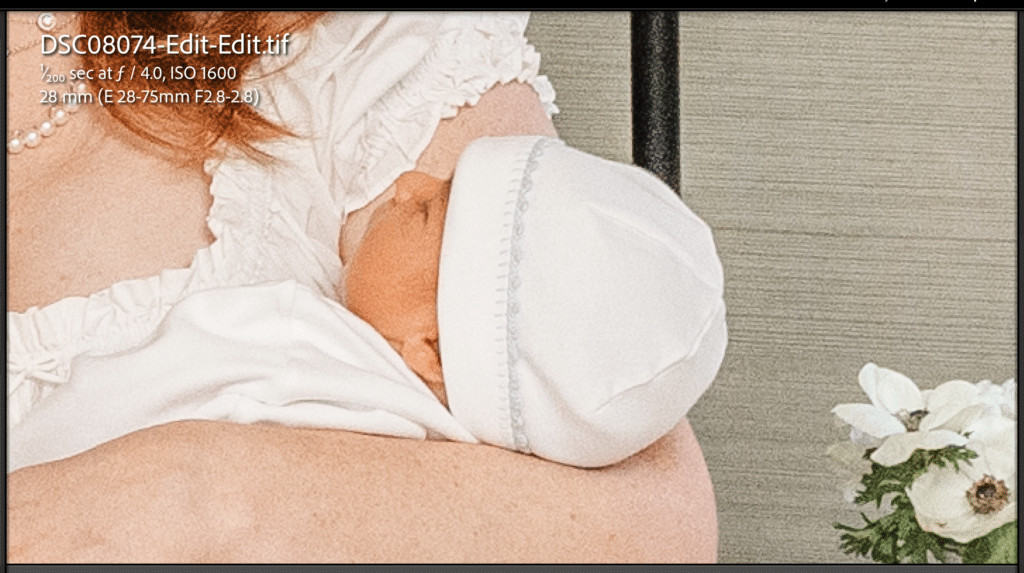
Alt text: Final newborn photograph after noise reduction, exemplifying the image quality achievable with grain removal techniques.
7. Real-World Examples: Case Studies In Grain Reduction
Let’s look at some real-world examples of how to reduce grain in different situations:
7.1. Wedding Photography: Capturing Clean Images In Challenging Lighting
Answer: Wedding photographers often face challenging lighting conditions.
To minimize noise:
- Use fast lenses.
- Use on-camera or off-camera flash.
- Use noise reduction software in post-processing.
7.2. Portrait Photography: Smoothing Skin Without Losing Detail
Answer: Portrait photographers need to smooth skin without making it look unnatural.
To achieve this:
- Use frequency separation.
- Use noise reduction software selectively.
- Pay attention to detail.
7.3. Landscape Photography: Dealing With Noise In Long Exposures
Answer: Landscape photographers often use long exposures, which can introduce noise.
To minimize noise:
- Use a low ISO setting.
- Use dark frame subtraction.
- Use noise reduction software in post-processing.
8. The Future Of Noise Reduction: What’s On The Horizon?
Noise reduction technology is constantly evolving. Here’s what to expect in the future:
8.1. AI-Powered Noise Reduction: The Next Frontier
Answer: AI-powered noise reduction is becoming increasingly sophisticated.
AI algorithms can learn to identify and remove noise more effectively than traditional methods.
8.2. Hardware Improvements: Lower Noise Sensors And Processors
Answer: Camera manufacturers are constantly working to improve sensor and processor technology.
Future cameras will likely have lower noise levels and better image quality.
8.3. Real-Time Noise Reduction: Seeing The Results As You Shoot
Answer: Real-time noise reduction is becoming more common.
Some cameras and software now offer real-time noise reduction, allowing you to see the results as you shoot.
9. Common Mistakes To Avoid When Removing Grain From Photos
Here are some common mistakes to avoid when removing grain from photos:
9.1. Over-Processing: When Less Is More
Answer: Over-processing can result in a loss of detail and a “plastic” appearance.
Use noise reduction tools selectively and always zoom in to check the results.
9.2. Ignoring The Root Cause: Addressing The Source Of The Noise
Answer: Addressing the source of the noise is just as important as removing it in post-processing.
Focus on proper exposure, lighting, and camera settings to minimize noise in the first place.
9.3. Neglecting Detail: Preserving Sharpness And Texture
Answer: Preserving sharpness and texture is essential for a natural-looking image.
Use noise reduction tools that allow you to control the amount of detail preserved.
10. Grain Removal Checklist: A Step-By-Step Guide
Here’s a step-by-step checklist for removing grain from photos:
- Assess the image: Identify the source and severity of the noise.
- Adjust exposure: Correct any exposure issues.
- Use noise reduction software: Apply noise reduction selectively.
- Preserve detail: Use detail sliders to bring back lost detail.
- Check the results: Zoom in to check for artifacts or loss of detail.
- Make final adjustments: Fine-tune the image to achieve the desired look.
FAQ: Addressing Your Concerns About Grain In Photos
Question 1: How Does ISO Affect Grain In Photos?
Answer: Higher ISO settings increase the sensitivity of your camera’s sensor to light, but they also amplify noise, resulting in grainy photos.
Question 2: What Are The Best Camera Settings For Minimizing Grain?
Answer: The best camera settings for minimizing grain include using the lowest possible ISO, balancing aperture and shutter speed, and ensuring proper exposure.
Question 3: Can I Remove Grain From Photos On My Phone?
Answer: Yes, many mobile apps offer noise reduction tools that can help remove grain from photos taken on your phone.
Question 4: Is It Possible To Completely Eliminate Grain From A Photo?
Answer: While it’s difficult to completely eliminate grain from a photo, you can significantly reduce it using the techniques and tools discussed in this guide.
Question 5: What Is The Difference Between Luminance And Color Noise?
Answer: Luminance noise appears as grain or texture, while color noise appears as colored speckles.
Question 6: Which Software Is Best For Removing Grain From Photos?
Answer: Topaz Photo AI and Lightroom are both excellent software options for removing grain from photos.
Question 7: How Do I Prevent Grain In Low Light Photography?
Answer: To prevent grain in low light photography, use a wide aperture, lower shutter speed, increase ISO as a last resort, and consider using a tripod.
Question 8: What Is Frequency Separation And How Does It Help With Noise Reduction?
Answer: Frequency separation involves splitting an image into two layers, allowing you to selectively reduce noise in different areas of the image.
Question 9: Are Full-Frame Cameras Better For Low-Noise Photography?
Answer: Yes, full-frame cameras generally produce less noise than crop sensor cameras due to their larger sensors.
Question 10: How Can I Preserve Detail While Reducing Noise In My Photos?
Answer: Use noise reduction tools selectively and adjust detail sliders to bring back lost detail while minimizing grain.
We hope this comprehensive guide has helped you understand How To Take Grain Out Of Photos. Remember, practice makes perfect! Experiment with different techniques and tools to find what works best for you.
Ready to take your photography to the next level? Visit dfphoto.net for more tutorials, tips, and inspiration. Explore our rich collection of articles, stunning photo galleries, and connect with a vibrant community of photographers. Whether you’re seeking in-depth guides on advanced techniques or looking for creative inspiration, dfphoto.net is your ultimate resource. Join us today and unlock your full potential!