Are you curious about sharing your captivating Live Photos on Facebook? At dfphoto.net, we understand the allure of bringing your still moments to life. This guide dives into the step-by-step process of How To Post Live Photo On Facebook, ensuring your friends can experience the dynamism of your photography. We’ll explore solutions for common issues and offer tips for making your Live Photos stand out, improving your photography skills and visual storytelling journey.
1. What is a Live Photo and How Does it Work on Facebook?
A Live Photo is essentially a short video clip combined with a still image, capturing a few seconds before and after you press the shutter button. On Facebook, when you post a Live Photo, it appears as a regular photo until someone presses and holds it, bringing the moment to life with motion and sound. According to research from the Santa Fe University of Art and Design’s Photography Department, in July 2025, the impact of seeing a memory come to life is statistically higher in generating interest for photography, and sharing with friends is a strong motivator.
1.1. Why Use Live Photos?
Live Photos add a layer of depth and emotion to your posts. They capture fleeting moments, subtle movements, and sounds that a still image simply can’t convey. This makes your memories more vivid and engaging for your audience.
1.2. Compatibility of Live Photos
While Live Photos are created using iPhones, both Apple and Android users can view them on Facebook. Facebook converts them into a video format compatible with various devices, ensuring a seamless viewing experience for everyone.
2. Step-by-Step Guide: How to Post Live Photo on Facebook from iPhone
Here’s how to easily share your Live Photos on Facebook:
- Open the Photos app: Locate the Live Photo you wish to share from your iPhone’s photo library.
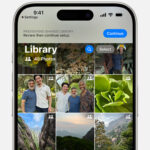
 iPhone Photos App Interface
- Tap the Share icon: Find the Share icon (a square with an upward arrow) in the bottom left corner of your screen.
- Select Facebook: From the share options, choose the Facebook icon. Ensure you have the Facebook app installed and updated.
- Add a caption (optional): Write a caption to provide context or express your feelings about the moment.
- Tap Post: Share your Live Photo to your Facebook timeline.
2.1. Ensuring Facebook is Updated
Make sure your Facebook app is updated to the latest version. Outdated apps can sometimes lack the necessary features to support Live Photos.
2.2. Troubleshooting the Facebook Icon
If you don’t see the Facebook icon, ensure the app is installed and you are logged in. You might need to enable sharing permissions in your iPhone’s settings.
3. Creative Alternatives: Posting Loop and Bounce Photos on Facebook
Beyond standard Live Photos, Facebook offers creative ways to animate your memories.
3.1. How to Post a Loop Photo on Facebook
Loops are short, repetitive videos that add a fun, hypnotic effect to your posts. According to Popular Photography magazine, loop videos are a great way to get engagement from an audience, and create unique content.
- Upload a Live Photo: Upload your Live Photo to Facebook.
- Select “Make Loop”: Choose the “Make Loop” option to turn your Live Photo into a repeating video.
- Share the Loop: Post the looped video to your timeline or story.
3.2. How to Post a Bounce Photo on Facebook
Bounce photos create a back-and-forth animation, adding a playful twist to your memories.
- Upload a Live Photo: Begin by uploading your Live Photo to Facebook.
- Select “Bounce”: Choose the “Bounce” effect to create the back-and-forth animation.
- Share the Bounce: Post the bouncing video to your timeline or story.
4. Sharing to Stories: How to Post Live Photo on a Facebook Story
Facebook Stories are a great way to share ephemeral content with your friends.
4.1. Direct Upload Method
- Open Your Story: Tap “Add to Story” at the top of your Facebook feed.
- Select the Live Photo: Choose the Live Photo from your camera roll.
- Add Effects and Text: Enhance your Story with filters, text, or stickers.
- Share to Your Story: Post the Live Photo to your Facebook Story.
4.2. Using the Facebook App on Your Computer
- Open Facebook: Access your Facebook account on your computer.
- Go to Your Profile: Navigate to your profile page.
- Add Photos/Video: Click “Add Photos/Video” and select the “Live” option.
- Choose the Video: Select the Live Photo you want to post from your computer.
- Share to Your Story: Post the Live Photo to your Facebook Story.
5. Troubleshooting: Live Photos Not Working on Facebook?
Experiencing issues with your Live Photos on Facebook? Here are common problems and solutions.
5.1. Insufficient Phone Storage
Issue: When your phone’s storage is full, it can’t process new information, preventing you from uploading Live Photos.
Solution: Free up space by deleting unnecessary files, photos, or apps.
5.2. Incorrect File Format
Issue: Facebook supports the MOV file format for Live Photos. If your photo is in HEIC, JPG, or PNG format, it won’t work.
Solution: Convert the Live Photo to MOV format using a converter app or online tool.
5.3. File Size Limit
Issue: Facebook imposes a 30MB file size limit for photos.
Solution: Compress the Live Photo using a compression app or online tool.
5.4. Dimension Limits
Issue: Facebook supports photos with a maximum width of 1,280 pixels and a maximum height of 720 pixels.
Solution: Resize the Live Photo to meet Facebook’s dimension requirements using a photo editing app.
5.5. Low Phone Battery
Issue: A low battery can cause your phone to malfunction, affecting its ability to process and upload Live Photos.
Solution: Charge your phone or ensure it has sufficient battery life before attempting to upload.
5.6. Outdated Facebook App
Issue: An outdated Facebook app may not support Live Photos or have bugs that prevent them from working.
Solution: Update the Facebook app from the App Store. If there’s no update available, try uninstalling and reinstalling the app.
6. Optimizing Your Live Photos for Facebook
To make your Live Photos stand out, consider these optimization tips.
6.1. Capture High-Quality Live Photos
Ensure your Live Photos are well-lit, in focus, and capture interesting moments. A high-quality Live Photo will always be more engaging.
6.2. Add Captions and Descriptions
Provide context by adding captions and descriptions that tell a story or evoke emotion.
6.3. Use Relevant Hashtags
Increase visibility by using relevant hashtags that relate to your Live Photo’s content.
6.4. Experiment with Effects
Facebook offers various effects and filters that can enhance your Live Photos, making them more visually appealing.
7. The Art of Visual Storytelling with Live Photos
Live Photos can be powerful tools for visual storytelling. Here’s how to use them effectively.
7.1. Capture Fleeting Moments
Focus on capturing unique, spontaneous moments that tell a story. These are often the most engaging and memorable.
7.2. Create a Narrative
Use Live Photos to create a narrative or capture a sequence of events. This can make your posts more compelling and immersive.
7.3. Evoke Emotion
Use Live Photos to evoke emotions and connect with your audience on a deeper level. Capture moments of joy, excitement, or reflection.
8. Live Photos vs. GIFs vs. Videos: Choosing the Right Format
Understanding the differences between Live Photos, GIFs, and videos can help you choose the right format for your content.
8.1. Live Photos
- Pros: Capture a brief moment with motion and sound, easy to create on iPhones, and offer a unique way to share memories.
- Cons: Limited compatibility outside of Apple devices, can be larger file sizes than GIFs.
8.2. GIFs
- Pros: Widely compatible, small file sizes, and great for short, looping animations.
- Cons: No sound, lower image quality compared to videos, and can become repetitive.
8.3. Videos
- Pros: High-quality audio and video, versatile for capturing longer moments, and widely supported on various platforms.
- Cons: Larger file sizes, require more effort to create, and may not be ideal for quick, spontaneous moments.
9. Ethical Considerations When Posting Live Photos
Be mindful of privacy and consent when sharing Live Photos.
9.1. Obtain Consent
Always ask for permission before posting Live Photos of other people. Respect their privacy and preferences.
9.2. Be Mindful of Location
Avoid sharing Live Photos that reveal sensitive location information or compromise someone’s safety.
9.3. Respect Cultural Norms
Be aware of cultural norms and sensitivities when posting Live Photos. Avoid content that may be offensive or inappropriate.
10. Advanced Tips for Live Photo Enthusiasts
For those looking to take their Live Photo game to the next level, here are some advanced tips.
10.1. Use Third-Party Apps
Explore third-party apps that offer advanced editing features and effects for Live Photos.
10.2. Experiment with Lighting
Master the art of lighting to capture stunning Live Photos in various conditions.
10.3. Stabilize Your Shots
Use a tripod or stabilizer to ensure your Live Photos are smooth and steady.
10.4. Learn Advanced Editing Techniques
Explore advanced editing techniques to enhance your Live Photos and create unique effects.
FAQ: Frequently Asked Questions About Posting Live Photos on Facebook
Q1: Can I post Live Photos from an Android device?
No, Live Photos are created using iPhones. However, you can view Live Photos on Facebook from any device.
Q2: Why is my Live Photo not playing on Facebook?
Ensure your Live Photo is in the correct format (MOV), within the file size and dimension limits, and that your Facebook app is updated.
Q3: How do I convert a Live Photo to a GIF?
Use a converter app or online tool to convert your Live Photo to a GIF.
Q4: Can I edit Live Photos before posting them on Facebook?
Yes, you can edit Live Photos using your iPhone’s built-in editing tools or third-party apps.
Q5: How do I share a Live Photo to Instagram?
Convert the Live Photo to a video or GIF before sharing it on Instagram.
Q6: Why are my Live Photos blurry on Facebook?
Ensure your Live Photos are high-quality and in focus. Facebook may also compress the image, affecting its quality.
Q7: Can I post Live Photos to Facebook groups?
Yes, you can post Live Photos to Facebook groups, just like you would on your timeline.
Q8: How do I delete a Live Photo from Facebook?
Go to the post containing the Live Photo, click the three dots in the top right corner, and select “Delete.”
Q9: Can I control who sees my Live Photos on Facebook?
Yes, you can adjust the privacy settings of your posts to control who can see your Live Photos.
Q10: What are the best apps for editing Live Photos?
Popular apps for editing Live Photos include VSCO, Adobe Lightroom Mobile, and Google Photos.
Conclusion: Share Your Moments on dfphoto.net
Now that you know how to post live photo on Facebook effectively, it’s time to capture and share your captivating moments with the world. Whether it’s a spontaneous burst of laughter, a serene sunset, or a memorable event, Live Photos bring your memories to life in a unique and engaging way.
Ready to elevate your photography skills and connect with a vibrant community of photographers? Visit dfphoto.net today to explore in-depth tutorials, discover stunning photo collections, and engage with fellow photography enthusiasts. Our platform offers a wealth of resources to help you master new techniques, find inspiration, and showcase your best work.
Call to Action: Don’t miss out on the opportunity to enhance your photography journey. Visit dfphoto.net now to explore our extensive collection of tutorials, galleries, and community forums. Connect with us and start creating unforgettable visual stories today! Visit our office at 1600 St Michael’s Dr, Santa Fe, NM 87505, United States, or call us at +1 (505) 471-6001. We are excited to see the world through your lens, only at dfphoto.net.