Recovering deleted photos and videos from your iPhone can seem daunting, but dfphoto.net provides you with simple and effective methods to retrieve your precious memories. We’ll explore various techniques, from utilizing the Recently Deleted album to employing advanced data recovery tools, ensuring you can restore your lost photos and videos.
1. Understanding Photo and Video Deletion on iPhone
1.1 What Happens When You Delete a Photo or Video?
When you delete a photo or video on your iPhone, it isn’t immediately erased from your device’s storage. Instead, it is moved to the “Recently Deleted” album within the Photos app. This feature provides a safety net, allowing you to recover accidentally deleted items within a specific timeframe. According to Apple Support, items remain in the Recently Deleted album for 30 days.
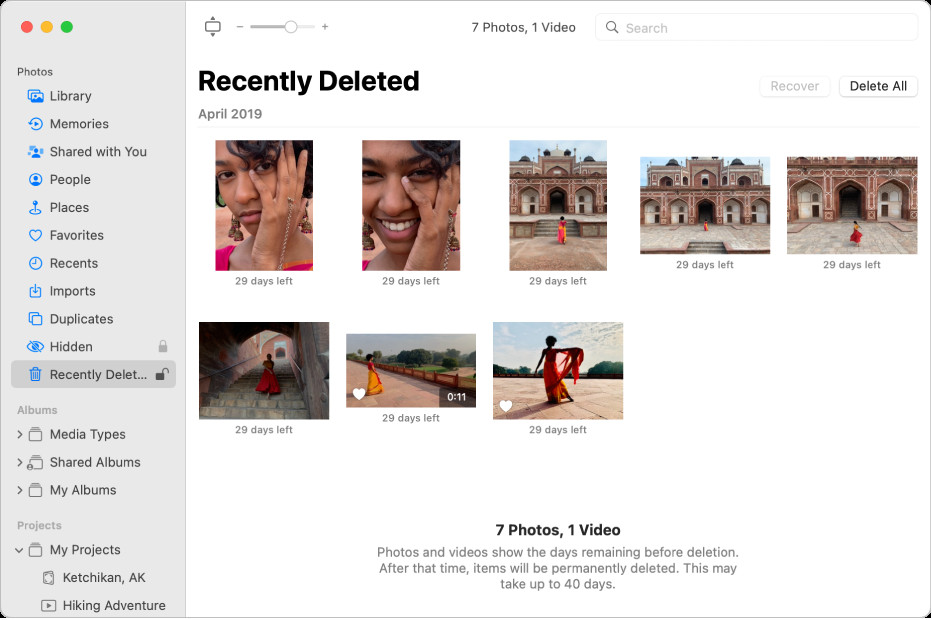
1.2 The Recently Deleted Album: Your First Line of Defense
The Recently Deleted album acts as a temporary holding place for your deleted photos and videos. It allows you to review and restore items you may have removed unintentionally. This album can be found within the “Albums” tab in the Photos app.
1.3 Permanent Deletion: When Photos Are Gone for Good
After 30 days in the Recently Deleted album, items are permanently deleted from your iPhone and iCloud. Once this happens, standard recovery methods within the Photos app will no longer work, necessitating more advanced recovery techniques.
2. Immediate Recovery: Retrieving Photos from the Recently Deleted Album
2.1 Accessing the Recently Deleted Album
To access the Recently Deleted album on your iPhone, follow these steps:
- Open the Photos app.
- Tap the Albums tab.
- Scroll down to the Utilities section and tap Recently Deleted.
- On iOS 16 and later, you may need to use Face ID or Touch ID to unlock this album for enhanced security.
2.2 Recovering Individual Photos and Videos
Once you’re in the Recently Deleted album, you can recover individual photos and videos:
- Tap Select in the upper-right corner.
- Tap on the photos or videos you wish to recover.
- Tap Recover in the bottom-right corner.
- Confirm by tapping Recover Photo or Recover Video.
2.3 Recovering All Items at Once
If you want to recover all the photos and videos in the album, you can do so quickly:
- Tap Select in the upper-right corner.
- Tap Recover All in the bottom-right corner.
- Confirm by tapping Recover [Number] Photos or Recover [Number] Videos.
3. Cloud-Based Recovery: iCloud Photos
3.1 How iCloud Photos Syncs Your Data
iCloud Photos automatically uploads and stores your photos and videos in iCloud, making them accessible on any device where you’re signed in with the same Apple ID. According to Apple’s documentation, any changes you make to your photo library on one device are reflected on all your other devices.
3.2 Recovering Photos from iCloud.com
If you have iCloud Photos enabled, you can recover deleted photos and videos from iCloud.com:
- Open a web browser and go to iCloud.com.
- Sign in with your Apple ID and password.
- Click on Photos.
- In the Photos app on iCloud.com, click the Recently Deleted album in the sidebar.
- If you don’t see the sidebar, click the Sidebar button.
- Select the photos or videos you want to recover, then click Recover.
3.3 Checking iCloud Backup
iCloud Backup periodically creates backups of your iPhone’s data, including photos and videos, when your device is connected to Wi-Fi, plugged into a power source, and locked. If you have a recent iCloud backup, you may be able to restore your entire device to recover deleted photos and videos.
3.3.1 Steps to Restore from iCloud Backup
- Erase Your iPhone: Go to Settings > General > Transfer or Reset iPhone > Erase All Content and Settings.
- Follow Setup Assistant: After your iPhone restarts, follow the on-screen instructions until you reach the Apps & Data screen.
- Restore from iCloud Backup: Select Restore from iCloud Backup and sign in with your Apple ID.
- Choose Backup: Choose the most recent backup from the list.
Note: Restoring from an iCloud backup will overwrite your current data, so ensure you back up any recent changes before proceeding.
 Recovering deleted photos from iCloud backup, showing the option to restore data during iPhone setup
4. Computer-Based Recovery: Using iTunes/Finder Backups
4.1 How iTunes/Finder Backups Work
iTunes (on older macOS versions) or Finder (on newer macOS versions) can create backups of your iPhone’s data on your computer. These backups include photos, videos, and other data, and can be used to restore your device to a previous state.
4.2 Restoring from an iTunes/Finder Backup
- Connect Your iPhone to Your Computer: Use a USB cable to connect your iPhone to the computer you used to create the backup.
- Open iTunes or Finder:
- On macOS Mojave or earlier, open iTunes.
- On macOS Catalina or later, open Finder.
- Select Your iPhone: In iTunes, click the iPhone icon near the top left. In Finder, select your iPhone from the Locations section in the sidebar.
- Restore Backup:
- In iTunes, click Restore Backup.
- In Finder, click Restore iPhone.
- Choose Backup: Select the most recent backup from the list.
- Click Restore: Follow the on-screen instructions to restore your iPhone.
Note: Restoring from an iTunes/Finder backup will overwrite your current data, so ensure you back up any recent changes before proceeding.
4.3 Limitations of Backup Restoration
Restoring from a backup will revert your iPhone to the state it was in when the backup was created. This means any data created after the backup date will be lost unless you back it up separately.
5. Advanced Data Recovery Techniques
5.1 When to Consider Advanced Recovery
If your photos and videos are no longer in the Recently Deleted album, and you don’t have an iCloud or iTunes/Finder backup, you may need to consider advanced data recovery techniques. These methods often involve using specialized software or professional data recovery services.
5.2 Data Recovery Software
Several data recovery software options are available for iOS devices. These tools scan your iPhone’s storage to identify and recover deleted files. Popular options include:
- EaseUS MobiSaver: Known for its user-friendly interface and effective recovery capabilities.
- iMobie PhoneRescue: Offers a high success rate and supports various data types.
- Dr.Fone – Data Recovery (iOS): A comprehensive tool that can recover data from iOS devices, iCloud, and iTunes backups.
5.2.1 How Data Recovery Software Works
Data recovery software works by scanning the iPhone’s storage for residual data fragments of deleted files. When a file is deleted, it isn’t immediately erased from the storage medium. Instead, the space it occupied is marked as available for new data. Data recovery software attempts to locate and reassemble these fragments into usable files.
5.2.2 Steps to Use Data Recovery Software
- Download and Install the Software: Choose a reputable data recovery software and download it to your computer.
- Connect Your iPhone: Connect your iPhone to your computer using a USB cable.
- Run the Software: Launch the data recovery software and follow the on-screen instructions to scan your iPhone.
- Preview and Recover: Preview the recoverable files and select the photos and videos you want to restore.
- Save the Recovered Files: Choose a location on your computer to save the recovered files.
Important Considerations:
- Stop Using Your iPhone: To maximize the chances of successful data recovery, stop using your iPhone as soon as you realize data is missing. Continued use can overwrite the deleted data, making it unrecoverable.
- Rooting or Jailbreaking: Some data recovery software may require you to root or jailbreak your iPhone. This can void your warranty and pose security risks, so proceed with caution.
- Success Rate: The success rate of data recovery software varies depending on the circumstances, such as how long ago the data was deleted and whether the storage space has been overwritten.
5.3 Professional Data Recovery Services
If data recovery software fails to retrieve your deleted photos and videos, or if your iPhone has physical damage, you may need to seek the help of a professional data recovery service. These services have specialized equipment and expertise to recover data from severely damaged devices.
5.3.1 Benefits of Professional Services
- Advanced Equipment: Professional data recovery services use advanced equipment, such as cleanroom environments and specialized data extraction tools.
- Expertise: Data recovery specialists have extensive knowledge of storage media and data recovery techniques.
- Higher Success Rate: Professional services often have a higher success rate than DIY methods, especially in cases of physical damage or complex data loss scenarios.
5.3.2 Finding a Reputable Service
When choosing a professional data recovery service, consider the following factors:
- Experience: Look for a service with a proven track record and years of experience in iOS data recovery.
- Reputation: Check online reviews and testimonials to gauge the service’s reputation.
- Cleanroom Environment: Ensure the service has a cleanroom environment to prevent further damage to your device during the recovery process.
- Cost: Obtain a quote before committing to the service, and understand the pricing structure.
6. Preventing Future Data Loss
6.1 Regular Backups
The best way to prevent data loss is to create regular backups of your iPhone. You can back up your device to iCloud or your computer using iTunes/Finder.
6.1.1 Setting Up Automatic iCloud Backups
- Go to Settings > [Your Name] > iCloud > iCloud Backup.
- Toggle iCloud Backup to the On position.
- Ensure your iPhone is connected to Wi-Fi, plugged into a power source, and locked to initiate automatic backups.
6.1.2 Backing Up to Your Computer
- Connect your iPhone to your computer using a USB cable.
- Open iTunes (on older macOS versions) or Finder (on newer macOS versions).
- Select your iPhone from the list of devices.
- Click Back Up Now.
6.2 Utilizing Cloud Storage
In addition to iCloud Photos, consider using other cloud storage services to back up your photos and videos. Popular options include Google Photos, Dropbox, and Microsoft OneDrive. These services offer additional storage space and features for managing your media.
6.3 Being Mindful of Deletions
Take extra care when deleting photos and videos on your iPhone. Double-check before confirming the deletion to avoid accidental data loss.
7. Understanding Data Overwriting
7.1 How Data Overwriting Affects Recovery
Data overwriting occurs when new data is written to the same storage space as deleted files. This process can make data recovery more difficult or impossible.
7.2 Minimizing Overwriting
To minimize the risk of data overwriting, follow these tips:
- Stop Using Your iPhone: As soon as you realize data is missing, stop using your iPhone to prevent new data from being written to the storage.
- Avoid Downloading New Apps: Downloading new apps can overwrite deleted data.
- Do Not Take New Photos or Videos: Taking new photos or videos can also overwrite deleted data.
8. Security Considerations
8.1 Protecting Your Privacy
When using data recovery software or professional services, ensure they are reputable and prioritize your privacy. Read the terms of service and privacy policies carefully before entrusting them with your data.
8.2 Avoiding Scams
Be wary of data recovery scams that promise unrealistic results or ask for exorbitant fees upfront. Do your research and choose a service with a proven track record.
9. Case Studies and Success Stories
9.1 Real-Life Examples
- Case Study 1: Accidental Deletion of Family Vacation Photos: A user accidentally deleted photos from a family vacation. Using EaseUS MobiSaver, they were able to recover the photos and restore them to their iPhone.
- Case Study 2: Water-Damaged iPhone: An iPhone was damaged by water, resulting in data loss. A professional data recovery service was able to recover the photos and videos from the damaged device.
- Case Study 3: iCloud Sync Issue: Due to an iCloud sync issue, a user’s photos were deleted from their iPhone. By restoring from a recent iCloud backup, they were able to recover their lost photos.
9.2 Lessons Learned
These case studies highlight the importance of regular backups, using reliable data recovery tools, and seeking professional help when necessary.
10. dfphoto.net: Your Resource for Photography and Data Recovery Tips
At dfphoto.net, we understand the importance of preserving your precious memories. Whether you’re a professional photographer or an amateur enthusiast, our website offers a wealth of resources, including:
- Detailed Guides: Step-by-step guides on various photography techniques and data recovery methods.
- Expert Advice: Tips and advice from experienced photographers and data recovery specialists.
- Community Forum: A platform to connect with other photographers and share your experiences.
Visit dfphoto.net to learn more about photography and how to protect your valuable photos and videos.
FAQ: Recovering Deleted Photos and Videos from iPhone
1. Can I recover deleted photos from my iPhone without a backup?
Yes, you can attempt to recover deleted photos from your iPhone without a backup using data recovery software. However, the success rate depends on whether the data has been overwritten.
2. How long do deleted photos stay in the Recently Deleted album?
Deleted photos and videos stay in the Recently Deleted album for 30 days. After that, they are permanently deleted.
3. Is it possible to recover photos after they have been permanently deleted?
Recovering photos after they have been permanently deleted is challenging but possible with advanced data recovery techniques or professional services.
4. Does iCloud Photos automatically back up my photos and videos?
Yes, iCloud Photos automatically uploads and stores your photos and videos in iCloud, making them accessible on any device where you’re signed in with the same Apple ID.
5. What should I do immediately after realizing I’ve deleted important photos?
Stop using your iPhone immediately to prevent data overwriting. Avoid taking new photos or videos, downloading new apps, or performing any other actions that could write data to the storage.
6. Can I recover deleted photos from a water-damaged iPhone?
Recovering photos from a water-damaged iPhone may require professional data recovery services. These services have specialized equipment to recover data from damaged devices.
7. Is it safe to jailbreak my iPhone for data recovery?
Jailbreaking your iPhone can void your warranty and pose security risks. It is generally not recommended unless you are comfortable with the risks involved.
8. How much does it cost to recover deleted photos from a professional service?
The cost of professional data recovery services varies depending on the complexity of the recovery and the service provider. It is best to obtain a quote before committing to the service.
9. What is the best data recovery software for iPhone?
Popular data recovery software options for iPhone include EaseUS MobiSaver, iMobie PhoneRescue, and Dr.Fone – Data Recovery (iOS). Choose a reputable software with a proven track record.
10. How can I prevent future data loss on my iPhone?
Create regular backups of your iPhone to iCloud or your computer, utilize cloud storage services, and be mindful of deletions to prevent future data loss.
Losing photos and videos from your iPhone can be a stressful experience, but with the right knowledge and tools, you can often recover your precious memories. Remember to act quickly, create regular backups, and seek professional help when needed. At dfphoto.net, we’re here to support you every step of the way.