Want to create stunning panoramic images? This guide on How Do I Stitch Photos Together In Photoshop will show you easy and advanced methods to create breathtaking wide-angle views, brought to you by dfphoto.net. Learn how to seamlessly blend your photos and unlock your creative potential.
1. What Exactly Is A Panoramic Photo?
A panoramic photograph captures a scene with an expansive field of view, far exceeding what a standard lens can achieve in a single shot. While definitions can vary, here’s a breakdown:
- Aspect Ratio: It should be at least twice as wide as it is tall (or vice-versa), with a ratio of 2:1 or greater.
- Multiple Images: Typically created by stitching together multiple overlapping photographs.
- Wide Field of View: Captures a significantly broader perspective than a single image.
- Common Use: Popular in landscape photography but can be applied creatively to other genres.
The 2:1 ratio is a good starting point, but the real essence lies in capturing a scene that benefits from a wider perspective.
2. Essential Techniques For Shooting Panoramic Photos
Creating stunning panoramic photos starts with mastering the art of capturing individual frames. Here’s a breakdown of key techniques:
-
Exposure Triangle Mastery: A solid understanding of aperture, shutter speed, and ISO is crucial for consistent exposure across all frames.
-
Compositional Awareness: Strong composition is important. Ensure the scene has a clear subject and visual flow, making the expanded view compelling.
-
Tripod Stability (Recommended): A tripod is highly recommended to maintain consistent camera position and avoid vertical displacement between frames.
-
Consistent Focus: Disable autofocus after the initial focus lock to prevent focus shifting between frames. This can be achieved through back-button focus or switching to manual focus.
-
Overlap: Each frame should overlap the previous one by approximately one-third (1/3). This overlap provides sufficient data for stitching software to seamlessly blend the images.
Santa Fe University of Art and Design’s Photography Department research indicates that a 30-40% overlap between frames significantly improves the accuracy and quality of panoramic stitches.
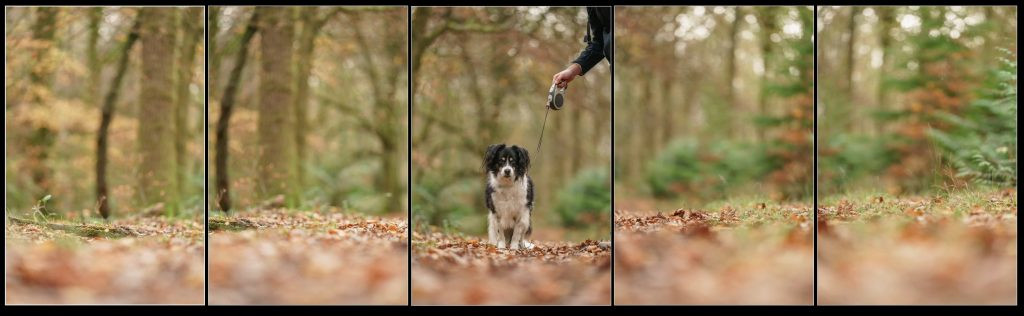 Panoramic raw images demonstrating frame overlap for easier stitching
Shooting the frames involves focusing on the primary subject and taking the first shot. Then, carefully rotate the camera while maintaining the established overlap and take subsequent shots. The goal is to capture a series of RAW files that, when viewed sequentially, display a continuous scene with the necessary overlap for seamless stitching. A tripod minimizes vertical variations between frames.
3. Step-by-Step: Stitching Panoramas in Lightroom Classic
If your frames are well-aligned with sufficient overlap, Lightroom Classic simplifies the stitching process:
- Prepare Your Files: Organize your frames so you can visually see the complete scene across the sequence.
- Select Frames: Hold the Command key (Ctrl on Windows) and click each image you want to include in the panorama.
- Photo Merge: Right-click on one of the selected images and choose Photo Merge -> Panorama…
- Experiment: The Panorama Merge window offers various projection options (Spherical, Cylindrical, Perspective) and boundary warp settings. Experiment until you achieve the most natural-looking result with minimal distortion.
- Stacking (Optional): The “stack” function creates a stack of images used in the pano, which you can check.
- Merge: Click “Merge” to initiate the panorama creation. This process may take a few moments, so be patient.
That’s it, it’s very simple.
4. Stitching Panoramas in Photoshop: A Detailed Guide
Photoshop provides more control over the stitching process. Here’s a comprehensive guide:
-
Initial Steps: Follow steps 1 and 2 from the Lightroom Classic instructions above to select your frames.
-
Merge to Panorama: Right-click on one of the images and choose Edit in -> Merge to Panorama in Photoshop.
-
Automated Stitching (Easy Method):
- In the Photomerge window, you can often leave the default settings checked and click “OK”. Photoshop will automatically align, blend, and stitch the images into a panorama.
- If you encounter issues with the automatic stitching, proceed to the advanced steps for greater control.
-
Advanced Stitching (For Experienced Users):
- Disable Blending: Deselect “Blend Images Together.” This gives you manual control over the blending process, especially useful for complex scenes.
- Vignette and Distortion Correction: Check the boxes for “Vignette Removal” and “Geometric Distortion Correction” if your lens exhibits these issues. Click “OK.”
- Layer Alignment: Photoshop will open each frame as a separate layer and automatically align them.
- Manual Masking and Blending: This is where your Photoshop skills come into play. Use layer masks to selectively reveal portions of each layer, blending them seamlessly to create the final panorama.
- Fine-Tuning: Pay close attention to color and exposure variations between frames. Use adjustment layers to create a consistent look across the entire panorama.
According to Popular Photography magazine, mastering manual masking techniques is essential for achieving professional-quality panoramic stitches in Photoshop.
If you’re new to Photoshop, stick to the automated method. Experienced users can leverage the advanced steps for maximum control and refinement.
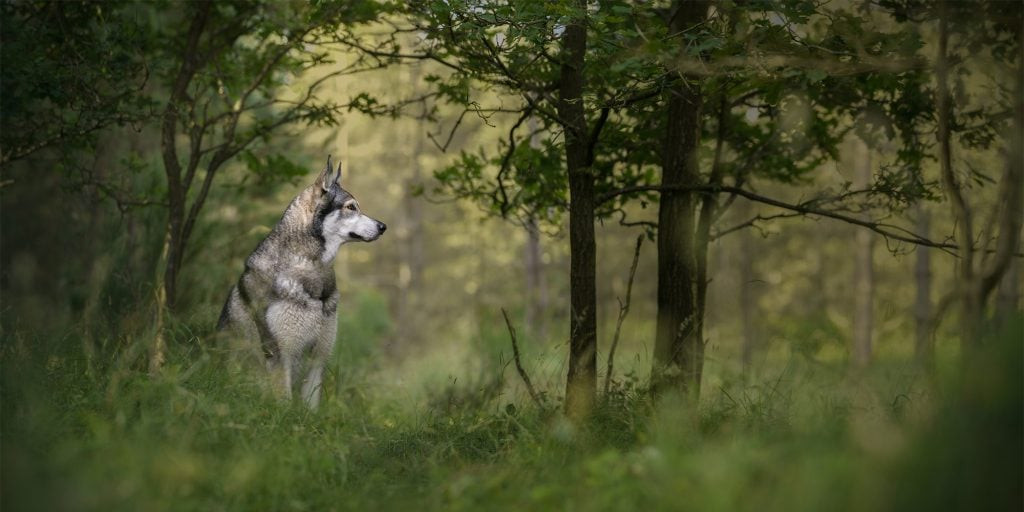
5. Inspiration: Panoramic Photo Examples
Here’s a small selection of Panoramic photos to hopefully provide some inspiration!
 A panoramic landscape showcasing a serene lakeside view
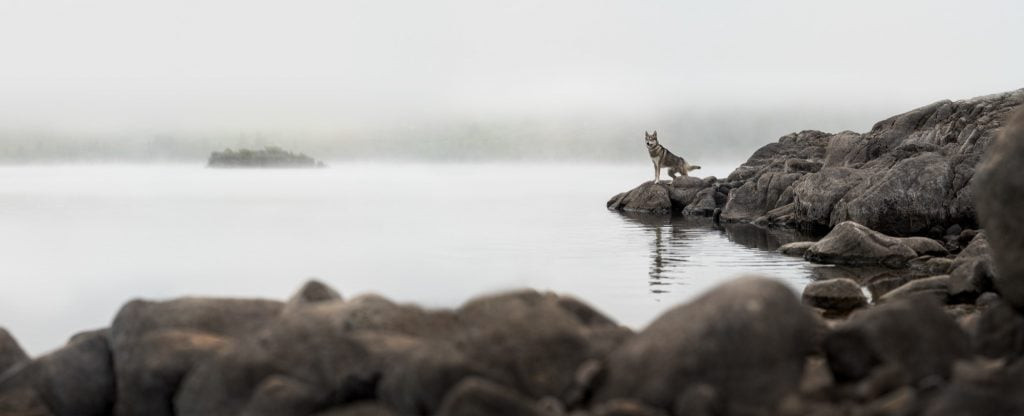 A panoramic view of Loch Canis Lupus, capturing its expansive beauty
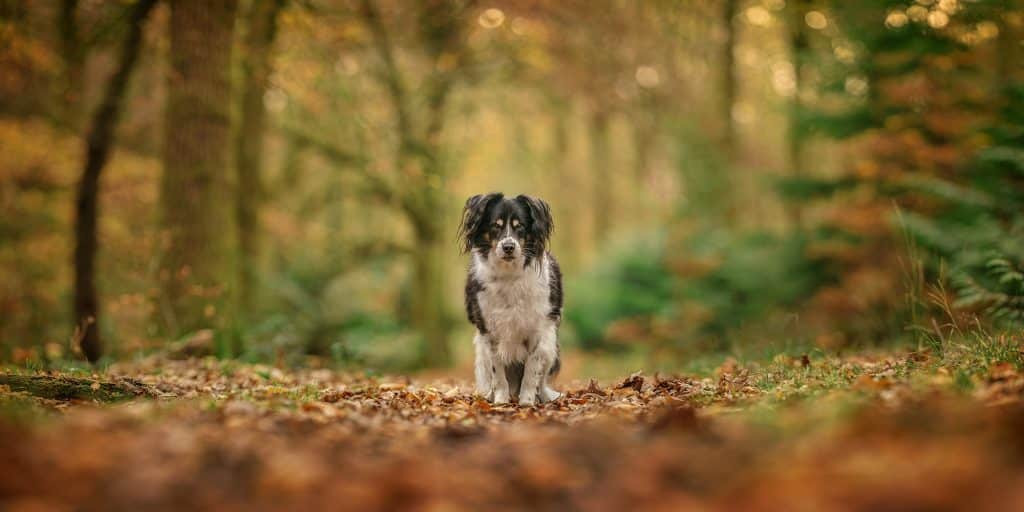
 A wide panoramic shot demonstrating effective use of multiple frames
6. Overcoming Common Challenges
Creating seamless panoramas can present some common challenges. Here’s how to address them:
- Misalignment: Ensure consistent camera positioning and sufficient overlap between frames. A tripod is invaluable for minimizing misalignment.
- Exposure Variations: Shoot in manual mode to maintain consistent exposure across all frames. If variations persist, use adjustment layers in Photoshop to even them out.
- Blending Issues: Manual masking in Photoshop offers the greatest control over blending. Pay attention to detail when creating masks to avoid visible seams.
- Distortion: Experiment with different projection options in Photoshop’s Photomerge feature (Spherical, Cylindrical, Perspective) to minimize distortion.
7. The Power of Perspective: Composition in Panoramas
Panoramic photography offers a unique opportunity to play with perspective and draw viewers into a scene. Here are some compositional considerations:
- Leading Lines: Utilize natural lines in the landscape (rivers, roads, fences) to guide the viewer’s eye through the panorama.
- Rule of Thirds: Apply the rule of thirds to create a balanced and visually appealing composition across the wide format.
- Foreground Interest: Include interesting elements in the foreground to add depth and scale to the panorama.
- Negative Space: Use open areas of sky or water to create a sense of spaciousness and balance.
8. Advanced Techniques: Beyond the Basics
Once you’ve mastered the fundamentals, explore these advanced techniques:
- HDR Panoramas: Combine multiple exposures for each frame to create a high dynamic range panorama with incredible detail in both highlights and shadows.
- Vertical Panoramas: Capture tall subjects like skyscrapers or forests by stitching together images vertically.
- 360° Panoramas: Create fully immersive panoramic experiences by capturing a complete 360-degree view.
9. Essential Equipment for Panoramic Photography
While you can create panoramas with basic equipment, these tools will enhance your results:
| Equipment | Benefit |
|---|---|
| Tripod | Provides stability, ensuring consistent camera positioning and minimizing misalignment. |
| Wide-Angle Lens | Captures a wider field of view, reducing the number of frames needed for the panorama. |
| Remote Shutter | Minimizes camera shake during exposures, especially important for long exposures. |
| Leveling Base | Allows for precise horizontal adjustments, ensuring a level horizon in your panorama. |
| Panoramic Head | A specialized tripod head that rotates the camera around its nodal point, minimizing parallax errors and improving stitching accuracy. |
| Post-Processing Software | Adobe Photoshop and Lightroom Classic are industry-standard tools for stitching and editing panoramas. |
10. dfphoto.net: Your Resource for Photography Inspiration
Ready to elevate your photography? Visit dfphoto.net for:
- In-Depth Tutorials: Expand your knowledge with detailed guides on various photography techniques.
- Stunning Galleries: Find inspiration in our curated collections of exceptional photographs.
- Community Connection: Connect with fellow photographers, share your work, and learn from others.
11. Staying Updated: Current Trends in Panoramic Photography in the USA
Keep pace with the evolving landscape of panoramic photography. Here’s what’s trending in the USA:
- Drone Panoramas: Drones are transforming panoramic photography, offering unique aerial perspectives and the ability to capture large areas quickly.
- Virtual Reality (VR) Integration: 360° panoramas are finding new applications in VR experiences, allowing viewers to immerse themselves in virtual environments.
- Mobile Panoramas: Smartphones are increasingly capable of capturing high-quality panoramas, making the technique more accessible than ever.
12. The Art of Patience: Mastering the Process
Creating exceptional panoramas requires patience and attention to detail. Don’t be discouraged by initial challenges. With practice, you’ll develop the skills and intuition to capture breathtaking wide-angle views that showcase your unique vision.
13. Blending Realities: Merging Art and Technology
Panoramic photography is where artistic vision meets technical execution. Mastering the techniques allows you to transcend the limitations of traditional photography and create images that truly capture the grandeur and beauty of the world around us.
14. Explore Scenic Locations: Capturing the American Landscape
The USA offers a wealth of stunning locations perfect for panoramic photography:
- National Parks: From the majestic Grand Canyon to the serene landscapes of Yosemite, national parks offer endless panoramic opportunities.
- Address: 1600 St Michael’s Dr, Santa Fe, NM 87505, United States.
- Phone: +1 (505) 471-6001
- Coastal Views: Capture dramatic seascapes along the Pacific Coast Highway or the rugged shores of Maine.
- Urban Skylines: Showcase the architectural grandeur of cities like New York, Chicago, and San Francisco with stunning urban panoramas.
- Mountain Ranges: The Rocky Mountains, the Appalachian Mountains, and the Sierra Nevada offer breathtaking mountain vistas perfect for panoramic photography.
- Deserts: The stark beauty of the American deserts provides unique opportunities for capturing wide, expansive landscapes.
15. Preserving Memories: Documenting Life’s Grand Moments
Beyond landscapes, panoramic photography can be used to document special events and create lasting memories. Capture the energy of a wedding, the excitement of a sporting event, or the joy of a family gathering with a unique panoramic perspective.
16. The Future of Panoramic Photography
Panoramic photography continues to evolve with advancements in technology. Expect to see:
- AI-Powered Stitching: Artificial intelligence will further automate and improve the stitching process, making it easier to create seamless panoramas.
- Computational Photography: Smartphones and cameras will leverage computational photography techniques to overcome limitations in lens quality and sensor size, producing even better panoramic images.
- Interactive Panoramas: Viewers will have greater control over how they explore panoramic images, with features like zoom, pan, and virtual tours.
17. Embrace Imperfection: Finding Beauty in the Unexpected
While technical precision is important, don’t be afraid to embrace imperfections and experiment with creative techniques. Sometimes, the most compelling panoramas are those that break the rules and showcase a unique perspective.
18. Connect and Learn: Joining the Photography Community
Engage with other photographers to share your work, learn new techniques, and find inspiration. Online forums, photography clubs, and workshops offer valuable opportunities to connect with like-minded individuals and grow as a photographer.
19. Share Your Vision: Showcasing Your Panoramic Creations
Don’t keep your panoramic creations hidden. Share them with the world through online platforms, social media, and print exhibitions. Your unique perspective deserves to be seen and appreciated.
20. Call to Action: Start Your Panoramic Journey Today
Ready to unleash your creative potential? Visit dfphoto.net today to discover a wealth of resources, connect with a vibrant community, and embark on your panoramic photography adventure!
FAQ: Stitching Photos Together in Photoshop
1. What is the minimum overlap required when shooting photos for a panorama?
A minimum overlap of one-third (30-40%) between frames is recommended to ensure seamless stitching and minimize distortion.
2. Do I need a special lens to shoot panoramas?
While a wide-angle lens can be helpful, it’s not essential. You can create panoramas with any lens, but a wider lens will reduce the number of frames needed.
3. What is the best camera setting for shooting panoramas?
Shoot in manual mode to maintain consistent exposure and white balance across all frames. Use a low ISO to minimize noise and a narrow aperture to maximize depth of field.
4. Can I stitch photos together from different cameras?
Yes, but it can be more challenging due to variations in lens characteristics and sensor size. Careful post-processing is required to match the images.
5. What are the best software options for stitching panoramas?
Adobe Photoshop and Lightroom Classic are industry-standard tools for stitching panoramas. Other options include PTGui, PanoramaStudio, and Hugin.
6. How do I correct perspective distortion in panoramas?
Photoshop’s Photomerge feature offers different projection options (Spherical, Cylindrical, Perspective) that can help minimize distortion. You can also use manual perspective correction tools.
7. How do I remove ghosting or artifacts in panoramas?
Ghosting can occur when objects move between frames. Manual masking in Photoshop allows you to selectively remove these artifacts.
8. What is HDR panorama photography?
HDR panorama photography involves combining multiple exposures for each frame to create a high dynamic range panorama with exceptional detail in both highlights and shadows.
9. How do I create a 360-degree panorama?
You’ll need a specialized panoramic head and a fisheye lens to capture a complete 360-degree view. Software like PTGui can then be used to stitch the images together.
10. How can I improve the sharpness of my panoramas?
Use a tripod, a remote shutter release, and a sharp lens. Consider using focus stacking techniques to maximize depth of field. Address: 1600 St Michael’s Dr, Santa Fe, NM 87505, United States. Phone: +1 (505) 471-6001 Website: dfphoto.net
This comprehensive guide equips you with the knowledge and inspiration to create stunning panoramic photos. Remember to visit dfphoto.net for more photography tips, tutorials, and inspiration!