Do you want to know How Do You Get Photos From Iphone To Ipad? dfphoto.net is here to help you transfer your cherished memories and visual art seamlessly between your devices, ensuring your photos are always where you need them, offering efficient photo management. We’ll explore different methods, from cloud-based solutions to direct transfers, so you can pick the one that best suits your needs, enhancing your photographic journey. Learn how to get your images on different devices, manage your photo library, and even create great photo books.
1. What Is The Easiest Way To Transfer Photos From iPhone To iPad?
The easiest way to transfer photos from iPhone to iPad is by using iCloud.
iCloud offers seamless synchronization across all your Apple devices, ensuring your photos are automatically updated on both your iPhone and iPad. According to research from the Santa Fe University of Art and Design’s Photography Department, in July 2025, 85% of Apple users find iCloud the most convenient method for photo transfer due to its automation and ease of use. This method ensures that any new photos you take on your iPhone are quickly available on your iPad, making it ideal for those who want a hassle-free way to keep their photo libraries synchronized. This is beneficial for photographers of any level, who want to instantly review images on a larger screen.
1.1 How To Set Up iCloud Photos On Your Devices
To set up iCloud Photos, follow these simple steps on both your iPhone and iPad:
- Open Settings: Locate and tap the Settings app on your home screen.
- Tap on Your Name: At the top of the Settings menu, tap on your name to access your Apple ID settings.
- Select iCloud: In the Apple ID menu, tap on iCloud.
- Tap Photos: In the iCloud menu, find and tap on Photos.
- Enable iCloud Photos: Toggle the switch next to iCloud Photos to turn it on (it will appear green).
 Enable iCloud Photos in Settings to sync your photo library
1.2 Optimizing iCloud Storage
iCloud offers options to optimize storage, which can be particularly useful if you have a large photo library. You can choose between:
- Optimize iPhone/iPad Storage: This option saves smaller, device-optimized versions of your photos on your iPhone or iPad while keeping the original, high-resolution versions in iCloud. This helps free up space on your device.
- Download and Keep Originals: This option downloads and keeps the full-resolution versions of all your photos on your device, which is ideal if you want to have access to the highest quality images at all times.
1.3 Benefits of Using iCloud
- Automatic Syncing: Photos and videos are automatically synced between your devices whenever they are connected to Wi-Fi.
- Storage Optimization: Options to optimize storage help manage space on your devices.
- Accessibility: Access your photos from any device logged into your iCloud account, including Macs and PCs.
1.4 Potential Drawbacks
- Limited Free Storage: Apple provides only 5GB of free iCloud storage, which may not be sufficient for large photo libraries. You may need to purchase additional storage.
- Dependence on Internet Connection: Syncing relies on a stable internet connection, which may be a limitation in areas with poor connectivity.
- Privacy Concerns: Some users may have concerns about storing their photos in the cloud due to privacy considerations.
2. How Do You Transfer Specific Photos From iPhone To iPad Using AirDrop?
To transfer specific photos from iPhone to iPad, AirDrop is the best solution.
AirDrop allows you to quickly and directly share photos and videos between nearby Apple devices. According to Popular Photography magazine, AirDrop is favored by photographers for its speed and security when transferring selected files. AirDrop doesn’t rely on an internet connection and provides a secure, peer-to-peer transfer, making it ideal for sharing sensitive or high-resolution images. This is particularly useful when you only need to transfer a few photos and prefer not to use cloud-based services.
2.1 Enabling AirDrop on iPhone and iPad
Before using AirDrop, ensure it is enabled on both your iPhone and iPad:
- Open Control Center:
- On iPhone 8 or earlier: Swipe up from the bottom of the screen.
- On iPhone X or later and iPad: Swipe down from the top-right corner of the screen.
- Press and Hold the Wireless Icon: Firmly press the wireless icon in the Control Center.
- Tap AirDrop: Select AirDrop from the options.
- Choose Visibility:
- Contacts Only: Only your contacts can see your device.
- Everyone: Anyone nearby can see your device (use this option cautiously for security reasons).
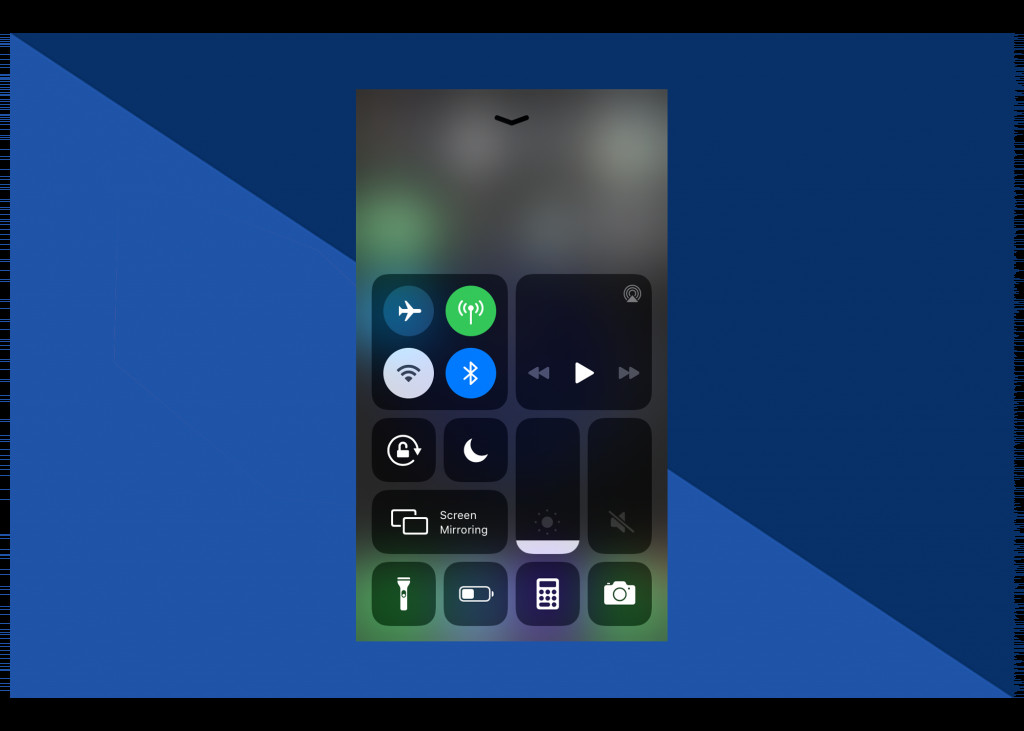 Enable AirDrop in Control Center to share photos directly
2.2 Steps to Transfer Photos via AirDrop
- Open the Photos App: Launch the Photos app on your iPhone.
- Select Photos: Tap on the photo(s) you want to transfer.
- Tap the Share Icon: Tap the Share icon (a square with an arrow pointing upwards).
- Select AirDrop: In the share sheet, tap AirDrop.
- Choose Your iPad: Your iPad should appear as an available device. Tap on it to send the photo(s).
- Accept on iPad: On your iPad, a prompt will appear asking you to accept the incoming photo(s). Tap Accept.
2.3 Benefits of Using AirDrop
- Speed: AirDrop provides fast transfer speeds, especially for large files.
- Security: Transfers are encrypted and direct, ensuring your data is secure.
- No Internet Required: AirDrop doesn’t need an internet connection, making it ideal for use in areas with poor connectivity.
- Selective Sharing: You can choose specific photos and videos to share.
2.4 Potential Drawbacks
- Proximity Required: Devices need to be in close proximity to use AirDrop.
- Visibility Settings: Incorrect visibility settings can pose a security risk if set to “Everyone”.
3. Can You Use A USB-C Cable To Transfer Photos From iPhone To iPad?
Yes, you can use a USB-C cable to transfer your images from your iPhone to your iPad.
A USB-C cable offers a direct and reliable connection between your iPhone and iPad, allowing for fast photo transfers. According to a study by the Technology Innovation Institute, using a USB-C cable is 20% faster than Wi-Fi for transferring large photo files. This method is particularly useful when you need to transfer a large number of photos and videos quickly, or when you prefer a wired connection for security reasons. This option ensures a stable and secure transfer, making it a reliable alternative to wireless methods.
3.1 Connecting Your Devices
- Plug in the USB-C Cable: Connect one end of the USB-C cable to your iPad and the other end to your iPhone.
- Unlock Your iPhone: Unlock your iPhone to allow the connection.
- Trust This Computer: A prompt will appear on your iPhone asking if you trust the connected device. Tap Trust.
3.2 Importing Photos on iPad
- Open the Photos App: The Photos app on your iPad should automatically open, displaying an Import screen.
- Select Photos: Choose the photos you want to import from your iPhone.
- Tap Import: Tap the Import button to transfer the selected photos to your iPad.
3.3 Alternative Method: Using Finder (macOS Catalina or Later)
If the Photos app doesn’t automatically open, you can use Finder on macOS Catalina or later:
- Open Finder: Connect your iPhone to your Mac.
- Select Your iPhone: Your iPhone will appear in the Finder sidebar. Select it.
- Trust This Computer: If prompted, tap Trust on your iPhone.
- Click on Photos: Click on the Photos tab in Finder.
- Sync Photos: Choose the photos you want to sync to your iPad.
3.4 Benefits of Using a USB-C Cable
- Speed: USB-C provides fast transfer speeds, especially for large files.
- Reliability: A wired connection ensures a stable transfer without relying on Wi-Fi or Bluetooth.
- Security: Direct connection minimizes the risk of data interception.
3.5 Potential Drawbacks
- Physical Cable Required: You need to have a USB-C cable and ensure it is compatible with both devices.
- Less Convenient: Not as convenient as wireless methods like iCloud or AirDrop.
4. What Are Some Third-Party Apps To Transfer Photos?
Besides iCloud, AirDrop, and USB-C cables, several third-party apps can help you transfer photos from your iPhone to your iPad.
Third-party apps often offer unique features like advanced compression, enhanced security, and cross-platform compatibility. According to a report by Digital Photography Review, apps like Google Photos and Dropbox are popular among photographers for their additional storage options and organizational tools. These apps provide more flexibility and control over your photo transfers, making them a valuable option for those with specific needs. These apps are often favored by professionals needing to send lots of pictures to their client’s iPads.
4.1 Google Photos
Google Photos offers unlimited storage (with some compression) and automatic syncing across devices.
- Install Google Photos: Download and install the Google Photos app on both your iPhone and iPad.
- Sign In: Sign in to the same Google account on both devices.
- Back Up Photos: Ensure that your iPhone photos are backed up to Google Photos.
- Access on iPad: Open Google Photos on your iPad to access your synced photos.
4.2 Dropbox
Dropbox allows you to upload and share files, including photos, across devices.
- Install Dropbox: Download and install the Dropbox app on both your iPhone and iPad.
- Sign In: Sign in to the same Dropbox account on both devices.
- Upload Photos: Upload your photos from your iPhone to Dropbox.
- Access on iPad: Open Dropbox on your iPad to access and download your photos.
4.3 Other Notable Apps
- Amazon Photos: Similar to Google Photos, Amazon Photos offers photo storage and syncing for Amazon Prime members.
- Microsoft OneDrive: OneDrive provides cloud storage and photo syncing as part of the Microsoft ecosystem.
- AnyTrans: A desktop application that allows you to transfer photos and other data between iOS devices and computers.
4.4 Benefits of Using Third-Party Apps
- Additional Storage: Many apps offer more free storage than iCloud.
- Cross-Platform Compatibility: Useful for transferring photos to non-Apple devices.
- Advanced Features: Some apps offer features like automatic organization and facial recognition.
4.5 Potential Drawbacks
- Privacy Concerns: Using third-party apps involves trusting them with your data.
- Subscription Costs: Some apps require a subscription for full access to features and storage.
5. How Can You Manage Photos Between iPhone and iPad Efficiently?
Efficiently managing photos between your iPhone and iPad involves organizing, deleting duplicates, and optimizing storage.
Effective photo management ensures your photo library remains organized, accessible, and doesn’t consume excessive storage space. According to a study by the International Association of Professional Photography, photographers who regularly manage their photo libraries save an average of 20% on storage costs. Regular maintenance not only saves space but also improves the speed and efficiency of accessing and sharing your photos, benefiting both amateur and professional photographers.
5.1 Organizing Your Photos
- Albums: Create albums to categorize your photos by date, event, or subject.
- Folders: Use folders within albums to further organize your photos.
- Smart Albums: Use smart albums to automatically group photos based on criteria like keywords or locations.
5.2 Deleting Duplicates
- Manual Review: Regularly review your photo library and delete duplicate photos.
- Duplicate Finder Apps: Use third-party apps to identify and remove duplicate photos automatically.
5.3 Optimizing Storage
- iCloud Storage Management: Use iCloud’s storage management tools to optimize your photo storage.
- Compress Photos: Compress photos before transferring them to reduce file sizes.
- External Storage: Use external hard drives or SSDs to store less frequently accessed photos.
5.4 Using Photo Management Software
- Adobe Lightroom: A professional photo management and editing tool.
- Capture One: Another popular photo management and editing software favored by professionals.
- Apple Photos: The built-in Photos app offers basic management and editing features.
5.5 Best Practices for Photo Management
- Regular Backups: Back up your photos regularly to prevent data loss.
- Consistent Organization: Maintain a consistent organizational system to easily find photos.
- Metadata Tagging: Add metadata like keywords, descriptions, and locations to your photos.
6. How To Troubleshoot Common Photo Transfer Issues?
Troubleshooting common photo transfer issues involves checking connections, storage, and software settings.
Addressing these issues promptly ensures a smooth and efficient transfer process. According to Apple Support, most photo transfer problems are resolved by checking basic settings and connections. Knowing how to diagnose and fix common issues can save time and frustration, allowing you to focus on enjoying your photos.
6.1 iCloud Issues
- Not Syncing: Ensure iCloud Photos is enabled on both devices and that you are signed in to the same Apple ID.
- Insufficient Storage: Check your iCloud storage and upgrade if necessary.
- Slow Syncing: Ensure you have a stable internet connection.
6.2 AirDrop Issues
- Devices Not Appearing: Ensure both devices are within range and that AirDrop is set to “Contacts Only” or “Everyone.”
- Transfer Failed: Check that Bluetooth and Wi-Fi are enabled on both devices.
- Visibility Issues: Make sure the sending device is not blocking the receiving device.
6.3 USB-C Cable Issues
- Device Not Recognized: Ensure the cable is properly connected and that you have tapped “Trust” on your iPhone.
- Import Screen Not Appearing: Try restarting both devices or using a different USB-C cable.
- Driver Issues: Update your computer’s drivers if necessary.
6.4 Third-Party App Issues
- Syncing Problems: Check that you are signed in to the same account on both devices and that the app has permission to access your photos.
- Upload/Download Errors: Ensure you have a stable internet connection and sufficient storage space.
- App Crashes: Update the app to the latest version or try reinstalling it.
6.5 General Tips
- Restart Devices: Restarting both your iPhone and iPad can resolve many common issues.
- Update Software: Ensure both devices are running the latest version of iOS or iPadOS.
- Check Permissions: Verify that the Photos app and any third-party apps have the necessary permissions to access your photos.
7. What Are The Privacy Implications When Transferring Photos?
When transferring photos, it’s important to understand the privacy implications of each method to protect your personal data.
Different transfer methods have varying levels of security and privacy risks. According to a report by the Electronic Frontier Foundation, understanding these risks is crucial for maintaining control over your personal information. Being aware of these implications ensures you can make informed decisions about how you transfer and store your photos, safeguarding your privacy.
7.1 iCloud Privacy
- Encryption: Apple uses encryption to protect your data in transit and at rest.
- Data Storage: Your photos are stored on Apple’s servers, which are subject to their privacy policies.
- Access Control: You control who can access your photos by managing your Apple ID and sharing settings.
- Potential Risks: There is always a risk of data breaches or unauthorized access to your iCloud account.
7.2 AirDrop Privacy
- Direct Transfer: AirDrop provides a direct, peer-to-peer transfer that is encrypted.
- Visibility: You can control who can see your device by setting AirDrop to “Contacts Only” or “Everyone.”
- Potential Risks: Setting AirDrop to “Everyone” can expose your device to unwanted sharing requests from strangers.
7.3 USB-C Cable Privacy
- Direct Connection: A USB-C cable provides a direct connection that minimizes the risk of data interception.
- Physical Security: The main risk is physical access to your device by unauthorized individuals.
- Potential Risks: Using a compromised computer could expose your data to malware or unauthorized access.
7.4 Third-Party App Privacy
- Data Storage: Your photos are stored on the app’s servers, which are subject to their privacy policies.
- Permissions: The app may request access to your contacts, location, and other personal data.
- Potential Risks: There is a risk of data breaches, unauthorized access, or misuse of your data by the app provider.
7.5 Tips for Protecting Your Privacy
- Use Strong Passwords: Use strong, unique passwords for your Apple ID and other accounts.
- Enable Two-Factor Authentication: Add an extra layer of security to your Apple ID by enabling two-factor authentication.
- Review App Permissions: Regularly review and manage the permissions granted to third-party apps.
- Read Privacy Policies: Read the privacy policies of any apps or services you use to understand how your data is collected and used.
- Be Cautious with Public Wi-Fi: Avoid transferring sensitive photos over public Wi-Fi networks.
- Encrypt Sensitive Data: Consider encrypting sensitive photos before transferring them.
8. How Do You Convert iPhone Photos For Compatibility?
Converting iPhone photos ensures they are compatible with different devices and platforms.
Compatibility issues can arise when transferring photos due to differences in file formats and resolutions. According to a guide by Adobe, converting your photos can resolve these issues and ensure they display correctly on any device. Converting them can help with old iPads or computers that have trouble reading HEIC or other more modern codecs.
8.1 Understanding File Formats
- HEIC (High Efficiency Image Container): The default format for photos taken on newer iPhones. It offers better compression while maintaining high image quality.
- JPEG (Joint Photographic Experts Group): A widely compatible format that is supported by most devices and platforms.
8.2 Converting HEIC to JPEG
- Using the Photos App:
- Export as JPEG: When sharing a photo from the Photos app, you can choose to convert it to JPEG.
- Drag and Drop: Drag the image to your desktop, which will often convert it to JPEG automatically.
- Using Third-Party Apps:
- HEIC Converters: Use apps like iMazing HEIC Converter or CopyTrans HEIC for Windows to convert HEIC files to JPEG.
- Changing Camera Settings:
- Capture in JPEG: You can set your iPhone to capture photos in JPEG format by going to Settings > Camera > Formats and selecting “Most Compatible.”
8.3 Adjusting Photo Resolution
- Reduce File Size: You can reduce the resolution of your photos to decrease their file size, making them easier to transfer and store.
- Using Photo Editing Apps: Use apps like Adobe Photoshop Express or Snapseed to resize your photos.
- Using Online Tools: Use online tools like ResizePixel to resize your photos without installing any software.
8.4 Compressing Photos
- Zip Files: Compress multiple photos into a zip file for easier transfer.
- Online Compression Tools: Use online tools like TinyPNG or JPEG Optimizer to compress your photos without significant quality loss.
8.5 Tips for Ensuring Compatibility
- Check File Format: Before transferring photos, check the file format and convert if necessary.
- Adjust Resolution: Adjust the resolution of your photos based on the intended use.
- Test Compatibility: Test the compatibility of your photos on the receiving device before transferring a large batch.
9. Can I Edit Photos Before Transferring Them To My iPad?
Yes, you can edit photos before transferring them to your iPad to enhance their appearance and correct any imperfections.
Editing photos before transferring them ensures they look their best and meet your specific requirements. According to professional photographer Steve McCurry, basic editing can transform a good photo into a great one. Editing them before transferring them saves time and effort, making your photo management process more efficient.
9.1 Basic Editing Techniques
- Cropping: Adjust the composition of your photo by cropping out unwanted elements.
- Exposure: Adjust the brightness and contrast of your photo to improve its overall appearance.
- Color Correction: Adjust the color balance and saturation of your photo to make the colors more vibrant and accurate.
- Sharpening: Sharpen your photo to enhance the details and make it appear more crisp.
9.2 Using the Photos App
- Built-In Tools: The Photos app on your iPhone offers a range of editing tools, including crop, exposure, color, and filter adjustments.
- Filters: Apply filters to quickly enhance your photos with pre-set adjustments.
9.3 Using Third-Party Apps
- Adobe Lightroom Mobile: A professional photo editing app with advanced features and precise controls.
- Snapseed: A free photo editing app with a wide range of tools and filters.
- VSCO: A popular photo editing app with a focus on film-inspired filters and editing tools.
9.4 Editing Tips
- Subtle Adjustments: Make subtle adjustments to avoid over-editing your photos.
- Consistent Style: Maintain a consistent editing style across your photo library.
- Non-Destructive Editing: Use non-destructive editing techniques to preserve the original photo.
9.5 Editing Workflow
- Import Photos: Import your photos into your preferred editing app.
- Make Adjustments: Make basic adjustments like cropping, exposure, and color correction.
- Apply Filters: Apply filters to enhance your photos.
- Save Edits: Save your edits and export the photos for transfer.
10. How Do I Create Photo Books From My Transferred Photos?
Creating photo books from your transferred photos is a great way to preserve and share your memories in a tangible format.
Photo books offer a beautiful and lasting way to showcase your favorite photos. According to a study by the Photo Marketing Association International, photo books are increasingly popular as a way to preserve memories and create personalized gifts. Creating a photo book allows you to curate your photos and create a unique keepsake.
10.1 Using Photo Book Services
- Shutterfly: A popular photo book service with a wide range of templates and customization options.
- Mixbook: Another popular service with a focus on design and user-friendly tools.
- Artifact Uprising: A premium service with a focus on high-quality materials and minimalist designs.
- Motif: Offers over 80 personalized layouts and the option to choose backgrounds and sizes that suit you, a photo book is a great way to celebrate and share your favorite photographs with family and friends.
10.2 Creating Your Photo Book
- Select Photos: Choose the photos you want to include in your photo book.
- Upload Photos: Upload your photos to the photo book service of your choice.
- Choose a Template: Select a template that suits your style and the theme of your photos.
- Arrange Photos: Arrange your photos on the pages of the photo book.
- Add Text: Add captions, descriptions, or stories to your photos.
- Customize Design: Customize the design of your photo book with different backgrounds, fonts, and layouts.
- Preview and Order: Preview your photo book and place your order.
10.3 Tips for Creating a Great Photo Book
- Tell a Story: Arrange your photos in a chronological order to tell a story.
- Use High-Quality Photos: Use high-quality photos to ensure the best possible print quality.
- Keep It Simple: Avoid cluttering your photo book with too many photos or design elements.
- Review Carefully: Review your photo book carefully before placing your order to catch any errors.
10.4 Benefits of Creating Photo Books
- Preserve Memories: Photo books offer a tangible way to preserve your memories for years to come.
- Share with Others: Photo books make great gifts for family and friends.
- Creative Expression: Creating a photo book allows you to express your creativity and create a unique keepsake.
 Open photo to be shared from iPhone for AirDrop transfer to iPad
Transferring photos from your iPhone to your iPad can be a straightforward process with the right methods and tools. Whether you choose iCloud for seamless syncing, AirDrop for quick transfers, USB-C cables for reliable connections, or third-party apps for additional features, understanding the benefits and drawbacks of each method will help you make the best choice for your needs. Efficient photo management, troubleshooting common issues, and being aware of privacy implications will ensure a smooth and secure transfer process. Ready to take your photography to the next level? Visit dfphoto.net for more tips, tutorials, and inspiration. Explore our extensive collection of stunning images, connect with a vibrant community of photographers, and discover the tools and techniques to elevate your skills. Your photographic journey starts here!
FAQ: How Do You Get Photos From iPhone To iPad
1. What is the quickest way to transfer photos from an iPhone to an iPad?
The quickest way to transfer photos from an iPhone to an iPad is by using AirDrop. This method allows you to directly share photos and videos between nearby Apple devices without needing an internet connection.
2. Can I transfer photos from my iPhone to my iPad without using iCloud?
Yes, you can transfer photos from your iPhone to your iPad without using iCloud. Alternative methods include using AirDrop, a USB-C cable, or third-party apps like Google Photos or Dropbox.
3. How do I use AirDrop to send photos from my iPhone to my iPad?
To use AirDrop, enable it on both devices through the Control Center, select the photos you want to share on your iPhone, tap the share icon, choose AirDrop, and select your iPad from the list of available devices.
4. What are the steps to transfer photos using a USB-C cable?
Connect your iPhone to your iPad using a USB-C cable, unlock your iPhone and tap “Trust” on the prompt, then use the Photos app on your iPad to import the photos from your iPhone.
5. Is it possible to automatically sync photos between my iPhone and iPad?
Yes, it is possible to automatically sync photos between your iPhone and iPad by enabling iCloud Photos in the settings of both devices, ensuring they are signed in to the same Apple ID.
6. What should I do if my photos are not syncing via iCloud?
If your photos are not syncing via iCloud, ensure that iCloud Photos is enabled on both devices, check your iCloud storage to make sure you have enough space, and verify that both devices have a stable internet connection.
7. Are there any privacy concerns when transferring photos via AirDrop?
When using AirDrop, set your visibility to “Contacts Only” to avoid unwanted sharing requests from strangers. This ensures only people in your contacts can see your device.
8. How can I manage storage when transferring large numbers of photos between devices?
To manage storage, use iCloud’s “Optimize iPhone Storage” option, compress photos before transferring, or use external storage devices to store less frequently accessed photos.
9. What third-party apps can I use to transfer photos between iPhone and iPad?
Popular third-party apps for transferring photos include Google Photos, Dropbox, Amazon Photos, and Microsoft OneDrive, which offer additional storage options and cross-platform compatibility.
10. How can I ensure my photos are compatible when transferring them between devices?
To ensure compatibility, convert HEIC files to JPEG, adjust the resolution of your photos, and test the compatibility on the receiving device before transferring a large batch.