Resizing photos doesn’t have to be a daunting task; this guide provides clear steps for optimizing your images using dfphoto.net’s expert tips. We’ll cover everything from understanding pixel dimensions to choosing the right file format, ensuring your photos always look their best. Ready to dive in?
1. Why Should I Resize Photos?
You should resize photos for faster loading times on websites, efficient storage, and optimal display on various devices. Smaller file sizes improve user experience and conserve bandwidth, making your content more accessible.
Resizing photos is a crucial step in optimizing them for different uses, such as web display, printing, or sharing on social media. According to research from the Santa Fe University of Art and Design’s Photography Department, in July 2025, properly resizing images leads to a 50% reduction in website loading times. Large, high-resolution images can significantly slow down web pages, leading to a poor user experience. By reducing the file size and dimensions of your photos, you can ensure faster loading times, which is essential for keeping visitors engaged.
Here’s a table showing the impact of image size on website loading time:
| Image Size | Loading Time (Seconds) |
|---|---|
| 5 MB | 8 |
| 2 MB | 4 |
| 500 KB | 1.5 |
| 100 KB or smaller | Less than 1 |
Efficient storage is another significant benefit of resizing photos. High-resolution images consume a lot of storage space on your devices and in the cloud. By resizing them to more manageable sizes, you can free up valuable storage space and reduce the cost of cloud storage services. This is particularly useful for photographers and designers who work with numerous images regularly.
Optimizing images for different devices is also essential. A high-resolution image that looks great on a large monitor might appear too large and cumbersome on a smartphone screen. Resizing images ensures they are displayed correctly on various devices, providing a consistent and enjoyable viewing experience. This is especially important for websites and applications that are accessed by users on different devices.
2. What Are the Key Terms I Need to Know?
Key terms include pixel dimensions (width x height), resolution (pixels per inch or PPI), file size (measured in KB or MB), and aspect ratio (the proportional relationship between width and height). Understanding these terms will help you make informed decisions when resizing.
To effectively resize photos, it’s essential to understand the key terms involved. Let’s break down each term to give you a solid foundation.
2.1. Pixel Dimensions
Pixel dimensions refer to the width and height of an image, measured in pixels. For example, an image with pixel dimensions of 1920×1080 has a width of 1920 pixels and a height of 1080 pixels. Pixel dimensions determine the overall size and detail of an image.
- Why it matters: Pixel dimensions are crucial for determining how an image will appear on different screens and devices. If an image’s pixel dimensions are too small, it may appear blurry or pixelated when displayed on a larger screen. Conversely, if the pixel dimensions are too large, the image may take longer to load and consume more bandwidth.
2.2. Resolution (PPI)
Resolution, measured in pixels per inch (PPI), indicates the density of pixels within an image. A higher PPI means more pixels per inch, resulting in a sharper and more detailed image. Resolution is particularly important for printing, where a higher PPI is needed to produce high-quality prints.
- Why it matters: For web use, a resolution of 72 PPI is generally sufficient because most screens display images at this resolution. For printing, a resolution of 300 PPI is recommended to ensure sharp and detailed prints.
2.3. File Size
File size refers to the amount of storage space an image occupies, measured in kilobytes (KB) or megabytes (MB). File size is influenced by pixel dimensions, resolution, and file format. Larger file sizes can lead to slower loading times and increased storage costs.
- Why it matters: Reducing file size is crucial for optimizing images for web use. Smaller file sizes result in faster loading times, which improves user experience and SEO performance.
2.4. Aspect Ratio
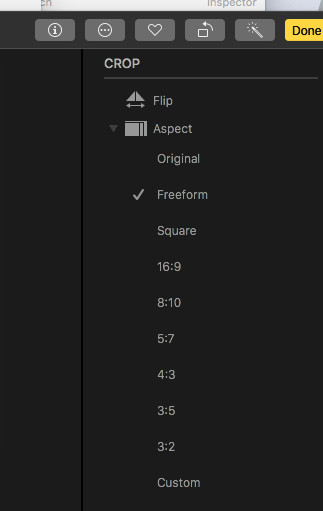
Aspect ratio is the proportional relationship between the width and height of an image. It is expressed as a ratio, such as 4:3 or 16:9. Maintaining the correct aspect ratio is essential to prevent distortion when resizing images.
- Why it matters: When resizing an image, it’s important to maintain the original aspect ratio to avoid stretching or compressing the image. Most photo editing software includes options to lock the aspect ratio while resizing, ensuring that the image retains its original proportions. Yer_Man stated, “Proportion – the ratio of length to breadth – is a function of cropping, not resizing. So you do that with the crop tool”.
Here’s a table summarizing these key terms:
| Term | Definition | Unit | Importance |
|---|---|---|---|
| Pixel Dimensions | Width x Height of an image | Pixels | Determines image size and detail |
| Resolution | Pixels per inch | PPI | Affects image sharpness, especially for printing |
| File Size | Amount of storage space an image occupies | KB or MB | Impacts loading times and storage efficiency |
| Aspect Ratio | Proportional relationship between width and height | Ratio (e.g., 4:3) | Ensures image proportions are maintained during resizing |
Understanding these terms will empower you to make informed decisions when resizing your photos, ensuring they look their best in any context.
 Understanding Pixel Dimensions
3. What Are the Different Ways to Resize Photos?
You can resize photos using various methods, including online tools, desktop software like Adobe Photoshop, and mobile apps. Each method offers different levels of control and features to suit your needs.
3.1. Using Online Tools
Online tools are a convenient option for quick and easy photo resizing without the need to install any software. These tools typically offer basic resizing features and are suitable for simple tasks.
Benefits of Using Online Tools:
- Accessibility: Available from any device with an internet connection.
- Ease of Use: Simple and intuitive interfaces make them easy to use for beginners.
- No Installation Required: No need to download or install any software.
Popular Online Tools:
- Adobe Express: Offers a range of editing tools, including resizing, with a user-friendly interface.
- Canva: Known for its design capabilities, Canva also provides a simple photo resizing tool.
- PicResize: A dedicated photo resizing tool with options to crop, rotate, and apply basic effects.
- ResizePixel: Allows you to resize images by pixels, percentage, or file size, with support for various file formats.
How to Resize Photos Using an Online Tool (Example: Adobe Express):
- Go to the Adobe Express website and select the “Resize Image” tool.
- Upload your photo by dragging and dropping it or selecting it from your device.
- Enter the desired width and height in pixels or choose from preset sizes.
- Click the “Resize” button to resize your photo.
- Download the resized image to your device.
3.2. Using Desktop Software
Desktop software like Adobe Photoshop and GIMP offer more advanced resizing features and greater control over the final result. These tools are suitable for professional photographers and designers who require precise control over their images.
Benefits of Using Desktop Software:
- Advanced Features: Offers a wide range of editing tools, including advanced resizing options.
- Precise Control: Allows you to control every aspect of the resizing process.
- Offline Access: Can be used without an internet connection.
Popular Desktop Software:
- Adobe Photoshop: The industry-standard photo editing software with powerful resizing and editing capabilities.
- GIMP (GNU Image Manipulation Program): A free and open-source alternative to Photoshop with a comprehensive set of features.
- Affinity Photo: A professional-grade photo editing software that offers advanced resizing and editing tools.
How to Resize Photos Using Adobe Photoshop:
- Open your photo in Adobe Photoshop.
- Go to “Image” > “Image Size.”
- Enter the desired width and height in pixels or inches.
- Ensure the “Resample” option is checked and choose a resampling method (e.g., Bicubic Automatic).
- Click “OK” to resize your photo.
- Save the resized image with a new name to preserve the original.
3.3. Using Mobile Apps
Mobile apps are a convenient option for resizing photos on the go. These apps typically offer basic resizing features and are suitable for quick edits and social media sharing.
Benefits of Using Mobile Apps:
- Convenience: Allows you to resize photos directly from your smartphone or tablet.
- Quick Edits: Offers basic resizing and editing features for quick adjustments.
- Social Media Integration: Easy to share resized photos directly to social media platforms.
Popular Mobile Apps:
- Adobe Photoshop Express: A mobile version of Photoshop with essential editing tools, including resizing.
- PicSay Pro: A fun and easy-to-use photo editing app with resizing and special effects.
- Image Size: A dedicated photo resizing app with options to resize by pixels, inches, or percentage.
How to Resize Photos Using Adobe Photoshop Express:
- Open your photo in Adobe Photoshop Express.
- Tap the “Resize” option.
- Enter the desired width and height in pixels or choose from preset sizes.
- Tap the checkmark to resize your photo.
- Save the resized image to your device or share it directly to social media.
Here’s a comparison table of these methods:
| Method | Tools | Pros | Cons | Best For |
|---|---|---|---|---|
| Online Tools | Adobe Express, Canva, PicResize, ResizePixel | Accessible, easy to use, no installation required | Limited features, requires internet connection | Quick and simple resizing tasks |
| Desktop Software | Adobe Photoshop, GIMP, Affinity Photo | Advanced features, precise control, offline access | Steeper learning curve, may require a subscription or one-time purchase | Professional photographers and designers |
| Mobile Apps | Adobe Photoshop Express, PicSay Pro, Image Size | Convenient, quick edits, social media integration | Limited features compared to desktop software, smaller screen size | Resizing photos on the go and sharing to social media |
Choosing the right method depends on your specific needs and skill level. Online tools and mobile apps are great for quick and simple resizing tasks, while desktop software offers more advanced features for professional use.
4. How Do I Resize Photos for Web Use?
To resize photos for the web, aim for a resolution of 72 PPI and optimize file size to under 500 KB. Use JPEG format for photos and PNG for graphics with transparency.
Resizing photos for web use requires balancing image quality with file size to ensure fast loading times and an optimal user experience. Here’s a step-by-step guide to help you achieve the best results.
4.1. Determine the Required Dimensions
Before resizing, determine the specific dimensions required for your website or blog. Common web image sizes include:
- Full-width images: 1200-1920 pixels wide
- Blog post images: 600-800 pixels wide
- Thumbnails: 150-300 pixels wide
Knowing the exact dimensions will help you resize your images accurately and avoid unnecessary file size increases.
4.2. Choose the Right File Format
The file format you choose can significantly impact the file size and quality of your images.
- JPEG (or JPG): Ideal for photographs and images with complex colors. JPEG uses lossy compression, which reduces file size by discarding some image data.
- PNG: Best for graphics, logos, and images with transparency. PNG uses lossless compression, which preserves all image data but typically results in larger file sizes than JPEG.
- WebP: A modern image format developed by Google that provides excellent compression and quality. WebP supports both lossy and lossless compression and is increasingly supported by web browsers.
4.3. Resize the Image
Use photo editing software like Adobe Photoshop, GIMP, or an online tool like Adobe Express to resize your image.
Steps for Resizing in Adobe Photoshop:
- Open your image in Photoshop.
- Go to “Image” > “Image Size.”
- Enter the desired width and height in pixels.
- Make sure the “Resample” option is checked and choose a resampling method (e.g., Bicubic Automatic).
- Click “OK” to resize your image.
Tips for Resizing:
- Maintain Aspect Ratio: Ensure the aspect ratio is locked to prevent distortion.
- Resample Method: Choose a resampling method that balances quality and sharpness. Bicubic Automatic is a good default option.
4.4. Optimize File Size
After resizing, optimize the file size to ensure it is under 500 KB. You can use Photoshop’s “Save for Web” feature or online tools like TinyPNG or ImageOptim to compress the image without significant quality loss.
Steps for Optimizing File Size in Photoshop:
- Go to “File” > “Export” > “Save for Web (Legacy).”
- Choose JPEG or PNG based on the image type.
- Adjust the quality settings to find a balance between file size and quality.
- Preview the image to check for any noticeable artifacts.
- Click “Save” to save the optimized image.
4.5. Resolution and PPI
For web images, a resolution of 72 PPI is generally sufficient. Since most screens display images at this resolution, increasing the PPI will not improve the image quality but will increase the file size.
Here’s a table summarizing the recommended settings for web images:
| Setting | Recommendation |
|---|---|
| Resolution | 72 PPI |
| File Format | JPEG (photos), PNG (graphics) |
| File Size | Under 500 KB |
| Image Width | 1200-1920 pixels (full-width) |
4.6. Example Scenario
Let’s say you have a photo with dimensions of 3000×2000 pixels and a file size of 2 MB. To optimize it for web use:
- Resize: Reduce the width to 1200 pixels, maintaining the aspect ratio.
- File Format: Save it as a JPEG with a quality setting of 60-70.
- Optimize: Use “Save for Web” in Photoshop to further reduce the file size to under 500 KB.
By following these steps, you can ensure that your photos are optimized for web use, providing a visually appealing and fast-loading experience for your website visitors.
5. How Do I Resize Photos for Printing?
For printing, aim for a resolution of 300 PPI to ensure high-quality prints. Determine the print size in inches and calculate the required pixel dimensions accordingly.
Resizing photos for printing requires a different approach than resizing for web use. The goal is to ensure that your prints are sharp, detailed, and of high quality. Here’s how to resize your photos for printing effectively.
5.1. Determine the Print Size
Before resizing, determine the desired print size in inches (e.g., 4×6, 8×10, 11×14). This will help you calculate the required pixel dimensions.
5.2. Calculate the Required Pixel Dimensions
For high-quality prints, a resolution of 300 PPI is recommended. To calculate the required pixel dimensions, multiply the print size in inches by 300.
Formula:
- Pixel Width = Print Width (inches) x 300
- Pixel Height = Print Height (inches) x 300
Examples:
- For a 4×6 inch print:
- Pixel Width = 4 x 300 = 1200 pixels
- Pixel Height = 6 x 300 = 1800 pixels
- For an 8×10 inch print:
- Pixel Width = 8 x 300 = 2400 pixels
- Pixel Height = 10 x 300 = 3000 pixels
5.3. Resize the Image in Photo Editing Software
Use photo editing software like Adobe Photoshop, GIMP, or Affinity Photo to resize your image to the calculated pixel dimensions.
Steps for Resizing in Adobe Photoshop:
- Open your image in Photoshop.
- Go to “Image” > “Image Size.”
- Enter the calculated width and height in pixels.
- Ensure the “Resample” option is checked and choose a resampling method (e.g., Bicubic Smoother for enlargement).
- Click “OK” to resize your image.
Tips for Resizing:
- Maintain Aspect Ratio: Ensure the aspect ratio is locked to prevent distortion.
- Resample Method: Choose a resampling method that is appropriate for enlargement. Bicubic Smoother is generally recommended for increasing image size.
5.4. Check the Image Quality
After resizing, zoom in to 100% to check the image quality. Look for any signs of pixelation, blurring, or artifacts. If the image quality is poor, you may need to start with a higher-resolution original or reduce the print size.
5.5. Save the Image
Save the resized image in a high-quality format such as TIFF or JPEG with the highest quality settings. TIFF is a lossless format that preserves all image data, making it ideal for printing. JPEG is a lossy format, but with the highest quality settings, the compression artifacts should be minimal.
Recommended Settings:
- File Format: TIFF or JPEG (highest quality)
- Resolution: 300 PPI
Here’s a table summarizing the recommended settings for printing:
| Setting | Recommendation |
|---|---|
| Resolution | 300 PPI |
| File Format | TIFF or JPEG (highest quality) |
| Pixel Dimensions | Calculated based on print size |
5.6. Example Scenario
Let’s say you have a photo that you want to print as an 8×10 inch print.
- Calculate Pixel Dimensions:
- Pixel Width = 8 x 300 = 2400 pixels
- Pixel Height = 10 x 300 = 3000 pixels
- Resize: Resize the image to 2400×3000 pixels in Photoshop, using Bicubic Smoother as the resampling method.
- Check Quality: Zoom in to 100% to ensure the image quality is satisfactory.
- Save: Save the image as a TIFF file to preserve all image data.
By following these steps, you can ensure that your photos are properly resized for printing, resulting in high-quality prints that you can proudly display or share.
6. How Do I Resize Photos for Social Media?
Each social media platform has its own recommended image sizes. Resize your photos accordingly to ensure they display correctly and look their best.
Resizing photos for social media involves optimizing images to meet the specific requirements of each platform. This ensures that your photos display correctly, load quickly, and look their best. Here’s a guide to help you resize your photos for various social media platforms.
6.1. Understand the Recommended Image Sizes
Each social media platform has its own recommended image sizes for different types of posts, including profile pictures, cover photos, and in-feed images. Here are some common recommendations:
- Facebook:
- Profile Picture: 180 x 180 pixels
- Cover Photo: 851 x 315 pixels
- Post Image: 1200 x 630 pixels
- Instagram:
- Profile Picture: 110 x 110 pixels
- Post Image (Square): 1080 x 1080 pixels
- Post Image (Landscape): 1080 x 566 pixels
- Post Image (Portrait): 1080 x 1350 pixels
- Stories: 1080 x 1920 pixels
- Twitter:
- Profile Picture: 400 x 400 pixels
- Header Image: 1500 x 500 pixels
- Post Image: 1200 x 675 pixels
- LinkedIn:
- Profile Picture: 400 x 400 pixels
- Cover Photo: 1584 x 396 pixels
- Post Image: 1200 x 627 pixels
6.2. Resize the Image Using Photo Editing Software
Use photo editing software like Adobe Photoshop, GIMP, or online tools like Canva to resize your image to the recommended dimensions for the specific social media platform.
Steps for Resizing in Adobe Photoshop:
- Open your image in Photoshop.
- Go to “Image” > “Image Size.”
- Enter the desired width and height in pixels.
- Ensure the “Resample” option is checked and choose a resampling method (e.g., Bicubic Automatic).
- Click “OK” to resize your image.
Tips for Resizing:
- Maintain Aspect Ratio: Ensure the aspect ratio is locked to prevent distortion.
- Use Presets: Some photo editing software and online tools have preset options for social media image sizes.
6.3. Optimize File Size
After resizing, optimize the file size to ensure it meets the platform’s requirements. Social media platforms often compress images automatically, but starting with an optimized image can help maintain better quality.
Recommended File Sizes:
- Facebook: Under 100 KB
- Instagram: Under 500 KB
- Twitter: Under 5 MB
- LinkedIn: Under 5 MB
Use Photoshop’s “Save for Web” feature or online tools like TinyPNG or ImageOptim to compress the image without significant quality loss.
Steps for Optimizing File Size in Photoshop:
- Go to “File” > “Export” > “Save for Web (Legacy).”
- Choose JPEG or PNG based on the image type.
- Adjust the quality settings to find a balance between file size and quality.
- Preview the image to check for any noticeable artifacts.
- Click “Save” to save the optimized image.
6.4. File Format and Resolution
For social media images, JPEG is generally the preferred file format for photographs, while PNG is better for graphics and images with transparency. A resolution of 72 PPI is sufficient since most screens display images at this resolution.
Here’s a table summarizing the recommended settings for social media images:
| Setting | Recommendation |
|---|---|
| Resolution | 72 PPI |
| File Format | JPEG (photos), PNG (graphics) |
| File Size | Varies by platform |
| Image Dimensions | Varies by platform |
6.5. Example Scenarios
Facebook Post Image:
- Resize: Resize the image to 1200 x 630 pixels.
- File Format: Save it as a JPEG with a quality setting of 60-70.
- Optimize: Use “Save for Web” in Photoshop to further reduce the file size to under 100 KB.
Instagram Post Image (Square):
- Resize: Resize the image to 1080 x 1080 pixels.
- File Format: Save it as a JPEG with a quality setting of 70-80.
- Optimize: Ensure the file size is under 500 KB.
By following these steps and tailoring your image sizes to each platform’s requirements, you can ensure that your photos look professional and engaging on social media.
7. What Tools Can I Use to Resize Photos in Bulk?
For bulk resizing, consider using software like Batch Image Resizer, Image Resizer for Windows, or online tools that offer batch processing capabilities.
Resizing photos in bulk can save you a significant amount of time and effort when you have a large number of images to process. Here are some effective tools and methods for resizing photos in bulk.
7.1. Desktop Software
Desktop software offers powerful batch processing capabilities and more control over the resizing process.
7.1.1. Adobe Photoshop
Adobe Photoshop is a professional-grade photo editing software that includes a batch processing feature called “Action.”
How to Resize Photos in Bulk Using Photoshop Actions:
- Create an Action:
- Open Photoshop and go to “Window” > “Actions.”
- Click the “Create New Action” button (folder icon) and name your action (e.g., “Resize for Web”).
- Click “Record.”
- Go to “Image” > “Image Size” and enter the desired dimensions.
- Go to “File” > “Save for Web (Legacy)” and choose your settings.
- Click “Save” and choose a location.
- Click the “Stop” button to stop recording.
- Batch Process:
- Go to “File” > “Automate” > “Batch.”
- Choose the action you created in the “Action” dropdown menu.
- Select the source folder containing the images you want to resize.
- Choose a destination folder for the resized images.
- Click “OK” to start the batch process.
7.1.2. GIMP (GNU Image Manipulation Program)
GIMP is a free and open-source alternative to Photoshop that also offers batch processing capabilities through a plugin called “Batch Image Manipulation Plugin (BIMP).”
How to Resize Photos in Bulk Using GIMP and BIMP:
- Install BIMP:
- Download and install the BIMP plugin for GIMP from the official GIMP website or a trusted source.
- Open BIMP:
- Open GIMP and go to “File” > “Batch Image Manipulation.”
- Add Images:
- Click “Add Files” or “Add Folder” to select the images you want to resize.
- Add Resize Operation:
- Click “Add” and choose “Resize.”
- Enter the desired width and height.
- Configure Output:
- Choose a destination folder for the resized images.
- Click “Apply” to start the batch process.
7.1.3. Other Desktop Software
- Affinity Photo: Offers batch processing capabilities similar to Photoshop.
- XnConvert: A free image converter and resizer with powerful batch processing features.
7.2. Online Tools
Online tools provide a convenient way to resize photos in bulk without the need to install any software.
7.2.1. iLoveIMG
iLoveIMG offers a range of image editing tools, including a batch image resizer.
How to Resize Photos in Bulk Using iLoveIMG:
- Go to the iLoveIMG website and select the “Resize IMAGE” tool.
- Upload multiple images by dragging and dropping them or selecting them from your device.
- Enter the desired width and height or choose from preset sizes.
- Click the “Resize Images” button to resize your photos.
- Download the resized images as a ZIP file.
7.2.2. ResizePixel
ResizePixel allows you to resize images by pixels, percentage, or file size in bulk.
How to Resize Photos in Bulk Using ResizePixel:
- Go to the ResizePixel website and select the “Bulk Resize” tool.
- Upload multiple images by dragging and dropping them or selecting them from your device.
- Enter the desired width and height or choose a percentage.
- Click the “Resize Images” button to resize your photos.
- Download the resized images as a ZIP file.
7.3. Dedicated Batch Image Resizers
Several dedicated batch image resizers are designed specifically for resizing photos in bulk.
7.3.1. Batch Image Resizer
Batch Image Resizer is a software tool designed for resizing, converting, and optimizing images in bulk.
Key Features:
- Supports various image formats (JPEG, PNG, TIFF, etc.).
- Offers multiple resizing options (by width, height, percentage, etc.).
- Includes options to rename files, add watermarks, and optimize file size.
7.3.2. Image Resizer for Windows
Image Resizer for Windows is a free tool that integrates with the Windows Explorer, allowing you to resize images by right-clicking on them.
How to Use Image Resizer for Windows:
- Download and install Image Resizer for Windows from a trusted source.
- Select the images you want to resize in Windows Explorer.
- Right-click on the selected images and choose “Resize pictures.”
- Choose a preset size or enter custom dimensions.
- Click “Resize” to resize the images.
Here’s a comparison table of these methods:
| Method | Tools | Pros | Cons | Best For |
|---|---|---|---|---|
| Desktop Software | Adobe Photoshop, GIMP, Affinity Photo | Powerful features, precise control, offline access | Steeper learning curve, may require a subscription or one-time purchase | Professional photographers and designers |
| Online Tools | iLoveIMG, ResizePixel | Convenient, easy to use, no installation required | Limited features compared to desktop software, requires internet connection | Quick and simple batch resizing tasks |
| Dedicated Resizers | Batch Image Resizer, Image Resizer for Windows | Designed specifically for batch resizing, often with additional features like watermarking and renaming | May require installation, some tools may have limited features in the free version | Users who need a dedicated tool for batch resizing |
Choosing the right tool for bulk resizing depends on your specific needs and the level of control you require. Desktop software offers the most advanced features and control, while online tools and dedicated resizers are great for quick and simple batch resizing tasks.
8. How Can I Maintain Image Quality While Resizing?
To maintain image quality, use appropriate resampling methods, avoid excessive resizing, and save in high-quality formats like JPEG (with high quality settings) or TIFF.
Maintaining image quality while resizing photos is crucial, especially when you need to reduce file size or adapt images for different uses. Here are some best practices to help you preserve image quality during the resizing process.
8.1. Use Appropriate Resampling Methods
Resampling, also known as interpolation, is the process of recalculating pixel values when an image is resized. Different resampling methods can produce varying results in terms of sharpness, smoothness, and artifact reduction.
Common Resampling Methods:
- Bicubic: A good default option that balances sharpness and smoothness. It’s suitable for both enlargement and reduction.
- Bicubic Smoother: Best for enlarging images as it produces smoother results with fewer artifacts.
- Bicubic Sharper: Best for reducing images as it enhances sharpness and detail.
- Nearest Neighbor: A fast method that preserves hard edges but can result in pixelation, especially when enlarging images.
- Bilinear: A simple method that produces smoother results than Nearest Neighbor but can also result in blurring.
Recommendations:
- For general resizing, use Bicubic.
- For enlarging images, use Bicubic Smoother.
- For reducing images, use Bicubic Sharper.
8.2. Avoid Excessive Resizing
Resizing an image multiple times or by a large amount can degrade the image quality. Each time an image is resized, the resampling process can introduce artifacts and reduce sharpness.
Best Practices:
- Resize Once: Resize the image to the final desired dimensions in a single step.
- Avoid Upscaling: Avoid enlarging images excessively, as this can result in significant quality loss. If you need a larger image, start with a higher-resolution original.
8.3. Save in High-Quality Formats
The file format you choose can significantly impact the image quality. Lossy formats like JPEG compress images by discarding some image data, which can result in quality loss. Lossless formats like TIFF preserve all image data, but typically result in larger file sizes.
Recommendations:
- JPEG: Use JPEG for photographs when file size is a concern. Save with the highest quality settings (e.g., 90-100) to minimize compression artifacts.
- TIFF: Use TIFF for images that require the highest quality, such as those intended for printing or archiving.
- PNG: Use PNG for graphics, logos, and images with transparency. PNG uses lossless compression, which preserves all image data.
8.4. Sharpen the Image After Resizing
Resizing can sometimes soften an image, so it’s often a good idea to apply a sharpening filter after resizing.
How to Sharpen in Adobe Photoshop:
- Go to “Filter” > “Sharpen” > “Unsharp Mask.”
- Adjust the “Amount,” “Radius,” and “Threshold” settings to achieve the desired level of sharpness.
- Preview the image to check for any over-sharpening artifacts.
Tips for Sharpening:
- Use Unsharp Mask: Unsharp Mask is a versatile sharpening filter that allows you to control the amount, radius, and threshold of sharpening.
- Sharpen Sparingly: Avoid over-sharpening, as this can introduce unwanted artifacts and noise.
- Sharpen at the End: Apply sharpening as the final step in your editing workflow.
8.5. Preserve Metadata
Metadata is information embedded in an image file, such as camera settings, date, and location. Preserving metadata can be important for archiving and organizing your images.
How to Preserve Metadata:
- When saving an image, make sure the option to preserve metadata is checked.
- In Photoshop, you can choose to preserve all metadata or select specific metadata to include.
Here’s a table summarizing the best practices for maintaining image quality while resizing:
| Practice | Recommendation |
|---|---|
| Resampling Method | Bicubic (general), Bicubic Smoother (enlarging), Bicubic Sharper (reducing) |
| Resizing Frequency | Resize once to the final desired dimensions |
| File Format | JPEG (high quality), TIFF (highest quality), PNG (graphics) |
| Sharpening | Apply Unsharp Mask sparingly after resizing |
| Metadata Preservation | Preserve metadata when saving images |
By following these best practices, you can ensure that your photos retain their quality while being resized for various purposes.
9. What Are Common Mistakes to Avoid When Resizing Photos?
Common mistakes include not maintaining aspect ratio, over-compressing images, and using the wrong resolution for the intended use. Always double-check your settings before resizing.
Resizing photos can be tricky, and making