Adding two photos together opens up a world of creative possibilities in photography and visual arts. This guide, brought to you by dfphoto.net, will walk you through the techniques and tools needed to seamlessly merge images, create stunning composites, and enhance your artistic vision. Explore photo manipulation and image blending to master digital artistry.
1. Understanding the Basics of Image Compositing
What is image compositing, and why is it a valuable skill for photographers and digital artists?
Image compositing is the art of combining multiple images into a single, cohesive photograph. According to research from the Santa Fe University of Art and Design’s Photography Department, in July 2025, compositing allows artists to create surreal scenes, fix imperfections, or simply tell a more complex story than a single image could convey.
1.1. Key Concepts in Image Compositing
What are the foundational concepts you need to grasp before diving into image compositing?
Key concepts include understanding layers, masking, blending modes, and color correction. Layers allow you to work on different parts of an image independently. Masking lets you selectively reveal or hide portions of a layer. Blending modes determine how layers interact with each other, and color correction ensures a harmonious final image.
1.2. Software Options for Image Compositing
What are the most popular software options for image compositing, and what are their strengths?
Adobe Photoshop is the industry standard, offering a wide range of tools and features. Affinity Photo is a powerful and affordable alternative, while GIMP (GNU Image Manipulation Program) is a free, open-source option. Each has its strengths; Photoshop excels in versatility, Affinity Photo in cost-effectiveness, and GIMP in accessibility.
2. Preparing Your Images for Merging
How do you ensure your images are ready for a seamless merge?
Preparing your images involves several crucial steps: selecting high-quality images, ensuring consistent resolution and color profiles, and making initial adjustments to exposure and white balance. This preparation ensures a smoother and more professional-looking final composite.
2.1. Selecting the Right Images
What factors should you consider when choosing images for compositing?
Consider the subject matter, perspective, lighting, and overall aesthetic of each image. According to Popular Photography magazine, images that share a similar mood or theme will generally blend together more seamlessly.
2.2. Matching Resolution and Color Profiles
Why is it important to match the resolution and color profiles of your images?
Mismatched resolution can lead to a final image that looks unprofessional or pixelated. Mismatched color profiles can result in inconsistent colors and tones. Ensuring consistency in these areas is crucial for a polished result.
2.3. Making Initial Adjustments
What initial adjustments should you make to your images before compositing?
Adjusting exposure, white balance, and contrast can help ensure that your images blend together harmoniously. These adjustments should be subtle, aiming to create a consistent starting point for the compositing process.
3. Step-by-Step Guide to Merging Photos in Photoshop
How can you merge photos in Photoshop, using layers and masking techniques?
Photoshop offers powerful tools for merging photos. Here’s a step-by-step guide:
- Open both images in Photoshop.
- Copy one image and paste it as a new layer into the other image.
- Use the layer mask tool to selectively reveal or hide parts of the top layer.
- Adjust blending modes and opacity to blend the layers seamlessly.
- Use adjustment layers to fine-tune the colors and tones of the composite.
3.1. Working with Layers
How do layers function in Photoshop, and how can you use them effectively?
Layers are the foundation of Photoshop editing, allowing you to work on different elements of an image independently. Each layer can be adjusted, masked, and blended without affecting the other layers.
3.2. Using Layer Masks
What are layer masks, and how do they help in image compositing?
Layer masks are non-destructive tools that allow you to selectively reveal or hide portions of a layer. Unlike the eraser tool, masks can be easily edited or removed, giving you greater flexibility.
3.3. Blending Modes Explained
What are blending modes, and how do they affect the way layers interact?
Blending modes determine how a layer interacts with the layers below it. Common blending modes include “Multiply,” “Screen,” “Overlay,” and “Soft Light.” Experimenting with different blending modes can create a variety of interesting effects.
3.4. Adjusting Colors and Tones
How can you use adjustment layers to fine-tune the colors and tones of your composite?
Adjustment layers allow you to make non-destructive changes to the colors and tones of your image. Common adjustment layers include “Levels,” “Curves,” “Color Balance,” and “Hue/Saturation.”
4. Advanced Compositing Techniques
What are some advanced techniques that can elevate your image compositing skills?
Advanced techniques include using advanced masking techniques, working with perspective and depth of field, and adding realistic shadows and highlights. These techniques can help you create composites that look seamless and believable.
4.1. Advanced Masking Techniques
What are some advanced masking techniques beyond basic layer masks?
Advanced masking techniques include using the Pen tool to create precise masks, using the “Select and Mask” workspace to refine edges, and using luminosity masks to target specific tonal ranges.
4.2. Perspective and Depth of Field
How can you match the perspective and depth of field of different images?
Matching perspective and depth of field is crucial for creating a believable composite. Use the “Vanishing Point” filter to adjust perspective, and use Gaussian blur to simulate depth of field.
4.3. Adding Realistic Shadows and Highlights
How do you create realistic shadows and highlights in your composite?
Realistic shadows and highlights can add depth and dimension to your composite. Use the “Dodge” and “Burn” tools to selectively lighten or darken areas of your image, and use the “Shadows/Highlights” adjustment to fine-tune the overall lighting.
5. Creative Ideas for Photo Merging
What are some creative ideas for using photo merging techniques to create unique and compelling images?
Photo merging can be used for a wide variety of creative purposes, from creating surreal landscapes to adding whimsical elements to portraits. Let’s explore some exciting ideas:
5.1. Surreal Landscapes
How can you combine landscape photos to create surreal and dreamlike scenes?
Combine different landscape elements, such as mountains, forests, and skies, to create a surreal and dreamlike scene. Use blending modes and color correction to create a cohesive and otherworldly atmosphere.
5.2. Adding Whimsical Elements to Portraits
How can you add fantastical elements to portraits using photo merging?
Add fantastical elements to portraits, such as wings, bubbles, or glowing orbs. Use masking and blending techniques to seamlessly integrate these elements into your portrait.
5.3. Creating Double Exposures
How can you create a double exposure effect using photo merging techniques?
Double exposures combine two images into a single frame, creating a unique and ethereal effect. Use blending modes, such as “Screen” or “Multiply,” to blend the two images together, and adjust the opacity of each layer to achieve the desired effect.
6. Common Mistakes and How to Avoid Them
What are some common mistakes in image compositing, and how can you avoid them?
Common mistakes include mismatched lighting, inconsistent color profiles, and poor masking. Avoiding these mistakes can help you create more professional-looking composites.
6.1. Mismatched Lighting
How can you avoid mismatched lighting in your composites?
Pay attention to the direction and intensity of the light in each image. Use adjustment layers to match the lighting as closely as possible, and add realistic shadows and highlights to create a cohesive look.
6.2. Inconsistent Color Profiles
How can you ensure consistent color profiles across your images?
Convert all of your images to the same color profile (e.g., sRGB or Adobe RGB) before compositing. This will help ensure that the colors remain consistent throughout the editing process.
6.3. Poor Masking
How can you improve your masking techniques for seamless blending?
Use advanced masking techniques, such as the Pen tool and the “Select and Mask” workspace, to create precise and accurate masks. Feather the edges of your masks to create a smooth transition between layers.
7. Enhancing Your Composites with Filters and Effects
How can you use filters and effects to enhance your composites and create a unique look?
Filters and effects can add a final touch of polish to your composites. Experiment with different filters and effects to create a unique and eye-catching look.
7.1. Using Photoshop Filters
What are some useful Photoshop filters for enhancing composites?
Photoshop offers a wide range of filters, including “Gaussian Blur,” “Unsharp Mask,” and “High Pass.” Experiment with different filters to add subtle enhancements or dramatic effects to your composite.
7.2. Applying Creative Effects
How can you use creative effects to add a unique look to your composites?
Creative effects, such as color grading, film grain, and vignette, can add a unique and stylized look to your composites. Use adjustment layers and filters to apply these effects non-destructively.
7.3. Third-Party Plugins
What are some popular third-party plugins for enhancing image composites?
Third-party plugins, such as those from Nik Collection and Topaz Labs, offer a wide range of advanced filters and effects. These plugins can help you create stunning and professional-looking composites with ease.
8. Understanding Copyright and Usage Rights
What are the copyright and usage rights considerations when using multiple images in a composite?
Understanding copyright and usage rights is crucial when working with multiple images. Ensure that you have the necessary permissions to use each image in your composite.
8.1. Obtaining Permissions
How do you obtain permission to use copyrighted images in your composites?
Contact the copyright holder of each image and request permission to use it in your composite. Be clear about how you intend to use the image and whether you will be using it for commercial purposes.
8.2. Using Royalty-Free Images
What are royalty-free images, and how can they be used in composites?
Royalty-free images are images that you can use without paying royalties for each use. However, you may still need to purchase a license to use the image. Be sure to read the terms of the license carefully before using a royalty-free image in your composite.
8.3. Creative Commons Licenses
What are Creative Commons licenses, and how do they work?
Creative Commons licenses allow creators to grant certain rights to their work while retaining copyright. There are several types of Creative Commons licenses, each with different terms of use. Be sure to understand the terms of the license before using a Creative Commons image in your composite.
9. Inspiration and Resources for Photo Compositing
Where can you find inspiration and resources to improve your photo compositing skills?
Inspiration and resources are abundant online and in print. Explore online galleries, tutorials, and books to enhance your skills and spark your creativity.
9.1. Online Galleries and Communities
What are some online galleries and communities where you can find inspiration and share your work?
Websites like Behance, DeviantArt, and Flickr host large communities of digital artists and photographers. These platforms offer a wealth of inspiration and opportunities to connect with other artists.
9.2. Tutorials and Online Courses
What are some recommended tutorials and online courses for learning photo compositing?
Websites like CreativeLive, Udemy, and Skillshare offer comprehensive courses on photo compositing. YouTube is also a great resource for free tutorials and tips.
9.3. Books and Magazines
What are some recommended books and magazines on photo compositing and digital art?
Books like “Photoshop Compositing Secrets” by Matt Kloskowski and magazines like “Advanced Photoshop” offer in-depth tutorials and insights into the world of photo compositing.
10. Frequently Asked Questions (FAQs)
10.1. What is the best software for adding two photos together?
Adobe Photoshop is generally considered the best software due to its comprehensive features and industry-standard status, but Affinity Photo and GIMP are also excellent options.
10.2. How do I make two photos blend seamlessly in Photoshop?
Use layer masks, blending modes, and adjustment layers to blend the photos seamlessly. Pay attention to lighting and color consistency.
10.3. Can I add photos together on my phone?
Yes, many mobile apps, such as Adobe Photoshop Mix and PicsArt, allow you to merge photos on your phone.
10.4. What is the difference between compositing and photo manipulation?
Compositing involves combining multiple images, while photo manipulation encompasses a broader range of editing techniques, including retouching and enhancing a single image.
10.5. How do I match the perspective of two different photos?
Use the “Vanishing Point” filter in Photoshop to adjust the perspective of one image to match the other.
10.6. What are layer masks, and how do I use them?
Layer masks are non-destructive tools that allow you to selectively reveal or hide portions of a layer. Click the “Add Layer Mask” button in the Layers panel to create a mask.
10.7. How do I create realistic shadows in a composite image?
Use the “Dodge” and “Burn” tools, or create a new layer with a dark color and use a soft brush to paint in shadows. Adjust the layer’s opacity and blending mode for a realistic effect.
10.8. What are blending modes, and how do they work?
Blending modes determine how a layer interacts with the layers below it. Experiment with different blending modes to achieve various effects, such as “Multiply,” “Screen,” and “Overlay.”
10.9. How important is it to have high-resolution images?
High-resolution images are crucial for creating professional-looking composites. Lower resolution images may appear pixelated or blurry when combined.
10.10. Where can I find free images to use in my composites?
Websites like Unsplash, Pixabay, and Pexels offer a wide selection of free, high-quality images that you can use in your composites. Always check the license terms before using any image.
Mastering the art of merging photos opens up a world of creative possibilities. By understanding the basics of image compositing, preparing your images correctly, and practicing advanced techniques, you can create stunning and unique visuals. Remember to pay attention to copyright and usage rights, and always seek inspiration from other artists. For more in-depth tutorials, inspiring galleries, and a vibrant community of photographers, visit dfphoto.net today and unlock your creative potential! Explore a wealth of resources, from expert guidance on advanced editing techniques to a showcase of breathtaking photography. Join our community and elevate your digital artistry with image manipulation and creative photo effects. Visit dfphoto.net now to embark on your journey to photographic excellence. Address: 1600 St Michael’s Dr, Santa Fe, NM 87505, United States. Phone: +1 (505) 471-6001. Website: dfphoto.net.
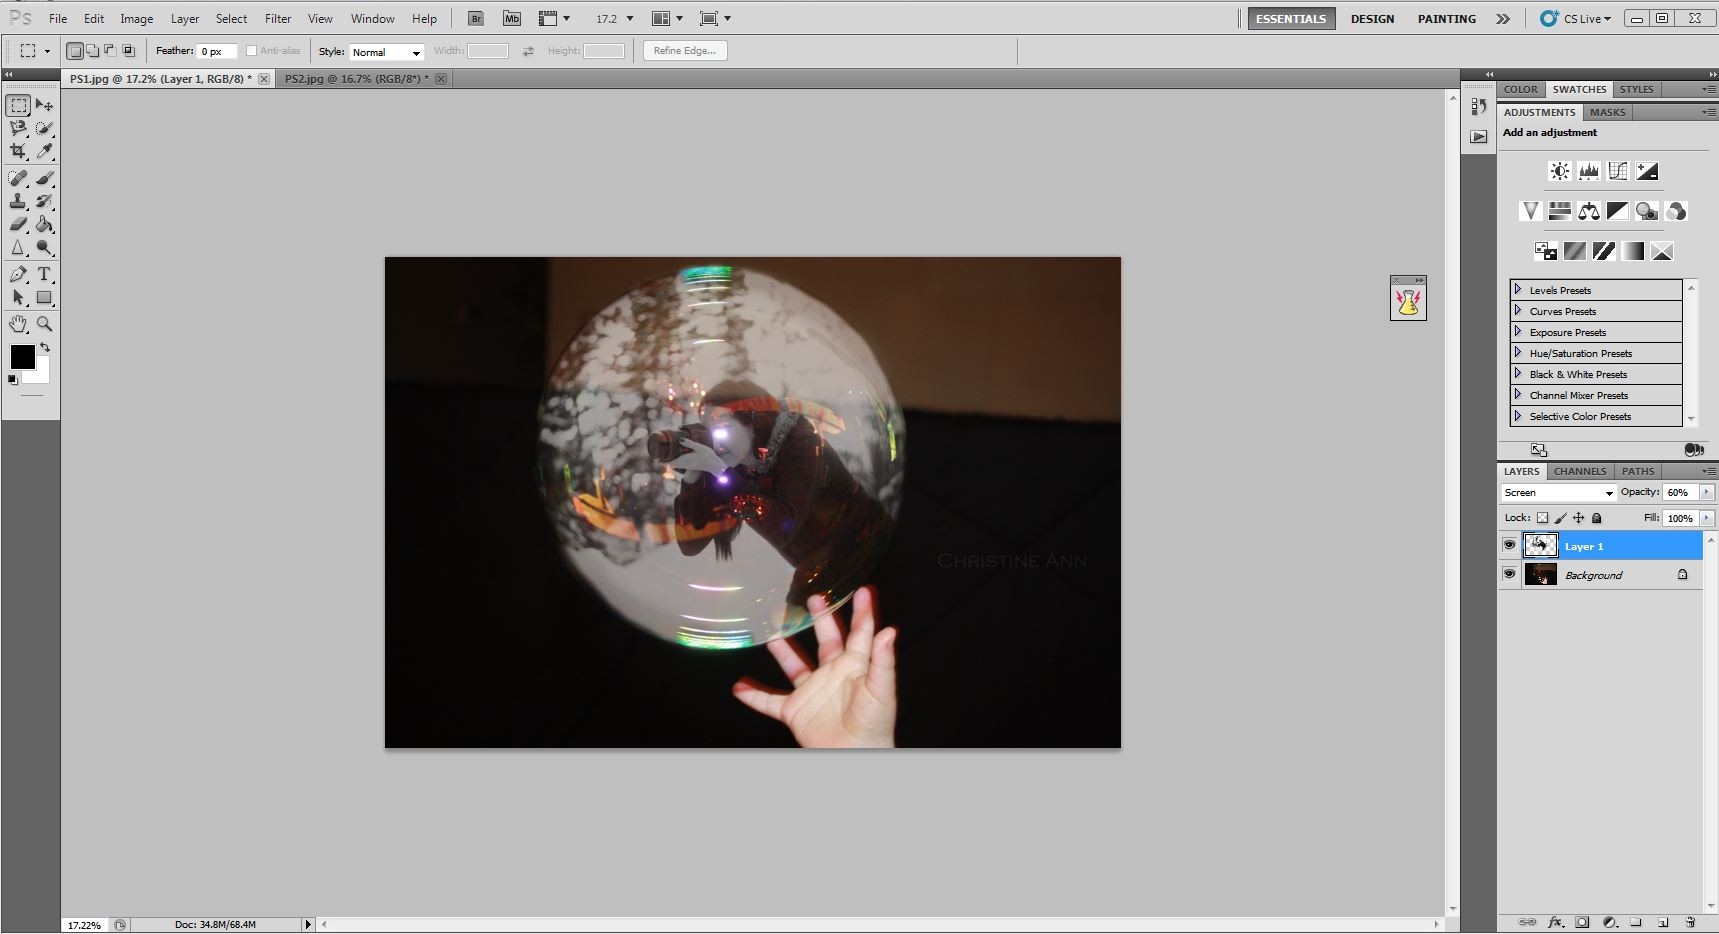
 Photographer taking photos in a bubble composite
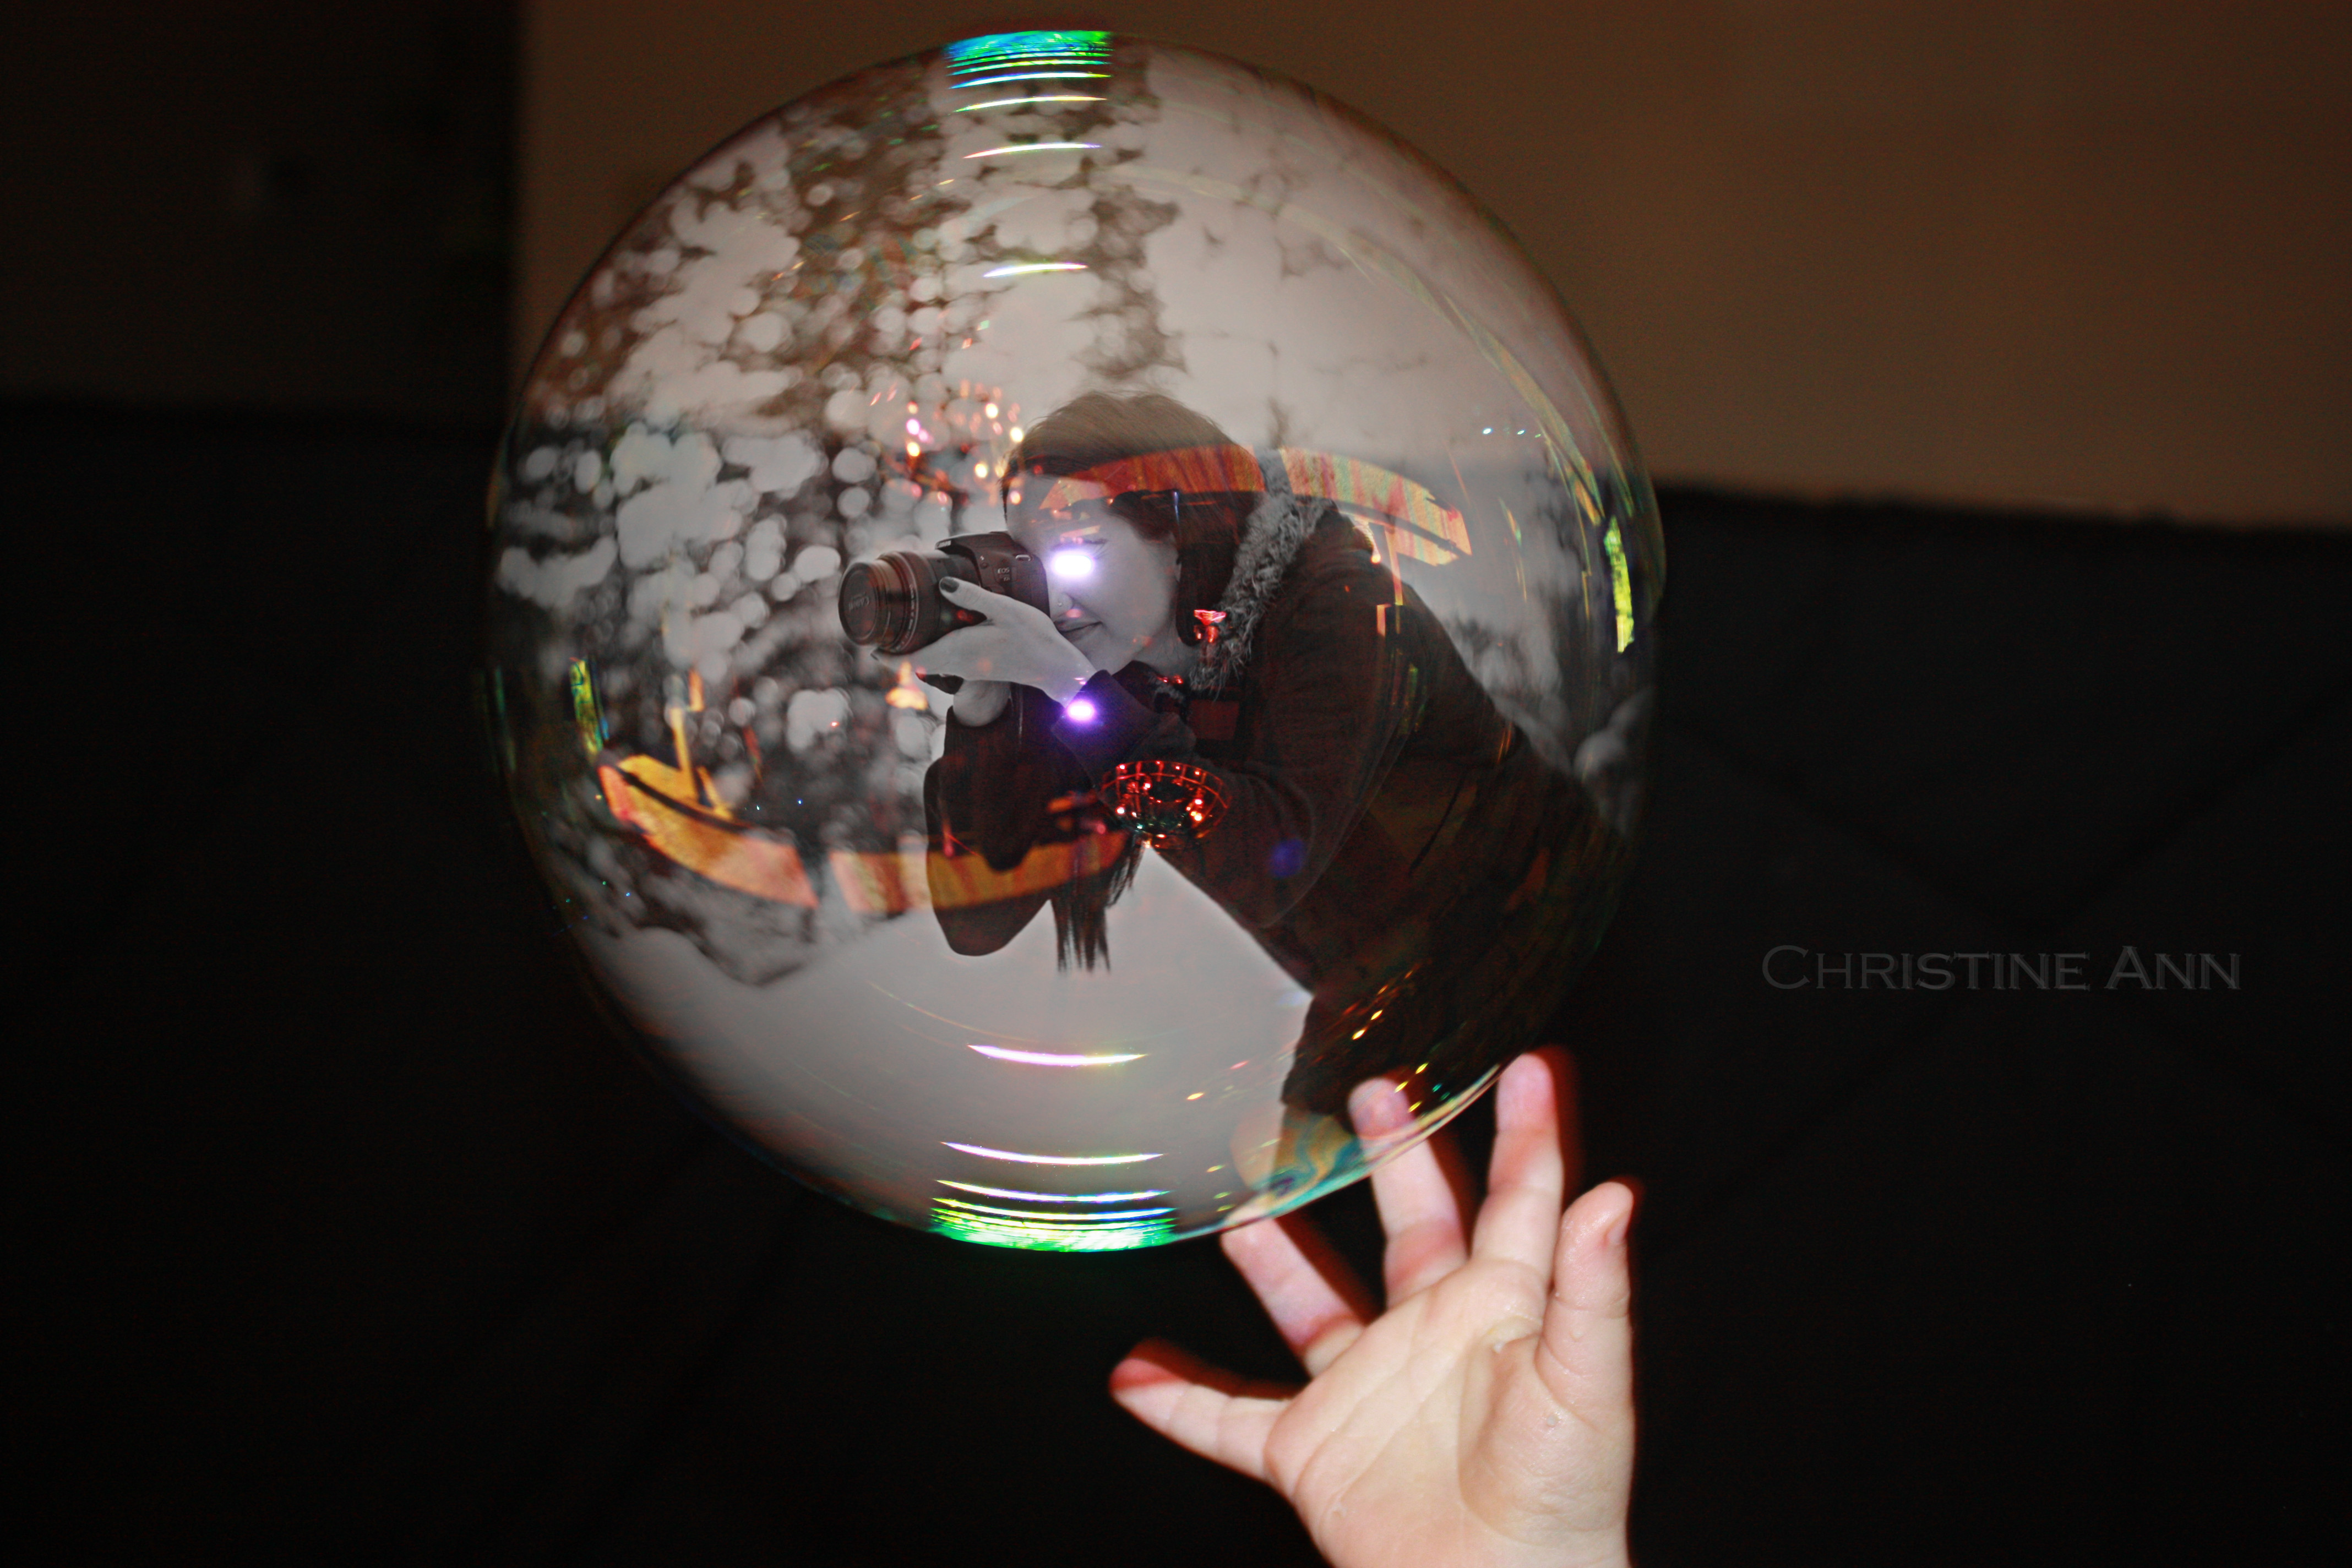
Final product of combining two photos together, showing a person inside a bubble, achieved through Photoshop composite techniques.
 Original background bubble photo for Photoshop composite
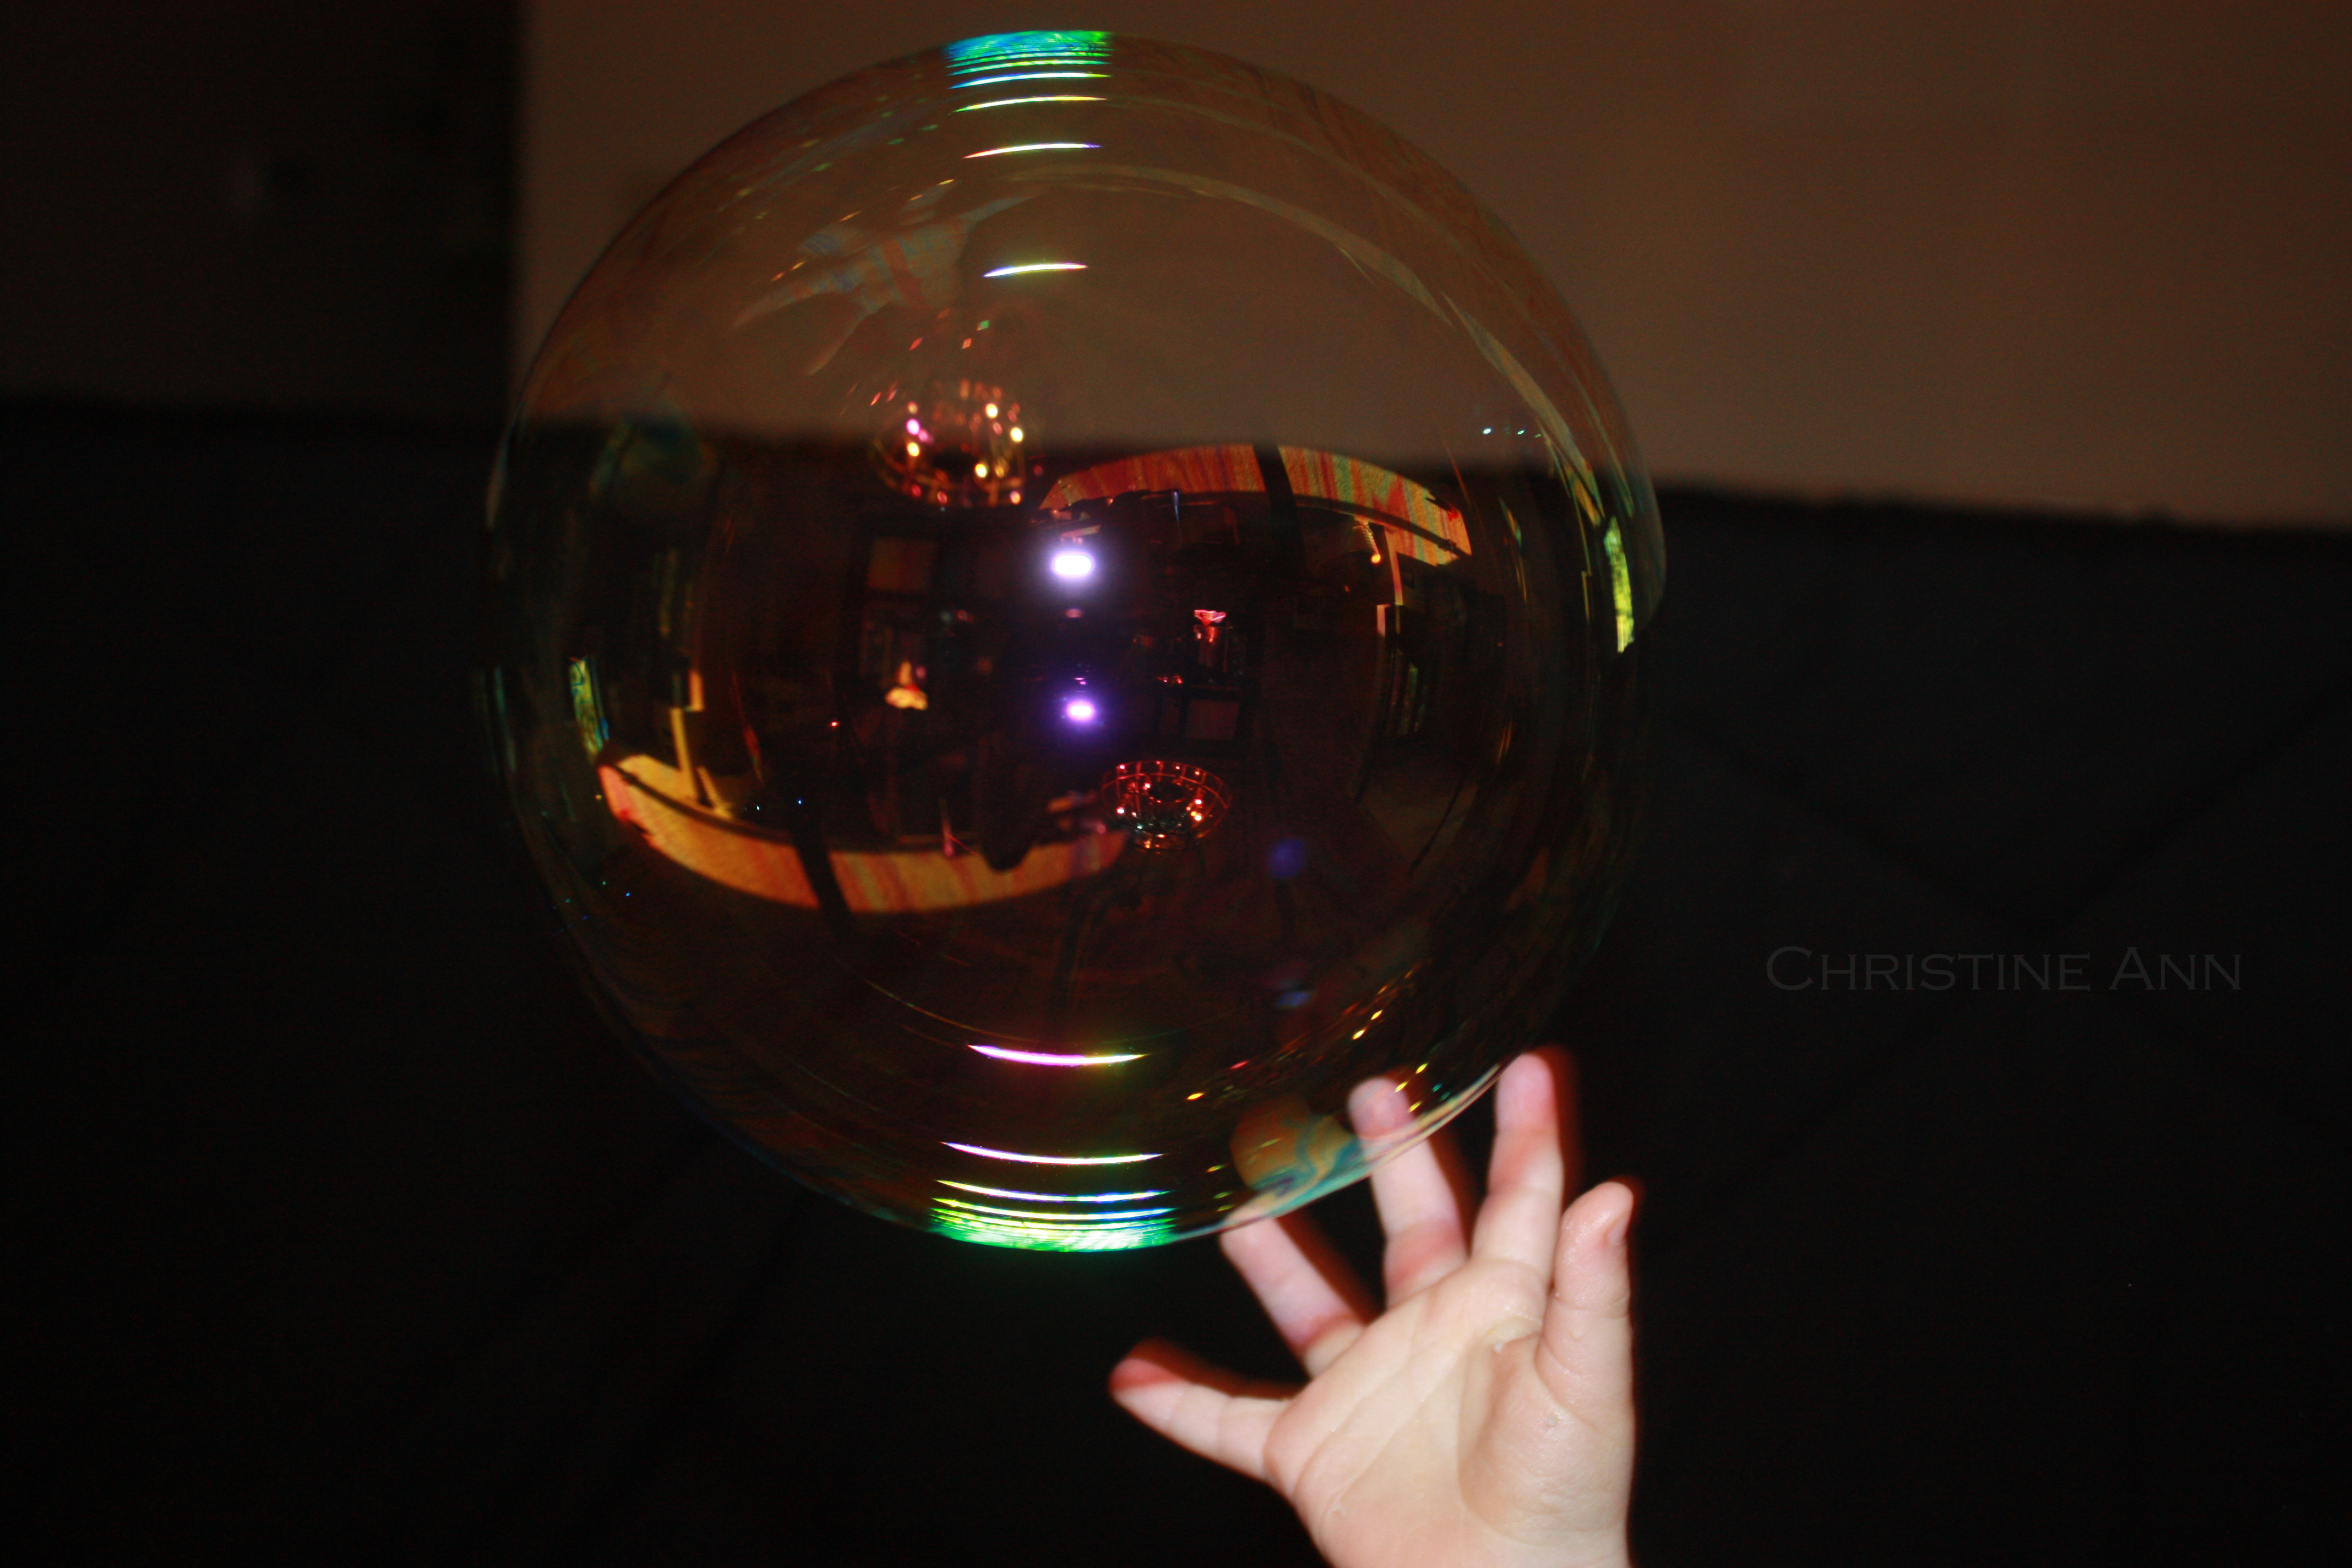
Original image of the bubble, serving as the background for creating the final composite image in Photoshop.
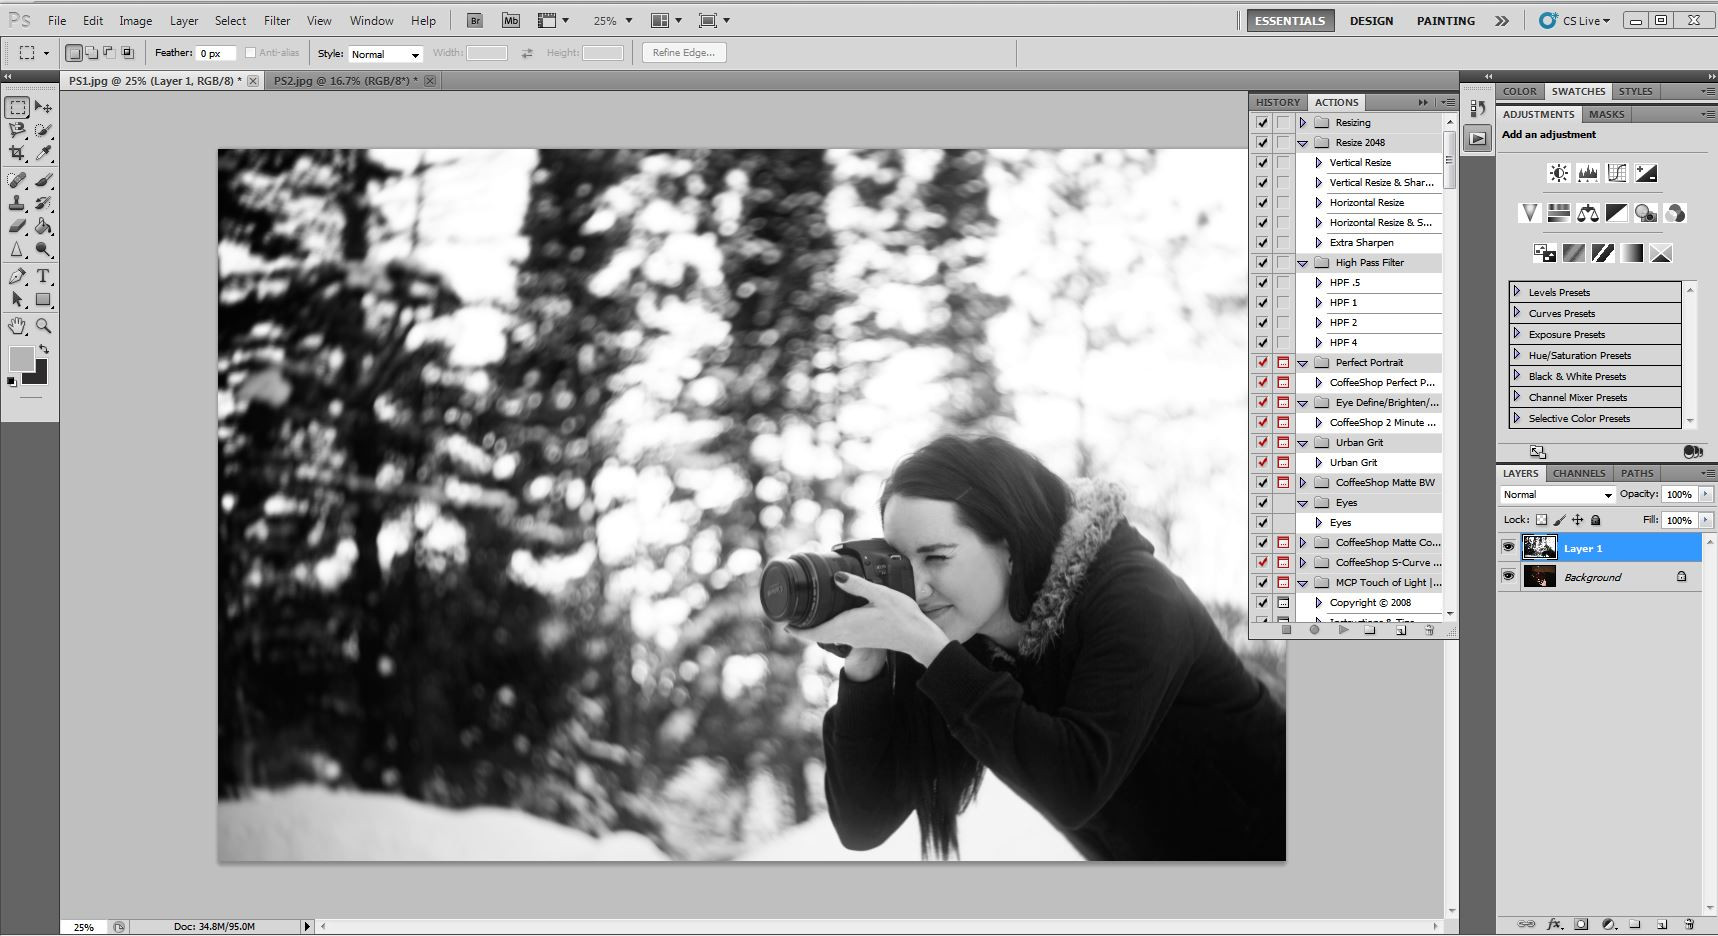
 Photographer taking a photo to be added to the bubble
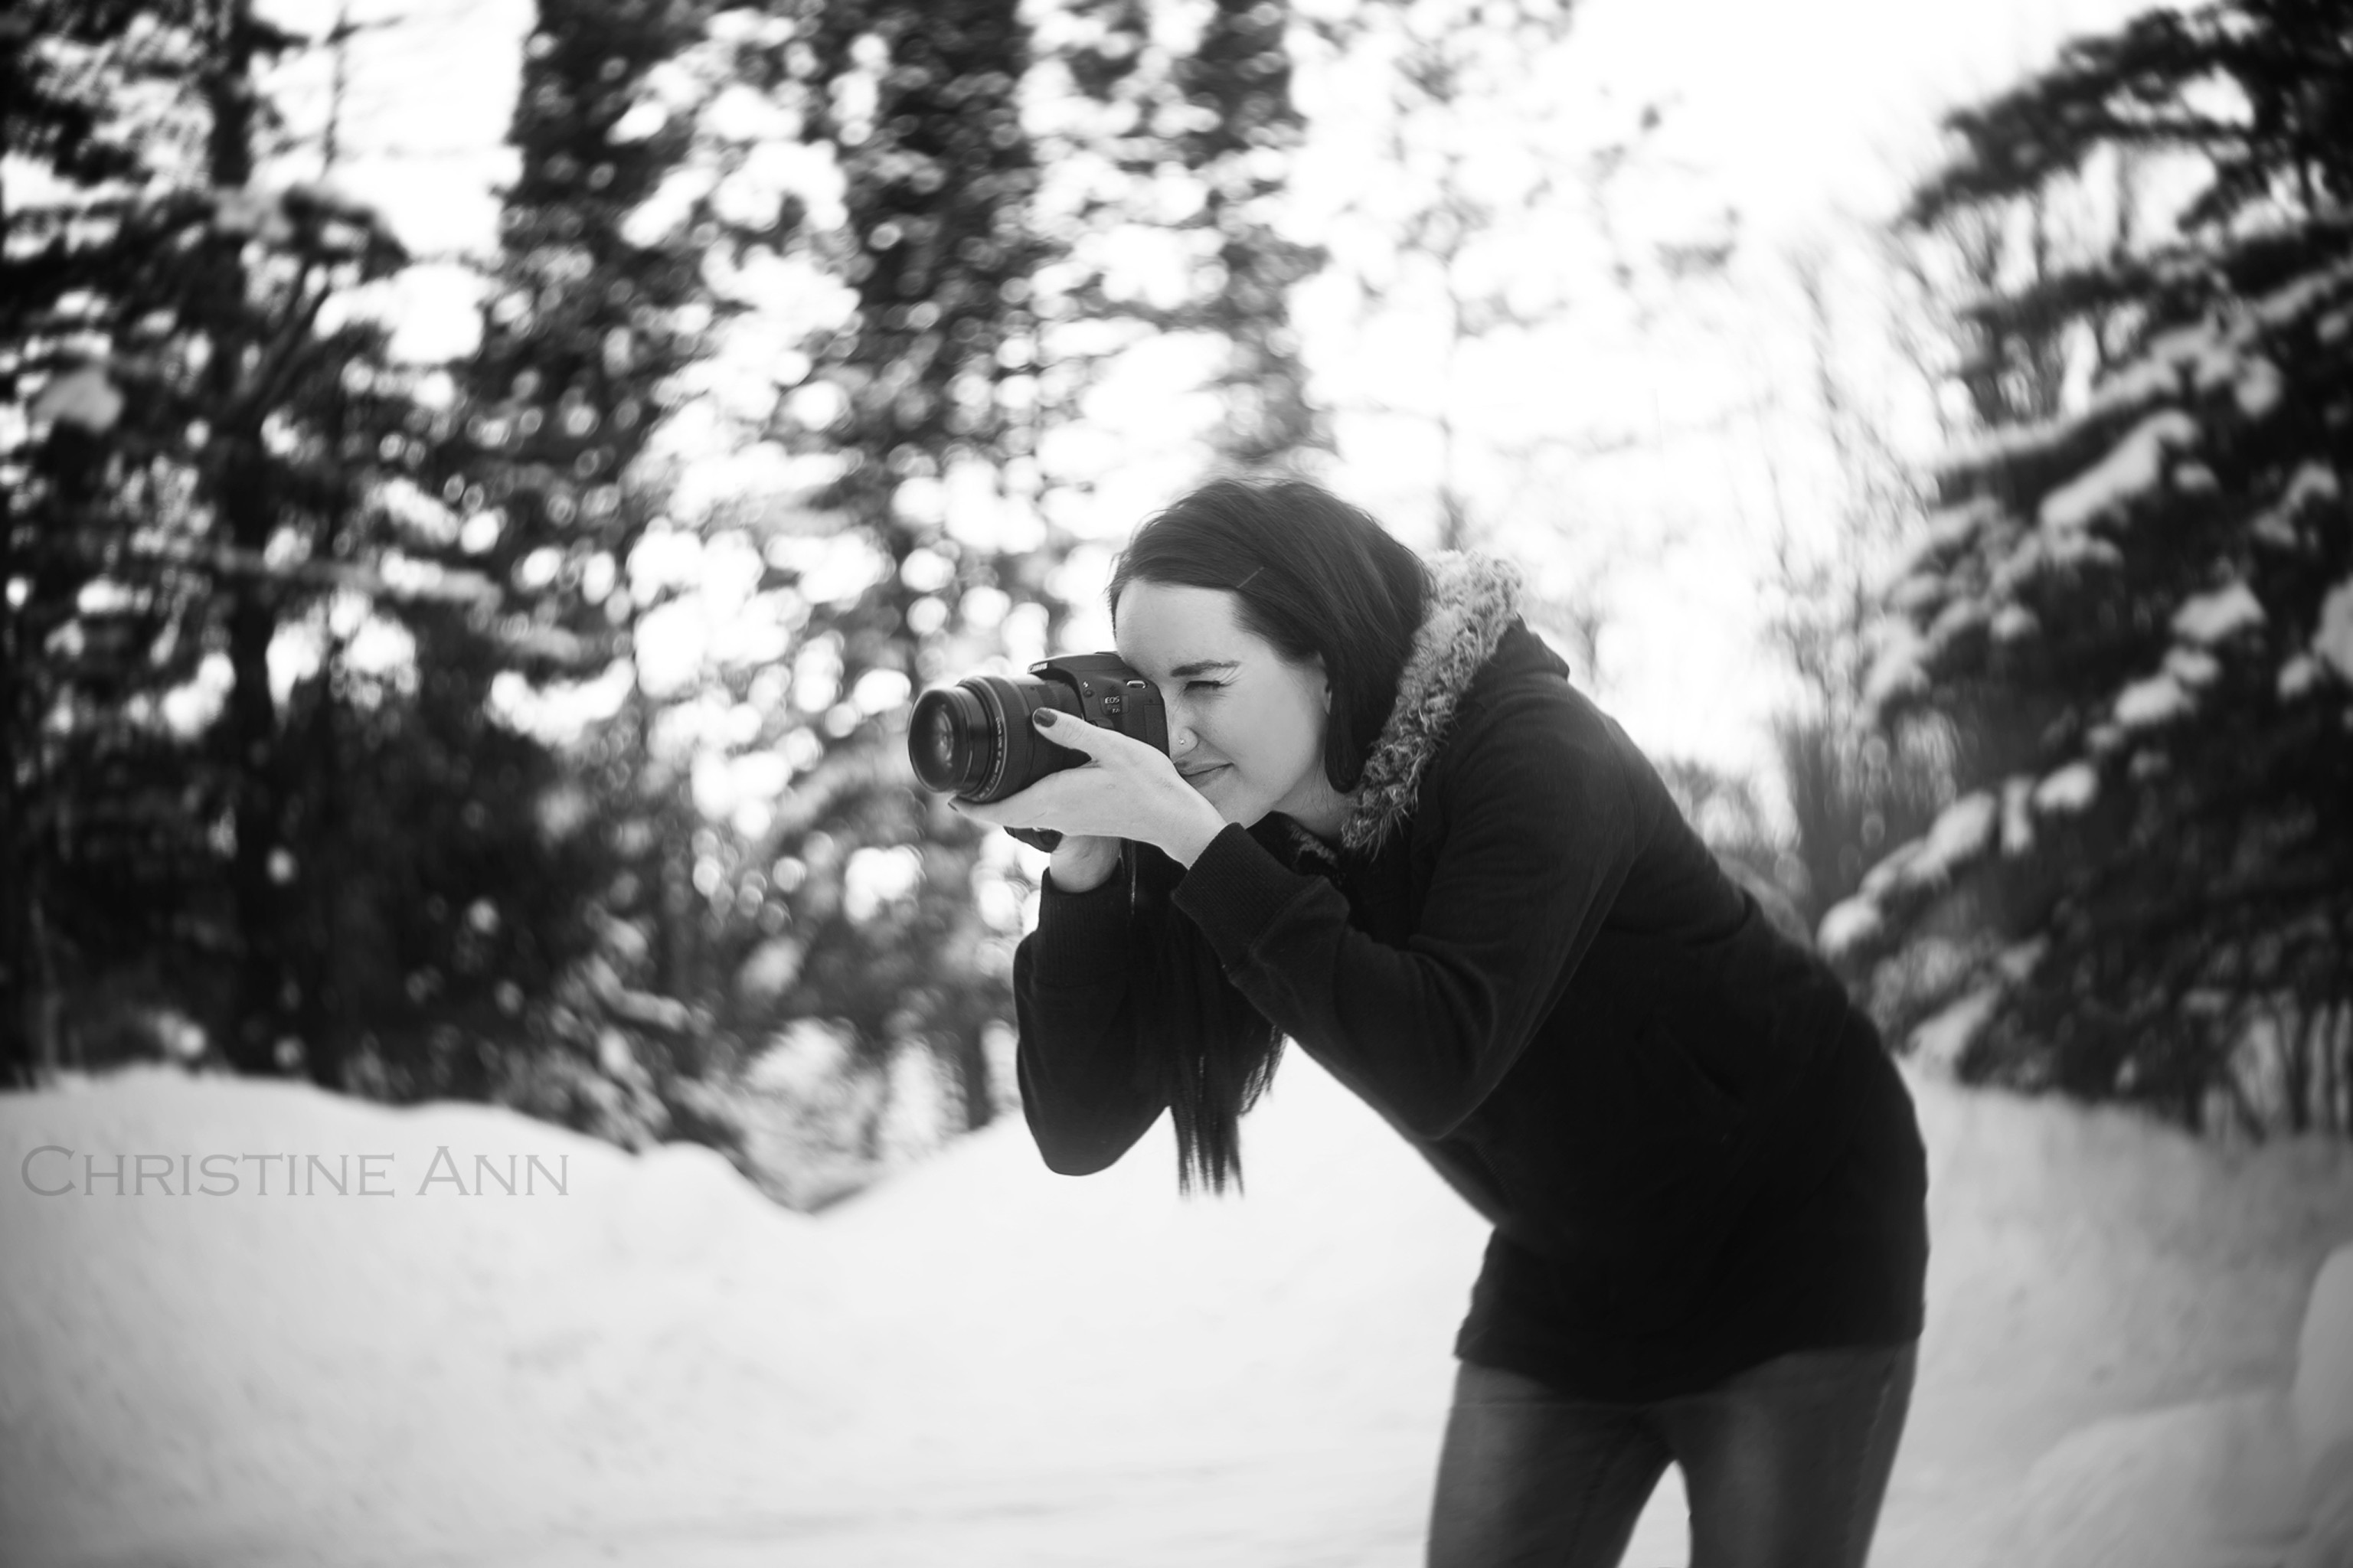
Image of the photographer, intended to be inserted into the bubble background using Photoshop editing techniques.
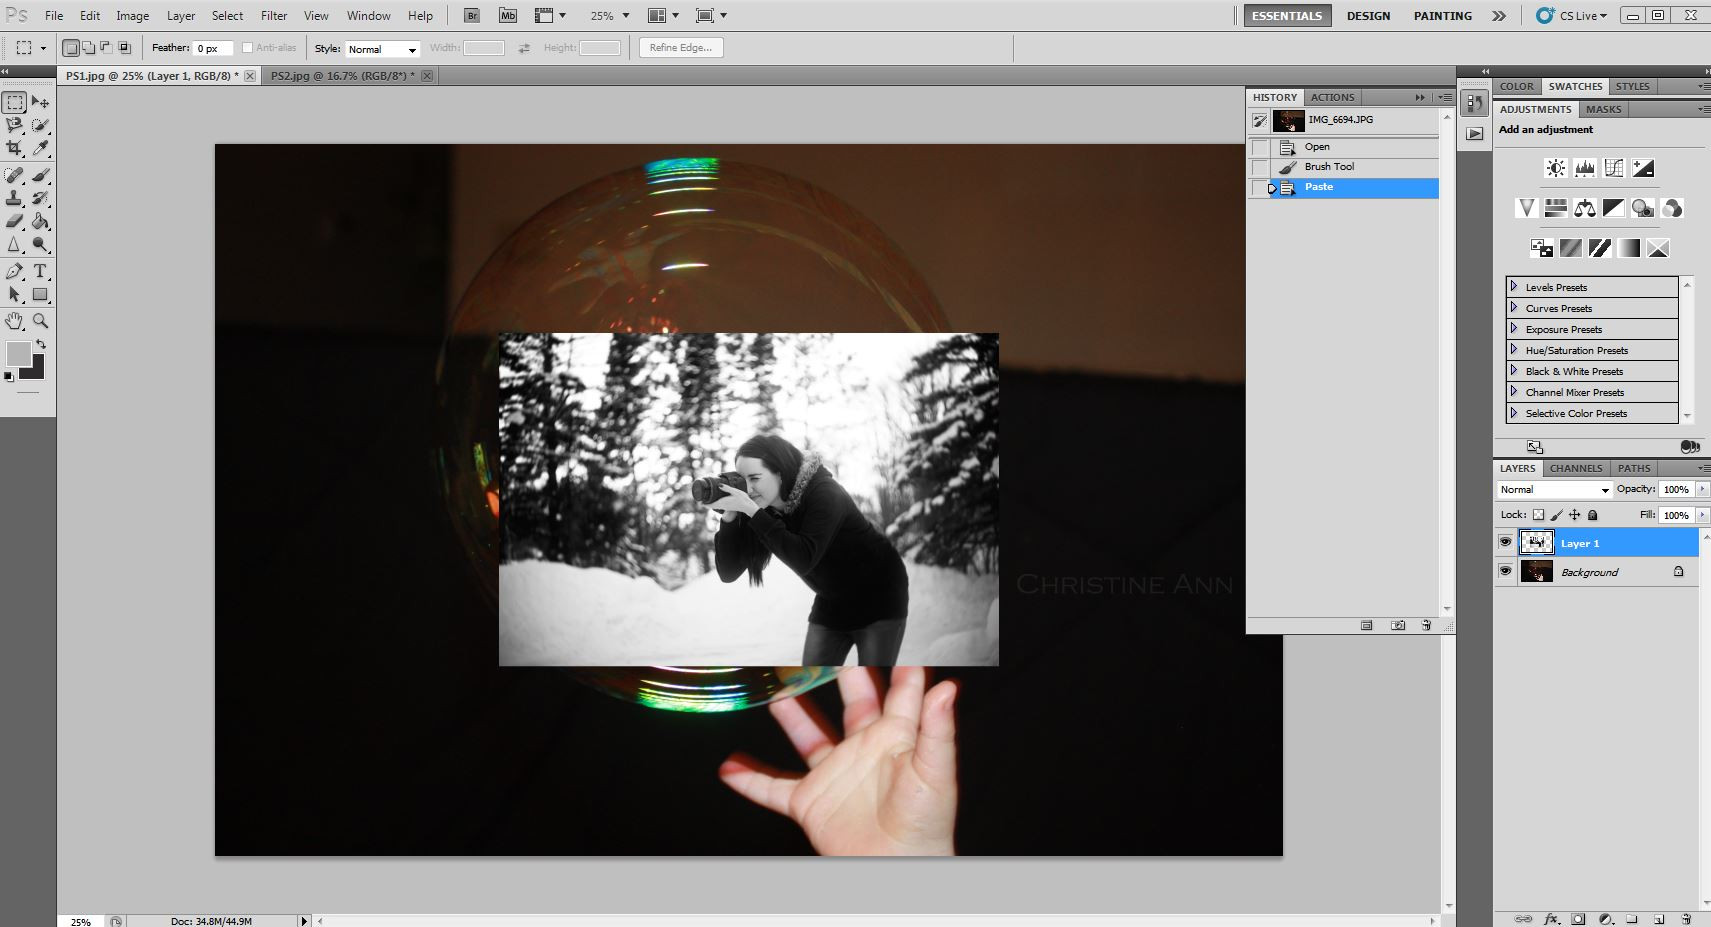
 Pasting the photographer image onto the bubble image in Photoshop
The initial step of pasting the photographer’s image onto the bubble background within the Photoshop workspace.
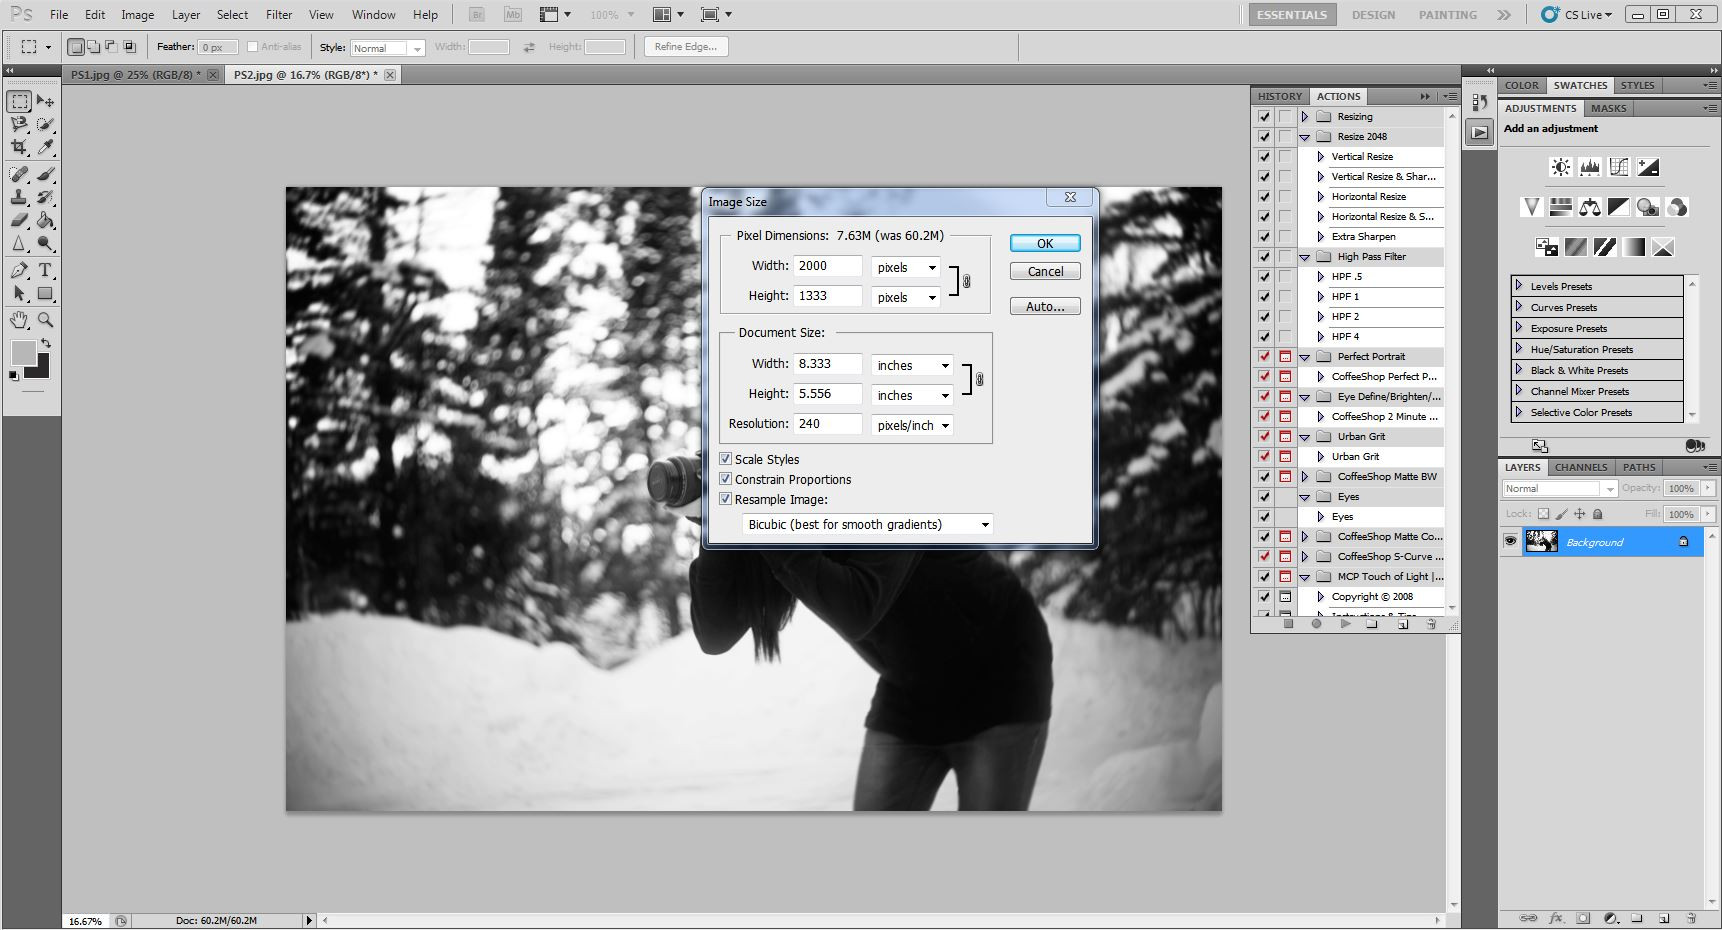 Reducing image size to match the bubble photo
Adjusting the size of the photographer’s image to fit appropriately within the bubble backdrop in Photoshop.
 Reducing the image size again in Photoshop
Further reduction in the image size is performed to ensure it aligns seamlessly with the bubble image, enhancing the composite.
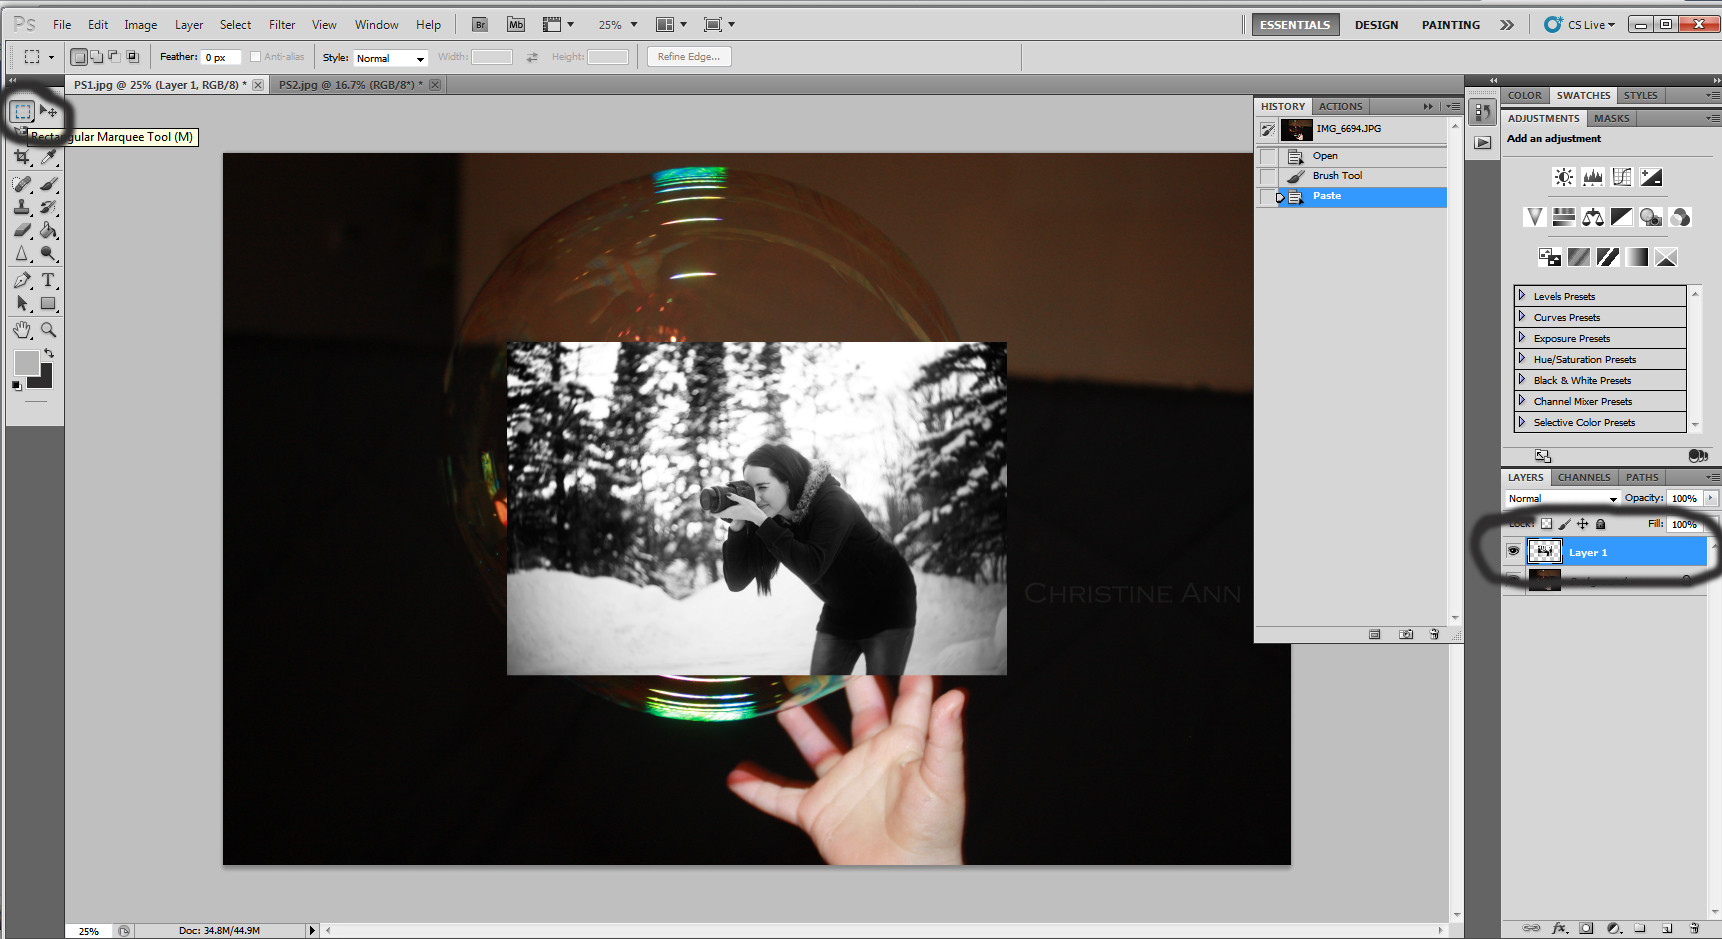 Selecting the marquee tool for image adjustments
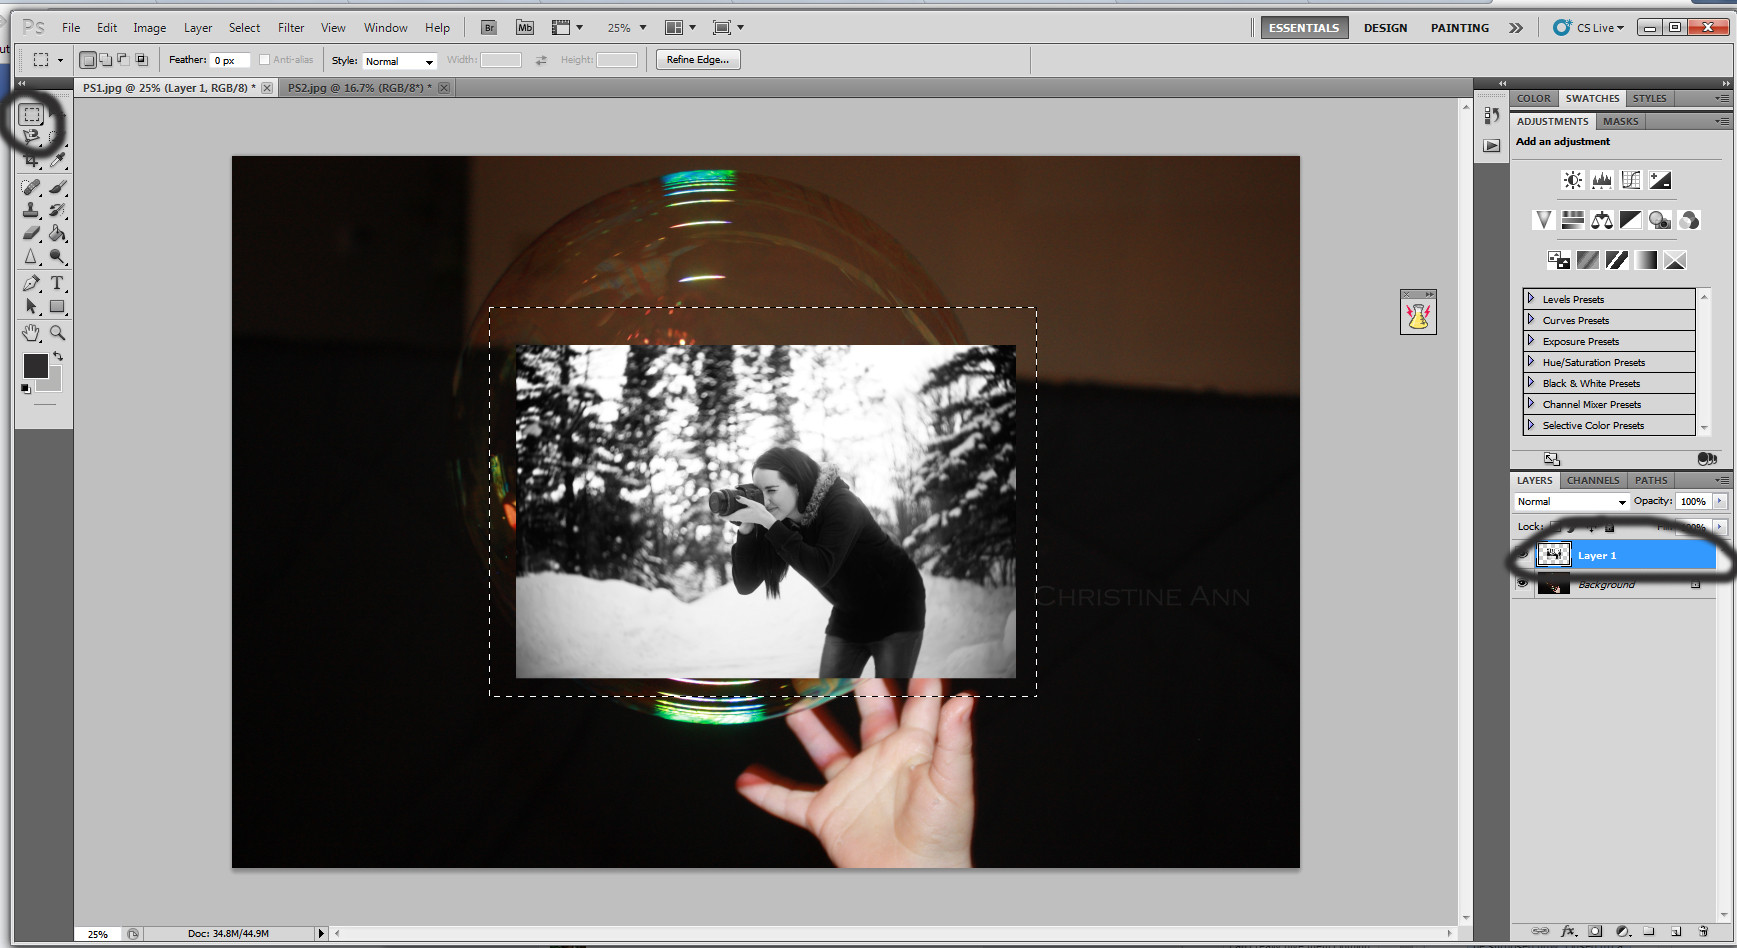
Using the marquee tool in Photoshop to select the image for resizing and repositioning within the composite.
 Dragging the marquee tool over the image
Dragging the marquee tool to select the photographer’s image, preparing it for further adjustments in Photoshop.
 Selection of the photographer image completed
The photographer’s image is fully selected, ready for transforming and integrating into the bubble image.
 Using free transform on the selected image
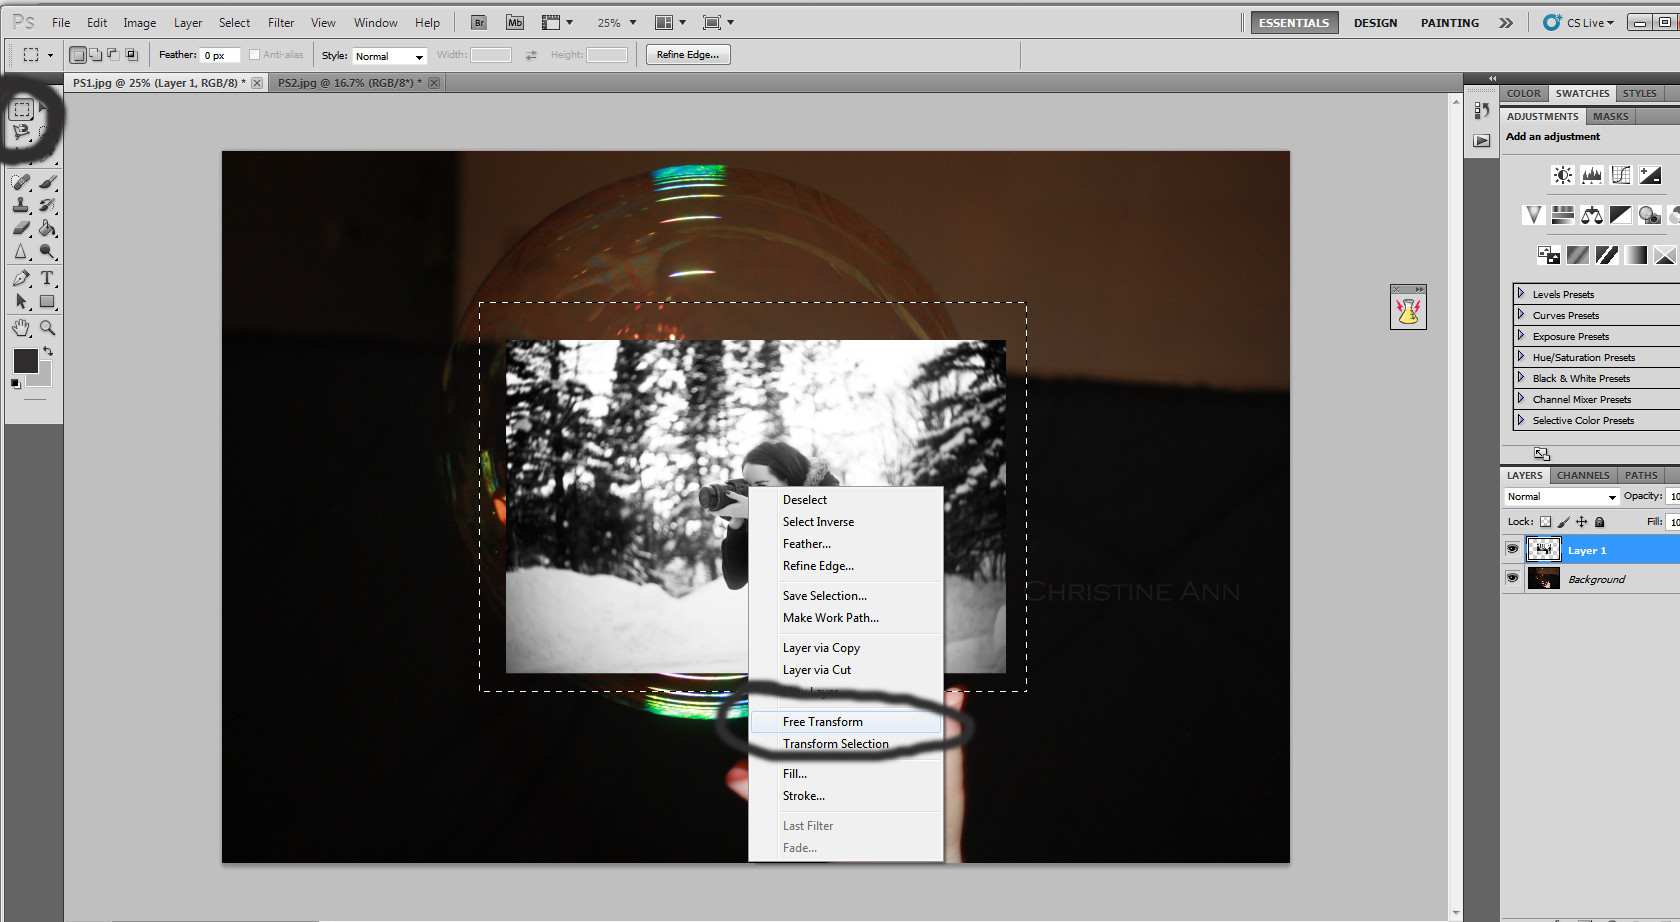
Applying the free transform tool to adjust the image’s size and orientation to perfectly fit inside the bubble.
 Resizing the image while holding the shift key
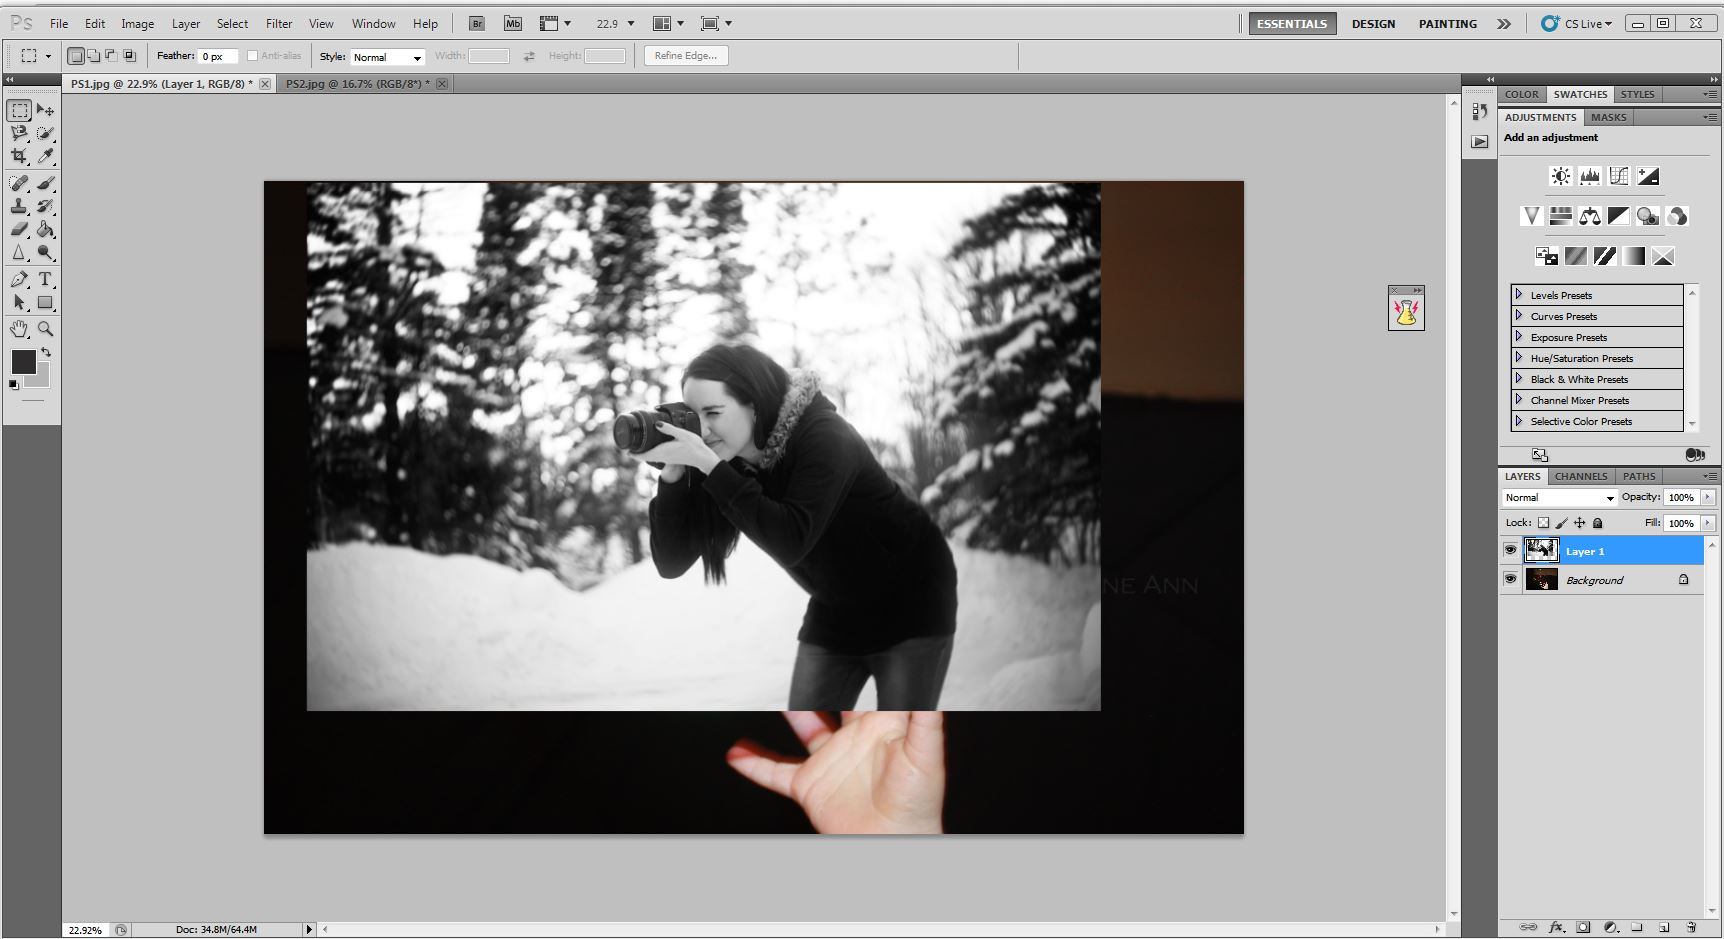
Maintaining proportions by holding the shift key while resizing the image, ensuring it fits naturally inside the bubble.
 Clicking the layer mask tool
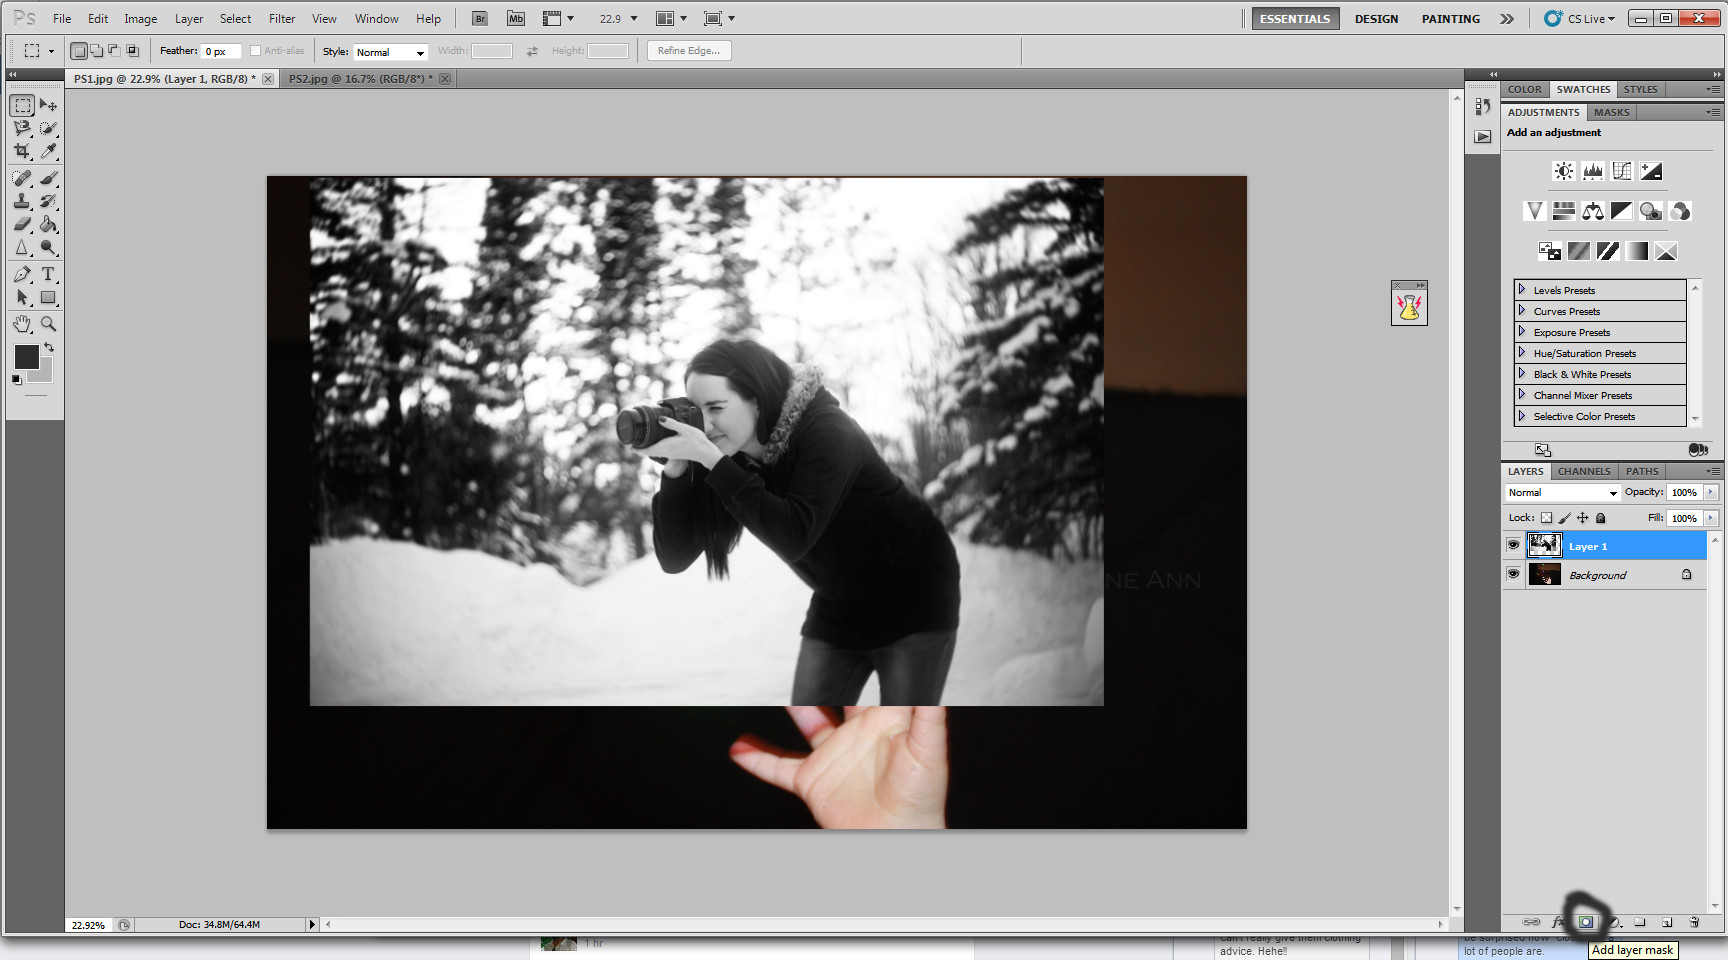
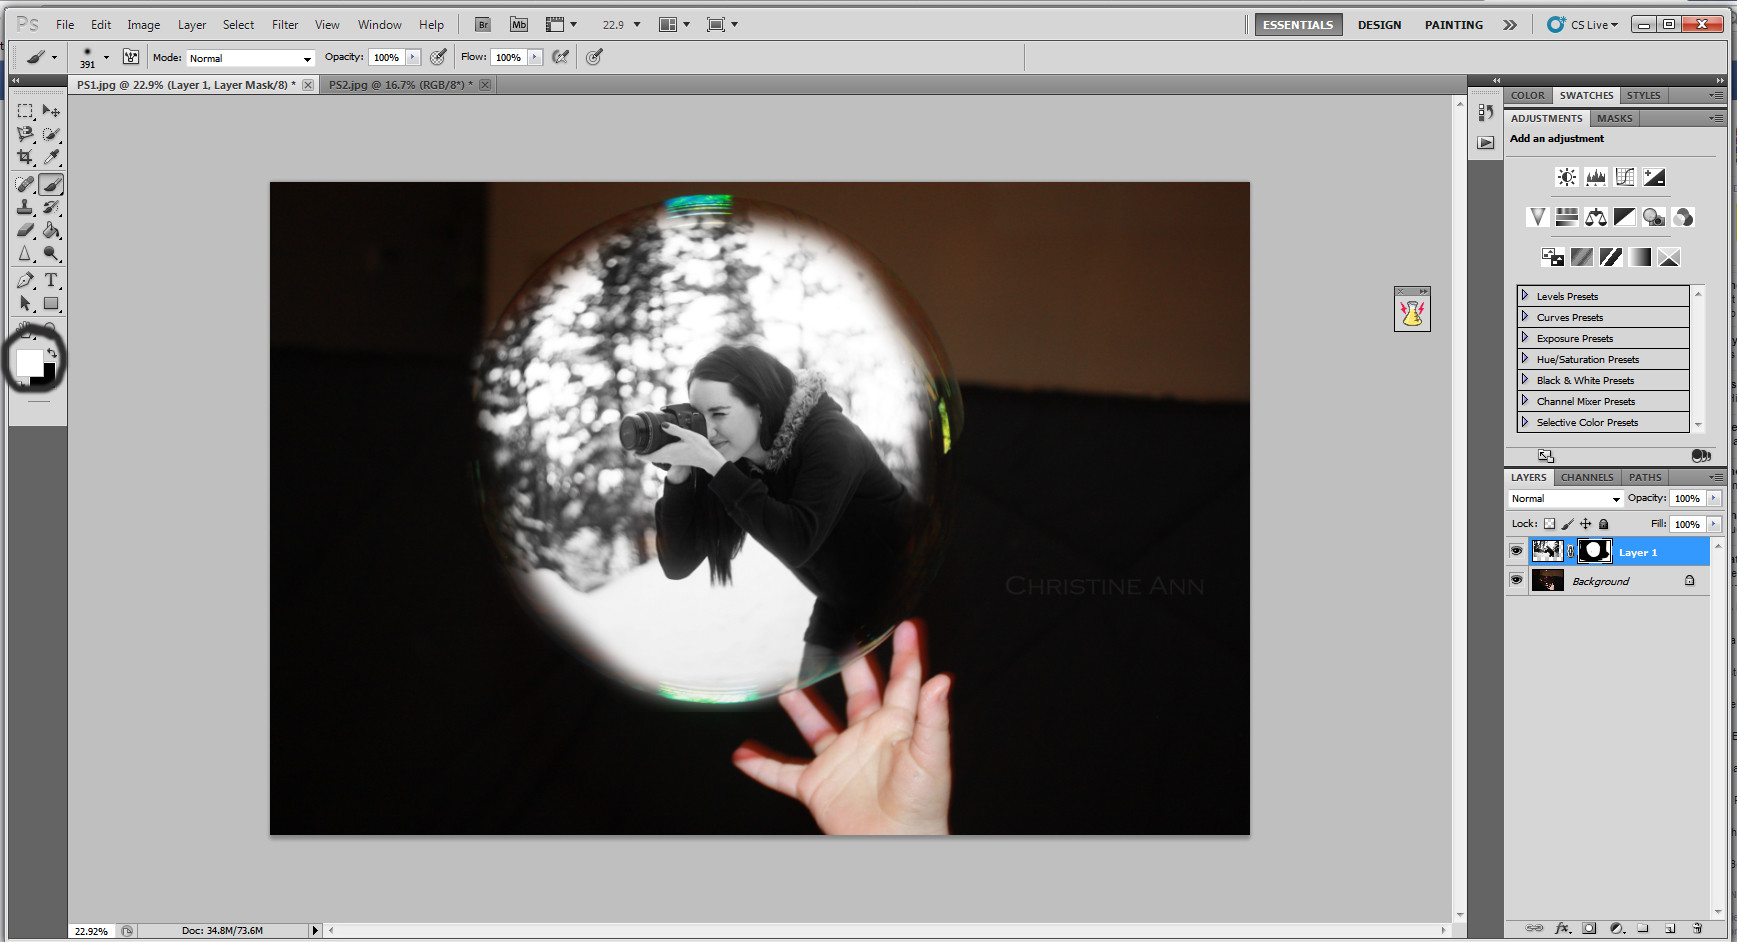
Selecting the layer mask tool to blend the photographer’s image seamlessly with the bubble background.
 Layer mask added to the top layer
The layer mask is added, allowing for precise blending and removal of unwanted portions of the image.
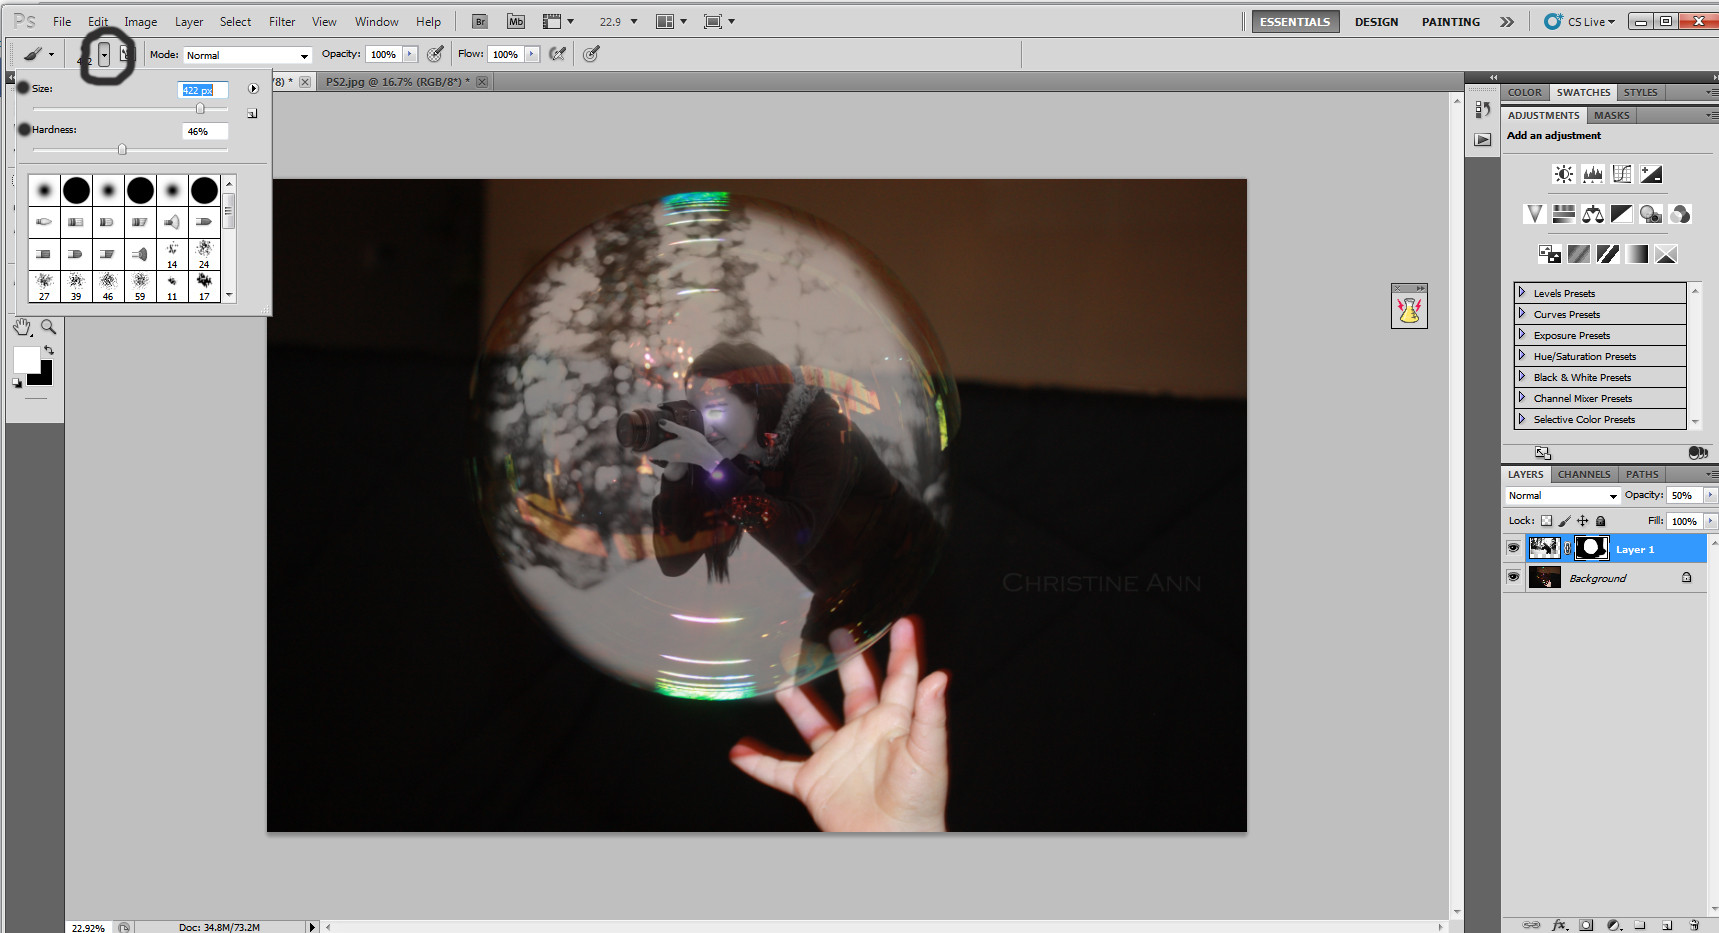
 Painting with the black brush to remove parts of the image
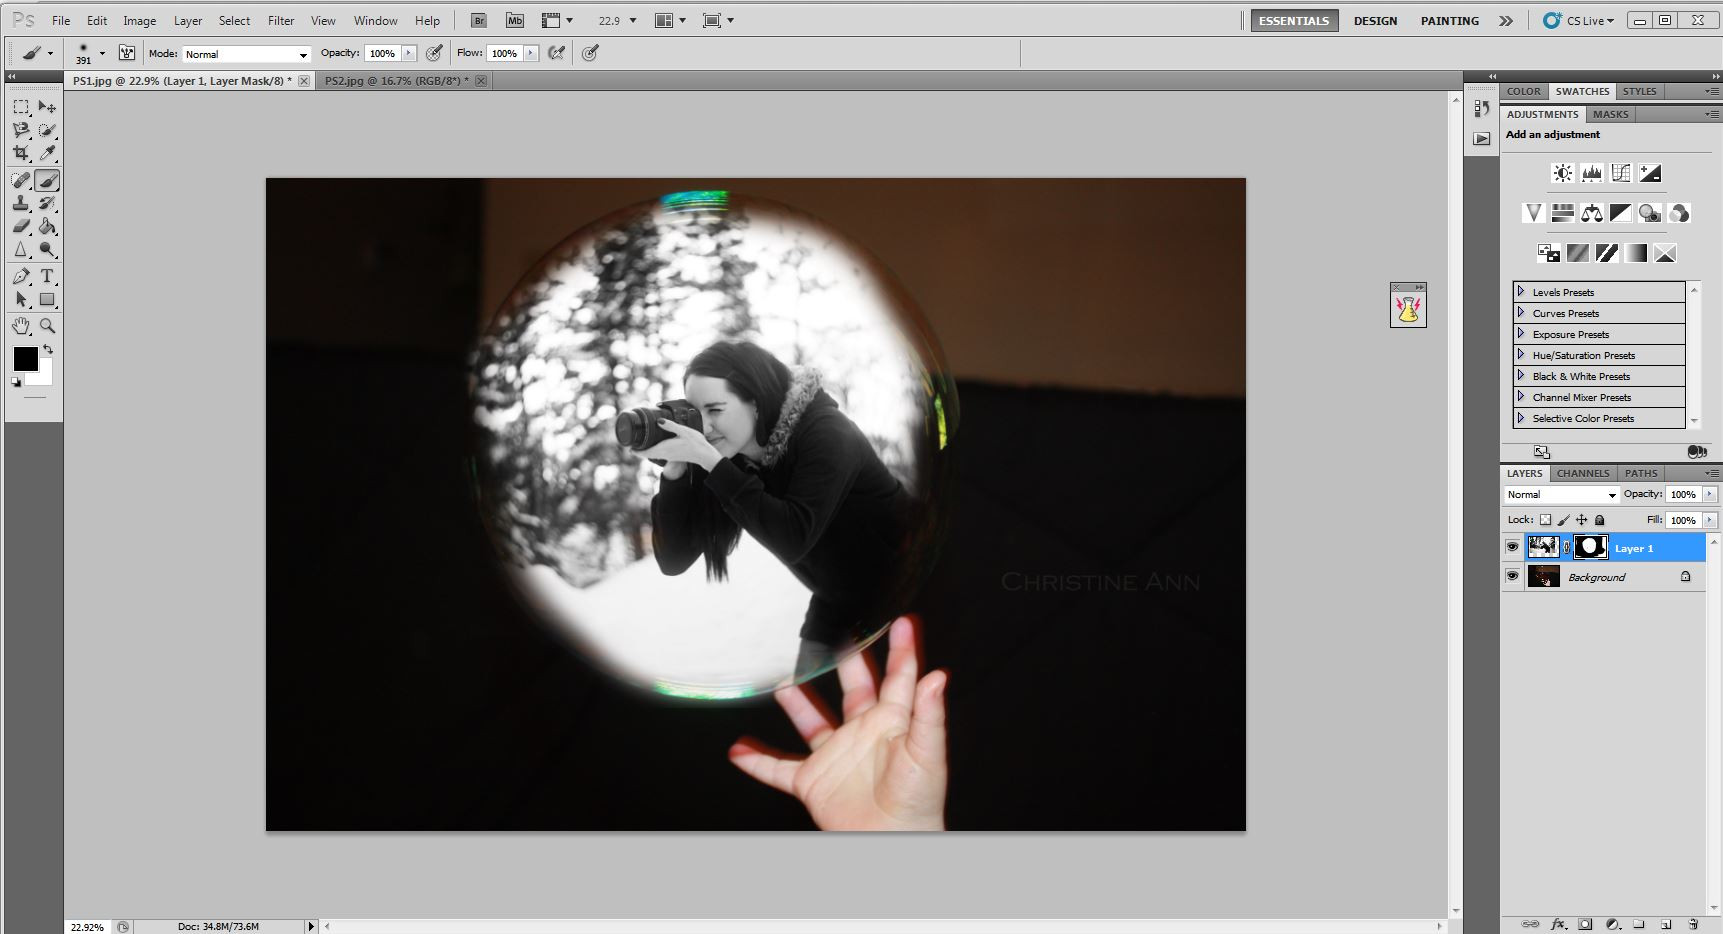
Using a black brush on the layer mask to selectively erase parts of the image, ensuring the photographer appears inside the bubble.
 Switching to the white brush to bring back parts of the image
Switching to a white brush to restore any accidentally erased areas, refining the composite’s accuracy.
 Bringing back some of the image to refine the composition
Restoring parts of the photographer’s image for a more refined integration with the bubble, improving the overall aesthetic.
 Reducing opacity to see the bubble below
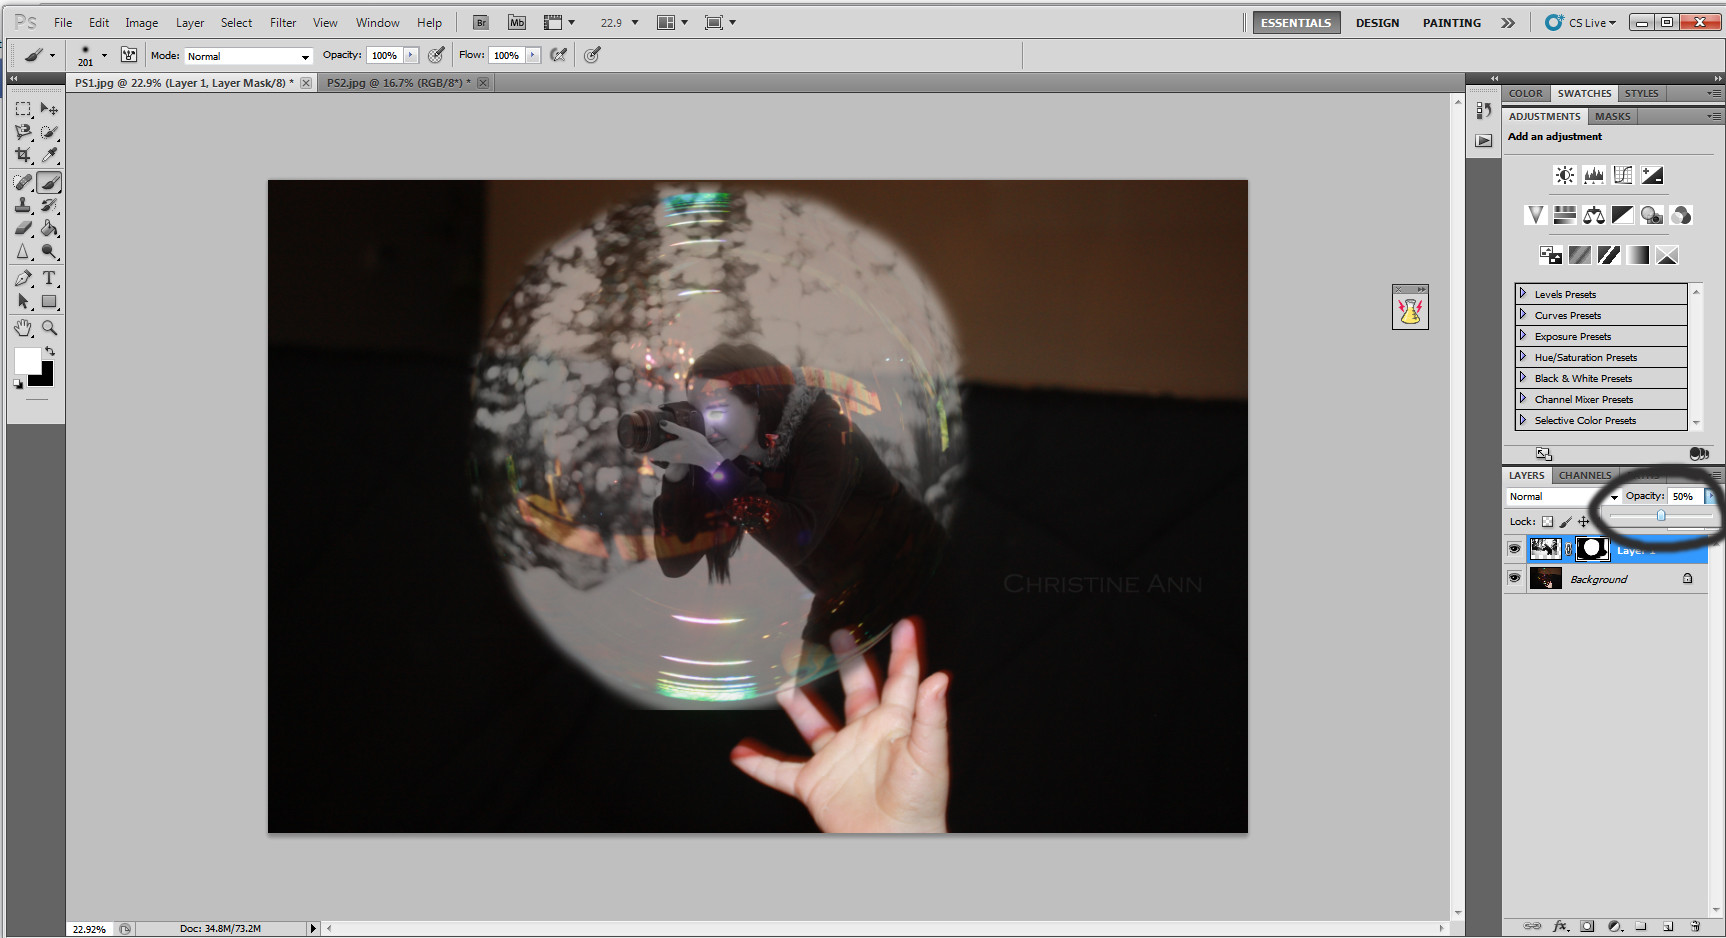
Reducing the layer’s opacity to view the bubble beneath, facilitating accurate alignment and positioning.
 Opacity reduced to better align the images
With reduced opacity, fine-tuning the alignment of the photographer inside the bubble for a polished look.
 Reducing brush opacity for subtle adjustments
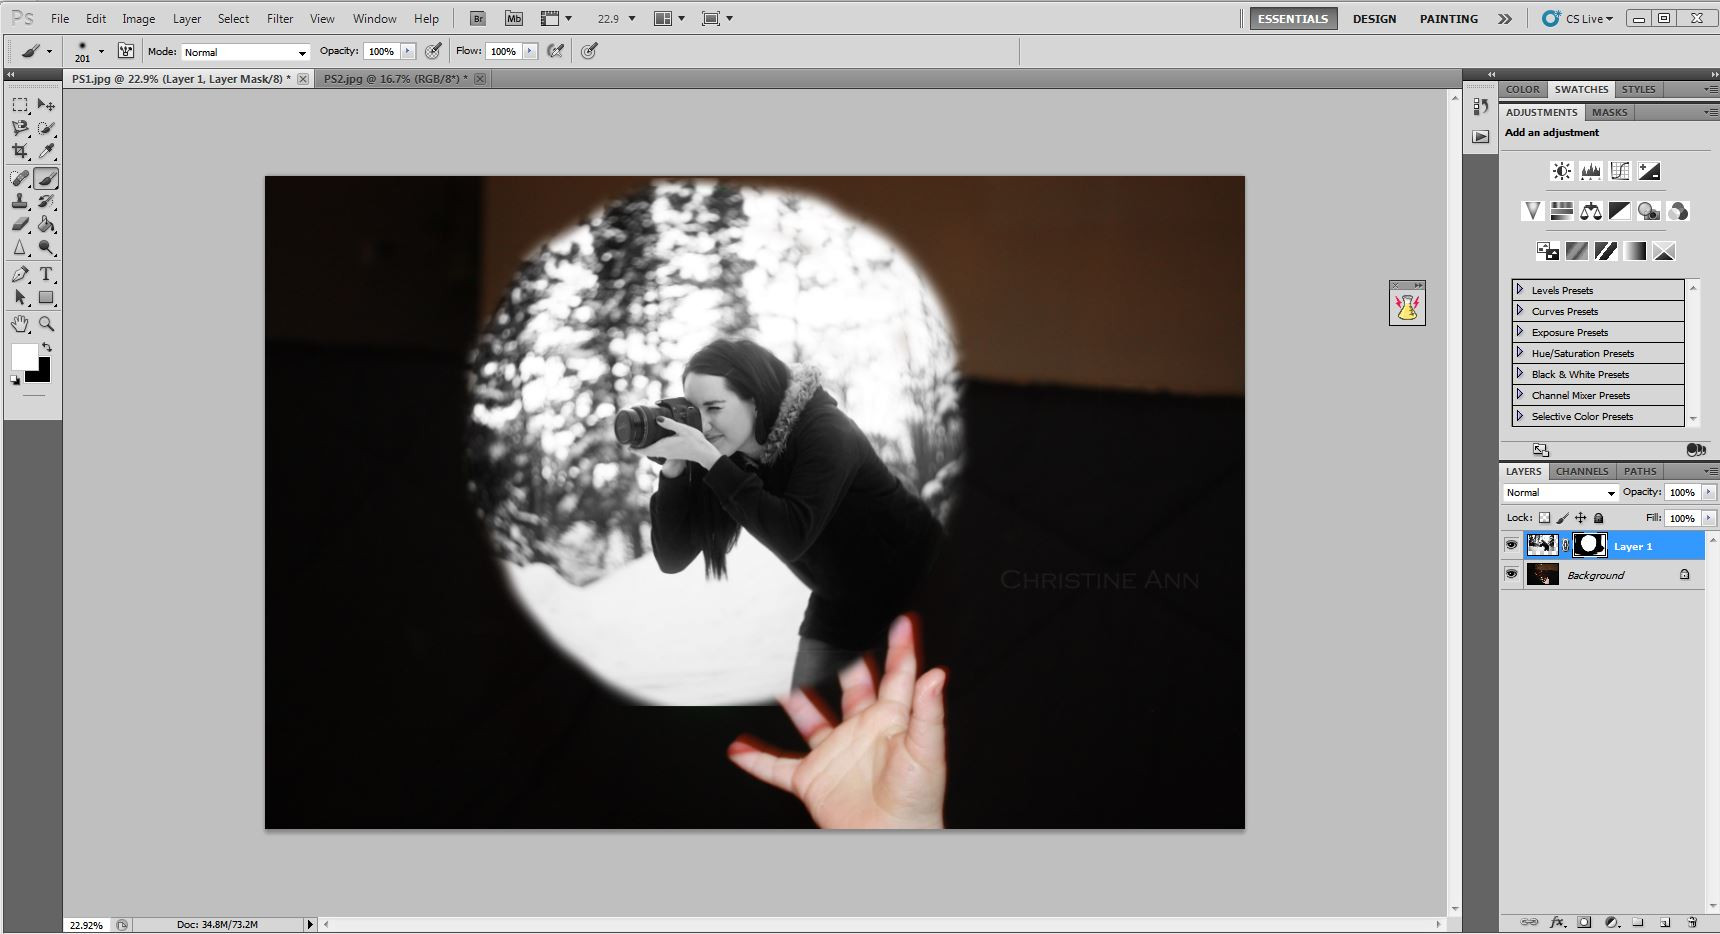
Adjusting the brush opacity for subtle blending, ensuring a seamless transition between the images.
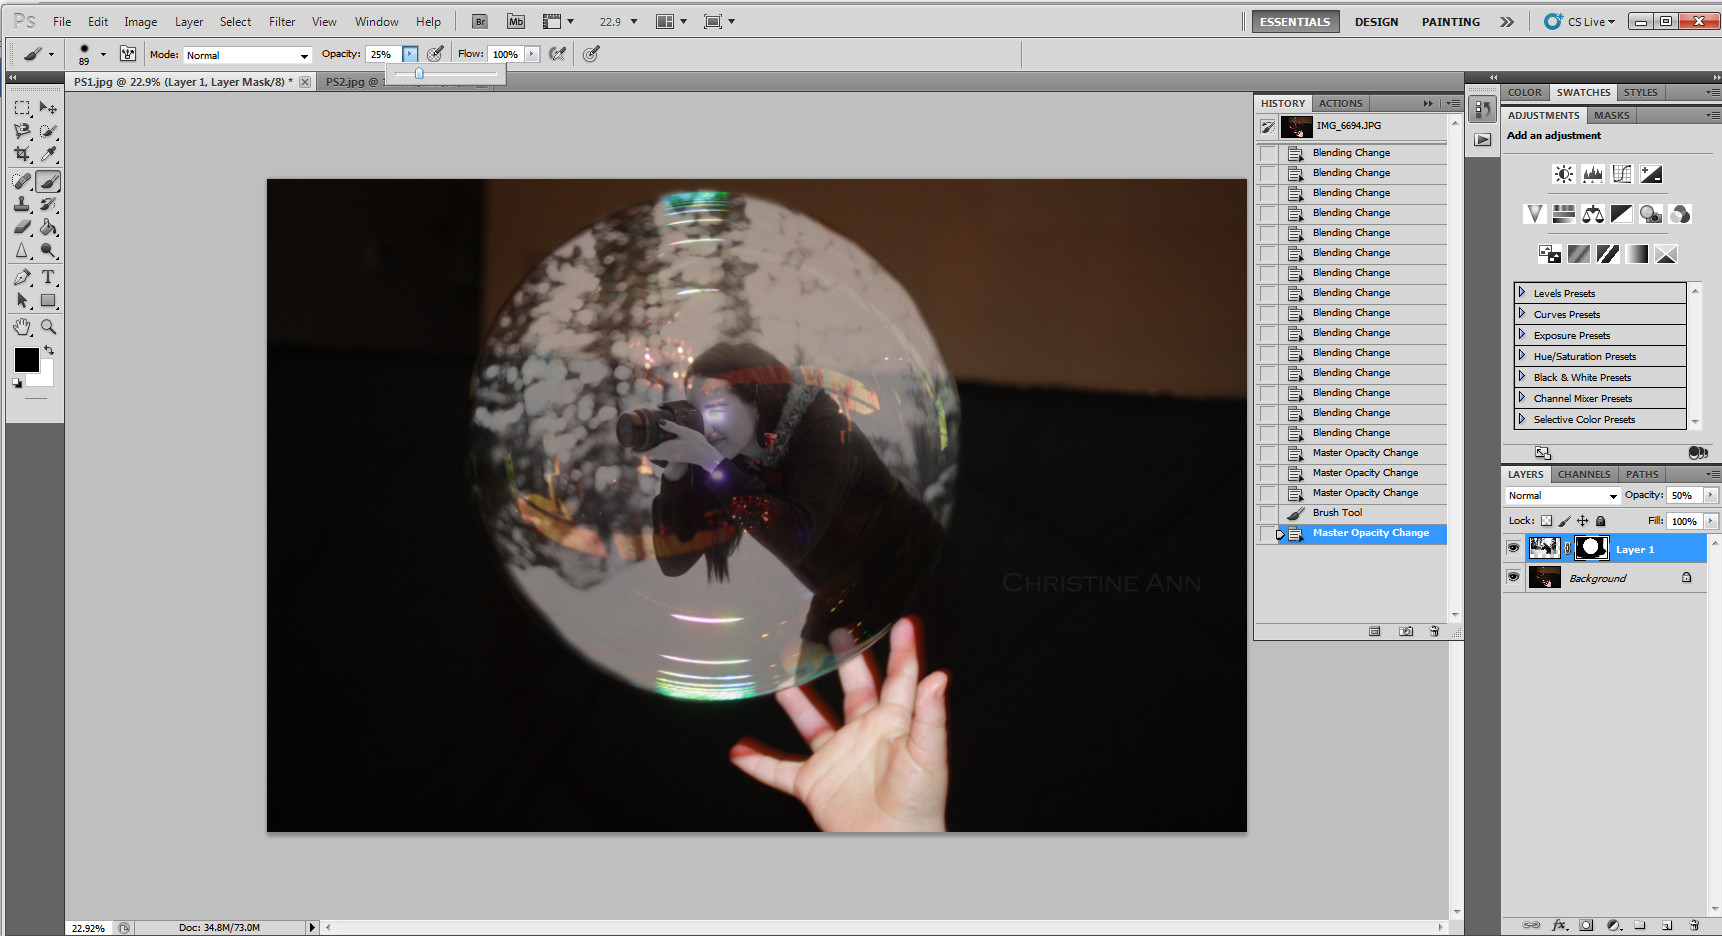 Applying subtle brush adjustments for a 3D look
Adding subtle touches with the brush to give the composite a 3D appearance, enhancing the final image.
 Applying the layer mask in Photoshop
Applying the layer mask to finalize the blending, ensuring the photographer is perfectly integrated within the bubble.
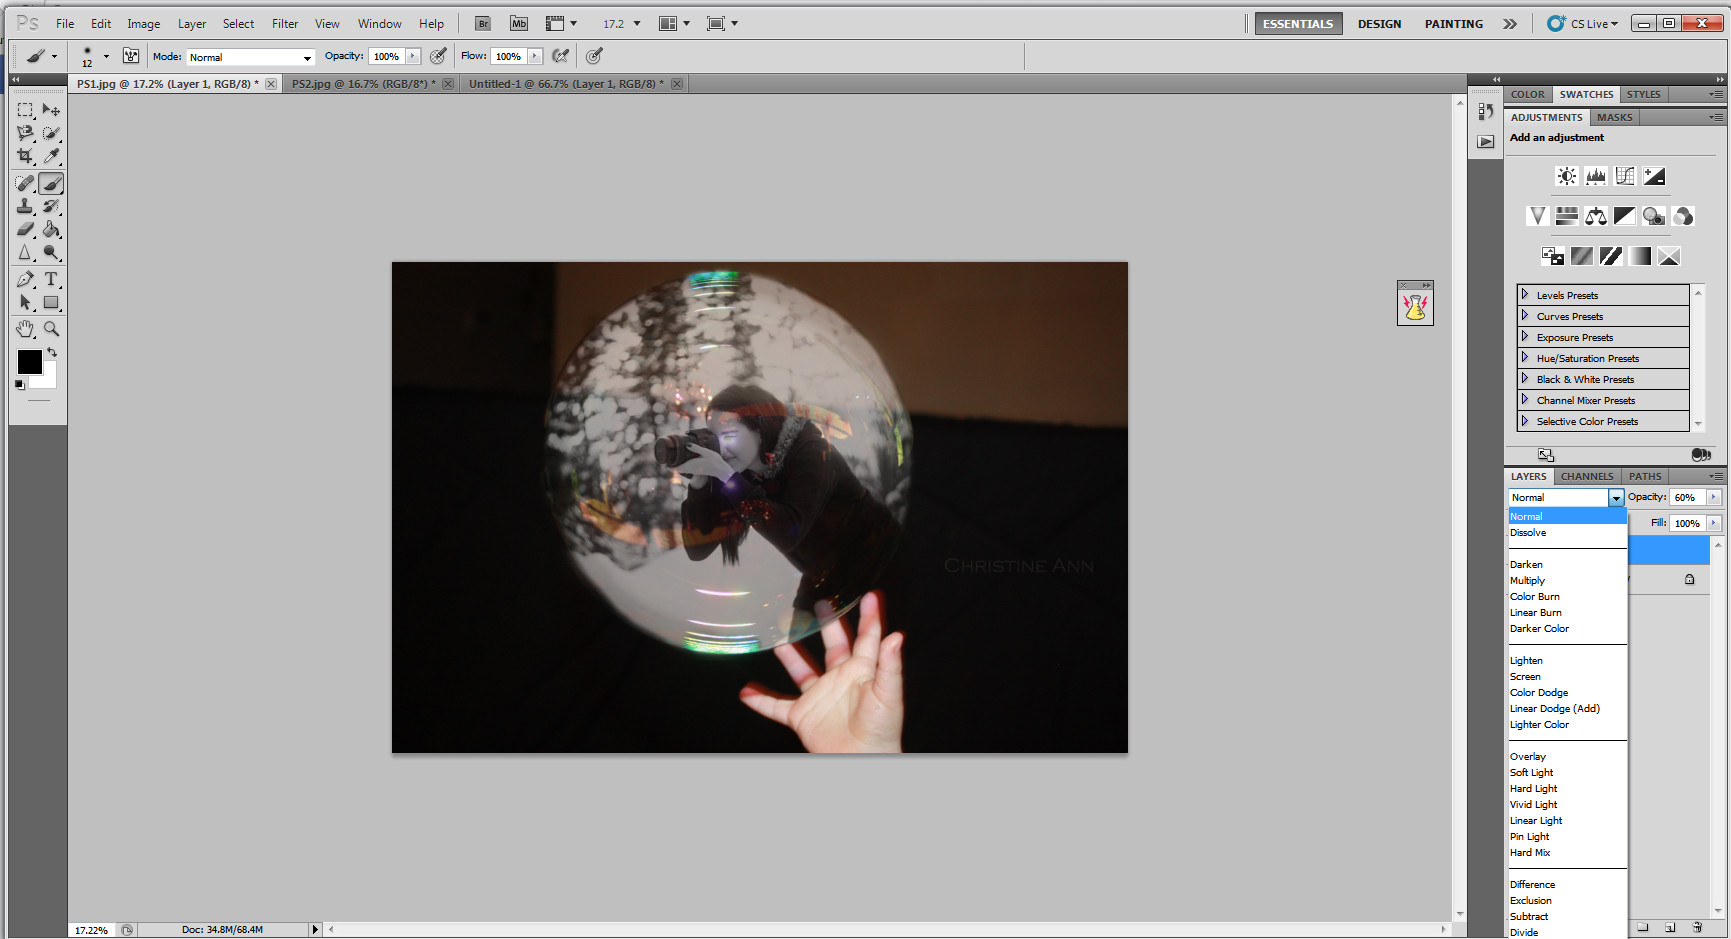
 Changing the layer to screen mode
Changing the layer mode to “Screen” for enhanced blending and visual effect in the composite.
 Adjusting the top layer opacity
Final opacity adjustments to refine the image’s overall look, balancing the visual elements.
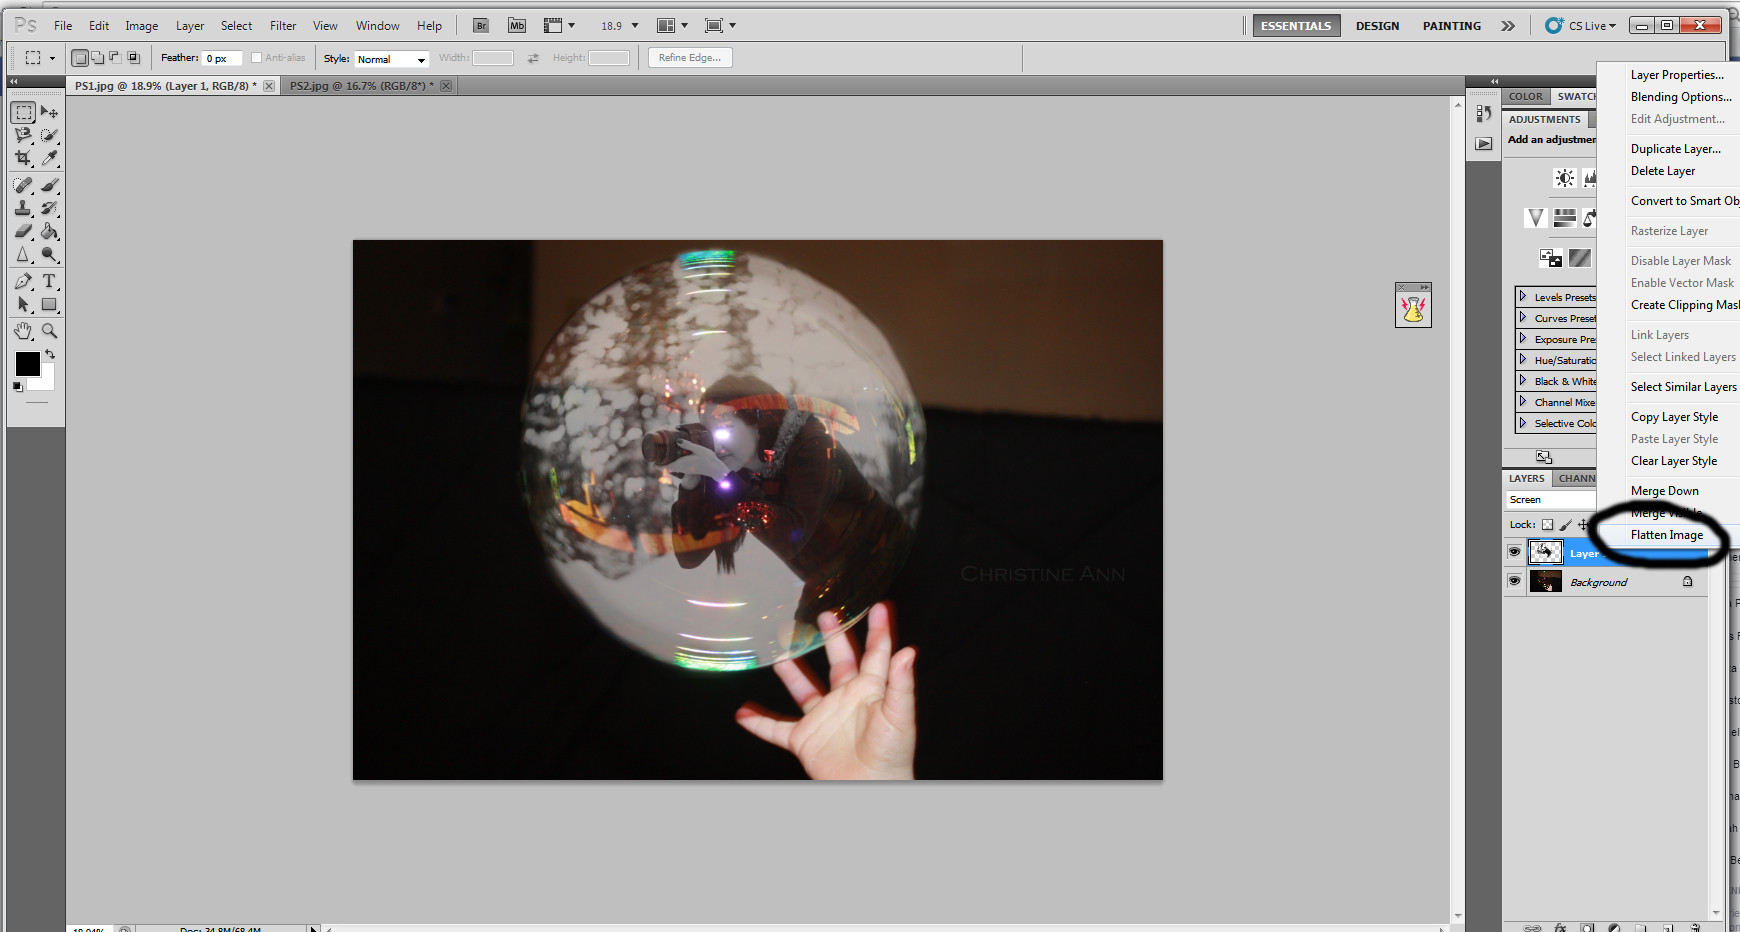
 Flattening the image in Photoshop
Flattening the image layers to prepare for final enhancements and adjustments.
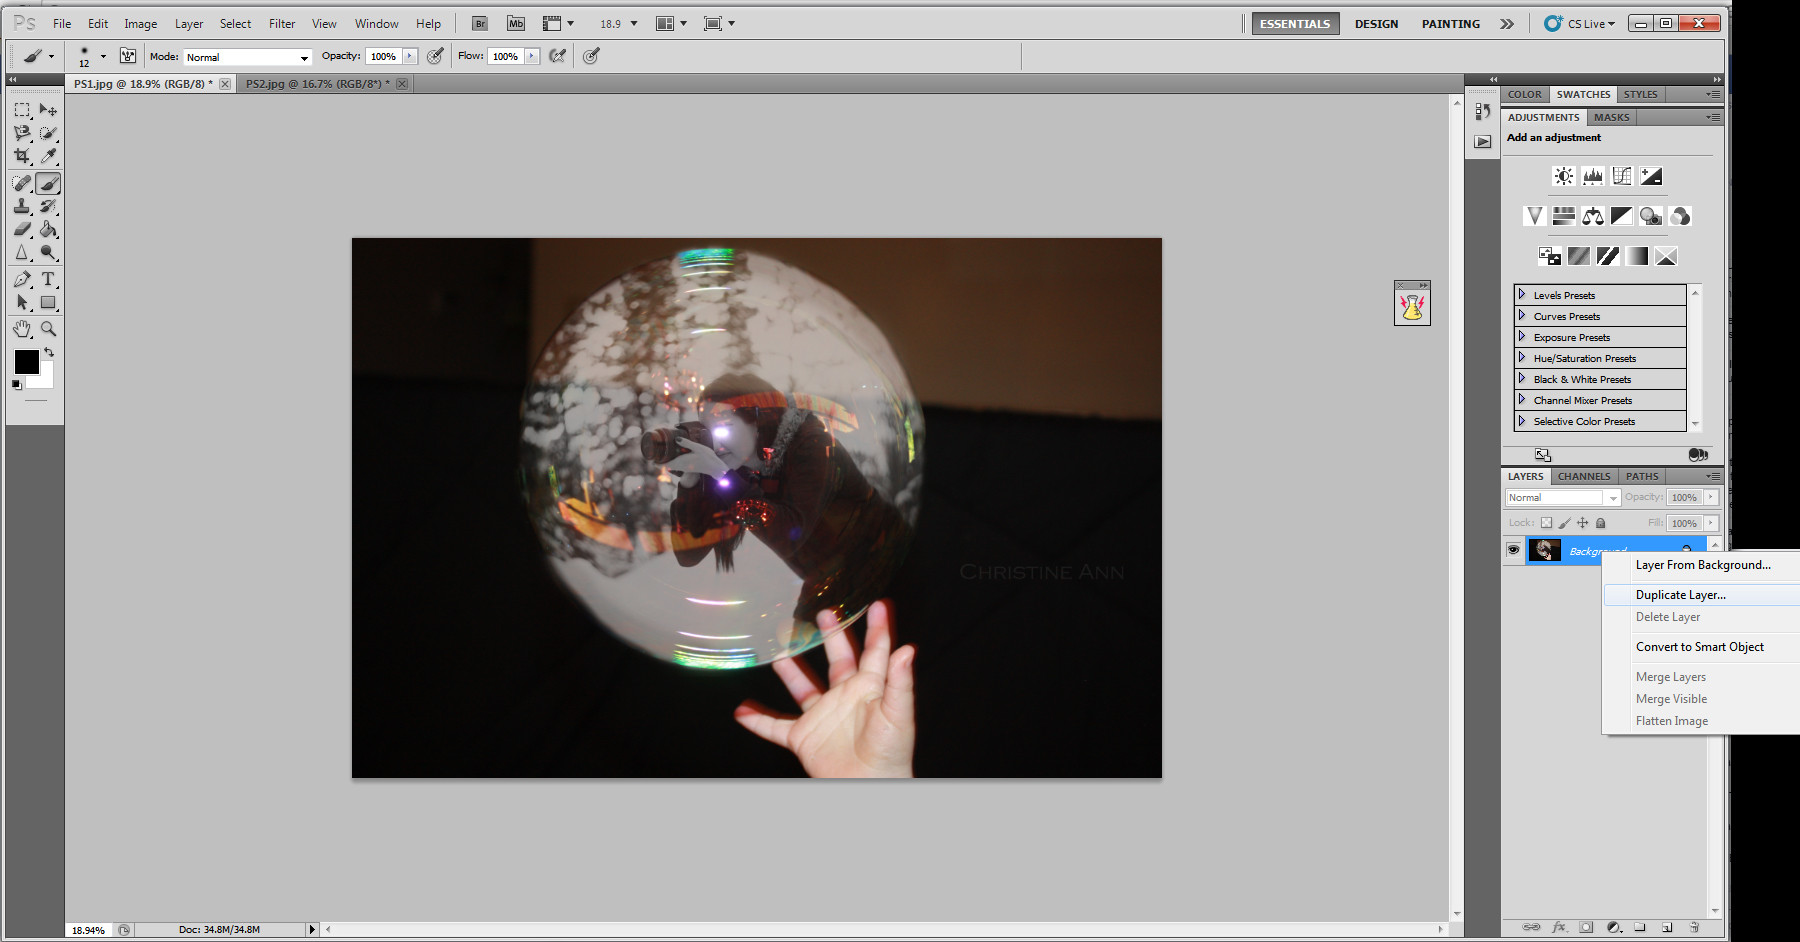
 Duplicating the layer for further editing
Duplicating the layer for non-destructive editing, enabling further enhancements without altering the original.
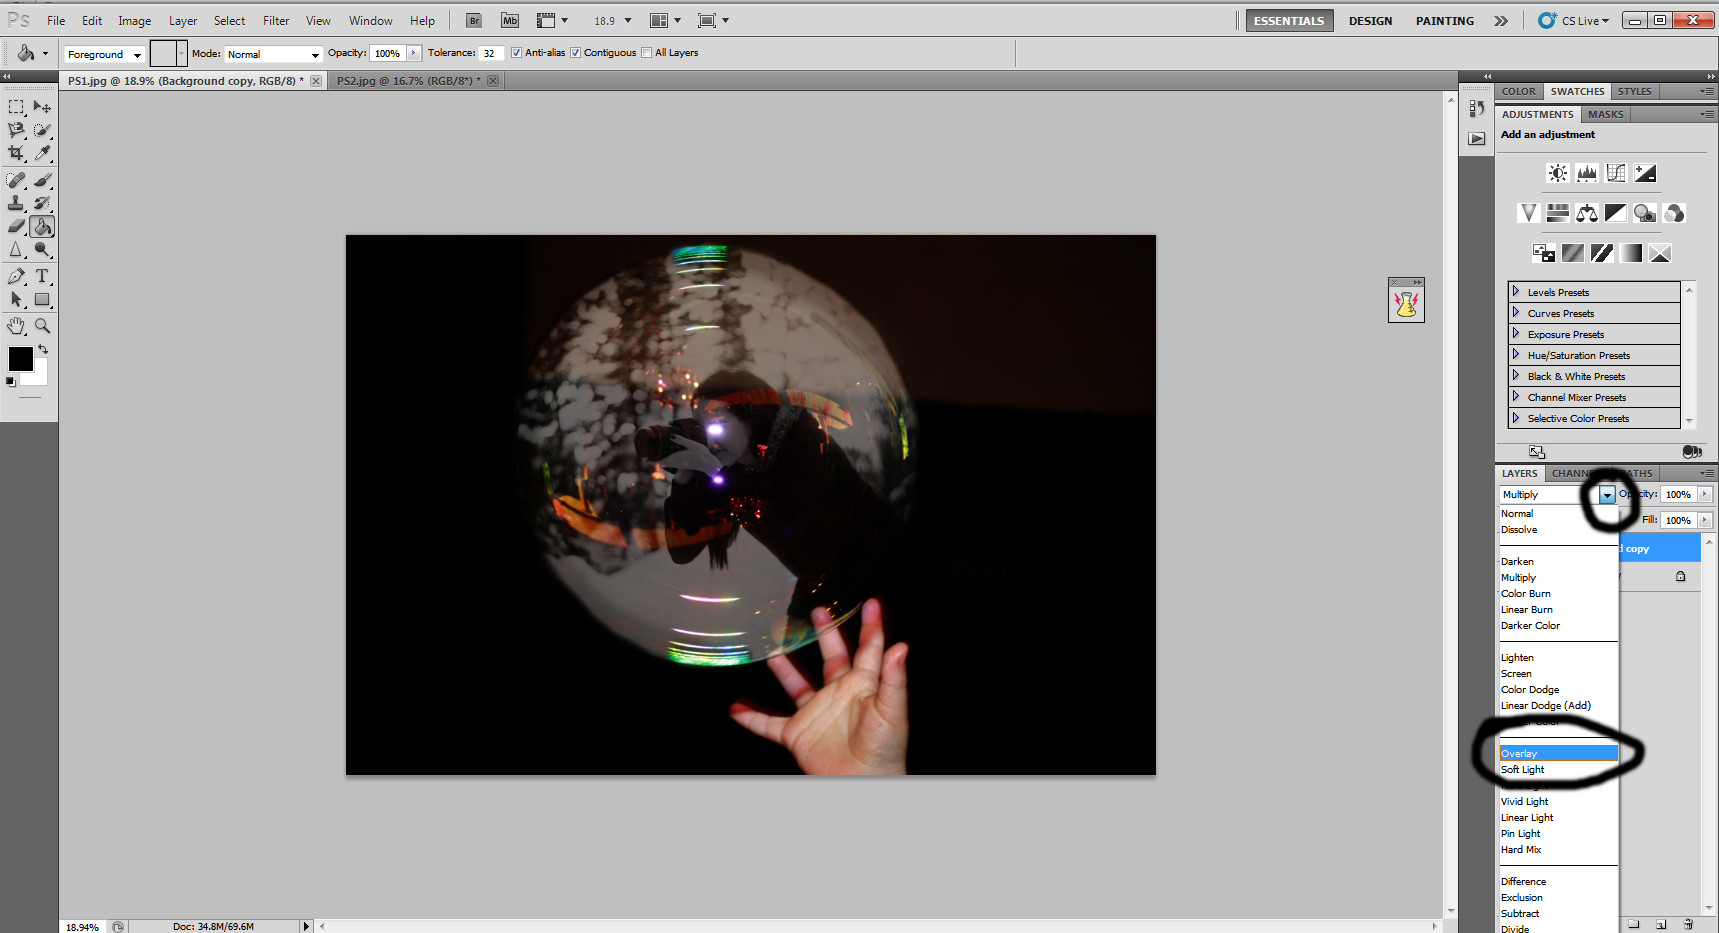
 Changing the layer to overlay mode
Setting the duplicated layer to “Overlay” mode, enhancing colors and sharpness for a more vibrant final image.