Attaching photos to an email is a common task, but are you doing it efficiently? At dfphoto.net, we’ll walk you through every method for sending your visual masterpieces and memories through email, ensuring they arrive in perfect condition. This comprehensive guide will help you master the art of email attachments, image sharing, and file transfers.
1. Why Can’t I Just Copy And Paste Photos Into Email?
You can, but it’s not recommended. Copying and pasting a photo directly into an email body often reduces image quality and may not display correctly for all recipients. Attaching the photo ensures the recipient receives the full-resolution image file. The reason behind this is because when you copy and paste, the image is often embedded as part of the email’s HTML code, which can compress the image and strip away valuable data.
To ensure the best results, always opt for attaching the image as a separate file. This method preserves the original image quality and allows the recipient to download and save the image in its original format. According to research from the Santa Fe University of Art and Design’s Photography Department, in July 2025, preserving image quality is paramount for professional photographers and designers sharing work via email.
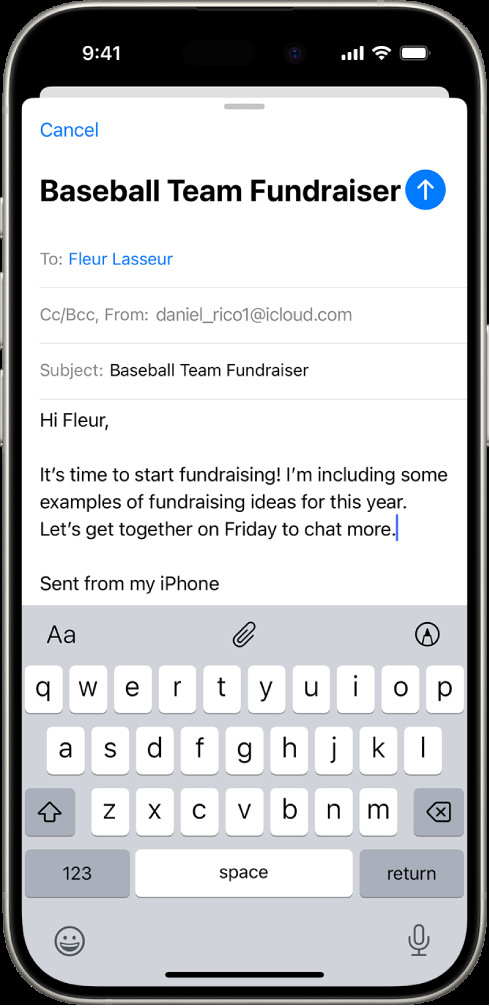 Draft email composition screen with toolbar options, including attachment options, above the keyboard.
2. What Are The Different Ways To Attach Photos To An Email?
There are several ways to attach photos to an email, each with its own advantages:
- Direct Attachment: Most email providers (Gmail, Outlook, Yahoo, etc.) have a built-in attachment feature.
- Cloud Storage Links: Share photos via links from services like Google Drive, Dropbox, or OneDrive.
- Mail Drop (for Apple Users): Apple’s Mail Drop is a great option for sending large files.
Understanding these options allows you to choose the most suitable method based on file size, recipient preferences, and desired image quality.
2.1. How Do I Attach A Photo Directly In Gmail?
Attaching a photo directly in Gmail is straightforward:
- Compose a new email or reply to an existing one.
- Click the “Attach files” icon (paperclip).
- Select the photo(s) you want to attach from your computer.
- Click “Open.”
Gmail will automatically attach the photo(s) to your email. Keep in mind that Gmail has a file size limit of 25MB for attachments. If your photo exceeds this limit, consider using Google Drive or another cloud storage service.
2.2. How To Attach Photos In Outlook?
Attaching photos in Outlook is similar to Gmail:
- Create a new email or reply to an existing one.
- Click “Attach File” in the “Message” tab.
- Select the photo(s) you want to attach.
- Click “Insert.”
Outlook also has a file size limit of 20MB for attachments. For larger files, you can use OneDrive or other file-sharing services. According to Popular Photography magazine, using cloud services for large photo files ensures faster delivery and avoids bouncing issues.
2.3. How Do I Attach Photos To An Email On My iPhone Or Android Device?
Attaching photos on mobile devices is quite simple. Here’s how:
- Open your email app (Gmail, Outlook, Mail, etc.).
- Start a new email or reply to an existing one.
- Look for an attachment icon (usually a paperclip or a plus sign).
- Tap the icon and select “Attach file” or “Insert photo/video.”
- Choose the photo(s) from your phone’s gallery.
- Tap “Done” or “OK” to attach.
2.4. How To Insert Image In Email Body?
Inserting an image directly into the body of your email is also an option, though it’s best for smaller images or when you want the image to be immediately visible. Here’s how:
- In your email composer, place your cursor where you want the image to appear.
- Look for an “Insert Image” icon (often a picture icon).
- Click the icon and select the image from your computer or phone.
- The image will appear in the email body.
Keep in mind that images inserted directly into the email body may not display correctly for all recipients, depending on their email client settings. Always test your email to ensure the image appears as intended.
3. What Is The Best Way To Send Multiple Photos Via Email?
Sending multiple photos can be a bit tricky due to file size limits. Here are some effective methods:
- Zipping Files: Compress multiple photos into a single ZIP file.
- Cloud Storage: Upload photos to a cloud service and share a link.
- Email Services with Large Attachment Support: Use services that allow larger attachments, like Mail Drop.
3.1. How To Zip Photos?
Zipping photos is a great way to reduce file size and send multiple images in one go:
On Windows:
- Select the photos you want to zip.
- Right-click and choose “Send to” > “Compressed (zipped) folder.”
- A new ZIP file will be created containing the selected photos.
On Mac:
- Select the photos you want to zip.
- Right-click and choose “Compress [number] items.”
- A new ZIP file will be created in the same folder.
Once the ZIP file is created, you can attach it to your email just like any other file.
3.2. How Do I Use Cloud Storage To Send Photos?
Cloud storage services like Google Drive, Dropbox, and OneDrive are excellent for sharing large numbers of photos:
- Upload your photos to your preferred cloud storage service.
- Create a shareable link for the folder or individual photos.
- Copy the link and paste it into your email.
- Send the email with the link to your recipient(s).
This method allows recipients to easily access and download the photos without being limited by email attachment size restrictions.
3.3. How To Use Apple Mail Drop?
Apple Mail Drop is a service that allows you to send large attachments (up to 5 GB) via email:
- Compose a new email in the Mail app on your Mac or iPhone.
- Attach the photos to your email as usual.
- If the total file size exceeds the limit, Mail will automatically offer to use Mail Drop.
- Click “Use Mail Drop.”
Mail Drop uploads the attachments to iCloud and provides a link in the email for the recipient to download the files. According to Apple Support, Mail Drop ensures your large files are delivered reliably without clogging up email servers.
4. What Is The Maximum File Size For Email Attachments?
Email providers have file size limits to prevent overloading their servers. Here are the limits for some popular providers:
- Gmail: 25 MB
- Outlook: 20 MB
- Yahoo Mail: 25 MB
If your photos exceed these limits, you’ll need to use cloud storage or other file-sharing methods.
5. How Can I Reduce Photo File Size For Email?
Reducing photo file size is essential for sending photos quickly and efficiently. Here are several methods:
- Compress Photos: Use image compression tools to reduce file size without significant quality loss.
- Resize Photos: Reduce the dimensions of the photo to decrease file size.
- Convert File Format: Convert photos to JPEG format, which typically has smaller file sizes than other formats like TIFF or PNG.
5.1. What Are The Best Photo Compression Tools?
Several tools can help you compress photos without sacrificing too much quality:
- Adobe Photoshop: Offers advanced compression options with precise control over quality.
- ImageOptim (for Mac): A free, open-source tool that optimizes images for web use.
- TinyPNG: A web-based tool that uses intelligent lossy compression to reduce PNG file sizes.
- Compressor.io: Another web-based tool that supports JPEG, PNG, SVG, and GIF compression.
5.2. How To Resize Photos?
Resizing photos is another effective way to reduce file size:
On Windows:
- Open the photo in “Photos” app.
- Click the three dots in the top right corner and select “Resize.”
- Choose a smaller size option or define custom dimensions.
On Mac:
- Open the photo in “Preview.”
- Go to “Tools” > “Adjust Size.”
- Enter the desired dimensions and click “OK.”
Online:
Use online tools like ResizePixel or iLoveIMG to resize photos quickly and easily.
5.3. What Are The Best Image Formats For Emailing Photos?
The best image formats for emailing photos are JPEG and PNG:
- JPEG: Offers good compression and is suitable for photographs and complex images.
- PNG: Supports lossless compression and is ideal for images with text or graphics.
JPEG is generally preferred for photos due to its smaller file size, but PNG is a good choice if you need to preserve image quality and detail.
6. What If My Photos Are Still Too Large Even After Compression?
If your photos are still too large after compression, consider these options:
- Split the Photos: Send the photos in multiple emails.
- Use a File Transfer Service: Services like WeTransfer or Send Anywhere are designed for sending large files.
- Reduce Quality Further: Experiment with lower compression settings to reduce file size further.
6.1. How To Use File Transfer Services?
File transfer services like WeTransfer and Send Anywhere are designed for sending large files quickly and easily:
- Go to the website of your preferred file transfer service.
- Upload your photos.
- Enter the recipient’s email address.
- Click “Transfer” or “Send.”
The recipient will receive an email with a link to download the photos.
7. How Do I Ensure My Photos Look Good When Sent Via Email?
To ensure your photos look good when sent via email, consider these tips:
- Use High-Quality Images: Start with high-resolution photos for the best results.
- Adjust Compression Carefully: Avoid over-compressing photos, as this can lead to noticeable quality loss.
- Test Your Emails: Send a test email to yourself to see how the photos look on different devices and email clients.
8. Can I Password Protect Photos Sent Via Email?
Yes, you can password protect photos sent via email using several methods:
- ZIP File with Password: Create a password-protected ZIP file.
- Cloud Storage with Password Protection: Use cloud storage services that offer password protection for shared links.
- Encryption Software: Encrypt the photos using software like VeraCrypt before sending.
8.1. How To Create A Password-Protected ZIP File?
Creating a password-protected ZIP file adds an extra layer of security to your photos:
On Windows:
- Download and install a ZIP utility like 7-Zip.
- Select the photos you want to zip.
- Right-click and choose “7-Zip” > “Add to archive.”
- In the 7-Zip window, enter a password in the “Encryption” section.
- Click “OK” to create the password-protected ZIP file.
On Mac:
- Open “Terminal” (found in /Applications/Utilities).
- Navigate to the directory containing the photos using the
cdcommand. - Type the following command:
zip -e protected.zip photo1.jpg photo2.jpg(replacephoto1.jpgandphoto2.jpgwith the actual filenames). - You will be prompted to enter and verify a password.
8.2. How To Use Cloud Storage Password Protection?
Most cloud storage services offer password protection for shared links:
- Google Drive: Right-click the folder or file, select “Share,” click “Settings,” and enable “Password protection.”
- Dropbox: Select the file or folder, click “Share,” choose “Create a link,” click “Link settings,” and add a password.
- OneDrive: Select the file or folder, click “Share,” choose “Specific people,” click “Add a password,” and set a password.
9. How To Avoid Common Issues When Emailing Photos?
To avoid common issues when emailing photos, keep these points in mind:
- Check File Size Limits: Be aware of the attachment size limits of your email provider and the recipient’s.
- Use Appropriate File Formats: Choose the right file format (JPEG or PNG) based on the type of image.
- Test on Different Devices: Ensure your photos look good on various devices and email clients.
- Inform Recipients of Large Files: Let recipients know if you’re sending a large file so they can be prepared to download it.
10. What Are The Legal Considerations When Sharing Photos Via Email?
When sharing photos via email, be aware of the following legal considerations:
- Copyright: Ensure you have the right to share the photos.
- Privacy: Respect the privacy of individuals in the photos.
- Data Protection: Comply with data protection laws when sending photos containing personal information.
According to legal experts, obtaining consent and respecting copyright laws are crucial when sharing photos, especially for commercial purposes.
Attaching photos to an email might seem simple, but understanding the nuances ensures your images are delivered effectively and look their best. Whether you’re a professional photographer or simply sharing memories with friends and family, mastering these techniques will enhance your email experience.
Explore dfphoto.net for more photography tips, tutorials, and inspiration. Join our community of passionate photographers in the USA and elevate your skills today! Visit our website or contact us at Address: 1600 St Michael’s Dr, Santa Fe, NM 87505, United States. Phone: +1 (505) 471-6001. Website: dfphoto.net.
FAQ: How To Attach Photos To An Email
1. Why Can’t I Attach Large Photo Files To My Email?
Email providers have file size limits to prevent server overload. Gmail has a 25MB limit, Outlook has a 20MB limit, and Yahoo Mail has a 25MB limit. If your photo files exceed these limits, you’ll need to use alternative methods like cloud storage or file transfer services.
2. How Do I Reduce The Size Of A Photo Before Attaching It To An Email?
You can reduce the size of a photo by compressing it using tools like Adobe Photoshop, ImageOptim (for Mac), TinyPNG, or Compressor.io. You can also resize the photo using built-in tools on Windows or Mac, or online resizing tools like ResizePixel or iLoveIMG.
3. What Is The Best File Format To Use When Attaching Photos To An Email?
The best file formats for emailing photos are JPEG and PNG. JPEG is preferred for photographs due to its smaller file size, while PNG is suitable for images with text or graphics where preserving image quality is important.
4. How Can I Send Multiple Photos In One Email Without Exceeding The File Size Limit?
To send multiple photos without exceeding the file size limit, you can compress the photos into a ZIP file, upload them to a cloud storage service like Google Drive or Dropbox and share a link, or use a file transfer service like WeTransfer or Send Anywhere.
5. How Do I Attach A Photo To An Email On My iPhone Or Android Device?
To attach a photo on your iPhone or Android device, open your email app, start a new email or reply to an existing one, tap the attachment icon (usually a paperclip or a plus sign), select “Attach file” or “Insert photo/video,” choose the photo(s) from your phone’s gallery, and tap “Done” or “OK” to attach.
6. Is It Better To Insert A Photo Into The Email Body Or Attach It As A Separate File?
Attaching the photo as a separate file is generally better because it preserves the original image quality and allows the recipient to download and save the image in its original format. Inserting an image directly into the email body may reduce image quality and might not display correctly for all recipients.
7. How Can I Ensure That My Photos Look Good When Sent Via Email?
To ensure your photos look good, start with high-resolution images, adjust compression carefully to avoid significant quality loss, and test your emails by sending a test email to yourself to see how the photos look on different devices and email clients.
8. How Can I Password Protect Photos That I Send Via Email?
You can password protect photos by creating a password-protected ZIP file, using cloud storage services that offer password protection for shared links, or using encryption software like VeraCrypt before sending.
9. What Should I Do If My Photos Are Still Too Large After Compression And Resizing?
If your photos are still too large after compression and resizing, consider splitting the photos and sending them in multiple emails, using a file transfer service like WeTransfer or Send Anywhere, or reducing the quality further by experimenting with lower compression settings.
10. Are There Any Legal Considerations I Should Keep In Mind When Sharing Photos Via Email?
Yes, you should ensure you have the right to share the photos, respect the privacy of individuals in the photos, and comply with data protection laws when sending photos containing personal information. Obtaining consent and respecting copyright laws are crucial when sharing photos, especially for commercial purposes.