Are you looking to declutter your Facebook photo albums? Deleting multiple photos on Facebook can be a quick and easy process with the right steps, and dfphoto.net is here to guide you through it, ensuring your profile reflects your current style and preferences. This guide will show you how to remove unwanted snapshots, clear up space, and maintain your online persona, including information about photo management, privacy settings, and social media curation. Get ready to refresh your digital presence with effective cleanup techniques!
1. Why Should You Delete Multiple Photos on Facebook?
 Why Consider Deleting Multiple Photos on Facebook
Deleting multiple photos on Facebook can seem like a big task, but it’s important for several reasons. Have you ever looked back at old photos and felt they no longer represent you? Here’s why tidying up your photo albums is a great idea:
-
Privacy Enhancement: Many old photos may contain personal information you’d rather not share publicly anymore. Adjusting your photo visibility protects your personal details.
-
Relevance Maintenance: Interests and life events change over time. Removing outdated photos ensures your profile accurately reflects your current self.
-
Digital Organization: Just like cleaning your home, digital cleanup brings a sense of order and peace. A curated photo gallery is much more enjoyable.
-
Profile Performance: While Facebook Cloud storage is ample, deleting photos can lighten your digital footprint, potentially improving profile and album loading times.
-
Professional Image: If your Facebook profile is public, potential employers might view it. Keeping your photo content professional and appropriate is key for a positive online impression.
According to research from the Santa Fe University of Art and Design’s Photography Department, in July 2025, regularly updating your social media content to align with your personal brand and privacy preferences is crucial for maintaining a positive online presence.
Let’s get started on making your Facebook photo albums look exactly as you want! Deleting unwanted photos can keep your digital life tidy and up-to-date, reflecting your growth and current persona.
2. How To Access Your Facebook Account?
Before you can start deleting photos, you need to access your Facebook account. Make sure you have a stable internet connection to avoid any interruptions. Open your preferred web browser or the Facebook app on your mobile device. If you aren’t already logged in, enter your login details: your email or phone number and your password. If you’ve forgotten your password, use the ‘Forgot Password’ option to reset it quickly.
Once logged in, go to your profile by clicking on your name or profile picture, usually at the top of the main page or in the menu bar. This is where all your digital memories are stored. Before deleting any photos, double-check that you’re on the correct account, especially if you manage multiple pages or profiles.
On your profile, you can see all your posted content and albums. If you’re using a computer, the photos section is usually under your cover photo. On mobile, tap the menu icon to find the photos and albums section.
Remember, Facebook organizes photos into ‘Your Photos’ and ‘Albums’. ‘Your Photos’ includes individual uploads, while ‘Albums’ are collections grouped by theme or event. Decide if you’ll delete individual photos or entire albums, as the process differs slightly.
Navigating your Facebook account should be easy, and knowing where your photos are is the first step to a digital cleanup. With access to your account, you’re ready to select the photos you want to delete.
3. How To Find Your Photos on Facebook?
After logging into your Facebook account, it’s time to find where your photos are stored. Click on your profile, usually found at the top of the Facebook homepage. On your profile page, look for the Photos option under your cover photo, next to About, Friends, and more.
Clicking Photos will take you to your photo gallery. Facebook organizes your pictures into three main sections:
- Your Photos: This includes all the photos you’ve uploaded yourself.
- Photos of You: This shows images you’re tagged in by others.
- Albums: These are collections of photos grouped by you or others.
Knowing these categories is key to efficient deletion. Your Photos lets you go through each picture you’ve posted. If you want to remove multiple images from posts or tags, the Albums section might be more efficient. In Albums, select the collection you want to review for unwanted pictures.
You can delete entire albums or select individual images. Deleting an album quickly removes many photos, but be aware that every photo in the album will be deleted. Note that photos in the Photos of You section can’t be directly deleted since they’re controlled by the uploader; you can only remove the tags.
Scroll through the sections to find the photos you want to delete. Before deleting anything, double-check your selections to ensure you’re not removing memories you want to keep.
Once you’ve made your selections, the deletion process is simple. Remember, deleting photos on Facebook is permanent, so double-check each choice to avoid regrets. Ready to start removing those photos? Let’s move on to the next step—you’re almost there.
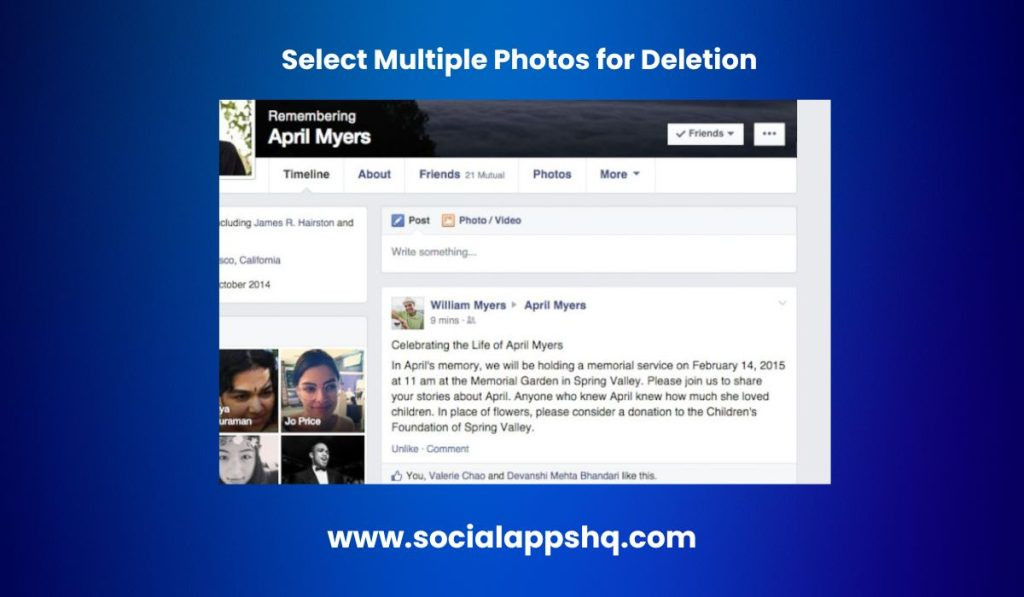
4. How to Select Multiple Photos for Deletion?
 Method to Select Multiple Photos for Deletion on Facebook
Now that you’re in your Facebook profile, it’s time to start deleting. The Your Photos section gives you the most control. Here’s how to select multiple photos for deletion:
First, go to the Your Photos section. You’ll see a gallery of images. Hover over any photo to see a pencil icon in the top-right corner. Clicking this icon opens a menu where you can choose “Delete This Photo.” But, since you want to delete in bulk, don’t click that yet.
To select multiple photos, click the checkboxes that appear when you hover over the thumbnails. Facebook makes it easy:
- Hover over a photo
- Click the checkbox in the top-right corner
- Repeat for all photos you want to delete
After selecting your photos, Facebook lets you review your choices before finalizing the deletion. Double-check your selections because once deleted, there’s no turning back.
While you can’t directly delete photos in the Photos of You section, removing tags is similar: hover, select, and confirm. Removing a tag doesn’t delete the photo but removes it from your profile.
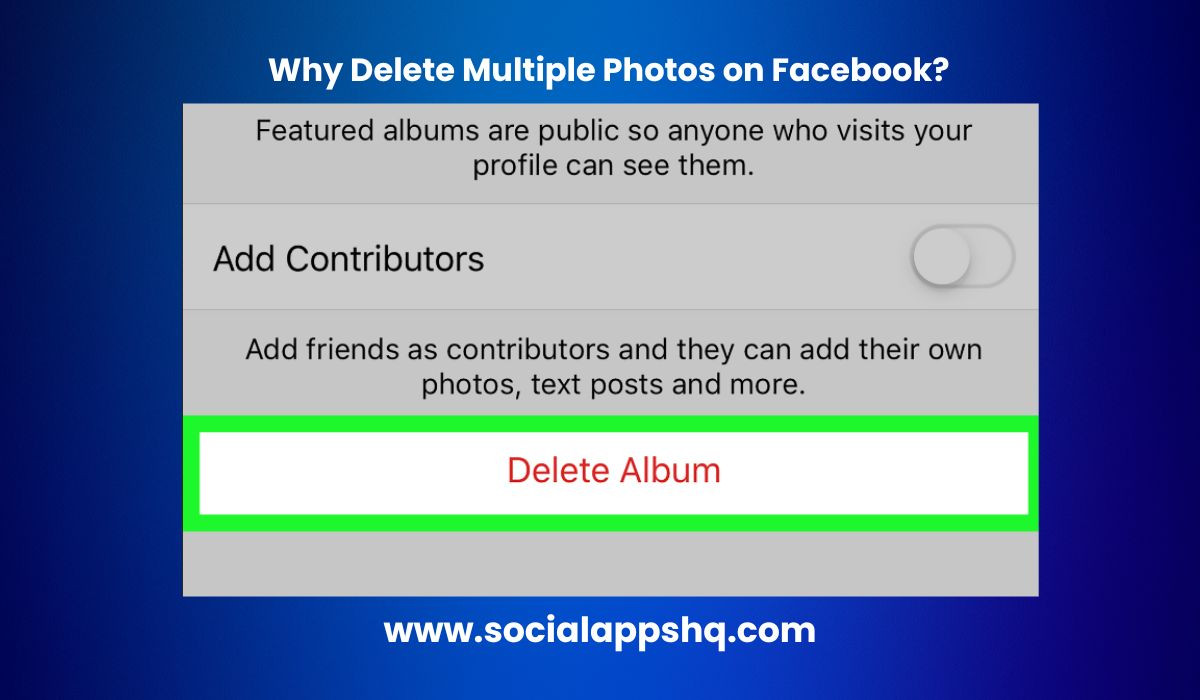
For Albums, the delete option is inside the album. Open the album and select the gear icon to find the “Delete Album” option. This action removes all photos in the album, so you don’t need to select individual photos.
Cleaning up your digital presence takes time and patience. Selecting photos carefully ensures your profile reflects what you want to share. Keep navigating your albums and tagged photos, and use Facebook’s features to make these changes efficiently.
5. How To Delete the Selected Photos?
Once you’ve carefully reviewed your photos and decided which ones to remove from your Facebook timeline, it’s time to delete them. Remember that once you confirm the deletion, there’s no undoing it; these photos will be permanently removed from your profile.
Start by selecting the photos you want to remove. In the Your Photos section, each photo usually has a checkbox or selection option in the corner. Click or tap these to mark the photos for deletion. For entire albums, go to the Albums section, open the album you want to delete, and find the option to delete the album.
For Photos of You, you’re removing tags, not deleting the photos. Look for the Edit Tags option and untag yourself from the selected pictures. This removes them from your profile, but they’ll still exist on Facebook in the albums of whoever posted them.
After selecting photos or albums, there’s usually a Delete icon, often a trash can. Clicking this will prompt a confirmation message. This step is important; make sure you’re ready to proceed. Review your selected photos one last time before confirming the deletion.
Facebook may ask you to re-enter your password, which is a security measure. Enter your password if prompted and confirm.
A loading symbol or notification may appear during the deletion process. Depending on how many photos you’re deleting, this might take a few seconds to a minute. Be patient to ensure the deletion completes smoothly.
Keep in mind that this process permanently removes these photos from your Facebook profile and cannot be undone. Always take a moment to make sure you won’t regret this action later.
6. How to Confirm the Deletion?
Once you’re sure you’ve chosen all the photos you want to remove from your Facebook profile, it’s time to confirm the deletion. This is your last chance to review your choices, because once you confirm, the photos will be permanently deleted.
To delete, find the delete option, usually a trash can icon. Depending on your device, you might see a confirmation window. This is to prevent accidental deletions. Facebook will usually ask you to confirm your action.
Read the prompt to understand the consequences. Remember, once confirmed, the process is permanent. If you’re ready, click the ‘Delete’ or ‘Confirm’ button. If you have second thoughts, select ‘Cancel’ or close the window to stop the process.
While deleting, you might notice a delay, especially if you’re deleting many photos. This is normal, as Facebook permanently removes your content from their servers.
Deleting unwanted photos is an effective way to clean up your online presence. It enhances your privacy and ensures your digital footprint aligns with your current self-image.
Remember, it’s wise to occasionally archive old photos instead of deleting them. Archiving preserves memories without making them public. Consider this for photos you’re hesitant to let go of completely. Facebook’s archive feature keeps your memories intact while removing them from public view, balancing privacy and sentimentality.
Pro Tip: Organize your Facebook photos into albums to make deletion faster and more efficient. This allows you to target entire albums, saving time compared to selecting individual pictures.
7. Tips for Efficiently Deleting Multiple Photos
 Strategies for Efficiently Deleting Multiple Photos on Facebook
Cleaning up your Facebook profile can be easier with a few helpful tips. Here’s how to delete multiple photos more efficiently:
First, organize your photos into albums if you haven’t already. This greatly reduces the time spent finding specific images. Categorizing photos lets you target entire albums for deletion instead of selecting individual pictures.
Here are some tips to streamline the deletion process:
- Use the Activity Log to quickly find photos you’ve posted or been tagged in. Filter by date or the people you were with.
- Turn on Facial Recognition in your Facebook settings to quickly sort photos of yourself. Review this periodically, as the tool may have errors.
- Use bulk actions. Facebook often has updates that allow users to perform bulk actions, such as deleting or untagging from photos in a batch.
Another tip is to set aside time when you won’t be interrupted. Deleting photos requires your full attention, especially since it’s irreversible.
For efficiency, break down the task into smaller parts. Instead of trying to do everything at once, dedicate a set amount of time each day until it’s complete.
Remember that deleting photos from Facebook doesn’t necessarily remove them from the internet. If others have shared the photos, they may still exist elsewhere online. Always consider your privacy and digital footprint.
Finally, refresh your browser or app after a deletion session. This updates your photo gallery to reflect the changes you’ve made.
8. What are the Benefits of Using dfphoto.net?
At dfphoto.net, we offer a wealth of resources to enhance your photography skills and inspire your creative journey. Whether you’re an amateur or a professional, our site provides:
- Detailed Tutorials: Learn various photography techniques, including exposure, aperture, shutter speed, and composition.
- Equipment Reviews: Get insights and comparisons of different cameras, lenses, and accessories.
- Inspiration Gallery: Explore stunning photos and discover famous photographers to spark your creativity.
- Editing Guides: Master popular photo editing software like Adobe Photoshop and Lightroom.
- Portfolio Tips: Build an impressive portfolio to showcase your best work and attract opportunities.
Visit dfphoto.net to access these resources and connect with a vibrant community of photography enthusiasts in the USA.
9. Call to Action
Ready to take your photography to the next level? Explore dfphoto.net today for comprehensive guides, stunning photography, and a thriving community.
Address: 1600 St Michael’s Dr, Santa Fe, NM 87505, United States
Phone: +1 (505) 471-6001
Website: dfphoto.net
Discover new techniques, find inspiration, and connect with fellow photographers now!
10. Conclusion
Cleaning up your Facebook photo collection doesn’t have to be hard. With the right approach, you can quickly and easily remove unwanted images. Remember to handle the process carefully to ensure you only delete photos you’re ready to part with. Once you’ve mastered these steps, keeping a curated and organized online presence is a breeze. So go ahead—clean up your albums and enjoy a clutter-free Facebook experience.
Whether you’re looking to refine your personal brand or simply declutter your digital life, dfphoto.net offers the resources and community to help you achieve your goals.
Frequently Asked Questions
1. How Can I Efficiently Delete Multiple Photos on Facebook?
To efficiently delete multiple photos, organize them into albums, use the Activity Log to find what you need, use Facial Recognition for quick identification, and use bulk actions to delete several photos at once. Efficiently deleting photos ensures a tidy and relevant online presence.
2. What Should I Consider Before Deleting My Facebook Photos?
Before deleting, carefully review your selections to avoid removing photos you might want to keep. Consider your privacy needs and the impact on your digital footprint. Thoughtful consideration prevents regrets and ensures a curated digital life.
3. What Steps Can I Take to Make the Photo Deletion Process on Facebook Easier?
Breaking the deletion task into smaller, manageable chunks and deleting systematically can make the process easier. Also, organizing photos in albums streamlines the process. Simpler processes save time and make digital cleanup more manageable.
4. How Do I Use Facebook’s Activity Log to Delete Photos?
Navigate to your Activity Log, filter for photos and videos, and use this to identify the images you want to delete. Check the boxes next to the photos and select ‘Delete’ to remove them. Activity logs offer a straightforward way to manage and delete unwanted content.
5. What Should I Do After Deleting Multiple Photos on Facebook?
After deleting multiple photos, refresh your browser or app to ensure all changes are properly reflected and the photos have been successfully removed from your profile. Refreshing ensures your profile accurately reflects the changes you’ve made.
6. Can I Recover Photos I Have Deleted on Facebook?
No, once you confirm the deletion of photos on Facebook, they are permanently removed and cannot be recovered.
7. Will Deleting Photos from Facebook Also Delete Them from My Phone?
No, deleting photos from Facebook only removes them from your Facebook profile. They will still remain on your phone unless you manually delete them from your device.
8. How Do I Remove Tags from Photos I Am Tagged In?
To remove tags, go to the photo, click on the options menu (three dots), select “Remove Tag,” and confirm your decision. Removing tags effectively disassociates the photo from your profile.
9. Is There a Limit to How Many Photos I Can Delete at Once on Facebook?
Facebook does not specify a limit, but deleting photos in smaller batches is advisable to avoid potential issues with the deletion process.
10. How Does Archiving Photos Differ from Deleting Them?
Archiving photos removes them from your timeline but keeps them accessible to you. Deleting them permanently removes them from Facebook. Archiving is a great way to preserve memories while decluttering your public profile.
