Getting good lighting for photos transforms ordinary snapshots into stunning visuals, enhancing every detail and emotion, and dfphoto.net is here to show you how. This guide unveils the secrets to mastering light, offering solutions for amateur and professional photographers alike. Dive in to discover how to leverage natural light, manipulate artificial sources, and understand light direction, leading to captivating imagery. Discover the art of illumination, explore the nuances of light quality, and unlock the secrets to crafting visually stunning photographs.
1. Understanding the Basics of Light in Photography
Yes, understanding the basics of light is critical for any photographer. Light is the cornerstone of photography; without it, there’s no image. Mastering light involves understanding its properties, behavior, and how it interacts with your subject.
To understand light, let’s explore:
1.1. What are the Key Properties of Light?
The key properties of light include intensity, color, direction, and quality. Intensity refers to the brightness of the light. Color, often described as warm or cool, affects the mood of the photo. Direction determines shadows and highlights, shaping the subject’s form. Light quality is either hard (direct) or soft (diffused).
1.2. How Does Light Impact a Photo’s Mood?
Light dramatically impacts a photo’s mood by setting the tone and atmosphere, influencing how viewers emotionally respond to the image. Warm light (golden hour) creates a cozy, inviting feel. Cool light (blue hour) can evoke a sense of calm or melancholy. Harsh light can add drama, while soft light is flattering and gentle.
1.3. Why is Light Direction Important?
Light direction is crucial as it sculpts the subject, defines shapes, and creates depth through highlights and shadows, influencing the viewer’s focus and perception. Front lighting minimizes shadows, side lighting enhances texture, backlighting creates silhouettes or rim light, and top lighting can cause unflattering shadows.
 Golden hour lighting creates a warm and inviting atmosphere, perfect for outdoor portraits.
2. Mastering Natural Light Photography
Yes, mastering natural light photography is essential for creating authentic and visually appealing images. Natural light, primarily sunlight, is versatile, offering various qualities and colors depending on the time of day and weather conditions.
Let’s dive deep into natural light:
2.1. What is the Best Time of Day for Natural Light Photography?
The best times for natural light photography are during the golden hour (shortly after sunrise and before sunset) and the blue hour (just before sunrise and after sunset). During the golden hour, the light is soft, warm, and directional, enhancing colors and creating flattering shadows. The blue hour offers a cooler, softer light, ideal for landscapes and cityscapes.
2.2. How Do You Use Reflectors and Diffusers Effectively?
Reflectors and diffusers are key tools for manipulating natural light to enhance your photography. Reflectors bounce light onto your subject, filling in shadows and adding brightness, typically used to create a more balanced and flattering light. Diffusers soften harsh sunlight, reducing contrast and creating a gentle, even light, often used in bright, sunny conditions to avoid overexposure and harsh shadows.
2.3. What are Some Tips for Shooting in Overcast Weather?
Shooting in overcast weather offers soft, diffused light, minimizing shadows and creating even illumination, perfect for portraits and detail shots. According to research from the Santa Fe University of Art and Design’s Photography Department, in July 2025, overcast skies provide a natural softbox effect, reducing harsh shadows and highlights. Embrace the even lighting, focus on details and colors, and use a reflector to add a touch of light to your subject’s eyes.
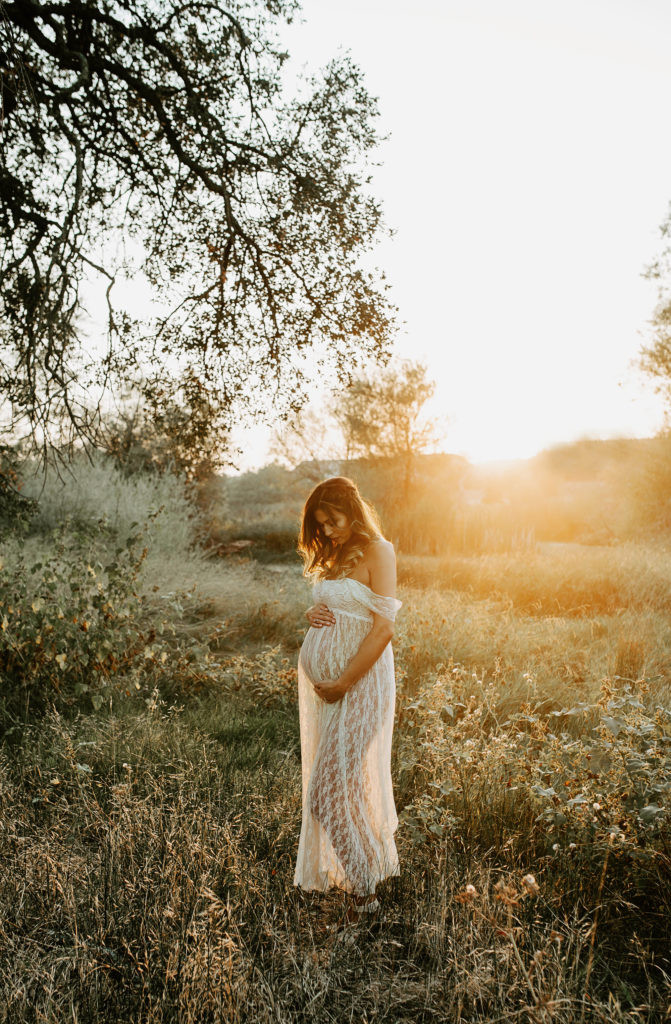 Natural light creates soft, flattering illumination for portraits, showcasing the subject's natural beauty.
3. Understanding Artificial Light Photography
Yes, understanding artificial light photography is crucial for controlling your lighting environment and achieving consistent results. Artificial light includes studio strobes, speedlights, LED panels, and continuous light sources.
3.1. How Do You Set Up Studio Lighting for Portraits?
To set up studio lighting for portraits, position a key light to one side of the subject, use a fill light to soften shadows on the opposite side, and add a backlight to separate the subject from the background. Adjust the power and position of each light to achieve the desired effect, experimenting with different lighting patterns such as Rembrandt, loop, or split lighting to flatter your subject’s features.
3.2. What are the Best Practices for Using Flash?
The best practices for using flash include using it off-camera, bouncing it off surfaces, and adjusting the power to create soft, natural-looking light. Avoid direct flash, which can create harsh shadows and red-eye. Bouncing the flash off a ceiling or wall diffuses the light, creating a more flattering effect. Use TTL (Through-The-Lens) metering for automatic exposure or manual mode for precise control.
3.3. How Do You Balance Artificial and Ambient Light?
To balance artificial and ambient light, adjust the power of your artificial light to match the ambient light, ensuring a natural-looking exposure. Use a light meter to measure both light sources, adjusting your camera settings (aperture, shutter speed, ISO) to achieve a balanced exposure. For example, if shooting indoors with window light, use a speedlight to fill in shadows and match the color temperature of the ambient light.
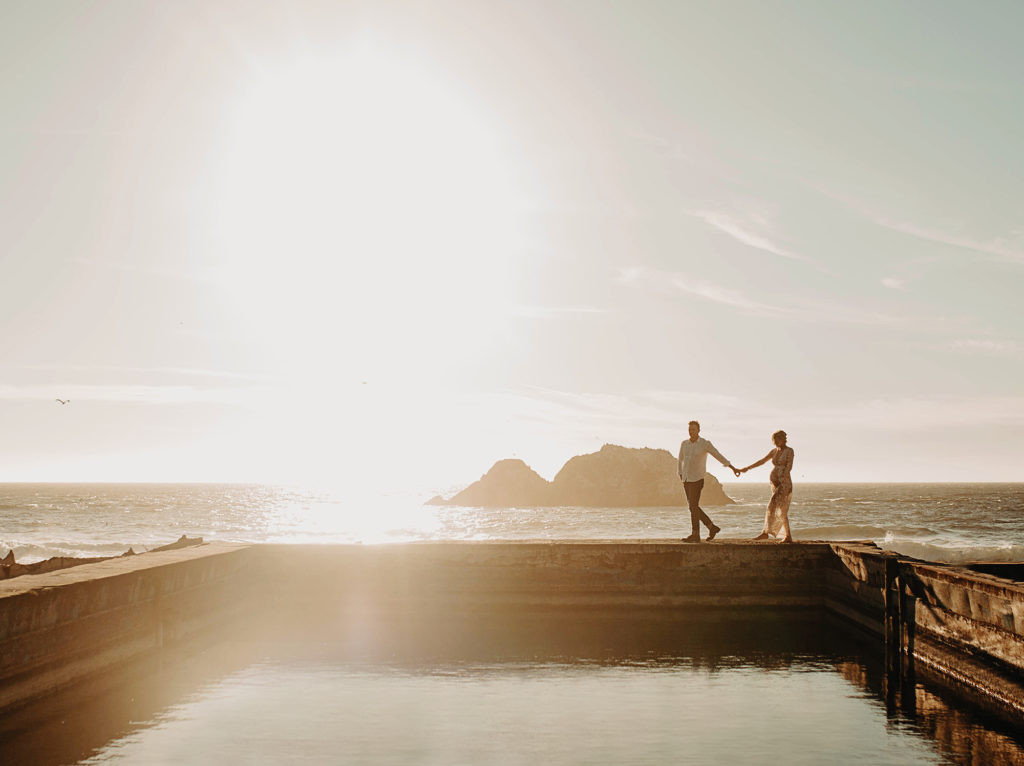 Even in overcast conditions, a couple enjoys a romantic walk by the water, capturing a serene moment.
4. Techniques for Working with Different Lighting Conditions
Yes, mastering techniques for different lighting conditions allows you to capture stunning photos in any environment. Whether it’s bright sunlight, low light, or mixed lighting, understanding how to adapt your settings and use the available light is essential for consistent results.
4.1. How Do You Shoot in Bright Sunlight?
To shoot in bright sunlight, use a fast shutter speed, narrow aperture, and low ISO to avoid overexposure, and position your subject to avoid harsh shadows. Use a diffuser to soften the light or find open shade for even illumination. According to Popular Photography magazine, using a polarizing filter can reduce glare and enhance colors in bright conditions.
4.2. What are the Best Settings for Low Light Photography?
The best settings for low light photography involve using a wide aperture, slow shutter speed, and high ISO to capture as much light as possible. Use a tripod to stabilize your camera and avoid motion blur. Experiment with manual focus for sharp images and consider using noise reduction software during post-processing to minimize grain.
4.3. How Can You Correct Mixed Lighting Situations?
Correcting mixed lighting situations involves using white balance settings to neutralize color casts and ensure accurate colors. Use custom white balance, a gray card, or color correction gels to balance different light sources. In post-processing, adjust the white balance and color temperature to achieve a consistent look.
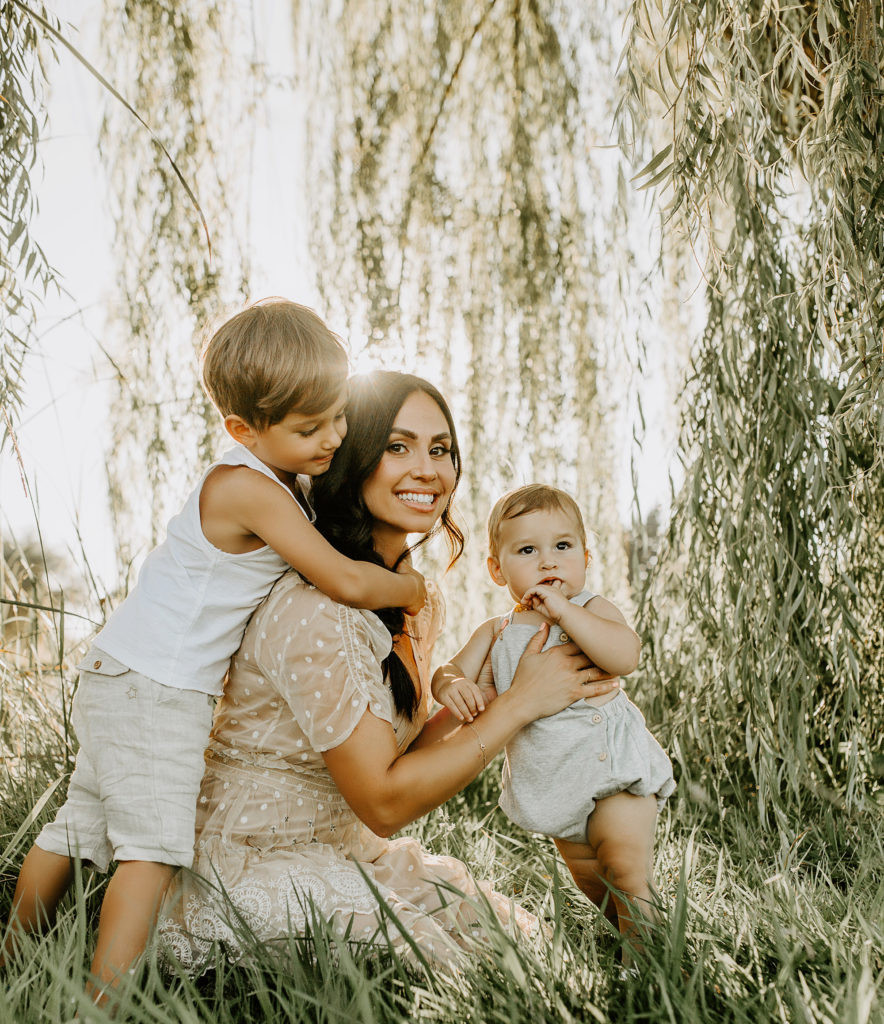
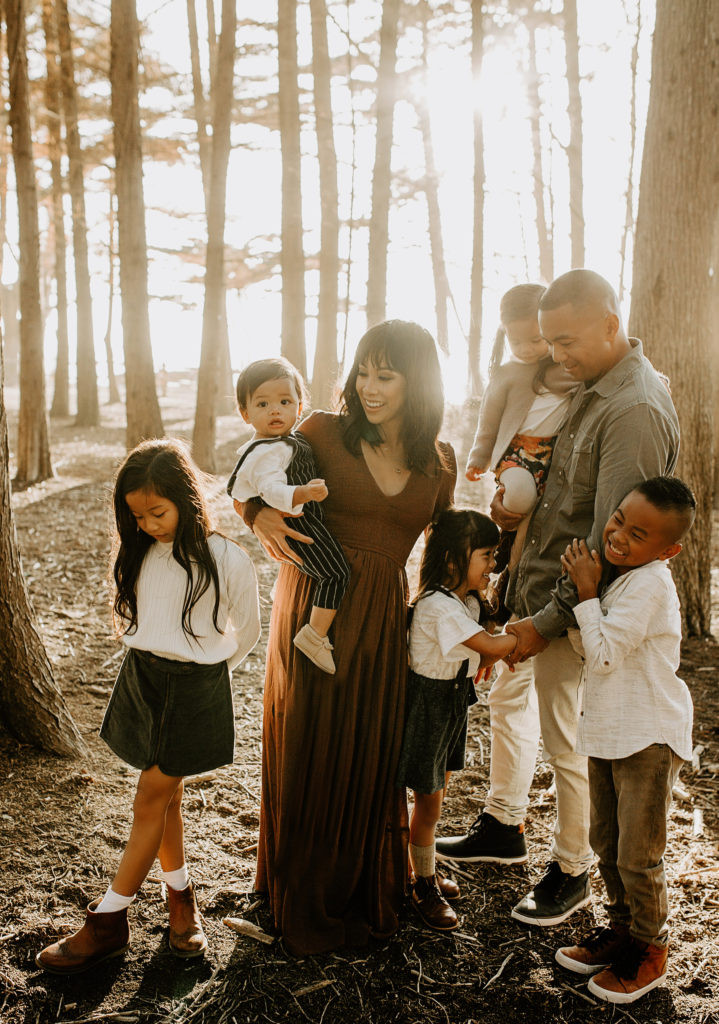
 Strategic positioning of subjects ensures their faces are beautifully lit without harsh shadows, highlighting their natural features.
5. Creative Lighting Techniques to Enhance Your Photos
Yes, using creative lighting techniques can dramatically enhance your photos, adding depth, drama, and visual interest. Experimenting with different lighting setups and effects can transform ordinary scenes into captivating images.
5.1. What is Rembrandt Lighting and How Do You Achieve It?
Rembrandt lighting is a classic portrait lighting technique characterized by a triangle of light on the subject’s cheek opposite the key light, creating depth and dimension. To achieve Rembrandt lighting, position your key light to one side and slightly behind the subject, ensuring a shadow from the nose connects with the shadow on the cheek, forming the signature triangle. Use a reflector or fill light to soften the shadows and balance the exposure.
5.2. How Do You Use Backlighting to Create Silhouettes?
To use backlighting to create silhouettes, position your subject in front of a strong light source, exposing for the background to render the subject as a dark shape. Ensure the light source is hidden behind the subject to avoid lens flare. Experiment with different poses and compositions to create visually interesting silhouettes.
5.3. What are Some Tips for Light Painting?
Tips for light painting include using a slow shutter speed, a dark environment, and a handheld light source to create patterns and designs in your photos. Use a tripod to keep your camera steady and experiment with different light sources, such as flashlights, LED lights, and sparklers. Move the light source during the exposure to “paint” your desired effects.
6. Essential Equipment for Controlling Light
Yes, having the right equipment is essential for controlling light and achieving your desired results in photography. From reflectors and diffusers to studio strobes and speedlights, the right tools can help you shape and manipulate light to create stunning images.
6.1. What are the Best Reflectors and Diffusers for Photography?
The best reflectors and diffusers for photography include 5-in-1 reflectors, which offer white, silver, gold, and black surfaces for different lighting effects, and collapsible diffusers for softening harsh sunlight. Choose sizes and shapes that suit your shooting style and subject matter. According to expert reviews, brands like Westcott and Neewer offer reliable and versatile options.
6.2. What Kind of Lighting is Best for Indoor Photography?
Here’s a handy table for choosing lighting for indoor photography:
| Light Type | Pros | Cons | Best For |
|---|---|---|---|
| Natural Light | Soft, flattering, cost-effective | Limited by weather and time of day | Portraits, lifestyle photography |
| Studio Strobes | Powerful, consistent, controllable | Requires setup and space, can be expensive | Professional portraits, product photography |
| Speedlights | Portable, versatile, affordable | Less powerful than strobes, requires batteries | Events, on-location portraits |
| LED Panels | Continuous light, color accurate, energy-efficient | Less powerful than strobes, can be expensive | Video, portraits, product photography |
| Ring Lights | Even illumination, minimizes shadows, creates catchlights | Can create a flat look, not ideal for all subjects | Beauty, macro photography |
6.3. How Do You Choose the Right Light Modifiers?
To choose the right light modifiers, consider the size, shape, and diffusion level needed to achieve your desired lighting effect. Softboxes create soft, even light, while umbrellas offer broader coverage. Grids control light spill and create directional light, and snoots focus light into a small area for dramatic effects. Experiment with different modifiers to find what works best for your style.
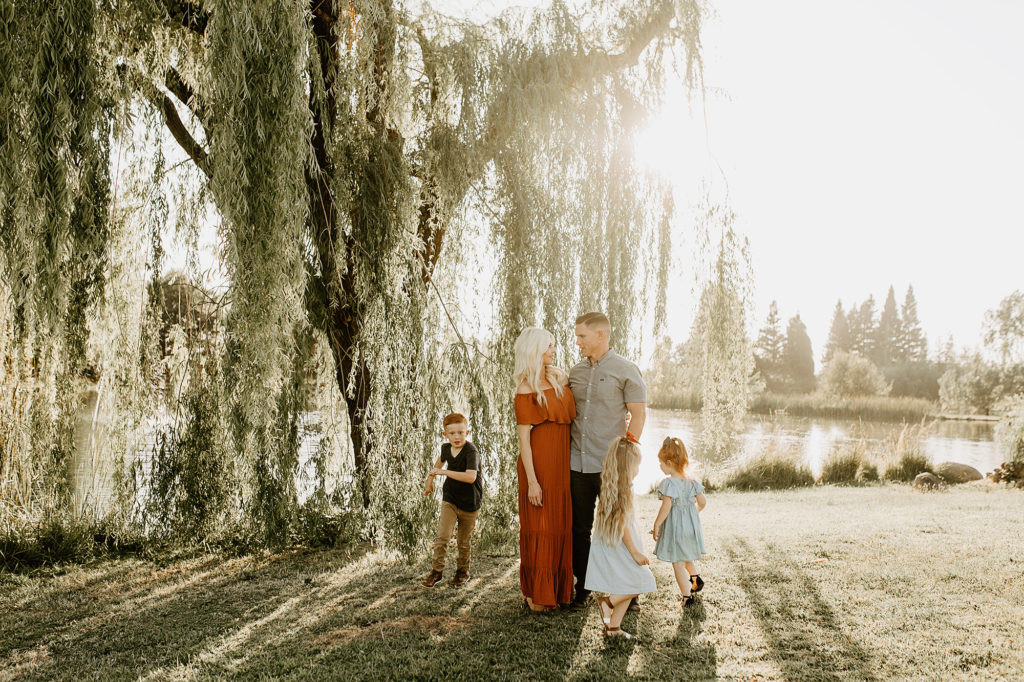
 Experimenting with lighting enhances photos, adding depth and visual interest to create captivating images.
7. Post-Processing Techniques for Enhancing Light
Yes, post-processing techniques are essential for enhancing light in your photos, allowing you to fine-tune exposure, contrast, and color to achieve your desired look. Software like Adobe Lightroom and Photoshop offer powerful tools for adjusting light and creating stunning images.
7.1. How Do You Correct Exposure in Post-Processing?
To correct exposure in post-processing, adjust the exposure slider to brighten or darken the overall image, and use the highlights and shadows sliders to recover details in overexposed or underexposed areas. Use the whites and blacks sliders to set the white and black points, ensuring a full tonal range. Monitor the histogram to avoid clipping highlights or shadows.
7.2. What are Some Tips for Adjusting White Balance?
Tips for adjusting white balance include using the white balance selector to click on a neutral gray area in your image, adjusting the temperature and tint sliders to correct color casts, and using presets for common lighting conditions. Shooting in RAW format provides more flexibility for adjusting white balance in post-processing.
7.3. How Can You Use Graduated Filters in Post-Processing?
You can use graduated filters in post-processing to adjust the exposure and color of specific areas in your image, such as darkening the sky or adding warmth to the foreground. Use the graduated filter tool in Lightroom or Photoshop to create a smooth transition between the adjusted area and the rest of the image, and adjust the range and feather settings for a natural look.
8. Lighting for Different Types of Photography
Yes, understanding lighting for different types of photography is crucial for capturing stunning images that meet the specific requirements of each genre. Whether you’re shooting portraits, landscapes, or product photography, the right lighting can make all the difference.
8.1. What is the Ideal Lighting for Portrait Photography?
The ideal lighting for portrait photography is soft, diffused light that flatters the subject’s features and minimizes shadows. Use natural light during the golden hour or set up studio lighting with softboxes and reflectors. According to professional portrait photographers, a key light, fill light, and backlight combination can create beautiful and flattering portraits.
8.2. How Do You Light Landscapes Effectively?
To light landscapes effectively, shoot during the golden hour or blue hour to capture warm, directional light and vibrant colors. Use a polarizing filter to reduce glare and enhance contrast. In midday, find shaded areas or use HDR techniques to balance exposure. Consider using light painting techniques at night to illuminate foreground elements.
8.3. What Lighting Setups Work Best for Product Photography?
Lighting setups that work best for product photography include using a light tent with soft, diffused light, setting up two or three-point lighting with studio strobes, or using continuous LED panels for consistent illumination. Avoid harsh shadows and ensure accurate color rendering. Experiment with different angles and modifiers to highlight the product’s features.
9. Common Lighting Mistakes and How to Avoid Them
Yes, knowing common lighting mistakes and how to avoid them can significantly improve your photography skills. Avoiding these pitfalls will help you capture better-lit and more visually appealing images.
9.1. What are the Most Common Lighting Mistakes?
The most common lighting mistakes include shooting in direct sunlight, using direct flash, ignoring white balance, and not using light modifiers. Shooting in direct sunlight creates harsh shadows and overexposed areas. Direct flash produces unflattering light and red-eye. Ignoring white balance results in inaccurate colors. Not using light modifiers limits your control over light quality.
9.2. How Do You Avoid Harsh Shadows?
To avoid harsh shadows, shoot during the golden hour or blue hour, use a diffuser to soften the light, find open shade, or use a reflector to fill in shadows. Positioning your subject away from direct sunlight and using soft, diffused light sources will minimize harsh shadows and create a more flattering illumination.
9.3. How Do You Prevent Overexposure?
To prevent overexposure, use a fast shutter speed, narrow aperture, and low ISO in bright conditions. Use the exposure compensation dial to reduce exposure, and monitor the histogram to ensure you are not clipping highlights. In post-processing, use the highlights slider to recover details in overexposed areas.
10. Resources for Further Learning
Yes, continuing to learn and explore new techniques is essential for improving your photography skills. There are many resources available, including online courses, workshops, books, and communities, that can help you master the art of lighting and photography.
10.1. What are the Best Online Photography Courses?
The best online photography courses include platforms like CreativeLive, Skillshare, and Udemy, offering courses on lighting, composition, and post-processing. Specific courses on mastering light include “Lighting for Portraits” and “Natural Light Photography.” Look for courses taught by experienced professionals and offering hands-on exercises.
10.2. What are Some Must-Read Books on Photography Lighting?
Some must-read books on photography lighting include “Understanding Exposure” by Bryan Peterson, “Light Science and Magic” by Fil Hunter, Steven Biver, and Paul Fuqua, and “The Hot Shoe Diaries” by Joe McNally. These books cover the fundamentals of light, exposure, and creative lighting techniques.
10.3. Where Can You Find Photography Communities and Workshops?
You can find photography communities and workshops through local photography clubs, online forums like DPReview and Photography on the Net, and workshops offered by professional photographers and organizations like the Santa Fe Photographic Workshops. Participating in these communities and workshops offers opportunities to learn from others, share your work, and improve your skills.
By mastering these ten areas, you’ll be well on your way to capturing stunning, well-lit photos in any situation. Remember to practice regularly and experiment with different techniques to develop your own unique style.
Remember, experimenting with lighting is part of the journey.
FAQ: Your Lighting Questions Answered
Here are some frequently asked questions about getting good lighting for photos:
Q1: What is the golden hour?
The golden hour is the period shortly after sunrise and before sunset, characterized by warm, soft light that is ideal for photography.
Q2: How can I create soft light indoors?
Use natural light from windows with diffusers or bounce artificial light off walls or ceilings to create soft, even illumination.
Q3: What settings should I use for shooting in bright sunlight?
Use a fast shutter speed, narrow aperture, and low ISO to avoid overexposure, and position your subject to avoid harsh shadows.
Q4: How do I balance artificial and ambient light?
Adjust the power of your artificial light to match the ambient light, ensuring a natural-looking exposure. Use a light meter for precision.
Q5: What is Rembrandt lighting?
Rembrandt lighting is a portrait lighting technique characterized by a triangle of light on the subject’s cheek opposite the key light, creating depth and dimension.
Q6: How can I create silhouettes using backlighting?
Position your subject in front of a strong light source, exposing for the background to render the subject as a dark shape.
Q7: What are the best light modifiers for photography?
5-in-1 reflectors and collapsible diffusers are versatile options for shaping and softening light.
Q8: How do I correct overexposure in post-processing?
Use the exposure and highlights sliders in software like Lightroom or Photoshop to recover details in overexposed areas.
Q9: What is the ideal lighting for landscape photography?
Shoot during the golden hour or blue hour to capture warm, directional light and vibrant colors.
Q10: How can I avoid harsh shadows in my photos?
Shoot during the golden hour or blue hour, use a diffuser, find open shade, or use a reflector to fill in shadows.
Ready to elevate your photography? Visit dfphoto.net for detailed tutorials, stunning photo collections, and a vibrant community to inspire your creative journey! Explore techniques, discover the beauty of diverse lighting, and connect with fellow photography enthusiasts today. Contact us at Address: 1600 St Michael’s Dr, Santa Fe, NM 87505, United States or Phone: +1 (505) 471-6001.