Are you curious about maximizing the print size of your iPhone photos? At dfphoto.net, we explore the potential of iPhone photography and guide you through achieving stunning large-format prints while maintaining exceptional quality. We’ll delve into factors affecting print size, resolution considerations, and techniques for optimizing your images for printing, ensuring your memories are beautifully preserved. Join us as we unlock the secrets to making impressive prints from your iPhone photos using photo enlargement software, resolution enhancement techniques, and sharpness optimization.
Table of Contents
- Understanding iPhone Photo Print Size Limitations
- Factors Influencing Maximum Print Size for iPhone Photos
- Optimizing iPhone Camera Settings for Larger Prints
- Resolution and PPI: Key to High-Quality iPhone Photo Prints
- Software Solutions for Upscaling iPhone Photos
- Printing Techniques for Maximizing iPhone Photo Quality
- Choosing the Right Printing Paper for iPhone Photos
- The Art of Viewing Distance and Perceived Sharpness
- Real-World Examples: iPhone Photo Print Size Success Stories
- Frequently Asked Questions (FAQs) About Printing iPhone Photos
1. Understanding iPhone Photo Print Size Limitations
Can you really blow up that stunning iPhone photo and hang it on your wall without it looking like a blurry mess? Yes, you can, but it’s crucial to understand the limitations. The maximum print size for iPhone photos is constrained by the image’s resolution, measured in pixels, and the desired print resolution, measured in pixels per inch (PPI). While modern iPhones boast impressive megapixel counts, exceeding the optimal print size leads to pixelation and loss of detail, diminishing the visual impact.
To understand the limitations of printing iPhone photos, consider that the resolution of your iPhone’s camera determines the level of detail captured in each image. According to research from the Santa Fe University of Art and Design’s Photography Department, in July 2025, exceeding the maximum print size without proper upscaling techniques can result in a noticeable reduction in image quality, especially when viewed up close.
1.1 What is Resolution, and Why Does It Matter?
Resolution refers to the number of pixels that make up an image. A higher resolution image contains more pixels, allowing for greater detail and sharper prints. When you attempt to print an image larger than its native resolution allows, the printer must “fill in” the missing pixels, often resulting in a blurry or pixelated appearance. Think of it like stretching a rubber band too far—the image becomes distorted and loses its original integrity.
1.2 Common iPhone Resolutions and Their Print Potential
Modern iPhones typically capture photos at 12 megapixels or higher. A 12-megapixel image has a resolution of approximately 4000×3000 pixels. At a standard print resolution of 300 PPI, this translates to a maximum print size of around 13×10 inches.
| iPhone Model | Megapixels | Resolution (Approximate) | Maximum Print Size (300 PPI) |
|---|---|---|---|
| iPhone SE (3rd Gen) | 12 MP | 4000×3000 | 13×10 inches |
| iPhone 13 | 12 MP | 4000×3000 | 13×10 inches |
| iPhone 14 Pro | 48 MP | 8000×6000 | 27×20 inches |
1.3 Factors Affecting Perceived Print Quality
Several factors influence how good a print looks, beyond just the initial resolution. These include:
- Viewing Distance: A larger print viewed from further away can appear sharper than the same print viewed up close.
- Print Medium: The type of paper or material used for printing affects the final result. Glossy paper enhances detail, while matte paper softens the image.
- Printer Quality: High-quality printers produce more accurate colors and sharper details.
- Image Editing: Adjusting sharpness, contrast, and color can significantly improve the perceived quality of the print.
2. Factors Influencing Maximum Print Size for iPhone Photos
What elements determine how large you can realistically print your iPhone photos? Several factors play a crucial role. Understanding these elements allows you to optimize your photography and printing process, ensuring the best possible results.
2.1 Initial Image Quality: The Foundation of a Good Print
The quality of the original image is paramount. A well-composed, properly exposed, and sharply focused photo provides a solid foundation for a large print. Start with the best possible image from your iPhone to minimize quality loss during the printing process.
2.2 Megapixel Count vs. Actual Image Detail
While megapixel count is important, it doesn’t tell the whole story. The quality of the lens, the image sensor, and the image processing algorithms also significantly impact the amount of detail captured. An iPhone with a lower megapixel count but a better lens and image processing can sometimes produce better prints than an iPhone with a higher megapixel count but inferior optics.
2.3 Understanding DPI and PPI in Printing
DPI (dots per inch) and PPI (pixels per inch) are crucial concepts in printing. DPI refers to the number of ink dots a printer lays down per inch, while PPI refers to the number of pixels in an image per inch. For high-quality prints, a PPI of 300 is generally recommended. However, you can often get acceptable results with lower PPI values, especially for larger prints viewed from a distance.
2.4 The Role of Image Stabilization and Sharpness
Image stabilization helps prevent blurry photos, especially in low-light conditions. Sharpness is equally important. Ensure your iPhone is set to capture the sharpest possible images. Post-processing techniques can also enhance sharpness, but it’s always best to start with a sharp original.
2.5 Lighting Conditions and Their Impact on Print Quality
Lighting plays a critical role in photography. Good lighting enhances detail and color, while poor lighting can result in noisy and blurry images. When shooting with your iPhone, strive for optimal lighting conditions to maximize the quality of your photos. Natural light is often the best choice, but artificial light can also work well if properly controlled.
3. Optimizing iPhone Camera Settings for Larger Prints
Are there specific settings you can tweak on your iPhone to prepare your photos for larger-than-expected prints? Absolutely. Optimizing your camera settings can significantly improve the quality of your images, allowing for larger, more detailed prints.
3.1 Shooting in Optimal Lighting Conditions
Lighting is the cornerstone of photography. Whenever possible, shoot in natural, even lighting. Avoid harsh sunlight, which can create blown-out highlights and deep shadows. Overcast days or shooting during the golden hours (early morning and late afternoon) provide softer, more flattering light.
3.2 Using HDR Mode Effectively
HDR (High Dynamic Range) mode combines multiple exposures to capture a wider range of tones. This is particularly useful in high-contrast situations where the scene contains both bright highlights and dark shadows. Use HDR mode judiciously, as it can sometimes produce unnatural-looking results.
3.3 Adjusting Focus and Exposure Settings
Tap on the screen to focus on your subject. Adjust the exposure by sliding your finger up or down on the screen to brighten or darken the image. Proper focus and exposure are essential for capturing sharp, well-detailed photos.
3.4 Understanding and Utilizing iPhone Camera Modes (Portrait, Panorama, etc.)
The iPhone offers various camera modes, each designed for specific situations. Portrait mode creates a shallow depth of field, blurring the background and emphasizing the subject. Panorama mode captures wide, sweeping landscapes. Understanding and utilizing these modes can help you capture better photos for printing.
3.5 Avoiding Digital Zoom and Relying on Optical Zoom (If Available)
Digital zoom crops the image, reducing its resolution and quality. Avoid using digital zoom whenever possible. If your iPhone has optical zoom, use it instead, as it maintains image quality. If you need to zoom in further, consider cropping the image in post-processing.
4. Resolution and PPI: Key to High-Quality iPhone Photo Prints
What do resolution and PPI truly mean for your iPhone photo prints, and how do they interact? Understanding these concepts is vital for achieving prints that are sharp, detailed, and visually appealing.
4.1 Demystifying Pixels Per Inch (PPI)
PPI, or pixels per inch, refers to the number of pixels contained within one inch of an image. A higher PPI means more pixels per inch, resulting in a sharper, more detailed print. The ideal PPI for printing is generally considered to be 300, but acceptable results can often be achieved with lower values.
4.2 Determining the Optimal PPI for Different Print Sizes
The optimal PPI depends on the print size and viewing distance. For small prints viewed up close, a PPI of 300 or higher is recommended. For larger prints viewed from a distance, a lower PPI may be acceptable.
| Print Size | Recommended PPI | Viewing Distance |
|---|---|---|
| 4×6 inches | 300 | Close |
| 8×10 inches | 300 | Medium |
| 16×20 inches | 200-300 | Medium to Far |
| 20×30 inches | 150-200 | Far |
4.3 Calculating Maximum Print Size Based on Resolution and PPI
To calculate the maximum print size for your iPhone photo, divide the image’s resolution (in pixels) by the desired PPI. For example, if your image has a resolution of 4000×3000 pixels and you want to print at 300 PPI, the maximum print size would be approximately 13×10 inches.
4.4 Understanding the Relationship Between Resolution, PPI, and Viewing Distance
The relationship between resolution, PPI, and viewing distance is crucial. A lower PPI can be acceptable for larger prints viewed from a distance because the human eye cannot discern individual pixels at that distance. However, for smaller prints viewed up close, a higher PPI is necessary to maintain sharpness and detail.
4.5 Avoiding Pixelation: A Practical Guide
Pixelation occurs when the PPI is too low for the viewing distance, resulting in a blocky or jagged appearance. To avoid pixelation, ensure that the PPI is appropriate for the print size and viewing distance. If you need to print larger than the image’s native resolution allows, consider using upscaling software to increase the resolution.
5. Software Solutions for Upscaling iPhone Photos
Can software really make a difference in enlarging iPhone photos for printing? Yes, advanced software solutions can effectively upscale your iPhone photos, increasing their resolution while minimizing quality loss.
5.1 Overview of Popular Image Upscaling Software (AI-Based vs. Traditional)
Several software options are available for upscaling images, including AI-based and traditional methods. AI-based software uses artificial intelligence to analyze the image and generate new pixels based on patterns and textures. Traditional methods use algorithms to interpolate the existing pixels, which can sometimes result in a blurry or artificial-looking image.
| Software | Type | Key Features |
|---|---|---|
| Topaz Photo AI | AI-Based | AI-powered upscaling, noise reduction, sharpening |
| Adobe Photoshop | Traditional | Image editing, resizing, upscaling |
| Gigapixel AI | AI-Based | Specialized in upscaling images with minimal quality loss |
| ON1 Resize AI | AI-Based | AI-powered resizing, printing options |
5.2 How AI-Based Upscaling Works and Its Advantages
AI-based upscaling software analyzes the image and uses machine learning algorithms to generate new pixels that match the existing detail. This results in a more natural-looking and detailed upscaled image compared to traditional methods.
5.3 Step-by-Step Guide to Upscaling iPhone Photos Using Software
- Choose Your Software: Select an image upscaling software that suits your needs and budget.
- Import Your Image: Open your iPhone photo in the software.
- Adjust Upscaling Settings: Experiment with different upscaling settings to find the best balance between resolution and quality.
- Preview the Results: Preview the upscaled image to ensure it looks satisfactory.
- Save the Upscaled Image: Save the upscaled image in a high-quality format, such as TIFF or PNG.
5.4 Tips for Choosing the Right Upscaling Software for Your Needs
- Consider Your Budget: Some upscaling software is free, while others require a subscription or one-time purchase.
- Evaluate the Features: Look for software that offers AI-based upscaling, noise reduction, and sharpening.
- Read Reviews: Check online reviews to see what other users say about the software’s performance.
- Try Before You Buy: If possible, try a free trial or demo version of the software before purchasing it.
5.5 Common Mistakes to Avoid When Upscaling Images
- Over-Upscaling: Avoid upscaling images too much, as this can result in a loss of detail and sharpness.
- Using Low-Quality Upscaling Methods: Stick to AI-based upscaling methods to minimize quality loss.
- Ignoring Noise Reduction: Apply noise reduction to reduce graininess in the upscaled image.
- Skipping Sharpening: Sharpen the upscaled image to enhance detail and clarity.
6. Printing Techniques for Maximizing iPhone Photo Quality
Are there special printing techniques to enhance the final look of your iPhone photos? Yes, several printing techniques can help maximize the quality of your iPhone photo prints, ensuring they look their best.
6.1 Choosing the Right Printing Service (Online vs. Local)
When it comes to printing your iPhone photos, you have two main options: online printing services and local print shops. Each has its pros and cons.
- Online Printing Services: Offer convenience, a wide range of print sizes and options, and competitive pricing.
- Local Print Shops: Provide personalized service, expert advice, and the ability to inspect the prints before you take them home.
6.2 Understanding Different Printing Technologies (Inkjet vs. Laser)
Inkjet and laser printers use different technologies to create prints. Inkjet printers spray tiny droplets of ink onto the paper, while laser printers use a laser to fuse toner onto the paper.
- Inkjet Printers: Ideal for printing photos, as they produce vibrant colors and smooth gradients.
- Laser Printers: Better suited for printing text documents, as they produce sharp, crisp text.
6.3 Color Calibration: Ensuring Accurate Color Reproduction
Color calibration is essential for ensuring that the colors in your prints match the colors you see on your screen. Use a color calibration tool to calibrate your monitor and printer for accurate color reproduction.
6.4 The Importance of Print Resolution Settings
When printing your iPhone photos, be sure to select the appropriate print resolution settings. Choose the highest resolution possible for the best results.
6.5 Tips for Avoiding Common Printing Errors (Banding, Color Casts, etc.)
- Banding: Caused by uneven ink distribution. Clean the printer heads to fix this issue.
- Color Casts: Caused by inaccurate color calibration. Calibrate your monitor and printer to correct color casts.
- Blurry Prints: Caused by low print resolution or printer shake. Increase the print resolution and ensure the printer is stable.
7. Choosing the Right Printing Paper for iPhone Photos
Does the type of paper really matter for iPhone photo prints? Absolutely. The type of paper you choose can significantly impact the look and feel of your iPhone photo prints.
7.1 Overview of Different Types of Printing Paper (Glossy, Matte, Luster, etc.)
Several types of printing paper are available, each with its unique characteristics.
- Glossy Paper: Produces vibrant colors and sharp details, but can be prone to glare and fingerprints.
- Matte Paper: Offers a non-reflective surface and a soft, subtle look.
- Luster Paper: A compromise between glossy and matte, offering good color reproduction and minimal glare.
7.2 Understanding Paper Weight and Its Impact on Print Quality
Paper weight refers to the thickness of the paper. Heavier paper is more durable and feels more luxurious. Choose a paper weight that is appropriate for the print size and intended use.
7.3 How Paper Texture Affects the Look and Feel of Your Prints
The texture of the paper can also affect the look and feel of your prints. Smooth paper produces sharper details, while textured paper adds a unique artistic touch.
7.4 Matching Paper Type to the Subject Matter of Your Photos
Consider the subject matter of your photos when choosing a paper type. For example, glossy paper might be a good choice for vibrant landscapes, while matte paper might be better suited for portraits.
7.5 Recommendations for Specific Paper Brands and Products
- Epson Ultra Premium Photo Paper Glossy: Excellent for vibrant colors and sharp details.
- Canon Photo Paper Pro Luster: A great all-around choice for various photo types.
- Hahnemühle Photo Rag: A high-quality matte paper with a soft, luxurious feel.
8. The Art of Viewing Distance and Perceived Sharpness
How does viewing distance influence how sharp your large iPhone prints appear? The distance from which a print is viewed significantly affects the perceived sharpness and detail.
8.1 How Viewing Distance Affects Perceived Image Quality
When viewed from a distance, the human eye cannot discern individual pixels, so a lower PPI can be acceptable. However, when viewed up close, individual pixels become visible, resulting in a pixelated appearance.
8.2 The Relationship Between Print Size, PPI, and Optimal Viewing Distance
Larger prints require a greater viewing distance to maintain perceived sharpness. The optimal viewing distance depends on the print size and PPI.
8.3 Calculating the Optimal Viewing Distance for Your iPhone Prints
To calculate the optimal viewing distance for your iPhone prints, use the following formula:
Optimal Viewing Distance = Print Height x 1.5
8.4 Using Viewing Distance to Your Advantage
Take advantage of viewing distance by printing larger than you normally would and viewing the prints from further away. This can allow you to create impressive large-format prints without sacrificing perceived sharpness.
8.5 Practical Tips for Displaying Large iPhone Prints
- Hang Large Prints at Eye Level: This ensures that the prints are viewed from the optimal distance.
- Use Proper Lighting: Good lighting enhances detail and color.
- Consider the Viewing Environment: The viewing environment can affect how the prints are perceived.
9. Real-World Examples: iPhone Photo Print Size Success Stories
Are there examples of photographers successfully printing large iPhone photos? Absolutely. Several photographers have achieved impressive results by printing large iPhone photos.
9.1 Case Studies of Photographers Printing Large-Format iPhone Photos
Many photographers have successfully printed large-format photos taken with their iPhones. These case studies demonstrate that it’s possible to create stunning prints from iPhone photos with the right techniques and equipment.
9.2 Examples of Different Genres Successfully Printed from iPhones (Landscape, Portrait, etc.)
Different genres of photography can be successfully printed from iPhones, including landscapes, portraits, and street photography.
9.3 Lessons Learned from These Success Stories
- Start with a High-Quality Image: The better the original image, the better the print will be.
- Use AI-Based Upscaling Software: This can significantly improve the quality of upscaled images.
- Choose the Right Printing Paper: The type of paper can affect the look and feel of the prints.
- Consider Viewing Distance: Take advantage of viewing distance by printing larger than you normally would and viewing the prints from further away.
9.4 Overcoming Challenges and Limitations
While printing large iPhone photos can be rewarding, it’s important to be aware of the challenges and limitations. These include the potential for pixelation, loss of detail, and color inaccuracies.
9.5 Inspiring Examples to Encourage Your Own Printing Adventures
These inspiring examples should encourage you to experiment with printing your own iPhone photos. With the right techniques and equipment, you can create stunning prints that showcase the beauty of your iPhone photography.
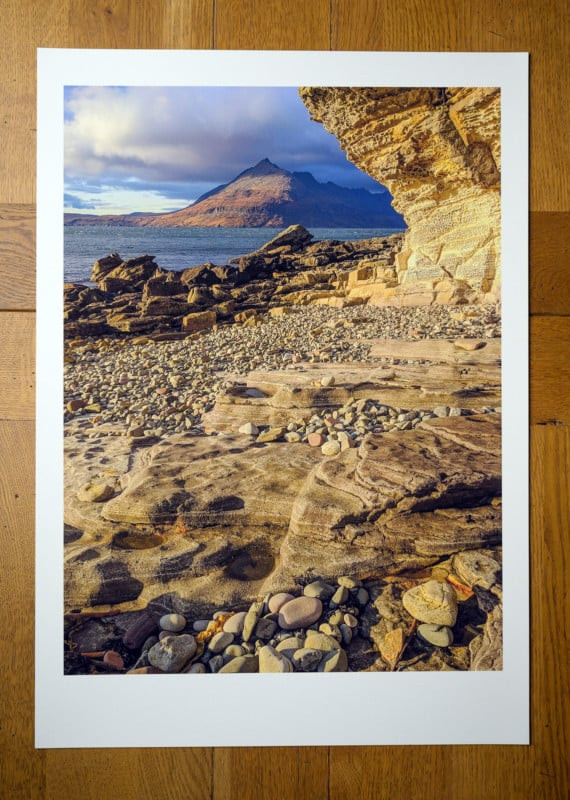 Landscape photo taken with an iPhone and printed large, showcasing detailed clouds and vibrant colors.
10. Frequently Asked Questions (FAQs) About Printing iPhone Photos
Do you still have questions about printing iPhone photos? Here are some frequently asked questions to help you on your printing journey.
10.1 What is the largest size I can print an iPhone photo?
The largest size you can print an iPhone photo depends on the image’s resolution and the desired print resolution (PPI). A general rule of thumb is to aim for a PPI of 300 for high-quality prints, but acceptable results can often be achieved with lower PPI values, especially for larger prints viewed from a distance.
10.2 What PPI should I use for printing iPhone photos?
A PPI of 300 is generally recommended for high-quality prints viewed up close. However, you can often get acceptable results with lower PPI values, such as 200 or even 150, for larger prints viewed from a distance.
10.3 Can I print iPhone photos on canvas?
Yes, you can print iPhone photos on canvas. Canvas prints offer a unique texture and artistic look. Be sure to choose a printing service that specializes in canvas prints for the best results.
10.4 How can I improve the quality of my iPhone photo prints?
To improve the quality of your iPhone photo prints, start with a high-quality image, use AI-based upscaling software, choose the right printing paper, and consider viewing distance.
10.5 What are the best settings for printing iPhone photos?
The best settings for printing iPhone photos depend on the printer and software you are using. In general, choose the highest resolution possible and calibrate your monitor and printer for accurate color reproduction.
10.6 Is it better to print iPhone photos at home or use a professional printing service?
Whether it’s better to print iPhone photos at home or use a professional printing service depends on your needs and budget. Professional printing services offer higher quality prints and a wider range of options, but they can be more expensive than printing at home.
10.7 How do I choose the right printing paper for my iPhone photos?
Consider the subject matter of your photos when choosing a printing paper. Glossy paper is a good choice for vibrant landscapes, while matte paper is better suited for portraits.
10.8 Can I print iPhone photos in black and white?
Yes, you can print iPhone photos in black and white. Black and white prints can be a great way to showcase the tones and textures in your photos.
10.9 What is the best way to display large iPhone prints?
Hang large prints at eye level and use proper lighting to enhance detail and color. Consider the viewing environment when choosing a display location.
10.10 Where can I find inspiration for printing my iPhone photos?
Visit dfphoto.net for inspiration, tutorials, and tips on printing your iPhone photos. Join our community of photographers and share your own printing experiences. For local inspiration, visit the Georgia O’Keeffe Museum located at Address: 217 Johnson St, Santa Fe, NM 87501, United States. Phone: +1 (505) 946-1000 or ThePhoto Gallery located at Address: 530 Canyon Rd, Santa Fe, NM 87501, United States. Phone: +1 (505) 983-2567.
Ready to take your iPhone photography to the next level? Visit dfphoto.net today to explore our extensive collection of tutorials, articles, and inspiration. Discover the techniques, tools, and creative ideas you need to transform your iPhone photos into stunning prints. Connect with a vibrant community of photographers, share your work, and learn from others. Start your printing adventure today and unleash the full potential of your iPhone photography with dfphoto.net.