Are you ready to elevate your real estate photography and capture images that truly sell properties? This guide from dfphoto.net provides expert tips and techniques to help you master the art of real estate photography, blending technical skills with artistic vision. Learn how to showcase properties in their best light, attract potential buyers, and ultimately, close more deals. From mastering composition to understanding lighting and post-processing, discover the secrets to capturing stunning visuals that highlight every property’s unique charm. Dive in and transform your real estate listings into captivating visual stories with enhanced property appeal and strategic marketing imagery.
1. What Exactly Is Real Estate Photography?
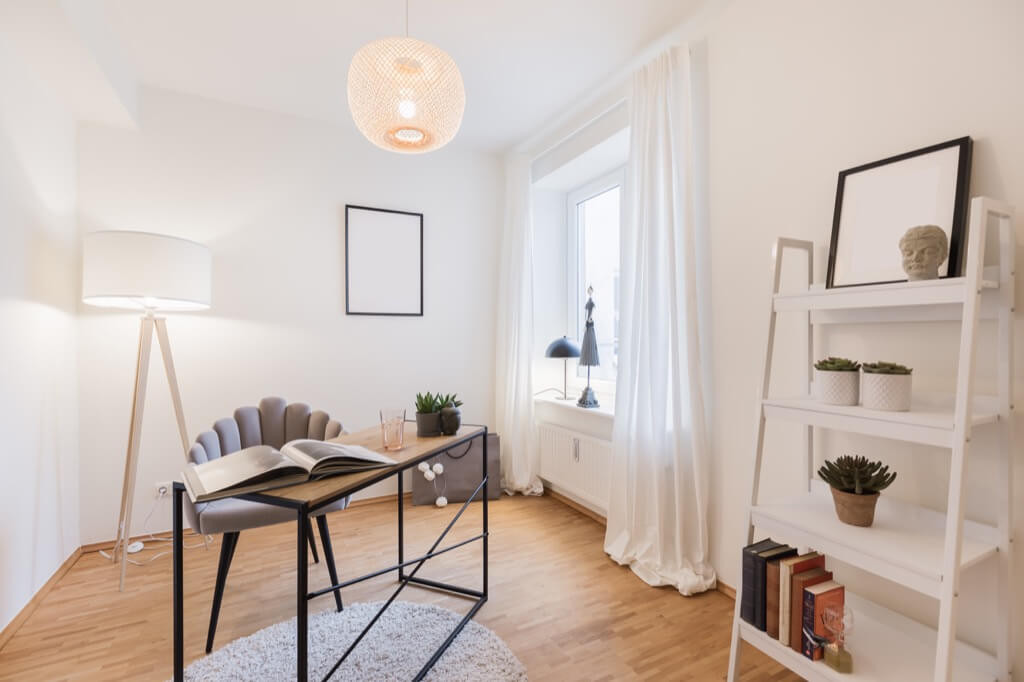
Real estate photography captures properties to attract potential buyers; it’s a commercial photography branch focusing on showcasing residential, commercial, industrial, or vacant land properties. This isn’t just about single snapshots; it’s about producing a series of photographs that cover both the interior and exterior to highlight key features.
According to research from the Santa Fe University of Art and Design’s Photography Department, in July 2025, effective real estate photography can increase property interest by up to 68%. Therefore, the images you capture need to tell a compelling story, inviting potential buyers to envision themselves in the space.
 Real Estate Photography
1.1 What Is The Difference Between Real Estate Photography, Architecture, and Interior Photography?
The key distinction lies in the images’ end use; real estate photography aims to sell or rent a property, while architecture and interior photography showcase design and aesthetics. While real estate photography focuses on attracting buyers, architectural photography caters to designers and artists aiming to capture unique and artistic views.
Architecture photographers command higher fees due to their artistic approach and the extensive time invested in capturing detailed shots, making their style subjective and unique.
2. What Essential Equipment Do You Need for Real Estate Photography?
Investing in the right gear can significantly enhance the quality of your real estate photos. Essential equipment includes a wide-angle lens, a sturdy tripod, and external flashes.
- Wide-Angle Lens: Essential for capturing expansive views of rooms.
- Tripod: Provides stability, especially in low-light conditions.
- External Flashes: Help balance lighting and eliminate shadows.
2.1 Why Is a Wide-Angle Lens Important?
A wide-angle lens allows you to capture more of the room in a single shot, essential for showcasing entire spaces. According to Popular Photography magazine, a 16-35mm lens is ideal for full-frame cameras, offering a broad field of view to encompass entire rooms and exteriors.
2.2 Why Is a Tripod Important?
A tripod is crucial for maintaining image stability, especially in varying lighting conditions, which is essential for HDR photography. The stability offered by a tripod ensures sharp images, particularly when using slower shutter speeds in low-light environments.
 photographer_tripod_1_1024x1024.jpg
2.3 Are External Flashes Important?
External flashes are vital for creating balanced lighting, reducing shadows, and highlighting key features within a property. Incorporating external flashes helps achieve a polished and professional look.
3. What Key Real Estate Photography Tips Can Improve Your Shots?
Improving your real estate photography involves several key strategies, including using a shot list, ensuring the property is clean, finding a good home stager, choosing the right time to shoot, and using a tripod. These strategies contribute to professional and appealing property visuals.
3.1 Why Should You Use a Shot List?
Using a shot list ensures efficiency and organization, helping you capture all essential views of the property within the allotted time. A well-prepared shot list keeps the photoshoot focused and ensures that all critical areas are covered, such as bedrooms, living rooms, kitchens, and outdoor spaces.
3.2 What Is the Importance of Cleanliness?
A clean and well-maintained property photographs better and presents a more appealing image to potential buyers. Ensuring the property is spotless avoids distractions and allows the property’s features to shine.
 Real Estate Photo Shoot
3.3 How Does a Home Stager Help?
A home stager enhances the property’s appeal by redecorating and arranging furniture, making it more attractive to potential buyers. Professional staging can significantly impact how a property is perceived, leading to quicker sales and higher offers.
3.4 What Is the Best Time of Day to Shoot Real Estate Photos?
Shooting during the golden hours (early morning or late afternoon) provides soft, warm lighting that enhances the property’s features. The soft shadows and warm tones of the golden hours create inviting and visually appealing photographs.
3.5 How Does a Tripod Improve Real Estate Photos?
A tripod stabilizes your camera, allowing for sharp images, especially in low-light conditions, and helps prevent perspective distortion. The stability provided by a tripod is essential for HDR photography, ensuring consistent framing across multiple shots.
4. What Are Some Advanced Techniques in Real Estate Photography?
Advanced techniques include mastering ambient light, being careful when mixing color temperatures, choosing the best perspective, shooting at the right height, correcting perspective distortion in post-production, using HDR, and photo compositing.
4.1 How Can Ambient Light Be Effectively Used?
Using ambient light effectively involves positioning yourself to capture natural light, closing blinds to reduce contrast, and turning off indoor lights to avoid mixed temperatures. Employing these techniques maximizes natural light benefits, creating bright and inviting images.
 How to Shoot Real Estate Photography
4.2 Why Is Managing Color Temperature Important?
Managing white balance is crucial to avoid color casts and ensure that the property looks natural in photographs. Mixed lighting can result in unnatural hues that detract from the property’s appeal.
4.3 How to Choose the Best Perspective?
Selecting the best perspective involves showcasing the property’s key features while capturing the viewer’s interest. Including three walls in a shot offers a better sense of space and dimension, enhancing the overall composition.
4.4 What Is the Ideal Shooting Height for Real Estate Photography?
Shooting at chest height is standard to minimize distortion, but adjusting to doorknob height may be necessary to capture foreground details. Varying your shooting height ensures that you capture the best angle and perspective for each room.
4.5 How to Correct Perspective Distortion in Post-Production?
Correcting perspective distortion involves using software like Lightroom or Photoshop to straighten lines and adjust angles. Fixing distortion ensures the property appears professional and well-proportioned.
4.6 How Does HDR Enhance Real Estate Photos?
HDR photography combines multiple exposures to capture a wide dynamic range, balancing dark interiors with bright exteriors. By merging different exposures, HDR photography ensures that all details are visible, creating a balanced and visually appealing image.
 How to do Real Estate Photography
4.7 What Is Photo Compositing?
Photo compositing involves combining multiple images, each lit differently, to create a final, perfectly lit image. This technique allows for detailed lighting control, ensuring every corner of the room is well-illuminated.
5. What Post-Processing Techniques Are Essential for Real Estate Photography?
Essential post-processing techniques include correcting lens distortion, adjusting white balance, and enhancing colors. These adjustments bring out the best in your images, creating polished and professional visuals.
5.1 How Do You Correct Lens Distortion?
Lens distortion can be corrected using software like Adobe Lightroom. In the Optics section, select “Use Profile Corrections” to automatically fix any lens distortion.
5.2 How Do You Adjust White Balance?
Adjusting white balance ensures accurate color representation. Use the white balance tool in your editing software to correct any color casts and achieve a neutral tone.
5.3 How Do You Enhance Colors?
Enhancing colors can make your photos more vibrant and appealing. Adjust saturation and vibrance in your editing software to bring out the natural colors of the property.
6. How Can dfphoto.net Help Improve Your Real Estate Photography?
dfphoto.net offers a wealth of resources to enhance your real estate photography skills, including detailed tutorials, stunning photo collections, and a vibrant photography community. By exploring dfphoto.net, you can access expert knowledge, gain inspiration from beautiful imagery, and connect with fellow photographers.
6.1 What Resources Are Available on dfphoto.net?
dfphoto.net provides access to in-depth guides, equipment reviews, and creative inspiration to help you refine your photographic techniques. The site serves as a comprehensive resource for both novice and experienced photographers.
6.2 How Can the dfphoto.net Community Help?
Engaging with the dfphoto.net community allows you to connect with other photographers, share insights, and receive valuable feedback on your work. This collaborative environment fosters growth and learning, helping you refine your craft.
6.3 What Inspiration Can You Find on dfphoto.net?
dfphoto.net showcases a curated collection of stunning real estate photos, offering inspiration and ideas for your own projects. By exploring these images, you can gain insights into composition, lighting, and styling techniques.
7. What Are the Ethical Considerations in Real Estate Photography?
Maintaining honesty and transparency is crucial; always represent the property accurately and avoid misleading potential buyers. Ethical real estate photography builds trust and ensures that potential buyers have a clear understanding of the property’s true features.
7.1 Why Is Accurate Representation Important?
Accurate representation ensures that potential buyers are not misled, fostering trust and preventing disappointment. Honesty in your photography leads to more satisfied clients and a stronger reputation.
7.2 How to Avoid Misleading Potential Buyers?
Avoid using extreme wide-angle lenses that exaggerate space or editing techniques that misrepresent the property’s condition. Focus on capturing realistic and balanced images that provide an accurate depiction of the property.
8. How Can You Market Your Real Estate Photography Services?
Effective marketing strategies include creating a strong online presence, networking with real estate agents, and showcasing a high-quality portfolio. By implementing these strategies, you can attract more clients and establish yourself as a leading real estate photographer.
8.1 What Is the Role of an Online Portfolio?
An online portfolio showcases your best work, demonstrating your skills and style to potential clients. A well-curated portfolio is essential for attracting new business and establishing your credibility.
8.2 How Important Is Networking with Real Estate Agents?
Networking with real estate agents can provide a steady stream of clients and valuable referrals. Building strong relationships with agents ensures a consistent flow of work and opportunities.
8.3 Why Is a Strong Online Presence Important?
A strong online presence, including a professional website and active social media profiles, helps you reach a wider audience and attract potential clients. Engaging online presence enhances your visibility and establishes you as a trusted professional in the industry.
9. How to Stay Updated with the Latest Trends in Real Estate Photography?
Staying updated involves following industry blogs, attending workshops, and experimenting with new techniques. By continuously learning and adapting, you can maintain a competitive edge and offer innovative services.
9.1 What Are the Benefits of Following Industry Blogs?
Industry blogs provide insights into the latest trends, techniques, and technologies in real estate photography. Staying informed allows you to adapt and improve your skills continuously.
9.2 How Do Workshops Enhance Your Skills?
Workshops offer hands-on training and personalized feedback, helping you refine your skills and stay current with industry best practices. Interactive learning environments are invaluable for skill development and networking.
9.3 Why Experiment with New Techniques?
Experimenting with new techniques allows you to discover innovative approaches and differentiate yourself from competitors. Continuously exploring new methods keeps your work fresh and engaging.
10. What Are Some Common Mistakes to Avoid in Real Estate Photography?
Common mistakes include poor lighting, cluttered spaces, and distorted perspectives. Addressing these issues will significantly improve the quality and appeal of your real estate photos.
10.1 How to Overcome Poor Lighting?
Utilize natural light whenever possible, supplement with external flashes, and use HDR techniques to balance exposure. Effective lighting is essential for showcasing the property’s features and creating a welcoming atmosphere.
10.2 How to Handle Cluttered Spaces?
Work with the homeowner or stager to declutter and depersonalize the space before the photoshoot. A clean and organized property photographs better and presents a more appealing image to potential buyers.
10.3 How to Prevent Distorted Perspectives?
Use a tripod, level your camera, and correct distortion in post-processing to ensure accurate and professional-looking images. Correcting perspective distortion enhances the overall quality and appeal of your photographs.
Real estate photography combines technical skill with an artistic eye. By following these tips and continuously improving your techniques, you can capture stunning visuals that help sell properties effectively. Visit dfphoto.net for more resources and inspiration to elevate your photography skills.
Elevate your real estate listings with professional-quality images. Visit dfphoto.net now to discover essential tutorials, explore captivating photography collections, and connect with a thriving community of photographers. Enhance your skills, gain inspiration, and create visuals that attract potential buyers and close more deals. Start your journey to becoming a top-tier real estate photographer today! You can find us at 1600 St Michael’s Dr, Santa Fe, NM 87505, United States, or give us a call at +1 (505) 471-6001.
FAQ: How to Shoot Real Estate Photos
1. What is the best camera setting for real estate photography?
The best camera settings for real estate photography typically involve using a narrow aperture (f/8 to f/11) to ensure sharpness throughout the image, a low ISO (100 to 400) to minimize noise, and adjusting the shutter speed to achieve proper exposure. Additionally, using a tripod is essential for stability.
2. How do you photograph a small room in real estate?
To photograph a small room in real estate, use a wide-angle lens (16-35mm), shoot from the corners to maximize space visibility, use a tripod to keep the camera steady, and ensure the room is well-lit, using natural light and supplemental lighting as needed. Correcting perspective distortion in post-processing is also crucial.
3. What makes a good real estate photo?
A good real estate photo is well-composed, accurately represents the property, has balanced lighting, sharp details, and correct perspective. It should also highlight the property’s best features and create an inviting atmosphere, enticing potential buyers.
4. How important is lighting in real estate photography?
Lighting is extremely important in real estate photography as it sets the mood, highlights features, and creates an inviting space. Using a combination of natural and artificial light to balance the exposure and minimize shadows is essential for capturing high-quality images.
5. Should I use HDR for real estate photography?
Yes, using HDR (High Dynamic Range) is often beneficial for real estate photography. HDR combines multiple exposures to capture a wider range of light and detail, especially in rooms with both bright windows and dark interiors, resulting in a balanced and visually appealing image.
6. What software is best for editing real estate photos?
The best software for editing real estate photos includes Adobe Lightroom and Adobe Photoshop. Lightroom is excellent for basic adjustments like exposure, white balance, and lens correction, while Photoshop offers more advanced editing capabilities such as compositing and detailed retouching.
7. How can I improve the composition of my real estate photos?
To improve composition, use the rule of thirds, shoot from optimal heights (chest or doorknob level), include leading lines to draw the viewer’s eye, and ensure the room is staged and clutter-free. Capturing three walls in a shot can also provide a better sense of space.
8. What are some common mistakes to avoid in real estate photography?
Common mistakes to avoid include poor lighting, cluttered spaces, distorted perspectives, using too wide of an angle (causing distortion), and not correcting white balance. Attention to these details can significantly enhance the quality of your photos.
9. How do I correct perspective distortion in real estate photos?
Perspective distortion can be corrected using editing software like Adobe Lightroom or Photoshop. In Lightroom, use the “Upright” tool in the Geometry panel, or manually adjust the vertical and horizontal sliders. In Photoshop, use the Lens Correction filter to fix distortion.
10. What is the ideal time of day to shoot real estate photos?
The ideal time of day to shoot real estate photos is during the “golden hours,” which are early morning and late afternoon. The soft, warm light during these times enhances the property’s features and creates a more inviting atmosphere. Cloudy days can also provide soft, even lighting, but may require more post-processing to enhance the sky.