Are you looking for ways How To Draw On A Photo On Iphone using the built-in Markup tool? Then you’re in the right place because dfphoto.net is here to help you master adding sketches, text, signatures, and more to your photos directly on your iPhone. Discover the hidden potential of your iPhone’s photo editing capabilities and unleash your creativity with simple yet powerful techniques. This guide covers everything from basic drawing to advanced editing, ensuring your photos stand out. Dive in to learn photo illustration and visual storytelling, and use photo annotations to bring your creative ideas to life.
1. What Apps and Features Use Markup on iPhone?
Markup on iPhone integrates seamlessly with several apps, enhancing your ability to annotate and personalize images. These apps and features include Mail, Messages, and Photos. Each provides unique tools and functionalities, allowing you to add drawings, text, and signatures directly onto your photos and documents. Mastering these integrations can significantly improve your workflow and creative expression.
1.1 How to Use Markup in Mail on iPhone?
You can enhance your emails by adding markups to photos and attachments:
- Open Mail and start a new email or reply to an existing one.
- Tap inside the email body, then tap the gray arrow icon or Return to open the format bar. Alternatively, tap inside the email, tap the cursor, and select Insert Photo or Video or Add Attachment. Scroll through the options by tapping the arrow icon if needed.
- Tap the Camera button or the Document button, then find the photo or PDF to attach and mark up.
- Tap the attachment, then tap the gray arrow icon. Tap the Markup button to add your annotations. Use the plus button to add a signature, text, and more.
- Tap Done, then send your email.
1.2 How to Use Markup in Messages on iPhone?
Markup in Messages allows you to quickly annotate and share photos with your contacts:
- Open Messages and tap the compose button to start a new conversation, or go to an existing one.
- Tap the Plus button, then tap Photos.
- Select a photo.
- Tap the photo in the message, then tap Markup. From here, you can add a sketch to the photo or tap the plus button for other Markup options.
 Annotating an image in Messages on an iPhone, showing the Markup button
- Tap Save, then tap Done.
- Tap the Send button.
1.3 How to Use Markup in Photos on iPhone?
You can edit your photos directly within the Photos app by using Markup:
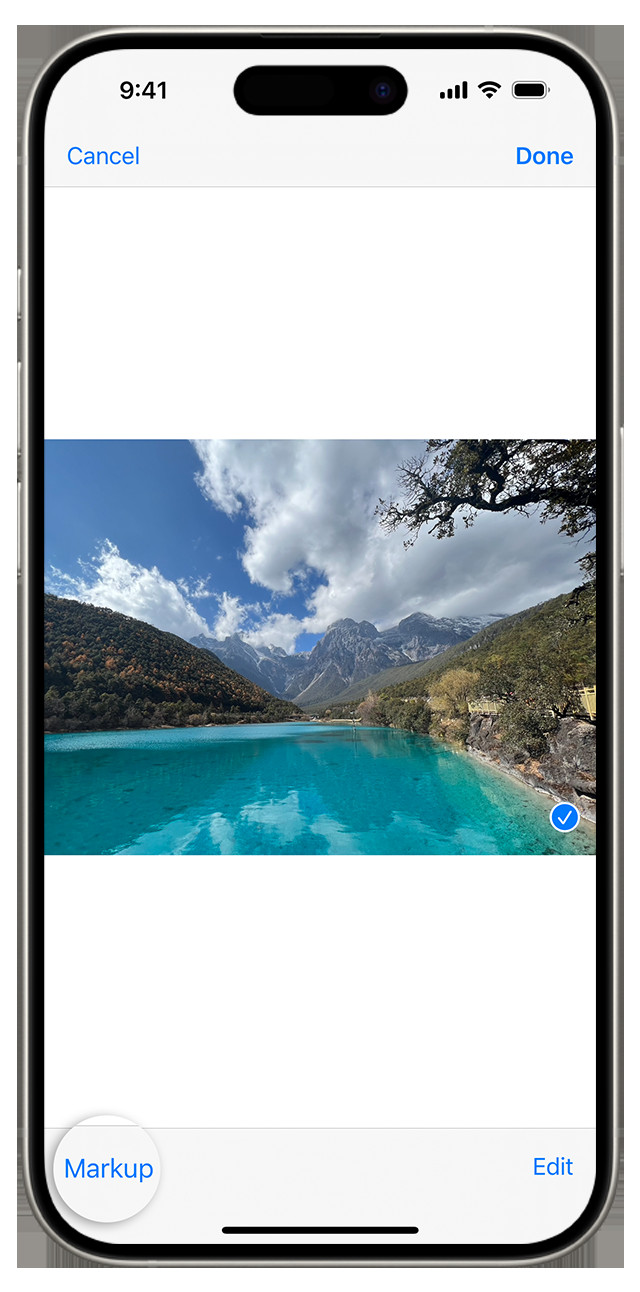
- Go to Photos and select the photo you want to edit.
- Tap Edit, then tap the Markup button. Tap the Add button to add text, shapes, and more.
 Adding text to an image in Photos using Markup on an iPhone
- Tap Done, then tap Done again.
2. How to Draw with Markup on iPhone?
Drawing with Markup on iPhone is intuitive, allowing you to personalize your photos with ease. After selecting a Markup tool such as the pen, highlighter, or pencil, choose a color and start drawing. Tap the same tool again to adjust the color opacity or select another tool to change the thickness. The Color button also allows you to change color shades, providing a versatile drawing experience. This feature is useful for quick sketches, detailed annotations, and creative enhancements.
 Using Markup to draw directly onto an image on an iPhone
2.1 How to Move a Drawing on iPhone?
Moving a drawing in Markup is simple, giving you control over the placement of your annotations. After drawing something, tap the Lasso button and trace a circle around the drawing you want to move. Then, drag it to your desired location. This function is beneficial when rearranging elements to achieve the perfect composition.
2.2 How to Erase or Undo a Drawing on iPhone?
Correcting mistakes in Markup is straightforward with the erase and undo tools. To erase a drawing, tap the eraser button and rub your finger across the area you want to remove. Alternatively, you can undo any markup action using the Undo button. If you accidentally undo a markup, shake your device and tap Redo. These features ensure a smooth editing process, allowing you to refine your markups with precision.
3. How to Add Text, a Signature, and Shapes in Markup on iPhone?
Markup on iPhone offers a range of tools to enhance your photos, including text, signatures, and shapes. These features allow for detailed customization, adding a professional touch to your images. Adding text can help convey messages, signatures can personalize documents, and shapes can highlight specific areas.
3.1 How to Add Text in Markup on iPhone?
To add text, tap the Add button and select the text option. A text box will appear on your image, which you can move and resize. Tap the circle to choose a different text color, then tap the formatting button to adjust the font, size, and alignment. This flexibility allows you to create clear, impactful text annotations on your photos.
3.2 How to Add a Signature in Markup on iPhone?
Adding a signature in Markup is useful for personalizing documents. Tap the Add button and select the signature option. You can add an existing signature or create a new one. Signatures can be resized and placed anywhere on the document, providing a convenient way to authenticate and personalize your files.
3.3 How to Add Shapes in Markup on iPhone?
Shapes can be added to screenshots, photos, or PDFs to highlight or emphasize specific areas. Tap the Add button and select a shape. Drag the shape to where you want it and use the blue dots to adjust its size and shape. Use the green dots to adjust the arrow’s curve and the speech bubble’s appearance. These tools make it easy to draw attention to important details in your images.
4. Mastering Photo Annotation Techniques on iPhone
Photo annotation techniques can significantly enhance your ability to communicate ideas and provide context to your images. Whether you’re marking up documents for work or adding creative touches to your photos, understanding these techniques will help you make the most of the Markup tools on your iPhone. By using a combination of drawing, text, signatures, and shapes, you can transform ordinary photos into informative and engaging visuals.
4.1 Utilizing Different Markup Tools for Various Effects
Each tool in Markup serves a unique purpose, and understanding their applications can elevate your photo editing skills.
- Pen: Ideal for freehand drawing and detailed annotations.
- Highlighter: Perfect for emphasizing specific sections of an image without obscuring the content.
- Pencil: Suitable for creating sketches and adding subtle details.
- Text Tool: Useful for adding labels, descriptions, and captions.
- Shapes: Great for highlighting areas or creating diagrams.
- Magnifier: Helps focus on specific details by magnifying a selected area.
4.2 Creative Uses of Color and Opacity in Photo Annotation
Color and opacity play crucial roles in effective photo annotation, allowing you to create visually appealing and informative markups.
- Color Selection: Choose colors that contrast well with the underlying image to ensure your annotations are easily visible. Use different colors to distinguish between various types of annotations.
- Opacity Adjustment: Adjust the opacity of your annotations to create subtle effects or to ensure that the underlying image remains visible. Lower opacity can be useful when highlighting without completely obscuring the content.
4.3 Advanced Tips for Precise Drawing and Annotation
Precise drawing and annotation require a steady hand and a few advanced techniques:
- Zooming In: Zoom in on the image to add fine details and precise annotations. This is particularly useful when working on small areas or adding intricate drawings.
- Using a Stylus: Consider using a stylus for more accurate drawing and writing. A stylus can provide better control and precision compared to using your finger.
- Practicing Regularly: The more you practice, the better you will become at using the Markup tools. Experiment with different techniques and tools to find what works best for you.
5. How Can dfphoto.net Help You Improve Your iPhone Photography?
At dfphoto.net, we are dedicated to helping you enhance your iPhone photography skills. Our website offers a wealth of resources, including detailed tutorials, creative inspiration, and expert advice. Whether you are a beginner or an experienced photographer, dfphoto.net provides the tools and knowledge you need to take your iPhone photography to the next level.
5.1 Exploring dfphoto.net for Tutorials and Creative Inspiration
dfphoto.net is your go-to source for comprehensive tutorials and creative inspiration:
- Detailed Tutorials: Access step-by-step guides on various iPhone photography techniques, including composition, lighting, and editing.
- Creative Ideas: Discover innovative ways to use your iPhone camera and explore different photography genres.
- Expert Tips: Learn from professional photographers who share their insights and best practices.
5.2 Connecting with the Photography Community
Join the dfphoto.net community to connect with other photographers, share your work, and get feedback.
- Forums: Participate in discussions, ask questions, and share your knowledge with fellow photographers.
- Galleries: Showcase your best iPhone photos and get inspired by the work of others.
- Workshops: Attend online and in-person workshops to learn new skills and techniques.
5.3 Leveraging dfphoto.net Resources for Advanced Editing Techniques
dfphoto.net provides resources to help you master advanced editing techniques on your iPhone.
- Software Reviews: Get unbiased reviews of the best photo editing apps for iPhone.
- Editing Tutorials: Learn how to use advanced editing tools to enhance your photos and create stunning effects.
- Preset Packs: Download preset packs to quickly apply professional-looking edits to your photos.
6. What Are the Benefits of Drawing on Photos on Your iPhone?
Drawing on photos on your iPhone offers numerous benefits, from enhancing personal expression to improving professional communication. This versatile feature allows you to personalize images, add context, and create engaging visuals directly on your device. Whether you’re a casual user or a professional, mastering the art of drawing on photos can significantly enhance your digital experience.
6.1 Personalizing Your Photos
Adding personal touches to your photos can make them more meaningful and memorable.
- Creative Expression: Use the drawing tools to add unique sketches, doodles, and artistic elements to your photos.
- Adding Captions: Write personalized captions and messages directly on your photos to share your thoughts and feelings.
- Creating Memes: Turn ordinary photos into funny memes by adding humorous drawings and text.
6.2 Enhancing Communication
Drawing on photos can be a powerful tool for communication in both personal and professional contexts.
- Providing Feedback: Annotate screenshots and documents with specific feedback, making it easier to communicate changes and suggestions.
- Creating Tutorials: Draw on photos to create visual guides and tutorials for various tasks.
- Highlighting Key Information: Use drawings and shapes to emphasize important details in images and documents.
6.3 Improving Collaboration
Collaborating with others becomes more efficient when you can annotate and share photos with ease.
- Sharing Ideas: Sketch out ideas and concepts on photos to share your vision with your team.
- Project Management: Annotate project-related photos to track progress and communicate updates.
- Remote Work: Collaborate effectively with remote teams by annotating and sharing images in real-time.
7. What Are the Best Accessories for Drawing on Photos on Your iPhone?
To enhance your drawing experience on the iPhone, several accessories can provide better precision, comfort, and functionality. These accessories range from styluses to screen protectors, each designed to improve your workflow and creativity. Investing in the right accessories can transform your iPhone into a powerful tool for digital art and photo annotation.
7.1 Styluses for Enhanced Precision
A stylus is an essential accessory for anyone serious about drawing on their iPhone.
- Apple Pencil: The Apple Pencil is designed to work seamlessly with the iPad, but it can also be used on iPhones with a compatible screen protector. It offers unparalleled precision and pressure sensitivity, making it ideal for detailed drawing and writing.
- Adonit Styluses: Adonit offers a range of styluses designed for various devices, including iPhones. These styluses provide excellent precision and are a more affordable alternative to the Apple Pencil.
- Generic Capacitive Styluses: Numerous generic capacitive styluses are available at various price points. While they may not offer the same level of precision as the Apple Pencil or Adonit styluses, they can still be a significant improvement over using your finger.
7.2 Screen Protectors for a Better Drawing Surface
The type of screen protector you use can impact your drawing experience.
- Matte Screen Protectors: Matte screen protectors provide a paper-like texture that can make drawing feel more natural. They also reduce glare, making it easier to see your screen in bright light.
- Tempered Glass Screen Protectors: Tempered glass screen protectors offer excellent protection against scratches and impacts. While they may not provide the same texture as matte screen protectors, they offer a smooth and durable drawing surface.
7.3 Stands and Grips for Comfortable Use
Using a stand or grip can make drawing on your iPhone more comfortable, especially for extended periods.
- Adjustable Stands: An adjustable stand allows you to position your iPhone at the perfect angle for drawing. This can help reduce strain on your neck and wrists.
- Ergonomic Grips: Ergonomic grips can make your iPhone easier to hold and prevent hand fatigue. Look for grips that are designed to be comfortable and provide a secure hold.
8. How to Overcome Common Challenges When Drawing on Photos on Your iPhone?
Drawing on photos on your iPhone can be a rewarding experience, but it also comes with its own set of challenges. From dealing with limited screen space to achieving precise lines, understanding these challenges and how to overcome them is crucial for improving your skills. By implementing the right techniques and using the appropriate tools, you can enhance your drawing experience and create stunning visuals on your iPhone.
8.1 Dealing with Limited Screen Space
The limited screen space on an iPhone can make detailed drawing difficult.
- Zooming In: Zoom in on the image to add fine details and precise annotations. This allows you to work on small areas with greater accuracy.
- Using a Stylus: A stylus can provide better control and precision, making it easier to draw on small screens.
- Simplifying Designs: Simplify your designs and focus on the essential elements to make the most of the available screen space.
8.2 Achieving Precise Lines and Curves
Creating precise lines and curves can be challenging without the right techniques.
- Steady Hand: Practice drawing with a steady hand to improve the accuracy of your lines.
- Using Guides: Use the built-in shapes and lines tools to create straight lines and perfect curves.
- Zooming In: Zoom in on the image to ensure that your lines and curves are exactly where you want them.
8.3 Managing Mistakes and Corrections
Mistakes are inevitable when drawing, but there are several ways to manage them effectively.
- Using the Undo Button: The undo button is your best friend when it comes to correcting mistakes. Use it to quickly remove unwanted lines and shapes.
- Using the Eraser Tool: The eraser tool allows you to selectively remove parts of your drawing. Use it to clean up small mistakes and refine your work.
- Practicing Patience: Don’t get discouraged by mistakes. Practice patience and keep working on your drawing until you are satisfied with the result.
9. What Are Some Creative Ideas for Drawing on Photos on Your iPhone?
Drawing on photos on your iPhone opens up a world of creative possibilities. Whether you’re looking to add a personal touch to your memories, create eye-catching social media posts, or explore digital art, the options are endless. By experimenting with different techniques and tools, you can transform ordinary photos into unique and engaging visuals.
9.1 Adding Whimsical Illustrations to Photos
Transform your photos into whimsical works of art by adding fun and playful illustrations.
- Doodles and Sketches: Add doodles, sketches, and cartoon characters to your photos to create a lighthearted and joyful effect.
- Fantasy Elements: Incorporate fantasy elements such as wings, halos, and magical creatures to create surreal and enchanting images.
- Nature-Inspired Drawings: Draw flowers, leaves, and other nature-inspired elements to add a touch of beauty and tranquility to your photos.
9.2 Creating Custom Stickers and Emojis
Design your own stickers and emojis to personalize your messages and social media posts.
- Character Design: Create unique characters and avatars that represent you or your brand.
- Expressive Emojis: Design emojis that convey a wide range of emotions and expressions.
- Themed Stickers: Create stickers that are themed around specific events, holidays, or interests.
9.3 Designing Photo-Based Greeting Cards
Turn your photos into personalized greeting cards for special occasions.
- Birthday Cards: Add birthday-themed drawings and messages to your photos to create unique birthday cards.
- Holiday Cards: Design holiday cards with festive drawings and greetings.
- Thank You Cards: Create thank you cards with heartfelt messages and personalized illustrations.
10. How to Optimize Your iPhone Photos for Drawing and Editing?
Optimizing your iPhone photos for drawing and editing ensures that you have the best possible canvas to work with. From adjusting camera settings to using the right lighting, several factors can impact the quality of your photos and the ease with which you can draw on them. By following these tips, you can enhance your iPhone photography and create stunning visuals with your drawings.
10.1 Adjusting Camera Settings for Optimal Image Quality
Proper camera settings are crucial for capturing high-quality photos that are easy to draw on.
- Resolution: Set your camera to the highest resolution to capture as much detail as possible.
- HDR Mode: Use HDR (High Dynamic Range) mode to capture a wider range of tones and details in your photos.
- Gridlines: Enable gridlines to help you compose your shots and ensure that your photos are well-balanced.
10.2 Using Natural and Artificial Lighting Effectively
Lighting plays a vital role in the quality of your photos.
- Natural Light: Use natural light whenever possible to create soft and flattering images. Avoid harsh sunlight, which can create strong shadows and blown-out highlights.
- Artificial Light: If you need to use artificial light, use a softbox or diffuser to soften the light and reduce harsh shadows.
- Golden Hour: The golden hour (the hour after sunrise and the hour before sunset) provides warm and beautiful light that is perfect for photography.
10.3 Editing Photos Before Drawing
Basic photo editing can enhance the quality of your images and make them easier to draw on.
- Cropping: Crop your photos to improve their composition and remove distracting elements.
- Adjusting Exposure: Adjust the exposure to brighten or darken your photos.
- Adjusting Contrast: Adjust the contrast to make your photos more vibrant and dynamic.
FAQ: How to Draw on a Photo on iPhone?
Can I draw on any photo on my iPhone?
Yes, you can draw on any photo in your Photos app using the Markup tool, as well as photos attached in Mail and Messages.
Is the Markup tool free to use?
Yes, the Markup tool is a built-in feature on iPhones and is free to use.
Can I add text to photos using Markup?
Yes, the Markup tool includes a text option for adding labels, descriptions, and captions.
Can I erase or undo my drawings in Markup?
Yes, Markup provides both an eraser tool and an undo button for correcting mistakes.
Can I move drawings after I’ve made them?
Yes, you can use the Lasso tool to select and move your drawings within the photo.
Can I change the color and thickness of my drawing tools?
Yes, you can adjust the color, opacity, and thickness of the pen, highlighter, and pencil tools.
Can I add shapes to my photos using Markup?
Yes, Markup includes a variety of shapes that you can add and customize.
Can I sign documents using Markup?
Yes, Markup allows you to add a saved signature or create a new one.
Can I use a stylus with Markup for more precise drawing?
Yes, using a stylus can enhance precision when drawing with Markup.
Where can I find more tutorials and tips for iPhone photography?
You can find more tutorials, tips, and creative inspiration at dfphoto.net.
Address: 1600 St Michael’s Dr, Santa Fe, NM 87505, United States. Phone: +1 (505) 471-6001. Website: dfphoto.net.