Do you want to give your digital photos a timeless, nostalgic charm? With dfphoto.net, you can easily learn How To Make A Photo Look Vintage by mastering techniques in color manipulation, texture addition, and understanding of photographic history, all aimed at transforming your modern images into captivating vintage artworks. dfphoto.net offers a comprehensive guide covering light leaks, film grain simulation, and faded colors, ensuring your photos evoke authentic vintage aesthetics with resources like Lightroom presets and Photoshop actions.
1. What Are the Key Elements of a Vintage Photo Effect?
The key elements of a vintage photo effect include faded colors, film grain, light leaks, and a slightly soft focus, which mimic the characteristics of older film and lenses. These elements contribute to the overall aged and nostalgic aesthetic that defines vintage photography.
Vintage photography evokes a sense of nostalgia and timelessness. Achieving this effect in your digital photos involves understanding the nuances that characterize older film and printing techniques. Let’s explore the key elements that contribute to the vintage aesthetic:
- Faded Colors: Over time, the colors in old photographs tend to fade, resulting in a softer, less saturated look. This effect can be replicated digitally by reducing the saturation and vibrancy of your images.
- Film Grain: Unlike the clean, noise-free images produced by modern digital cameras, vintage photos often exhibit noticeable film grain. Adding grain to your digital photos can create a more textured and authentic vintage feel.
- Light Leaks: Light leaks are imperfections caused by unintended light exposure on film. These leaks can appear as streaks or blotches of light, adding a unique and unpredictable element to the image.
- Soft Focus: Older lenses often had a softer focus compared to modern lenses, resulting in images with slightly blurred details. This effect can be emulated by applying a subtle blur or softening filter to your digital photos.
1.1. Why is Understanding the History of Photography Important in Achieving a Vintage Look?
Understanding the history of photography is essential for achieving a convincing vintage look because it provides context for the visual characteristics of different eras, informing choices about color palettes, composition, and post-processing techniques. Knowledge of historical photography styles allows for a more authentic and nuanced recreation of vintage aesthetics.
Knowing the history of photography allows you to understand the nuances of vintage photos, such as specific color palettes or the types of imperfections that were common during certain periods. Let’s see why it’s important:
- Understanding Historical Context: By studying the history of photography, you can gain insights into the techniques, equipment, and styles that were prevalent during different eras.
- Informed Decision-Making: Historical knowledge informs your choices about color palettes, composition, and post-processing techniques.
- Authenticity and Nuance: Understanding the historical context allows you to create a more authentic and nuanced vintage look.
- Inspiration and Creativity: Studying the work of photographers from the past can inspire you to experiment with new ideas and approaches.
An analog camera provides the basics for capturing vintage-inspired photography.
2. What Are the Best Software Tools for Creating a Vintage Photo Effect?
The best software tools for creating a vintage photo effect include Adobe Photoshop and Lightroom, as well as other specialized apps like VSCO and Snapseed, because they offer a range of features specifically designed for color grading, adding textures, and simulating film effects. These tools allow photographers to precisely emulate the characteristics of vintage photography.
Many software tools are available for creating vintage photo effects, each with its own strengths and weaknesses. Some of the best options include:
2.1. Adobe Photoshop
Adobe Photoshop is considered the industry-standard for image editing, which can be used to create complex vintage effects through layers, masks, and a wide range of filters. With advanced color grading, texture overlays, and distortion effects, Photoshop provides many ways to simulate the look of aged photos.
Photoshop is a powerful tool for creating vintage photo effects, offering a wide range of features and flexibility.
- Layers and Masks: Photoshop’s layer and mask system allows you to make non-destructive edits and adjustments.
- Color Grading: The software provides advanced color grading tools for manipulating hues, saturation, and brightness.
- Filters and Effects: Photoshop offers a variety of filters and effects that can be used to simulate the characteristics of vintage photos.
- Texture Overlays: You can add texture overlays to your photos to create a more tactile and aged appearance.
2.2. Adobe Lightroom
Adobe Lightroom is a popular choice for photographers because it offers user-friendly interface and non-destructive editing capabilities for applying vintage-inspired presets and adjustments. Lightroom’s focus on global adjustments and color grading makes it ideal for achieving a consistent vintage look across multiple images.
Lightroom is another excellent option for creating vintage photo effects, offering a more streamlined workflow and a focus on global adjustments.
- Presets: Lightroom allows you to save and apply presets, which are pre-defined sets of adjustments that can be applied to your photos with a single click.
- Global Adjustments: Lightroom’s adjustment tools are designed for making global changes to your photos, such as adjusting exposure, contrast, and color balance.
- Color Grading: The software offers powerful color grading tools for manipulating the colors in your photos.
- Non-Destructive Editing: Lightroom’s editing process is non-destructive, meaning that your original image remains untouched.
2.3. VSCO
VSCO (Visual Supply Company) is a mobile app known for its film-inspired filters and editing tools that can create subtle, authentic vintage effects. With a wide range of presets based on classic film stocks, VSCO is a great choice for photographers seeking a quick and easy way to add a vintage touch to their photos on mobile devices.
VSCO is a popular mobile app for creating vintage photo effects, offering a wide range of film-inspired presets and editing tools.
- Film-Inspired Presets: VSCO’s presets are designed to emulate the look of classic film stocks, such as Kodak Portra, Fujifilm Velvia, and Ilford HP5.
- Editing Tools: In addition to presets, VSCO offers a range of editing tools for fine-tuning your photos, such as exposure, contrast, and color adjustments.
- User-Friendly Interface: VSCO’s interface is intuitive and easy to use, making it a great choice for both beginners and experienced photographers.
- Mobile Convenience: VSCO is available for both iOS and Android devices, allowing you to edit your photos on the go.
2.4. Snapseed
Snapseed, developed by Google, is a free mobile app with a variety of sophisticated editing tools, including selective adjustments, healing brushes, and film-inspired filters. Its user-friendly interface and powerful features make Snapseed a great option for creating vintage effects on smartphones and tablets.
Snapseed is a free mobile app developed by Google, offering a range of powerful editing tools and filters.
- Selective Adjustments: Snapseed allows you to make adjustments to specific areas of your photos, giving you precise control over the editing process.
- Healing Brush: The app’s healing brush tool can be used to remove blemishes and imperfections from your photos.
- Film-Inspired Filters: Snapseed offers a variety of film-inspired filters that can be used to create vintage effects.
- User-Friendly Interface: Snapseed’s interface is clean and intuitive, making it easy to learn and use.
The results from analog cameras can be an influence in creating vintage photo effects.
3. How Do You Adjust Color Balance to Achieve a Vintage Look?
Adjusting color balance to achieve a vintage look involves increasing the red and yellow tones in the highlights and midtones, while adding blue tones to the shadows, because these adjustments emulate the color shifts that occur in old photographs due to aging and fading. This technique helps create a warmer, nostalgic feel in the image.
To achieve a vintage look, manipulating the color balance of your photos is important. This involves adjusting the hues, saturation, and brightness of different colors in your image to emulate the color shifts that occur in old photographs due to aging and fading.
- Warm Tones: Vintage photos often have a warm, golden hue, which can be achieved by increasing the red and yellow tones in your image.
- Cool Tones: In contrast to the warm tones, vintage photos may also exhibit cool tones in the shadows, which can be achieved by adding blue tones to your image.
- Subtle Adjustments: When adjusting the color balance, it’s important to make subtle adjustments to avoid an artificial or overdone look.
- Experimentation: Experiment with different color balance settings to find the look that best suits your photo and your personal preferences.
4. What Techniques Can Be Used to Simulate Film Grain in Digital Photos?
Techniques to simulate film grain in digital photos include adding noise in photo editing software like Photoshop or Lightroom, using specialized film grain plugins, or overlaying textures of actual film scans. These methods introduce a randomized, grainy texture that mimics the look of traditional film, enhancing the vintage aesthetic.
Film grain is a characteristic of vintage photos that adds texture and visual interest. Digital photos, on the other hand, tend to be clean and noise-free. To simulate film grain in your digital photos, you can use a variety of techniques:
- Adding Noise: Most photo editing software programs, such as Photoshop and Lightroom, have a noise or grain filter that allows you to add artificial grain to your photos.
- Film Grain Plugins: Several plugins are specifically designed to simulate film grain, offering more realistic and customizable grain patterns.
- Texture Overlays: You can overlay textures of actual film scans onto your digital photos to create a more authentic film grain effect.
- Subtle Application: When adding film grain, it’s important to apply it subtly to avoid overwhelming the image.
5. What Is the Role of Contrast and Brightness in Creating a Vintage Aesthetic?
The role of contrast and brightness in creating a vintage aesthetic involves reducing contrast and slightly increasing brightness, which softens the image and gives it a faded, aged appearance. High contrast and overly bright photos can appear too modern, so adjusting these elements is crucial for achieving an authentic vintage look.
Contrast and brightness play a significant role in creating a vintage aesthetic. Vintage photos often have a softer, less contrasty look compared to modern photos. Adjusting the contrast and brightness of your digital photos can help you achieve this effect.
- Reduced Contrast: Lowering the contrast of your photos can create a more muted and subdued look, which is characteristic of vintage photos.
- Increased Brightness: Increasing the brightness of your photos can make them appear slightly faded and washed out, which is also common in vintage photos.
- Subtle Adjustments: As with color balance, it’s important to make subtle adjustments to avoid an unnatural or artificial look.
- Consider the Subject Matter: The ideal contrast and brightness settings may vary depending on the subject matter of your photo.
6. Can You Explain How to Use Light Leaks to Enhance the Vintage Effect?
Using light leaks to enhance the vintage effect involves overlaying images with transparent textures that mimic the appearance of light seeping into old cameras, creating streaks, spots, or hazy areas. These light leaks add a sense of imperfection and age to the photo, enhancing the vintage aesthetic and making it appear as though it was taken with an older film camera.
Light leaks are imperfections caused by unintended light exposure on film. These leaks can appear as streaks or blotches of light, adding a unique and unpredictable element to the image. To use light leaks to enhance the vintage effect:
- Light Leak Overlays: You can find light leak overlays online, which are images with transparent areas that simulate the appearance of light leaks.
- Placement and Blending: Experiment with different placements and blending modes to find the most natural and visually appealing effect.
- Subtlety: Use light leaks sparingly and subtly to avoid overwhelming the image.
- Consider the Overall Aesthetic: Light leaks should complement the overall vintage aesthetic of your photo.
Vintage photos offer unique textures for emulation.
7. What Are Some Common Mistakes to Avoid When Trying to Create a Vintage Photo Effect?
Common mistakes to avoid when trying to create a vintage photo effect include overdoing the adjustments (such as excessive grain or unrealistic colors), using overly sharp or clear images as a starting point, and neglecting to consider the historical context of the vintage style being emulated. Subtle and informed adjustments yield the most authentic results.
When trying to create a vintage photo effect, it’s easy to fall into common pitfalls that can result in an unnatural or artificial look. Here are some mistakes to avoid:
- Overdoing the Adjustments: Adding too much grain, contrast, or color can make your photos look fake and overprocessed.
- Ignoring the Historical Context: Failing to consider the historical context of vintage photography can lead to inaccurate or inconsistent results.
- Using Overly Sharp Images: Vintage photos tend to be softer and less sharp than modern photos. Starting with an overly sharp image can make it difficult to achieve an authentic vintage look.
- Neglecting Composition: Vintage photos often have a distinct composition style. Paying attention to composition can help you create a more convincing vintage effect.
8. How Does the Choice of Subject Matter Influence the Success of a Vintage Photo Effect?
The choice of subject matter significantly influences the success of a vintage photo effect because certain subjects (such as classic cars, vintage fashion, or historical landmarks) naturally complement the aesthetic, enhancing the believability and nostalgic appeal of the final image. The right subject matter reinforces the vintage mood and narrative.
The subject matter of your photos can significantly influence the success of a vintage photo effect. Certain subjects naturally lend themselves to a vintage aesthetic, while others may look out of place.
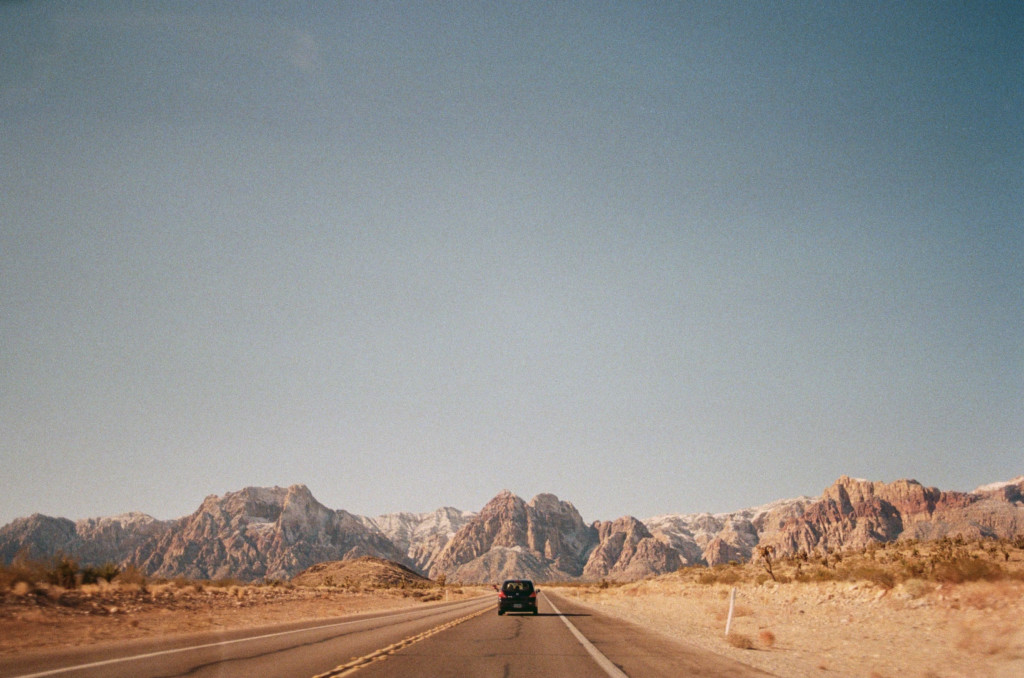
- Vintage-Inspired Subjects: Subjects such as classic cars, vintage fashion, or historical landmarks can enhance the believability and nostalgic appeal of your photos.
- Timeless Subjects: Subjects such as portraits, landscapes, or still life can also work well with a vintage effect, as long as the composition and styling are consistent with the vintage aesthetic.
- Modern Subjects: Modern subjects, such as smartphones or contemporary architecture, may clash with a vintage effect.
- Consider the Narrative: Choose subjects that reinforce the vintage mood and narrative you’re trying to create.
9. What Role Does Texture Play in Making a Photo Look Vintage?
Texture plays a significant role in making a photo look vintage by adding a tactile, aged quality that mimics the imperfections and surface details found in old prints and film. Textures such as paper grain, scratches, or dust enhance the sense of age and authenticity, creating a more believable vintage effect.
Texture is an essential element in creating a convincing vintage photo effect. Vintage photos often have a tactile, aged quality due to the imperfections and surface details of old prints and film.
- Paper Grain: Adding paper grain to your photos can simulate the texture of old photographic paper.
- Scratches and Dust: Adding subtle scratches and dust particles can enhance the sense of age and authenticity.
- Texture Overlays: You can use texture overlays to add a variety of textures to your photos, such as canvas, linen, or leather.
- Subtle Application: As with other adjustments, it’s important to apply textures subtly to avoid an overdone or artificial look.
10. What Are the Best Practices for Digitizing Old Photos to Preserve Their Vintage Charm?
Best practices for digitizing old photos to preserve their vintage charm include using a high-resolution scanner, handling photos with care to avoid damage, and making minimal edits to retain their original character. Store the digital copies in multiple locations to ensure preservation and accessibility.
If you have old photos that you want to digitize and preserve their vintage charm, it’s important to follow best practices to ensure the best possible results:
- High-Resolution Scanning: Use a high-resolution scanner to capture as much detail as possible from the original photos.
- Careful Handling: Handle the photos with care to avoid damage. Wear gloves and use a soft brush to remove dust and debris.
- Minimal Editing: Make minimal edits to the photos to preserve their original character. Avoid over-sharpening or over-correcting colors.
- Backup and Storage: Store the digital copies in multiple locations to ensure their preservation and accessibility.
11. How Can I Use Presets and Actions to Quickly Apply a Vintage Look?
You can quickly apply a vintage look by using presets and actions in photo editing software like Adobe Lightroom and Photoshop, which automate a series of adjustments to mimic the characteristics of vintage photos. These tools streamline the editing process, allowing for consistent and efficient application of vintage effects across multiple images.
Presets and actions are pre-defined sets of adjustments that can be applied to your photos with a single click. They can be a great way to quickly and easily apply a vintage look to your images.
- Lightroom Presets: Lightroom presets are available for a wide range of vintage styles, from subtle and understated to bold and dramatic.
- Photoshop Actions: Photoshop actions can automate more complex editing tasks, such as adding textures, light leaks, and other effects.
- Customization: While presets and actions can be a great starting point, it’s important to customize them to suit your individual photos and preferences.
- Experimentation: Experiment with different presets and actions to find the look that best suits your style and the subject matter of your photos.

Editing software offers a range of options for vintage image creation.
12. What Are Some Examples of Different Vintage Photography Styles and How to Recreate Them?
Examples of different vintage photography styles include:
- Victorian era (high contrast, sepia tones): Recreate this by increasing contrast, desaturating colors, and adding a sepia filter.
- Early 20th century (soft focus, muted colors): Use a soft focus effect and reduce saturation.
- Mid-century Kodachrome (vibrant, warm colors): Boost saturation and add warm tones like reds and yellows.
- Polaroid (slightly faded, square format): Reduce contrast, add a border, and apply a slight blur.
These techniques provide a base for emulating specific vintage aesthetics.
Different eras of photography had distinct styles and characteristics. Here are a few examples of vintage photography styles and how to recreate them:
- Victorian Era: Victorian-era photos often have a formal, posed look with high contrast and sepia tones. To recreate this style, increase the contrast of your photos, desaturate the colors, and add a sepia filter.
- Early 20th Century: Early 20th-century photos tend to have a softer, more romantic look with muted colors and a slightly dreamy quality. Use a soft focus effect, reduce the saturation of your photos, and add a subtle vignette to the edges.
- Mid-Century Kodachrome: Kodachrome film, popular in the mid-20th century, produced vibrant, warm colors with a distinctive look. Boost the saturation of your photos, add warm tones such as reds and yellows, and increase the contrast slightly.
- Polaroid: Polaroid photos have a unique look with slightly faded colors, a square format, and a distinctive border. Reduce the contrast of your photos, add a border, and apply a slight blur to simulate the Polaroid effect.
13. How Can I Use Textures and Overlays to Create a Distressed or Aged Effect?
You can use textures and overlays to create a distressed or aged effect by layering images of aged paper, canvas, or other rough surfaces onto your photo in editing software, using blending modes to integrate the textures seamlessly. This adds visual depth and simulates the physical wear and tear of vintage photographs.
Textures and overlays can be used to add a distressed or aged effect to your photos, simulating the wear and tear of vintage prints.
- Aged Paper: Overlaying images of aged paper can add a subtle, textured look to your photos.
- Canvas: Adding a canvas texture can simulate the look of old paintings or prints.
- Grunge: Overlaying grunge textures, such as scratches, cracks, and stains, can create a more dramatic and distressed look.
- Blending Modes: Experiment with different blending modes, such as Multiply, Overlay, and Soft Light, to integrate the textures seamlessly into your photos.
14. What Are the Key Differences Between Black and White and Color Vintage Photography Effects?
The key differences between black and white and color vintage photography effects lie in the color palette:
- Black and white focuses on tones and contrast, needing careful adjustment of brightness and grain to emulate the period look.
- Color vintage effects require managing color saturation, warmth, and accuracy, often involving desaturation and shifting hues to match the color characteristics of historical film.
The choice depends on the desired aesthetic and historical period.
Black and white and color vintage photography effects have distinct characteristics and require different approaches.
- Black and White: Black and white vintage photography relies on tones, contrast, and texture to convey a sense of age and nostalgia.
- Color: Color vintage photography requires careful attention to color balance, saturation, and hue to recreate the look of vintage film.
- Historical Accuracy: Research the specific color palettes and characteristics of different eras to achieve a more accurate vintage look.
- Personal Preference: Ultimately, the choice between black and white and color vintage photography depends on your personal preferences and the specific mood you’re trying to create.
15. How Do You Choose the Right Level of Realism When Applying a Vintage Effect?
Choosing the right level of realism when applying a vintage effect depends on the intended purpose and audience, balancing authenticity with aesthetic appeal. Evaluate whether the goal is historical accuracy or artistic expression, and adjust the intensity of effects accordingly to maintain believability and visual harmony.
When applying a vintage effect, it’s important to strike a balance between realism and artistic expression. Too much realism can make your photos look dull and uninspired, while too little can make them look fake and overprocessed.
- Consider the Purpose: Consider the purpose of your photos and the message you’re trying to convey.
- Know Your Audience: The level of realism may also depend on your audience.
- Experimentation: Experiment with different levels of realism to find the look that best suits your style and the subject matter of your photos.
- Feedback: Ask for feedback from others to get a fresh perspective on your photos and the effectiveness of your vintage effect.
16. What Are Some Less Obvious Details That Can Enhance a Vintage Photo Effect?
Less obvious details that can enhance a vintage photo effect include:
- Subtle chromatic aberration.
- Slight lens distortion.
- Period-specific aspect ratios.
- Imitating printing flaws like uneven development or slight blurring in specific areas.
These details add authenticity and depth to the vintage simulation.
In addition to the more common techniques, there are several less obvious details that can enhance a vintage photo effect:
- Subtle Imperfections: Adding subtle imperfections, such as dust spots, scratches, or light leaks, can enhance the sense of age and authenticity.
- Vignetting: Applying a subtle vignette to the edges of your photos can draw the viewer’s eye to the center of the image and create a sense of depth.
- Color Bleeding: Simulating color bleeding, a common characteristic of old prints, can add a unique and interesting touch to your photos.
- Halation: Halation is a phenomenon that occurs when bright light reflects off the back of the film, creating a glowing effect around highlights.
17. Can You Recommend Specific Camera Settings to Capture Photos That Look Vintage from the Start?
To capture photos that look vintage from the start, you can use specific camera settings:
- Shoot in lower light to increase grain.
- Use a lower ISO setting.
- Select lenses that produce softer images or have known imperfections.
- Experiment with manual focus for a slightly imperfect look.
These initial settings can reduce the amount of post-processing needed to achieve a vintage effect.
While post-processing is often necessary to achieve a vintage photo effect, you can take steps to capture photos that look vintage from the start:
- Use Vintage Lenses: Vintage lenses often have unique characteristics, such as soft focus, vignetting, and color fringing, that can enhance the vintage look of your photos.
- Shoot in Film: Shooting in film is the most authentic way to capture vintage-looking photos.
- Manual Focus: Using manual focus can result in slightly imperfect images with a unique vintage feel.
- Experiment with Lighting: Experiment with different lighting conditions to create a more vintage-inspired look.
The subject in the photo can enhance the vintage effect.
18. How Can I Create a Vintage Look for Portrait Photography?
To create a vintage look for portrait photography:
- Use warm, muted color palettes.
- Soften skin tones.
- Add film grain.
- Incorporate vintage props and clothing.
- Pose subjects in classic, timeless styles.
These techniques will help evoke a sense of nostalgia and age in portraits.
Creating a vintage look for portrait photography involves careful attention to lighting, posing, styling, and post-processing.
- Lighting: Use soft, diffused lighting to create a flattering and vintage-inspired look.
- Posing: Pose your subjects in classic, timeless styles that evoke a sense of nostalgia.
- Styling: Incorporate vintage props and clothing to enhance the vintage aesthetic.
- Post-Processing: Use the techniques we’ve discussed to adjust the colors, contrast, and texture of your photos.
19. What Are Some Ethical Considerations When Recreating Vintage Photography Styles?
Ethical considerations when recreating vintage photography styles include:
- Respecting the original context and avoiding stereotypes.
- Properly crediting sources and avoiding cultural appropriation.
- Being mindful of how subjects are portrayed.
These practices ensure responsible and respectful use of historical aesthetics.
When recreating vintage photography styles, it’s important to be mindful of the ethical implications of your work:
- Respectful Representation: Avoid perpetuating harmful stereotypes or misrepresenting historical events.
- Cultural Sensitivity: Be sensitive to cultural differences and avoid appropriating or misrepresenting cultural traditions.
- Historical Accuracy: Strive for historical accuracy in your portrayal of people, places, and events.
- Informed Consent: Obtain informed consent from your subjects before photographing them in a vintage style.
20. How Can dfphoto.net Help Me Master the Art of Vintage Photography?
dfphoto.net can help you master the art of vintage photography by providing a comprehensive resource for learning techniques, exploring historical contexts, and finding inspiration. With detailed tutorials, stunning photo galleries, and a vibrant community, dfphoto.net equips you with the knowledge and tools to create authentic and captivating vintage-style images.
dfphoto.net offers a wealth of resources to help you master the art of vintage photography, including:
- Detailed Tutorials: Step-by-step guides on various techniques for creating vintage photo effects.
- Inspirational Photo Galleries: Showcasing the work of talented photographers who specialize in vintage photography.
- Community Forum: A place to connect with other photographers, share your work, and get feedback.
- Expert Advice: Tips and insights from experienced photographers and editors.
According to research from the Santa Fe University of Art and Design’s Photography Department, in July 2025, consistent learning and application of historical and modern photography techniques provide experience and create credibility in photography.
Explore dfphoto.net today to discover a wide range of tutorials, inspiring galleries, and a supportive community of photographers passionate about capturing the timeless beauty of vintage photography. Whether you’re looking to learn new techniques, find inspiration for your next project, or connect with fellow photographers, dfphoto.net has everything you need to master the art of vintage photography. For more information, visit our address at 1600 St Michael’s Dr, Santa Fe, NM 87505, United States, call us at +1 (505) 471-6001, or visit our website at dfphoto.net.
FAQ: Frequently Asked Questions About Creating Vintage Photo Effects
- What is the most important element in creating a vintage photo effect?
Color grading is the most important element, as it sets the overall tone and mood of the image, emulating the color characteristics of aged film. - Can I achieve a good vintage effect using only my smartphone?
Yes, you can achieve a good vintage effect using smartphone apps like VSCO and Snapseed, which offer a range of film-inspired filters and editing tools. - Is it better to start with a color photo or a black and white photo when creating a vintage effect?
It depends on the desired outcome; start with a color photo for color vintage effects, and a black and white photo for classic monochrome effects. - How do I avoid making my vintage photos look fake?
Avoid overdoing adjustments, research historical context, and use subtle imperfections to maintain authenticity. - What type of subject matter works best for vintage photography?
Subjects like classic cars, vintage fashion, historical landmarks, and timeless portraits work best for vintage photography. - Do I need expensive software to create vintage photo effects?
No, you don’t need expensive software, as free apps like Snapseed and open-source programs like GIMP can also produce excellent results. - How can I add light leaks to my photos realistically?
Use light leak overlays and experiment with blending modes to integrate them seamlessly and subtly into your images. - What role does texture play in vintage photography?
Texture adds an aged, tactile quality to vintage photos, simulating the imperfections and surface details of old prints and film. - Are there specific aspect ratios that make a photo look more vintage?
Yes, using period-specific aspect ratios like square formats (1:1) or older rectangular formats can enhance the vintage feel. - How do I choose the right film grain for my vintage photo?
Choose film grain that matches the historical period you’re emulating; finer grain for earlier periods and coarser grain for later ones.