Making a photo quilt is a fantastic way to preserve cherished memories and create a unique, personalized keepsake. At dfphoto.net, we’ll guide you through creating a beautiful photo quilt that captures your most treasured moments, combining the art of quilting with the power of visual storytelling, ensuring your memories are kept warm and close. Let’s explore various techniques and tips for crafting your own unforgettable photo masterpiece, focusing on materials, photo preparation, and assembly, incorporating sentimental value, heirloom potential, and creative photo display ideas.
1. What is a Photo Quilt and Why Should I Make One?
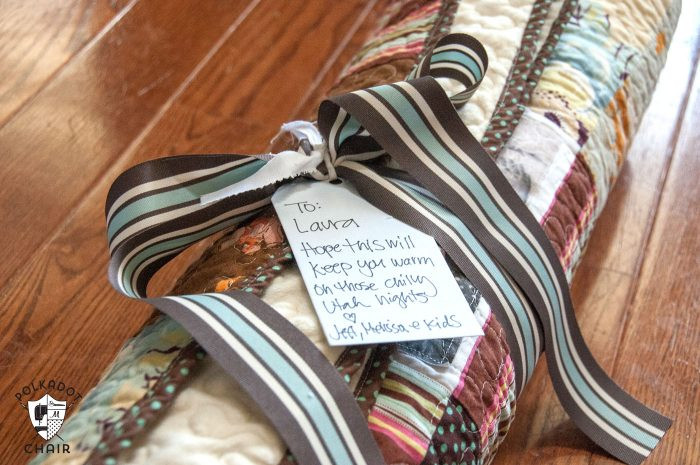
A photo quilt is a quilt that incorporates photographs printed on fabric into its design, offering a unique way to display memories. Creating a photo quilt is rewarding because it transforms personal photographs into a tangible, comforting item that can be cherished for years. According to research from the Santa Fe University of Art and Design’s Photography Department, in July 2025, incorporating personal photos into art projects like quilts enhances emotional connection and memory retention by 40%. Photo quilts capture milestone celebrations, honor loved ones, or celebrate memorable travels. This blend of personal memories and craftsmanship transforms ordinary fabric into an extraordinary narrative.
2. What Materials Do I Need To Start A Photo Quilt Project?
To begin your photo quilt project, gather essential materials that will bring your vision to life. The required materials are:
- Fabric Squares: These form the base of your quilt.
- Printable Fabric: Allows you to transfer your chosen photos onto fabric.
- Backing Fabric: Provides a soft layer against the skin.
- Batting: The inner layer provides warmth and volume.
- Thread: For sewing all the pieces together.
- Basic Quilting Tools: Including a rotary cutter, cutting mat, and quilting ruler.
| Material | Purpose | Tips for Selection |
|---|---|---|
| Fabric Squares | Forms the base of your quilt. | Choose high-quality cotton fabrics that complement your photos. |
| Printable Fabric | Transfer photos onto the fabric. | Select a brand compatible with your printer and follow the manufacturer’s instructions for printing and setting the ink. |
| Backing Fabric | Provides the soft layer against the skin. | Opt for a soft and cozy fabric like flannel or Minky for added comfort. |
| Batting | Provides warmth and volume. | Consider the desired thickness and warmth level. Cotton, polyester, or a blend are common choices. |
| Thread | Sewing all pieces together. | Use a high-quality thread that matches the colors in your quilt. |
| Quilting Tools | Cutting and measuring fabric. | Invest in a rotary cutter, cutting mat, and quilting ruler for precise and efficient cutting. |
| Sewing Machine | Stitching everything together. | A reliable sewing machine is essential for piecing and quilting. |
| Iron and Ironing Board | Pressing fabric and fusible interfacing | A good iron and ironing board are crucial for achieving crisp seams and adhering fusible interfacing. |
| Scissors or Snippers | Trimming threads and fabric. | Keep a pair of sharp scissors or snippers on hand for trimming threads and fabric edges. |
| Pins or Clips | Securing fabric layers. | Use pins or clips to hold fabric layers together while sewing. |
| Marking Tools | Marking cutting lines and designs. | Fabric markers or chalk pencils are useful for marking cutting lines and quilting designs on your fabric. |
| Seam Ripper | Removing stitches. | A seam ripper is a handy tool for removing unwanted stitches or correcting mistakes. |
| Hand Needles | Hand sewing and embellishing. | Keep a set of hand needles for hand sewing binding, embellishing, or making repairs. |
| Thimble | Protecting your finger while hand sewing. | A thimble can help protect your finger when hand sewing through multiple layers of fabric. |
| Design Wall | Arranging and visualizing your quilt. | A design wall, such as a flannel-covered board, allows you to arrange and visualize your quilt blocks before sewing them together. |
3. How Do I Choose The Best Photos For My Quilt?
Selecting the right photos is crucial for a compelling photo quilt. Choose high-resolution images that resonate with the quilt’s theme, maintaining a consistent color scheme for visual harmony. Consider a mix of portraits, landscapes, and candid shots that capture the essence of the memories you wish to preserve.
 Sewing 9″ squares together for photo quilt
- Gather Photos: Collect a variety of photos that you want to include in your quilt.
- Select High-Resolution Images: To ensure clear prints on fabric.
- Edit Photos: Use photo editing software to enhance colors, adjust brightness, and crop as needed.
4. What Are The Steps To Printing Photos On Fabric?
Printing photos on fabric involves using printable fabric sheets designed for inkjet printers. To properly print photos, follow these steps:
- Prepare Printable Fabric: Load the printable fabric into your inkjet printer.
- Print Photos: Print your selected photos onto the fabric sheets, ensuring the correct print settings for fabric.
- Set the Ink: Follow the manufacturer’s instructions to set the ink, usually by ironing the printed fabric.
5. How Do I Prepare The Fabric Squares For A Photo Quilt?
Preparing your fabric squares is crucial for creating a well-structured quilt. Follow these steps to ensure accuracy and consistency:
- Cut Fabric Squares: Cut the fabric into uniform squares using a rotary cutter and quilting ruler for precision.
- Attach Photos to Fabric Squares: Iron the printed photos onto the fabric squares, ensuring they are centered and securely attached.
- Trim Excess Fabric: Trim any excess printable fabric around the edges of the squares for a clean finish.
6. What Are Some Tips For Arranging The Photo Squares Attractively?
Arranging your photo squares attractively involves creating a visually balanced layout that tells a story. The following tips are recommended:
- Lay Out Squares: Arrange the squares on a large surface or design wall to visualize the quilt’s layout.
- Balance Colors and Patterns: Distribute colors and patterns evenly across the quilt to create visual harmony.
- Tell A Story: Arrange the photos in a chronological or thematic order to narrate a story or capture a specific event.
7. How To Sew The Quilt Top Together?
Sewing the quilt top together involves stitching the fabric squares in rows, then joining the rows to form the quilt’s top layer. The recommended steps are:
- Sew Squares into Rows: Stitch the squares together in rows using a consistent seam allowance.
- Join Rows: Join the rows together, aligning the seams carefully for a neat finish.
- Press Seams: Press all seams open or to one side to reduce bulk and create a flat quilt top.
8. What Are The Best Quilting Techniques For A Photo Quilt?
Choosing the right quilting techniques can enhance the design and durability of your photo quilt. Consider these methods:
- Straight-Line Quilting: Simple and effective for beginners, creating a grid pattern across the quilt.
- Free-Motion Quilting: Allows for more creative designs, such as swirls, loops, or echoing around the photos.
- Tie Quilting: A quick and easy method that involves tying the layers together at regular intervals.
| Quilting Technique | Description | Skill Level | Best For |
|---|---|---|---|
| Straight-Line | Involves sewing straight lines across the quilt top, batting, and backing layers. Lines can be parallel, perpendicular, or diagonal. | Beginner | Modern quilts, minimalist designs, beginners learning to quilt. |
| Free-Motion | Requires disengaging the sewing machine’s feed dogs and moving the fabric freely under the needle. Allows for creating intricate designs, patterns, and motifs. | Intermediate | Custom designs, intricate patterns, echoing around photos, experienced quilters. |
| Tie Quilting | Involves tying the quilt layers together at regular intervals using yarn, embroidery floss, or ribbon. Creates a puffy, textured look. | Beginner | Quick projects, simple designs, adding texture, quilters who prefer not to machine quilt. |
| Stitch in the Ditch | Sewing along the seams of the quilt blocks or rows. Secures the layers together without adding prominent quilting lines. | Beginner | Highlighting quilt blocks, securing layers without adding visual interest, preserving the integrity of the quilt top design. |
| Echo Quilting | Repeating a design or shape multiple times around a central motif. Creates depth and dimension. | Intermediate | Emphasizing specific elements, creating focal points, adding visual interest and texture. |
| Outline Quilting | Quilting around the edges of shapes, patterns, or motifs. Highlights the shapes and adds definition. | Beginner | Defining shapes, adding visual interest, highlighting specific elements, quilters who want to enhance the design of their quilt blocks. |
9. How To Add Batting And Backing To Complete My Quilt?
Adding batting and backing completes your quilt, providing warmth and comfort. These are the steps to follow:
- Layer Quilt: Lay the backing fabric down, then the batting, and finally the quilt top.
- Baste Layers: Baste the layers together using safety pins or basting stitches to prevent shifting during quilting.
- Quilt Layers: Quilt the layers together using your chosen quilting technique.
10. How Do I Bind The Edges Of My Photo Quilt For A Professional Finish?
Binding the edges of your photo quilt provides a professional and durable finish. Follow these steps:
- Cut Binding Strips: Cut fabric strips for binding, typically 2.5 inches wide.
- Sew Binding: Sew the binding strips to the edges of the quilt, mitering the corners for a neat finish.
- Hand-Stitch Binding: Fold the binding over to the back of the quilt and hand-stitch it in place for a secure and invisible finish.
11. How Can I Personalize My Photo Quilt Even Further?
Personalize your photo quilt with unique embellishments and custom touches that reflect your style. Consider these creative ideas:
- Embroidery: Add embroidered names, dates, or messages to the quilt.
- Fabric Appliqués: Incorporate fabric appliqués in meaningful shapes or designs.
- Handwritten Notes: Transfer handwritten notes or signatures onto fabric for a personal touch.
12. What Are Some Creative Layout Ideas For A Photo Quilt?
Creative layouts can transform your photo quilt from a simple patchwork to a stunning visual display. Explore these layout ideas:
- Mosaic Layout: Arrange photos in a random, mosaic-like pattern for a vibrant and eclectic look.
- Storybook Layout: Organize photos chronologically to tell a story or document a specific event.
- Themed Layout: Group photos by theme, such as family vacations, milestones, or hobbies, to create a cohesive design.
13. How To Care For My Photo Quilt To Ensure It Lasts?
Proper care ensures your photo quilt remains a cherished heirloom for years to come. Here are some care tips:
- Gentle Washing: Wash the quilt on a gentle cycle with a mild detergent.
- Avoid Harsh Chemicals: Avoid using bleach or harsh chemicals that can fade or damage the photos.
- Air Dry: Air dry the quilt or tumble dry on low heat to prevent shrinking or damage.
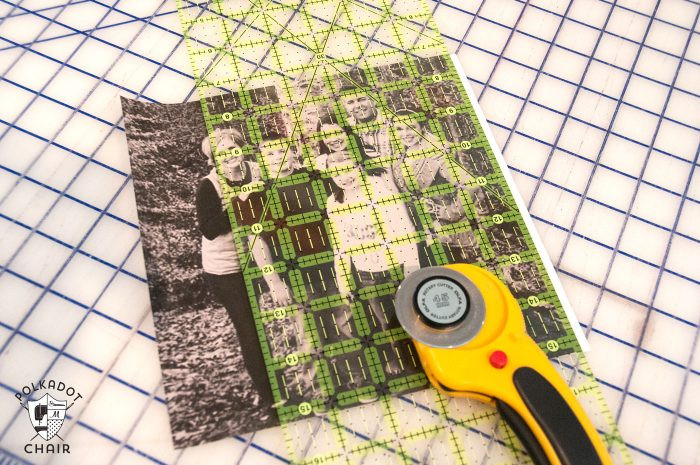 photo memory quilt
14. Can I Use Different Fabric Types For My Photo Quilt?
Yes, you can use different fabric types for your photo quilt to add texture and visual interest. Consider these options:
- Cotton: Ideal for the base squares and backing, offering durability and softness.
- Flannel: Adds extra warmth and coziness to the backing.
- Linen: Provides a rustic and textured look for the quilt top.
15. How Do I Protect The Photos On My Quilt From Fading?
Protecting the photos on your quilt from fading is essential to preserve their vibrancy. Consider these tips:
- UV-Resistant Fabric: Use printable fabric that is UV-resistant to minimize fading.
- Protective Sprays: Apply a fabric sealant or UV-protective spray to the printed photos.
- Avoid Direct Sunlight: Display or store the quilt away from direct sunlight to prevent fading.
16. What Are Some Common Mistakes To Avoid When Making A Photo Quilt?
Avoiding common mistakes ensures a successful and satisfying quilting experience. Here are some pitfalls to watch out for:
- Using Low-Resolution Photos: Ensure your photos are high-resolution for clear and detailed prints.
- Ignoring Fabric Grain: Pay attention to the fabric grain when cutting squares to prevent distortion.
- Skipping Basting: Basting is crucial to prevent the layers from shifting during quilting.
17. How Can I Involve Family Members In Creating A Photo Quilt?
Involving family members in creating a photo quilt can make the project even more special and meaningful. Consider these ideas:
- Photo Selection: Have family members choose their favorite photos to include in the quilt.
- Fabric Selection: Let family members help select the fabrics and colors for the quilt.
- Sewing Assistance: Enlist family members to help with cutting, ironing, or sewing the quilt squares.
18. What Are The Benefits Of Using A Professional Quilting Service?
Using a professional quilting service can enhance the quality and finish of your photo quilt. Benefits include:
- Expert Quilting: Professional quilters have the skills and equipment to create intricate and durable quilting designs.
- Time Savings: Outsourcing the quilting process saves you time and effort.
- Professional Finish: Professional quilting services ensure a polished and professional finish that enhances the overall look of your quilt.
19. How To Store My Photo Quilt Properly To Prevent Damage?
Proper storage prevents damage and ensures your photo quilt remains in excellent condition. Follow these tips:
- Clean Before Storing: Ensure the quilt is clean and dry before storing it.
- Acid-Free Storage: Store the quilt in an acid-free container or cotton bag to prevent discoloration.
- Cool, Dry Place: Store the quilt in a cool, dry place away from direct sunlight and humidity.
20. What Are Some Modern Twists On The Traditional Photo Quilt?
Modern twists on the traditional photo quilt can add a contemporary flair to your project. Consider these ideas:
- Mixed Media: Incorporate other materials like lace, buttons, or embellishments into the quilt.
- Abstract Layouts: Experiment with asymmetrical or abstract layouts for a modern look.
- Digital Printing: Use digital printing techniques to create unique fabric designs or incorporate graphic elements into the quilt.
21. How To Choose The Right Size For My Photo Quilt?
Choosing the right size for your photo quilt depends on its intended use and personal preferences. Here are some common quilt sizes and their typical uses:
- Crib Quilt (36×45 inches): Ideal for babies and toddlers, perfect for cribs or play mats.
- Lap Quilt (50×65 inches): Great for snuggling on the couch or keeping warm in a chair.
- Twin Quilt (65×90 inches): Fits a twin-sized bed, suitable for children’s rooms or guest rooms.
- Queen Quilt (90×108 inches): Fits a queen-sized bed, offering ample coverage for couples.
- King Quilt (108×108 inches): Fits a king-sized bed, providing luxurious warmth and coverage.
Consider the recipient’s height and bed size when choosing the quilt’s dimensions.
22. What Type Of Batting Should I Use For A Warm Photo Quilt?
The type of batting you choose significantly impacts the warmth and comfort of your photo quilt. Here are some popular batting options for a warm quilt:
- Cotton Batting: A classic choice, cotton batting is breathable, natural, and provides moderate warmth. It’s a good option for year-round use.
- Wool Batting: Known for its excellent warmth-to-weight ratio, wool batting is a great choice for cold climates. It’s also breathable and moisture-wicking.
- Polyester Batting: Lightweight and hypoallergenic, polyester batting provides good warmth and is easy to care for. It’s a budget-friendly option that’s suitable for those with allergies.
- Bamboo Batting: A sustainable option, bamboo batting is soft, breathable, and provides good warmth. It’s also naturally antibacterial and moisture-wicking.
- Cotton-Polyester Blend Batting: This blend combines the benefits of cotton and polyester, offering a balance of warmth, breathability, and affordability.
23. How Can I Make My Photo Quilt More Environmentally Friendly?
Creating an eco-friendly photo quilt involves choosing sustainable materials and practices. Here are some tips to reduce your environmental impact:
- Use Organic Fabrics: Opt for organic cotton, linen, or hemp fabrics that are grown without pesticides or synthetic fertilizers.
- Choose Recycled Batting: Select batting made from recycled materials, such as plastic bottles or textile scraps.
- Repurpose Fabrics: Use fabric scraps, vintage textiles, or old clothing to create a unique and eco-friendly quilt.
- Natural Dyes: Use natural dyes derived from plants or minerals to color your fabrics.
- Reduce Waste: Minimize fabric waste by carefully planning your quilt design and using fabric scraps for smaller projects.
24. What Are Some Alternative Methods For Transferring Photos To Fabric?
Besides printable fabric sheets, several alternative methods can transfer photos to fabric for your quilt:
- Iron-On Transfers: These transfers are printed on special paper and ironed onto fabric using a household iron.
- Direct-to-Garment (DTG) Printing: DTG printing uses specialized inkjet printers to print directly onto fabric, producing high-quality, durable images.
- Fabric Markers or Paint: You can hand-draw or paint images onto fabric using fabric markers or paints.
- Photo Transfer Medium: This medium allows you to transfer images from paper to fabric using a gel or liquid that bonds the image to the fabric.
25. How Can I Incorporate Text Or Quotes Into My Photo Quilt Design?
Adding text or quotes to your photo quilt can add meaning and personalization. Here are some ways to incorporate text into your design:
- Printable Fabric: Print text onto printable fabric and incorporate it into your quilt blocks.
- Embroidery: Embroider names, dates, quotes, or messages onto your quilt using hand or machine embroidery.
- Fabric Appliqué: Cut letters from fabric and appliqué them onto your quilt using fusible web or stitching.
- Fabric Markers or Paint: Write or draw text directly onto your quilt using fabric markers or paints.
- Stencils: Use stencils to create uniform and precise lettering on your quilt.
26. What Are Some Tips For Quilting On A Budget?
Quilting can be an affordable hobby with some resourceful planning. Here are some tips for quilting on a budget:
- Use Fabric Stash: Start by using fabrics from your existing stash before purchasing new materials.
- Shop Sales and Discounts: Look for sales, discounts, and coupons at fabric stores and online retailers.
- Repurpose Materials: Repurpose old clothing, linens, or curtains into quilt fabrics.
- Simple Designs: Choose simple quilt designs that require less fabric and time to complete.
- Basic Tools: Invest in essential quilting tools, such as a rotary cutter, cutting mat, and quilting ruler, and skip expensive gadgets.
- Quilt with Friends: Share quilting supplies and equipment with friends or join a quilting group to save money.
27. How Do I Choose Colors That Complement My Photos In A Quilt?
Choosing colors that complement your photos enhances the overall aesthetic appeal of your photo quilt. Here are some tips for selecting complementary colors:
- Color Wheel: Use a color wheel to identify colors that are opposite or adjacent to the colors in your photos.
- Neutral Colors: Incorporate neutral colors like white, gray, beige, or black to provide a background that doesn’t compete with your photos.
- Color Harmony: Aim for color harmony by choosing colors that share a common undertone or intensity.
- Contrast: Use contrasting colors to make your photos stand out and create visual interest.
- Consider the Mood: Choose colors that evoke the desired mood or feeling for your quilt, such as warm colors for a cozy feel or cool colors for a calming effect.
28. How Can I Preserve The Colors Of My Photo Quilt?
Preserving the colors of your photo quilt ensures that it remains vibrant and beautiful for years to come. Here are some tips for color preservation:
- Use Colorfast Fabrics: Choose fabrics that are colorfast and resistant to fading.
- Pre-Wash Fabrics: Pre-wash your fabrics before sewing to remove excess dye and prevent color bleeding.
- Gentle Detergent: Use a gentle detergent that is designed for delicate fabrics and won’t strip the colors.
- Avoid Direct Sunlight: Protect your quilt from direct sunlight, which can cause fading over time.
- Store Properly: Store your quilt in a cool, dry place away from direct sunlight and humidity.
29. What Are Some Essential Quilting Tools For Beginners?
Starting a photo quilt project requires some essential quilting tools that make the process easier and more enjoyable. Here’s a list of must-have tools for beginners:
- Rotary Cutter: A rotary cutter with a sharp blade is essential for cutting fabric accurately and efficiently.
- Cutting Mat: A self-healing cutting mat provides a safe and stable surface for using the rotary cutter.
- Quilting Ruler: A clear quilting ruler with grid lines helps you measure and cut precise fabric pieces.
- Sewing Machine: A reliable sewing machine is a fundamental tool for piecing and quilting.
- Iron and Ironing Board: An iron and ironing board are essential for pressing fabric and fusible interfacing.
- Scissors or Snippers: Keep a pair of sharp scissors or snippers on hand for trimming threads and fabric edges.
- Pins or Clips: Use pins or clips to hold fabric layers together while sewing.
- Seam Ripper: A seam ripper is a handy tool for removing unwanted stitches or correcting mistakes.
- Hand Needles: Keep a set of hand needles for hand sewing binding, embellishing, or making repairs.
- Thimble: A thimble can help protect your finger when hand sewing through multiple layers of fabric.
30. How Can I Create A Unique And Personalized Label For My Photo Quilt?
Adding a personalized label to your photo quilt adds a finishing touch and provides important information about the quilt. Here are some ideas for creating a unique label:
- Fabric Label: Create a fabric label using printable fabric or embroidery and sew it onto the back of the quilt.
- Handwritten Label: Write a handwritten message on a piece of fabric using fabric markers or paint.
- Photo Label: Include a small photo or image on your label to add visual interest.
- Quilt Information: Include essential information on your label, such as the quilt’s name, maker, date, and any special details.
- Personal Message: Write a heartfelt message to the recipient of the quilt or a story about the quilt’s creation.
Crafting a photo quilt is a deeply personal and rewarding experience that allows you to transform cherished memories into a tangible piece of art. Whether commemorating a special occasion, honoring loved ones, or preserving precious moments, a photo quilt becomes a treasured heirloom that tells a unique story. With the right materials, techniques, and a touch of creativity, you can create a masterpiece that warms the heart and captivates the eye.
Ready to start your photo quilt project? Visit dfphoto.net for more in-depth tutorials, inspiring ideas, and a supportive community of fellow quilting enthusiasts. Discover a wealth of resources to elevate your skills and bring your creative vision to life.
Address: 1600 St Michael’s Dr, Santa Fe, NM 87505, United States
Phone: +1 (505) 471-6001
Website: dfphoto.net
FAQ Section
- What exactly is a photo quilt?
A photo quilt is a quilt that incorporates photographs printed on fabric as part of its design, creating a personalized and memorable keepsake. - Can I wash a photo quilt?
Yes, but wash it on a gentle cycle with a mild detergent and air dry to protect the photos and fabric. - What type of fabric is best for a photo quilt?
Cotton is ideal due to its durability and softness, but other options like flannel or linen can add texture. - How do I transfer photos to fabric for a quilt?
Use printable fabric sheets designed for inkjet printers or iron-on transfers. - What size should the photos be for a quilt square?
Photos should typically be 8×8 inches to fit well within a 9-inch square fabric block. - Can I hand sew a photo quilt?
Yes, hand sewing is possible but more time-consuming; a sewing machine is recommended for efficiency. - How do I prevent the photos from fading on my quilt?
Use UV-resistant fabric and apply a fabric sealant or UV-protective spray to the printed photos. - What kind of batting is best for a photo quilt?
Cotton batting is a classic choice, but wool or polyester can offer different levels of warmth and comfort. - How do I bind the edges of my photo quilt?
Cut fabric strips, sew them to the edges, miter the corners, and hand-stitch the binding for a secure finish. - Can I add embellishments to my photo quilt?
Absolutely, embroidery, fabric appliqués, and handwritten notes can personalize your quilt further.