Attaching a photo to an email is a fundamental skill for sharing visual content. At dfphoto.net, we guide you through the process, enriching your understanding of digital communication and visual artistry. Whether you’re a photography enthusiast or a professional, mastering this skill enhances your ability to share your work and connect with others effectively, incorporating image optimization techniques for stunning visuals.
1. Why Can’t I Attach A Photo To An Email?
Yes, you can absolutely attach photos to emails, and it’s a common practice for sharing images. There are a few common reasons why you might encounter difficulties when trying to attach a photo:
- File Size Limitations: Email providers often have limits on the size of attachments.
- Incorrect Attachment Method: You might be using the wrong method to attach the file.
- File Format Issues: Sometimes, the email system may not support certain image formats.
- Technical Glitches: There could be temporary technical issues with your email provider or device.
- Permissions: You may lack the necessary permissions to access the photo on your device.
Attaching photos to emails is a core skill for photographers, enthusiasts, and anyone sharing visual content, according to the Santa Fe University of Art and Design’s Photography Department. The ability to effectively send images enhances communication and collaboration in various fields.
2. How Do I Attach A Photo To An Email On My iPhone?
Attaching a photo to an email on your iPhone is straightforward. Here’s how:
- Open the Mail App: Start by opening the Mail app on your iPhone.
- Compose a New Email: Tap the compose button to start a new email.
- Tap in the Email Body: Tap where you want to insert the photo.
- Access Photo Library: Tap the attachment icon (usually a paperclip or a “+” sign). Then, select the photo icon.
- Choose a Photo: Select the photo you want to attach from your photo library.
- Insert the Photo: The photo will be inserted into the email. You can then add a subject, recipient’s email address, and any additional text.
- Send the Email: Tap the send button to send your email with the attached photo.
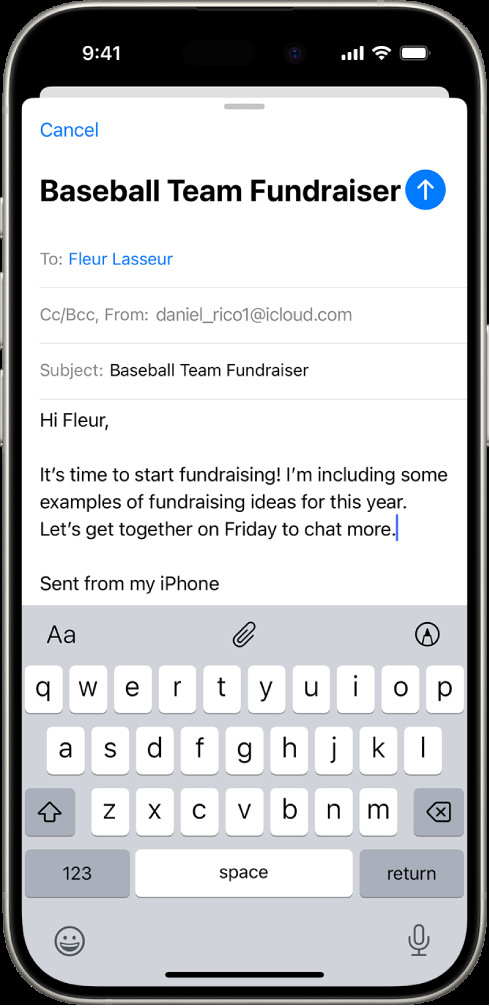 Draft email composition showing attachment options.
You can also attach a photo directly from the Photos app:
- Open the Photos App: Open the Photos app on your iPhone.
- Select the Photo: Find and select the photo you want to send.
- Tap the Share Button: Tap the share icon (usually a square with an arrow pointing upwards).
- Choose Mail: Select the Mail app from the share options.
- Compose the Email: A new email will open with the photo already attached. Add the recipient’s email address, subject, and any additional text.
- Send the Email: Tap the send button to send your email with the attached photo.
For professional photographers, sharing images directly from the iPhone is a great way to quickly share your work while on the go. You can also use the Photos app to do basic photo editing.
3. How Do I Attach A Photo To An Email On My Android Device?
Attaching a photo to an email on your Android device is a simple process. Here’s how to do it:
- Open the Email App: Start by opening your preferred email app on your Android device, such as Gmail or Samsung Email.
- Compose a New Email: Tap the compose button to start a new email. This is usually a “+” sign or a pencil icon.
- Tap the Attachment Icon: Look for the attachment icon, which is typically a paperclip symbol. Tap on it.
- Select “Attach File” or “Insert”: Depending on your email app, you might see options like “Attach file,” “Insert picture,” or similar. Select the appropriate option to attach a photo.
- Navigate to the Photo: Use the file manager to navigate to the location where the photo is stored. This could be in your device’s internal storage, SD card, or a cloud storage service like Google Drive or Dropbox.
- Select the Photo: Tap on the photo you want to attach to the email.
- Compose the Email: The photo will be attached to the email. Now, add the recipient’s email address, a subject, and any additional text you want to include.
- Send the Email: Finally, tap the send button (usually an arrow or a paper airplane icon) to send your email with the attached photo.
You can also attach a photo directly from the Gallery or Photos app:
- Open the Photos App: Open the Gallery or Photos app on your Android device.
- Select the Photo: Find and select the photo you want to send.
- Tap the Share Button: Tap the share icon, which usually looks like three dots connected by lines.
- Choose Email: Select your email app (e.g., Gmail) from the share options.
- Compose the Email: A new email will open with the photo already attached. Add the recipient’s email address, subject, and any additional text.
- Send the Email: Tap the send button to send your email with the attached photo.
Attaching photos to emails directly from your Android device provides a seamless way to share images with clients or colleagues. Remember to optimize your images for faster sending and viewing, and manage the file size to avoid exceeding attachment limits.
4. What Is The Best Way To Attach Large Photos To Email?
The best way to attach large photos to email involves using cloud storage services and linked sharing, reducing the image size, or using file compression. Here are the popular methods:
- Use Cloud Storage Services:
- How It Works: Upload the large photo to a cloud storage service like Google Drive, Dropbox, or OneDrive. Then, create a shareable link and include that link in your email.
- Pros: Avoids email attachment size limits, keeps the original image quality, and allows recipients to access the photo at their convenience.
- Cons: Requires the recipient to have internet access and possibly a cloud storage account to view the photo.
- Compress the Photo:
- How It Works: Use image compression tools or software to reduce the file size of the photo.
- Pros: Makes the photo small enough to attach to an email, and is easy to do.
- Cons: Reduces the quality of the image.
- Use File Compression (ZIP Files):
- How It Works: Compress the photo into a ZIP file using built-in tools on your operating system or third-party software like 7-Zip or WinRAR.
- Pros: Can significantly reduce file size, making it easier to attach to emails.
- Cons: Requires the recipient to have software to unzip the file.
- Use Email Services with Large Attachment Limits:
- How It Works: Some email services offer higher attachment limits than others.
- Pros: Simple if your email provider supports large attachments.
- Cons: Still subject to size limits.
- Resize the Photo:
- How It Works: Reduce the dimensions (width and height) of the photo using image editing software.
- Pros: Reduces file size while maintaining reasonable image quality.
- Cons: Requires image editing software and may reduce image quality.
Photographers and visual artists often need to share high-resolution images, and these methods provide reliable ways to overcome email attachment limitations. According to “Popular Photography” magazine, cloud storage and file compression are essential techniques for sharing large files without compromising quality.
5. How Do I Reduce The Photo Size To Attach To An Email?
Reducing photo size is essential when attaching photos to emails, especially when dealing with large files. Here are several methods to reduce the file size of your photos:
- Using Image Editing Software:
- Adobe Photoshop:
- Open Image: Open your photo in Adobe Photoshop.
- Resize Image: Go to
Image > Image Size. Reduce the dimensions (width and height) to a smaller size. For example, if your image is 3000×2000 pixels, try reducing it to 1500×1000 pixels. - Save for Web: Go to
File > Export > Save for Web (Legacy). Choose a lower quality JPEG setting (e.g., Medium or Low) and adjust the quality slider until you reach an acceptable file size. - Save: Save the resized and compressed image.
- GIMP (Free Alternative):
- Open Image: Open your photo in GIMP.
- Scale Image: Go to
Image > Scale Image. Reduce the width and height. - Export Image: Go to
File > Export As. Choose JPEG as the file format and adjust the quality settings to reduce the file size. - Export: Export the resized and compressed image.
- Adobe Photoshop:
- Using Online Image Compression Tools:
- TinyPNG:
- Visit Website: Go to the TinyPNG website (https://tinypng.com/).
- Upload Image: Drag and drop your photo onto the webpage.
- Download: TinyPNG automatically compresses the image. Download the compressed image.
- CompressJPEG:
- Visit Website: Go to the CompressJPEG website (https://compressjpeg.com/).
- Upload Image: Upload your photo to the website.
- Adjust Quality: Adjust the quality slider to reduce the file size.
- Download: Download the compressed image.
- TinyPNG:
- Using Built-In Tools on Windows:
- Open with Photos App: Right-click the photo, select
Open with > Photos. - Resize: Click the three dots in the top-right corner and select
Resize. - Choose a Size: Choose a predefined size (e.g., Small, Medium) or define a custom size.
- Save a Copy: Save the resized image as a copy to keep the original intact.
- Open with Photos App: Right-click the photo, select
- Using Built-In Tools on macOS:
- Open with Preview: Open the photo with the Preview app.
- Adjust Size: Go to
Tools > Adjust Size. - Reduce Dimensions: Reduce the width and height of the image.
- Adjust Quality: Go to
File > Export. Adjust the quality slider to reduce the file size. - Save: Save the resized image.
- Using Mobile Apps:
- Image Size (Android):
- Download and install the “Image Size” app from the Google Play Store.
- Open the app and select your photo.
- Enter the desired width and height.
- Save the resized image.
- Reduce Photo Size (iOS):
- Download and install the “Reduce Photo Size” app from the App Store.
- Open the app and select your photo.
- Choose a compression level or custom size.
- Save the resized image.
- Image Size (Android):
Reducing the photo size to attach to an email is a practical skill for photographers and anyone sharing visual content. This ensures that your photos can be sent quickly and efficiently without exceeding email size limits, according to the American Society of Media Photographers.
6. How Do I Scan A Photo And Attach It To An Email?
Scanning a photo and attaching it to an email is a great way to share physical prints digitally. Here’s a step-by-step guide on how to do it:
- Using a Dedicated Scanner:
- Connect the Scanner: Connect your scanner to your computer and turn it on.
- Install Scanner Software: Install the scanner software that came with your device or download it from the manufacturer’s website.
- Open the Scanning Software: Open the scanning software on your computer.
- Place the Photo: Place the photo on the scanner bed, ensuring it is properly aligned.
- Preview Scan: In the software, select the preview option to see a low-resolution scan of the photo.
- Adjust Settings: Adjust the settings for the scan, such as resolution (300 DPI is usually sufficient for photos), color mode (color or grayscale), and file format (JPEG is a good choice for photos).
- Scan the Photo: Click the scan button to start the scanning process.
- Save the Scanned Image: Once the scan is complete, save the image to your computer. Choose a location and a descriptive file name.
- Attach to Email: Open your email client, create a new email, and attach the scanned image to the email.
- Using a Smartphone (iOS or Android) with Scanning Apps:
- Download a Scanning App: Download and install a scanning app on your smartphone. Some popular options include:
- Google Scan (Android): A free app that uses your phone’s camera to scan documents and photos.
- Adobe Scan (iOS and Android): A powerful scanning app with OCR capabilities.
- CamScanner (iOS and Android): A versatile scanning app with many features.
- Open the Scanning App: Open the scanning app on your smartphone.
- Position the Photo: Place the photo on a flat, well-lit surface.
- Scan the Photo: Follow the app’s instructions to scan the photo. Usually, you’ll need to point your camera at the photo and tap a button to capture the image.
- Adjust and Crop: Adjust the scanned image as needed. Most scanning apps allow you to crop the image, adjust the brightness and contrast, and apply filters to improve the image quality.
- Save the Scanned Image: Save the scanned image to your phone’s storage or to a cloud service like Google Drive or Dropbox.
- Attach to Email: Open your email app, create a new email, and attach the scanned image to the email.
- Download a Scanning App: Download and install a scanning app on your smartphone. Some popular options include:
- Using the iPhone Mail App:
- Open the Mail App: Start by opening the Mail app on your iPhone.
- Create a New Email: Tap the compose button to start a new email.
- Tap in the Email Body: Tap where you want to insert the scanned document.
- Show the Toolbar: Tap the “>” button above the keyboard to show more options.
- Tap the Insert Photo or Video Button:
- Position iPhone: Position iPhone so that the document page appears on the screen—iPhone automatically captures the page.
- Tap Retake or Done: scan any additional pages, then tap Save.
Scanning photos and attaching them to emails provides a convenient way to digitize and share your physical photo collection, allowing you to preserve and share your memories with ease.
7. What Are The Common Email Attachment Size Limits?
Understanding email attachment size limits is important to ensure your photos are successfully sent. Here’s a list of common email providers and their attachment size limits:
| Email Provider | Attachment Size Limit | Notes |
|---|---|---|
| Gmail | 25 MB | If you need to send larger files, Gmail recommends using Google Drive. |
| Outlook.com | 20 MB | For files larger than 20 MB, you can use OneDrive. |
| Yahoo Mail | 25 MB | Similar to Gmail, Yahoo Mail allows you to send larger files using Dropbox. |
| iCloud Mail | 20 MB | Apple’s Mail Drop can be used for larger files, up to 5 GB. |
| AOL Mail | 25 MB | AOL Mail also has a 25 MB limit, which is fairly standard. |
| Zoho Mail | 25 MB | Zoho Mail follows the industry standard for attachment limits. |
| ProtonMail | 25 MB | ProtonMail, known for its security, also adheres to the 25 MB limit. |
Exceeding these limits can result in your email being rejected or undelivered, so it’s essential to be aware of these restrictions.
According to email provider guidelines, knowing the attachment size limits helps users choose the appropriate method for sharing files, whether it’s compressing the file, using cloud storage, or adjusting the image size. This ensures efficient and reliable email communication.
8. How Do I Send A Photo As A Link In An Email?
Sending a photo as a link in an email is a useful alternative when the photo file is too large to attach directly. This method involves uploading the photo to a cloud storage service and then sharing the link to the photo in your email. Here’s how to do it:
- Choose a Cloud Storage Service:
- Select a cloud storage service such as Google Drive, Dropbox, OneDrive, or iCloud.
- Upload the Photo:
- Upload the photo to your chosen cloud storage service.
- Get a Shareable Link:
- Once the photo is uploaded, find the option to “Share” or “Get Link” for the photo.
- The cloud storage service will generate a unique link that you can share with others.
- Adjust Link Permissions (Optional):
- Depending on the cloud storage service, you might be able to adjust the permissions for the link. For example, you can set the link to be viewable by anyone with the link, or restrict access to specific email addresses.
- Compose Your Email:
- Open your email client and create a new email.
- Enter the recipient’s email address, a subject, and any additional text you want to include in the email.
- Insert the Link:
- Copy the shareable link from the cloud storage service and paste it into the body of your email.
- You can add a brief description or message to let the recipient know what the link is for.
- Send the Email:
- Review your email to ensure the link is correct and the message is clear, then send the email.
Sharing photos as links provides a practical way to bypass email attachment size limits while still allowing recipients to access and view your images conveniently.
9. How Can I Ensure The Photo Quality Is Maintained When Attaching To An Email?
Maintaining photo quality when attaching to an email is crucial, especially for photographers and visual artists. Here are several strategies to ensure that the image quality is preserved:
- Avoid Over-Compression:
- When reducing file size, use the lowest compression setting that still provides acceptable image quality. Over-compressing an image can lead to noticeable artifacts and loss of detail.
- Resize Appropriately:
- Instead of heavily compressing the image, resize it to dimensions that are suitable for email viewing.
- Use the Correct File Format:
- JPEG is a common format for photos, but it uses lossy compression, which means some image data is lost during compression. For the best quality, consider using PNG for images with sharp lines and text, as it uses lossless compression.
- Send as a Link:
- The best way to ensure no quality loss is to send the photo as a link from a cloud storage service like Google Drive, Dropbox, or OneDrive.
- Test the Attachment:
- Before sending the email to the intended recipient, send it to yourself first to check the image quality. This allows you to see how the image will appear to the recipient and make any necessary adjustments.
These strategies help ensure that the quality of your photos is maintained as much as possible when sending them via email, providing a better viewing experience for the recipient.
10. What Are The Best Photo Formats For Email Attachments?
Choosing the right photo format for email attachments is crucial to balance file size and image quality. Here are the best photo formats for email attachments:
- JPEG (or JPG):
- Description: JPEG (Joint Photographic Experts Group) is the most common image format for photographs.
- Pros: Excellent compression, resulting in smaller file sizes, widely supported by email clients and devices.
- Cons: Lossy compression, which means some image quality is lost during compression, not ideal for images with text or sharp lines.
- Best Use: Suitable for most photographs where file size is a concern and minor quality loss is acceptable.
- PNG (Portable Network Graphics):
- Description: PNG is a lossless image format that preserves image quality.
- Pros: Lossless compression, meaning no image quality is lost, good for images with text, logos, and sharp lines, supports transparency.
- Cons: Larger file sizes compared to JPEG, not always ideal for photographs with complex colors.
- Best Use: Ideal for images where preserving quality is crucial, such as logos, graphics, and screenshots.
- GIF (Graphics Interchange Format):
- Description: GIF is an image format that supports animated images and is commonly used for simple graphics.
- Pros: Supports animation, lossless compression for images with few colors.
- Cons: Limited color palette (256 colors), not suitable for photographs.
- Best Use: Suitable for simple animations, icons, and graphics with limited colors.
- WebP:
- Description: WebP is a modern image format developed by Google that provides superior lossless and lossy compression for images on the web.
- Pros: Excellent compression, supports both lossless and lossy compression, supports animation and transparency.
- Cons: Not as widely supported as JPEG and PNG, some older email clients may not display WebP images correctly.
- Best Use: Ideal for web images where file size and quality are both important, but ensure compatibility with the recipient’s email client.
Choosing the right format helps ensure that your photos are displayed correctly and efficiently, providing a better viewing experience for the recipient.
At dfphoto.net, we provide detailed guides and resources to help you master the art of digital photography and image sharing, including optimal file formats and compression techniques for email attachments.
FAQ: Attaching Photos to Emails
- Question: How do I attach a photo to an email on my phone?
- Answer: On both iPhone and Android, you can attach a photo by composing a new email, tapping the attachment icon (usually a paperclip), and selecting the photo from your device’s gallery.
- Question: Why is my photo too large to attach to an email?
- Answer: Email providers have size limits on attachments, typically around 20-25 MB. Large photos exceed this limit due to high resolution and file size.
- Question: How can I reduce the size of a photo to attach it to an email?
- Answer: You can reduce the photo size by using image editing software, online compression tools, or built-in tools on your computer or smartphone to resize or compress the image.
- Question: What is the best format to save a photo for email attachments?
- Answer: JPEG (JPG) is generally the best format for photos due to its good compression and wide compatibility. For images with text or graphics, PNG is a better choice.
- Question: How do I send a high-resolution photo without attaching it to an email?
- Answer: You can upload the photo to a cloud storage service like Google Drive, Dropbox, or OneDrive and share the link in your email.
- Question: Can I attach multiple photos to one email?
- Answer: Yes, you can attach multiple photos to one email as long as the total size of all attachments does not exceed the email provider’s limit.
- Question: How do I scan a photo and attach it to an email?
- Answer: You can scan a photo using a dedicated scanner or a smartphone scanning app. Save the scanned image and then attach it to your email.
- Question: Why does my attached photo look blurry in the email?
- Answer: This can happen if the photo was heavily compressed or resized to a very small size. Try using a higher quality setting when resizing or compressing the image.
- Question: How do I ensure the recipient can view the attached photo?
- Answer: Use widely supported image formats like JPEG or PNG. If you’re using a less common format, inform the recipient and provide instructions for viewing it.
- Question: Is it better to embed a photo in the email or attach it?
- Answer: Attaching a photo is generally better because it ensures the recipient receives the full-resolution image and can save it. Embedding can reduce the image quality and may not be supported by all email clients.
Mastering the skill of attaching photos to emails is essential for effective communication, whether for professional or personal use.
Connect with dfphoto.net
Ready to take your photography skills to the next level? Visit dfphoto.net to explore a wealth of tutorials, stunning photo galleries, and a vibrant community of photography enthusiasts. Learn new techniques, find inspiration, and connect with fellow photographers. Start your journey today and discover the endless possibilities of visual storytelling.
Address: 1600 St Michael’s Dr, Santa Fe, NM 87505, United States
Phone: +1 (505) 471-6001
Website: dfphoto.net
