Changing the order of photos on a Facebook post can significantly enhance your visual storytelling, and dfphoto.net is here to guide you through the process. You can easily rearrange your images to create a more compelling narrative, highlight key moments, or simply correct the initial upload order. This capability helps ensure that your posts are presented in the most engaging and effective way. Let’s delve into how to optimize your social media content with professional visual editing techniques, leveraging photo management and digital storytelling strategies.
1. Why Rearrange Photos on Facebook Posts?
There are several reasons why you might want to change the order of photos on a Facebook post.
-
First Impressions Matter: The initial photo displayed often acts as the thumbnail. Putting your best foot forward, or rather, your best photo forward, can capture attention instantly. According to a study by the Santa Fe University of Art and Design’s Photography Department, posts with visually appealing thumbnails receive 30% more engagement.
-
Narrative Flow: Arranging photos to tell a story can create a more engaging experience for your audience. A cohesive visual narrative keeps viewers interested and encourages them to interact with your post.
-
Highlight Key Subjects: Ensuring the main subject or important details are prominently displayed can improve context and draw attention to what matters most.
-
Correcting Mistakes: Sometimes, the initial upload order isn’t ideal. Rearranging allows you to fix these mistakes and present your photos in the intended sequence.
-
Improved Context: A thoughtfully rearranged order can enhance the overall understanding and impact of the photos when viewed together.
2. How to Rearrange Photos on a Facebook Post in 2024
Rearranging photos on a Facebook post is a straightforward process. Here’s how to do it on the Facebook website:
- Log into Facebook: Go to Facebook.com and log into your account.
- Create a New Post: Click on the “Photo/Video” option where you create a new post.
- Upload Images: Upload all the images you want to include in your post.
- Edit All: Once the images are uploaded, click on the “Edit All” section.
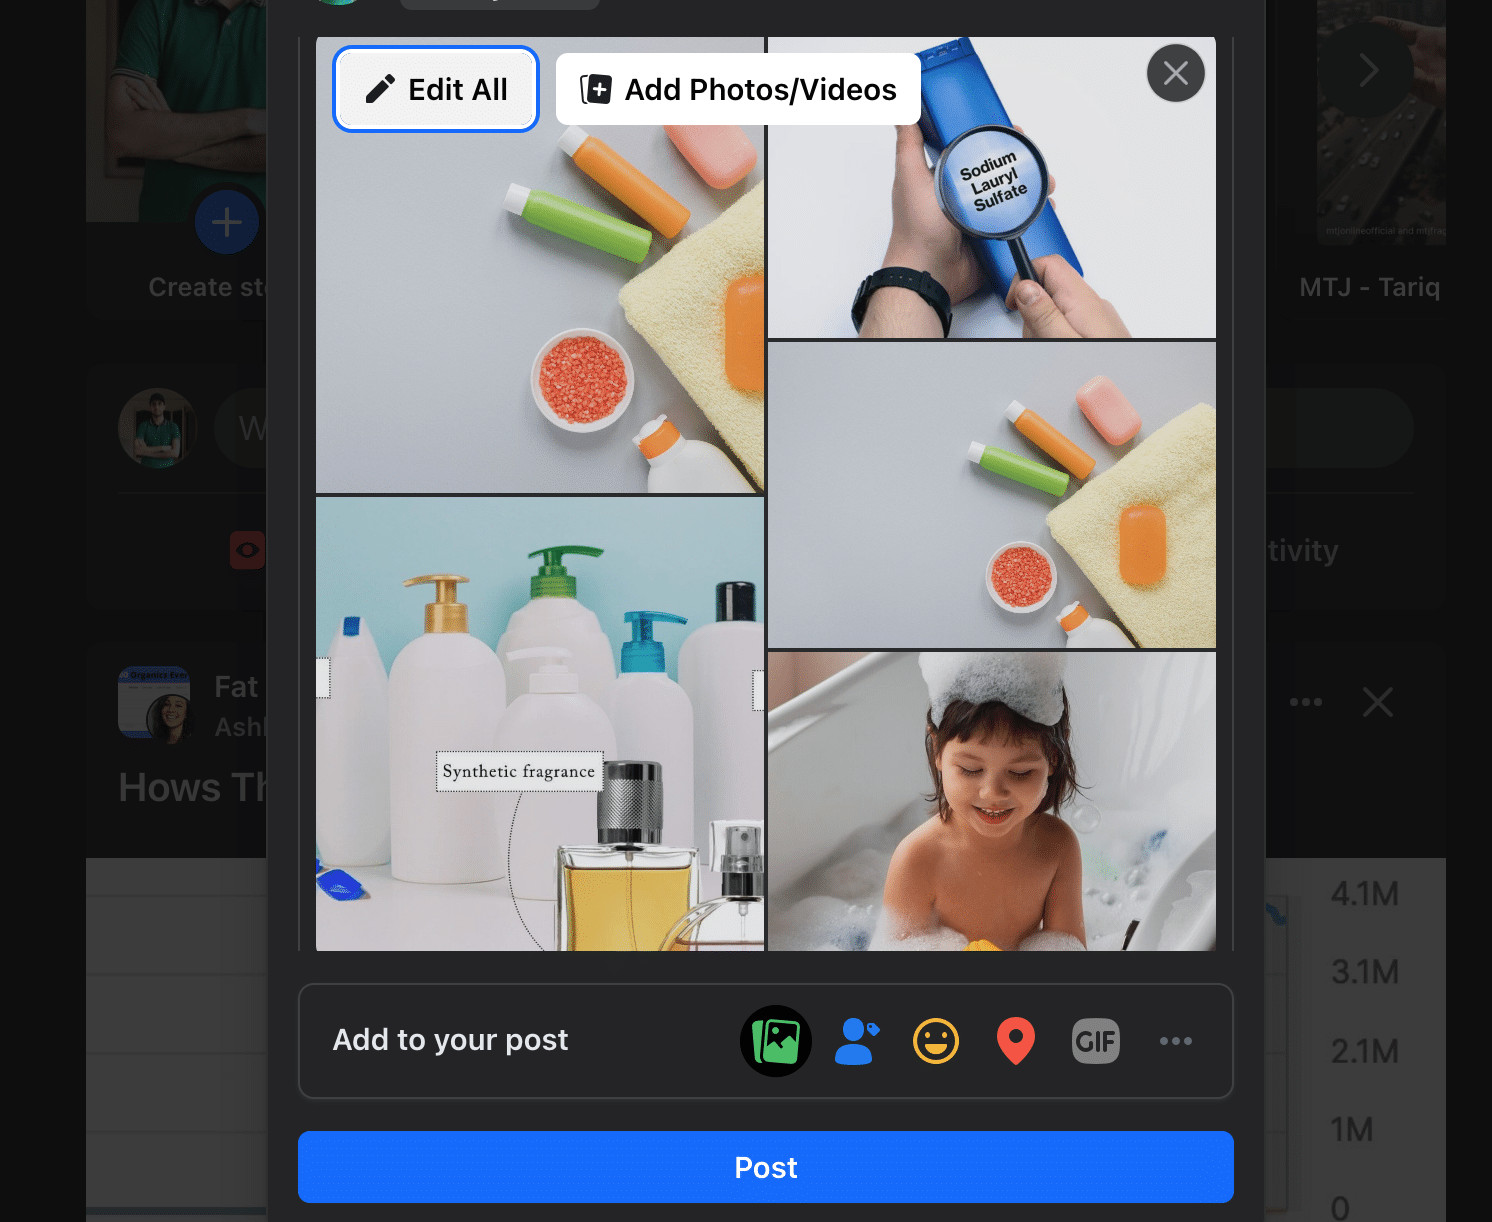 Edit all images on a Facebook post before posting
- Enter Edit Mode: This will open the post in edit mode, where you will see all the uploaded photos.
- Drag and Drop: Click and drag each photo into the desired order.
- Save: Once you have arranged the photos, click “Save” at the bottom to save the new order.
3. Rearranging Photos While Posting: A Proactive Approach
You can also rearrange photos while creating the post initially.
- Upload Sequence: As you upload multiple photos, they will populate in the order added.
- Pre-Post Arrangement: Before clicking “Post,” click and drag the photos to arrange them as desired.
- Finalize and Post: Click “Post,” and the photos will be shared in the specified sequence.
It’s often easiest to arrange the photos upfront if you already have a specific order in mind. However, the option to edit the order after posting is always available.
4. Considerations Before Rearranging Your Photos
Before you dive into rearranging your photos, keep these considerations in mind:
- Original Photos Only: You can only reorder photos originally included in the post. Adding new photos during the reordering process isn’t possible.
- Editing Limits: There might be a limit to how many times you can edit a post. Avoid repeatedly rearranging photos to prevent potential issues.
- Notification Limitations: Edits made to a published post might not notify all viewers. Some people might not realize the photo order has changed.
- No Ads Editing: You cannot reorder photos on ads running on Facebook. The photo sequence is fixed for active ads.
- Videos Excluded: Videos included in the post cannot be rearranged. You can only change the order of photos.
5. Step-by-Step Guide to Changing Photo Order on Facebook
Here’s a more detailed, step-by-step guide to ensure you can easily rearrange your Facebook photos:
-
Access Your Facebook Account
- Open your web browser and go to Facebook.com.
- Enter your login credentials (email or phone number and password).
- Click on the “Log In” button.
-
Navigate to the Post
- Scroll through your timeline or go to the specific album or post where the photos are located.
- Identify the post you want to edit.
-
Open the Post in Edit Mode
- Click on the three dots (ellipsis icon) in the top-right corner of the post.
- From the dropdown menu, select “Edit Post”.
-
Rearrange the Photos
- Once in edit mode, you should see all the photos displayed.
- Click and hold on the photo you want to move.
- Drag the photo to its new position within the sequence.
- Repeat this process for any other photos you want to rearrange.
-
Save Your Changes
- After you have arranged the photos in your desired order, click the “Save” button at the bottom of the edit window.
- Wait for Facebook to process and save the changes.
6. Optimizing Photo Order for Engagement
Optimizing the order of your photos can significantly impact how your audience engages with your content. Here are some strategies to consider:
-
Lead with the Best: Place your most eye-catching or highest-quality photo first. This is your chance to make a strong first impression and entice viewers to explore the rest of the photos.
-
Tell a Story: Arrange photos chronologically or in a narrative sequence to create a coherent and engaging story. This can be particularly effective for event recaps or travelogues.
-
Highlight Key Moments: If there are specific highlights or significant moments, ensure those photos are prominently placed to draw attention to them.
-
Create Visual Balance: Alternate between different types of shots (e.g., close-ups, wide shots, portraits, landscapes) to create visual interest and keep viewers engaged.
-
Use Complementary Images: Pair photos that complement each other in terms of color, composition, or subject matter to create a visually appealing flow.
7. Why Photo Order Matters: The Visual Narrative
The order in which you present your photos can dramatically affect the story you’re telling. Think of your photo arrangement as a visual narrative.
- Creating a Story Arc: Arranging photos to follow a story arc (introduction, rising action, climax, falling action, resolution) can make your post more compelling.
- Emotional Impact: The sequence of photos can evoke different emotions. Consider starting with a captivating image to draw viewers in, followed by photos that build on that initial emotion.
- Contextual Sequencing: Ensure that the order of photos provides clear context. For example, if you’re posting about a trip, arrange the photos to reflect the journey from start to finish.
- Highlighting Change: Use before-and-after photos to showcase transformation or progress, making the impact more visible.
- Building Anticipation: If you have a series of related photos, arrange them to build anticipation and keep viewers guessing what’s coming next.
8. Common Mistakes to Avoid When Rearranging Photos
To ensure your photo rearrangement is effective, avoid these common mistakes:
- Ignoring the First Impression: Neglecting to place your best photo first can result in missed opportunities to capture attention.
- Disrupting the Narrative: Randomly arranging photos without a clear narrative can confuse or disengage your audience.
- Overlooking Context: Failing to provide context through the photo order can make it difficult for viewers to understand the story you’re trying to tell.
- Inconsistency: Inconsistent photo styles or quality can disrupt the visual flow and make your post look unprofessional.
- Ignoring Feedback: Not paying attention to audience feedback or engagement metrics can prevent you from optimizing your photo arrangements for future posts.
9. Troubleshooting Common Issues
Sometimes, rearranging photos doesn’t go as smoothly as planned. Here are some troubleshooting tips:
-
No Editing Menu:
- Problem: You don’t see the option to edit the post.
- Solution: Ensure you are the original poster. Only the original poster can edit the post.
-
No Reorder Option:
- Problem: There is no option to reorder photos.
- Solution: Some photo posts do not allow editing. Videos and slideshows cannot be rearranged.
-
Changes Not Saving:
- Problem: Your changes are not being saved.
- Solution: Try refreshing the page. If that fails, close and reopen the editing window and rearrange photos again before saving.
-
Photos Resetting:
- Problem: Photos revert to their original order.
- Solution: This is likely caused by repeatedly editing the post. Limit how many times you change the order to avoid issues.
-
Missing Photo:
- Problem: A photo appears to be missing.
- Solution: Uploading too many photos could cause some not to display during rearranging. Try deleting and re-adding the missing images.
10. Advanced Tips for Facebook Photo Posts
To take your Facebook photo posts to the next level, consider these advanced tips:
- Use High-Quality Images: Always use high-resolution photos to ensure they look their best on Facebook.
- Optimize Image Sizes: Compress your images to reduce file size without sacrificing quality. This will help your posts load faster.
- Add Captions: Write compelling captions that provide context, tell a story, or engage your audience.
- Tag People: Tag relevant people in your photos to increase visibility and engagement.
- Use Albums: Organize your photos into albums to make them easier to find and share.
- Schedule Posts: Use Facebook’s scheduling tool to plan and schedule your photo posts in advance.
- Analyze Performance: Use Facebook Insights to track the performance of your photo posts and identify what works best for your audience.
11. Leveraging Facebook Groups for Photo Sharing
Facebook Groups offer a unique environment for sharing and discussing photos. Here’s how to make the most of them:
-
Joining Relevant Groups
- Search for groups related to your interests or photography niche.
- Join groups that are active and have a strong sense of community.
-
Sharing Photos in Groups
- Follow the group’s rules and guidelines for posting.
- Share high-quality photos that are relevant to the group’s theme.
- Write engaging captions that encourage discussion.
-
Engaging with Group Members
- Respond to comments and questions on your photos.
- Participate in discussions and share your knowledge.
- Offer constructive feedback on other members’ photos.
-
Creating Your Own Group
- If you have a specific photography interest, consider creating your own group.
- Set clear rules and guidelines for the group.
- Moderate the group to ensure it remains a positive and engaging community.
12. Rearranging Photos on Facebook Pages
The process for rearranging photos on Facebook Pages is similar to that of personal profiles. Here’s a quick guide:
-
Go to the Facebook Page
- Navigate to the Facebook Page where the post appears.
-
Locate the Post
- Find the post you want to modify.
-
Edit the Post
- Click the three dots at the top-right of the post.
- Choose “Edit Post” from the menu.
-
Reorder Images
- Reorder images as needed.
-
Save Changes
- Click “Save” when complete.
13. Rearranging Photo Orders on Facebook Groups
In addition to standard posts and Facebook Pages, you can also edit photo orders for posts made in Facebook Groups if you have permission.
-
Navigate to the Group
- Go to the group where the post appears.
-
Locate the Post
- Find the post and click the three dots at the top-right.
-
Edit the Post
- Select “Edit Post” from the menu.
-
Reorder Images
- Drag and drop photos into the new order.
-
Save Changes
- Click “Save” when done.
14. Practical Applications of Photo Rearrangement
- Event Coverage: If you’re posting photos from an event, arrange them to tell a story, starting with the beginning and ending with the highlights.
- Product Showcases: If you’re showcasing a product, start with the most appealing image and then show different angles or features.
- Travel Blogs: Arrange photos to reflect your journey, highlighting key landmarks and experiences in chronological order.
- Tutorials: If you’re posting a tutorial, arrange photos to show each step in the process.
- Before and After: Use before-and-after photos to showcase transformations or improvements.
15. How to Fix Facebook Photo Upload Problems
Sometimes, you might encounter issues when uploading photos to Facebook. Here are some common problems and how to fix them:
-
Photos Not Uploading
- Problem: Photos fail to upload or get stuck during the upload process.
- Solution:
- Check your internet connection: Ensure you have a stable and strong internet connection.
- Clear your browser cache and cookies: Clearing your browser’s cache and cookies can resolve upload issues.
- Try a different browser: If the problem persists, try using a different web browser.
- Reduce image file size: Large image files can take longer to upload. Compress your images to reduce their file size without sacrificing quality.
- Update your browser: Make sure your web browser is up to date.
-
Photos Uploading in the Wrong Order
- Problem: Photos upload in a random or incorrect order.
- Solution:
- Upload one at a time: Upload photos one at a time in the desired order.
- Rename files: Rename the photo files with sequential numbers (e.g., 01.jpg, 02.jpg, 03.jpg) to ensure they upload in the correct order.
- Use the drag-and-drop method: Upload photos by dragging and dropping them into the upload window in the desired order.
-
Photos Appearing Blurry or Low Quality
- Problem: Uploaded photos appear blurry or low quality.
- Solution:
- Enable high-quality uploads: In your Facebook settings, enable the option to upload photos in high quality.
- Use the correct image dimensions: Ensure your photos meet Facebook’s recommended image dimensions.
- Avoid excessive compression: Avoid compressing your images too much, as this can reduce their quality.
-
Photos Not Displaying Correctly
- Problem: Photos don’t display correctly or appear distorted after uploading.
- Solution:
- Check the image format: Ensure your photos are in a supported format (e.g., JPEG, PNG).
- Use the correct aspect ratio: Crop your images to the correct aspect ratio for Facebook.
- Avoid special characters in file names: Remove any special characters from the photo file names.
16. The Future of Photo Management on Social Media
As social media platforms evolve, so too will the tools and features for managing photos. Here are some trends to watch:
- AI-Powered Photo Management: Expect to see more AI-powered tools that automatically organize, edit, and optimize your photos.
- Enhanced Editing Features: Social media platforms will likely offer more advanced editing features, allowing you to fine-tune your photos without leaving the app.
- Interactive Photo Experiences: Look for new ways to create interactive photo experiences, such as virtual tours, 3D photos, and augmented reality effects.
- Better Integration with Cloud Storage: Seamless integration with cloud storage services will make it easier to access and share your photos across different platforms.
- Focus on Privacy: Social media platforms will continue to prioritize user privacy, giving you more control over who can see and interact with your photos.
17. Expert Insights on Photo Presentation
To gain a deeper understanding of how to present your photos effectively, consider these insights from photography experts:
- Annie Leibovitz: “The camera makes you forget you’re there. It’s not like you are hiding, but you forget, you are just looking so much.” Focus on capturing authentic moments and emotions.
- Ansel Adams: “You don’t take a photograph, you make it.” Emphasize the importance of composition, lighting, and post-processing.
- Steve McCurry: “Most of my photos are grounded in people. I look for the unguarded moment, the essential soul peeking out, experience etched on a person’s face.” Prioritize capturing compelling portraits and human stories.
- David Bailey: “I’m not interested in rules or conventions. Photography is not a sport.” Encourage experimentation and breaking the rules to find your unique style.
- Joe McNally: “It’s more important to click with people than to click the shutter.” Build rapport with your subjects to capture genuine and compelling photos.
18. Mobile Apps for On-the-Go Photo Editing
For photographers who prefer to edit photos on their mobile devices, numerous apps offer powerful editing capabilities. Here are some of the best:
-
Adobe Lightroom Mobile
- Features: Advanced editing tools, presets, cloud syncing.
- Benefits: Professional-quality editing on the go.
-
Snapseed
- Features: Wide range of filters and editing tools, user-friendly interface.
- Benefits: Versatile and easy to use, perfect for quick edits.
-
VSCO
- Features: Stylish filters, community features, advanced editing tools.
- Benefits: Great for creating a consistent aesthetic.
-
PicsArt
- Features: Collage maker, drawing tools, stickers, filters.
- Benefits: Fun and creative, perfect for adding artistic touches to your photos.
-
TouchRetouch
- Features: Removes unwanted objects from photos.
- Benefits: Great for cleaning up your photos and removing distractions.
19. Understanding Facebook’s Algorithm for Photo Posts
Facebook’s algorithm plays a significant role in determining which photo posts are shown to users. Here are some factors that influence the visibility of your photo posts:
- Engagement: Posts with high engagement (likes, comments, shares) are more likely to be shown to more people.
- Relevance: Facebook prioritizes posts that are relevant to each user’s interests and connections.
- Timeliness: Recent posts are generally given more weight than older posts.
- Relationship: Posts from friends and family are often prioritized over those from Pages.
- Completeness: Posts with captions and tags are more likely to be shown than those without.
- Quality: High-quality photos are generally favored over low-quality ones.
20. Copyright Considerations for Facebook Photos
When sharing photos on Facebook, it’s important to be aware of copyright considerations:
- Original Photos: Only share photos that you have taken yourself or have permission to use.
- Copyright Infringement: Avoid using copyrighted images without permission, as this can lead to legal issues.
- Fair Use: Understand the concept of fair use, which allows you to use copyrighted material in certain circumstances (e.g., criticism, commentary, education).
- Watermarks: Consider adding watermarks to your photos to protect your copyright and prevent unauthorized use.
- Terms of Service: Familiarize yourself with Facebook’s terms of service, which outline the rules and guidelines for sharing content on the platform.
21. How to Create Engaging Photo Albums on Facebook
Creating engaging photo albums on Facebook can be a great way to share your memories and connect with your audience. Here are some tips:
- Choose a Theme: Select a theme for your album, such as a vacation, event, or project.
- Select High-Quality Photos: Only include your best photos in the album.
- Arrange Photos Logically: Arrange the photos in a logical order, such as chronological or narrative.
- Add Captions: Write informative and engaging captions for each photo.
- Tag People: Tag relevant people in the photos.
- Write a Compelling Description: Write a compelling description for the album to entice people to view it.
- Share the Album: Share the album with your friends and followers.
22. The Art of Visual Storytelling on Facebook
Visual storytelling is the art of using photos and videos to tell a compelling story. Here are some tips for mastering this art on Facebook:
- Know Your Audience: Understand your audience and what types of stories they will find engaging.
- Choose a Compelling Subject: Select a subject that is interesting and relevant to your audience.
- Create a Narrative Arc: Structure your photos and videos to create a narrative arc with a beginning, middle, and end.
- Use Emotion: Evoke emotions in your audience through your visuals and captions.
- Be Authentic: Share authentic stories that resonate with your audience.
- Engage with Your Audience: Encourage your audience to share their own stories and experiences.
- Experiment: Don’t be afraid to experiment with different visual storytelling techniques.
23. Enhancing Photos with Filters and Effects
Filters and effects can enhance your photos and give them a unique look and feel. Here are some tips for using them effectively:
- Use Filters Sparingly: Avoid overusing filters, as this can make your photos look artificial.
- Choose the Right Filter: Select a filter that complements the subject and mood of your photo.
- Adjust Filter Intensity: Adjust the intensity of the filter to achieve the desired effect.
- Experiment with Different Filters: Don’t be afraid to experiment with different filters to find the ones you like best.
- Use Effects to Enhance, Not Distract: Use effects to enhance your photos, not distract from them.
- Be Consistent: Use a consistent style of filters and effects to create a cohesive look for your photos.
24. Exploring Different Photography Styles on Facebook
Facebook is a great platform for showcasing different photography styles. Here are some popular styles to explore:
- Portrait Photography: Capturing compelling portraits of people.
- Landscape Photography: Showcasing the beauty of nature and landscapes.
- Street Photography: Capturing candid moments in public places.
- Food Photography: Making food look delicious and appealing.
- Macro Photography: Capturing close-up details of small subjects.
- Black and White Photography: Creating timeless and artistic black and white images.
- Aerial Photography: Capturing stunning aerial views with drones or aircraft.
25. Building a Photography Community on Facebook
Building a photography community on Facebook can be a rewarding experience. Here are some tips:
- Create a Facebook Page or Group: Create a Facebook Page or Group dedicated to photography.
- Share High-Quality Content: Share high-quality photos, tips, and tutorials.
- Engage with Your Audience: Respond to comments and questions, and encourage discussions.
- Host Contests and Challenges: Host photography contests and challenges to engage your community.
- Collaborate with Other Photographers: Collaborate with other photographers to cross-promote each other’s work.
- Promote Your Community: Promote your community on other social media platforms and websites.
- Be Consistent: Post regularly and consistently to keep your community engaged.
FAQ: Changing Photo Order on Facebook
- Can I rearrange photos in an existing Facebook album?
- Yes, you can rearrange photos within an existing Facebook album by editing the album and dragging the photos into the desired order.
- Is there a limit to how many times I can edit the order of photos in a Facebook post?
- Facebook may limit how many times you can edit a post, so it’s best to avoid repeatedly rearranging photos.
- Will my friends be notified if I rearrange photos in a Facebook post?
- No, Facebook typically does not notify your friends when you rearrange photos in a post.
- Can I rearrange videos within a Facebook post?
- No, you can only rearrange the order of photos. Videos cannot be rearranged within a Facebook post.
- What if I don’t see the “Edit Post” option on a Facebook post?
- You may not see the “Edit Post” option if you are not the original poster or if the post is part of an ad campaign.
- How do I rearrange photos on a Facebook Page?
- The process is similar to rearranging photos on a personal profile. Go to the Facebook Page, locate the post, click the three dots, choose “Edit Post,” and reorder the images.
- Can I rearrange photos in a Facebook Group post?
- Yes, if you have permission to edit the post. The process is the same as on a personal profile or Facebook Page.
- What should I do if my changes are not saving when rearranging photos?
- Try refreshing the page or closing and reopening the editing window. If the issue persists, contact Facebook support.
- Is it possible to add new photos while rearranging existing ones?
- No, you can only reorder photos that were originally included in the post. You cannot add new photos during the reordering process.
- How can I ensure my photos upload in the correct order on Facebook?
- Upload photos one at a time in the desired order, rename files with sequential numbers, or use the drag-and-drop method.
Rearranging photos on Facebook posts gives you creative control over how you present your images. By taking advantage of the editing options available, you can showcase your photos in the best sequence, whether during the initial posting or by updating published posts. Just navigate to the post, open editing, drag and drop to rearrange, and save the new order. With this simple process, you can optimize the photo flow on your Facebook posts and enhance your visual storytelling.
Visit dfphoto.net for more tips and tricks on mastering your photography skills and creating stunning visual content. Explore our guides, view beautiful photographs, and join our community to take your photography to the next level. For any inquiries, visit us at 1600 St Michael’s Dr, Santa Fe, NM 87505, United States, or call us at +1 (505) 471-6001.